
Easy Marbled Rye Bread: Looks Impressive, Simple to Make

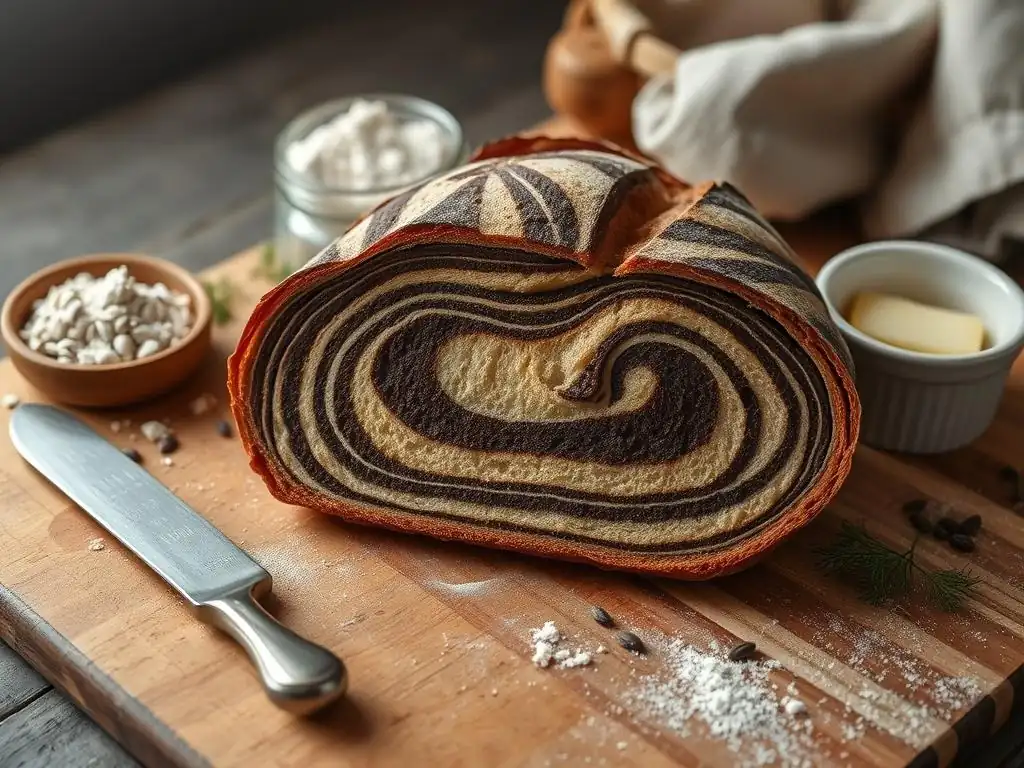
Welcome to BakeWithEase, where baking becomes a joy, not a chore! Ever dreamed of creating stunning, bakery-worthy breads at home? This week, we're diving into the secrets behind a loaf that's as beautiful as it is delicious. Prepare to impress with our Easy Marbled Rye Bread Recipe – a surprisingly simple method for achieving that gorgeous swirl. Intrigued? Let's unlock the secrets to this captivating bread and discover just how easy it is to bake!
- Classic Marbled Rye Bread: A Step-by-Step Guide
- Our Guide to Baking Perfect Marbled Rye at Home
- Why You'll Love This Marbled Rye Bread Recipe
- Understanding Marbled Rye Bread: A Culinary Staple
- Ingredients for Your Homemade Marbled Rye Bread
- Step-by-Step: Baking Your Classic Marbled Rye Bread
- Tips for Baking the Best Marbled Rye Bread
- Serving and Storing Your Marbled Rye Bread
- Troubleshooting Your Marbled Rye Bread Recipe
- Explore More Bread Recipes
-
Frequently Asked Questions
- What makes this marbled rye bread recipe considered "easy"?
- What specific baking skills are helpful, but not necessarily required, before attempting this recipe?
- Can I substitute any ingredients in the Easy Marbled Rye Bread recipe?
- How long does it realistically take to make this Easy Marbled Rye Bread from start to finish?
- What are some tips for achieving the best marbled effect in the bread?
- Final Reflection: The Unexpected Joy of Marbled Rye
- Unleash Your Inner Baker: Marble Rye Awaits!
Classic Marbled Rye Bread: A Step-by-Step Guide
Our Guide to Baking Perfect Marbled Rye at Home
Embarking on the journey to bake your own bread is incredibly rewarding, and creating a loaf as striking as marbled rye can seem intimidating. However, with the right guidance, baking this classic becomes an achievable and enjoyable process, even for those new to breadmaking.
This guide breaks down each step, from mixing the dough to achieving that beautiful swirl, making the easy marbled rye bread recipe accessible and fun. We'll cover the essential ingredients, the simple techniques for marbling, and tips to ensure your loaf turns out perfectly every time, offering a delicious and visually impressive bread straight from your oven.
This article is designed to demystify the process, transforming the perceived complexity of baking marbled rye into a series of manageable steps. We focus on common ingredients and straightforward methods, ensuring that whether you're a seasoned baker or just starting out, you can successfully create a loaf that rivals bakery quality. Get ready to fill your home with the wonderful aroma of freshly baked bread and impress yourself and others with your homemade easy marbled rye bread recipe.
Why You'll Love This Marbled Rye Bread Recipe
Visually Appealing and Delicious
One of the most immediate reasons to try this easy marbled rye bread recipe is its stunning appearance. The contrast between the light and dark doughs creates a unique, swirling pattern that makes each slice a work of art. This visual appeal makes it a fantastic centerpiece for any meal or a standout element in a sandwich. Beyond its looks, the flavor profile is equally compelling, offering a balance of earthy rye notes with subtle sweetness and depth from the dark dough components.
The beauty of the marble effect isn't just for show; it hints at the delightful combination of flavors within. Imagine a slice with ribbons of light and dark rye, each contributing slightly different characteristics to the overall taste. This visual-culinary synergy elevates a simple loaf into something special, proving that an easy marbled rye bread recipe can deliver both impressive aesthetics and delicious results.
Authentic Rye Flavor
This recipe focuses on delivering a true, authentic rye bread experience. By incorporating a significant portion of rye flour, we capture the distinct, slightly tangy, and earthy flavor characteristic of traditional rye loaves. The base dough provides a robust foundation, while the dark swirl enhances this with undertones from ingredients like molasses and caraway seeds, commonly found in classic deli-style rye breads.
Achieving that authentic rye flavor is key to a satisfying marbled loaf. Unlike some recipes that use minimal rye, this approach ensures the characteristic taste is prominent but balanced. It's this commitment to flavor integrity that makes this easy marbled rye bread recipe stand out, delivering a taste that is both traditional and deeply satisfying.
Versatile for Sandwiches and More
Marbled rye bread is incredibly versatile, serving as the perfect base for a wide variety of meals. Its sturdy texture holds up well to hearty fillings, making it ideal for classic sandwiches like a Reuben or a pastrami on rye. However, its use extends far beyond sandwiches; it's also fantastic toasted and topped with butter, cream cheese, or smoked salmon, or simply served alongside soups and stews to soak up flavorful broths.
The unique flavor profile of marbled rye complements both savory and slightly sweet toppings. Its ability to pair well with such diverse ingredients makes this easy marbled rye bread recipe a valuable addition to your baking repertoire. Whether you're planning a picnic, a simple breakfast, or a comforting dinner, a loaf of homemade marbled rye is sure to find its place.
Understanding Marbled Rye Bread: A Culinary Staple
Origins of Marbled Rye
Rye bread itself has a long history, particularly in Eastern and Northern Europe, where rye grain was more readily available than wheat in certain climates. Different regions developed their own styles, from light rye to dense pumpernickel.
The concept of combining different doughs to create a marbled effect likely evolved from bakers experimenting with traditional rye recipes, perhaps initially combining a standard light rye with a darker, often sweetened or colored, version. While a single definitive origin point for marbled rye is hard to pinpoint, it became particularly popular in North America, especially associated with delicatessens and sandwich culture, likely emerging in the 20th century as a visually appealing variation on standard rye loaves.
The innovation of marbling allowed bakers to offer a bread that was not only flavorful but also visually striking. This technique built upon centuries of rye bread tradition, adapting it for new tastes and markets. The evolution of marbled rye from simple rye loaves highlights the dynamic nature of baking, where tradition meets creativity to produce beloved staples like this easy marbled rye bread recipe.
Achieving the Marble Effect
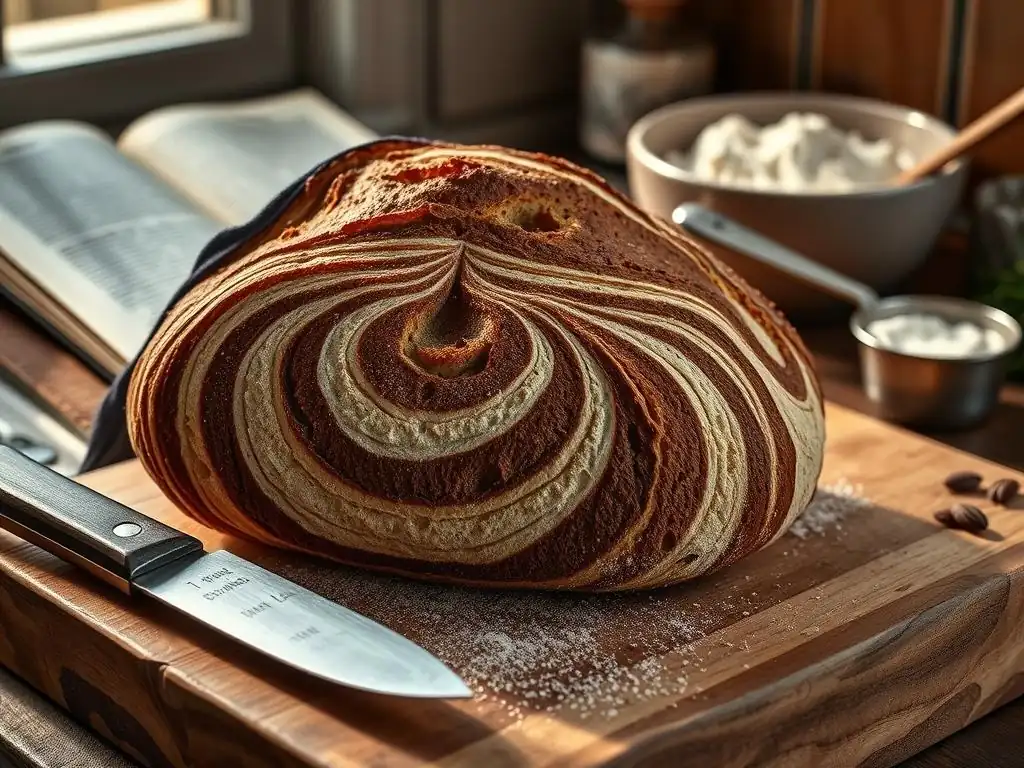
The signature marble effect in this bread is created by combining two distinct doughs: a standard light rye dough and a darker rye dough. The dark dough typically gets its color and often a slightly different flavor profile from additions like cocoa powder, molasses, or even dark caramel coloring, along with a higher proportion of rye flour or different leavening. The marbling is achieved by gently layering or swirling portions of the light and dark doughs together before the final shaping and baking.
The key to a beautiful marble is not to overmix the two doughs once they are combined. Gentle layering, rolling, and shaping techniques ensure that the distinct colors remain separate, creating clear veins and swirls rather than a muddy, uniform shade. Mastering this simple layering technique is crucial for the visual success of your easy marbled rye bread recipe, transforming the loaf into its iconic striped form.
Types of Rye Bread
Rye bread exists in a spectrum of forms, largely defined by the proportion of rye flour to wheat flour, the type of rye flour used (light, medium, dark, pumpernickel), and the leavening method (yeast, sourdough, or chemical leaveners). Light rye bread uses mostly refined rye flour and often a significant amount of wheat flour, resulting in a lighter color and texture.
Dark rye bread uses more whole or dark rye flour and sometimes coloring agents like molasses or cocoa. Pumpernickel is a very dark, dense, and often slightly sweet rye bread traditionally made with coarse rye meal and baked for a long time at a low temperature.
Marbled rye typically falls somewhere between light and dark rye, often combining a light rye dough with a darker, richer version. Other variations include Jewish rye, which often contains caraway seeds and has a slightly sour tang (sometimes from a sourdough starter or vinegar), and specific regional loaves like German Roggenbrot. Understanding these variations helps appreciate where a classic easy marbled rye bread recipe fits within the broader world of rye baking.
Ingredients for Your Homemade Marbled Rye Bread
Essential Ingredients for the Dough
Rye Flour: For Distinctive Flavor
Rye flour is the cornerstone of this recipe, providing the characteristic earthy and slightly tangy flavor that defines rye bread. Different types of rye flour exist, from light to dark, based on how much of the bran and germ are removed during milling. For a classic marbled rye, a medium rye flour is often ideal, offering a good balance of flavor without the density of dark rye or pumpernickel. The amount of rye flour used relative to wheat flour significantly impacts the final taste and texture; a typical marbled rye might use 30-50% rye flour.
Rye flour behaves differently than wheat flour due to its lower gluten content and higher levels of pentosans, which absorb a lot of water. This means rye doughs can be stickier and less elastic than wheat doughs. Using the right proportion, perhaps around 40% medium rye flour in your easy marbled rye bread recipe, ensures that distinctive flavor while still allowing the dough to be manageable for shaping and rising.
Bread Flour: Providing Structure
Bread flour, a high-protein wheat flour (typically 12-14% protein), is essential in this easy marbled rye bread recipe for providing structure. While rye flour contributes flavor, it lacks the strong gluten network necessary to give the bread its rise and hold its shape. The gluten in bread flour develops during kneading, creating a framework that traps the carbon dioxide produced by the yeast, allowing the loaf to expand and develop a desirable crumb structure.
Using a substantial portion of bread flour, perhaps 60% in combination with the rye flour, ensures that the dough is strong enough to handle the marbling process and achieve a good rise. This balance between rye and wheat flour is key to a loaf that is both flavorful and has a pleasant texture – not too dense, but with a satisfying chewiness.
Water, Yeast, Salt: The Foundation of Baking
Water is critical for hydrating the flour, activating the yeast, and allowing gluten development. The temperature of the water is important; lukewarm water (around 95-105°F or 35-40°C) is typically used to quickly activate active dry yeast, while cooler water can be used for longer, slower fermentation with instant yeast. The hydration level (ratio of water to flour) affects the dough's consistency and the final bread's texture; a hydration of around 65-75% is common for this type of loaf.
Yeast is the leavening agent, consuming sugars in the flour and producing carbon dioxide gas, which makes the bread rise. Either active dry or instant yeast can be used in an easy marbled rye bread recipe, following package directions for activation if necessary. Salt is vital for flavor, controlling yeast activity, and strengthening the gluten structure. It should always be added, typically around 1.8-2% of the total flour weight, but kept separate from the yeast during initial mixing as it can inhibit yeast activity.
Ingredients for the Dark Rye Swirl
Cocoa Powder: Adding Color and Depth
Unsweetened cocoa powder is a common ingredient in the dark dough of marbled rye. Its primary role is to contribute a deep, rich brown color that contrasts beautifully with the lighter dough, enhancing the visual marble effect. A small amount, maybe 1-2 tablespoons per loaf's dark portion, is usually sufficient for color. Beyond color, it can also add a subtle hint of complexity to the flavor, though its contribution is usually minimal compared to the rye and molasses.
Using natural unsweetened cocoa powder is generally preferred over Dutch-processed cocoa for this application, as its slightly acidic nature can interact differently with leavening agents, although in a yeast dough the difference is less critical than in baking soda-leavened goods. The cocoa's role in defining the dark ribbons makes it a key component in this easy marbled rye bread recipe.
Molasses: Enhancing Flavor and Color
Molasses is another essential ingredient for the dark rye swirl, serving a dual purpose. It contributes significantly to the dark color, deepening the shade provided by the cocoa powder. More importantly, it adds a distinct, slightly sweet, and robust flavor that is characteristic of many traditional dark rye and pumpernickel breads. Blackstrap molasses offers the deepest color and strongest flavor, while lighter molasses varieties are milder.
Typically, 1-3 tablespoons of molasses are added to the dark dough portion. This not only helps achieve that rich, dark hue for the marble but also imparts a subtle sweetness and a depth of flavor that complements the earthy rye notes. The combination of molasses and cocoa powder is fundamental to creating the unique character of the dark swirl in this easy marbled rye bread recipe.
Caraway Seeds: For Traditional Rye Flavor
Caraway seeds are a classic addition to many rye bread recipes, including marbled rye. They provide a warm, slightly anise-like flavor that is instantly recognizable and pairs wonderfully with the robust taste of rye. While some people prefer their rye bread without caraway, for an authentic deli-style marbled rye, they are highly recommended. They can be added to either the light dough, the dark dough, or both, depending on desired flavor distribution.
Adding perhaps 1-2 teaspoons of caraway seeds to the dark dough, or dividing them between both, infuses the bread with that traditional, aromatic rye bread spice. The seeds can be used whole or lightly crushed to release more of their volatile oils and intensify the flavor. Including caraway seeds elevates this easy marbled rye bread recipe from a simple loaf to a classic, flavorful experience.
Step-by-Step: Baking Your Classic Marbled Rye Bread
Preparing the Rye Dough
Combining Dry Ingredients
The first step in preparing the dough for your easy marbled rye bread recipe is to combine the dry ingredients. In a large mixing bowl, whisk together the rye flour, bread flour, salt, and yeast (if using instant yeast).
Ensure the salt and yeast are not dumped directly on top of each other, especially if using active dry yeast that will be proofed separately, as salt can harm yeast activity. Using a whisk helps to evenly distribute the ingredients, particularly the yeast and salt, throughout the flour mixture, which is crucial for consistent leavening and flavor distribution in the final loaf.
If using active dry yeast, you would typically proof it first in warm water with a pinch of sugar before combining it with the dry ingredients. However, with instant yeast, simply mixing it directly with the flours and salt is efficient. This initial mixing of dry ingredients sets the stage for proper hydration and gluten development once the wet ingredients are added, forming the foundation for your delicious marbled rye.
Activating the Yeast
If you are using active dry yeast for your easy marbled rye bread recipe, it needs to be activated before being added to the dry ingredients. In a separate bowl or measuring cup, combine the warm water (around 100-110°F or 38-43°C) specified in the recipe with the active dry yeast and usually a pinch of sugar. Stir gently and let it sit for 5-10 minutes.
You should see a foamy layer develop on the surface, indicating that the yeast is alive and active. If it doesn't foam, your yeast might be dead or the water temperature was incorrect, and you should start again with fresh yeast.
Once the yeast is bubbly and active, pour the mixture into the bowl with your combined dry ingredients. If using instant yeast, this proofing step is unnecessary as instant yeast can be added directly to the flour. Proper yeast activation is vital for ensuring your marbled rye bread rises correctly, resulting in a light and airy crumb structure.
Kneading for Smoothness
After combining the wet and dry ingredients, the dough will start to come together. Kneading is essential for developing the gluten structure in the bread flour, which gives the dough elasticity and strength, allowing it to hold its shape and rise properly. You can knead the dough by hand on a lightly floured surface or use a stand mixer fitted with a dough hook.
Kneading by hand typically takes 10-15 minutes, while a stand mixer might take 6-8 minutes on medium speed. The dough is sufficiently kneaded when it becomes smooth, elastic, and passes the windowpane test (you can stretch a small piece thin enough to see light through it without tearing).
For this easy marbled rye bread recipe, the dough might be slightly stickier due to the rye flour. Avoid adding too much extra flour during kneading, as this can result in a dry loaf. Instead, use a bench scraper to manage stickiness or lightly oil your hands and the work surface. Proper kneading is a crucial step for achieving the desired texture and rise in your finished marbled rye bread.
Creating the Dark Rye Swirl
Dividing the Dough
Once the main dough has been kneaded to smoothness, it's time to divide it to create the dark swirl portion for your easy marbled rye bread recipe. Typically, you'll divide the dough into two unequal parts. A common ratio is to reserve about one-third of the dough for the dark portion and leave two-thirds as the lighter dough. This ratio ensures a good balance of light and dark swirls throughout the loaf.
Use a scale for accuracy if possible to get the perfect division. For example, if your total dough weight is around 900 grams, you might set aside 300 grams for the dark dough and keep 600 grams as the light dough. Precise division helps ensure consistent marbling across different loaves you bake.
Incorporating Cocoa, Molasses, and Caraway Seeds
To create the dark dough for your easy marbled rye bread recipe, take the smaller portion of dough you just divided and flatten it slightly. Add the cocoa powder, molasses, and caraway seeds (if using) directly onto the dough. The amounts will depend on your specific recipe, but typically involve 1-2 tablespoons cocoa, 1-3 tablespoons molasses, and 1-2 teaspoons caraway seeds for a loaf-sized portion.
Work these ingredients into the dough. This can be done by kneading by hand or using a stand mixer on a low speed. The dough will initially look messy and streaky as the dark ingredients are incorporated. Continue kneading until the color is relatively uniform throughout the dough portion, though a perfectly even color isn't necessary as it will be part of the marble.
Kneading the Dark Dough
After adding the coloring and flavoring agents, continue kneading the dark dough for a few minutes to ensure the ingredients are fully incorporated and the dough develops a bit more structure after the additions. This additional kneading helps distribute the cocoa, molasses, and caraway seeds evenly, ensuring consistent flavor and color in the dark swirls of your easy marbled rye bread recipe.
The dark dough might feel slightly different in texture than the light dough due to the added ingredients, possibly a little stickier or denser. Knead until the dough is smooth and the color is a consistent deep brown. Avoid over-kneading, which can make the dough tough. Just a few minutes of gentle kneading should be sufficient to bring it together nicely.
Marbling the Dough: Creating the Swirl
Layering Light and Dark Doughs
Now for the fun part of your easy marbled rye bread recipe: creating the marble! Take both the light and dark dough portions. There are several ways to layer them. One common method is to roll each dough portion into a rectangle of roughly the same size, about 1/2 inch thick. Place the dark dough rectangle directly on top of the light dough rectangle, aligning the edges as much as possible.
Alternatively, you can divide each dough color into smaller pieces (e.g., 2-4 pieces of each color) and arrange them in an alternating pattern, perhaps in a checkerboard or random arrangement, before gently pressing them together. The goal is to have distinct layers or chunks of each color side-by-side or stacked.
Rolling and Shaping
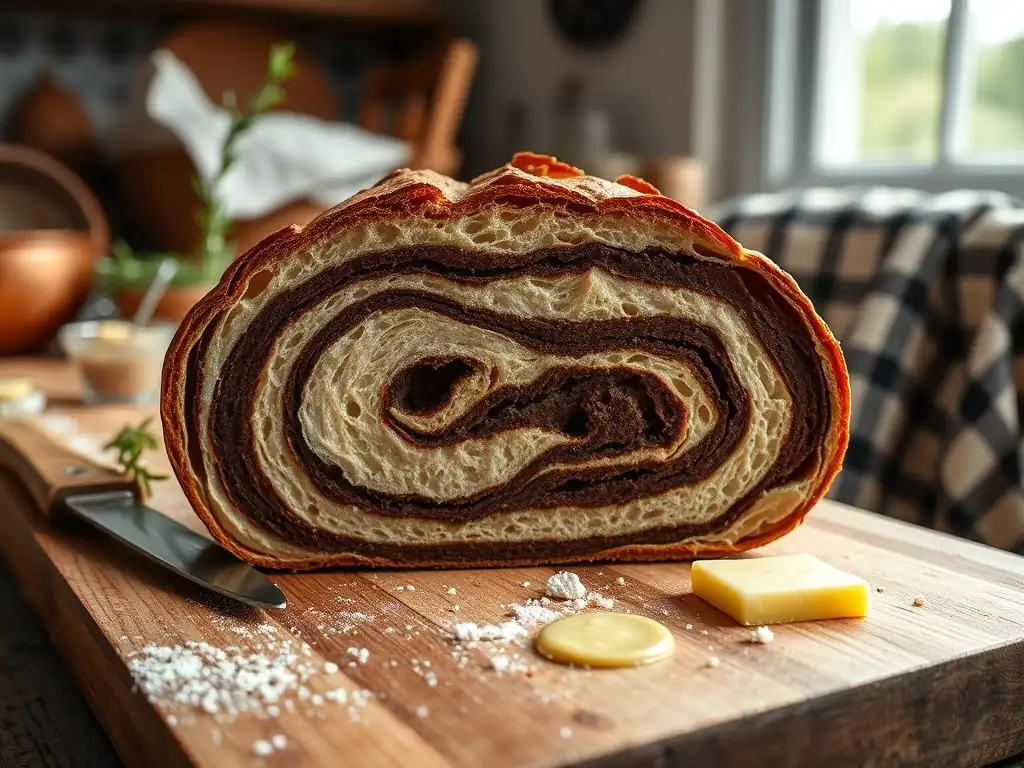
Once the light and dark doughs are layered or arranged, gently press them together to ensure they adhere. Then, starting from one edge, tightly roll the combined dough into a log shape. As you roll, the layers will compress and begin to swirl. Try to keep the tension even as you roll to create a uniform log. This rolling action is what transforms the layers into the classic swirling marble pattern seen in your easy marbled rye bread recipe.
After rolling, gently seal the seam along the bottom by pinching it together. You can then tuck the ends under to create a neat loaf shape, either a traditional batard (oval) or a boule (round), depending on your preference and baking vessel. Handling the dough gently at this stage is key to preserving the distinct layers and achieving a beautiful marble pattern.
Tips for a Beautiful Marble Pattern
To ensure a visually striking marble pattern in your easy marbled rye bread recipe, avoid overworking the dough once the colors are combined. The goal is definition, not blending. Roll the layered dough firmly enough to adhere but not so aggressively that the colors mix into a muddy mess. Aim for 1-2 rolls of the layered dough rather than multiple folds.
Another tip is to vary the thickness of the dough rectangles slightly when layering, or tear uneven pieces if using the chunk method. This can create more organic, less uniform swirls, which often look more appealing. Don't worry about perfection; the beauty of marbled bread is in its unique, swirling patterns that emerge during baking.
Proofing and Baking Your Rye Bread
First Rise: Doubling in Size
After shaping your marbled loaf, it's time for the first rise, also known as bulk fermentation. Place the shaped loaf in a lightly greased bowl or proofing basket, cover it loosely with plastic wrap or a clean kitchen towel, and let it rise in a warm, draft-free place. An ideal temperature for rising is around 75-80°F (24-27°C). The dough should approximately double in size. This usually takes 1 to 1.5 hours, but the exact time can vary significantly depending on the room temperature and the activity of your yeast.
During this time, the yeast is actively producing carbon dioxide, which causes the dough to expand. The gluten network relaxes, making the dough more pliable. Proper bulk fermentation is essential for developing flavor and achieving a good crumb structure in your easy marbled rye bread recipe. You can gently poke the dough; if the indentation slowly springs back halfway, it's ready for the next step.
Shaping the Loaf
This step was covered in the "Rolling and Shaping" section under "Marbling the Dough". The structure provided seems to have a slight overlap. I will proceed assuming the loaf is already shaped after marbling.
Second Rise: Achieving Optimal Height
Once the loaf has been shaped (after the marbling step), it undergoes a second rise, also called proofing. Place the shaped loaf on a baking sheet lined with parchment paper or in a greased loaf pan, depending on your desired final shape. Cover it loosely and let it rise again in a warm place. This second rise is typically shorter than the first, usually 30-60 minutes, until the loaf is visibly puffed up and has increased in size by about 50-75%.
Over-proofing can cause the loaf to collapse in the oven, while under-proofing will result in a dense loaf. The dough should feel light and airy. A gentle poke test should leave an indentation that springs back slowly but not completely. This final rise is crucial for achieving the desired volume and texture in your baked easy marbled rye bread recipe.
Baking to Golden Perfection
Preheat your oven to the specified temperature, typically around 375-400°F (190-200°C). If using a baking stone or steel, ensure it preheats in the oven. To create steam, which helps the crust develop nicely, you can place a tray of hot water on the bottom rack of the oven or use a Dutch oven method. Carefully transfer the proofed loaf to the preheated oven.
Bake the bread for 30-45 minutes, or until the crust is golden brown and the internal temperature reaches 200-210°F (93-99°C) when measured with an instant-read thermometer. Baking time will vary depending on the size and shape of the loaf and your oven. A perfectly baked easy marbled rye bread recipe will have a rich color and sound hollow when tapped on the bottom.
Tips for Baking the Best Marbled Rye Bread
Dough Hydration
Dough hydration, the ratio of water to flour, is a critical factor in the texture of your easy marbled rye bread recipe. Rye flour absorbs more water than wheat flour, so rye doughs tend to be stickier. A hydration level between 65% and 75% of the total flour weight is common for a manageable yet moist dough. Too little water results in a dry, dense loaf, while too much makes the dough difficult to handle and can lead to a flat bread.
Observing the dough's consistency during mixing is key. It should be sticky but still manageable. If it feels too dry, add a tablespoon of water at a time. If it's too wet, add a tablespoon of flour. Getting the hydration right is fundamental to achieving a good crumb structure and a delicious loaf from your easy marbled rye bread recipe.
Proofing Environment
The environment where your dough proofs significantly impacts the rising time and the final loaf. A warm, draft-free location with consistent temperature is ideal for both the first and second rises of your easy marbled rye bread recipe. Temperatures between 75-80°F (24-27°C) encourage optimal yeast activity. If your kitchen is cool, you can create a warm environment by placing the covered dough in a turned-off oven with the light on, or in a microwave that has been briefly heated with a cup of boiling water (remove the water before adding the dough).
Consistent temperature prevents uneven rising and helps the dough develop flavor properly. Be patient during proofing; the time is a guideline, and dough is ready when it looks and feels right (e.g., doubled in size, passes the poke test). A well-proofed dough is essential for a light and airy texture in your finished marbled rye.
Oven Temperature and Baking Time
Accurate oven temperature and baking time are crucial for a perfectly baked easy marbled rye bread recipe. Preheat your oven for at least 20-30 minutes to ensure it reaches and maintains the target temperature, typically 375-400°F (190-200°C). An oven thermometer can help verify your oven's accuracy. Baking at the correct temperature ensures the crust develops properly and the interior cooks through evenly.
Baking time will vary based on loaf size and shape, but generally ranges from 30 to 45 minutes. The best way to determine if your bread is done is to check its internal temperature with an instant-read thermometer. It should register between 200°F (93°C) and 210°F (99°C). The crust should be a deep golden brown, and the bottom of the loaf should sound hollow when tapped. Don't rush the baking; underbaked rye can be gummy.
Serving and Storing Your Marbled Rye Bread
Serving Suggestions
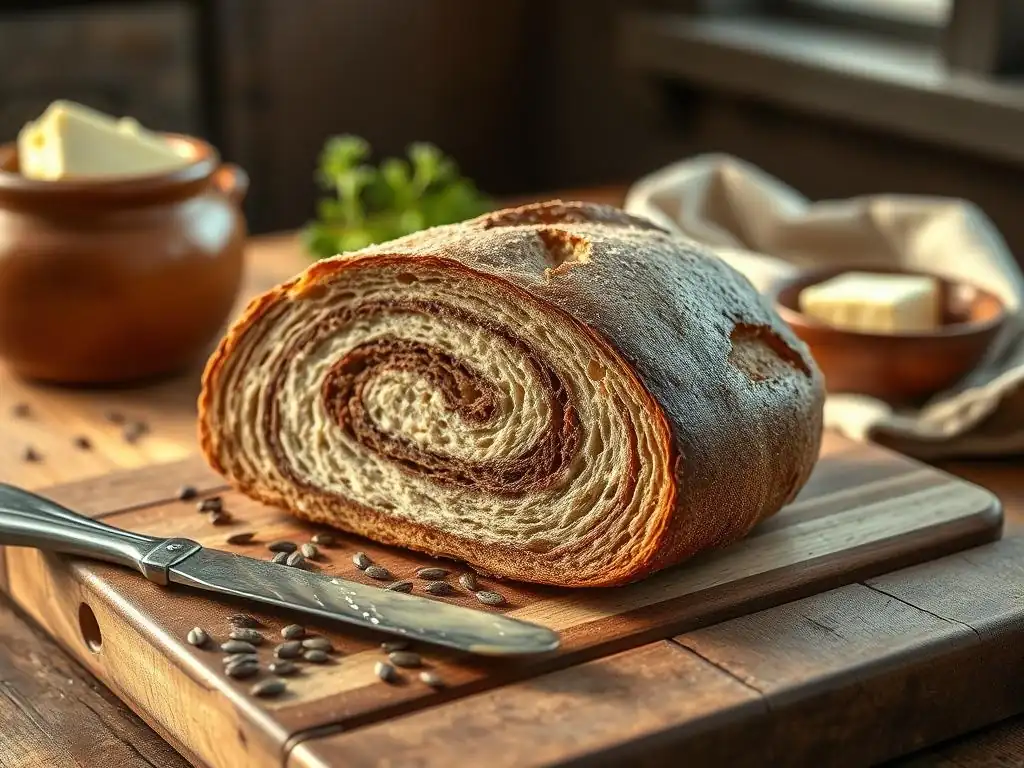
Your homemade easy marbled rye bread recipe is incredibly versatile and can be enjoyed in numerous ways. It is the quintessential bread for classic deli sandwiches like the Reuben (corned beef, sauerkraut, Swiss cheese, Russian dressing) or a simple pastrami on rye. The bread's sturdy texture holds up well to moist fillings.
Beyond sandwiches, try it toasted for breakfast with butter or cream cheese. It pairs wonderfully with smoked fish, like salmon or whitefish salad. Serve thick slices alongside hearty soups or stews, or use it as the base for open-faced appetizers topped with savory spreads. The unique flavor profile complements a wide range of dishes, making this bread a fantastic addition to any meal.
Proper Storage Methods
To keep your easy marbled rye bread recipe fresh, proper storage is key. Once the bread has cooled completely on a wire rack (which is essential to prevent a soggy bottom crust), store it at room temperature. Wrap the loaf tightly in plastic wrap, aluminum foil, or place it in a bread box or a sealed plastic bag. This helps retain moisture and keeps the crust from becoming too hard.
Avoid storing freshly baked bread in the refrigerator, as this can actually cause it to stale faster due to a process called starch retrogradation. Stored properly at room temperature, your marbled rye bread will typically stay fresh for 3-4 days. For longer storage, slice the cooled loaf and freeze the slices in a freezer-safe bag or container for up to 3 months.
Using Stale Rye Bread
Even if your easy marbled rye bread recipe has gone slightly stale, it can still be put to delicious use. Stale rye bread makes excellent croutons or breadcrumbs. Cube the bread, toss with olive oil and seasonings, and bake until crispy for homemade croutons perfect for soups and salads. Process dried stale bread in a food processor for flavorful breadcrumbs to use in meatloaf, meatballs, or as a topping for casseroles.
Stale rye can also be revived slightly by toasting, which can bring back some of its texture and aroma. Don't let any of your delicious homemade bread go to waste; there are plenty of ways to utilize it even after it's past its prime freshness.
Troubleshooting Your Marbled Rye Bread Recipe
Common Baking Issues
When following an easy marbled rye bread recipe, you might occasionally encounter common baking issues. One frequent problem is the dough not rising sufficiently, which can result in a dense loaf. This is often caused by inactive yeast, incorrect water temperature during activation, a cool proofing environment, or insufficient kneading. Another issue is the marble pattern not being distinct, which usually happens if the two doughs are overmixed when combined. A tough crust can result from baking at too high a temperature or insufficient steam in the oven.
Other potential problems include a gummy interior (underbaking or too high hydration) or the loaf spreading too much during baking (under-proofing or weak gluten development). Identifying the symptom is the first step to diagnosing the cause and improving your technique for the next bake of your easy marbled rye bread recipe.
Solutions for Rye Bread Problems
For a dense loaf with poor rise, check your yeast's expiration date and ensure your water temperature is correct for activation (around 100-110°F for active dry). Provide a warm, consistent environment (75-80°F) for both rises. Ensure you are kneading enough to develop sufficient gluten structure. If the marble isn't distinct, be gentler and quicker when combining the doughs; aim for layering or brief rolling, not extensive kneading.
To prevent a tough crust, ensure there is adequate steam in the oven during the initial phase of baking (using a steam tray or Dutch oven). If the interior is gummy, increase baking time or temperature slightly and ensure the internal temperature reaches 200-210°F. If the loaf spreads excessively, try proofing slightly longer or work on your shaping technique to build more surface tension. Patience and observation are your best tools when troubleshooting your easy marbled rye bread recipe.
Explore More Bread Recipes
Sourdough Bread Variations
Once you've mastered the easy marbled rye bread recipe, you might be interested in exploring the world of sourdough. Sourdough baking uses a wild yeast starter for leavening, offering a unique tangy flavor and chewy texture. Variations include classic country loaves, whole wheat sourdough, or even sourdough enriched with ingredients like seeds or herbs.
Working with a sourdough starter introduces a new rhythm to baking, often involving longer fermentation times. Experimenting with different hydration levels and flours can yield a wide range of results, providing a fascinating next step in your bread baking journey.
Beginner-Friendly Bread Recipes
If you're still building your confidence after trying the easy marbled rye bread recipe, there are many other beginner-friendly bread recipes to explore. Simple no-knead breads, quick yeast rolls, or basic sandwich loaves are excellent options that require minimal technique but deliver delicious results.
These recipes often use straightforward methods and common ingredients, allowing you to practice fundamental skills like mixing, kneading (or not kneading! ), shaping, and proofing without complex steps. Building a repertoire of simple successes can make tackling more elaborate recipes, like enriched doughs or shaped loaves, feel less daunting.
Baking Tips and Techniques
Continuous learning is part of the joy of baking. Beyond specific recipes like the easy marbled rye bread recipe, there are numerous tips and techniques that apply to bread baking in general. Understanding the role of ingredients like flour types, yeast, and salt is fundamental. Mastering techniques such as proper kneading, recognizing when dough is sufficiently proofed, and creating steam in your oven can dramatically improve your results.
Learning about baker's percentages, autolyse, or preferments can further elevate your skills. Many resources, including online guides and books, delve into the science and art of baking. By continuously refining your techniques, you can consistently produce high-quality, delicious bread at home.
Frequently Asked Questions
What makes this marbled rye bread recipe considered "easy"?
The recipe emphasizes simple steps and easy-to-find ingredients, making it approachable for bakers of all skill levels. The marbled effect is achieved through a straightforward layering technique, not complex dough manipulation.
What specific baking skills are helpful, but not necessarily required, before attempting this recipe?
While not mandatory, a basic understanding of yeast activation and dough kneading can be beneficial. However, the recipe includes detailed instructions for those unfamiliar with these techniques.
Can I substitute any ingredients in the Easy Marbled Rye Bread recipe?
While substitutions are possible, they may affect the final texture and flavor. For example, different types of flour can impact the dough's rise and crumb structure.
How long does it realistically take to make this Easy Marbled Rye Bread from start to finish?
Expect a total time commitment of around 3-4 hours, including preparation, proofing, baking, and cooling. The active time, however, is considerably less.
What are some tips for achieving the best marbled effect in the bread?
Ensure both the light and dark doughs are of similar consistency. Gently layering the doughs and avoiding over-mixing while shaping is key for achieving a distinct and visually appealing marble.
Final Reflection: The Unexpected Joy of Marbled Rye
The art of baking, often perceived as intimidating, can be surprisingly accessible. This simple marbled rye bread recipe proves that creating beautiful and delicious food doesn't require years of culinary training or a professional kitchen. The stunning visual appeal, achieved with minimal effort, makes this recipe a perfect gateway for aspiring bakers of all skill levels.
The enduring appeal of homemade bread transcends mere sustenance; it's a connection to tradition, a celebration of simple ingredients transformed, and a source of immense satisfaction. Bread is the staff of life,
a common saying reminds us, but it's also so much more – a symbol of comfort, sharing, and the enduring power of simple pleasures. This recipe, with its elegant marbling, elevates the everyday loaf into something special, something to be savored and shared. The process itself, from kneading the dough to the satisfying aroma filling your kitchen, is a meditative experience, a welcome respite from the demands of modern life.
Now, I invite you to try this recipe. Don't be afraid to experiment – adjust the spices, add your favorite seeds, and let your creativity flow. The beauty of baking lies in its adaptability. More than just a recipe, this is an invitation to rediscover the joy of creating something beautiful and delicious with your own hands. The next time you're looking for a rewarding and impressive project, remember the simple elegance of marbled rye bread. The satisfaction you'll feel is truly worth the effort.
Unleash Your Inner Baker: Marble Rye Awaits!
Thanks for taking the time to explore the magic of marbled rye bread! We hope you gained confidence in tackling this seemingly complex loaf. Now it's time to put your new skills to the test!
- Bake your own masterpiece: Grab those ingredients and try the recipe today! The satisfying aroma alone is worth it. Don't worry about perfection—the beauty of this bread lies in its rustic charm.
- Share your creation: Post a picture of your marbled rye on social media and tag us @BakeWithEase – we’d love to see your baking journey!
- Explore more rustic recipes: Dive into our recipe archive for more bread-baking inspiration, or perhaps try your hand at another beautiful loaf.
What delicious adventure will your next baking project be?