
Adapting Advanced Pizza Dough for Home Ovens vs. Pizza Ovens

Welcome to BakeWithEase, your partner in creating delicious baked goods!
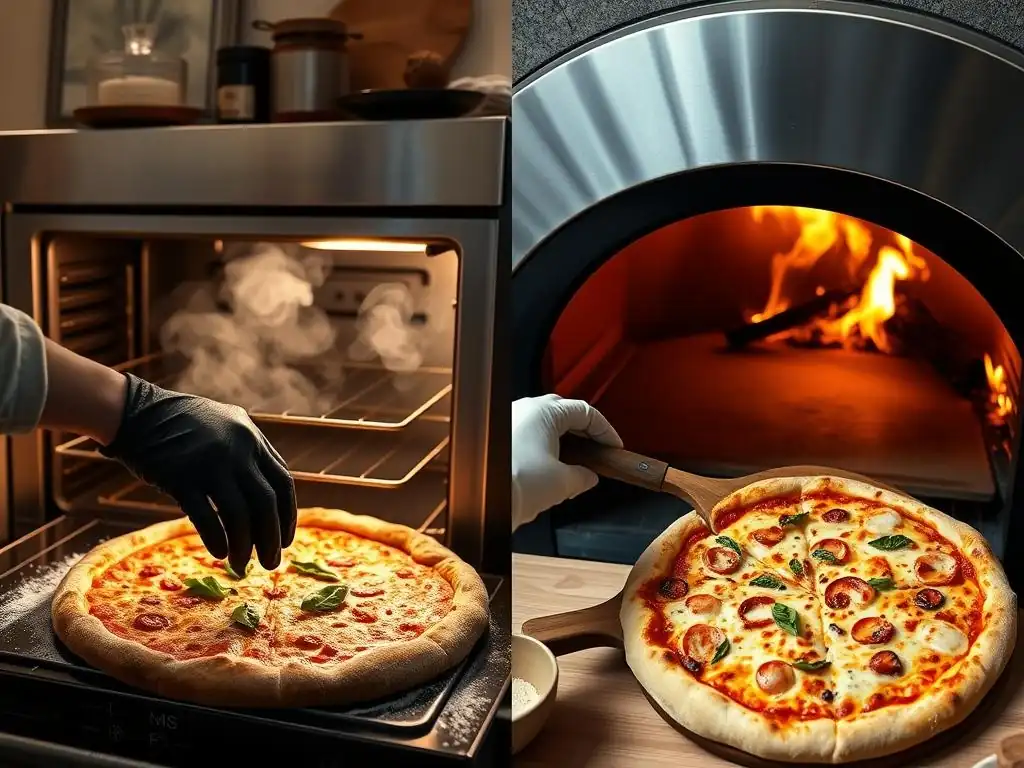
Ever wondered how to bridge the gap between restaurant-quality pizza and what you can achieve at home? We're diving deep into the secrets of perfecting pizza dough – specifically, how to make crucial homemade pizza dough oven adjustments to achieve that coveted crispy crust and airy interior, even without a professional pizza oven. Intrigued? Let's unlock the secrets!
- Adapting Advanced Pizza Dough for Home Ovens vs. Pizza Ovens: BakeWithEase Guide
- Understanding the Differences: Home Ovens vs. Pizza Ovens for Baking Pizza
- Key Considerations When Adapting Advanced Pizza Dough Recipes
- Modifying Advanced Pizza Dough Recipes for Home Oven Baking Success
- Adapting Advanced Pizza Dough for Pizza Oven Performance
- Troubleshooting Common Pizza Dough Issues in Different Ovens
- Advanced Pizza Dough Recipes and Oven-Specific Modifications
- Achieving Pizza Perfection: Final Tips and Recommendations
-
Frequently Asked Questions
- What are the main differences between home ovens and pizza ovens that affect pizza dough baking?
- Why is it important to adjust a pizza dough recipe designed for a pizza oven when using a home oven?
- What are some common adjustments to make to pizza dough recipes for home ovens?
- How does preheating a baking stone or steel help when baking pizza in a home oven?
- What role does hydration level play in adapting pizza dough for home ovens?
- Final Reflection: The Humble Home Oven's Pizza Revolution
- Unleash Your Inner Pizzaiolo!
Adapting Advanced Pizza Dough for Home Ovens vs. Pizza Ovens: BakeWithEase Guide
Understanding the Differences: Home Ovens vs. Pizza Ovens for Baking Pizza
Baking the perfect pizza crust is an art, and the oven you use plays a monumental role in the final outcome. While dedicated pizza ovens, whether wood-fired, gas, or electric, are designed specifically for high-temperature pizza baking, standard home ovens offer a more versatile but often challenging environment for achieving that ideal crust. Understanding the fundamental differences between these two types of ovens is the first step in making effective homemade pizza dough oven adjustments.
The primary goal when baking pizza is to cook the dough quickly at a high temperature to create a crispy exterior, a light and airy interior (cornicione), and perfectly melted toppings. Pizza ovens excel at this rapid, high-heat transfer. Home ovens, while capable of reaching relatively high temperatures, typically lack the extreme heat, conductive surfaces, and specific atmospheric conditions of their pizza-focused counterparts, necessitating careful adjustments to your advanced pizza dough recipes and techniques.
The Heat Factor: Temperature Discrepancies and Pizza Dough Impact
The most significant difference between home ovens and dedicated pizza ovens is the achievable temperature. Standard home ovens typically max out around 500-550°F (260-290°C), with some newer models reaching slightly higher. In stark contrast, pizza ovens, especially traditional wood-fired ovens, can reach temperatures of 700-900°F (370-480°C) or even higher. This substantial temperature gap fundamentally alters the baking process for your homemade pizza dough.
At extremely high temperatures, like those in a pizza oven, the crust cooks incredibly fast – often in just 60-90 seconds for a Neapolitan style. This rapid cooking causes the water in the dough to flash into steam, creating large, airy bubbles and a light, crisp texture with characteristic charring (leopard spotting).
In a home oven, the lower temperature means baking takes much longer, typically 8-15 minutes or more. This slower bake can result in a denser crust, less significant rise, and a more uniformly browned finish unless specific homemade pizza dough oven adjustments are made to compensate for the reduced heat intensity.
Baking Surface Matters: Stone, Steel, and Standard Racks
The surface your pizza bakes on is critical for effective heat transfer to the base of the dough, which is essential for a crispy bottom crust. In many dedicated pizza ovens, the baking surface is a thick stone or refractory brick that absorbs and radiates intense heat. This conductive heat transfer from the oven floor is a key factor in achieving the rapid crisping of the pizza's base.
In a standard home oven, the pizza is often placed directly on a metal baking sheet or a standard oven rack. Metal baking sheets provide some conduction but don't hold and radiate heat as effectively as stone. Baking directly on a rack offers minimal conductive heat transfer to the base, leading to a softer, less crispy bottom crust.
Utilizing a pizza stone or baking steel in a home oven is a common and effective homemade pizza dough oven adjustment. A preheated baking steel, for instance, can transfer heat much faster than a stone, simulating the intense floor heat of a pizza oven more closely and significantly improving crust crispness.
Humidity Control: How Ovens Differ in Moisture Retention
Ovens also differ in their atmospheric conditions, particularly humidity. Wood-fired pizza ovens, due to combustion and the enclosed space, often have a relatively humid environment early in the bake as moisture evaporates from the dough and wood. This initial steam can help the dough expand rapidly before the crust sets. Electric and gas pizza ovens can be drier, but still often operate in a way that traps some moisture.
Home ovens, by contrast, tend to be much drier environments. The constant circulation of air (especially in convection ovens) and venting mechanisms remove moisture efficiently. This lack of humidity can cause the surface of the dough to dry out and set too quickly before maximum expansion is achieved, potentially resulting in a less airy crust. While it's challenging to replicate the humidity of a wood-fired oven perfectly, understanding this difference is important for making homemade pizza dough oven adjustments, such as considering dough hydration levels or briefly adding steam (though this is less common for pizza than for bread).
Key Considerations When Adapting Advanced Pizza Dough Recipes
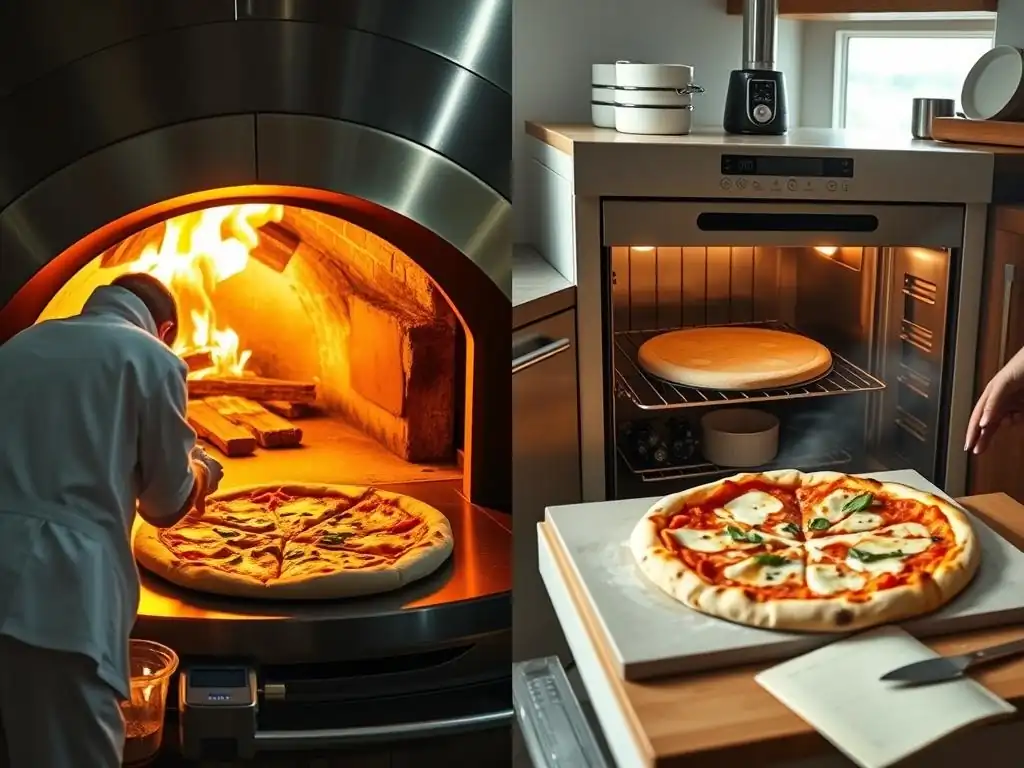
Adapting an advanced pizza dough recipe, often designed for high-heat pizza ovens, to bake successfully in a standard home oven requires careful consideration of several dough characteristics. These characteristics interact with the oven environment to determine the final crust texture and structure. Making informed homemade pizza dough oven adjustments means understanding how factors like gluten development, hydration levels, and yeast activity behave differently under varying temperature and time conditions.
It's not just about changing the baking temperature; it's about anticipating how the dough will perform throughout the entire process, from fermentation to the final bake. Successful adaptation hinges on balancing the dough's potential with the oven's limitations and strengths.
Gluten Development: Adjusting for Slower Baking Times in Home Ovens
Gluten is the protein network in dough that provides structure and elasticity. In a high-temperature pizza oven, the rapid bake means the gluten structure sets very quickly. For doughs designed for this environment, strong gluten development is crucial to support the rapid expansion and structure. However, when baking in a slower home oven, the dough is exposed to heat for a longer period. This extended exposure can cause the gluten to continue developing and setting, potentially leading to a tougher or chewier crust than desired if the initial development isn't managed.
For homemade pizza dough oven adjustments in a home oven, you might consider slightly less aggressive gluten development during kneading compared to a high-heat dough, or allowing for a longer, slower fermentation which naturally tenderizes the gluten. Alternatively, using a slightly lower protein flour blend could also help manage toughness over the extended bake time typical of home ovens. The goal is a structure strong enough to hold its shape but tender enough for a pleasant chew after a longer bake.
Hydration Levels: Optimizing Dough Moisture for Different Oven Types
Hydration refers to the ratio of water to flour in the dough. High hydration doughs (e.g., 65-70% hydration or more) are common for Neapolitan style pizza baked in very hot ovens. The high water content turns to steam rapidly, creating a very open, airy crumb structure. In a high-heat pizza oven, the intense heat crisps the exterior quickly, preventing the dough from becoming soggy.
However, using a very high hydration dough in a lower-temperature home oven can be challenging. The slower bake means the water evaporates more gradually, increasing the risk of a gummy or soggy bottom crust, especially without an effective baking surface like steel.
For homemade pizza dough oven adjustments in a home oven, slightly reducing the hydration level by perhaps 2-5% compared to a pizza oven recipe can make the dough easier to handle and reduce the risk of a soggy outcome. Conversely, if adapting a lower hydration recipe for a pizza oven, you might increase hydration slightly to encourage more airiness and rapid steam production.
Yeast Activity: Controlling Fermentation Based on Oven Capabilities
Yeast activity, controlled by fermentation time and temperature, develops flavor and produces carbon dioxide gas, which gives the dough its rise and structure. The ideal level of fermentation depends partly on how quickly the dough will bake. Dough intended for a very quick, high-heat bake in a pizza oven might undergo a relatively shorter, perhaps warmer, fermentation to ensure there's plenty of gas production ready for the explosive oven spring.
For homemade pizza dough oven adjustments in a home oven with a longer bake time, a longer, slower fermentation (often in the refrigerator) is frequently preferred. This extended cold fermentation develops more complex flavors in the dough and also helps to condition the gluten. While gas production is slower in the cold, the longer duration accumulates sufficient leavening. Over-proofing dough for a home oven bake can be detrimental, leading to a lack of oven spring and a dense crust, so understanding how your fermentation schedule aligns with your oven's baking time is crucial.
Modifying Advanced Pizza Dough Recipes for Home Oven Baking Success
Successfully baking advanced pizza dough in a home oven requires specific modifications to both the dough preparation and the baking process. Since you can't replicate the extreme temperatures of a dedicated pizza oven, the strategy shifts to optimizing the bake within the home oven's capabilities. These homemade pizza dough oven adjustments focus on maximizing heat transfer, managing bake time, and ensuring even cooking.
Implementing these techniques can significantly improve the crust texture, bringing you closer to that desired pizzeria-quality result even with standard kitchen equipment.
Lowering Oven Temperature and Extending Baking Time
Given that home ovens don't reach the ultra-high temperatures of pizza ovens, attempting to bake for the same short duration will result in uncooked dough. The primary adjustment is to lower the temperature relative to a pizza oven recipe (but still aiming for the highest possible home oven temperature, typically 500-550°F or 260-290°C) and significantly extend the baking time. A pizza that might take 90 seconds in a 900°F pizza oven could take 10-15 minutes or more at 500°F in a home oven.
This extended bake time requires the dough to be structured differently than one designed for a rapid bake. As discussed earlier, managing gluten development and hydration becomes more critical to prevent toughness or dryness. Monitoring the pizza closely throughout the longer bake is essential to prevent burning the toppings while ensuring the crust is cooked through.
Utilizing Baking Stones or Steel for Improved Crust
As mentioned before, a standard oven rack or thin baking sheet provides poor heat transfer to the bottom of the pizza. Using a preheated pizza stone or, even better, a baking steel is perhaps the most impactful homemade pizza dough oven adjustment you can make for a home oven. These surfaces absorb and store a significant amount of thermal energy. When the pizza is placed on the hot stone or steel, this energy is rapidly transferred to the base of the dough.
A baking steel, being more conductive than stone, transfers heat even faster, helping to achieve a crispier bottom crust and better oven spring, mimicking some of the effects of a pizza oven floor. Preheat your stone or steel in the oven at its maximum temperature for at least 45 minutes to an hour to ensure it is fully saturated with heat. This intense initial heat burst is crucial for setting the base quickly.
Preheating Strategies: Achieving Optimal Heat Before Baking
Simply setting your oven to its maximum temperature and waiting for the indicator light to suggest it's ready is often insufficient, especially when using a baking stone or steel. These thermal masses require significant time to absorb enough heat to be effective. A key homemade pizza dough oven adjustment is extending the preheating time.
Preheating the oven with the stone or steel inside for a minimum of 45-60 minutes at the highest possible temperature (500-550°F or 260-290°C) is highly recommended. Use an internal oven thermometer to verify the air temperature, but remember the surface temperature of the stone or steel is the most critical factor for the crust base. This thorough preheating ensures maximum heat transfer when the pizza is launched.
The Importance of Dough Docking for Even Baking
Dough docking involves pricking the surface of the dough with a fork or a specialized tool before adding toppings. This technique is sometimes used for specific pizza styles (like some thin crusts or Roman style) or for focaccia to prevent large bubbles from forming. While not universally applied to all pizza doughs, it can be a useful homemade pizza dough oven adjustment in a home oven, particularly if you struggle with excessively large bubbles that char or unevenly cook the toppings during the longer bake time.
- Consider docking if:
- You are making a thinner crust.
- You want a flatter, more uniform surface.
- You frequently get very large, uncontrolled bubbles in your home oven.
- Avoid docking if:
- You are aiming for a puffy, airy Neapolitan-style cornicione.
- Your dough is already prone to being dense.
Docking allows some of the steam to escape in a controlled manner, potentially leading to a more even bake across the base and preventing huge, empty pockets in the crust.
Adapting Advanced Pizza Dough for Pizza Oven Performance
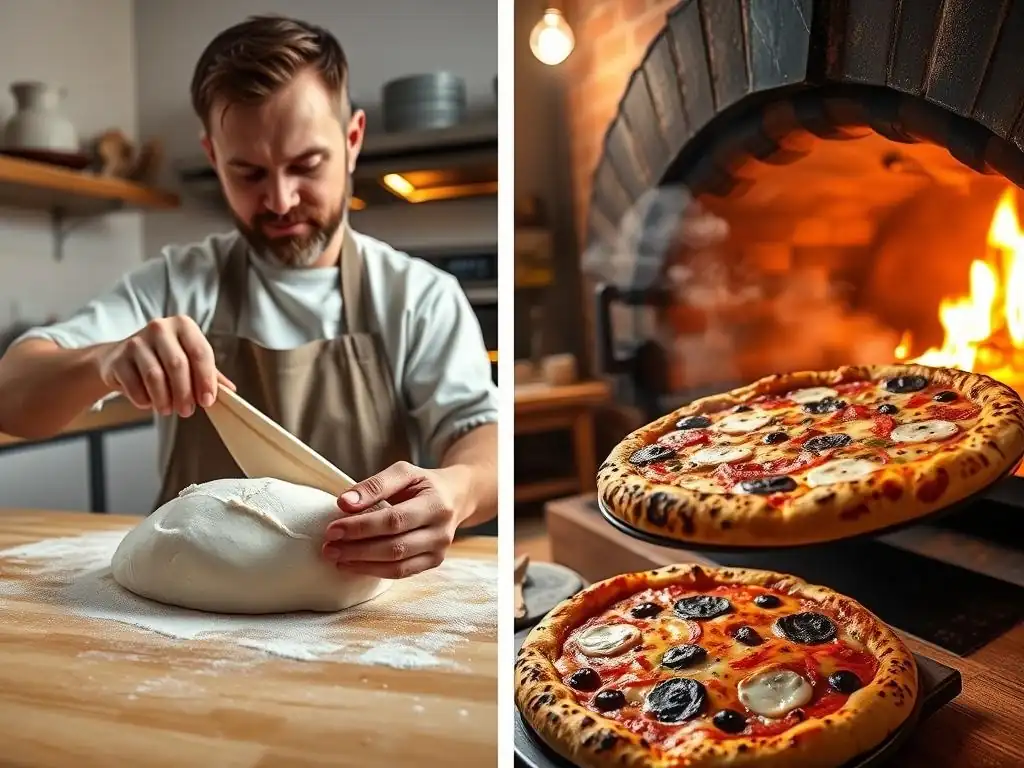
While advanced pizza dough recipes are often designed for pizza ovens, simply having the right oven isn't enough. Mastering baking in a high-temperature pizza oven requires specific techniques to leverage the oven's capabilities and handle the incredibly fast bake times. Adapting your approach to the intense heat is just as important as adapting dough for a home oven; it's just a different set of homemade pizza dough oven adjustments.
Understanding how dough behaves at extreme temperatures and learning to work quickly and efficiently are key to achieving the desired results, such as a perfect Neapolitan crust with characteristic charring and a light, airy edge.
High-Temperature Baking Techniques: Mastering the Neapolitan Style
The hallmark of baking in a pizza oven is the high temperature, typically 700-900°F (370-480°C) or even higher. This heat allows for incredibly fast baking, often just 60-120 seconds. Mastering this requires speed and precision. Launching the pizza correctly onto the hot surface is crucial to prevent sticking. Once in the oven, the pizza usually needs to be rotated multiple times to ensure even cooking, as heat distribution can be uneven, especially in wood-fired ovens.
Working with peels (both launching and turning peels) becomes essential. You need to be able to slide the pizza off the launching peel smoothly and then use a turning peel to rotate it every 15-30 seconds or so as it bakes. This rapid turning ensures all sides of the crust are exposed to the most intense heat and helps develop the characteristic leopard spotting without burning. This fast-paced environment is a significant homemade pizza dough oven adjustment compared to the more leisurely pace of home oven baking.
Adjusting Dough Thickness for Quick Cooking
In a high-temperature pizza oven, the dough cooks through very quickly. This means that the thickness of the dough needs to be carefully controlled. Doughs designed for these ovens, like Neapolitan, are typically stretched very thin in the center with a thicker rim (cornicione). The thin center cooks almost instantly, allowing the toppings to cook without burning, while the thicker rim puffs up dramatically in the intense heat.
Attempting to bake a thicker dough, like a New York style or a pan pizza dough, in a 900°F oven would likely result in a severely burnt exterior long before the interior is cooked. Therefore, when using a pizza oven, ensuring your advanced pizza dough is stretched to the appropriate thinness for the style (often 3-4mm in the center for Neapolitan, for example) is a critical homemade pizza dough oven adjustment.
Understanding Charring and Leopard Spotting
One of the desired outcomes of baking in a high-temperature pizza oven, particularly for Neapolitan style, is the development of charring, often referred to as "leopard spotting." These are small, dark spots on the rim of the crust caused by the rapid caramelization and carbonization of sugars in the dough at extremely high temperatures. They contribute a unique flavor and visual appeal.
Achieving leopard spotting requires both high heat and a well-fermented dough with sufficient sugars. While some charring is desirable, excessive charring indicates burning. Learning to balance the bake – rotating the pizza to expose different parts of the rim to the hottest spots while preventing burning – is a key skill in mastering pizza oven baking. It's a fine line between perfect spotting and an unpleasantly burnt crust, requiring practice and careful monitoring.
Preventing Burning: Monitoring and Adjusting Baking Time
Given the speed at which pizza bakes in a high-temperature oven, the risk of burning is very high. The difference between a perfectly baked pizza and a burnt one can be a matter of seconds. Constant monitoring is non-negotiable. You cannot simply set a timer and walk away.
You need to watch the crust color, the bubbling of the cheese, and the charring on the rim continuously. Use a turning peel to lift the edge of the pizza and check the color of the bottom crust. If one side is cooking faster than another (common in wood-fired ovens with hot spots), rotate the pizza immediately.
If the top is cooking faster than the bottom, you might need to lift the pizza closer to the heat source (the dome) for a few seconds using the peel. If the bottom is cooking too fast, you might need to lift it off the floor slightly or move it to a cooler spot. These real-time homemade pizza dough oven adjustments are crucial for success.
Troubleshooting Common Pizza Dough Issues in Different Ovens
Regardless of the oven type, bakers inevitably encounter issues with their pizza dough. Many common problems are exacerbated or manifest differently depending on whether you're using a home oven or a high-temperature pizza oven. Knowing how to diagnose and address these issues is part of mastering homemade pizza dough oven adjustments.
From soggy bottoms in a home oven to burnt crusts in a pizza oven, understanding the root cause based on the oven environment is key to finding the right solution and improving your results.
Soggy Crust in Home Ovens: Causes and Solutions
A soggy or gummy bottom crust is a frequent frustration when baking pizza in a home oven. This typically happens because the bottom of the dough hasn't cooked through and crisped up sufficiently before the top is ready.
- Causes:
- Oven temperature too low.
- Insufficient preheating of the baking surface (stone/steel).
- Not using a baking stone or steel.
- Dough hydration is too high for the oven setup.
- Too many wet toppings.
- Pizza baked on a cold surface or thin tray.
- Solutions (Homemade Pizza Dough Oven Adjustments):
- Ensure your oven is at its maximum temperature (500-550°F or 260-290°C).
- Preheat your stone or steel for at least 45-60 minutes.
- Always use a preheated stone or steel.
- Consider slightly reducing dough hydration if the issue persists.
- Pre-cook wet toppings (like mushrooms or onions) to remove excess moisture.
- Launch the pizza directly onto the hot baking surface using parchment paper (which can be removed after 1-2 minutes) or semolina/flour.
Burnt Crust in Pizza Ovens: Prevention Strategies
Conversely, burning is the primary concern in high-temperature pizza ovens. The rapid cooking window means dough can go from perfectly baked to burnt in seconds.
- Causes:
- Oven temperature is too high for the dough thickness/type.
- Pizza is too close to the heat source (fire or heating element).
- Insufficient rotation of the pizza during baking.
- Dough is over-fermented (too many sugars on the surface).
- Dough is too thin in spots.
- Prevention Strategies (Homemade Pizza Dough Oven Adjustments):
- Monitor oven temperature and adjust fire/settings as needed (aim for 700-900°F depending on style).
- Position the pizza correctly – not directly in the hottest spot unless intentionally charring the edge briefly.
- Rotate the pizza frequently (every 15-30 seconds) using a turning peel.
- Ensure dough fermentation is appropriate – avoid excessive surface sugars from over-proofing.
- Stretch dough evenly, avoiding excessively thin spots in the rim or base.
- If edges are burning, lift the pizza off the floor briefly using the peel.
Uneven Baking: Addressing Hotspots and Coldspots
Uneven baking can occur in both oven types but is particularly common in less consistent home ovens and wood-fired pizza ovens with variable heat distribution. One side of the pizza cooks faster than the other, leading to a partially burnt, partially undercooked result.
- Causes:
- Inconsistent oven temperature (thermostat issues, poor calibration).
- Heating elements cycling on/off unevenly.
- Poor air circulation (in home ovens).
- Location of fire/heat source (in pizza ovens).
- Pizza not rotated during baking.
- Addressing Unevenness (Homemade Pizza Dough Oven Adjustments):
- Use an oven thermometer to verify temperature and identify potential hotspots/coldspots in your home oven.
- For home ovens, try baking on a different rack position or using a convection setting if available (though convection can sometimes dry out the crust).
- In pizza ovens, identify the hottest areas (often closest to the fire/elements) and plan your rotation strategy accordingly.
- Crucially, rotate the pizza frequently! This is the most effective way to ensure even cooking in any oven with uneven heat. Rotate 180 degrees halfway through in a home oven, or in smaller increments every few seconds in a pizza oven.
Advanced Pizza Dough Recipes and Oven-Specific Modifications
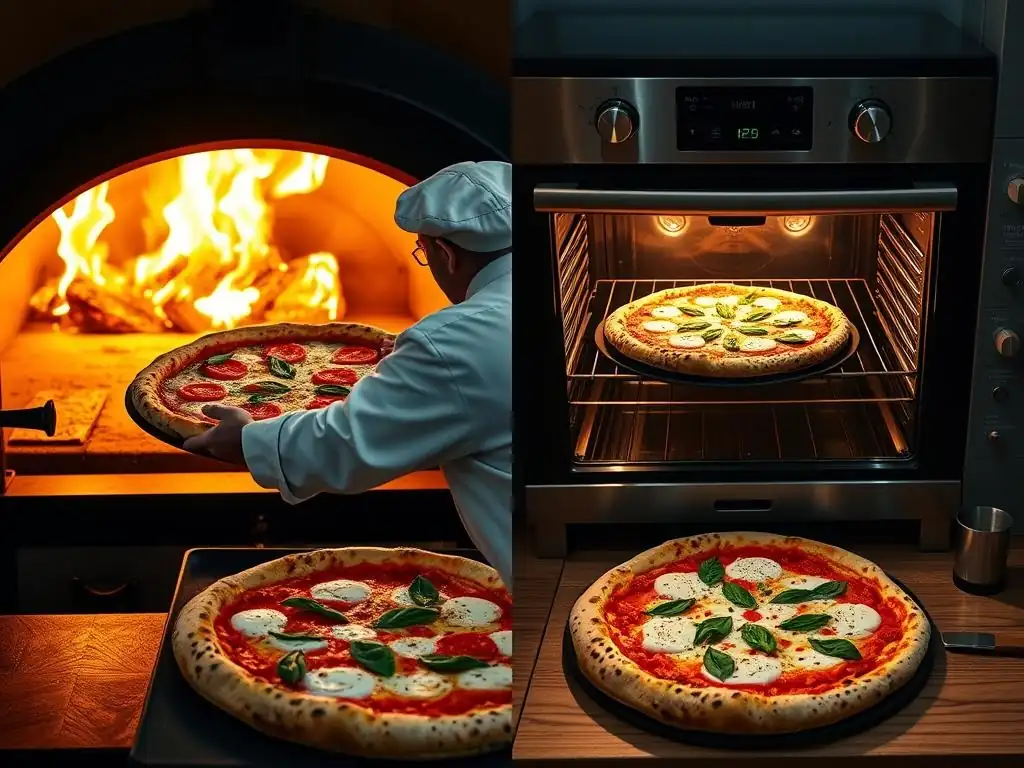
Let's look at how specific types of advanced pizza dough might be adapted for different oven environments. Understanding the typical characteristics of these doughs helps in making the necessary homemade pizza dough oven adjustments.
These examples illustrate how the principles of hydration, fermentation, and heat transfer apply to real-world dough styles.
Sourdough Pizza Dough Adaptations for Home and Pizza Ovens
Sourdough adds complexity and flavor to pizza dough, relying on wild yeast and bacteria for leavening and fermentation. Sourdough pizza dough can produce excellent results in both home and pizza ovens, but requires different handling.
Adjusting Starter Amounts for Home Oven Baking
Sourdough ferments slower than commercial yeast dough. For a home oven with a longer bake time, you often want a dough that has developed significant flavor through a long, cool fermentation (e.g., 24-72 hours in the refrigerator). The amount of starter used can influence the speed of fermentation.
For a home oven bake where you might allow more time for flavor development, you could use a smaller percentage of starter (perhaps 10-20% of the total flour weight) and rely on a longer bulk and cold proofing time. This slower fermentation helps tenderize the gluten which is beneficial for the longer bake.
// Example Sourdough Ratio Adjustment for Home Oven (Approximation)
Flour: 1000g
Water: 650g (65% hydration)
Sourdough Starter (active, ~100% hydration): 150g (15% of flour weight)
Salt: 25g (2.5%)

// Fermentation Plan Example
Bulk Fermentation: 2-4 hours at room temperature (approx. 72°F / 22°C) with 2-3 sets of folds.
Cold Fermentation: 24-72 hours in the refrigerator (approx. 38°F / 3°C) as individual dough balls.
This lower starter percentage and longer cold ferment is a typical homemade pizza dough oven adjustment for enhancing flavor and managing dough strength for a slower bake.
High Hydration Sourdough for Pizza Ovens
For a high-temperature pizza oven, a higher hydration sourdough dough (often 65-70% or more) works beautifully. The intense heat transforms the water into steam rapidly, creating a very open, airy, and light crust structure characteristic of Neapolitan-style pizza.
The fermentation for a pizza oven might be shorter or warmer compared to a home oven dough, aiming for significant gas production ready for the explosive oven spring. Using a higher percentage of vigorous starter (e.g., 20-30% of flour weight) can speed up the initial bulk fermentation, allowing dough balls to be ready for a shorter cold proof (12-24 hours) before baking.
// Example High Hydration Sourdough for Pizza Oven (Approximation)
Flour: 1000g
Water: 680g (68% hydration)
Sourdough Starter (active, ~100% hydration): 250g (25% of flour weight)
Salt: 25g (2.5%)

// Fermentation Plan Example
Bulk Fermentation: 2-3 hours at room temperature (approx. 72°F / 22°C) with 3-4 sets of folds.
Cold Fermentation: 12-24 hours in the refrigerator (approx. 38°F / 3°C) as individual dough balls.
Warm Up: 1-2 hours at room temperature before baking.
This higher hydration and potentially shorter, warmer fermentation is a key homemade pizza dough oven adjustment to leverage the intense heat of a pizza oven for maximum oven spring and airiness.
Neapolitan Pizza Dough Recipe and Pizza Oven Baking Guide
Authentic Neapolitan pizza dough (governed by the Associazione Verace Pizza Napoletana standards, though home bakers often adapt) is typically made with just flour (Type 00), water, salt, and yeast (or sourdough). It's characterized by high hydration (often 58-65% for commercial yeast, higher for sourdough) and a relatively short fermentation (12-24 hours) before being baked for 60-90 seconds in a wood-fired oven at 800-900°F (430-480°C).
- Pizza Oven Baking Guide:
- Preheat oven to 800-900°F (430-480°C). Ensure the floor is equally hot.
- Stretch dough ball very thin in the center (approx. 3mm) leaving a thicker rim (approx. 1-2cm).
- Add minimal, fresh toppings quickly.
- Launch pizza onto the hot oven floor using a peel dusted with semolina or flour.
- Bake for 60-90 seconds, rotating the pizza frequently (every 15-30 seconds) with a turning peel to ensure even cooking and desired charring.
- Remove with a peel when the crust is puffed, spotted, and the cheese is melted and bubbly.
Attempting this exact dough and method in a home oven would result in a soggy, pale crust. Significant homemade pizza dough oven adjustments, like using a steel, lowering hydration slightly, and extending the bake time, are necessary for a Neapolitan-style result in a home oven.
New York Style Pizza Dough Adaptations for Home Ovens
New York style pizza dough is typically lower in hydration than Neapolitan (often 58-62%) and may include a small amount of sugar and oil, which contribute to browning and tenderness during a longer bake. It's traditionally baked on the oven floor (often a deck oven) at a lower temperature than Neapolitan, perhaps 550-650°F (290-340°C), for a longer time, around 8-12 minutes. This results in a crust that is chewy, foldable, and has a more uniform brown color than Neapolitan.
- Adaptations for Home Ovens: New York style dough is actually quite well-suited for adaptation to a home oven, as the target temperature and bake time are closer to what a home oven can achieve.
- Use a baking steel or stone, preheated at the oven's maximum temperature (500-550°F or 260-290°C) for at least 60 minutes.
- Stretch dough to a medium thickness – thinner than pan pizza, thicker than Neapolitan in the center. Aim for a diameter appropriate for your oven/stone size.
- Top as desired, but avoid overloading, especially with wet ingredients.
- Launch pizza onto the hot stone/steel.
- Bake for 8-12 minutes, rotating 180 degrees halfway through for even cooking. You may need to finish under the broiler for the last minute or two to crisp the top, but watch very closely.
These homemade pizza dough oven adjustments leveraging a hot baking surface and appropriate bake time make achieving a satisfying chewy-crisp New York style crust possible in a standard home oven.
Achieving Pizza Perfection: Final Tips and Recommendations
Mastering advanced pizza dough and baking it to perfection, whether in a home oven or a dedicated pizza oven, is an ongoing journey. It involves not just understanding the dough and the oven, but also refining your tools, practicing your technique, and focusing on quality ingredients. Making effective homemade pizza dough oven adjustments is a skill that improves with experience.
Don't be discouraged by initial results. Every bake is a learning opportunity. Pay attention to what works and what doesn't, and adjust your approach for the next time.
Investing in Baking Tools: Pizza Stones, Steels, and Thermometers
While you can start baking pizza with minimal equipment, investing in a few key tools can dramatically improve your results, especially for homemade pizza dough oven adjustments in a home oven.
- Pizza Stone or Baking Steel: As discussed, this is perhaps the single best investment for home oven pizza bakers. A steel offers faster heat transfer and is less prone to breaking than a stone.
- Pizza Peels: You'll need a peel to launch the pizza into the oven and ideally a turning peel (smaller, round) for rotating in a hot oven. Wooden peels are good for launching; metal peels are better for retrieving and turning.
- Infrared Thermometer: Useful for measuring the surface temperature of your baking stone or steel, or the floor of your pizza oven, ensuring it's adequately preheated.
- Oven Thermometer: Helps verify the actual air temperature inside your home oven, which can differ significantly from the dial setting.
These tools facilitate better heat management and dough handling, crucial for successful homemade pizza dough oven adjustments.
Practice Makes Perfect: Experimenting with Dough and Oven Settings
There is no substitute for practice. Baking great pizza requires developing a feel for the dough, understanding how it behaves in your specific oven, and refining your technique.
- Keep Notes: Jot down details about each bake: hydration level, fermentation time/temperature, oven temperature (measured! ), preheating time, bake time, results (crust texture, color, toppings). This helps you identify what variables impact the outcome.
- Experiment: Try small variations in your homemade pizza dough oven adjustments – a slightly longer preheat, a small change in hydration, adjusting rack position, trying the broiler finish in a home oven, or varying rotation frequency in a pizza oven.
- Learn from Mistakes: A burnt crust or a soggy bottom isn't a failure, it's data. Analyze what happened based on the principles discussed (heat, surface, time, dough properties) and adjust for the next attempt.
Achieving Authentic Pizza Taste: Ingredient Quality and Techniques
Finally, while dough and oven techniques are critical, the quality of your ingredients and your overall approach to building the pizza also significantly impact the final taste and authenticity.
- Flour: Using appropriate flour (e.g., high-protein bread flour for chew, Italian Type 00 for specific Neapolitan textures) makes a difference.
- Tomatoes: Quality canned whole peeled tomatoes (like San Marzano) crushed by hand make a simple, flavorful sauce.
- Cheese: Fresh mozzarella (used sparingly to avoid excess moisture) and high-quality low-moisture mozzarella are standard.
- Technique: Stretching the dough gently to preserve air bubbles, saucing and topping without overloading the pizza, and baking at the correct temperature for the appropriate time are all essential techniques that complement your homemade pizza dough oven adjustments.
Combining well-adapted dough, optimized oven technique, quality ingredients, and consistent practice is the recipe for achieving pizza perfection at home.
Frequently Asked Questions
What are the main differences between home ovens and pizza ovens that affect pizza dough baking?
Home ovens typically have a lower maximum temperature and less consistent heat distribution compared to pizza ovens, which can reach extremely high temperatures and maintain even heat. This difference significantly impacts the dough's rise and crust formation.
Why is it important to adjust a pizza dough recipe designed for a pizza oven when using a home oven?
Adjusting is crucial because high-heat pizza oven recipes may result in undercooked dough and burnt toppings in a home oven. Modifications ensure the dough cooks properly and the toppings are evenly baked.
What are some common adjustments to make to pizza dough recipes for home ovens?
Common adjustments include decreasing the hydration level of the dough, increasing the proofing time, and using a baking stone or steel to help retain heat. These changes mimic the effect of a hotter oven.
How does preheating a baking stone or steel help when baking pizza in a home oven?
A preheated baking stone or steel provides a hot, even surface that mimics the high heat of a pizza oven. This helps the dough cook more quickly and develop a crispier crust.
What role does hydration level play in adapting pizza dough for home ovens?
Lowering the hydration level makes the dough easier to handle and helps it cook more evenly in a home oven. High-hydration doughs are often better suited for the intense heat of a pizza oven.
Final Reflection: The Humble Home Oven's Pizza Revolution
The quest for perfect pizza transcends the professional kitchen; it's a journey undertaken daily in countless home kitchens. Achieving that signature Neapolitan char and airy crust in a home oven, however, demands adaptation and understanding. This article explored the crucial adjustments needed when translating advanced pizza dough recipes, designed for high-heat pizza ovens, to the more modest temperatures of our home appliances. We've uncovered the secrets to success, from adjusting hydration levels to mastering the art of the pre-bake.
The pursuit of the perfect pizza slice is, for many, more than just a culinary endeavor; it's a connection to tradition, a celebration of family, and a testament to the power of simple ingredients transformed by skill and passion. The best things in life are simple,
a common adage, rings particularly true when considering the joy derived from a perfectly crafted pizza, born from humble ingredients and a touch of ingenuity. This journey of adaptation reflects a larger cultural shift – the increasing desire to recreate professional-level experiences within the comfort of our own homes.
Now, consider your own pizza-making journey. What adjustments have you made to your favorite recipes? What challenges have you overcome? Don't be afraid to experiment! The techniques discussed in this article are a starting point; your own discoveries and refinements will lead you to your own unique, perfect pizza. Embrace the process, celebrate the imperfections, and savor the delicious results. The journey to pizza perfection is a rewarding one, and your home oven is more capable than you might think.
Unleash Your Inner Pizzaiolo!
Thanks for taking the time to explore the secrets of crafting perfect pizza dough, even without a professional pizza oven! You’ve now got the knowledge to elevate your pizza game significantly. Ready to put your newfound skills to the test?
- Bake your masterpiece! Use the techniques you've learned to create your dream pizza tonight – don't wait! Experiment with different toppings and share your creation with us in the comments below.
- Share your pizza journey! Show off your delicious creations on social media using #BakeWithEasePizza. Let's inspire each other!
- Dive deeper into pizza perfection: Explore more of our pizza recipes and tips on bakewithease.com (Note: I cannot include actual links as per instructions).
What unique topping combination will you try first to perfect your home-oven pizza?