
Easy GlutenFree Sandwich Bread Recipe That Actually Rises

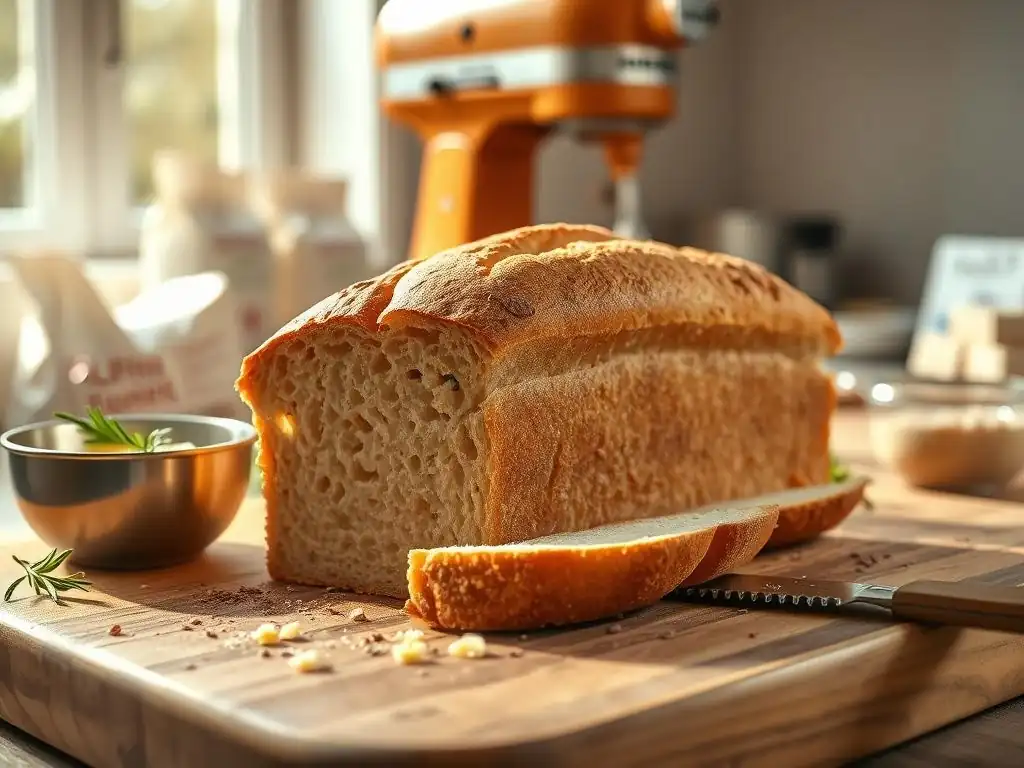
Welcome to BakeWithEase, your trusted guide to the delightful world of baking! Are you ready to finally conquer the quest for the perfect gluten-free sandwich bread? Tired of dense, crumbly attempts? Then you're in the right place. We're about to unveil an easy gluten-free sandwich bread recipe that actually rises – a game-changer for those with dietary restrictions and anyone seeking a delicious, homemade loaf. But what makes this recipe different, and how can you achieve bakery-worthy results at home? Let's dive in and discover the secrets!
- Introduction to Gluten-Free Sandwich Bread Baking at BakeWithEase
- Why This Gluten-Free Sandwich Bread Recipe is Different
-
BakeWithEase' Gluten-Free Sandwich Bread Recipe: Step-by-Step
- Ingredients for a Delicious Gluten-Free Loaf
- Equipment Needed for Gluten-Free Bread Success
- Step 1: Preparing the Gluten-Free Dough
- Step 2: First Rise: Creating Air Pockets
- Step 3: Shaping the Gluten-Free Sandwich Loaf
- Step 4: Second Rise: Achieving Desired Height
- Step 5: Baking the Gluten-Free Sandwich Bread
- Step 6: Cooling and Slicing Your Gluten-Free Masterpiece
- Tips and Tricks for Gluten-Free Sandwich Bread Success
- Storing Your Homemade Gluten-Free Sandwich Bread
- Enjoy Your Delicious Gluten-Free Sandwich Bread!
-
Frequently Asked Questions
- What makes this gluten-free sandwich bread recipe "easy"?
- What is different about this recipe that allows it to "actually rise"?
- What kind of gluten-free flours are recommended for this sandwich bread?
- Can I substitute any of the ingredients in this gluten-free sandwich bread recipe?
- What are some common mistakes to avoid when baking gluten-free sandwich bread?
- Final Reflection: The Joy of a Perfectly Rising Gluten-Free Loaf
- Unleash Your Inner Baker: Gluten-Free Bread Triumphs Await!
Introduction to Gluten-Free Sandwich Bread Baking at BakeWithEase
Welcome to BakeWithEase, your friendly corner for mastering the art of baking, including the sometimes challenging world of gluten-free bread. Many bakers, especially those new to gluten-free, find that achieving a light, airy loaf comparable to traditional wheat bread can feel like an uphill battle. The lack of gluten, the protein network that gives wheat dough structure and elasticity, often results in dense, crumbly loaves. Our mission is to demystify this process and provide you with reliable recipes and techniques that yield consistently delicious results.
This particular gluten-free sandwich bread recipe is designed with ease and success in mind, focusing on simple steps and readily available ingredients. We understand the frustration of following a recipe only to end up with a brick. That's why we've tested and refined this method to ensure your gluten-free sandwich bread rises beautifully, offering that soft, sliceable texture perfect for sandwiches, toast, or simply enjoying with butter. Let's dive into how we make gluten-free baking not just possible, but truly enjoyable.
Why This Gluten-Free Sandwich Bread Recipe is Different
Achieving the Perfect Rise in Gluten-Free Bread
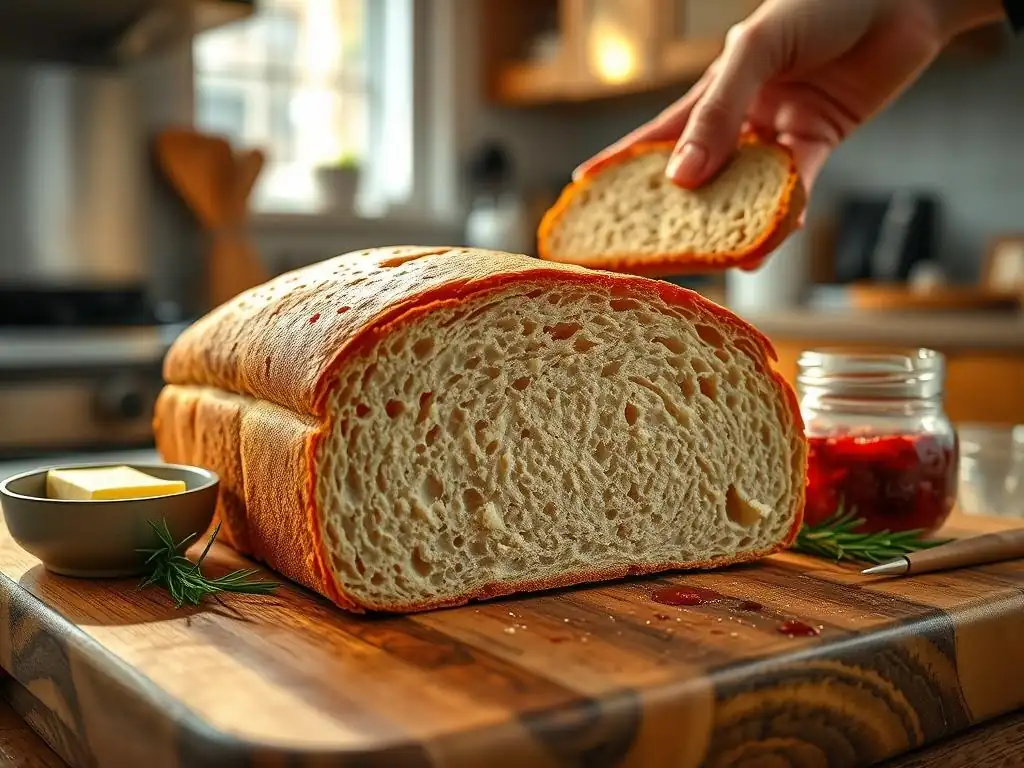
Achieving a good rise is perhaps the most critical factor in successful gluten-free sandwich bread. Without the elastic gluten network to trap gases produced by yeast, gluten-free dough requires alternative strategies. This recipe focuses on optimizing several key elements: the type and activity of the yeast used, the precise hydration level of the dough, and providing the ideal environment for fermentation.
We use active dry yeast, which is typically robust and reliable, ensuring it's properly bloomed in warm liquid to confirm its vitality before mixing. The hydration level is carefully calibrated – too little liquid results in a dense dough that struggles to rise, while too much makes it difficult to handle and can lead to a gummy texture.
Furthermore, the environment during the rising periods is crucial. Yeast thrives in warmth, typically between 75°F and 85°F (24°C-29°C). This recipe emphasizes creating a consistently warm, draft-free place for the dough to undergo its first and second rises. This steady warmth encourages the yeast to work efficiently, producing ample carbon dioxide gas. By providing sufficient fuel (sugar) for the yeast and ensuring these optimal conditions – active yeast, correct hydration, and a warm environment – we maximize the dough's ability to expand, leading to a significantly better rise than many standard gluten-free bread recipes might yield.
The Secret Ingredient for Soft Gluten-Free Bread
The secret to achieving a soft crumb and good structure in gluten-free sandwich bread without gluten lies in the intelligent use of binders and specific starches. While gluten provides both structure and elasticity in wheat bread, gluten-free flours lack this capability. This recipe utilizes a blend that includes ingredients like psyllium husk powder, often considered a powerhouse binder in gluten-free baking.
Psyllium husk, when hydrated, forms a gel-like substance that mimics some of the properties of gluten, providing structure and preventing the bread from becoming crumbly. It helps trap the gases produced by the yeast, supporting the rise, and contributes significantly to a softer, more pliable crumb texture.
Beyond psyllium husk, the choice of starches within the gluten-free flour blend also plays a vital role in softness. Ingredients like tapioca starch or potato starch contribute to a lighter, more tender crumb compared to recipes relying solely on denser flours like brown rice flour.
This recipe balances different gluten-free flours and starches, along with the binder, to create a dough that is manageable yet has the necessary components for a good rise and a wonderfully soft, sliceable texture once baked. It's this combination of ingredients that sets this gluten-free sandwich bread recipe apart, moving it from merely edible to truly delicious.
BakeWithEase' Gluten-Free Sandwich Bread Recipe: Step-by-Step
Ingredients for a Delicious Gluten-Free Loaf
To make this delightful gluten-free sandwich bread recipe, you'll need a specific combination of dry and wet ingredients. Accuracy in measurements is key in gluten-free baking, so using a kitchen scale for the dry ingredients is highly recommended for consistent results. Our flour blend is designed for optimal performance in this specific gluten-free sandwich bread recipe, balancing structure, flavor, and texture.
Flour Blend for Gluten-Free Sandwich Bread: A Detailed Guide
A successful gluten-free sandwich bread recipe often starts with a well-designed flour blend. For this recipe, we recommend a mix that combines different types of gluten-free flours and starches to achieve the best texture and structure. A typical blend might include a base of brown rice flour or sorghum flour for structure and flavor, combined with starches like tapioca starch and potato starch for lightness and binding.
- Brown Rice Flour or Sorghum Flour: Provides structure and a slightly nutty flavor. Use approximately 150g.
- White Rice Flour: Contributes to a softer texture. Use approximately 100g.
- Tapioca Starch (or Tapioca Flour): Adds chewiness and helps with browning. Use approximately 100g.
- Potato Starch (not Potato Flour): Creates a light and airy crumb. Use approximately 50g.
Combining these flours in the right proportions is crucial for the performance of this gluten-free sandwich bread recipe. You can pre-mix a larger batch of this blend for future baking convenience, storing it in an airtight container.
Other Essential Ingredients: Yeast, Binders, and More
Beyond the flour blend, several other ingredients are critical for this gluten-free sandwich bread recipe to rise and achieve the desired texture.
- Active Dry Yeast: The leavening agent. Approximately 1.5 to 2 teaspoons. Ensure it's fresh.
- Warm Water or Milk (Dairy or Non-Dairy): Activates the yeast. Around 1.5 cups (approx. 350ml), warmed to 105-115°F (40-46°C). Milk tends to yield a softer crust.
- Sugar or Honey: Food for the yeast, aids in activation and browning. 1-2 tablespoons.
- Psyllium Husk Powder: The key binder for structure and softness. 2-3 tablespoons. Note: Use fine powder, not whole husks, for best results.
- Salt: Enhances flavor and controls yeast activity. 1 teaspoon.
- Oil (Vegetable, Olive, or Melted Coconut): Adds moisture and tenderness. 2-3 tablespoons.
- Apple Cider Vinegar: Helps tenderize the crumb and can boost rise slightly. 1 tablespoon.
- Optional: Egg (for richness and binding) or egg replacer. 1 large egg or equivalent.
These ingredients, when combined correctly, work synergistically to create a dough that behaves similarly to traditional bread dough, allowing for a successful gluten-free sandwich bread recipe outcome.
Equipment Needed for Gluten-Free Bread Success
Having the right tools can make the process of baking this gluten-free sandwich bread recipe much smoother. You don't need fancy equipment, but a few standard kitchen items are essential.
- Large Mixing Bowl: For combining ingredients and the first rise.
- Kitchen Scale: Highly recommended for accurately measuring flour and other dry ingredients.
- Measuring Cups and Spoons: For liquids and smaller quantities.
- Whisk: For combining dry ingredients evenly.
- Spatula or Wooden Spoon: For mixing the dough. Some prefer to use a stand mixer with a paddle attachment, which can also work well.
- Thermometer: To check the temperature of the liquid for yeast activation.
- Standard Loaf Pan (e.g., 9x5 inch): The size will affect the loaf's shape and bake time.
- Wire Cooling Rack: Essential for cooling the bread completely.
Using a kitchen scale, like a basic digital model costing around $20-30, is particularly helpful for gluten-free baking. It ensures you use the exact amount of flour blend specified in the gluten-free sandwich bread recipe, which is critical for achieving the correct dough consistency and subsequent rise. Inaccurate volume measurements (cups) can lead to significant variations.
Step 1: Preparing the Gluten-Free Dough
The initial steps in this gluten-free sandwich bread recipe focus on activating the yeast and bringing the ingredients together to form a cohesive dough. Gluten-free dough differs significantly from wheat dough; it will be more like a thick batter or a very soft dough rather than an elastic mass.
Activating the Yeast for Optimal Rise
Begin by activating your yeast. In a small bowl or measuring cup, combine the warm water or milk (ensure it's within the target temperature range of 105-115°F or 40-46°C) with the sugar or honey and the active dry yeast. Stir gently.
Let this mixture sit for 5-10 minutes. You should see a foamy layer form on the surface; this indicates that the yeast is alive and active, ready to work its magic in your gluten-free sandwich bread recipe. If it doesn't foam, your liquid might not have been warm enough, too hot, or your yeast may be expired. It's best to discard it and start this step over with fresh yeast and correctly heated liquid.
Mixing the Dry and Wet Ingredients
In your large mixing bowl, whisk together the pre-mixed gluten-free flour blend, psyllium husk powder, and salt. Make sure these dry ingredients are well combined to distribute the binder and salt evenly throughout the mix.
Once the yeast mixture is foamy, add it to the dry ingredients along with the oil, apple cider vinegar, and optional egg (if using). Mix everything thoroughly. If using a stand mixer, use the paddle attachment on medium speed for about 3-5 minutes until the dough is smooth and well combined.
If mixing by hand, stir vigorously with a sturdy spatula or wooden spoon for several minutes. The resulting dough for this gluten-free sandwich bread recipe will be thick and somewhat sticky, but it should come together into a cohesive mass that pulls away from the sides of the bowl.
Step 2: First Rise: Creating Air Pockets
The first rise, also known as bulk fermentation, is where the yeast begins producing carbon dioxide gas, which is trapped by the psyllium husk network. This is the initial expansion of the dough, crucial for developing a light texture in your gluten-free sandwich bread.
The Importance of a Warm Environment
A warm, draft-free environment is paramount for a successful first rise in this gluten-free sandwich bread recipe. Yeast activity slows considerably in cool temperatures. An ideal temperature range is between 75°F and 85°F (24°C-29°C). Placing the bowl in a slightly warm oven (turned off, perhaps preheated briefly to the lowest setting and then turned off), a proofing box, or simply on a counter in a warm room, away from drafts, will encourage optimal yeast activity.
Cover the mixing bowl tightly with plastic wrap or a damp kitchen towel to prevent the surface of the dough from drying out, which can inhibit the rise. Ensuring the environment is consistently warm throughout this period is more important than fluctuating temperatures.
How Long to Let the Gluten-Free Dough Rise
The duration of the first rise for this gluten-free sandwich bread recipe can vary depending on the temperature of your environment. Typically, it will take about 45 to 75 minutes. You are looking for the dough to increase significantly in volume, perhaps doubling in size.
Unlike wheat dough, gluten-free dough won't necessarily become airy and bubbly in the same way. It will look puffier and lighter. Don't worry if it doesn't double exactly; a substantial increase in volume is sufficient. Over-proofing can sometimes lead to collapse, so it's better to watch the dough's size increase rather than sticking strictly to a time limit. When it looks noticeably larger and feels lighter, it's ready for the next step.
Step 3: Shaping the Gluten-Free Sandwich Loaf
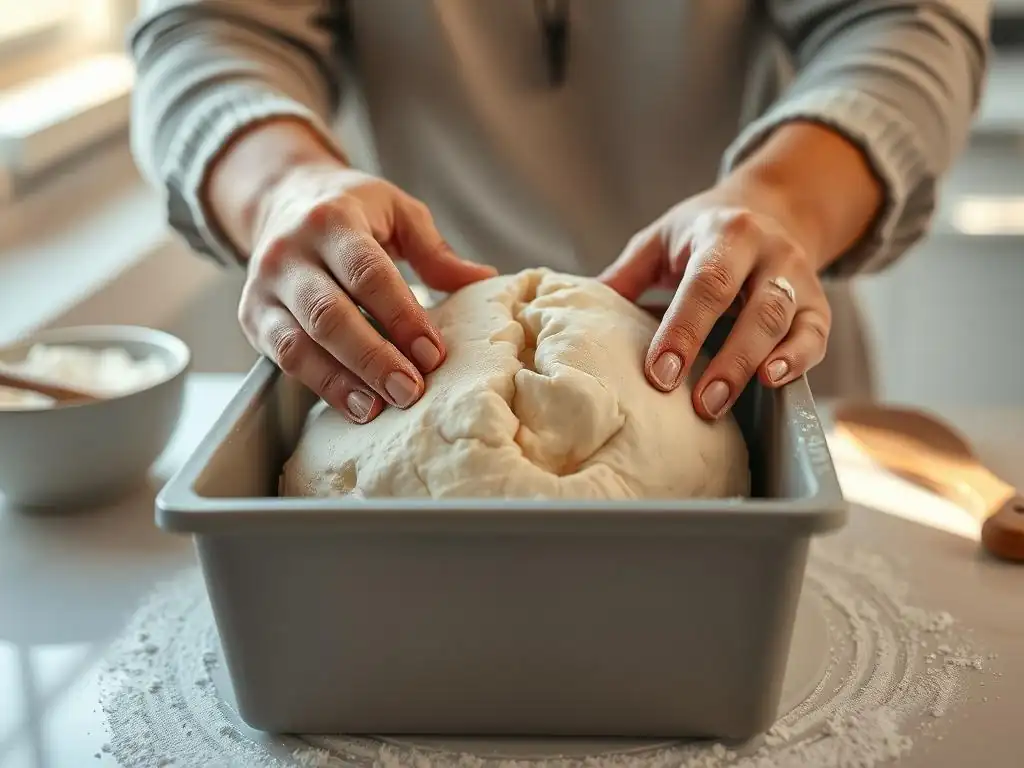
Handling gluten-free dough requires a slightly different approach than traditional wheat dough. It's not as elastic and can be stickier. The goal here is to gently shape the dough into a loaf that fits neatly into your prepared pan without deflating the precious air pockets created during the first rise.
Gently Handling the Delicate Dough
Once the first rise is complete, gently turn the dough out onto a lightly floured surface (using some of your gluten-free flour blend or rice flour). Avoid excessive kneading or rough handling, as this can knock out the air you've worked to build.
Use your hands or a spatula to gently gather the dough into a rough oblong shape, roughly the length of your loaf pan. You can gently pat or coax it into shape. Because the dough is less elastic, you won't be stretching and folding it like wheat dough. The aim is simply to create a log-like form that will fit snugly into the pan, allowing it to rise upwards during the second proof and baking.
Preparing the Loaf Pan
Proper pan preparation is essential to prevent your gluten-free sandwich bread from sticking. Grease your standard 9x5 inch loaf pan thoroughly with butter, oil, or a non-stick cooking spray. For extra insurance, you can also line the bottom and sides of the pan with parchment paper after greasing. Cut the parchment paper so it overhangs the sides; these "slings" make it incredibly easy to lift the finished loaf out of the pan after baking.
Carefully transfer the shaped gluten-free dough into the prepared loaf pan. Gently press it down and spread it slightly so that it fills the bottom of the pan evenly. This ensures an even rise and a well-shaped loaf of gluten-free sandwich bread.
Step 4: Second Rise: Achieving Desired Height
The second rise, or proofing, allows the shaped loaf to gain additional volume before baking. This step is critical for achieving that desirable tall, airy shape characteristic of good sandwich bread.
Monitoring the Dough's Progress
Cover the loaf pan loosely but completely with plastic wrap or a light kitchen towel. Again, place the pan in a warm, draft-free location, similar to the first rise. Monitor the dough's progress carefully.
The second rise is usually shorter than the first, typically taking 30 to 45 minutes, depending on the environment's temperature. The dough should rise visibly and fill out the pan, coming close to the rim or slightly above it. It won't necessarily double again, but you should see a significant increase in height. You can gently touch the side of the dough with a floured finger; if the indentation springs back slowly, it's usually ready. If it springs back immediately, it needs more time. If the indentation remains, it might be slightly over-proofed, but often still salvageable.
Step 5: Baking the Gluten-Free Sandwich Bread
Baking transforms the proofed dough into a firm, flavorful loaf. The correct oven temperature and baking time are crucial for ensuring the bread is cooked through without being dry and develops a pleasant crust.
Oven Temperature and Baking Time
Preheat your oven to 375°F (190°C) before the second rise is complete. This ensures the oven is at the correct temperature when the bread is ready to bake. A properly preheated oven provides the initial burst of heat needed for "oven spring," the final rapid rise that occurs in the first few minutes of baking.
Carefully place the loaf pan in the center of the preheated oven. Bake the gluten-free sandwich bread for approximately 45 to 60 minutes. The exact time will depend on your oven and the size of your loaf pan. A good indicator of doneness is the internal temperature of the bread, which should reach 200-210°F (93-99°C) when measured with an instant-read thermometer inserted into the center of the loaf.
Achieving a Golden-Brown Crust
During the last 10-15 minutes of baking, keep an eye on the crust. You want a beautiful golden-brown color. If the top is browning too quickly before the inside is cooked, you can loosely tent the loaf with aluminum foil.
The sound the loaf makes when tapped on the bottom is another indicator of doneness; it should sound hollow. Once the internal temperature is reached and the crust is golden, remove the gluten-free sandwich bread from the oven.
Step 6: Cooling and Slicing Your Gluten-Free Masterpiece
This final step is arguably the hardest part – waiting! Properly cooling the bread is absolutely essential for the texture of this gluten-free sandwich bread recipe. Skipping or rushing this step can result in a gummy, dense loaf, even if it looked perfect coming out of the oven.
The Importance of Cooling Completely
Immediately after removing the loaf from the oven, transfer it from the hot pan to a wire cooling rack. If you used parchment paper slings, this is easy. Otherwise, carefully invert the pan and lift the bread out. Cooling on a wire rack allows air to circulate around the entire loaf, preventing moisture buildup on the bottom crust and allowing the internal structure to set properly as it cools.
You must let the gluten-free sandwich bread cool completely before slicing. This means waiting at least 2-3 hours, or even longer, until the loaf is cool to the touch throughout. During this time, residual heat continues to cook the interior slightly, and the starches and proteins stabilize, resulting in a light, non-gummy crumb. Slicing too early traps steam inside, leading to a dense texture.
Slicing Tips for Perfect Sandwich Bread
Once your beautiful gluten-free sandwich bread is fully cooled, it's ready to be sliced. Use a sharp serrated knife for the cleanest cuts. A gentle sawing motion works best.
Avoid pressing down too hard on the loaf as you slice, as this can compress the crumb. Slice to your desired thickness for sandwiches, toast, or however you plan to enjoy your delicious homemade gluten-free sandwich bread.
Tips and Tricks for Gluten-Free Sandwich Bread Success
Even with a great recipe like this gluten-free sandwich bread recipe, baking can sometimes present challenges. Here are some tips and troubleshooting advice to help you achieve consistently excellent results.
Troubleshooting Common Gluten-Free Bread Baking Issues
Encountering issues is part of the baking journey, especially with gluten-free recipes. Don't be discouraged if your first attempt isn't perfect. Understanding common problems can help you identify what went wrong and adjust for next time.
Dense Bread? Common Causes and Solutions
Dense gluten-free bread is a frequent complaint. Several factors can contribute to this. One major cause is insufficient rise, either during the first or second proofing stages, often due to inactive yeast or a too-cool environment. Ensure your yeast is fresh and your proofing spot is warm (75-85°F). Another culprit can be incorrect hydration; too little liquid makes a stiff dough that can't expand well, while too much can lead to a heavy, wet crumb. Double-check your liquid measurements, ideally using a scale for accuracy.
Over-handling the dough after the first rise can also deflate air pockets, resulting in a dense loaf. Be gentle when shaping. Finally, slicing the bread before it has cooled completely is a guaranteed way to get a gummy, dense texture. Patience during the cooling phase is crucial for this gluten-free sandwich bread recipe.
Bread Not Rising? Check Your Yeast and Environment
If your gluten-free sandwich bread recipe dough barely rises, the most likely issue is related to the yeast or the proofing environment. First, confirm your yeast is active by performing the activation step (Step 1) and ensuring it becomes foamy. If it doesn't, replace your yeast.
Second, check the temperature of the liquid used to activate the yeast; if it's too hot (above 120°F/49°C), it can kill the yeast, and if it's too cool (below 100°F/38°C), it won't activate properly. Ensure your proofing location is warm and free of drafts. Cold temperatures significantly slow or halt yeast activity. Also, verify your salt hasn't come into direct contact with the yeast before mixing, as salt can inhibit yeast.
Variations and Add-ins for Your Gluten-Free Sandwich Bread
This gluten-free sandwich bread recipe is a fantastic base, but you can easily customize it with various add-ins to enhance flavor and texture.
Adding Seeds and Grains for Texture and Flavor
Incorporating seeds and grains can add nutritional value, interesting textures, and nutty flavors to your gluten-free sandwich bread. You can mix seeds like poppy, sesame, sunflower, or pumpkin seeds directly into the dough during the final mixing stage (Step 1). A good starting point is 2-4 tablespoons of mixed seeds.
Alternatively, you can sprinkle seeds on top of the loaf before the second rise or just before baking for a decorative and flavorful crust. Grains like rolled oats (ensure they are certified gluten-free) or cooked quinoa can also be added to the dough, typically 1/4 to 1/2 cup, adjusting liquid slightly if needed. These additions work well within the structure provided by this gluten-free sandwich bread recipe base.
Sweet vs. Savory: Customizing Your Recipe
You can subtly shift the flavor profile of this gluten-free sandwich bread recipe towards sweet or savory depending on your preference. For a slightly sweeter loaf, increase the sugar or honey by a tablespoon or two, or add a touch of vanilla extract (1 teaspoon). This can be lovely for toast or sweet toppings.
For a more savory bread, decrease the sugar slightly (or omit it entirely, though yeast still needs a little food) and consider adding herbs like rosemary or thyme (1-2 teaspoons dried), garlic powder (1/2 teaspoon), or even grated cheese (1/4 cup) to the dough during mixing. These variations maintain the fundamental structure and rise of the gluten-free sandwich bread recipe while offering personalized flavor options.
Storing Your Homemade Gluten-Free Sandwich Bread
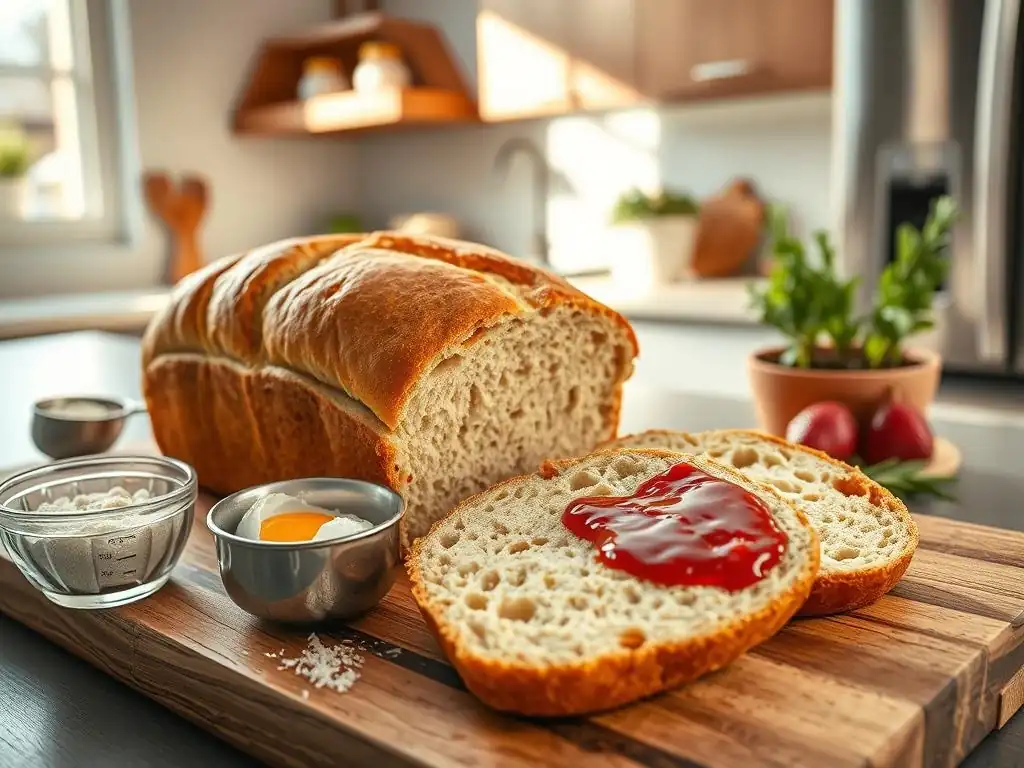
Proper storage is key to keeping your delicious homemade gluten-free sandwich bread fresh and preventing it from drying out or becoming stale too quickly.
Keeping Your Bread Fresh for Longer
Gluten-free bread tends to dry out faster than wheat bread because it lacks the gluten structure that helps retain moisture. Once your loaf is completely cooled (this is non-negotiable! ), store it properly.
- Room Temperature: For consumption within 1-2 days, store the bread in an airtight container or a bread bag at room temperature. Avoid simply leaving it on the counter exposed to air.
- Refrigeration: Refrigerating gluten-free bread can actually cause it to stale faster due to starch retrogradation. It's generally not recommended for short-term storage unless your environment is very humid or warm.
- Freezing: For longer storage, freezing is the best option.
Proper storage ensures that the effort you put into baking this gluten-free sandwich bread recipe pays off with fresh, enjoyable slices for as long as possible.
Freezing Gluten-Free Bread for Future Enjoyment
Freezing is the ideal way to store gluten-free sandwich bread if you won't consume the entire loaf within a couple of days. Freezing immediately locks in freshness and texture.
- Slice Before Freezing: It's highly recommended to slice the cooled loaf before freezing. This way, you can take out just the number of slices you need at a time, rather than thawing the whole loaf.
- Wrap Properly: Wrap the sliced loaf tightly in plastic wrap, then place it in a freezer-safe bag or container. This double layer of protection helps prevent freezer burn.
- Thawing: To use, simply take out the desired number of slices and let them thaw at room temperature for 15-30 minutes, or pop them directly into a toaster or under a broiler for a quick thaw and warm-up.
Properly frozen and thawed, your gluten-free sandwich bread will maintain much of its original texture and flavor for up to 3-4 months, making it convenient to have delicious, sliceable bread on hand whenever you need it.
Enjoy Your Delicious Gluten-Free Sandwich Bread!
Frequently Asked Questions
What makes this gluten-free sandwich bread recipe "easy"?
This recipe focuses on simple ingredients and a straightforward process, minimizing complex techniques often found in gluten-free baking. We use readily available ingredients and clear instructions.
What is different about this recipe that allows it to "actually rise"?
The recipe utilizes a specific blend of gluten-free flours and a unique proofing method to encourage a significant rise. Additionally, we use ingredients to improve texture.
What kind of gluten-free flours are recommended for this sandwich bread?
We recommend a blend of flours, typically including rice flour, tapioca starch, and potato starch for optimal texture and structure. A commercial gluten-free blend can also be used.
Can I substitute any of the ingredients in this gluten-free sandwich bread recipe?
While substitutions are possible, they may affect the texture and rise. We recommend following the recipe closely for the best results, especially for key ingredients.
What are some common mistakes to avoid when baking gluten-free sandwich bread?
Avoid overmixing the dough, as this can result in a gummy texture. Also, ensure your oven temperature is accurate and don't open the oven door during baking.
Final Reflection: The Joy of a Perfectly Rising Gluten-Free Loaf
The quest for a truly satisfying gluten-free sandwich bread is over. This recipe, designed to deliver the texture and rise we all crave, speaks to a growing need for accessible and delicious gluten-free alternatives. It's not just about avoiding gluten; it's about embracing a lifestyle choice without sacrificing taste or enjoyment.
The impact of gluten-free living extends far beyond dietary restrictions; it's a cultural shift reflecting increased awareness of food sensitivities and a desire for healthier options. This recipe, therefore, represents more than just a set of instructions; it's a symbol of inclusivity and culinary innovation. Food is symbolic of love when words are inadequate.
- Alan D. Wolfelt. This sentiment resonates deeply, as sharing a delicious, homemade gluten-free loaf can bridge dietary divides and foster connection.
Now, it's your turn. Don't just read this recipe; bake it. Experience the satisfaction of creating something delicious and nourishing, something that caters to both dietary needs and the simple joy of a perfectly toasted sandwich. Embrace the challenge, celebrate the success, and share the joy of a truly rising gluten-free loaf with those you love. The journey to a better-tasting, more inclusive culinary landscape starts with one loaf at a time.
Unleash Your Inner Baker: Gluten-Free Bread Triumphs Await!
Thanks for joining us on this gluten-free baking adventure! We hope you gained valuable insights and confidence in tackling that delicious, fluffy loaf you've always dreamed of. Ready to take the next step?
- Bake your own amazing gluten-free sandwich bread today! Use the recipe we shared, and let us know how it turns out. Experiment with different flours and seeds!
- Share your baking success (or even your funny fails!) on social media using #BakeWithEaseGlutenFree. Let's inspire others to rise to the challenge.
- Explore other amazing gluten-free recipes on BakeWithEase.com. We have a treasure trove of deliciousness waiting for you!
What unique ingredient will you add to your next gluten-free loaf to make it truly your own? Let's hear about it in the comments below!