
Crafting Chewy & Crispy Pizza Dough: A Baker's Guide

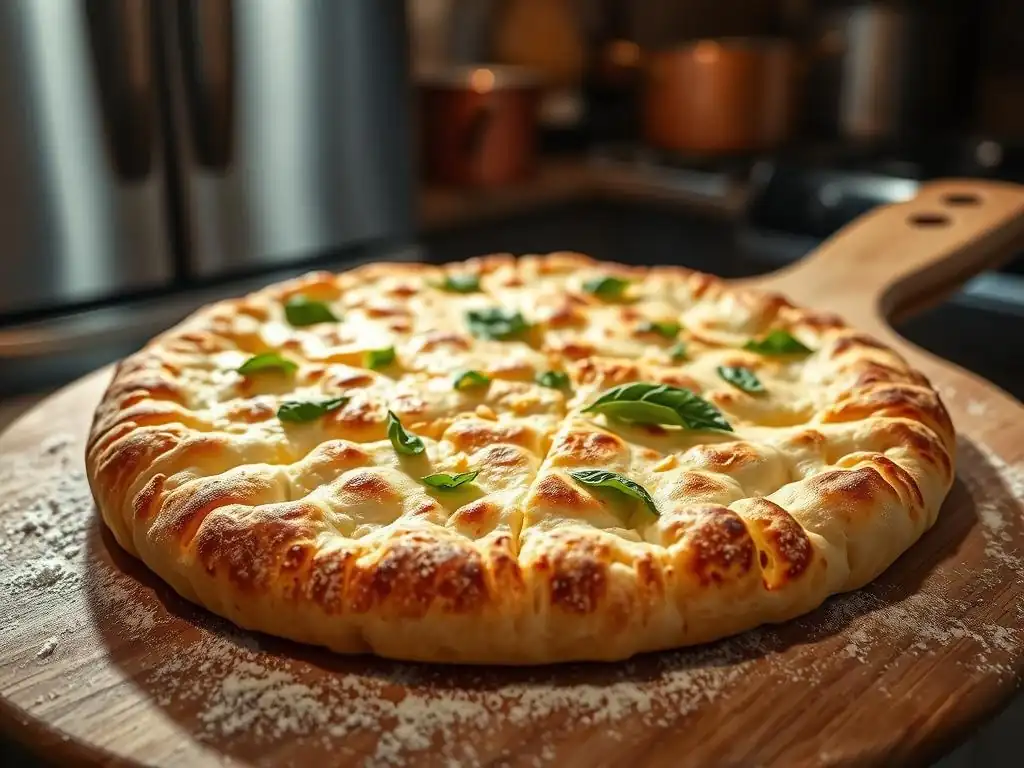
Welcome to BakeWithEase, your guide to baking brilliance! Ever dream of crafting that perfect pizza – one with a satisfying chew and an irresistible crisp? You're in the right place. We'll unlock the secrets to amazing chewy crispy pizza dough, starting with this comprehensive guide. Get ready to elevate your pizza game and impress everyone with your homemade masterpiece. Keep reading to discover the techniques and tips that will transform your dough from ordinary to extraordinary!
- Crafting Neapolitan Pizza Dough: A Home Baker's Guide
- Introduction to Neapolitan Pizza Dough Perfection
- Understanding the Science Behind the Dough
- Essential Ingredients for Neapolitan Pizza Dough
-
Step-by-Step Guide to Making Neapolitan Pizza Dough
- Step 1: Activating the Yeast
- Step 2: Mixing the Dough
- Step 3: Kneading Techniques for Gluten Development
- Step 4: First Rise: Bulk Fermentation
- Step 5: Dividing and Balling the Dough
- Step 6: Second Rise: Proofing
- Step 7: Stretching and Shaping the Pizza Base
- Step 8: Baking for Authentic Neapolitan Results
- Tips and Tricks for Achieving the Ideal Texture
- Troubleshooting Common Pizza Dough Problems
- Pizza Dough Recipe Variations for Different Tastes
- Serving and Storing Your Homemade Pizza
- Mastering Homemade Pizza: Next Steps
- Conclusion: Enjoy Your Neapolitan Pizza Creation!
-
Frequently Asked Questions
- What makes pizza dough chewy and crispy at the same time?
- What type of flour is best for chewy crispy pizza dough?
- How does hydration affect the chewy and crispy texture of pizza dough?
- What oven temperature is ideal for baking chewy crispy pizza?
- Can I use a stand mixer to make chewy crispy pizza dough, or is kneading by hand better?
- Final Reflection: The Enduring Quest for the Perfect Slice
- Unleash Your Inner Pizzaiolo: Craft the Perfect Dough!
Crafting Neapolitan Pizza Dough: A Home Baker's Guide
Introduction to Neapolitan Pizza Dough Perfection
Why Aim for the Perfect Neapolitan Crust?
The perfect Neapolitan pizza crust is a culinary masterpiece, characterized by its incredibly soft, airy interior, a thin base, and that signature slightly charred, crispy edge known as the cornicione. Achieving this balance is the goal for many home bakers, transforming a simple dish into an extraordinary experience. This specific texture – soft yet chewy inside, with a delightful crispness on the outside – is what elevates a pizza from good to unforgettable.
It's not just about taste; it's about the sensory pleasure of biting into a crust that has undergone a magical transformation in a hot oven. Mastering this specific type of homemade pizza dough allows you to replicate the authentic taste and texture found in the pizzerias of Naples right in your own kitchen.
Beyond the sensory delight, understanding how to create this ideal crust provides a fundamental education in dough handling and fermentation. It teaches patience and observation, key skills for any baker. The Neapolitan style, while seemingly simple with its minimal ingredients, is technically demanding and highly rewarding.
Success hinges on precision in ingredient ratios, careful kneading for optimal gluten development, and controlled fermentation processes. The outcome is a dough that stretches beautifully thin without tearing, puffs up dramatically when baked, and develops those coveted dark spots (leopard spotting) that signify perfect caramelization and char, contributing significantly to the flavor profile of your chewy crispy pizza dough.
BakeWithEase's Approach to Homemade Pizza Dough
At BakeWithEase, we believe that crafting exceptional homemade pizza dough, including the classic Neapolitan style, should be an accessible and enjoyable journey for every baker. Our approach simplifies the traditional techniques while emphasizing the core principles that guarantee success. We break down the process into manageable steps, focusing on understanding why each step is important, not just how to do it.
Our goal is to empower you with the knowledge to troubleshoot common issues and adapt the process to your home kitchen environment, even if you don't have a professional pizza oven. We guide you through selecting the right ingredients, mastering kneading techniques, and understanding the critical role of fermentation in developing both texture and flavor for your chewy crispy pizza dough.
We advocate for a patient and hands-on method, encouraging bakers to connect with their dough. This means paying attention to its feel, its temperature, and how it changes over time during mixing, kneading, and rising. For Neapolitan dough, specifically, we highlight the importance of high heat and short baking times, offering practical tips for achieving impressive results using standard home ovens, often with the help of a pizza stone or steel.
Our guidance aims to demystify the process, making the creation of a truly authentic and delicious Neapolitan crust a regular occurrence, not just a special occasion endeavor. With our straightforward instructions and helpful insights, you'll be crafting perfect homemade pizza dough that yields that ideal chewy and crispy crust in no time.
Understanding the Science Behind the Dough
The Role of Gluten in a Thin, Elastic Crust
Gluten is the structural backbone of bread and pizza dough, formed when two proteins found in wheat flour, glutenin and gliadin, combine with water and are agitated through mixing and kneading. Glutenin provides elasticity, allowing the dough to stretch, while gliadin provides extensibility, enabling it to expand. For a Neapolitan crust, which needs to be stretched incredibly thin without tearing and then develop a large, airy cornicione, strong yet elastic gluten development is paramount. The network traps the gases produced by the yeast during fermentation and baking, causing the dough to rise and puff up.
Without sufficient gluten development, the dough would be weak, difficult to stretch thinly, and would result in a dense, flat crust. The process of kneading aligns the gluten strands, creating a strong, flexible matrix capable of supporting the structure of the pizza as it bakes at high temperatures.
The type of flour used, specifically its protein content (which directly relates to gluten potential), significantly impacts the dough's final texture. Using a high-quality flour designed for pizza (like 00 flour, discussed later) provides the ideal protein balance for creating a dough with the necessary elasticity and strength for that signature chewy and crispy Neapolitan crust.
Achieving Char and Leopard Spotting: Hydration and Oven Temperature
The characteristic charring and leopard spotting on an authentic Neapolitan pizza crust are the result of complex chemical reactions occurring at extremely high temperatures. These dark spots are areas where the dough's surface rapidly caramelizes and undergoes the Maillard reaction. High oven temperatures, typically 800-900°F (425-480°C) in a traditional wood-fired oven, are crucial because they cause the exterior of the dough to cook and brown almost instantly while the interior remains soft and airy. This rapid cooking process is key to achieving the desired texture contrast: a chewy, airy interior surrounded by a thin, crispy, slightly charred exterior.
Hydration also plays a significant role. A dough with sufficient hydration (typically 58-65% water relative to flour weight for Neapolitan style) is more extensible and allows for thinner stretching. More importantly, the moisture on the surface of a well-hydrated dough helps facilitate the rapid heat transfer needed for quick blistering and spotting when it hits a very hot surface like a pizza stone or steel.
The surface moisture turns to steam, creating small bubbles that then brown and char quickly under intense heat. Achieving this at home requires pushing your oven to its maximum temperature, often 500-550°F (260-290°C), and using a preheated pizza stone or steel to mimic the intense floor heat of a professional oven, contributing to that desired chewy crispy pizza dough texture.
Essential Ingredients for Neapolitan Pizza Dough
00 Flour: The Foundation of a Great Crust
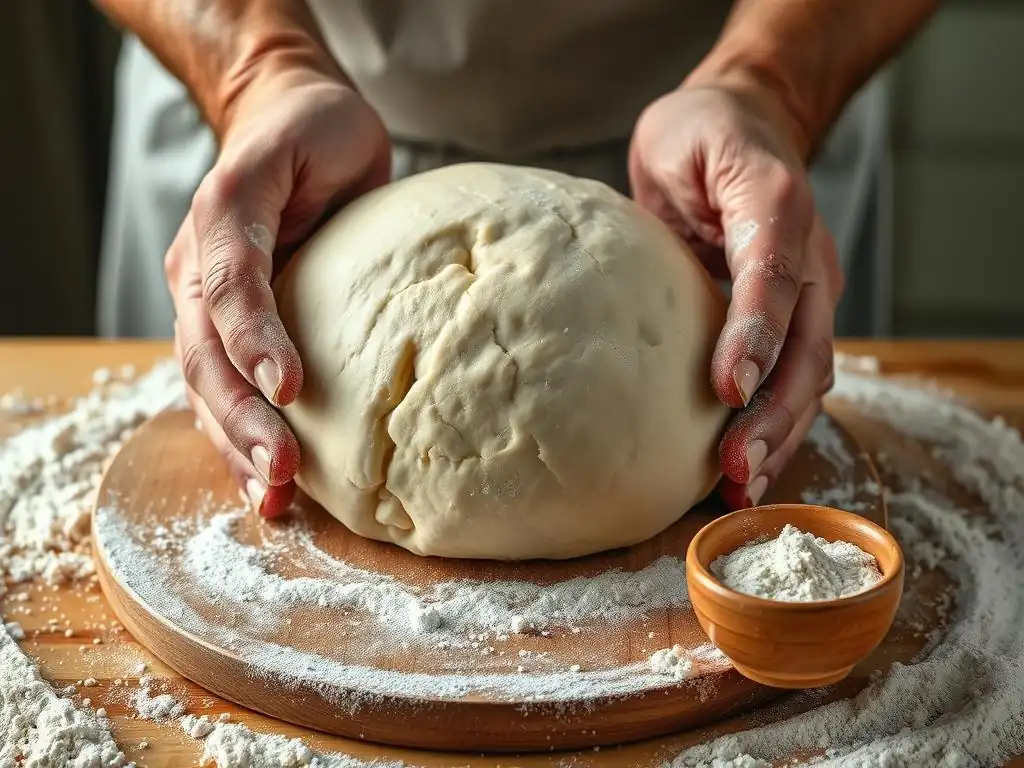
00 flour, often labeled "doppio zero" or "double zero," is the traditional choice for authentic Neapolitan pizza dough, and for good reason. Its name refers to its extremely fine grind, finer than standard all-purpose flour.
More importantly for pizza making, 00 flour typically has a moderate to high protein content (around 10-12.5%) but, crucially, the gluten developed from these proteins is highly extensible and less elastic than that from bread flour. This balance allows the dough to be stretched incredibly thin without snapping back or tearing, which is essential for the delicate base and airy cornicione of a Neapolitan pizza.
Using 00 flour results in a dough that is smooth, pliable, and easy to work with, provided it is properly hydrated and kneaded. While standard bread flour can yield a chewy crust due to its higher protein content and strong elastic gluten, it often makes the dough harder to stretch thinly and can result in a tougher cornicione compared to the light, airy structure achieved with 00.
For the most authentic chewy crispy pizza dough experience, investing in a good quality 00 flour specifically milled for pizza is highly recommended. Brands like Caputo or Antimo Caputo are popular choices often available online or in specialty stores.
Water: Hydration for Optimal Texture
Water is not just a binder in pizza dough; it's a critical component influencing hydration, texture, and fermentation. The amount of water used, expressed as a percentage of the flour weight (hydration percentage), significantly impacts the dough's feel and the final crust texture. For classic Neapolitan pizza dough, hydration typically ranges from 58% to 65%. Lower hydration doughs (closer to 58%) are easier for beginners to handle but can result in a slightly less airy crust. Higher hydration doughs (60-65%) are stickier and more challenging to work with but produce a lighter, more open crumb structure in the cornicione.
The temperature of the water also matters, as it affects the dough's final temperature and thus the rate of yeast activity. Lukewarm water, around 90-100°F (32-38°C), is often used to activate dry yeast quickly, especially for shorter fermentation times. However, for longer, cold fermentation (which develops more flavor), cooler water can be used to slow down the yeast initially. The quality of your water can even play a minor role; filtered water is often preferred to avoid any off-flavors from tap water chlorine, ensuring the pure taste of your chewy crispy pizza dough shines through.
Yeast: Fueling the Dough's Rise
Yeast is the living organism responsible for fermentation, the process that makes the dough rise and develops much of its flavor. As yeast consumes sugars in the flour, it produces carbon dioxide gas, which is trapped by the gluten network, causing the dough to expand. It also produces alcohol and other compounds that contribute to the complex aroma and taste of a well-fermented pizza crust. The type and amount of yeast, along with fermentation time and temperature, are key variables.
For Neapolitan pizza dough, either fresh yeast (compressed yeast) or active dry yeast/instant dry yeast can be used. Fresh yeast is traditional and very active but has a short shelf life. Active dry yeast needs to be proofed in water first, while instant dry yeast can often be mixed directly with the flour.
The quantity of yeast used is typically very small, especially for long, slow fermentation periods (e.g., 0.1-0.5% of the flour weight for a 24-hour cold ferment), as this allows for maximum flavor development without over-proofing. A longer, slower rise at cooler temperatures (like in the refrigerator) yields a more complex flavor profile and a better texture for your chewy crispy pizza dough than a rapid rise at room temperature.
Salt: Balancing Flavors and Controlling Yeast
Salt is a non-negotiable ingredient in pizza dough, serving multiple crucial functions beyond just adding flavor. It enhances the overall taste of the crust, balancing the slight sweetness that develops during fermentation. More importantly from a technical standpoint, salt strengthens the gluten structure, making the dough more elastic and easier to handle. It tightens the gluten network, which helps the dough hold its shape and trap gases more effectively during the rise and bake.
Salt also plays a vital role in controlling yeast activity. It slows down fermentation by drawing water out of the yeast cells via osmosis. While this might sound counterproductive, this controlled inhibition prevents the yeast from working too quickly, allowing for a slower, more even rise and the development of more desirable flavors.
The typical salt percentage in Neapolitan pizza dough is around 2-3% of the flour weight. Adding salt too early to activated yeast can damage the cells, so it's often added after the initial mixing of flour and water, or incorporated towards the end of the kneading process. This careful balance ensures your homemade pizza dough ferments correctly and develops the perfect structure for a chewy and crispy crust.
Step-by-Step Guide to Making Neapolitan Pizza Dough
Step 1: Activating the Yeast
If using active dry yeast, you'll need to activate or "proof" it first. This ensures the yeast is alive and ready to work. In a small bowl, combine the specified amount of active dry yeast with a small portion of the total lukewarm water required for the recipe, typically around 90-100°F (32-38°C). Add a pinch of sugar or a tiny amount of flour (optional, but gives the yeast something to "eat" immediately).
Stir gently and let the mixture sit for 5-10 minutes. You should see a foamy layer develop on the surface, indicating the yeast is active. If it doesn't foam, your yeast may be expired or the water temperature was incorrect, and you should start over with fresh yeast.
If using instant dry yeast or fresh yeast, this activation step is often not necessary. Instant dry yeast can typically be mixed directly into the flour, as its granules are finer and dissolve more easily. Fresh yeast can also be crumbled directly into the flour or dissolved in the water before combining with the flour.
However, proofing active dry yeast is a reliable way to verify its viability before committing to mixing the entire batch of dough, saving you potential frustration later in the process. This simple check is a foundational step towards ensuring your homemade pizza dough rises correctly.
Step 2: Mixing the Dough
Mixing is where the magic begins, bringing together the simple ingredients to form the basic dough structure. In a large bowl, combine the flour and salt. If using instant dry yeast, add it to the flour as well and whisk to distribute. If using active dry yeast or fresh yeast that was proofed, add the activated yeast mixture to the bowl.
Gradually add the remaining water while mixing. You can use a stand mixer with a dough hook attachment on a low speed, or mix by hand using a wooden spoon or your fingers. The goal is to hydrate the flour and bring the ingredients together into a shaggy, cohesive mass.
Continue mixing until there are no dry pockets of flour remaining. At this stage, the dough will look rough and sticky. Don't worry about achieving a smooth texture yet; that comes with kneading. The key is to ensure all the flour is incorporated and hydrated. This initial mix, sometimes called the autolyse phase (if you let it rest after mixing just flour and water), starts the gluten development process even before intense kneading begins. A thoroughly mixed dough sets the stage for proper gluten development and a successful rise, leading to that sought-after chewy crispy pizza dough.
Step 3: Kneading Techniques for Gluten Development
Kneading is the physical process that aligns the gluten proteins, transforming the shaggy mass into a smooth, elastic dough. This is crucial for developing the strength needed for thin stretching and trapping gas for a light, airy crust.
Hand Kneading: The Traditional Method
Hand kneading is a time-honored technique that allows you to truly feel the dough develop. Turn the shaggy dough out onto a lightly floured surface. Fold the far edge of the dough towards you, press down with the heels of your hands, and push away. Rotate the dough slightly and repeat the fold-press-push motion. Continue kneading, incorporating just enough flour to prevent excessive sticking, but avoid adding too much, which will make the dough tough. The dough will initially be sticky and uneven, but as you knead, it will become smoother, less sticky, and more elastic.
Kneading by hand typically takes 10-15 minutes to reach the desired consistency. You'll know the dough is properly kneaded when it's smooth, elastic, and passes the "windowpane test": gently stretch a small piece of dough; if it stretches thinly enough to see light through it without tearing easily, the gluten is well-developed. Hand kneading offers a tactile connection to the dough, allowing you to feel its resistance and elasticity, which is invaluable for understanding dough behavior and achieving the perfect texture for your homemade pizza dough.
Step 4: First Rise: Bulk Fermentation
The first rise, or bulk fermentation, is a critical period where the yeast produces gas, causing the dough to double or even triple in volume, and more importantly, where flavor compounds develop. Place the kneaded dough in a lightly oiled bowl, turning to coat. Cover the bowl tightly with plastic wrap or a damp towel to prevent a skin from forming. The temperature and duration of this rise significantly impact the final result.
A common method for Neapolitan dough is a long, slow fermentation, often involving a period in the refrigerator (cold fermentation). For example, dough can rise at room temperature for 1-2 hours, followed by 8-72 hours in the refrigerator at 39-41°F (4-5°C). This cold environment dramatically slows yeast activity but allows enzymes to break down starches into sugars and proteins into amino acids, resulting in a more complex flavor profile and improved crust texture.
Alternatively, a warmer bulk fermentation (e.g., 2-4 hours at 70-75°F / 21-24°C) is possible with more yeast, but flavor development is less pronounced. The key is to let the dough develop, becoming airy and flavorful, which is essential for a truly chewy crispy pizza dough.
Step 5: Dividing and Balling the Dough
After the bulk fermentation, the dough is ready to be divided into individual portions (balls) for each pizza. Gently turn the dough out onto a lightly floured surface. Avoid degassing it completely; you want to preserve some of the air pockets created during the first rise. Using a bench scraper or knife, divide the dough into equal portions. A typical Neapolitan pizza uses a dough ball weighing around 200-250 grams (7-9 ounces).
Shape each portion into a tight ball. There are several techniques for this, but a common one involves folding the edges of the dough underneath itself, creating surface tension on top. Cup your hand around the dough ball on the counter and rotate it gently, applying slight downward pressure, until a smooth, taut ball forms. This process creates surface tension, which helps the dough hold its shape during the second rise and allows for better stretching later. Proper balling is crucial for achieving a round pizza shape and an evenly developed cornicione.
Step 6: Second Rise: Proofing
The second rise, or proofing, allows the individual dough balls to relax and become airy after being shaped. Place the dough balls on a lightly floured surface or in individual proofing boxes/containers, ensuring they have space to expand. Cover them loosely with plastic wrap or proofing lids to prevent drying. This rise is typically shorter than the first and is often done at room temperature.
Proofing time varies depending on the dough's temperature and the desired outcome. Dough balls might proof at room temperature (around 70-75°F / 21-24°C) for 2-4 hours, or until they are visibly expanded and feel light and airy when gently poked (they should spring back slowly). This final rest allows the gluten to relax, making the dough easy to stretch, and the yeast to produce a final burst of gas for oven spring. Properly proofed dough is essential for achieving that light, airy, and chewy crispy pizza dough crust.
Step 7: Stretching and Shaping the Pizza Base
Stretching a Neapolitan pizza base requires a gentle touch to preserve the air bubbles that create the airy cornicione. Start with a well-proofed dough ball. Place it on a lightly floured surface (using semola flour is common as it helps prevent sticking and adds a touch of crispness). Gently press down on the center of the dough with your fingers, leaving a border around the edge untouched – this will become the cornicione.
Work from the center outwards, pushing the air towards the edges. Avoid using a rolling pin, which would deflate the dough and result in a flat crust. Once the center is flattened, you can lift the dough and gently stretch it by hand, rotating it while letting gravity help stretch it into a circle, or by draping it over your knuckles and rotating.
The goal is a thin base (almost translucent in the center) with a well-defined, airy rim. Aim for a diameter of about 10-12 inches (25-30 cm) for a typical Neapolitan pizza. Practice makes perfect in this step towards your perfect chewy crispy pizza dough.
Step 8: Baking for Authentic Neapolitan Results
Baking is the final, rapid transformation of the dough into a pizza. For authentic Neapolitan results, this needs to happen very quickly at extremely high temperatures.
Oven Temperature and Baking Time
Traditional Neapolitan pizza is baked in wood-fired ovens reaching 800-900°F (425-480°C) for only 60-90 seconds. In a home oven, you need to get as close to this as possible. Preheat your oven to its maximum temperature, typically 500-550°F (260-290°C), for at least 30-60 minutes.
This ensures not only the air is hot but also your pizza stone or steel is fully heated. Baking time in a home oven at these temperatures will usually be 4-8 minutes, depending on your oven and toppings. The crust should be puffed, with significant charring and leopard spotting on the cornicione, and the base should be cooked through but still pliable.
Using a Pizza Stone or Baking Steel
A pizza stone or baking steel is essential for mimicking the floor heat of a professional pizza oven. Place the stone or steel on the top rack of your oven during the entire preheating period. When you launch the pizza onto the hot surface, the intense direct heat immediately causes the dough to spring up and the bottom crust to crisp rapidly, contributing significantly to the chewy crispy pizza dough texture.
A baking steel generally conducts heat more efficiently than a stone, often resulting in a crispier bottom crust and more pronounced oven spring. Ensure your stone or steel is fully preheated before attempting to bake.
Tips and Tricks for Achieving the Ideal Texture
Dough Hydration Adjustments for Optimal Stretch
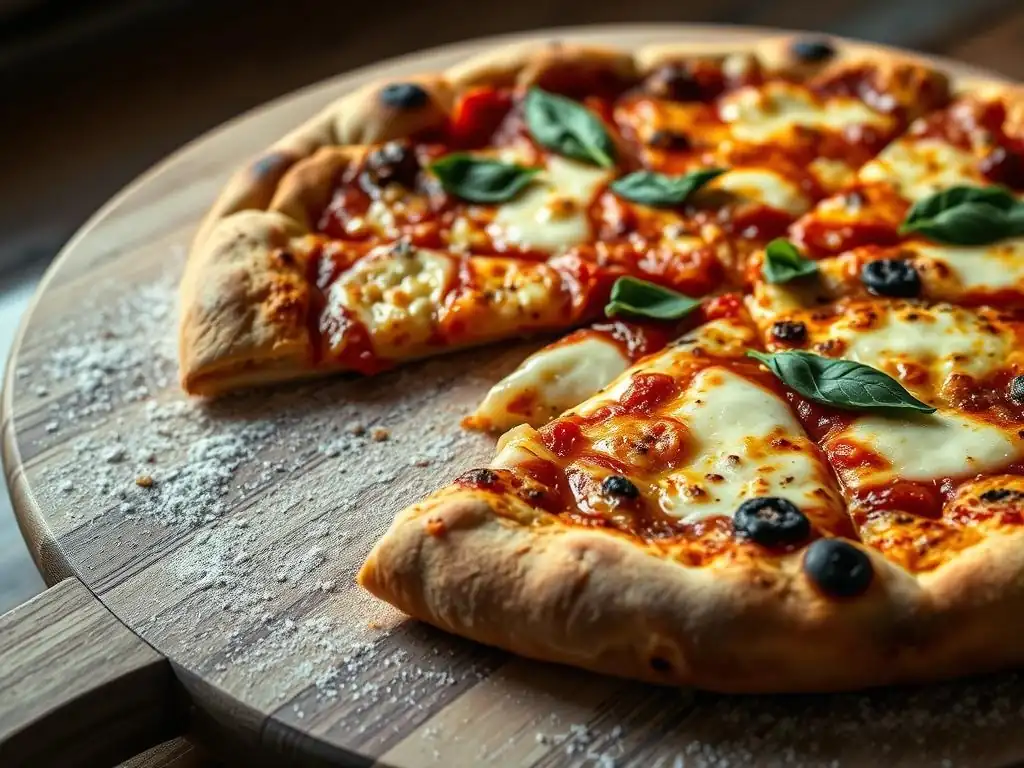
The ideal hydration for Neapolitan dough is often cited between 58% and 65%, but this can be adjusted based on the specific flour used and your desired outcome. A slightly higher hydration (e.g., 62-65%) will yield a more extensible dough that is easier to stretch very thinly and results in a lighter, airier cornicione.
However, higher hydration doughs are also stickier and require more practice to handle. If you are new to making homemade pizza dough, starting with a lower hydration (e.g., 58-60%) can make the kneading and stretching process much easier while still producing a delicious chewy crispy crust.
Conversely, if your dough feels too stiff or is difficult to stretch without tearing, you may need to increase the hydration slightly in your next batch. Environmental factors like humidity can also affect how much water your flour absorbs, so be prepared to make minor adjustments. The key is to observe how the dough feels during mixing and kneading – it should be supple and slightly tacky, but manageable.
Cold Fermentation for Enhanced Flavor
Cold fermentation, the process of slowly rising the dough in the refrigerator (typically 39-41°F / 4-5°C) for 24 to 72 hours, is a game-changer for both flavor and texture. At cold temperatures, yeast activity is significantly slowed, which allows for longer fermentation times without the dough becoming over-proofed. During this extended period, enzymes in the flour have more time to break down complex carbohydrates and proteins.
This enzymatic activity results in the production of simple sugars and amino acids, which contribute to a more complex, nuanced flavor profile and better browning during baking. Furthermore, the slow development of gases leads to a more even gluten structure and smaller, more uniform air pockets, resulting in a dough that is easier to digest and has a superior texture. While a faster room-temperature rise works, cold fermentation is arguably the most effective technique for achieving that authentic, deep flavor and perfect texture in your chewy crispy pizza dough.
Launching the Pizza Successfully
Getting the shaped pizza from your workspace onto the hot pizza stone or steel in the oven is a moment that can strike fear into any home baker! A successful launch prevents the pizza from sticking and collapsing. The key is speed and using the right tool: a pizza peel. Prepare your peel by dusting it generously with semola flour or a mix of semola and regular flour. Semola acts like tiny ball bearings, allowing the dough to slide easily.
Shape your pizza directly on the prepared peel. Add your toppings quickly to minimize the time the wet dough sits on the peel, which can cause it to stick. Once topped, give the peel a gentle shake to ensure the pizza is sliding freely.
Open the oven door, position the tip of the peel at the back of the stone/steel, and with a swift forward and backward jerk, slide the pizza off the peel onto the hot surface. It might take a few tries to master, but a good launch is crucial for an even bake and a perfect chewy crispy pizza dough crust.
Achieving Leopard Spotting
Leopard spotting, the desirable charring on the cornicione, indicates a well-baked Neapolitan pizza. Achieving this at home depends primarily on high heat and proper dough hydration and fermentation. As mentioned earlier, pushing your oven to its maximum temperature (500-550°F / 260-290°C) and using a preheated pizza stone or steel is fundamental. The intense heat causes the surface of the dough to blister and char rapidly.
Ensure your dough is properly proofed and at room temperature before baking. Cold dough won't spring up as effectively. The hydration level should be sufficient (around 60-65%) to create surface moisture that facilitates rapid blistering. If your oven has a broiler, you can use it for the last minute or two of baking (carefully watching to prevent burning!) to add extra heat from above and encourage spotting, contributing to that signature chewy crispy pizza dough appearance and flavor.
Troubleshooting Common Pizza Dough Problems
Dough Too Sticky
If your homemade pizza dough is excessively sticky and difficult to handle after kneading, it's likely due to high hydration or insufficient gluten development. First, consider if the hydration percentage was particularly high (above 65% can be challenging for beginners). If kneading by hand, ensure you've kneaded for long enough (10-15 minutes) to develop sufficient gluten structure; sticky dough often needs more kneading, not more flour. Avoid the temptation to add large amounts of extra flour, as this can make the dough tough.
Instead, try incorporating small amounts of flour (a tablespoon at a time) during kneading until the dough becomes more manageable. If using a stand mixer, ensure you've mixed on a medium speed for the recommended time (usually 8-10 minutes). Allowing the dough to rest for 10-15 minutes after the initial mix (autolyse) can also help the flour absorb water better, reducing stickiness before kneading begins. Sometimes, simply letting the dough rest in the refrigerator for a few hours can make it less sticky and easier to handle due to the gluten relaxing and hydrating further.
Dough Too Dry
Dough that feels stiff, crumbly, or doesn't come together easily during mixing is typically too dry. This is usually a result of insufficient water for the amount of flour used, or inaccurate measuring. Ensure you are measuring your ingredients accurately, ideally using a kitchen scale for both flour and water to achieve precise hydration percentages. Different flours can absorb different amounts of water, so the hydration percentage might need slight adjustment based on the specific flour brand you use.
If you realize the dough is too dry during mixing or kneading, you can try incorporating a small amount of extra water, a teaspoon at a time, kneading it in until the dough reaches a more pliable consistency. This is easier to do early in the process.
If the dough has already completed its bulk fermentation and is still too dry or tight, it might be difficult to fix completely, but allowing it to rest longer before stretching can help the gluten relax, making it slightly more workable, though it may not achieve the ideal chewy crispy pizza dough texture.
Dough Not Rising
Lack of rise in your homemade pizza dough can be frustrating and is usually due to inactive yeast or unfavorable fermentation conditions. First, check the expiration date on your yeast and ensure it was stored correctly (cool, dry place, or refrigerator/freezer after opening). If using active dry yeast, confirm it foamed when proofed in warm water (Step 1). If it didn't, the yeast is dead.
Ensure the water temperature used for mixing wasn't too hot (above 130°F / 54°C), which can kill yeast, or too cold, which slows it down excessively. Also, check the ambient temperature where the dough is rising; yeast is most active between 75-85°F (24-29°C), though it works slowly in the refrigerator. If the environment is too cold, try placing the covered dough in a slightly warmer spot (like an oven with just the light on).
Too much salt can also inhibit yeast, so ensure you didn't accidentally add too much relative to the flour. Give the dough sufficient time; cold fermentation is slow, and visual rise is minimal compared to room temperature.
Crust Not Charring Enough
Insufficient charring or leopard spotting on the crust often points to a lack of sufficient heat during baking. Neapolitan pizza requires very high temperatures. Ensure your oven is preheated to its maximum setting (500-550°F / 260-290°C) and that your pizza stone or steel has been preheating for at least 30-60 minutes to reach full temperature. Baking on a cold or insufficiently heated surface will result in a pale, undercooked bottom and less oven spring.
The duration of the bake also matters; a pale crust after 6-8 minutes might indicate the oven isn't hot enough or the pizza isn't getting enough direct heat. Try moving the pizza to a higher rack position if possible, closer to the heating element or broiler (if using). Ensure your dough hydration is adequate (around 60-65%) as surface moisture aids in blistering. Finally, the dough itself needs proper fermentation; well-fermented dough browns better due to the availability of simple sugars. Achieving good char is key to the aesthetic and flavor of a chewy crispy pizza dough.
Pizza Dough Recipe Variations for Different Tastes
Adjusting Hydration for a Softer Crust
While classic Neapolitan aims for a specific texture, adjusting hydration is the easiest way to modify your homemade pizza dough for a slightly different outcome. Increasing hydration above the typical 60-65% range (e.g., to 68-75% or even higher for Roman-style pizza) will result in a wetter, stickier dough that is harder to handle but produces a significantly softer, more open, and airy crumb structure. This is excellent for styles where a very light, cloud-like crust is desired.
Conversely, decreasing hydration slightly (e.g., to 55-58%) yields a stiffer dough that is much easier to knead and shape, particularly for beginners. This will result in a denser crust with a tighter crumb structure, which some prefer, especially for pizzas loaded with heavier toppings. Experimenting with hydration allows you to tailor your chewy crispy pizza dough to your personal preference and skill level.
Using Different Types of Flour
While 00 flour is traditional for Neapolitan, using other flours can dramatically change the dough's characteristics. Bread flour (typically 12-14% protein) has stronger, more elastic gluten than 00 flour. Using bread flour will result in a chewier crust that is more resistant to stretching thinly and might have a denser cornicione. It's a good option if you prefer a robust, substantial crust.
All-purpose flour (around 10-12% protein) falls between 00 and bread flour. It can be used to make a decent pizza dough, though it may not achieve the same delicate balance of chewiness and crispness as 00 flour. Whole wheat flour can be added (replacing a percentage of the white flour) to increase fiber and nutrients and add a nutty flavor, though it will result in a denser dough due to the bran interfering with gluten development. Blending flours allows you to customize the texture and flavor profile of your homemade pizza dough.
Adding a Touch of Oil
Traditional Neapolitan pizza dough contains only flour, water, yeast, and salt. However, adding a small amount of olive oil (typically 1-3% of the flour weight) is common in many other pizza dough recipes, particularly those for home ovens. Oil makes the dough easier to handle, contributes to a softer interior crumb, and can help the crust brown more evenly.
The addition of oil slightly changes the texture, making it less rigidly structured than pure Neapolitan dough, but it can be beneficial for achieving a good result in a standard home oven that may not reach the extreme temperatures of a pizza oven. If you find your crust is consistently too dry or tough, incorporating a touch of good quality olive oil might be a simple solution to achieve a slightly softer, more tender chewy crispy pizza dough.
Serving and Storing Your Homemade Pizza
Best Toppings for Neapolitan Pizza
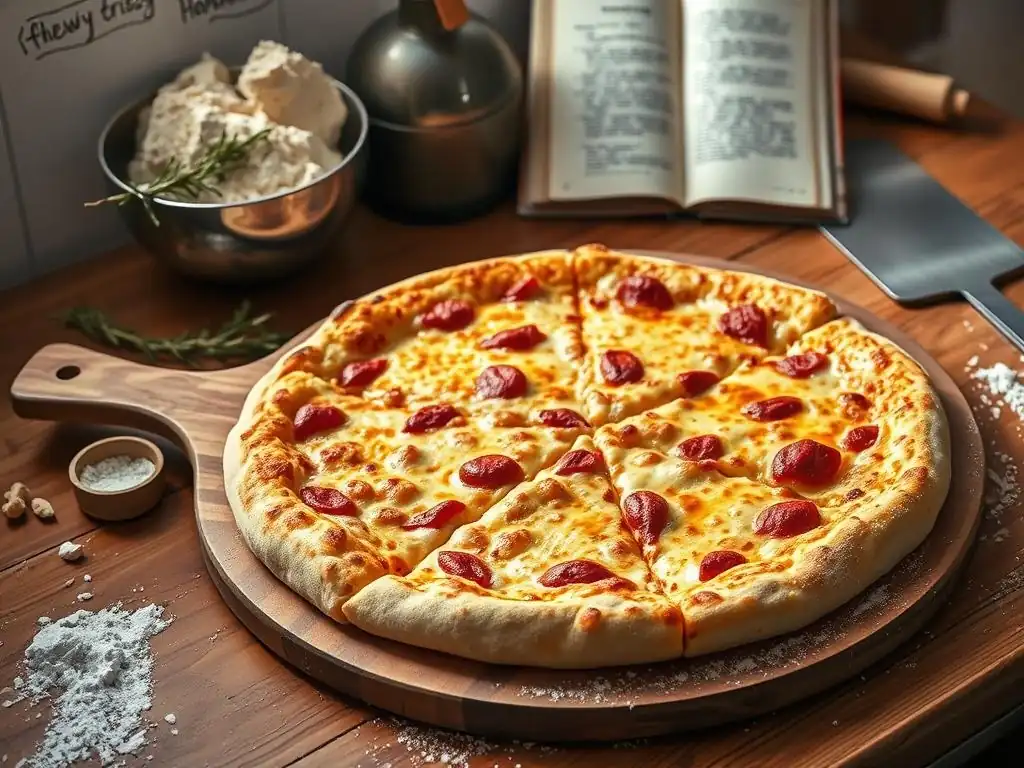
Authentic Neapolitan pizza is known for its simplicity, allowing the quality of the dough and main ingredients to shine. The classic Pizza Margherita features San Marzano tomatoes (crushed or pureed), fresh mozzarella (mozzarella di bufala or fior di latte), fresh basil leaves, a drizzle of extra virgin olive oil, and a sprinkle of salt. The minimal toppings ensure the pizza cooks quickly and evenly in the high heat without making the base soggy, preserving the integrity of the chewy crispy pizza dough.
Other traditional options include Pizza Marinara (tomato, garlic, oregano, olive oil - no cheese) or using minimal amounts of other high-quality ingredients like prosciutto cotto, mushrooms, or olives. The key is restraint; overloading a Neapolitan pizza with too many wet or heavy toppings will prevent the crust from cooking properly and achieving that desired light, airy texture and chewy crispness. Embrace simplicity to highlight your beautiful homemade pizza dough.
Reheating Leftover Pizza for Optimal Texture
Reheating leftover pizza often results in a soggy or hard crust, but there are ways to preserve that chewy and crispy texture. Avoid the microwave, which heats unevenly and makes the crust rubbery. The best method is often the stovetop. Place a slice in a non-stick skillet over medium heat. Cook for a few minutes until the bottom is crispy. You can add a few drops of water to the pan and cover it for the last minute to steam the toppings and cheese while keeping the crust crisp.
Alternatively, the oven or toaster oven works well. Place the pizza on a baking sheet or directly on the rack and reheat at 350-400°F (175-200°C) for 5-10 minutes, or until heated through and the crust is revived. This method helps to re-crisp the base and edges. While leftovers are never quite as good as fresh, these techniques help maintain the desirable texture of your homemade pizza dough.
Freezing Pizza Dough for Later Use
Homemade pizza dough freezes exceptionally well, making it convenient to prepare batches in advance. After the first rise (bulk fermentation) and dividing into balls (Step 5), lightly oil each dough ball and place them in individual freezer-safe bags or containers, pressing out as much air as possible. Label with the date and freeze for up to 2-3 months. Freezing stops the yeast activity, preserving the dough.
To use frozen dough, transfer the desired number of dough balls from the freezer to the refrigerator 24 hours before you plan to bake. This allows for a slow, safe thaw and continues the cold fermentation process, potentially enhancing flavor. On the day of baking, remove the dough balls from the refrigerator 2-4 hours before stretching (Step 7) to allow them to come to room temperature and relax. This thawing and proofing process ensures the dough is pliable and ready to stretch into a perfect base for your chewy crispy pizza.
Mastering Homemade Pizza: Next Steps
Experimenting with Different Flours
Once you've mastered the basic Neapolitan dough with 00 flour, broaden your horizons by experimenting with other flours. Try using a blend of 00 flour and bread flour to see how the increased elasticity affects handling and crust texture. Incorporate a small percentage of whole wheat flour for added flavor and nutrition. Explore specialty flours like spelt or Einkorn, understanding that they behave differently due to lower or different types of gluten. Each flour type will slightly alter the flavor, texture, and handling properties of your homemade pizza dough, offering endless possibilities for customization.
Exploring Sourdough Pizza Dough
Taking your pizza making to the next level involves exploring sourdough pizza dough. Instead of commercial yeast, a sourdough starter (a fermented culture of flour and water) is used as the leavening agent. Sourdough fermentation is slower and more complex, producing organic acids that contribute a unique tangy flavor and help break down the flour, potentially improving digestibility.
Sourdough pizza dough often results in a crust with an even more open, airy crumb structure and a more pronounced flavor profile compared to yeasted dough. The process requires maintaining a healthy starter and understanding its behavior, which adds a new layer of challenge and reward. Mastering sourdough pizza dough is a significant step in a baker's journey, yielding truly exceptional results with that signature chewy crispy texture and complex taste.
Conclusion: Enjoy Your Neapolitan Pizza Creation!
Crafting perfect Neapolitan pizza dough at home is a rewarding process that combines simple ingredients with careful technique and patience. By understanding the role of each ingredient, mastering the steps from mixing to baking, and troubleshooting common issues, you can consistently produce a homemade pizza dough that yields that coveted chewy and crispy crust. The journey involves learning to feel the dough, observe its changes, and adapt to your environment.
Whether you stick to the classic recipe or experiment with hydration, flours, or fermentation methods, the joy lies in creating something delicious from scratch. So, fire up your oven, stretch your beautifully proofed dough, add your favorite simple toppings, and savor the experience of biting into a perfect slice of homemade pizza with a wonderfully chewy crispy crust. Happy baking!
Frequently Asked Questions
What makes pizza dough chewy and crispy at the same time?
Achieving that perfect texture involves a balance of hydration and oven temperature. High hydration creates chewiness, while a hot oven crisps the crust. The type of flour also plays a significant role.
What type of flour is best for chewy crispy pizza dough?
High-protein flour, like bread flour, is recommended. This helps develop gluten, which contributes to the chewy texture. You can also use 00 flour for a more authentic Italian style.
How does hydration affect the chewy and crispy texture of pizza dough?
Higher hydration (more water in the dough) leads to a more open crumb structure and chewiness. However, too much water can make the dough difficult to handle. Aim for around 65-70% hydration.
What oven temperature is ideal for baking chewy crispy pizza?
A very hot oven is crucial for achieving a crispy crust. Aim for around 500-550°F (260-290°C). A pizza stone or baking steel can also help retain heat and create a crispier base.
Can I use a stand mixer to make chewy crispy pizza dough, or is kneading by hand better?
Both methods work. A stand mixer simplifies the process, but hand kneading allows for better control. The key is to knead until the dough is smooth and elastic, regardless of the method used.
Final Reflection: The Enduring Quest for the Perfect Slice
The pursuit of the perfect pizza dough—that elusive balance of chewy interior and crisp exterior—remains a culinary obsession, a testament to our enduring love affair with this simple yet infinitely adaptable dish. This guide has explored various techniques, from flour selection and hydration levels to fermentation methods and baking strategies, all in the service of achieving that ideal textural harmony. The journey, however, is far from over; each bake offers a new opportunity for refinement and discovery.
The quest for the perfect chewy and crispy pizza dough transcends mere recipe following; it's a journey of understanding the fundamental principles of baking, of appreciating the interplay of ingredients and processes. It's about embracing the imperfections, learning from each slightly under- or over-baked crust, and ultimately finding joy in the creative process. As the renowned pizzaiolo, Tony Gemignani, once said: Pizza is more than just food; it's a canvas for creativity and a celebration of community.
This sentiment perfectly encapsulates the spirit of this exploration. The pursuit of the perfect crust is, in essence, a pursuit of culinary mastery and a deeper appreciation for the art of baking.
Now, it's your turn. Don't be afraid to experiment, to adjust hydration levels, to try different flours, and to discover your own unique approach to crafting the perfect chewy and crispy pizza dough. Each experiment, each slightly imperfect pie, brings you closer to mastering this culinary art. Embrace the journey, savor the process, and most importantly, enjoy the delicious results! The perfect slice awaits.
Unleash Your Inner Pizzaiolo: Craft the Perfect Dough!
Thanks for taking the time to explore the world of chewy, crispy pizza dough! You've now got the knowledge to elevate your pizza game. Ready to put your new skills to the test?
- Knead your way to perfection: Try the recipe today! See how easily you can achieve that perfect balance of chew and crisp.
- Share your pizza pride: Post a picture of your masterpiece on social media and tag us – we’d love to see it!
- Experiment with flavors: Try adding different herbs or flours to your dough to discover your signature pizza crust.
What unique ingredient will you add to your next pizza dough creation?