
Why Your Bread is Dense and How to Fix It

Welcome to BakeWithEase, your baking sanctuary! Ever wondered why your homemade bread ends up more like a brick than a cloud? You're not alone. Unlock the secrets to perfect, airy loaves with our comprehensive guide to dense bread troubleshooting tips. We'll dive deep into the common culprits and, more importantly, show you exactly how to achieve the light, fluffy texture you crave. Ready to transform your bread baking? Let's get started!
- Why Your Bread is Dense and How to Fix It: Dense Bread Troubleshooting Tips from BakeWithEase
- Understanding Dense Bread: Common Causes and Solutions
- Dense Bread Troubleshooting: Key Factors to Consider
-
Dense Bread Troubleshooting: Step-by-Step Solutions
- Solution 1: Improve Yeast Activation for a Better Rise
- Solution 2: Master the Art of Kneading for Enhanced Gluten Development
- Solution 3: Optimize Proofing Conditions for a Light and Airy Loaf
- Solution 4: Choose the Right Flour for Your Bread Recipe
- Solution 5: Adjust Hydration Levels for Optimal Dough Consistency
- Preventative Measures: Avoiding Dense Bread in the Future
- Conclusion: Baking Lighter Bread is Within Reach
-
Frequently Asked Questions
- Why is my bread coming out so dense even when I follow the recipe?
- What are some common mistakes that lead to dense bread?
- How can I improve the texture of my bread to make it lighter and less dense?
- My bread rises initially, but then collapses and becomes dense during baking. What's happening?
- What ingredients can I add to my bread dough to help prevent it from becoming dense?
- Final Reflection: The Unexpected Joys of a Perfectly Light Loaf
- Unlock the Secret to Light & Airy Bread!
Why Your Bread is Dense and How to Fix It: Dense Bread Troubleshooting Tips from BakeWithEase
Understanding Dense Bread: Common Causes and Solutions
What Causes Dense Bread? Identifying the Culprits
Many factors can contribute to a loaf of bread turning out heavy and dense instead of light and airy. Often, it's not just one single issue but a combination of elements that disrupt the delicate balance required for successful bread making. Common culprits include inactive yeast, insufficient gluten development, improper proofing, using the wrong type of flour, or incorrect hydration levels in the dough. For instance, if your yeast isn't active, the dough won't produce enough carbon dioxide gas to create that desired open crumb structure, leading directly to a dense texture.
Understanding these potential pitfalls is the first step in effective dense bread troubleshooting. Think of bread making as a series of interconnected biological and physical processes. If one step, like fermentation driven by yeast, is stunted, it negatively impacts subsequent steps, such as the dough's ability to rise properly during proofing and baking. We'll delve into each of these areas to help you pinpoint exactly why your bread might be falling flat and how to implement effective dense bread troubleshooting tips.
Dense Bread vs. Properly Proofed Bread: Recognizing the Difference
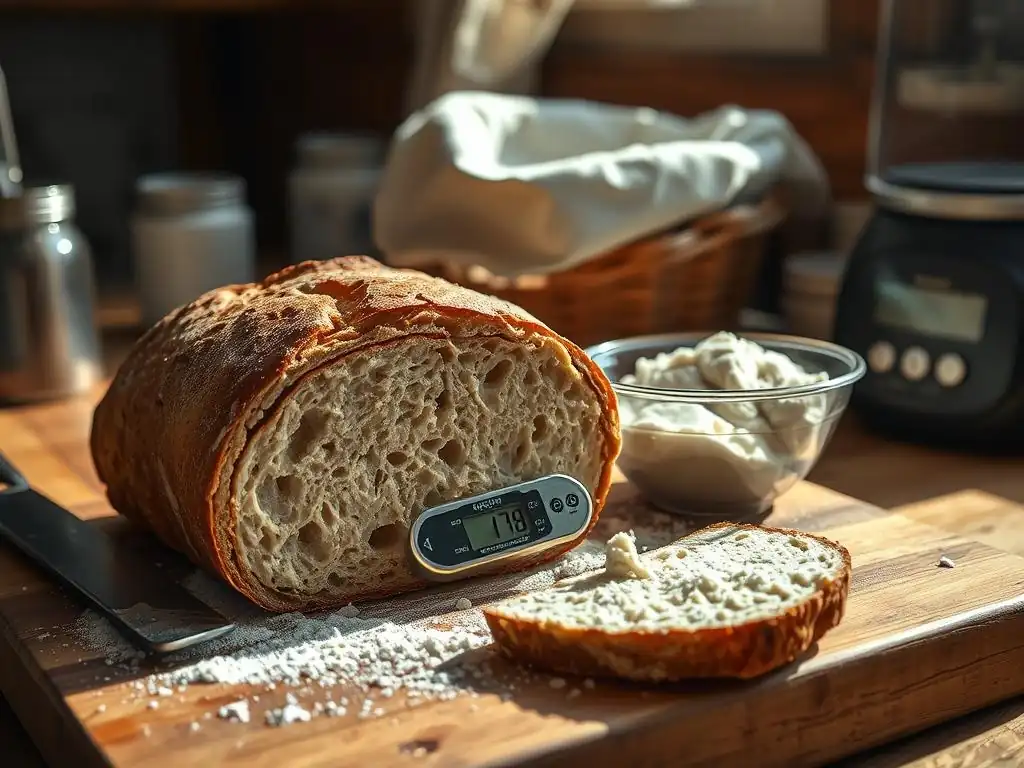
Visually and texturally, dense bread is starkly different from a properly proofed and baked loaf. A dense loaf will feel heavy for its size, have a tight, compact crumb structure with few or very small holes, and often possess a thick or tough crust. When you slice into it, the interior might look uniform and heavy, almost like cake or even clay in severe cases. This lack of internal structure is a tell-tale sign that the dough didn't rise adequately, failing to trap sufficient air bubbles during fermentation and proofing.
In contrast, properly proofed bread should feel relatively light when lifted, given its volume. Slicing into it reveals an open, irregular crumb structure – this is the network of air pockets (alveoli) created by yeast activity trapped within the gluten structure. These holes vary in size and shape depending on the bread type (e.g., a baguette has larger, more irregular holes than a sandwich loaf), but their presence indicates successful leavening and proper gluten development. Recognizing these differences is crucial for diagnosing problems and applying the right dense bread troubleshooting tips.
Dense Bread Troubleshooting: Key Factors to Consider
Yeast Activity and Its Impact on Bread Density
Yeast is the engine that drives fermentation in most bread recipes, producing the carbon dioxide gas that makes the dough rise. If your yeast is inactive or insufficient, it won't produce enough gas, resulting in a dough that doesn't expand properly and bakes into a dense loaf. The viability and quantity of yeast used are critical factors in achieving a light texture. Using old or improperly stored yeast is a frequent cause of failed rises and thus dense bread.
Different types of yeast require different handling. Active dry yeast typically needs to be proofed in warm water (around 105-115°F or 40-46°C) with a pinch of sugar for 5-10 minutes until it becomes foamy. Instant yeast can often be mixed directly with dry ingredients but still performs best when ingredients are at the correct temperature. Ensuring your yeast is alive and active is a fundamental step in dense bread troubleshooting.
Testing Your Yeast for Optimal Bread Baking
Testing active dry yeast is straightforward and highly recommended, especially if you're unsure about its freshness. Dissolve 1-2 teaspoons of yeast in about 1/4 cup of warm water (105-115°F / 40-46°C) with a pinch of sugar. Let it sit for 5-10 minutes. If the mixture becomes foamy and bubbly, your yeast is active and ready to use. If there's little to no activity, the yeast is likely dead or inactive, and you should discard it and use a fresh packet.
For instant yeast, while direct mixing is common, you can also test it by mixing a small amount with warm water. While it may not foam as dramatically as active dry, you should still see some signs of activity, like slight bubbling or expansion, within 10 minutes. If you're consistently getting dense bread, taking this small step to verify yeast viability is a crucial dense bread troubleshooting tip.
Troubleshooting Insufficient Yeast Activity
If your yeast test fails, the immediate solution is to use fresh yeast. Always store yeast properly – active dry and instant yeast last longer when stored in an airtight container in the refrigerator or freezer. When using yeast from storage, allow it to come closer to room temperature before activating it.
Beyond using fresh yeast, ensure the water temperature for activation is correct; water that is too hot will kill the yeast, while water that is too cold will slow down or prevent activation. Also, check the expiration date on the yeast packet.
If you're working with a recipe that calls for a specific amount of yeast, resist the urge to drastically reduce it, as this can also lead to insufficient rise and dense results. Doubling the amount of yeast will significantly speed up fermentation, but too much yeast can sometimes impart an off-flavor, so it's usually better to stick to recipe quantities or slightly increase proofing time if needed.
Gluten Development: Achieving the Right Texture for Lighter Bread
Gluten is the protein network that gives bread dough its structure and elasticity. It's formed when two proteins in flour, glutenin and gliadin, combine with water and are developed through kneading or mixing. This network is essential because it traps the carbon dioxide gas produced by the yeast, allowing the dough to rise and create that desirable open crumb. Without sufficient gluten development, the dough won't have the strength to hold the gas, resulting in a heavy, dense loaf.
Adequate kneading is key to developing a strong gluten network. However, there's a balance to strike. Both under-kneading and over-kneading can negatively impact the final texture, leading to issues that require specific dense bread troubleshooting tips. Understanding the signs of properly developed dough is vital for consistently achieving light, airy bread.
The Role of Kneading in Gluten Development
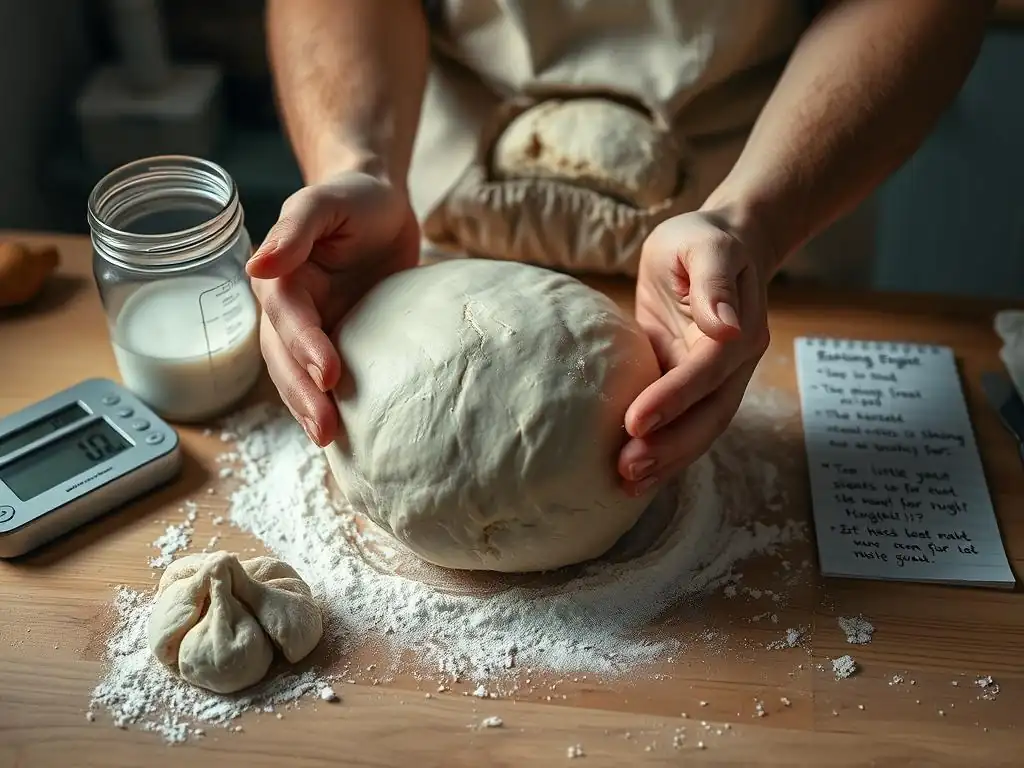
Kneading stretches and aligns the gluten proteins, forming a strong, elastic network. Whether you knead by hand or with a stand mixer, the physical action helps the proteins bond and organize. As you knead, you'll notice the dough changing texture – it becomes smoother, less sticky, and more pliable.
Proper gluten development allows the dough to stretch without tearing, trapping gas effectively. Think of it like stretching a balloon – a strong balloon can inflate significantly, holding air, while a weak one will pop or not expand much. The gluten network is the balloon for the CO2 gas. Achieving optimal gluten development through kneading is a fundamental dense bread troubleshooting step.
Over-Kneading vs. Under-Kneading: How They Affect Bread Density
Under-kneaded dough will feel shaggy, rough, and sticky. It won't pass the windowpane test (stretching a small piece thin enough to see light through without tearing). When baked, bread made from under-kneaded dough will be dense with a tight, cake-like crumb because the weak gluten network couldn't hold the gas.
Over-kneading, while less common, can also lead to dense bread. Over-kneaded dough feels very tight, tough, and can sometimes become sticky and lose its structure, almost breaking down. While it might pass the windowpane test initially, the gluten strands can start to break from excessive stress. Baked bread from over-kneaded dough might be dense and tough, lacking the desired open structure. Most home bakers are more likely to under-knead than over-knead, making insufficient kneading a common point for dense bread troubleshooting.
Proofing Problems: Ensuring Proper Bread Rise
Proofing (or proving) is the process where the shaped dough rests and rises before baking. This is when the yeast has its final opportunity to produce gas and expand the dough volume. Proper proofing is essential for a good crumb structure and preventing dense bread. The ideal proofing environment and duration are critical factors.
If dough is under-proofed, it hasn't had enough time to expand sufficiently before hitting the oven. The oven spring (the final burst of rising in the oven) might be vigorous, but the internal structure will be tight and dense because not enough gas was produced and trapped during the proofing stage. This is a frequent cause addressed by dense bread troubleshooting guides.
Understanding the Ideal Proofing Environment
Yeast is most active within a specific temperature range, typically between 75°F and 85°F (24°C and 30°C). A warm, draft-free environment is ideal for proofing. Humidity also plays a role; a dry environment can cause the surface of the dough to dry out and form a skin, restricting its ability to rise.
Creating an ideal proofing environment is simple. You can place the dough in a lightly oiled bowl covered with plastic wrap or a damp towel in a warm spot. Some bakers turn their oven off but leave the light on to create a slightly warm environment (often around 80-90°F or 27-32°C). Using dense bread troubleshooting tips related to environment can significantly improve your rise.
Over-Proofing and Under-Proofing: Density Implications
Under-proofing results in dense bread with a tight crumb, as discussed. The dough hasn't expanded enough, and while oven spring helps, it can't compensate for insufficient gas production.
Over-proofing occurs when the dough rises too much or for too long. The yeast eventually exhausts its food supply (sugars) and runs out of energy. The gluten structure, stretched to its limit, can begin to collapse. Over-proofed dough may look puffy but feels fragile; it might deflate slightly when poked. When baked, over-proofed bread often has a poor structure, a gummy or dense layer near the bottom, and can sometimes taste overly yeasty or alcoholic.
Identifying if your dough is under or over-proofed is a key part of dense bread troubleshooting. A simple test is the poke test: gently press your finger into the dough; if the indentation springs back immediately, it's likely under-proofed. If it springs back slowly, leaving a small indentation, it's perfectly proofed. If it leaves a deep indentation and doesn't spring back, it's likely over-proofed.
Flour Types and Their Influence on Bread Density
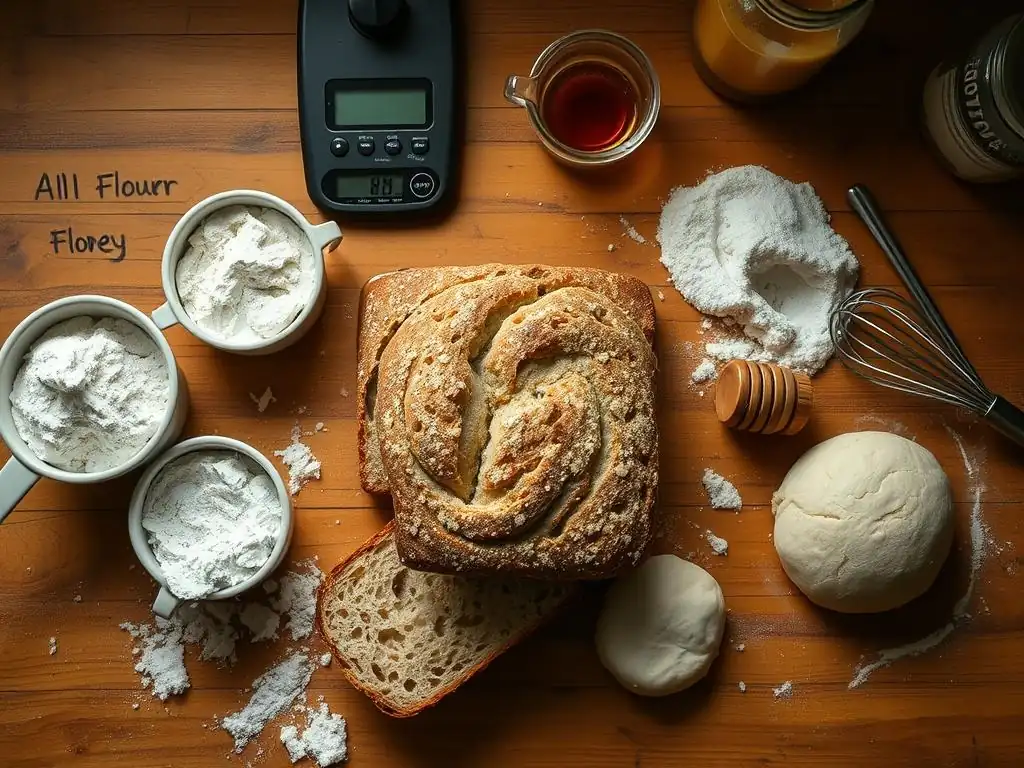
The type of flour you use significantly impacts the potential for gluten development and water absorption, both of which affect bread density. Different flours have varying protein contents. Bread flour, for instance, typically contains 12-14% protein, providing a strong gluten structure ideal for chewy, airy loaves like artisan bread or bagels. All-purpose flour has a lower protein content, usually 10-12%, making it suitable for a wider range of baked goods, including some breads, but it may not produce as open a crumb as bread flour.
Using a low-protein flour like cake flour (around 7-9% protein) in a recipe designed for bread flour will almost certainly result in a dense loaf because the gluten network won't be strong enough to support the rise. Conversely, using high-protein flour in a recipe intended for a softer crumb might make the dough too tough. Choosing the appropriate flour type is a fundamental dense bread troubleshooting step.
High-Protein Flour vs. Low-Protein Flour for Different Bread Types
High-protein flours, such as bread flour, are best for loaves where you want a significant rise and a chewy texture with a good crumb structure, like sourdough, ciabatta, or crusty country loaves. The higher protein content means more potential for gluten development, allowing the dough to trap more gas.
Low-protein flours, like cake flour or pastry flour, are designed for tender baked goods where minimal gluten development is desired, such as cakes, pastries, and cookies. Using these in standard bread recipes will result in a weak dough that cannot hold its shape or rise properly, leading to density. All-purpose flour is a versatile middle ground, suitable for softer sandwich breads or rolls, but might require slightly more kneading or a longer fermentation to develop sufficient structure compared to bread flour.
Measuring Flour Accurately for Consistent Results
Inconsistent flour measurements are a common source of baking problems, including dense bread. Scooping flour directly from the bag with your measuring cup can pack the flour down, resulting in significantly more flour by weight than intended. For example, a cup of spooned and leveled all-purpose flour weighs approximately 120 grams, but a cup scooped directly from the bag can weigh 150 grams or more – a difference of over 20%! This excess flour throws off the hydration balance and can lead to a stiff dough that struggles to rise.
The most accurate way to measure flour is by weight using a kitchen scale. Recipes often provide weight measurements for this reason. If a recipe only provides volume measurements, use the "spoon and level" method: gently spoon the flour into your measuring cup until it's overflowing, then level off the excess with a straight edge without packing the flour down. Accurate measurement is a simple yet effective dense bread troubleshooting tip.
Hydration Levels: Achieving the Perfect Dough Consistency
Hydration refers to the ratio of water to flour in a dough, usually expressed as a percentage (Baker's Percentage, where flour is always 100%). The amount of water significantly affects the dough's consistency, gluten development, and the final texture of the bread. Dough that is too dry will be stiff and difficult to knead, limiting gluten development and resulting in a dense, tight crumb.
Different flours absorb water differently. Whole wheat flour, for instance, typically requires more water than white bread flour due to the presence of bran and germ. Adjusting hydration based on the flour used and the desired bread type is crucial for preventing density issues.
The Importance of Water in Bread Making
Water is essential for activating the yeast and hydrating the flour proteins (glutenin and gliadin) to form gluten. It also affects the dough's temperature, which influences fermentation speed. The right amount of water makes the dough pliable and extensible, allowing the gluten network to stretch and trap gas effectively.
Dough hydration levels vary widely depending on the bread type. A standard sandwich loaf might have a hydration of 60-65% (60-65g water per 100g flour), while a rustic ciabatta might be 75-85% or even higher, resulting in a very wet, sticky dough but a highly open, airy crumb when baked correctly. Understanding the role of water is key to effective dense bread troubleshooting.
Adjusting Hydration for Different Flour Types
Since different flours absorb water differently, you often need to adjust the hydration level when substituting one flour for another, especially when incorporating whole grains. Whole wheat flour generally absorbs about 15-20% more water than white bread flour. If a recipe calls for 100% white flour at 65% hydration and you swap to 50% white and 50% whole wheat, you'll likely need to increase the total hydration to around 70-75% to achieve a similar dough consistency.
Observing the dough's feel is also important. A properly hydrated dough should be slightly tacky but not excessively sticky, pulling away from the sides of the bowl (if using a mixer) or your hands (if kneading manually). If your dough feels too stiff and dry, gradually add a tablespoon of water at a time during kneading until the desired consistency is reached. This kind of on-the-fly adjustment is a useful dense bread troubleshooting tip.
Dense Bread Troubleshooting: Step-by-Step Solutions
Solution 1: Improve Yeast Activation for a Better Rise
If you suspect inactive yeast is the cause of your dense bread, performing a yeast activation test is the first step. Use warm water (105-115°F for active dry, slightly cooler for instant if testing) and a pinch of sugar. This provides the yeast with food and the right temperature to become active.
If the yeast doesn't foam, discard it and get fresh yeast. Ensure your water temperature is accurate using a thermometer – temperatures above 130°F (54°C) will kill yeast instantly. Using fresh, properly activated yeast is a fundamental solution in dense bread troubleshooting.
Detailed Steps on How to Properly Proof Yeast
- Gather your ingredients: Active dry yeast, warm water (105-115°F / 40-46°C), and a pinch of sugar.
- Pour the warm water into a small bowl.
- Sprinkle the yeast and sugar over the water. Do not stir initially; let the yeast rehydrate for 1-2 minutes.
- Gently stir until the yeast is dissolved.
- Set the bowl aside in a warm, draft-free spot for 5-10 minutes.
- Observe the mixture: It should become foamy and bubbly, significantly increasing in volume.
- If it foams, the yeast is active and can be added to your recipe. If not, the yeast is inactive and won't leaven your bread, requiring you to start over with fresh yeast.
Solution 2: Master the Art of Kneading for Enhanced Gluten Development
To fix dense bread caused by insufficient gluten development, focus on proper kneading technique and duration. Kneading develops the gluten network, making the dough elastic and strong enough to hold gas. Knead until the dough is smooth, elastic, and passes the windowpane test. This might take 8-10 minutes by hand or 6-8 minutes in a stand mixer on medium speed, though times vary based on hydration and flour type.
If your dough feels rough and tears easily during shaping or stretching, it likely needs more kneading. If using a mixer, don't overload it, as this can prevent proper development. For hand kneading, use a push-and-fold motion, rotating the dough frequently.
Visual Cues for Perfectly Kneaded Dough
- Smooth Surface: The dough transitions from a shaggy, rough ball to a smooth, satiny surface.
- Elasticity: When you poke the dough, it springs back slowly.
- Windowpane Test: Take a small piece of dough (about the size of a golf ball) and gently stretch it thin between your fingers. If you can stretch it thin enough to see light through it without it tearing, the gluten is well-developed. If it tears quickly, it needs more kneading.
- Less Stickiness: As gluten develops, the dough becomes less sticky and easier to handle.
Solution 3: Optimize Proofing Conditions for a Light and Airy Loaf
Correcting proofing problems is crucial for dense bread troubleshooting. Ensure your dough is proofing in a warm, consistent temperature environment, ideally between 75-85°F (24-30°C). This temperature range allows yeast to work efficiently. Avoid cold or drafty spots, which slow down fermentation significantly.
Monitor the dough's progress rather than strictly adhering to recipe times, as proofing times are highly dependent on ambient temperature and yeast activity. Use the poke test to determine readiness.
Creating a Warm and Humid Proofing Environment
- Oven with Light On: Turn your oven light on (do not preheat the oven). Place the covered bowl of dough inside. The light generates enough heat to create a warm environment.
- Warm Water Bath: Place the covered dough bowl inside a larger bowl or sink filled with warm water (not hot). Ensure the water level is below the rim of the dough bowl.
- Proofing Box: If you bake frequently, consider investing in a dedicated proofing box that controls temperature and humidity.
- Microwave Trick: Heat a cup of water in the microwave until steaming, then turn off the microwave and place the covered dough bowl inside with the hot water. The steam creates humidity, and the residual heat provides warmth.
Solution 4: Choose the Right Flour for Your Bread Recipe
If your bread is consistently dense despite proper kneading and proofing, the flour type might be the culprit. For most standard, airy loaves, using bread flour (high protein) is recommended. Its higher gluten potential provides the structure needed for a good rise and open crumb.
Review your recipe and ensure you are using the flour specified. If substituting, understand how protein content affects the outcome and be prepared to adjust hydration or kneading time. For example, using all-purpose flour instead of bread flour might require slightly longer kneading to develop sufficient gluten.
Flour Recommendations for Different Bread Recipes
- Crusty Artisan Loaves (Sourdough, Baguettes, Ciabatta): High-protein bread flour (12-14% protein) is ideal for developing strong gluten and achieving a chewy texture with an open crumb.
- Soft Sandwich Bread, Rolls: All-purpose flour (10-12% protein) works well for a softer crumb, though bread flour can still be used for a chewier result.
- Whole Wheat Bread: Use whole wheat bread flour or a blend of whole wheat and white bread flour. Remember whole wheat absorbs more water.
- Rye Bread: Rye flour has low gluten potential. Often mixed with bread flour to provide structure. High percentages of rye will naturally result in denser bread.
Solution 5: Adjust Hydration Levels for Optimal Dough Consistency
Dough hydration is critical for achieving the desired texture. If your dough is too dry, it will be stiff, hard to work with, and result in dense bread. If it's too wet, it can be difficult to handle and might spread rather than rise upwards, though high hydration is key for very open crumb structures like ciabatta.
Learn to judge dough consistency by feel. It should be pliable and slightly tacky, but not stick excessively to your hands or the work surface after kneading. If your dough feels too dry while mixing or kneading, add water gradually, a tablespoon at a time, allowing it to be absorbed before adding more.
Tips for Adding Water Gradually to Achieve the Desired Dough Feel
- Start with the Recipe Amount: Always begin with the amount of water specified in the recipe.
- Assess Dough Feel: After the initial mix (autolyse or just combining ingredients), feel the dough. Is it stiff, dry, and shaggy? Or is it starting to come together?
- Add Water Incrementally: If the dough feels too dry and isn't coming together smoothly during kneading, add water one tablespoon at a time. Work the water in thoroughly before deciding if more is needed.
- Consider Flour Absorption: Remember that different flours, and even different brands of the same flour type, can absorb water differently. Environmental humidity can also play a small role.
- Visual and Tactile Cues: Look for the dough to become smoother and more elastic. It should eventually pull away cleanly from the sides of a mixing bowl. When kneading by hand, it should become less sticky and easier to handle as hydration and gluten develop.
Preventative Measures: Avoiding Dense Bread in the Future

Consistent baking practices are the best way to avoid dense bread. By focusing on a few key areas, you can significantly increase your chances of baking successful, airy loaves every time. These preventative measures build on the dense bread troubleshooting tips we've discussed, turning solutions into standard procedures.
Developing habits like accurate measurement, controlling dough temperature, and carefully following recipe instructions will help you avoid the common pitfalls that lead to dense results. Baking is a science as much as an art, and precision in these areas pays dividends.
Accurate Measurements: Ensuring Consistent Results Every Time
Using a kitchen scale to measure ingredients, especially flour and water, is the single most effective way to ensure consistency in your bread baking. As mentioned, volume measurements for flour can vary by over 20%, leading to significant hydration errors. A digital scale is relatively inexpensive and quickly pays for itself in saved ingredients and successful loaves.
For example, if a recipe calls for 500g of flour and 325g of water (65% hydration), using a scale guarantees you hit those precise ratios every time, regardless of how packed your flour is. This eliminates a major variable in dense bread troubleshooting.
Temperature Control: Maintaining Optimal Baking Conditions
Temperature affects yeast activity, fermentation speed, and gluten development. Yeast is most active in the 75-85°F (24-30°C) range. Maintaining a consistent dough temperature throughout the bulk fermentation and proofing stages is crucial. A dough thermometer can be helpful.
Aim for a final dough temperature after kneading in the target range (e.g., 75-80°F / 24-27°C). If your kitchen is cold, use warmer water or proof in a warm environment. If your kitchen is warm, use cooler water. Consistent temperature management helps ensure predictable rise times and prevents issues like under or over-proofing, reducing the need for dense bread troubleshooting.
Recipe Adherence: Following Instructions for Best Outcomes
While it's tempting to experiment, especially when starting out, following a well-tested recipe precisely is key to avoiding dense bread. Pay close attention to:
- Ingredient amounts and types: Use the specified flour, yeast type, and salt quantity. Salt controls yeast activity and strengthens gluten; too little or too much can cause problems.
- Kneading times/cues: Knead for the recommended duration or until the dough shows signs of proper development (e.g., passing the windowpane test).
- Proofing times/cues: Proof for the recommended time or until the dough passes the poke test, adjusting for your kitchen temperature.
- Baking temperature and time: Ensure your oven is preheated correctly (an oven thermometer is useful) and bake for the specified time until the internal temperature reaches the recommended level (e.g., 200-210°F / 93-99°C for most lean breads).
Ignoring these details can easily lead to a dense loaf. Treat the recipe as a guide and use your senses (sight, touch, smell) along with tests (windowpane, poke) to confirm readiness at each stage.
Conclusion: Baking Lighter Bread is Within Reach
Encountering dense bread is a common experience for bakers, but it's a hurdle that can definitely be overcome. By systematically examining potential causes – from yeast activity and gluten development to proofing, flour choice, and hydration – you can pinpoint what went wrong and apply the appropriate dense bread troubleshooting tips.
Remember that successful bread baking is about understanding the process and paying attention to the dough at each stage. With practice and careful observation, you'll learn to recognize the signs of a healthy, properly developing dough. Don't be discouraged by a few heavy loaves; each one is a learning opportunity. Embrace these dense bread troubleshooting tips, refine your technique, and you'll soon be consistently baking the light, airy bread you've been dreaming of. Happy baking!
Frequently Asked Questions
Why is my bread coming out so dense even when I follow the recipe?
Dense bread is often the result of under-proofing or not enough gluten development. Make sure to give your dough ample time to rise and knead it properly.
What are some common mistakes that lead to dense bread?
Common errors include using expired yeast, incorrect measurements of ingredients, and not kneading the dough enough. Double-check your ingredients and technique.
How can I improve the texture of my bread to make it lighter and less dense?
Focus on developing gluten through proper kneading and ensuring the dough rises adequately. Also, consider using a higher hydration recipe.
My bread rises initially, but then collapses and becomes dense during baking. What's happening?
This could be due to over-proofing, which weakens the gluten structure. Try reducing the proofing time slightly in your next bake.
What ingredients can I add to my bread dough to help prevent it from becoming dense?
Adding a small amount of vital wheat gluten can help strengthen the dough. Also, incorporating ingredients like potatoes can improve moisture and texture.
Final Reflection: The Unexpected Joys of a Perfectly Light Loaf
The quest for the perfect loaf—light, airy, and utterly delicious—is a journey many home bakers undertake, often encountering the frustrating reality of dense bread. This seemingly simple task reveals a surprising depth of knowledge, from understanding yeast activity to mastering hydration levels. The seemingly minor details, explored throughout this article, hold the key to unlocking the secrets of a truly exceptional bake.
The impact of a perfectly risen loaf extends far beyond the simple satisfaction of a successful bake. It speaks to a connection with tradition, a mastery of a fundamental skill, and the joy of creating something beautiful and delicious from humble ingredients. The process itself is meditative, a quiet act of creation that allows for reflection and mindful engagement. Bread is the staff of life,
they say, and the truth of that statement resonates deeply when you understand the effort and care that goes into crafting each loaf.
Now, consider your own baking journey. What have you learned from this exploration of dense bread troubleshooting? Perhaps you've discovered a new appreciation for the science behind baking, or maybe you've found a renewed sense of satisfaction in the process itself. I encourage you to experiment, to embrace the occasional failure as a learning opportunity, and to continue striving for that perfect, light loaf. The journey, with all its delightful imperfections, is as rewarding as the destination.
Unlock the Secret to Light & Airy Bread!
Thanks for taking the time to delve into the world of fluffy bread! We hope you now feel empowered to tackle those pesky density issues. Ready to put your new knowledge into practice?
- Bake your perfect loaf today! Experiment with a new recipe, focusing on the techniques we discussed, and see the amazing difference. Remember, even small adjustments can make a big impact.
- Share your baking journey! Show us your bread creations – tag us on social media and inspire others to achieve baking bliss.
- Consider exploring different flours – did you know rye flour can add unique flavor and texture?
Ready to rise to the occasion and bake your best bread yet?