
Kneading Dough by Hand vs. Using a Mixer: What's Best for You?

Welcome to BakeWithEase, your trusted companion in the delightful world of baking! Ever wondered if the secret to truly exceptional bread lies in the human touch? In this article, we delve into the surprisingly profound hand kneading dough benefits, exploring how this traditional technique can elevate your baking skills and unlock flavors you never knew existed. Get ready to discover whether embracing the art of hand kneading is the key to your next baking masterpiece. Let's get started!
- Introduction: The Baker's Dilemma - Hand Kneading vs. Stand Mixer
- Understanding Hand Kneading Dough Benefits for Beginners
- The Convenience of Using a Stand Mixer for Dough
- Hand Kneading Dough Benefits: A Detailed Comparison
- Mastering Hand Kneading Techniques: A Step-by-Step Guide
- Optimizing Stand Mixer Dough Kneading: A Guide to Success
- Dough Types: Which Method Works Best?
- Hand Kneading Dough Benefits: Addressing Common Concerns
- Choosing the Right Method for Your Needs: A Personalized Approach
- Conclusion: Embrace Both Techniques and Bake With Ease
-
Frequently Asked Questions
- What are the main hand kneading dough benefits highlighted on BakeWithEase.com?
- Is hand kneading dough better for all types of bread, according to BakeWithEase?
- Does BakeWithEase provide tips for making hand kneading easier?
- What are the advantages of using a mixer for kneading dough, as discussed on BakeWithEase.com?
- Can I find step-by-step guides for both hand kneading and using a mixer on BakeWithEase?
- Final Reflection: The Art and Science of Kneading
- Unleash Your Inner Baker: Take Your Dough to the Next Level!
Introduction: The Baker's Dilemma - Hand Kneading vs. Stand Mixer
Embarking on your baking journey often brings you face-to-face with a fundamental question: how do you bring your dough together and develop that all-important structure? For centuries, bakers relied solely on their hands, a rhythmic process of pushing, folding, and stretching. Today, the modern kitchen frequently features a powerful ally: the stand mixer, equipped with a sturdy dough hook designed to take on the heavy lifting. Both methods have their dedicated followers and offer unique advantages, making the choice not just about convenience, but about the experience and the final result you desire.
Deciding between hand kneading dough and using a stand mixer can feel like a significant choice, especially when you're just starting out. Each method impacts not only the effort and time involved but also how you connect with your ingredients and understand the dough development process. As a beginner, understanding these differences is key to choosing the technique that best fits your comfort level, your recipe, and your baking goals. Let's explore the nuances of both approaches to help you make an informed decision for your delicious creations.
Understanding Hand Kneading Dough Benefits for Beginners
The Traditional Art of Kneading by Hand
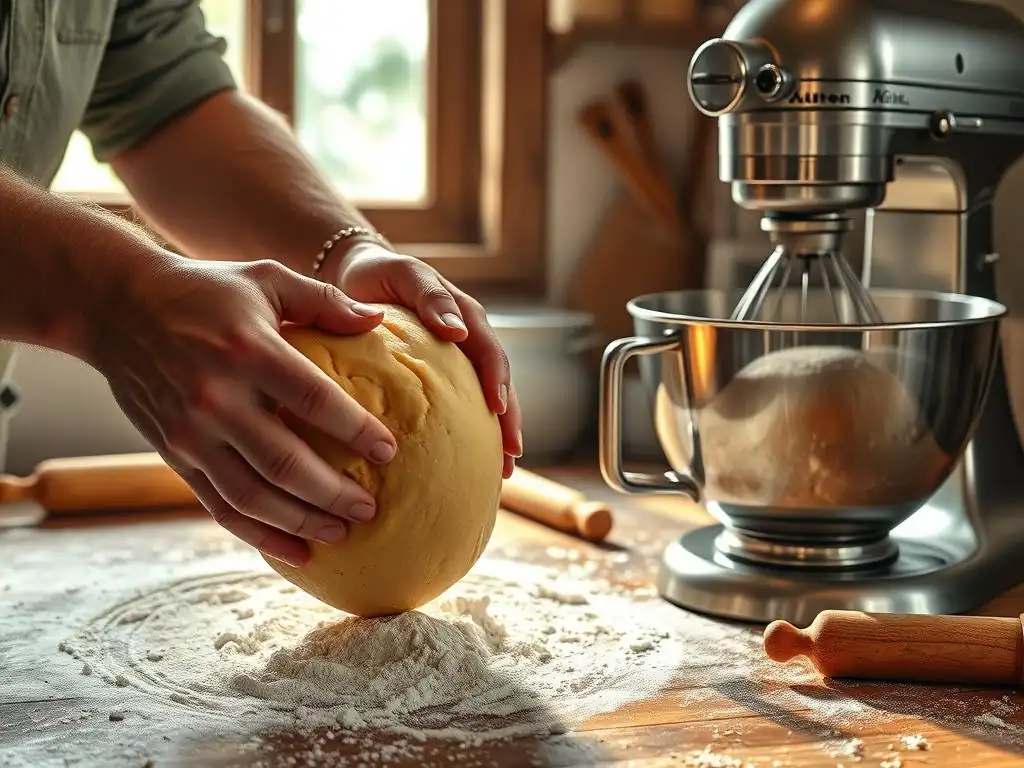
Kneading dough by hand is one of the oldest culinary techniques known, a practice that connects modern bakers to generations past. It involves working the dough manually on a surface, typically by repeatedly folding it over on itself and pushing it down and away with the heels of your hands.
This physical process develops the gluten network within the dough, which is essential for creating structure, elasticity, and ultimately, the airy texture in baked goods like bread. It's a tactile, intuitive process where you learn to feel the dough change as it becomes smoother, more elastic, and less sticky over time.
This traditional method offers a direct connection to your ingredients. You feel the initial shagginess of the mixed dough, the gradual transformation as gluten strands form, and the moment it reaches that perfect smooth, resilient state. While it requires physical effort and practice to master the technique, the benefits of hand kneading dough include a deeper understanding of dough consistency and development.
For instance, a basic white bread dough might require anywhere from 10 to 15 minutes of consistent hand kneading to reach optimal development, depending on hydration levels and flour type. This physical engagement provides immediate feedback that a machine cannot replicate.
Why Choose Hand Kneading? Exploring the Advantages
Choosing to knead by hand comes with several distinct advantages, particularly for those new to baking. One of the primary hand kneading dough benefits is the sensory feedback it provides. You can feel the dough's temperature, its stickiness, and its resistance as the gluten develops.
This tactile learning helps you understand what properly kneaded dough feels like, a skill that is invaluable for troubleshooting future baking projects. For example, if a dough is too sticky, you feel it instantly and can decide whether to add a tiny bit more flour, unlike a mixer where you might not notice until it's too late.
Beyond the educational aspect, hand kneading requires no special equipment other than your hands and a surface, making it highly accessible. This makes it an excellent starting point for beginners who aren't ready to invest in a stand mixer. Furthermore, many bakers find the rhythmic motion of hand kneading to be quite therapeutic and meditative.
Anecdotal evidence from baking communities suggests that the focused, repetitive action can be a stress reliever. While it might take slightly longer than a mixer, say an extra 5-10 minutes for a standard loaf, the physical activity and the connection to the process are significant hand kneading dough benefits for many.
Developing Gluten by Hand: A Tactile Experience
Developing gluten is the core purpose of kneading, and doing it by hand offers a unique tactile experience. Gluten is formed when two proteins in flour, glutenin and gliadin, are hydrated and agitated. This agitation causes them to link together, creating an elastic network that traps gases produced by yeast or other leaveners, allowing the dough to rise and hold its shape. When you knead by hand, you are physically aligning and stretching these protein strands.
As you knead, you'll notice the dough changing texture. Initially, it might be shaggy and sticky. With continued work, it will become smoother, more elastic, and less prone to sticking to your hands and the counter. You can test for proper gluten development using the "windowpane test": gently stretch a small piece of dough.
If you can stretch it thinly enough to see light through it without it tearing, the gluten is well-developed. This hands-on approach provides immediate, tangible proof of your progress and is a fundamental hand kneading dough benefit for learning bakers. Achieving this perfect windowpane often takes about 12-15 minutes of consistent hand work for a standard bread recipe.
The Convenience of Using a Stand Mixer for Dough
Efficiency and Speed: The Stand Mixer's Appeal
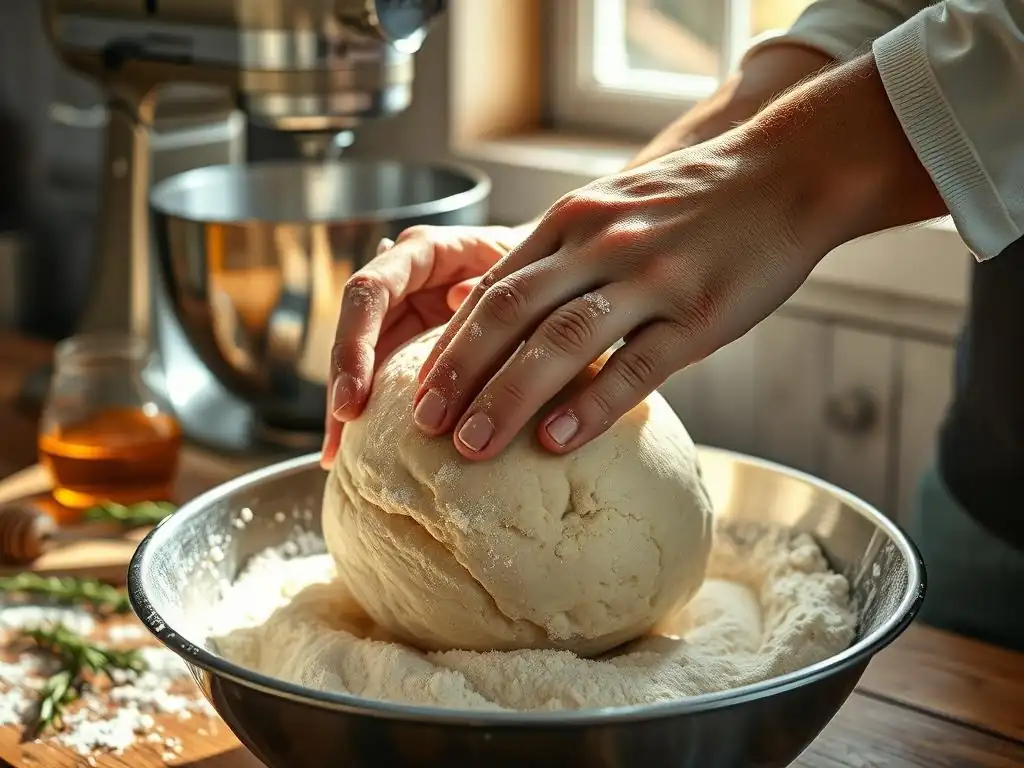
One of the most compelling reasons to use a stand mixer for kneading dough is its sheer efficiency and speed. A stand mixer, particularly a robust one with a dough hook attachment, can knead dough significantly faster and with less physical effort than kneading by hand. For instance, a typical bread dough that might take 10-15 minutes of vigorous hand kneading can often be fully developed in a stand mixer in just 6-8 minutes. This time-saving aspect is a major appeal, especially when baking large batches or when you have limited time.
The consistent speed and action of a stand mixer also ensure uniform kneading throughout the dough. Unlike hand kneading, where consistency might vary depending on your technique and fatigue, a mixer provides a steady, powerful motion. This leads to reliable gluten development batch after batch. For busy individuals or those baking frequently, the ability to simply set the mixer and let it work while you prepare other ingredients or clean up is an undeniable convenience. It transforms a physically demanding task into a relatively hands-off one.
When is a Stand Mixer the Best Choice for Dough Kneading?
A stand mixer is often the best choice in several scenarios. Firstly, for high-hydration doughs (those with a high ratio of water to flour), which can be extremely sticky and difficult to handle by hand, a mixer is invaluable. Examples include ciabatta or no-knead doughs that benefit from initial machine mixing. Secondly, when preparing large quantities of dough, such as for multiple loaves of bread or a big batch of pizza dough for a party, a stand mixer dramatically reduces the physical strain. Kneading several pounds of dough by hand is a significant workout!
Furthermore, for individuals who have physical limitations, such as arthritis, wrist pain, or limited strength, a stand mixer makes baking much more accessible. It allows them to enjoy the process and results of baking without the pain or difficulty associated with prolonged hand kneading. While hand kneading dough benefits include physical activity, the mixer offers an alternative that opens up baking to a wider range of people. For complex doughs requiring precise timing and minimal handling, like brioche or challah which incorporate a lot of butter and eggs, the mixer can often achieve the desired texture more consistently.
Stand Mixer Dough Kneading: Achieving Consistency
Consistency is a key advantage when using a stand mixer for kneading. Once you determine the optimal mixing time and speed for a specific recipe and mixer model, you can reliably replicate those results every time. This is particularly helpful for developing consistent gluten structure across batches, leading to predictable rise and texture in your final baked goods. The dough hook continuously pulls, stretches, and folds the dough against the sides of the bowl, ensuring that the entire mass is worked evenly.
To achieve this consistency, it's important to follow recipe guidelines for mixer kneading times and speeds. Over-kneading is a risk with a mixer, as the process is so efficient. Dough that is over-kneaded can become tough and lose its desirable texture. However, with practice and attention to visual cues (the dough should look smooth, elastic, and pull away from the sides of the bowl) and perhaps a quick windowpane test, consistent results are highly achievable. Using a mixer allows for precise control over kneading time, which is difficult to gauge perfectly by hand every time.
Hand Kneading Dough Benefits: A Detailed Comparison
Evaluating the Pros and Cons of Hand Kneading
Hand kneading dough offers a unique set of benefits and drawbacks. Pros:
- Sensory Experience: You feel the dough's texture, temperature, and development directly.
- Control: You have immediate control over the kneading intensity and can adjust based on feel.
- Accessibility: Requires no special equipment, making it cost-effective and possible anywhere with a surface.
- Skill Development: Builds intuition about dough consistency and gluten development.
- Physical Activity: Provides a moderate workout for arms and shoulders.
- Therapeutic: Many find the rhythmic process relaxing.
- Hand kneading dough benefits learning bakers by providing direct tactile feedback.
Cons:
- Time Consuming: Generally takes longer than using a mixer (e.g., 10-15+ minutes vs. 6-8 minutes).
- Physically Demanding: Requires significant effort, which can be tiring, especially for large batches or stiff doughs.
- Inconsistency: Results can vary depending on your energy level and technique on any given day.
- Messier: Can be stickier and messier, especially with high-hydration doughs.
Evaluating the Pros and Cons of Using a Stand Mixer
Using a stand mixer provides a different set of advantages and disadvantages when it comes to kneading. Pros:
- Speed: Kneads dough much faster than by hand.
- Efficiency: Requires minimal physical effort from the baker.
- Consistency: Provides uniform kneading for reliable results.
- Handles Difficult Doughs: Excellent for stiff or very wet/sticky doughs.
- Larger Batches: Easily handles bigger quantities of dough.
- Hands-Off Time: Allows you to multitask while the mixer works.
Cons:
- Cost: Stand mixers are a significant financial investment (basic models ~$200-300, higher end ~$400-600+).
- Takes Up Space: Stand mixers are bulky appliances that require counter or storage space.
- Risk of Over-Kneading: Easy to over-knead if not monitored, potentially resulting in tough dough.
- Less Tactile Feedback: You lose the direct feel of the dough's development.
- Can Overheat: Some mixers can overheat with very stiff or large doughs.
- Noise: Mixers can be quite noisy during operation.
Time Investment: Hand Kneading vs. Mixer Kneading
The time invested in kneading is a significant factor for many bakers. For a standard loaf of yeasted bread made with about 3-4 cups of flour, hand kneading typically requires between 10 and 15 minutes of continuous, active work. This time can vary slightly depending on the dough's hydration, the type of flour used, and the intensity of your kneading technique. Achieving sufficient gluten development is key, and this physical process simply takes time.
In contrast, the same dough mixed in a stand mixer with a dough hook usually reaches optimal gluten development in about 6 to 8 minutes on medium speed (typically speed 2 or 3 on most mixers). This represents a time saving of roughly 40-60% compared to hand kneading for many common bread doughs. While the mixer is working, you are free to do other tasks, making the overall process feel much faster and more efficient, even if the actual kneading time is the only part being compared.
Effort and Energy: The Physical Demands
Hand kneading is a physically demanding task. It requires using the weight of your body and the strength in your arms to push, fold, and stretch the dough repeatedly. For a 10-15 minute session, this can be a considerable workout, especially if you're working with a stiff dough or a large quantity. It can lead to fatigue in your hands, wrists, and arms. The physical effort is part of the hand kneading dough benefits for those looking for an active role, but it can be a barrier for others.
A stand mixer, on the other hand, requires very little physical effort from the baker once the ingredients are in the bowl. The machine does all the hard work. This makes it ideal for individuals who cannot perform strenuous physical tasks or for recipes that require very long kneading times (though most standard doughs are done in under 10 minutes in a mixer). While you still need to monitor the mixer to prevent over-kneading, the process is largely hands-off, freeing up your energy for other steps in the baking process.
Cost Considerations: Mixer Investment vs. Hand Kneading
The cost difference between hand kneading and using a stand mixer is substantial. Hand kneading requires virtually no financial investment beyond the cost of ingredients and a clean surface (which could be your countertop). You might opt for a dough scraper (a few dollars) or a kneading mat (around $10-30), but these are optional aids, not necessities. The primary "cost" of hand kneading is your time and physical energy.
A stand mixer, however, represents a significant upfront investment. Basic models from reputable brands might start around $200-$300, while more powerful and higher-capacity mixers can easily cost $400-$600 or even more. This makes a stand mixer a considerable purchase that might not be justifiable for someone who only bakes occasionally or is just trying it out. For dedicated bakers who make dough frequently, the cost per use decreases over time, making the investment worthwhile for the convenience and efficiency it provides.
Mastering Hand Kneading Techniques: A Step-by-Step Guide
Preparing Your Workspace for Hand Kneading
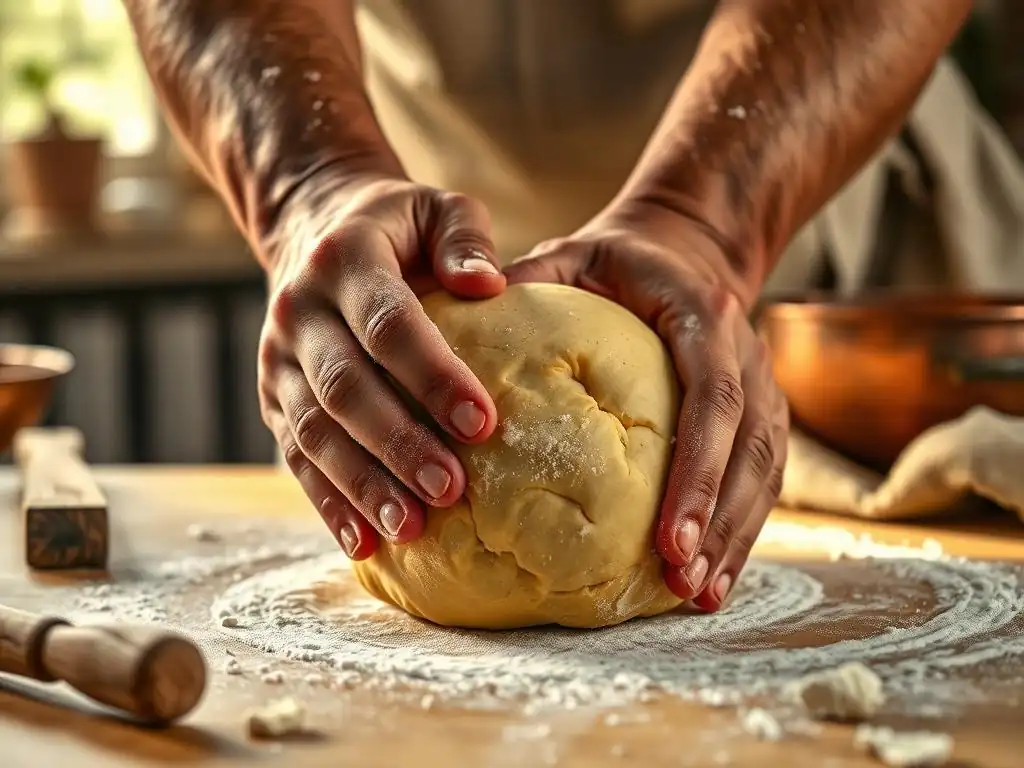
Before you begin hand kneading, setting up your workspace properly will make the process much smoother and less messy. First, choose a clean, sturdy surface. A kitchen countertop made of granite, marble, or laminate works well. Some people prefer a large wooden board or a silicone kneading mat, which can help with sticking and provide a defined area. Lightly flour your surface – just enough to prevent sticking, but not so much that you dry out the dough. Have a little extra flour nearby in case the dough is particularly sticky, but use it sparingly.
Ensure you have your mixed dough ready in a bowl. It should have just come together into a shaggy mass. Have a bench scraper or a stiff spatula handy; this tool is indispensable for scraping dough off the counter and your hands, and for dividing dough later.
Make sure your hands are clean and dry. Some bakers find it helpful to lightly oil their hands or keep them slightly floured, though the latter can add too much flour to the dough if not careful. A well-prepared space minimizes frustration and allows you to focus on the feel of the dough, enhancing the hand kneading dough benefits by making the experience more pleasant.
The Folding and Pressing Technique
The most common and effective technique for hand kneading involves a simple fold-and-push motion. Start by turning the shaggy dough out onto your lightly floured surface. Gather it into a rough ball. Using the heel of one hand (or both hands), push the dough down and away from you, stretching it slightly.
Next, fold the stretched portion of the dough back over towards you. Give the dough a quarter turn. Repeat the process: push, fold, turn. Continue this rhythmic motion. Initially, the dough will be sticky and tear easily. As you continue to push, fold, and turn, you'll feel the dough become smoother, more elastic, and less sticky.
The gluten strands are developing and aligning with each fold and push. Maintain a steady rhythm and pace. Don't add too much flour if the dough is sticky; often, continued kneading will work the stickiness out as the gluten develops. Aim for a consistent motion for 10-15 minutes, or until the dough passes the windowpane test. This methodical approach maximizes the hand kneading dough benefits by efficiently developing gluten.
Achieving the Perfect Dough Consistency by Hand
Knowing when your dough is perfectly kneaded by hand comes down to feel and a visual test. Initially, the dough will be rough, possibly sticky, and will tear easily when stretched. As you knead, you'll notice it becoming smoother, more elastic, and less sticky. It should start to feel supple and resilient. When you poke it gently with your finger, the indentation should slowly spring back. This resilience indicates that the gluten network is well-developed and has elasticity.
The most reliable test is the windowpane test, as mentioned earlier. Break off a small piece of dough, about the size of a golf ball. Gently stretch it between your fingers and thumbs, rotating it as you stretch.
If you can stretch it into a thin membrane that you can see light through without it tearing, it's ready. If it tears quickly, it needs more kneading. This ability to feel and see the dough change is a core hand kneading dough benefit, teaching you to truly understand the stages of dough development in a way that watching a mixer cannot.
Tips for Efficient Hand Kneading
To make hand kneading as efficient and enjoyable as possible, keep these tips in mind. Firstly, don't use too much flour on your surface or hands. Excess flour can make the dough dry and heavy. Only add a tiny bit if the dough is truly unmanageably sticky, or try scraping and continuing to knead first. Secondly, use the heel of your hand and your body weight to do the pushing; don't rely solely on arm strength. Lean into it slightly.
Maintain a consistent rhythm – push, fold, turn. This steady action is more effective than sporadic bursts of energy. If your dough is very sticky, try letting it rest for 5-10 minutes after the initial mixing before turning it out to knead; this brief rest allows the flour to fully hydrate, often making the dough easier to handle.
Lastly, trust your instincts and the feel of the dough. The hand kneading dough benefits are amplified when you learn to read the dough's readiness through touch rather than just watching a clock. Practice makes perfect, and you'll become more efficient with each batch.
Optimizing Stand Mixer Dough Kneading: A Guide to Success
Choosing the Right Dough Hook
For kneading dough in a stand mixer, you need the correct attachment: the dough hook. Stand mixers typically come with several attachments (whisk, paddle, dough hook), and using the wrong one for kneading can damage your mixer or result in poorly developed dough. Dough hooks are designed specifically for the heavy work of kneading dense doughs. They are usually spiral-shaped or C-shaped, depending on the mixer brand and model.
Ensure your dough hook is securely attached to the mixer head before you begin. If you have different sizes or types of dough hooks for your specific mixer model (less common for home mixers, but possible), refer to your mixer's manual to ensure you're using the appropriate one for the amount of dough you're making. Using the correct dough hook is the first step to optimizing your stand mixer's performance for kneading and achieving consistent, well-developed dough.
Mixer Speed Settings for Different Dough Types
Using the correct speed setting on your stand mixer is crucial for effective and safe dough kneading. For most bread doughs, it's recommended to start on a low speed (often speed 1 or 2) for the initial mixing phase to bring the ingredients together without flour flying everywhere. Once the dough has formed a shaggy mass, increase the speed to a medium-low setting (typically speed 2 or 3 on most KitchenAid or similar mixers) for the main kneading process.
Avoid using high speeds for kneading dough. High speeds can overwork the dough quickly, generate excessive heat which can negatively impact yeast activity and gluten structure, and put undue strain on the mixer's motor, potentially shortening its lifespan. Stiffer doughs might require a slightly lower speed than wetter doughs. Always refer to your mixer's manual for specific speed recommendations for dough, but generally, speeds 2 or 3 are the sweet spot for efficient and safe kneading without the benefits of hand kneading dough's physical connection.
Preventing Overheating and Over-Kneading
Preventing overheating and over-kneading are important considerations when using a stand mixer. Overheating can occur if the mixer is working too hard for too long, especially with large or very stiff doughs, or if using too high a speed. If your mixer feels hot to the touch or smells like burning motor, turn it off immediately and let it cool. Using the recommended speed and not exceeding the mixer's capacity (check your manual for maximum flour/dough weight) helps prevent this.
Over-kneading is another risk. While hand kneading gives you immediate tactile feedback to stop, a mixer keeps going until you turn it off. Over-kneaded dough can become tight, tough, and lose its ability to rise properly. Watch the dough as it kneads; it should become smooth, elastic, and pull away cleanly from the sides of the bowl.
It will also make a slapping sound against the bowl. Test a small piece with the windowpane test after the recommended kneading time (e.g., 6-8 minutes). If it passes, stop kneading. Don't just rely on time; visual and tactile cues (checking consistency) are still important, though different than the direct feel you get with the benefits of hand kneading dough.
Tips for Even Mixing and Gluten Development
To ensure even mixing and optimal gluten development in your stand mixer, start by adding wet ingredients to the bowl first, followed by dry ingredients. This helps prevent dry pockets of flour at the bottom. During the initial mixing phase on low speed, you may need to stop the mixer occasionally and scrape down the sides and bottom of the bowl with a spatula to ensure all ingredients are incorporated.
Once you increase the speed for kneading, let the mixer run uninterrupted for the recommended time, monitoring the dough's consistency. If the dough is climbing up the dough hook excessively, you might have too much dough for your mixer, or the dough is very sticky. You can try scraping it down or briefly stopping the mixer.
Ensuring the dough is centered in the bowl and freely moving around the hook helps achieve even development. While you don't get the hand kneading dough benefits of direct touch, observing the dough's behavior in the mixer teaches you different visual cues about its development.
Dough Types: Which Method Works Best?
Bread Dough: Hand Kneading vs. Mixer
For many types of bread dough, both hand kneading and using a mixer are viable options, and the best choice often comes down to personal preference, time, and physical ability. Basic lean bread doughs (flour, water, yeast, salt) like simple white bread, pizza dough, or rustic loaves can be effectively kneaded using either method. Hand kneading provides that satisfying tactile experience and control, while a mixer offers speed and consistency, especially for larger batches.
Enriched bread doughs, which contain ingredients like butter, eggs, milk, and sugar (e.g., brioche, challah, dinner rolls), often benefit from the power of a stand mixer. These doughs can be quite soft and sticky, particularly during the phase where butter is incorporated, making them challenging and messy to knead by hand. A stand mixer handles the incorporation of fats and liquids into these rich doughs with ease, developing the necessary gluten structure efficiently. While you can achieve the benefits of hand kneading dough with enriched doughs, it requires more skill and patience.
Pizza Dough: The Importance of Hand Feel
Pizza dough requires a good amount of gluten development to become stretchy and manageable for shaping. Both hand kneading and mixer kneading work well for pizza dough. Many home bakers find that kneading pizza dough by hand is a rewarding process. The benefits of hand kneading dough for pizza include developing a feel for the dough's elasticity, which is crucial for stretching it into a thin crust without tearing. Kneading by hand also allows you to incorporate any desired add-ins like herbs or garlic more gently if preferred.
Alternatively, a stand mixer can quickly bring pizza dough together and develop the gluten efficiently, usually in about 5-7 minutes. This is great when you're short on time or making multiple pizzas. However, even if you use a mixer, many bakers still recommend a brief period of hand shaping or stretching the dough after it has rested. This final handling step helps relax the gluten and gives you a feel for the dough's readiness, combining some of the hand kneading dough benefits with the mixer's efficiency.
Pastry Dough: Handling Delicate Textures
Pastry doughs, such as pie crust, biscuits, or scones, are fundamentally different from bread doughs in that they require minimal gluten development. In fact, overworking pastry dough and developing too much gluten will result in tough, rather than tender, baked goods. Therefore, kneading in the traditional sense is generally avoided for these types of doughs.
Mixing pastry dough is best done by hand or using a stand mixer with the paddle attachment, not the dough hook. The goal is just to bring the ingredients together until they are just combined, often leaving visible pieces of fat (like butter), which contribute to flakiness. Over-mixing is a significant risk, easily done in a powerful stand mixer if you're not careful. While there are no hand kneading dough benefits in the traditional sense here, gentle mixing by hand gives you the most control over ensuring the dough is just combined.
Cookie dough is another type of dough that does not require kneading for gluten development. Like pastry dough, excessive mixing can lead to tougher cookies. Most cookie recipes involve creaming butter and sugar, then mixing in eggs and vanilla, followed by the dry ingredients until just combined.
This mixing process is typically done using a stand mixer with the paddle attachment or with a hand mixer. For many cookie recipes, especially those that start with creaming, a mixer is more efficient than hand mixing with a spoon, which can be quite tiring. However, for simple drop cookies or recipes where you're adding delicate ingredients like chocolate chips or nuts, finishing the mixing by hand with a spatula ensures you don't overmix and helps distribute add-ins evenly. So, while you don't gain hand kneading dough benefits with cookies, hand mixing for the final stage is often preferred.
Hand Kneading Dough Benefits: Addressing Common Concerns
Is Hand Kneading Too Difficult?
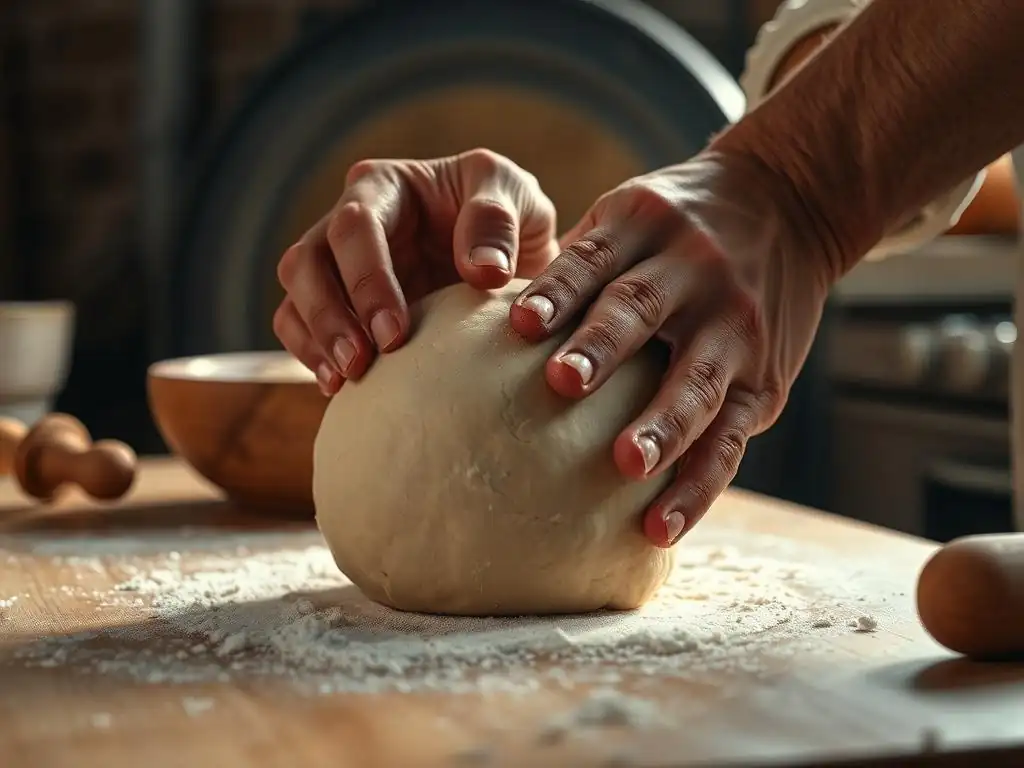
Many beginners worry that hand kneading is too difficult or requires a lot of strength. While it does require physical effort, it's not inherently difficult, and it becomes easier with practice. Think of it as a learned skill, much like riding a bike or tying your shoes. The motion of pushing, folding, and turning is repetitive and becomes more fluid over time. You don't need to be incredibly strong; using your body weight effectively is more important than brute force.
Starting with a smaller batch of dough (e.g., using 2-3 cups of flour) can make the process less daunting. Watch videos of experienced bakers hand kneading to get a visual sense of the technique and rhythm. The initial stickiness can be frustrating, but understanding that it's a normal part of the process helps. The benefits of hand kneading dough in learning to feel the dough's development outweigh the initial learning curve for many aspiring bakers. It's a skill well worth acquiring.
Does Hand Kneading Take Too Long?
Compared to the speed of a stand mixer, hand kneading does take longer. A typical bread dough might take 10-15 minutes of continuous hand work, whereas a mixer can often do it in 6-8 minutes. For some, this time difference is significant and makes the mixer the preferred choice, especially on busy days. However, "too long" is subjective and depends on your perspective and schedule.
Consider the time difference in the context of the entire baking process, which includes mixing, kneading, rising, shaping, and baking. The extra 5-10 minutes spent hand kneading might be a small fraction of the total time (which could be 3-4 hours or more for a yeasted bread). For many bakers, the meditative aspect and the connection to the dough provided by hand kneading make the extra time feel well spent. The benefits of hand kneading dough extend beyond just efficiency; they encompass the enjoyment of the process itself.
Can You Achieve the Same Results as a Mixer?
Absolutely! You can achieve results that are just as good, if not better in the opinion of some purists, by kneading dough by hand compared to using a mixer. The goal of kneading, regardless of the method, is to develop the gluten network. Both hands and mixers are capable of doing this effectively when the technique is applied correctly. Many professional bakers still prefer to hand knead certain doughs because it gives them a level of control and feel that a machine cannot replicate.
While a mixer offers consistency in terms of speed and duration, the benefits of hand kneading dough include the ability to constantly adjust your technique based on how the dough feels in that moment – whether it's slightly too wet, too dry, or needs more work in a specific area. This responsiveness can lead to exceptionally well-developed dough. The final quality of your baked goods depends more on proper gluten development and fermentation than solely on the method used for kneading.
Choosing the Right Method for Your Needs: A Personalized Approach
Considering Your Baking Experience
Your current baking experience level is a good starting point for deciding between hand kneading and a mixer. For absolute beginners, hand kneading can be incredibly educational. It teaches you the fundamental feel of dough as it develops, providing a tactile understanding of gluten formation that is hard to gain from simply watching a mixer. The benefits of hand kneading dough for learning are significant; it's a foundational skill.
More experienced bakers might gravitate towards a mixer for efficiency, especially if they bake frequently or in larger quantities. However, many experienced bakers still enjoy and choose to hand knead for certain recipes or when they want to feel more connected to the process. If you're comfortable with the basics, incorporating a mixer can be a natural next step to expand your capabilities, particularly with challenging doughs.
Evaluating Your Time Constraints
Time is a practical factor. If you consistently find yourself rushed when baking or want to bake larger batches, a stand mixer offers undeniable speed and efficiency benefits. Reducing kneading time from 15 minutes to 7 minutes can make a difference in fitting baking into a busy schedule.
If you have more flexible time or view baking as a leisurely activity, the extra minutes spent hand kneading might not feel like a constraint at all. For some, the process of hand kneading is part of the relaxation and enjoyment of baking. Consider your typical baking routine and how much time you realistically have to dedicate to the kneading step when weighing the benefits of hand kneading dough against the speed of a mixer.
Identifying Your Desired Dough Characteristics
Different recipes and desired final products might subtly influence the best kneading method. For very airy, open-crumb breads like ciabatta, a mixer is often preferred because it handles the extremely wet dough more easily and can develop a very strong gluten network needed to support the large air pockets. For doughs where a slightly denser, chewier texture is desired, or where minimal handling is key (like some rustic loaves), hand kneading might be favored by some bakers.
Ultimately, both methods can produce excellent results across a wide range of doughs. Consider what you want from your dough and your baking experience. Do you value the physical connection and intuitive feel that are among the primary hand kneading dough benefits? Or do you prioritize speed, consistency, and ease with difficult doughs that a mixer provides? Understanding the characteristics of the dough you're working with can help guide your choice.
Conclusion: Embrace Both Techniques and Bake With Ease
Ultimately, the choice between hand kneading and using a stand mixer isn't an either/or situation for many bakers. Both techniques are valuable skills, and embracing both can expand your baking horizons. Hand kneading offers a fundamental connection to your dough, teaching you its feel and behavior in a way that a machine cannot. The benefits of hand kneading dough include developing intuition, building skill, and enjoying a potentially therapeutic process, all while being incredibly accessible.
A stand mixer, conversely, provides unparalleled efficiency, speed, and consistency, making it ideal for larger batches, challenging doughs, or when time and physical effort are concerns. As you continue your baking journey with BakeWithEase, we encourage you to try both methods. Experiment with a simple bread recipe, kneading one batch by hand and another in a mixer.
Observe the differences in the process and the dough. Discover which method you enjoy more for different types of doughs and different baking occasions. By understanding and utilizing both hand kneading and mixer kneading, you can choose the best approach for any recipe, bake with greater ease, and achieve wonderful results every time.
Frequently Asked Questions
What are the main hand kneading dough benefits highlighted on BakeWithEase.com?
Hand kneading offers greater control over dough consistency and allows you to develop a feel for the dough, leading to better baking outcomes. It's also a more mindful and therapeutic process.
Is hand kneading dough better for all types of bread, according to BakeWithEase?
No, BakeWithEase suggests that while hand kneading is great for some breads, others like high-hydration doughs or those requiring extensive gluten development may benefit more from a stand mixer.
Does BakeWithEase provide tips for making hand kneading easier?
Yes, BakeWithEase offers tips such as using a well-floured surface, employing the correct kneading technique (push, fold, turn), and taking short breaks as needed to prevent fatigue.
What are the advantages of using a mixer for kneading dough, as discussed on BakeWithEase.com?
Mixers offer consistent kneading and are ideal for large batches or doughs requiring extended kneading times. They also free up your hands for other tasks.
Can I find step-by-step guides for both hand kneading and using a mixer on BakeWithEase?
Absolutely! BakeWithEase.com provides detailed step-by-step guides for both methods, ensuring you can choose the best approach based on your recipe and preference, with easy-to-find ingredients.
Final Reflection: The Art and Science of Kneading
The satisfying heft of dough in your hands, the rhythmic motion, the subtle changes in texture—these are experiences increasingly lost in our fast-paced world, yet they hold surprising benefits for both the baker and the bread itself. Hand kneading, while seemingly laborious, offers a connection to a time-honored tradition and a depth of understanding that a machine simply cannot replicate. The subtle feedback your hands provide allows for a level of control and intuition that elevates the baking process beyond mere mechanics.
The shift towards convenience has undeniably impacted our relationship with food preparation. We've traded the tactile experience of kneading for the efficiency of a machine, often overlooking the therapeutic and skill-building aspects of the process. The hands are the instruments of our intellect.
– Francis Bacon. This quote resonates deeply, as the act of kneading isn't just about manipulating dough; it's about engaging our senses and fostering a mindful connection with the ingredients and the process itself. The subtle nuances in texture, the warmth of the dough, the gradual development of gluten—these are all elements lost when relying solely on a machine.
Consider this your invitation to rediscover the joy of hand kneading. Don't be intimidated by the perceived effort; embrace it as an opportunity to slow down, connect with your food, and develop a deeper appreciation for the craft of baking. Even if you primarily use a mixer, try hand-kneading a small batch occasionally. Feel the dough, notice the changes, and savor the satisfaction of creating something delicious with your own two hands. The benefits extend far beyond the resulting loaf; they nourish the soul as well.
Unleash Your Inner Baker: Take Your Dough to the Next Level!
Thanks for taking the time to explore the world of dough-making with us! We hope you now feel more confident in choosing the right method for your baking needs. Ready to put your new knowledge into practice?
- Dive into your next baking project: Choose your favorite recipe and try kneading by hand or using a mixer based on what you learned. Pay close attention to the dough's texture and consistency—you'll be surprised by the difference!
- Share your baking journey: Post a picture of your perfectly kneaded dough (or your hilarious dough-kneading mishap!) on social media and tag us! Let's inspire each other.
- Explore our other articles: Discover more baking secrets and techniques on our website. We have a wealth of information to help you become a baking pro!
What unique texture or flavor did you discover by choosing a specific dough-making method? Let us know in the comments below!