
Achieve an Open, Irregular Crumb in Your Homemade Baguettes

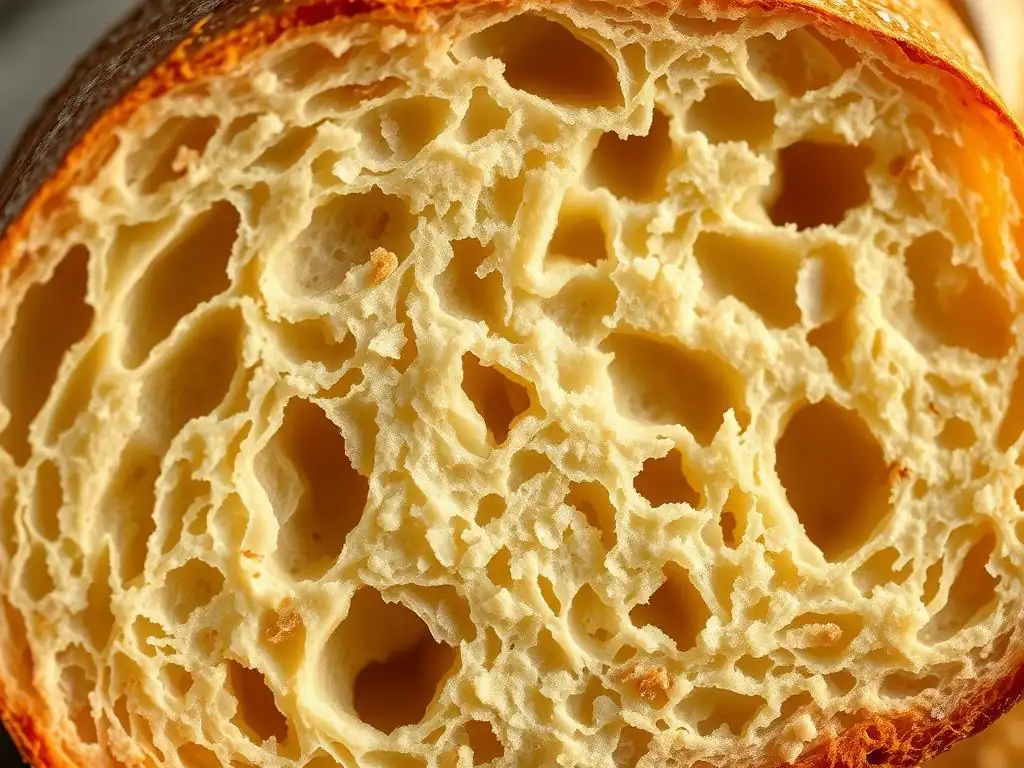
Welcome to BakeWithEase, your guide to baking brilliance! Ever dreamt of achieving that perfect, airy texture in your homemade baguettes? Unlock the secrets to an open, irregular crumb and elevate your bread baking game. Discover the techniques that transform simple ingredients into bakery-worthy masterpieces – are you ready to bake the perfect baguette?
- Achieve an Open, Irregular Crumb in Your Homemade Baguettes: A BakeWithEase Guide
- Introduction: The Quest for the Perfect Baguette Crumb Texture
- Understanding the Science Behind Baguette Crumb Structure
- Mastering the Techniques for an Open Crumb Baguette
- Advanced Tips for Perfecting Your Baguette Crumb
- Recipe for BakeWithEase Open Crumb Baguettes
- Conclusion: Enjoying Your Artisan Homemade Baguette with Perfect Crumb
-
Frequently Asked Questions
- How important is hydration for achieving an open crumb in baguettes?
- What role does fermentation play in developing the desired crumb texture?
- What type of flour is best for achieving an open crumb?
- What baking techniques contribute to an open baguette crumb?
- How does kneading affect the final crumb texture of a baguette?
- Final Reflection: The Pursuit of the Perfect Crumb
- Unlock the Secrets to Perfectly Irregular Crumb Baguettes!
Achieve an Open, Irregular Crumb in Your Homemade Baguettes: A BakeWithEase Guide
Introduction: The Quest for the Perfect Baguette Crumb Texture
Baking a baguette isn't just about shaping dough into a long, slender loaf; it's a pursuit of perfection in every detail, especially the interior structure. The hallmark of a truly great baguette is its crumb – that delicate network of air pockets that makes each bite light and airy. Achieving an open, irregular homemade baguette crumb texture is the dream of many home bakers, signaling success in nurturing the dough through its various stages. This guide from BakeWithEase is designed to help you unlock the secrets to that coveted structure, transforming your kitchen into a personal boulangerie.
The journey to mastering the homemade baguette crumb texture involves understanding the science behind it and meticulously executing key techniques. It requires patience, observation, and a willingness to learn from each bake. Whether you're aiming for large, dramatic holes or a consistently airy matrix, focusing on specific steps during mixing, fermentation, shaping, and baking will significantly impact the final result. Let's dive into how you can elevate your homemade baguette crumb texture from good to exceptional.
Understanding the Science Behind Baguette Crumb Structure
What is an Open Crumb Structure in Baguettes?
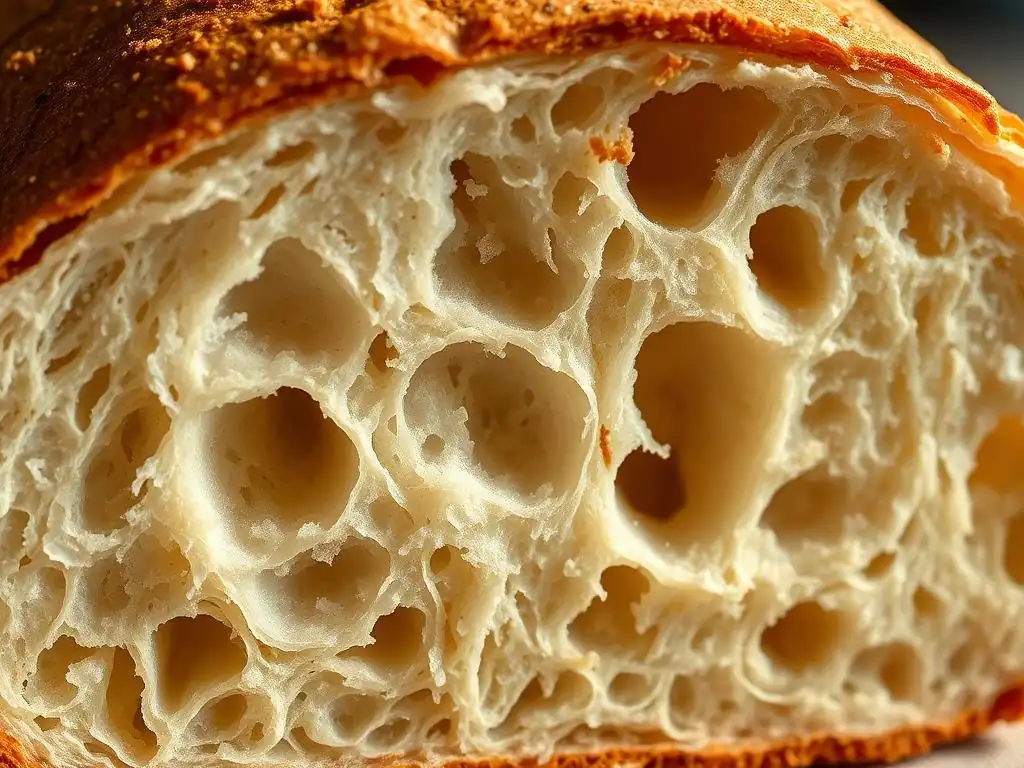
An open crumb structure in baguettes refers to the internal appearance characterized by large, irregularly shaped air pockets (alveoli) interspersed within a thin, delicate network of gluten. This is in contrast to a dense, uniform crumb where the air pockets are small and evenly distributed. The size and distribution of these voids are a direct result of gas production during fermentation and the dough's ability to trap and hold that gas. A highly desirable homemade baguette crumb texture boasts significant variation in hole size and shape, indicating careful handling and optimal development.
Achieving this specific homemade baguette crumb texture contributes immensely to the eating experience. The large air pockets create a light, almost ethereal quality, while the thin walls of the alveoli offer a satisfying chew and melt-in-your-mouth texture. This structure isn't just aesthetic; it's functional, allowing the flavors developed during fermentation to shine and providing the perfect balance to the baguette's crispy crust. Think of the classic image of a baguette with large, glossy holes – that's the open crumb we're aiming for.
Factors Influencing the Formation of an Irregular Baguette Crumb
The development of an irregular homemade baguette crumb texture is a complex interplay of several factors, each contributing uniquely to the final structure. Understanding these elements is crucial for diagnosing issues and refining your technique. Key influencers include the type of flour used, the hydration level of the dough, the activity of the yeast or starter, and the handling of the dough throughout the process. Each step, from the initial mix to the final bake, impacts how the gluten develops and how gas is retained.
Beyond the ingredients, environmental factors like temperature and humidity play a significant role, particularly during fermentation. The duration and conditions of bulk fermentation and proofing directly affect gas production and the dough's strength. Furthermore, the way you shape and score the dough, and the conditions inside your oven during baking (especially steam), are critical for allowing the dough to expand properly and set the internal structure. Mastering the homemade baguette crumb texture requires attention to all these details, creating a delicate balance that results in those beautiful, irregular holes.
Flour Type and Gluten Development for Baguette Crumb
The choice of flour is fundamental to achieving a good homemade baguette crumb texture. Baguettes traditionally use bread flour or a specialized French-style flour (Type 55), which typically have a protein content ranging from 11% to 13%. This protein is essential for forming gluten, the elastic network that gives dough its structure and ability to trap the gases produced by yeast. A flour with sufficient protein will develop strong, extensible gluten when hydrated and worked, allowing the dough to expand significantly without collapsing.
However, it's not just about the amount of protein, but its quality and how it's developed. Overworking the dough can lead to a tight gluten structure, resulting in a more uniform, smaller crumb. Conversely, insufficient gluten development will result in a weak dough that can't hold its shape or trap gas effectively, leading to a dense or gummy crumb. The goal is to develop a gluten network that is both strong enough to support the structure and extensible enough to allow large bubbles to form and expand, contributing to that desired irregular homemade baguette crumb texture.
Hydration Levels and Dough Consistency: Key to Open Crumb
Hydration, the ratio of water to flour by weight, is arguably one of the most critical factors for achieving an open homemade baguette crumb texture. Baguette dough is typically high in hydration, often ranging from 70% to 80% or even higher. More water allows for better gluten development (as gluten proteins need water to form their network) and results in a wetter, slacker dough. This slackness is essential because it provides less resistance to the expanding gases during fermentation and baking, allowing larger air pockets to form more easily.
Working with high-hydration dough can be challenging as it is sticky and requires different handling techniques compared to lower-hydration doughs. However, the effort is well worth it. A dough with around 75% hydration, for instance, will inherently favor a more open structure than one at 60%. The increased water content facilitates enzymatic activity, which can also contribute to better flavor and a more tender crumb. Mastering the feel of a high-hydration dough and learning to work with its stickiness is a key step towards perfecting your homemade baguette crumb texture.
The Role of Yeast Activity in Baguette Crumb Development
Yeast (or wild yeast in sourdough) is the engine of fermentation, producing carbon dioxide gas that inflates the dough and creates the air pockets that form the crumb structure. The activity level of the yeast is influenced by temperature, food availability (sugars in the flour), and time. Optimal yeast activity, neither too fast nor too slow, is crucial for developing both flavor and structure. Too little activity means insufficient gas production, leading to a dense crumb. Too much activity, especially in a short time, can exhaust the yeast and lead to a weak, collapsed structure.
The duration and temperature of fermentation significantly impact the size and distribution of the air pockets. A longer, slower fermentation (like cold fermentation in the refrigerator) allows for more complex flavor development and contributes to a more irregular, open homemade baguette crumb texture by giving the gluten network time to relax and become more extensible. Proper fermentation ensures that the dough has both the gas volume needed for expansion and the structural integrity (developed gluten) to hold that gas, resulting in the characteristic airy interior.
Mastering the Techniques for an Open Crumb Baguette
Step-by-Step Guide to Achieving an Irregular Crumb
Achieving that sought-after irregular homemade baguette crumb texture is a process that builds through careful attention at each stage. It's not just one magic step, but a combination of techniques that work together. From selecting the right ingredients to the final moments in the oven, every action influences the dough's ability to develop and retain gas, ultimately defining the internal structure. Follow these steps to guide your baking process.
This detailed guide breaks down the key stages, highlighting the specific actions and considerations necessary to promote an open, airy interior. By focusing on gentle handling, optimal fermentation, and creating the right conditions for oven spring, you significantly increase your chances of success. Remember that practice is key, and slight adjustments based on your environment and ingredients will help you fine-tune your approach to perfect your homemade baguette crumb texture.
1. Choosing the Right Flour for Baguette Baking
As mentioned, a good quality bread flour or French Type 55 flour is ideal. Look for flours with a protein content in the 11-13% range. This provides the necessary gluten-forming potential. Avoid all-purpose flour if you can, as its lower protein content (typically 9-10%) might struggle to support the large air pockets needed for an open homemade baguette crumb texture.
Consider the source and milling process of your flour, as this can also affect its performance. Some bakers prefer organic or stone-milled flours for added flavor complexity, but ensure they still have adequate protein for structure. A flour specifically marketed for bread or baguettes is usually a reliable choice for developing strong gluten.
2. Autolyse: The Secret to Enhanced Hydration and Crumb
Autolyse is a simple yet powerful technique where you mix just the flour and water from your recipe and let it rest for 20-60 minutes before adding the salt and yeast/starter. This resting period allows the flour to fully hydrate and enzyme activity to begin breaking down starches into simpler sugars, which feed the yeast. More importantly, it allows the gluten network to start forming on its own, without mechanical mixing.
This pre-hydration step makes the dough easier to mix, reduces the overall mixing time needed to develop gluten, and results in a more extensible dough. A more extensible dough is crucial for achieving an open homemade baguette crumb texture because it can stretch further to accommodate large gas bubbles during fermentation and oven spring without tearing. It's a low-effort step with significant benefits for crumb structure.
3. Mixing: Developing Gluten Without Overworking the Dough
The goal of mixing baguette dough is to develop a moderate gluten network – strong enough to hold shape and trap gas, but extensible enough to allow for large, irregular holes. For high-hydration doughs, minimal initial mixing is often preferred after the autolyse. A gentle mix by hand (like the pincer method or folding) or a short period in a stand mixer on low speed is usually sufficient.
Overworking the dough can tighten the gluten structure excessively, leading to a smaller, more uniform crumb. After the initial mix to incorporate ingredients, the bulk of the gluten development for an open homemade baguette crumb texture often happens during the bulk fermentation stage through periodic folds. The dough should be shaggy but starting to show some elasticity after mixing.
4. Bulk Fermentation: Creating Flavor and Air Pockets
Bulk fermentation, the first rise after mixing, is where the magic happens for developing flavor and initiating the formation of air pockets. During this time, yeast produces gas, and enzymatic activity breaks down starches, contributing to extensibility. The duration and temperature of bulk fermentation are critical; a typical range might be 2-4 hours at room temperature (around 70-75°F / 21-24°C), or significantly longer if cold fermenting in a refrigerator (12-48 hours at 38-40°F / 3-4°C).
A long, slow bulk fermentation, especially with a period in the cold, allows enzymes called proteases to slightly break down the gluten network, making it more extensible. This extensibility is key to achieving those large, irregular holes in the homemade baguette crumb texture. Monitor the dough's activity – it should increase significantly in volume (perhaps doubling) and become airy and bubbly.
Understanding Bulk Fermentation Time and Temperature
The ideal time and temperature for bulk fermentation depend on your recipe, the type and amount of leavening used, and your desired outcome. As a general guideline, room temperature bulk fermentation (around 72°F) for 2.5 to 3 hours with periodic folds is a common approach for a same-day bake. The dough should look significantly increased in volume and feel aerated.
For a more complex flavor and often a better homemade baguette crumb texture, many bakers opt for cold bulk fermentation. After an initial hour or two at room temperature, the dough is refrigerated for 12-24 hours. The cold slows down yeast activity but allows enzymes to work, improving dough extensibility and flavor. The dough might only increase by 50-75% in volume in the fridge, but it will be much easier to handle and shape while cold.
Performing Folds for Strength and Structure
Periodic folds during bulk fermentation are essential, particularly for high-hydration doughs. Folds help to develop gluten strength, equalize dough temperature, and redistribute yeast and food sources. For baguette dough, 3-5 sets of folds performed every 30-45 minutes during the first 1.5 to 2.5 hours of bulk fermentation are common.
To perform a fold, wet your hands slightly, gently lift one edge of the dough, stretch it upwards without tearing, and fold it back over the main mass of dough. Rotate the bowl and repeat 3-4 times until all sides have been folded into the center. This process builds tension and structure, allowing the dough to better hold the gas produced, which directly impacts the final homemade baguette crumb texture. Handle the dough gently to avoid degassing it too much.
5. Shaping: Gentle Handling for a Delicate Crumb
Shaping is where you transform the fermented dough into the classic baguette form. It's crucial to handle the dough gently during this stage to preserve the air pockets that developed during fermentation. Avoid degassing the dough excessively. The process typically involves pre-shaping into a rough cylinder, allowing a short rest (10-20 minutes), and then final shaping.
Final shaping involves carefully degasifying only the seam area, then folding and rolling the dough to create tension on the surface while maintaining an airy interior. Over-handling or roughly degassing the dough during shaping will crush the developing air pockets, resulting in a tighter, more uniform homemade baguette crumb texture instead of an open one. Practice makes perfect with shaping; the goal is a taut surface skin and a relatively untouched interior.
6. Proofing: Achieving Optimal Rise for a Light Texture
Proofing is the final rise after shaping, where the baguettes gain their final volume before baking. This stage is critical for achieving a light texture and contributing to the open homemade baguette crumb texture. Proofing is typically shorter than bulk fermentation, often 45-75 minutes at room temperature, or longer if proofing in the refrigerator. The dough should feel airy and have increased significantly in size, but should not be proofed so long that it starts to collapse.
Proper proofing ensures that there is sufficient gas for a good oven spring, but also that the gluten structure is relaxed enough to expand. Over-proofing can lead to a collapsed loaf in the oven and a dense crumb, as the gluten structure weakens. Under-proofing results in insufficient oven spring and a tight crumb. A good test is the poke test: gently poke the dough; if the indentation springs back slowly but not completely, it's likely ready.
7. Scoring: Releasing Steam and Controlling Expansion
Scoring, or slashing, the surface of the baguette dough just before baking serves several important purposes. It allows the baker to control where the loaf expands during oven spring, preventing uncontrolled tearing. More importantly for the crumb, the slashes act as vents, allowing steam to escape the crust while the interior continues to expand, contributing to a lighter, more open homemade baguette crumb texture.
Proper scoring requires a sharp blade (like a razor blade or lame) and confidence. The cuts should be made at an angle (typically 30-45 degrees) and overlap slightly. Deep enough cuts allow for good expansion, while too shallow cuts might burst elsewhere. The way the dough opens along the scores during baking is a good indicator of successful fermentation and shaping, and directly impacts the crumb structure just beneath the crust.
8. Baking: Creating Steam for a Crispy Crust and Open Crumb
Baking is the final act, and creating the right environment in the oven is paramount for both the crust and the homemade baguette crumb texture. High initial heat (often 450-475°F / 230-245°C) provides a strong oven spring, where the rapid expansion of gases in the dough causes a sudden increase in volume. Steam in the oven during the first 10-15 minutes prevents the crust from setting too quickly, allowing the loaf to expand fully and achieve maximum volume and openness in the crumb.
You can create steam by placing a tray of hot water or ice cubes at the bottom of your oven, or by using a Dutch oven or cloche to trap the dough's own steam. After the initial steaming period, the steam source is removed, and the temperature may be slightly reduced to allow the crust to brown and crisp up. This controlled expansion in a steamy environment is essential for setting that beautiful, open homemade baguette crumb texture.
Troubleshooting Common Baguette Crumb Problems
Even with the best techniques, you might encounter issues with your homemade baguette crumb texture. Troubleshooting involves reviewing each stage of the process to identify where things might have gone wrong. Common problems include a crumb that is too dense, too tight and uniform, or unevenly structured.
Addressing these issues systematically will improve your future bakes. Keep notes on your process – hydration, fermentation times and temperatures, shaping techniques, and baking parameters. This documentation helps you correlate specific actions with results in your homemade baguette crumb texture and make informed adjustments.
Dense Crumb: Identifying and Correcting the Issue
A dense homemade baguette crumb texture, lacking significant air pockets, is often a sign of insufficient gas production or retention.
- Possible Causes:
- Inactive yeast or starter.
- Under-fermentation (bulk fermentation or proofing too short).
- Insufficient hydration for the flour type.
- Overworking the dough during mixing or shaping, leading to a tight gluten structure.
- Lack of sufficient oven spring (often due to low oven temp or lack of steam).
- Solutions:
- Ensure your leavening is active (test yeast in warm water or check starter vitality).
- Allow longer bulk fermentation and/or proofing times, watching the dough's volume increase (aim for roughly doubling in bulk).
- Increase hydration slightly in your recipe (e.g., from 70% to 75%).
- Handle the dough more gently, especially during shaping. Focus on developing gluten through folds during bulk fermentation rather than aggressive mixing.
- Preheat your oven thoroughly to a high temperature (450-475°F) and ensure adequate steam during the initial bake.
Tight Crumb: Understanding the Causes and Solutions
A tight, uniform homemade baguette crumb texture, with many small, even holes, is usually caused by insufficient extensibility or too much degassing.
- Possible Causes:
- Insufficient hydration (dough too stiff).
- Under-developed gluten (dough lacks extensibility).
- Over-developed or overworked gluten (gluten too tight).
- Aggressive handling or excessive degassing during shaping.
- Too short of a bulk fermentation, especially without cold fermentation.
- Solutions:
- Increase hydration to make the dough slacker (75% or higher is common for open crumb).
- Ensure proper autolyse and sufficient folds during bulk fermentation to develop a strong yet extensible gluten network. Avoid excessive mechanical mixing.
- Handle the dough very gently during shaping, preserving as many air bubbles as possible.
- Consider incorporating a longer, colder bulk fermentation period to improve dough extensibility.
- Check your flour's protein content and quality.
Uneven Crumb: Achieving Uniform Openness
An uneven homemade baguette crumb texture might show large holes in some areas and dense spots in others. This can be frustrating but is often correctable.
- Possible Causes:
- Inconsistent mixing or folding, leading to uneven gluten development.
- Uneven temperature during fermentation.
- Rough or inconsistent shaping, trapping large pockets of air in some places while degassing others.
- Uneven scoring, causing the loaf to expand irregularly.
- Solutions:
- Ensure ingredients are well incorporated and folds are performed consistently throughout the dough mass.
- Maintain a consistent temperature for your bulk fermentation environment.
- Practice gentle and consistent shaping techniques, aiming for even tension and minimal degassing across the entire loaf.
- Use a sharp blade and practice making smooth, overlapping scores of consistent depth and angle.
- Sometimes, a very irregular crumb with some dense spots can be characteristic of extremely high hydration doughs or certain fermentation methods like no-knead, but generally, even openness is desired.
Advanced Tips for Perfecting Your Baguette Crumb
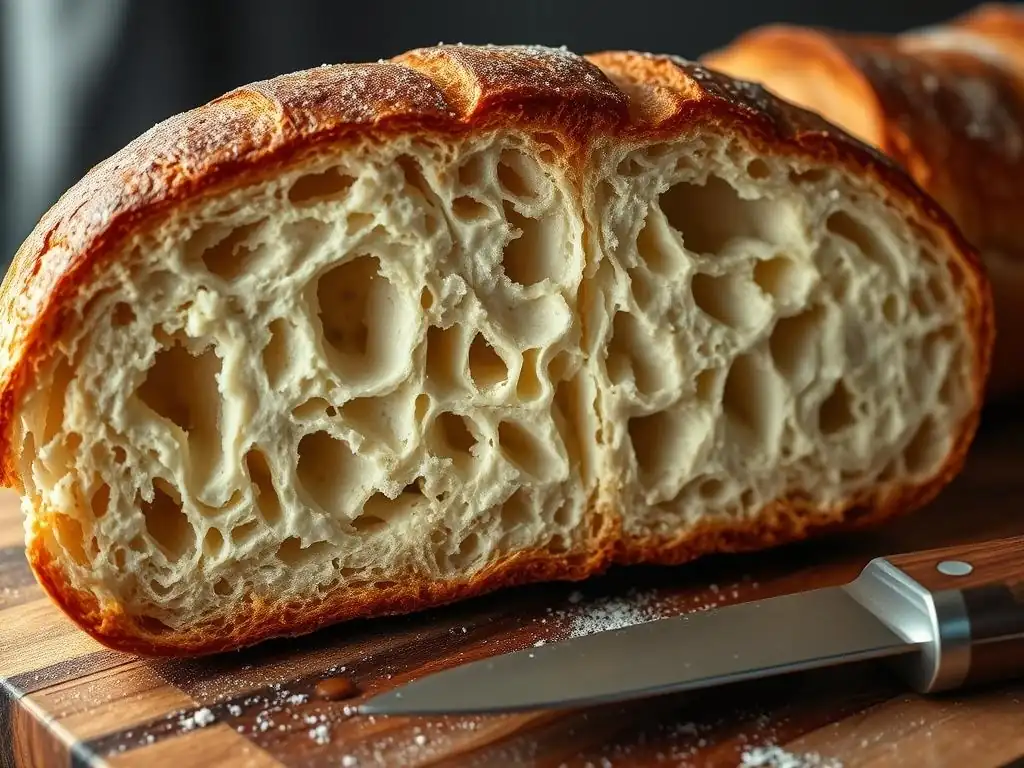
Once you've mastered the basics, you can explore advanced techniques to further enhance your homemade baguette crumb texture and flavor. These methods often involve pre-ferments or manipulating hydration and oven dynamics to push the boundaries of what's possible in a home oven.
Experimentation is key at this stage. Don't be afraid to tweak percentages, times, and temperatures. Keeping a baking journal is invaluable for tracking what works and what doesn't as you refine your approach to the ultimate homemade baguette crumb texture.
Using a Poolish or Biga for Enhanced Flavor and Crumb
Incorporating a pre-ferment like a poolish or biga is a traditional method for improving both the flavor and the homemade baguette crumb texture.
- Poolish: A wet pre-ferment (equal parts flour and water by weight, plus a small amount of yeast). Typically fermented at room temperature for 12-16 hours until very bubbly and active.
- Biga: A stiff pre-ferment (lower hydration, e.g., 50-60% hydration, with a small amount of yeast). Fermented for 12-24 hours, often starting at room temp then moving to the fridge.
Both poolish and biga contribute complex flavors developed during their long fermentation. More importantly for the crumb, they contribute mature yeast activity and acidity, which strengthens the gluten network and improves dough extensibility. The result is often a more robust oven spring and a more open, irregular homemade baguette crumb texture compared to using only direct yeast.
Experimenting with Different Hydration Levels
While we discussed high hydration as key, experimenting within the high-hydration range (e.g., 75%, 80%, 85%) can further impact your homemade baguette crumb texture. Higher hydration doughs are inherently slacker and offer less resistance to expanding gas, often leading to larger and more irregular holes.
However, working with very high hydration (80%+) requires significant practice and changes in handling techniques, as the dough becomes extremely sticky. Techniques like stretch and folds in the bowl, or even a no-knead approach, become more suitable. While higher hydration can lead to a more open crumb, there's a point where the gluten structure might struggle to support the weight, potentially leading to a gummy or collapsed interior if not handled correctly. Find the hydration level you're comfortable with that yields your desired homemade baguette crumb texture.
Mastering Oven Spring for Maximum Crumb Expansion
Oven spring, the rapid expansion of the loaf during the first 10-15 minutes of baking, is crucial for achieving maximum volume and an open homemade baguette crumb texture. It's driven by the rapid production and expansion of gases within the dough when exposed to high heat, combined with the dough's ability to stretch.
- Key factors for maximizing oven spring:
- Proper fermentation and proofing (dough has energy and is not over/under-proofed).
- Sufficient gluten development (dough has strength to expand).
- High initial oven temperature (450-475°F).
- Presence of steam during the initial bake (prevents crust from setting prematurely, allowing expansion).
- Proper scoring (allows controlled release and expansion).
Ensuring all these elements are aligned gives your baguettes the best chance for a dramatic oven spring, which directly translates to a lighter loaf and a more open homemade baguette crumb texture.
Recipe for BakeWithEase Open Crumb Baguettes
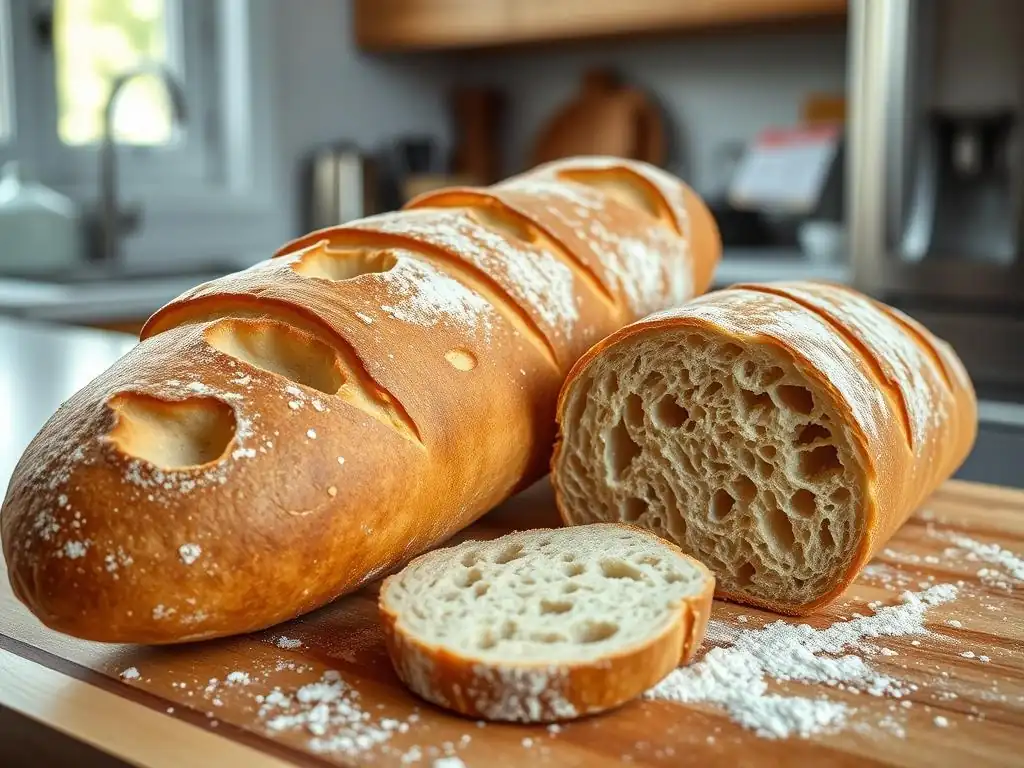
Here is a straightforward recipe designed to help you achieve a beautiful, open homemade baguette crumb texture using techniques discussed in this guide. This recipe uses a relatively high hydration and includes an autolyse and folding during bulk fermentation.
Ingredients List
- 500g Bread Flour (11-13% protein)
- 375g Water (75% hydration, preferably filtered, around 75-80°F / 24-27°C)
- 10g Fine Sea Salt
- 2g Instant Dry Yeast (or 2.4g Active Dry Yeast, activated)
Detailed Baking Instructions
- Autolyse: In a large bowl, combine the flour and water. Mix with a spatula or your hands until no dry flour remains. It will be shaggy. Cover and let rest for 30 minutes.
- Add Salt and Yeast: Sprinkle the salt and yeast over the dough. Dimple with wet fingers to help incorporate.
- Initial Mix: Gently mix by hand using the pincer method or stretch and folds in the bowl for 2-3 minutes until the salt and yeast are mostly incorporated. The dough will still be very wet and shaggy.
- Bulk Fermentation with Folds: Cover the bowl and let the dough rest at room temperature (around 72-75°F / 22-24°C). Perform a set of stretch and folds every 30 minutes for the first 2 hours (4 sets total). To fold, wet your hand, grab one side of the dough, stretch it up gently, and fold it over the center. Rotate the bowl and repeat 3 more times. After the folds, let the dough continue to ferment undisturbed for another 1-1.5 hours, or until it has increased significantly in volume (roughly doubled) and is bubbly. The total bulk fermentation time is about 3-3.5 hours.
- Divide and Pre-shape: Gently turn the dough out onto a lightly floured surface. Be careful not to deflate it. Divide the dough into 3 equal pieces (approx. 325g each). Gently pre-shape each piece into a loose cylinder or rectangle. Let rest uncovered for 15-20 minutes to allow the gluten to relax.
- Final Shaping: Lightly flour your work surface. Take one piece of dough, gently flatten it slightly into a rectangle without degassing. Fold the top third down and press gently. Fold the bottom third up over the top fold and seal the seam with your fingers. Gently roll the dough back and forth with light pressure, working from the center outwards, to lengthen it into a baguette shape (about 14-16 inches long). Aim for even tension along the surface.
- Proofing: Place the shaped baguettes seam-side up into a floured baker's couche (linen cloth) or onto parchment paper separated by folds to prevent sticking. Cover with plastic wrap or a light cloth. Proof at room temperature for 45-60 minutes, or until they are airy and have increased in volume. The poke test should show a slow spring back. Meanwhile, preheat your oven to 475°F (245°C) with a baking stone or steel inside, and a steam setup (like a cast iron pan on a lower rack).
- Score and Bake: Gently transfer the baguettes to parchment paper or a peel if using a stone. Score each baguette with 3-5 overlapping slashes using a sharp blade at a 30-45 degree angle. Carefully slide the baguettes onto the hot baking stone/steel. Pour a cup of hot water or ice into the steam pan and quickly close the oven door.
- Baking: Bake with steam for 10-15 minutes. Then, carefully remove the steam pan, lower the oven temperature to 450°F (230°C), and continue baking for another 15-20 minutes, or until the crust is deep golden brown and the internal temperature is around 205-210°F (96-99°C).
- Cooling: Transfer baguettes to a wire rack to cool completely before slicing. This is crucial for the homemade baguette crumb texture to set properly.
[ ] Ensure oven is fully preheated to 475°F
[ ] Prepare steam source before loading baguettes
[ ] Score baguettes confidently and quickly
[ ] Bake with steam for specified time
[ ] Remove steam and finish baking
[ ] Cool completely before cutting
Conclusion: Enjoying Your Artisan Homemade Baguette with Perfect Crumb
Congratulations! By following these steps and paying close attention to your dough, you are well on your way to consistently achieving a beautiful, open, irregular homemade baguette crumb texture. Each bake is a learning experience, and with practice, you'll develop an intuition for how the dough should feel at each stage. The satisfaction of slicing into a loaf you made yourself, revealing that airy, holey interior, is immense.
Enjoy your freshly baked artisan baguettes! The perfect homemade baguette crumb texture is ideal for soaking up olive oil, complementing a cheese board, or simply savoring on its own. Keep practicing, keep experimenting, and most importantly, keep baking with ease!
Further Resources for Bread Baking Enthusiasts
Baking the perfect homemade baguette crumb texture is just one part of the vast and rewarding world of bread baking. There are countless techniques, recipes, and types of bread to explore. Delving into topics like sourdough starters, different types of grains, advanced shaping methods, or using specialized equipment can further enhance your skills and understanding. Continue to read, watch, and bake to expand your repertoire.
Frequently Asked Questions
How important is hydration for achieving an open crumb in baguettes?
Hydration is crucial. Higher hydration doughs, often around 70-80%, create more steam during baking, leading to a more open and irregular crumb structure.
What role does fermentation play in developing the desired crumb texture?
Proper fermentation is key. A long, slow fermentation allows for the development of gluten structure and the production of gases that create the characteristic irregular holes in the crumb.
What type of flour is best for achieving an open crumb?
Bread flour with a high protein content is recommended. The higher protein content helps develop a strong gluten network, which is essential for trapping gases and creating that desired crumb texture.
What baking techniques contribute to an open baguette crumb?
Scoring the baguette properly allows for expansion during baking. Baking with steam in the oven is also essential to prevent the crust from setting too quickly, thus allowing for further expansion and a more open crumb.
How does kneading affect the final crumb texture of a baguette?
Gentle kneading is preferred. Over-kneading can lead to a tight crumb while under-kneading may result in a weak structure. Aim for a balance to develop the gluten without overworking the dough.
Final Reflection: The Pursuit of the Perfect Crumb
The quest for the ideal open, irregular crumb in a homemade baguette is more than just a culinary pursuit; it's a testament to the power of understanding process and embracing imperfection. Achieving that airy, textured interior, so characteristic of a truly excellent baguette, requires precision, patience, and a willingness to experiment. This journey, as detailed in this article, highlights the delicate balance between hydration, fermentation, and shaping – elements that, when mastered, unlock the secrets to a truly exceptional loaf.
The pursuit of this perfect crumb mirrors our own lives, doesn't it? We strive for perfection, for that ideal outcome, but often the most beautiful things arise from the unexpected. The slight variations in crumb structure, the irregular air pockets – these are not flaws, but rather the hallmarks of a handcrafted creation, imbued with personality and character. The most beautiful things are not associated with perfection, but with imperfection.
This quote, though not directly about baking, speaks volumes about the beauty found in embracing the unique qualities of our creations, be they baguettes or anything else.
So, I invite you, dear reader, to take this knowledge and apply it not only to your next baking endeavor but also to your broader life. Don't be afraid to experiment, to embrace the unexpected results, and to find beauty in the imperfections. The journey towards mastery, whether in baking or in any other pursuit, is far more rewarding than the destination itself.
The next time you knead dough, remember the lessons learned here, and let the process itself be a source of joy and self-discovery. The perfect crumb awaits, but so does the perfect you, revealed through the process of creation.
Unlock the Secrets to Perfectly Irregular Crumb Baguettes!
Thanks for taking the time to learn about achieving that coveted open, irregular crumb in your baguettes! We hope you gained valuable insights into the techniques that bring this artisan look and texture to life. Now it's time to put your newfound knowledge into practice.
- Bake your dream baguette: Try the recipe outlined in the article, paying close attention to the autolyse and bulk fermentation stages. This is your chance to perfect that airy crumb!
- Share your success (or questions!): Post a picture of your finished baguette in the comments below – we’d love to see your results!
- Experiment with flour types: Explore different flour blends to discover how they affect the crumb structure. What unique results can you achieve?
So, what unique flour blend will you try to unlock the next level of baguette perfection?