
Baking Sourdough Baguettes: Tips for Success

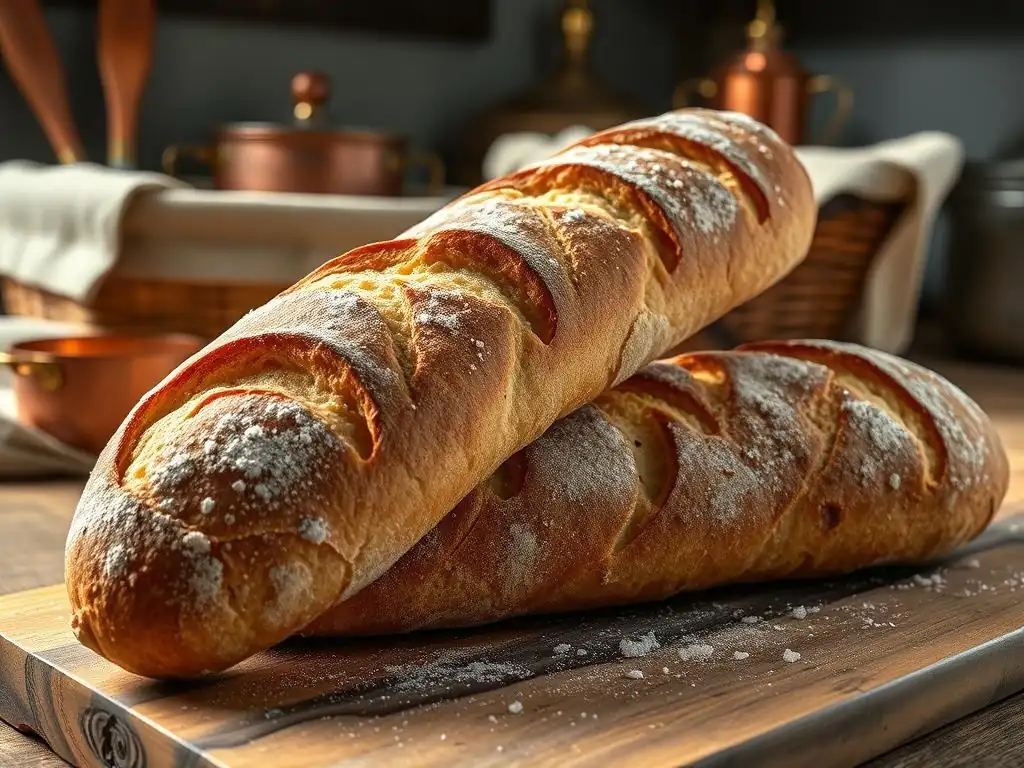
Welcome to BakeWithEase, your companion in the delightful world of baking! Ever dreamt of pulling a perfectly crusty, airy baguette from your own oven? This week, we're diving deep into perfecting the sourdough baguette recipe. Curious about the secrets to that signature tang and irresistible texture? Join us as we unlock the tips and tricks that will transform your baking and elevate your sourdough game. Get ready to bake with ease!
- Introduction to Perfecting Sourdough Baguette Recipe at Home
- Understanding the Fundamentals of Sourdough Baguette Baking
- Step-by-Step Guide to Baking Sourdough Baguettes
- Troubleshooting Common Sourdough Baguette Problems
- Advanced Techniques for Sourdough Baguette Mastery
- Serving and Storing Your Homemade Sourdough Baguettes
- Conclusion: Your Journey to Perfect Sourdough Baguettes
-
Frequently Asked Questions
- What makes a sourdough baguette different from a regular baguette?
- What is the most important thing to consider when perfecting a sourdough baguette recipe?
- Why is scoring the sourdough baguette important before baking?
- What can I do if my sourdough baguette is too dense?
- What temperature should I bake my sourdough baguette at, and for how long?
- Final Reflection: The Enduring Allure of the Perfect Sourdough Baguette
- Unleash Your Inner Boulanger: Bake the Perfect Baguette!
Introduction to Perfecting Sourdough Baguette Recipe at Home
Baking a baguette is a rewarding journey, and attempting it with sourdough adds a whole new dimension of flavor and complexity. These long, slender loaves, with their characteristic crispy crust and airy, open crumb, are a staple of French bakeries. While they might seem intimidating, achieving a truly great sourdough baguette at home is entirely possible with the right techniques and a bit of practice. This guide on perfecting sourdough baguette recipe will break down the process into manageable steps, helping you bake loaves you'll be proud to share (or keep all to yourself! ).
At BakeWithEase, we believe that everyone can master the art of baking, including the seemingly complex world of artisan bread. Perfecting sourdough baguette recipe is less about having fancy equipment and more about understanding the dough, the fermentation process, and how your oven behaves. We'll walk you through selecting the best ingredients, nurturing your sourdough starter, and handling the dough with care at each stage. Get ready to transform simple flour, water, salt, and starter into beautiful, flavorful baguettes right in your own kitchen.
Why Bake Sourdough Baguettes? The Appeal of Homemade Artisan Bread
There's a unique satisfaction that comes from baking bread from scratch, and sourdough baguettes offer a particularly delightful experience. The natural fermentation process imparts a complex, tangy flavor that is simply unmatched by commercial yeast breads. This depth of flavor develops slowly over hours, sometimes even days, creating nuances that reflect the quality of your ingredients and the health of your starter. Beyond taste, the aroma that fills your home as these loaves bake is intoxicating – a true testament to the magic happening in your oven.
Moreover, perfecting sourdough baguette recipe gives you control over the ingredients, allowing you to avoid preservatives and additives often found in store-bought bread. You can choose organic flours, filtered water, and high-quality salt, knowing exactly what goes into your body. The texture achieved with sourdough – that beautiful crackling crust giving way to a soft, holey interior – is the result of natural leavening working its magic. This tactile and sensory experience is a significant part of the appeal, making the effort involved incredibly worthwhile for any home baker.
BakeWithEase's Guide to Mastering Sourdough Baguette Techniques
Welcome to BakeWithEase's comprehensive guide designed to help you in perfecting sourdough baguette recipe. We've distilled years of baking experience and countless hours spent in the kitchen into actionable tips and clear instructions. Our approach focuses on demystifying the process, making it accessible for bakers at various skill levels. We understand the challenges that come with working with sourdough, from managing starter activity to achieving the perfect shape and bake, and we're here to help you navigate them successfully.
This guide covers everything from the foundational elements like ingredients and starter health to the intricate steps of mixing, shaping, proofing, and baking. We'll also touch upon troubleshooting common issues and explore advanced techniques for those looking to elevate their baguette game further. Our goal is not just to give you a recipe, but to equip you with the understanding needed to adapt and refine your process, leading to consistently excellent results. Think of this as your personal roadmap to mastering the art of baking sourdough baguettes at home.
Understanding the Fundamentals of Sourdough Baguette Baking
Achieving a successful sourdough baguette hinges on understanding a few core principles. Unlike baking with commercial yeast, sourdough relies on a living culture, which introduces variables that need careful management. Getting the basics right – from selecting the proper ingredients to understanding the fermentation process driven by your starter – lays the groundwork for that coveted crispy crust and open crumb.
The beauty of perfecting sourdough baguette recipe lies in its simplicity: flour, water, salt, and starter. Yet, the quality of these few components and how they interact is paramount. Learning to read your dough, understanding its hydration, and recognizing the signs of optimal fermentation are skills that develop with practice. This section dives into these fundamental aspects, providing the essential knowledge you need before you even start mixing.
Essential Ingredients for the Perfect Sourdough Baguette
The simplicity of baguette ingredients means that the quality of each one profoundly impacts the final loaf. Using the best possible flour, ensuring your water is suitable, and selecting the right salt are crucial steps. These elements don't just contribute volume; they build the structure, develop the flavor, and influence the texture of your baguette.
Neglecting the quality of even one ingredient can compromise the outcome, resulting in a dense crumb or a tough crust instead of the light, airy perfection you're aiming for. Investing in good ingredients is arguably the most straightforward way to improve your sourdough baguette baking from the very beginning.
High-Quality Flour: The Foundation of Your Baguette
Flour is the backbone of any bread, and for sourdough baguettes, selecting the right type is critical. Many bakers prefer using a high-protein bread flour, typically containing 12-14% protein. This higher protein content helps develop a strong gluten network, essential for trapping the gases produced by the sourdough starter and creating that characteristic open crumb structure. For instance, using a strong Canadian bread flour or a good quality unbleached bread flour from brands like King Arthur Baking or Bob's Red Mill can make a significant difference compared to standard all-purpose flour (which usually has around 10-11.5% protein).
Some artisan bakers also incorporate a percentage of whole wheat or rye flour, often between 5-15%, to add complexity and depth to the flavor profile. For example, adding 10% whole wheat flour can contribute nutty notes and a slightly denser texture while still allowing for a relatively open crumb if the gluten is well-developed. The key is finding a flour that handles the hydration levels needed for baguettes and provides the necessary structure and extensibility. Always check the protein content on the flour packaging to understand its potential for gluten development.
The Importance of Water Temperature in Sourdough
Water temperature plays a surprisingly vital role in sourdough baking, particularly in controlling the rate of fermentation. Since sourdough relies on wild yeasts and bacteria, which are sensitive to temperature, using the right water temperature helps regulate their activity. A common technique is to use the "desired dough temperature" calculation. You aim for a final dough temperature typically between 75-78°F (24-26°C). To achieve this, you might adjust your water temperature based on the ambient room temperature and the temperature of your flour and starter.
For example, if your kitchen is cool (say, 68°F / 20°C) and your flour/starter are also around that temperature, you'll need warmer water, perhaps around 80-85°F (27-29°C), to bring the final dough temperature up. Conversely, in a warm kitchen (78°F / 26°C or higher), you might need cooler water, potentially as low as 70°F (21°C), or even chilled water to prevent the dough from fermenting too quickly.
Using a thermometer to check your water temperature and the final dough temperature is a simple step that provides significant control over your fermentation schedule and ultimately, the quality of your perfected sourdough baguette recipe.
Mastering Sourdough Starter for Baguettes
Your sourdough starter is the heart of your baguette. Its health and activity level directly impact the dough's ability to rise, develop flavor, and achieve that beautiful open crumb. A strong, active starter is essential for perfecting sourdough baguette recipe. It needs to be vibrant and ready to work hard to lift a relatively wet dough into a light, airy loaf.
Understanding how to maintain your starter and feed it correctly for baking day is fundamental. A sluggish starter will result in a dense, flat baguette, no matter how perfect your technique is otherwise. Nurturing your starter is an ongoing process that pays dividends in every loaf you bake.
Maintaining a Healthy Sourdough Starter for Optimal Rise
A healthy sourdough starter is one that is regularly fed, active, and shows predictable behavior. For baguette baking, you typically want a starter that is very active and has recently peaked or is just past its peak. This means it should have at least doubled, preferably tripled, in volume within 4-8 hours after feeding (depending on temperature and feeding ratio). You should see numerous bubbles throughout the culture, and it should smell pleasantly tangy, not overly acetic or alcoholic.
To maintain this level of health, regular feeding is key. If kept at room temperature, feeding it once or twice a day is often necessary. If stored in the refrigerator, feeding it once a week or every two weeks is usually sufficient, but you'll need to revive it with a few consecutive feedings at room temperature before using it for baking.
A simple test for readiness is the "float test": drop a small spoonful of starter into a glass of water; if it floats, it's active and ready to leaven your dough. Aim for a starter that consistently passes this test when you plan to bake.
Feeding Your Starter: Schedules and Ratios for Baguette Baking
The feeding ratio and schedule for your starter before baking baguettes can influence its activity and the flavor it imparts. A common ratio is 1:2:2 (starter:water:flour) or 1:3:3 by weight, fed 4-12 hours before you plan to mix your dough, depending on the ambient temperature.
For example, if you need 100g of active starter for your recipe, you might take 20g of your existing starter, feed it with 40g of water and 40g of flour (1:2:2 ratio), and let it ripen at room temperature until it has significantly risen and is bubbly – this could take 4-6 hours at 75°F (24°C).
Feeding with a higher ratio (like 1:3:3) or using cooler water can slow down the ripening, which might be useful if you need to time your bake for later in the day or the next morning. Using the same type of flour you'll use in your final dough for the last few feedings can also help the starter adapt and perform optimally. Consistency in feeding and observing your starter's response are key to knowing when it's perfectly ripe for mixing your perfected sourdough baguette recipe.
Step-by-Step Guide to Baking Sourdough Baguettes
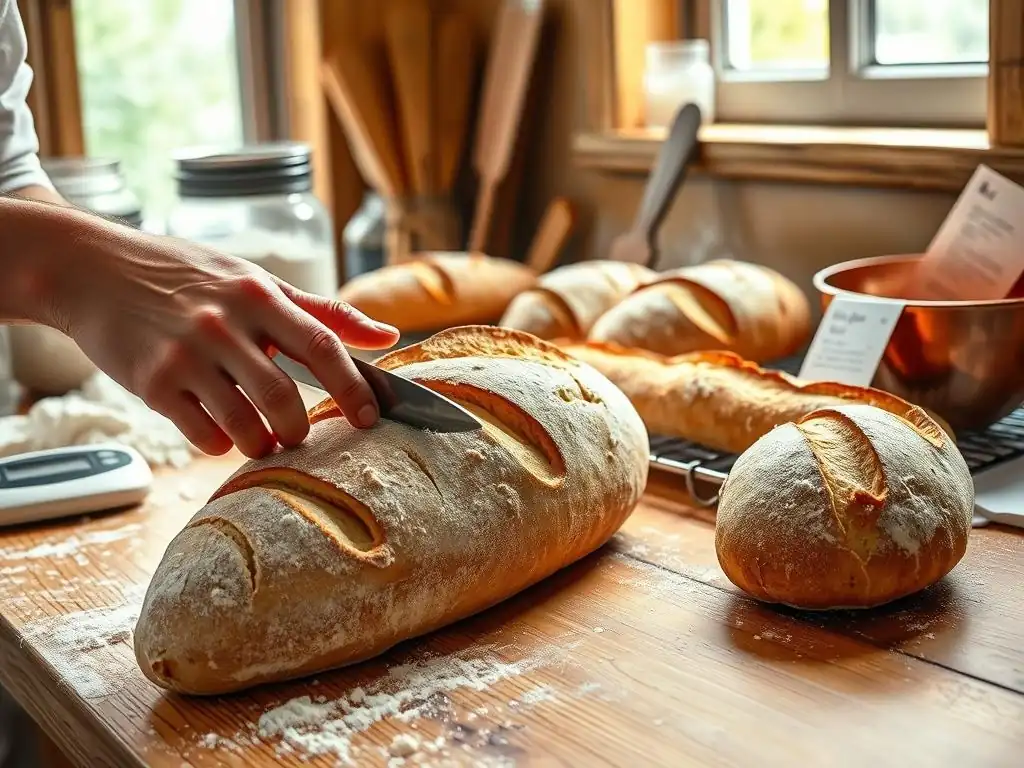
Baking sourdough baguettes involves several distinct stages, each crucial for developing the dough's structure, flavor, and the final shape and texture of the loaf. Following a structured approach helps ensure success. This section breaks down the entire process, from initial mixing to the final bake, into clear, actionable steps.
Mastering these steps is key to perfecting sourdough baguette recipe. While recipes might vary slightly in hydration or timing, the fundamental sequence and techniques remain consistent. Pay close attention to the feel of the dough and the signs of fermentation at each stage – this is where intuition developed through practice becomes invaluable.
Step 1: Mixing the Dough - Achieving the Right Consistency
The initial mixing phase is where your ingredients come together and the foundation of your gluten network begins to form. For baguettes, which often have a relatively high hydration, proper mixing is essential to develop strength without making the dough too difficult to handle. The goal is a shaggy mass where all ingredients are just combined.
Over-mixing at this stage isn't necessary, as the subsequent steps like autolyse and folds will further develop the gluten. The focus here is on hydration and ensuring everything is evenly distributed before the dough rests.
Autolyse: The Secret to a Better Baguette Crumb
Autolyse is a simple yet powerful technique that significantly improves dough handling and the final crumb structure, making it essential for perfecting sourdough baguette recipe. It involves mixing just the flour and water from your recipe and letting the mixture rest for 30 minutes to several hours before adding the starter and salt. During this rest period, the flour absorbs the water fully, and enzymatic activity begins to break down proteins, kickstarting gluten development without any mechanical mixing.
This process allows the dough to become more extensible and less sticky, making it easier to mix the remaining ingredients and perform subsequent folds. For example, resting the flour and water for 30-60 minutes can drastically reduce mixing time and lead to a smoother, more pliable dough from the start. It also contributes to a more open and even crumb structure in the baked baguette.
Hydration Levels: Finding the Sweet Spot for Sourdough Baguettes
Hydration refers to the ratio of water to flour in your dough, typically expressed as a percentage of the flour weight. Baguettes are often baked with relatively high hydration levels, commonly ranging from 70% to 80% or even higher. Higher hydration generally leads to a more open crumb and a crispier crust, which are desirable characteristics for a baguette. For instance, a recipe using 500g of flour and 375g of water would have 75% hydration (375/500 * 100).
However, higher hydration doughs are stickier and more challenging to handle, especially for beginners. Finding your sweet spot depends on your comfort level, the type of flour you use (some flours absorb more water than others), and the ambient humidity. Starting with a hydration level like 70-72% is often recommended for those new to perfecting sourdough baguette recipe, gradually increasing it as you gain confidence and experience. The goal is a dough that is wet enough for a good crumb but manageable enough to shape effectively.
Step 2: Bulk Fermentation - Developing Flavor and Structure
Bulk fermentation, also known as the first rise, is arguably the most critical stage in sourdough baking. It's during this period that the starter works its magic, producing carbon dioxide to leaven the dough and organic acids that contribute to the signature sourdough flavor. This stage develops both the flavor and the gluten structure necessary for a well-formed baguette.
Monitoring the dough's progress and performing periodic folds are key activities during bulk fermentation. The duration and temperature of this stage significantly impact the final loaf.
Understanding Bulk Fermentation Times and Temperatures
Bulk fermentation time is highly dependent on the dough temperature and the activity of your starter. At a room temperature of around 75-78°F (24-26°C), bulk fermentation for a baguette dough might take anywhere from 3 to 6 hours. At cooler temperatures, say 68°F (20°C), it could take significantly longer, potentially 8-12 hours or even more. The dough is ready when it has increased in volume by about 30-50%, feels airy and bubbly, and shows signs of fermentation like small bubbles on the surface.
Over-fermenting can lead to a slack dough that is difficult to shape and results in a dense crumb, while under-fermenting means the dough hasn't developed enough strength or flavor. For example, if your kitchen is warm, keep a close eye on the dough and potentially reduce the bulk fermentation time. Conversely, in a cooler environment, be patient and allow the dough the time it needs. Using a clear container with volume markings can help you track the dough's rise accurately.
Performing Folds: Strengthening the Dough for a Perfect Shape
Periodic folds (also called stretch and folds or coil folds) during bulk fermentation are essential for developing the gluten network and building strength in high-hydration doughs like those used for baguettes. These actions gently align the gluten strands and incorporate air, improving the dough's structure. Typically, you perform 3-5 sets of folds during the first 2-3 hours of bulk fermentation, with 30-60 minute intervals between sets.
To perform a stretch and fold, wet your hands slightly, grab one edge of the dough, gently stretch it upwards, and fold it over the rest of the dough. Rotate the container and repeat this 3-4 times until you've folded the dough from all sides. For coil folds, gently lift the dough from the center with wet hands, letting the ends hang down, and then fold the ends underneath the mass. These actions create tension and structure, which are vital for shaping long, thin baguettes that hold their form and achieve good oven spring when perfecting sourdough baguette recipe.
Step 3: Shaping Sourdough Baguettes Like a Pro
Shaping is where your dough starts to look like a baguette. This stage requires a gentle yet firm touch to create tension on the surface of the dough while preserving the airy structure developed during fermentation. Proper shaping is crucial for achieving the classic baguette form, ensuring even baking, and contributing to oven spring.
The shaping process is typically done in two steps: pre-shaping and final shaping. Each step serves a specific purpose in preparing the dough for its final proof and bake.
Pre-Shaping: Creating Tension and Structure
Pre-shaping is a brief intermediate step after bulk fermentation and before final shaping. Its purpose is to gently organize the dough and create some initial surface tension, making the final shaping easier and more effective. After dividing your dough into portions for each baguette, gently round each piece or shape it into a loose log.
Allow the pre-shaped pieces to rest, uncovered, for 15-20 minutes. This rest period, known as the bench rest, allows the gluten to relax, preventing the dough from tearing or resisting the final shaping. For example, if you have dough for three baguettes, divide the dough into three equal portions (using a scale is recommended for consistency), gently shape each into a rough cylinder, and let them rest on your counter. This quick step significantly improves the manageability of the dough for the next stage of perfecting sourdough baguette recipe.
Final Shaping: Achieving the Classic Baguette Form
Final shaping is where you transform the pre-shaped dough into its elongated baguette form. The goal is to create significant surface tension and an even thickness along the length of the loaf. Start by gently flattening the pre-shaped dough into a rectangle. Then, fold the top edge down to the center and press gently to seal. Fold the dough in half lengthwise, pressing the seam firmly with the heel of your hand to seal it completely.
Roll the dough back and forth gently with your hands, starting from the center and working outwards, to lengthen it to the desired baguette length (typically 12-16 inches or 30-40 cm). The key is to maintain tension on the surface while elongating the loaf evenly. Avoid using too much flour on your surface, as this can prevent the seam from sealing properly. With practice, you'll develop a feel for how much pressure to apply to create tension without tearing the dough or deflating it.
Step 4: Proofing - Preparing the Dough for Baking
Proofing, or the second rise, is the final fermentation stage before baking. During proofing, the shaped baguettes expand further as the starter continues to produce gas. This stage is critical for achieving the desired volume and airy texture in the baked loaf. Proper proofing is key to perfecting sourdough baguette recipe.
The duration and environment of proofing greatly influence the final outcome. Over-proofing or under-proofing can both lead to disappointing results.
Proofing Baskets: Ensuring a Beautiful Shape
Proofing baskets, or bannetons, are traditionally used for proofing shaped dough, especially for loaves like boules or batards. For baguettes, however, a common and effective method is to proof them on a couche – a piece of heavy linen or canvas flour sack cloth. The couche provides support and prevents the baguettes from spreading sideways while they proof.
To use a couche, heavily flour it (rice flour works well as it's less likely to be absorbed by the dough), then gently transfer the shaped baguettes onto it. Create folds or pleats in the cloth between the baguettes to keep them separate and supported. For example, if proofing three baguettes, you would lay one down, create a fold in the couche, lay the second, create another fold, and lay the third.
You can then cover the baguettes lightly with another part of the couche or plastic wrap to prevent drying. This method helps the baguettes maintain their elongated shape and promotes a good crust.
Over-Proofing vs. Under-Proofing: Identifying the Ideal Stage
Knowing when your baguettes are perfectly proofed is crucial for achieving optimal oven spring and crumb structure. The ideal stage is when the dough has increased noticeably in size (perhaps 30-40% from its shaped size) but still has some resilience when gently poked. The "poke test" is a common indicator: gently press a floured finger into the dough about half an inch deep. If the indentation springs back immediately, it's under-proofed. If it springs back very slowly and leaves a small indentation, it's likely ready. If the indentation remains completely, it's over-proofed.
Over-proofed baguettes will look very puffy and might collapse when scored or transferred to the oven, resulting in a flat loaf with a dense crumb. Under-proofed baguettes will have poor oven spring, potentially blow out in uneven places, and have a tight, dense crumb.
Proofing time varies significantly based on temperature; it could be 1-3 hours at room temperature (around 75°F / 24°C) or much longer if proofing in the refrigerator (cold proofing can take 8-16 hours or more and also enhances flavor). Learning to read the dough's readiness using visual cues and the poke test is key to perfecting sourdough baguette recipe.
Step 5: Baking - Achieving a Crispy Crust and Open Crumb
Baking is the final, exciting step where your proofed dough transforms into a beautiful baguette. The goal is to achieve a deep, golden-brown, crispy crust and a light, airy interior crumb. This requires high temperatures and the introduction of steam at the beginning of the bake.
Getting these conditions right in a home oven can be challenging but is essential for that authentic baguette texture. Using a baking stone or steel and creating a steamy environment are key strategies.
Scoring Techniques: How to Get a Beautiful Baguette Slash
Scoring (making cuts or slashes on the surface of the dough just before baking) serves both functional and aesthetic purposes. Functionally, the cuts allow the dough to expand predictably in the oven as gases build up, preventing blowouts and contributing to oven spring. Aesthetically, well-executed scores create the classic baguette pattern and contribute to the crust development. Baguettes are typically scored with several overlapping diagonal slashes running along the length of the loaf.
Use a very sharp blade, such as a lame (a razor blade on a handle), held at a shallow angle (about 30-45 degrees) to the dough's surface. Make quick, confident cuts about a quarter to a half-inch deep. The slashes should overlap by about a third of their length.
For a standard-sized baguette, you might make 5-7 such slashes. The angle and overlap are important for creating the desired "ear" or flap of crust that peels back as the baguette bakes. Practice on some scrap dough or even play-dough to get a feel for the motion before scoring your precious baguettes.
Baking Temperatures and Times for Optimal Results
Baguettes require a high baking temperature to achieve a crispy crust and good oven spring. Preheat your oven, ideally with a baking stone or steel inside, to a high temperature, typically between 450-500°F (230-260°C). Allow the oven and stone/steel to preheat for at least 30-60 minutes to ensure they are fully saturated with heat.
Once the baguettes are loaded and steam is introduced (see below), the temperature is often slightly reduced after the first 15-20 minutes to prevent the crust from burning before the interior is fully baked. A common baking plan is to bake at 475°F (245°C) with steam for 15-20 minutes, then remove the steam source, reduce the temperature to 450°F (230°C), and continue baking for another 15-25 minutes, or until the baguettes are deep golden brown and sound hollow when tapped on the bottom.
The total baking time is usually around 30-45 minutes, depending on the size of the baguettes and your oven.
Using Steam: Creating a Crusty Exterior and Soft Interior
Steam is absolutely essential during the initial phase of baking baguettes for perfecting sourdough baguette recipe. The high humidity in the oven prevents the surface of the dough from setting too quickly, allowing the loaf to expand fully (oven spring). The steam also gelatinizes the starches on the surface, which contributes to a thin, crispy crust rather than a thick, tough one. Once the crust has set (typically after 15-20 minutes), the steam is removed to allow the crust to dry out and become crispy.
There are several ways to create steam in a home oven. One effective method is to place a cast iron pan or a broiler tray on the bottom rack of your oven while preheating. Just before loading the baguettes, carefully pour a cup of boiling water into the hot pan (be cautious of the steam!).
Another method is to use a Dutch oven or a cloche designed for baguettes, which traps the dough's own moisture. For a baking stone setup, you can also spray the oven walls with water using a spray bottle, although this method provides less consistent steam than the boiling water in a hot pan method. Always use caution when working with hot ovens and steam.
Troubleshooting Common Sourdough Baguette Problems
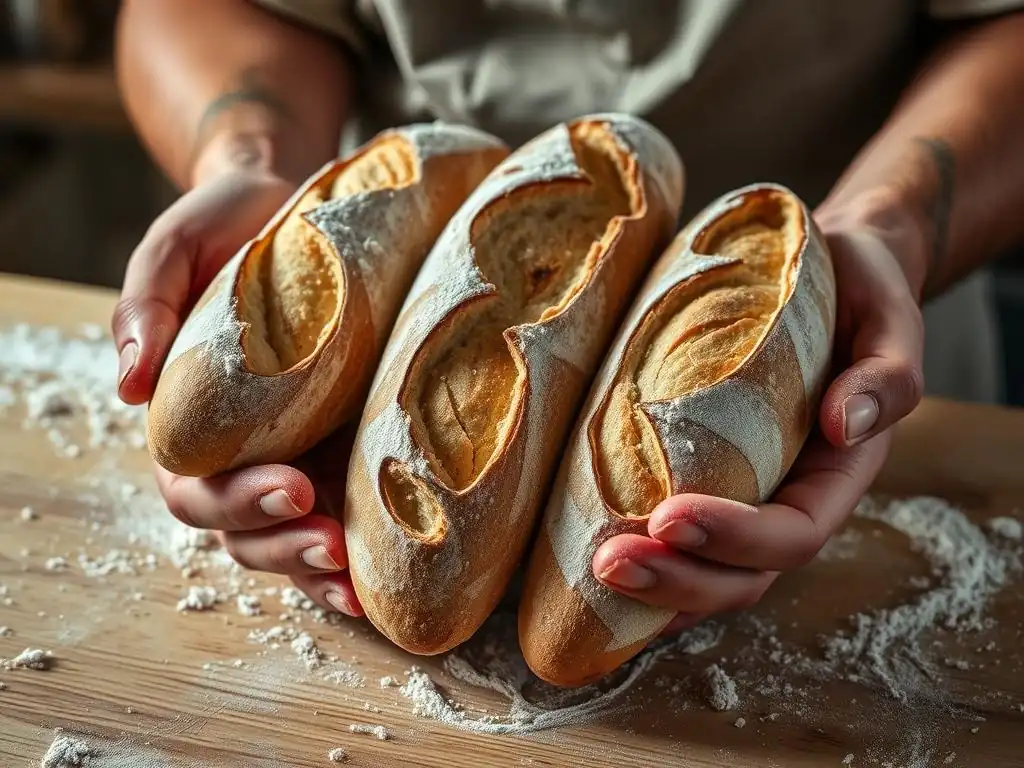
Even with careful attention to detail, baking sourdough baguettes can present challenges. Issues like a dense crumb, flat loaves, or a tough crust are common hurdles for home bakers. Understanding the potential causes of these problems is the first step towards fixing them and perfecting sourdough baguette recipe.
Don't be discouraged if your first few batches aren't perfect. Baking is a skill that improves with practice. By analyzing what went wrong, you can adjust your technique for the next bake.
Dense Crumb: Identifying the Causes and Solutions
A dense, heavy crumb in your sourdough baguettes can be frustrating. Several factors can contribute to this problem. One common cause is an inactive or weak sourdough starter that didn't produce enough gas to properly leaven the dough. If your starter didn't double or triple predictably after feeding, it might be the culprit. Solution: Nurse your starter back to health with consistent feedings at optimal temperatures before attempting another bake.
Another frequent reason for a dense crumb is insufficient bulk fermentation or proofing. If the dough didn't develop enough strength through folds or wasn't allowed enough time to rise adequately before baking, the gluten structure won't be strong enough to support an open crumb. For example, if your dough only increased by 10-20% in volume during bulk fermentation instead of the target 30-50%, it likely needed more time. Solution: Ensure your bulk fermentation and proofing times are appropriate for your dough temperature and starter activity, and make sure you are performing enough effective folds.
Flat Baguettes: Tips for Increasing Oven Spring
Flat baguettes that spread sideways instead of rising upwards in the oven are often a sign of insufficient dough strength or improper shaping and proofing. If the gluten network isn't strong enough, the dough won't have the structure to hold its shape and expand vertically. Solution: Focus on developing gluten strength through proper autolyse, sufficient mixing (but not over-mixing), and performing enough effective stretch and folds or coil folds during bulk fermentation. Using a high-protein flour also helps build a stronger structure.
Another major reason for flat loaves is over-proofing. An over-proofed dough has exhausted much of its leavening power before it even hits the oven, and the gluten structure may have started to degrade, causing it to spread. For instance, if your dough didn't spring back at all during the poke test, it was likely over-proofed. Solution: Pay close attention to the signs of readiness during proofing and bake the baguettes when they are perfectly proofed, not overly puffy. Using a couche for proofing also provides crucial support to help the baguettes hold their shape.
Tough Crust: Achieving the Perfect Balance
A tough, thick crust instead of a thin, crispy one can detract from an otherwise good baguette. This is often related to insufficient steam during the initial phase of baking or baking at too low a temperature. Without adequate steam, the crust forms too quickly and becomes thick and hard rather than allowing the dough to expand fully and develop a delicate exterior.
Solution: Ensure you are creating sufficient steam in your oven for the first 15-20 minutes of baking. Using a method like pouring boiling water into a hot pan on the bottom rack is generally more effective than just spraying the oven walls.
Baking at too low a temperature or for too long after the steam is removed can also contribute to a tough crust. The high initial heat helps set a thin crust quickly while the steam keeps it pliable for expansion. Solution: Preheat your oven and baking surface thoroughly to a high temperature (450-500°F / 230-260°C) and ensure you are using the correct baking times and temperatures as suggested in recipes, adjusting based on how your oven performs. Removing the steam source partway through the bake is also crucial for allowing the crust to dry and crisp up properly.
Advanced Techniques for Sourdough Baguette Mastery
Once you've gotten comfortable with the basics of perfecting sourdough baguette recipe, you might want to explore techniques that can add complexity, flavor, and unique characteristics to your loaves. These advanced methods often involve manipulating ingredients or fermentation processes in specific ways.
Experimenting with different flours, adding inclusions like seeds, or utilizing cold fermentation are popular ways to elevate your sourdough baguette baking.
Experimenting with Different Flours for Unique Flavors
While strong white bread flour is standard, incorporating other types of flour can significantly alter the flavor, texture, and nutritional profile of your baguettes. Using a percentage of whole wheat flour (e.g., 10-20% of the total flour weight) adds nutty, earthy notes and increases fiber content. For instance, a baguette made with 80% white bread flour and 20% whole wheat flour will have a deeper flavor than one made with 100% white flour.
Rye flour, even in small amounts (5-10%), can contribute a distinct tang and complexity. Spelt or Kamut flours offer different sweet or nutty undertones. Keep in mind that whole grain flours absorb more water and can affect gluten development, so you might need to adjust hydration levels and handle the dough more gently. Experimenting with small percentages of different flours is a great way to personalize your perfecting sourdough baguette recipe and discover new favorite flavor combinations.
Adding Seeds and Grains to Your Sourdough Baguettes
Adding seeds and grains can introduce wonderful textures and flavors to your sourdough baguettes. Common additions include sesame seeds, poppy seeds, flax seeds, sunflower seeds, or even cooked grains like quinoa or oats. These can be incorporated into the dough during the mixing phase or added as a coating on the outside of the shaped loaves before proofing.
If adding seeds or grains to the dough, it's often beneficial to pre-soak them (create a soaker) in a small amount of hot water for a few hours or overnight. This softens them, prevents them from absorbing water from your dough, and makes them easier to digest. For example, soaking 50g of mixed seeds in 50g of hot water until cool can then be added to your dough during the final mixing stage. Rolling the shaped baguettes in a tray of seeds before proofing is a simple way to add a flavorful, textured crust.
Cold Fermentation: Enhancing Flavor Development
Cold fermentation, typically done by proofing the shaped baguettes in the refrigerator for an extended period (8-16 hours or even up to 24 hours), is a technique widely used by artisan bakers. The cold temperature significantly slows down fermentation, allowing enzymes more time to break down starches and proteins into simpler compounds. This process develops more complex flavors, resulting in a tangier, more nuanced sourdough taste.
Beyond flavor, cold fermentation also makes the dough easier to handle and score, as it firms up in the cold. It also offers scheduling flexibility, allowing you to mix the dough one day and bake the baguettes the next morning without having to wake up early for a room-temperature proof. For example, you could shape your baguettes in the evening, place them on a couche in the refrigerator, and bake them straight from the fridge the following morning. This extended, slow proof contributes significantly to perfecting sourdough baguette recipe by maximizing flavor development.
Serving and Storing Your Homemade Sourdough Baguettes
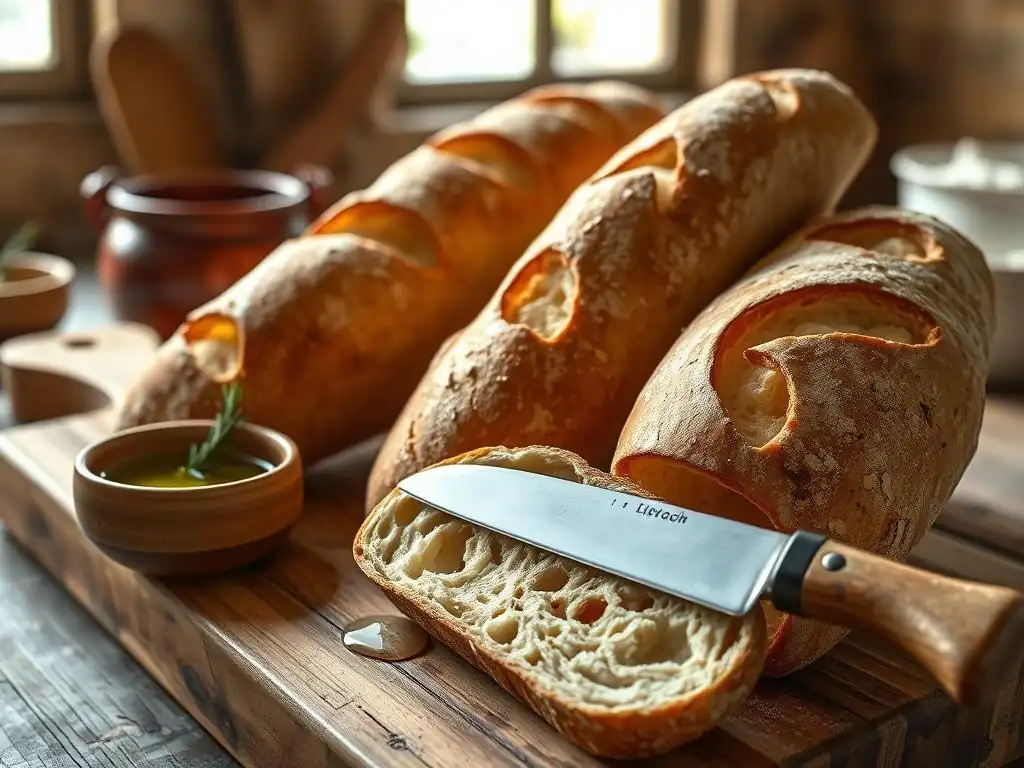
You've put in the effort to bake beautiful sourdough baguettes – now it's time to enjoy them! The way you serve and store your baguettes can significantly impact your enjoyment of their fresh-baked quality.
Proper handling after baking helps maintain that wonderful crispy crust and soft interior for as long as possible.
Best Ways to Enjoy Freshly Baked Baguettes
There's nothing quite like a warm, freshly baked sourdough baguette. The moment they come out of the oven, after cooling for just 15-30 minutes on a wire rack to allow the internal structure to set and the crust to fully crisp, they are at their absolute peak. Slice them thickly and enjoy them simply with butter or a drizzle of good olive oil.
Baguettes are also perfect for soaking up sauces, making bruschetta or crostini, or building delicious sandwiches. Consider serving them alongside soups, stews, or salads. The tangy flavor of the sourdough pairs wonderfully with a variety of dishes. Don't wait too long to enjoy them; the crustiest, most perfect texture is fleeting.
Storing Baguettes to Maintain Freshness
Baguettes are best enjoyed the day they are baked, as their thin crust can soften relatively quickly. However, you can store them to maintain quality for a day or two. The worst thing you can do is place a warm baguette in a plastic bag, as this traps moisture and quickly turns the crust soft and chewy.
For short-term storage (a few hours), simply leave the baguette cut-side down on a cutting board or wrap it loosely in a linen towel. For storing overnight or for up to 2 days, wrap the cooled baguette loosely in a paper bag. This allows some airflow, helping to preserve the crust. Avoid airtight containers or plastic bags if you want to keep the crust crispy. If the baguette goes slightly stale, it can be refreshed by lightly misting it with water and warming it in a 350°F (175°C) oven for 5-10 minutes.
Conclusion: Your Journey to Perfect Sourdough Baguettes
Baking sourdough baguettes at home is a deeply rewarding craft. While it requires attention to detail and patience, the result – a loaf with a crackling crust, complex flavor, and beautiful open crumb – is well worth the effort. By understanding the fundamentals, mastering each step from mixing to baking, and learning to troubleshoot, you are well on your way to perfecting sourdough baguette recipe.
Remember that every bake is a learning experience. Pay attention to how your dough behaves, note the results, and don't be afraid to experiment. With practice, you'll develop the intuition needed to consistently produce stunning baguettes.
Recap of Key Tips for Sourdough Baguette Success
- Healthy Starter: Ensure your sourdough starter is vigorous and active before you begin.
- Quality Ingredients: Use high-protein flour and understand how water temperature affects fermentation.
- Autolyse: Don't skip this step; it improves dough handling and crumb structure.
- Hydration: Find a hydration level that works for your flour and skill level, gradually increasing it.
- Bulk Fermentation: Allow adequate time for flavor development and perform sufficient folds for strength.
- Shaping: Practice pre-shaping and final shaping to create tension and form.
- Proofing: Know the signs of a perfectly proofed dough using the poke test. Use a couche for support.
- Baking: Preheat your oven and baking surface thoroughly, use high heat, and introduce plenty of steam initially. Score confidently with a sharp blade.
- Observation: Pay attention to the dough at every stage; it will tell you what it needs.
Further Resources for Sourdough Baking on BakeWithEase.com
Ready to dive deeper into the world of sourdough or explore other artisan baking projects? BakeWithEase.com offers a wealth of resources to support your baking journey.
- Detailed guides on maintaining and strengthening your sourdough starter.
- Recipes for other sourdough loaves like boules, batards, and specialty breads.
- Tips for using different flours and inclusions in sourdough baking.
- Troubleshooting guides for common sourdough issues.
- Video tutorials demonstrating key techniques like shaping and scoring.
Continue exploring our site for more tips, techniques, and recipes to help you master the art of baking at home, including perfecting sourdough baguette recipe and beyond!
Frequently Asked Questions
What makes a sourdough baguette different from a regular baguette?
A sourdough baguette gets its unique flavor and texture from wild yeasts and bacteria present in the sourdough starter, resulting in a tangy flavor and a chewier crumb compared to baguettes made with commercial yeast.
What is the most important thing to consider when perfecting a sourdough baguette recipe?
The strength and activity of your sourdough starter is paramount. A weak or inactive starter will result in a flat and dense baguette. It's also important to develop gluten.
Why is scoring the sourdough baguette important before baking?
Scoring allows the baguette to expand properly in the oven during baking. This prevents the baguette from bursting uncontrollably and helps create the characteristic crust and shape.
What can I do if my sourdough baguette is too dense?
Density can result from several factors, including under-proofing, a weak starter, or insufficient gluten development. Try proofing for a longer period and ensure your starter is active.
What temperature should I bake my sourdough baguette at, and for how long?
Bake at a high temperature, typically around 450-475°F (232-246°C), for approximately 20-25 minutes. This creates the crispy crust and allows the internal crumb to fully cook without drying out. Always adjust baking time based on your oven.
Final Reflection: The Enduring Allure of the Perfect Sourdough Baguette
The pursuit of the perfect sourdough baguette is more than just a culinary quest; it's a journey of patience, precision, and profound connection to the ancient art of bread making. This article has explored the nuances of achieving that coveted crisp crust and airy crumb, highlighting the critical role of starter management, hydration levels, and shaping techniques. But the true reward extends far beyond a visually stunning loaf.
The process of baking sourdough, particularly baguettes, has a unique ability to ground us in the present moment. The slow fermentation, the careful observation of the dough's rise, the satisfying thud of the baguette hitting the hot baking stone – these are moments of mindful engagement that are increasingly rare in our fast-paced world. Bread is the staff of life,
a simple phrase that speaks volumes about its fundamental importance and the deep satisfaction derived from its creation. This enduring truth resonates even more strongly when applied to the intricate process of sourdough baking.
Now, I invite you to consider your own journey in the kitchen. Don't be discouraged by initial setbacks; the path to mastering the sourdough baguette is paved with experimentation and learning. Embrace the challenges, savor the successes, and remember that the true magic lies not just in the final product, but in the process itself. So, gather your ingredients, nurture your starter, and embark on your own adventure in perfecting the art of the sourdough baguette. The reward – a crusty, flavorful loaf, and a deeper connection to the timeless traditions of baking – awaits.
Unleash Your Inner Boulanger: Bake the Perfect Baguette!
Thanks for joining us on this sourdough baguette journey! You've learned valuable techniques to elevate your baking game. Now it's time to put your newfound knowledge into practice.
- Bake your own masterpiece: Grab your ingredients and try the recipe – we're confident you'll be amazed by the results! Take notes on what works best for you.
- Share your success (or even your struggles!): Post a picture of your creation on social media and tag us – we’d love to see it!
- Explore other sourdough recipes on BakeWithEase – perhaps a rustic loaf is next on your list?
Ready to transform your kitchen into a Parisian boulangerie? What will your first post-baguette celebratory meal be?