
Proofing Baguettes in the Fridge: Benefits and Method

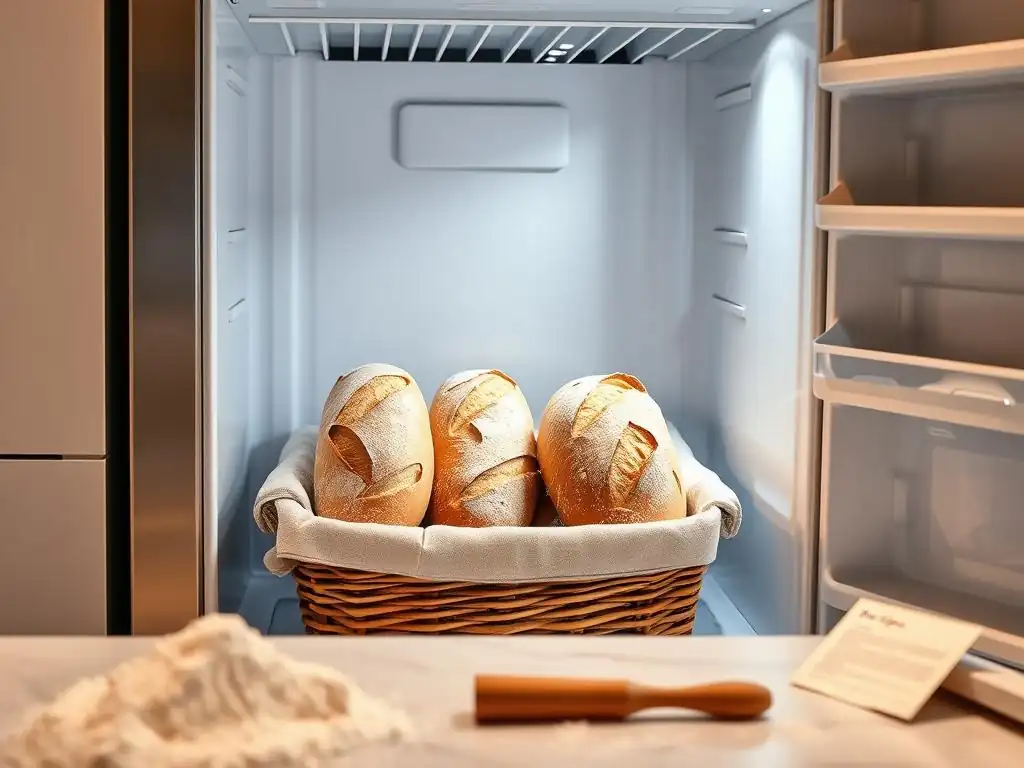
Welcome to BakeWithEase, your guide to confident baking! Ever wondered if you could effortlessly achieve that perfectly crisp baguette, even with a busy schedule? This article delves into the secrets of the fridge baguette proofing method, revealing how a little cold can unlock incredible flavor and texture. Get ready to discover a technique that simplifies your baking and elevates your bread game – read on to learn how!
- Fridge Baguette Proofing Method: BakeWithEase' Guide to Perfect Baguettes
- Introduction to Cold Proofing Baguettes
- Benefits of Proofing Baguettes in the Refrigerator
- Understanding the Science Behind Cold Fermentation for Baguettes
- Step-by-Step Guide: Fridge Baguette Proofing Method
- Baking Baguettes After Cold Proofing
- Troubleshooting Common Issues with Fridge Proofed Baguettes
- Tips and Tricks for Successful Cold Fermented Baguettes
- Beyond the Basics: Exploring Advanced Fridge Proofing Techniques
- Conclusion: Mastering the Art of Fridge Proofed Baguettes with BakeWithEase
- Frequently Asked Questions
- Final Reflection: The Cool Rise of the Perfect Baguette
- Unlock the Secrets of Perfectly Proofed Baguettes!
Fridge Baguette Proofing Method: BakeWithEase' Guide to Perfect Baguettes
Introduction to Cold Proofing Baguettes
What is Fridge Proofing and Why Use it for Baguettes?
Fridge proofing, also known as cold fermentation or retarding, is a baking technique where dough is allowed to rise slowly in a refrigerated environment, typically between 3°C and 5°C (about 37°F to 41°F). This process dramatically slows down yeast activity compared to proofing at room temperature. For baguettes, which benefit immensely from a long, slow fermentation, the fridge baguette proofing method is particularly advantageous.
It allows bakers to develop deeper, more complex flavors and aromas that simply aren't achievable with a rapid, warm proof. The extended fermentation time breaks down starches and proteins more thoroughly, contributing to a superior crust and crumb structure.
Using the fridge baguette proofing method also offers practical benefits. It provides flexibility in your baking schedule, allowing you to prepare the dough one day and bake it the next, or even several days later. This convenience makes baking artisan-quality baguettes more accessible for busy home bakers. Furthermore, the cold temperature makes the dough easier to handle and shape, especially high-hydration doughs typical of baguettes, resulting in better tension and structure before baking. It's a technique widely used by professional bakers to produce consistently excellent results, and it's one that home bakers can easily adopt with fantastic outcomes.
BakeWithEase' Recommendation: The Secret to Consistent Baguette Baking
At BakeWithEase, we firmly believe that mastering the fridge baguette proofing method is a game-changer for anyone aspiring to bake truly exceptional baguettes at home. This technique isn't just about slowing down the process; it's about enhancing every aspect of the final loaf – from the depth of flavor in the crumb to the crispness of the crust and the ease of handling the dough.
It transforms a simple mix of flour, water, salt, and yeast into a complex, aromatic bread. We've found through countless trials that baguettes proofed in the refrigerator consistently outperform those proofed solely at room temperature, yielding more predictable and satisfying results.
Our recommendation for achieving consistent baguette baking success centers on integrating cold fermentation into your routine. We've seen how bakers who adopt the fridge baguette proofing method report less stress about timing their bake perfectly within a tight window and more confidence in achieving that coveted open, airy crumb and deeply golden, crackling crust. It allows for greater control over the fermentation process and provides a buffer against environmental variables like room temperature fluctuations. By embracing cold proofing, you unlock a level of quality and convenience that elevates your baguette baking from good to truly outstanding.
Benefits of Proofing Baguettes in the Refrigerator
Enhanced Flavor Development Through Slow Fermentation
One of the most significant advantages of the fridge baguette proofing method is the profound impact it has on flavor. When yeast ferments slowly in a cold environment, it produces a wider range of organic acids and complex aromatic compounds compared to rapid fermentation at warmer temperatures. These compounds contribute to the nuanced, slightly tangy, and deeply 'wheaty' flavor characteristic of traditional artisan baguettes. Think of the difference between a quickly made loaf and a sourdough bread that has fermented for days – the principles are similar, though yeast-leavened cold-proofed dough develops its own unique profile.
Studies and anecdotal evidence from bakers worldwide consistently show that dough retarded in the fridge for 12-48 hours develops significantly richer flavor profiles than dough proofed for just a few hours at room temperature. This slow process allows enzymes in the flour, like proteases and amylases, to break down proteins and starches more effectively.
These broken-down components become food for the yeast over a longer period, resulting in a more complete fermentation and the creation of those desirable flavor precursors. The difference is palpable in the final bake, offering a depth of taste that is the hallmark of a truly great baguette.
Improved Dough Handling and Shaping
Working with cold dough is remarkably easier, especially when dealing with the high hydration levels often used in baguette recipes (typically 70-80% hydration relative to flour weight). Warm, rapidly proofed dough can be slack, sticky, and difficult to shape without losing precious gas or tearing the delicate gluten structure. The fridge baguette proofing method firms up the dough, making it less sticky and more manageable. The gluten network, though developed during the initial mixing and resting phases, tightens slightly in the cold, providing better structure and elasticity.
This improved handling means you can shape your baguettes with more confidence and precision. You can achieve better surface tension, which is crucial for creating a beautiful, taut skin that will expand properly in the oven and contribute to a crispy crust. The cold dough holds its shape better during transfer to the baking surface and is easier to score cleanly.
Bakers often find that attempting to shape and score warm, fully proofed baguette dough can be a frustrating experience, leading to deflated loaves. The firmness imparted by cold proofing simplifies these critical steps, leading to more consistently well-formed baguettes.
Convenience: Proofing Baguettes Overnight or Longer
The flexibility offered by the fridge baguette proofing method is a major draw for home bakers with busy schedules. Instead of being tied to a strict timeline dictated by room temperature proofing (which might range from 2-4 hours depending on conditions and yeast amount), you can fit your baking process around your life.
You can mix the dough in the evening, let it undergo a short initial proof, and then place it in the refrigerator to proof overnight, for 24 hours, or even up to 48-72 hours for some recipes. This allows you to bake fresh baguettes whenever it's most convenient, whether that's for breakfast, lunch, or dinner the next day or even the day after.
This extended proofing window means you don't have to rush or worry about the dough over-proofing if you're delayed. The cold temperature acts as a pause button on fermentation, giving you a much wider window of optimal readiness. For example, you could mix dough on a Friday evening, proof it in the fridge until Saturday morning for baking, or even leave it until Sunday morning. This level of scheduling freedom makes baking artisan bread at home a much less daunting and more enjoyable endeavor. The fridge baguette proofing method truly puts you in control of your baking timeline.
Better Oven Spring: Achieving a Light and Airy Crumb
Cold proofing contributes significantly to achieving excellent oven spring, which is the rapid expansion of the dough when it's first placed in a hot oven. Dough proofed in the refrigerator typically enters the oven colder.
This temperature difference between the cold dough and the hot oven (often 230-250°C or 450-480°F) causes a more vigorous burst of activity from the yeast and rapid expansion of gases within the dough structure before the crust sets. The cold temperature also helps the dough retain its shape and tension during the transfer and initial moments in the oven, allowing the gluten network to stretch maximally.
Furthermore, the slow gluten development during cold fermentation results in a stronger, more extensible network capable of trapping the gases produced during proofing and the initial oven spring. This leads to a more open, irregular crumb structure – the hallmark of a great baguette – with large, airy pockets. While room temperature proofing can also yield good results, the controlled, slower fermentation in the fridge often leads to more consistent and impressive oven spring, translating directly into a lighter, airier crumb and that desirable rustic appearance.
Understanding the Science Behind Cold Fermentation for Baguettes
Yeast Activity at Refrigerated Temperatures
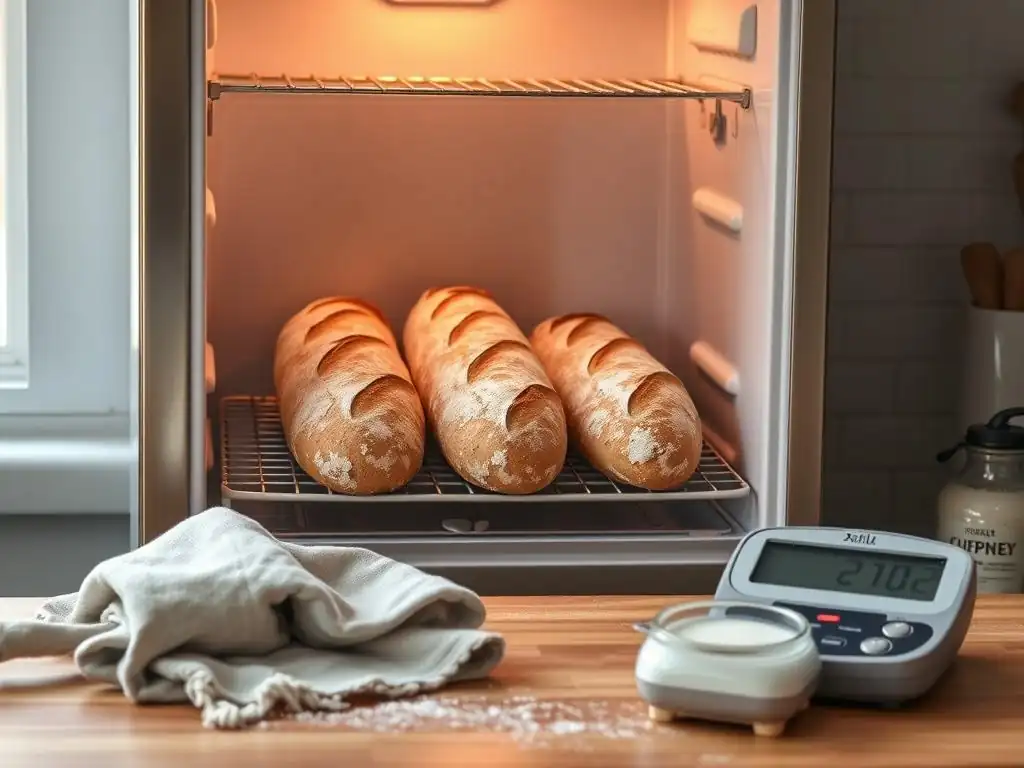
Yeast, the leavening agent in baguette dough, is a living organism whose activity is highly dependent on temperature. While yeast thrives in warm environments (around 25-30°C or 77-86°F), leading to rapid fermentation, its activity slows dramatically as temperatures drop. In the typical refrigerator range of 3-5°C (37-41°F), yeast is not dormant, but its metabolic rate is significantly reduced. It continues to produce carbon dioxide gas, which causes the dough to rise, but at a much slower pace. This slow, steady gas production over many hours is key to the fridge baguette proofing method.
At these cold temperatures, yeast primarily uses sugars readily available in the flour. Over time, enzymes within the flour, like amylase, break down complex starches into simpler sugars, providing a sustained food source for the yeast during the extended fermentation. This slow and continuous feeding and gas production builds a strong, stable gluten network capable of holding the gas without over-stretching and collapsing prematurely. The controlled environment of the refrigerator provides a stable temperature for this slow process, unlike the fluctuating temperatures of a typical kitchen counter.
Gluten Development and Dough Structure
Gluten, the protein network formed when water is added to flour and kneaded, is crucial for the structure of a baguette. It's the gluten that traps the gas produced by the yeast, allowing the dough to rise and creating the open crumb structure. During cold fermentation, while yeast activity slows, enzymatic activity continues, albeit also at a reduced rate. Protease enzymes in the flour slowly break down some of the protein chains, while mechanical stress from the slow gas production and internal dough movement helps align the gluten network.
This slow, enzymatic breakdown and alignment during the fridge baguette proofing method results in a more extensible and less elastic gluten network compared to dough proofed quickly at room temperature. An extensible dough can stretch further without tearing, which is essential for achieving good oven spring and an open crumb. The cold temperature also helps the gluten structure firm up, providing stability. When the cold dough hits the hot oven, this well-developed, extensible, and stable gluten network is ready to expand rapidly, supporting the vigorous gas production and resulting in that desirable airy interior.
How Cold Proofing Affects Baguette Flavor Profile
The complex flavors developed during the fridge baguette proofing method are a result of several biochemical processes occurring simultaneously during the slow fermentation. As mentioned, yeast produces more complex aromatic compounds when fermenting slowly in the cold compared to rapid fermentation. Additionally, lactic acid bacteria, often present in flour and sourdough starters (even in small amounts in commercial yeast dough), become more active relative to yeast at cooler temperatures. These bacteria produce lactic and acetic acids.
Lactic acid contributes a milder, rounded tang, while acetic acid provides a sharper, more vinegary note. The balance of these acids, developed over the prolonged cold fermentation, adds depth, complexity, and a subtle sourness that distinguishes artisan bread.
Furthermore, the slow breakdown of starches into sugars by enzymes creates more readily available food for the yeast and bacteria, leading to a more complete fermentation and the release of various volatile compounds that contribute to the bread's aroma. The combination of these processes under the controlled conditions of the fridge baguette proofing method yields a flavor profile far more nuanced and appealing than that of quickly proofed bread.
Step-by-Step Guide: Fridge Baguette Proofing Method
Preparing the Baguette Dough for Cold Proofing
The first step in the fridge baguette proofing method is preparing your dough. This typically involves mixing flour, water, yeast, and salt. Many baguette recipes use a pre-ferment like a poolish or a levain for added flavor, but a straight dough can also be cold proofed successfully. Ensure your dough is well-mixed and kneaded to develop sufficient gluten.
A typical baguette hydration is between 70% and 80%. For example, if using 500g of flour, you might use 350g to 400g of water. Yeast amounts are often reduced for long, cold fermentation; perhaps as little as 0.1-0.5% instant dry yeast relative to flour weight (e.g., 0.5g to 2.5g for 500g flour), depending on the desired proofing duration.
After mixing and kneading (either by hand or machine), the dough usually undergoes an initial bulk fermentation period at room temperature. This might last anywhere from 1 to 3 hours, with a few folds (like stretch and folds or coil folds) performed every 30-60 minutes during the first part of this period. These folds help strengthen the gluten structure and equalize dough temperature.
The dough should show some signs of activity and increase in volume by about 20-50% before being placed in the refrigerator. This initial rise kickstarts fermentation before the cold dramatically slows it down, which is crucial for successful cold proofing baguettes.
Poolish Baguette Recipe (Approximation)
Here is an approximate structure for a Poolish baguette dough suitable for the fridge baguette proofing method:
Poolish:
100g Bread Flour
100g Water (room temperature)
Pinch (approx 0.1g) Instant Dry Yeast

Mix poolish ingredients and let sit at room temperature for 12-16 hours until bubbly and mature.

Final Dough:
400g Bread Flour
200-250g Water (cool, adjust based on flour absorption and desired hydration)
Mature Poolish (all)
8g Salt
Pinch (approx 0.5g) Instant Dry Yeast (optional, for a little boost, or omit for longer proof)
Mix all final dough ingredients (except salt initially, add after autolyse if doing one, or add with others). Knead until dough is smooth and elastic. Perform 2-3 sets of stretch and folds over the next 1.5-2 hours at room temperature.
Shaping the Baguettes
After the initial bulk fermentation (and potentially a short room temperature proof after removing from the fridge, as discussed below), the dough is divided and shaped into baguettes. For typical home ovens, dough portions are often around 250-350g to make loaves roughly 12-16 inches long. Gently preshape the dough into rough cylinders or rectangles, cover, and let rest for 15-20 minutes. This allows the gluten to relax, making final shaping easier.
Final shaping involves degassing the dough gently, folding it onto itself, and rolling or stretching it into the characteristic long, thin baguette shape. The goal is to create surface tension without tearing the dough. A good technique involves folding the top edge down to the center, pressing to seal, then folding the dough in half lengthwise and sealing the seam firmly.
Then, gently roll it back and forth, applying slight pressure from the center outwards, to achieve the desired length and taper. Place the shaped baguettes seam-side up onto a couche (linen cloth) or floured surface, separated by folds in the cloth, or into perforated baguette pans.
Initial Proofing at Room Temperature (Optional)
Some bakers prefer to give the dough a short initial proof at room temperature after shaping but before refrigerating. This allows the shaping-induced stress on the gluten to relax slightly and gives the yeast a brief period of more active gas production before the cold slows it down. This step might last 30-60 minutes, depending on your room temperature and how active your dough is.
Alternatively, you can place the shaped baguettes directly into the refrigerator after shaping. This is often done if the dough had a significant initial bulk fermentation at room temperature or if you plan a very long cold proof (24+ hours). Placing them directly in the cold helps firm them up quickly, making them easier to handle and score when they come out of the fridge later. Experimentation will help you determine which approach works best with your specific recipe and schedule for your fridge baguette proofing method.
Refrigerating the Baguettes: Best Practices
Once shaped and potentially given a brief room temperature rest, the baguettes are ready for their cold proofing stage in the refrigerator. It's crucial to place them in the fridge as soon as possible after shaping to slow down fermentation effectively. If using a couche, carefully lift the cloth with the baguettes and place the entire setup on a baking sheet or board that fits in your fridge. If using perforated baguette pans, simply place the pans directly into the refrigerator.
Ensure there is adequate space between the baguettes to allow for some expansion during the cold proof. Avoid overcrowding the fridge, as this can restrict cold air circulation. The goal is to cool the dough down relatively quickly to halt rapid fermentation. This stage is where the magic of the fridge baguette proofing method truly happens, allowing flavors to deepen and structure to develop slowly over many hours.
Temperature Recommendations for Optimal Proofing
Maintaining a consistent cold temperature is key for successful fridge baguette proofing. The ideal temperature range for retarding dough is typically between 3°C and 5°C (37°F and 41°F). Temperatures much below 3°C can almost completely halt yeast activity, while temperatures above 5°C might lead to fermentation that is too rapid, potentially causing over-proofing, especially with longer proofing times.
It's a good idea to check your refrigerator's temperature with a thermometer to ensure it falls within this range. Avoid placing the dough in the coldest spot of the fridge (like against the back wall near the freezer compartment), as this could potentially freeze the dough surface, which is undesirable. A stable temperature within the recommended range allows for that slow, controlled fermentation that is the essence of the fridge baguette proofing method.
Covering the Baguettes to Prevent Drying
Preventing the surface of the baguettes from drying out during the long cold proof is absolutely essential. A dry skin will restrict oven spring and result in a poor crust. If using a couche, the dough is typically placed seam-side up, and the couche itself is floured and then folded over the top of the loaves. The entire tray with the couche and baguettes should then be covered loosely but effectively with plastic wrap or placed inside a large plastic bag. Ensure the plastic doesn't stick directly to the dough surface.
If using perforated baguette pans, cover the entire pan and baguettes loosely with plastic wrap. Again, make sure the plastic doesn't touch the dough surface directly; you can prop it up slightly with chopsticks or small containers if needed. Some bakers lightly mist the dough surface with water before covering, but ensuring a good seal with the plastic is usually sufficient to maintain humidity around the loaves during the fridge baguette proofing method.
Duration of Cold Proofing: How Long to Proof Baguettes in the Fridge?
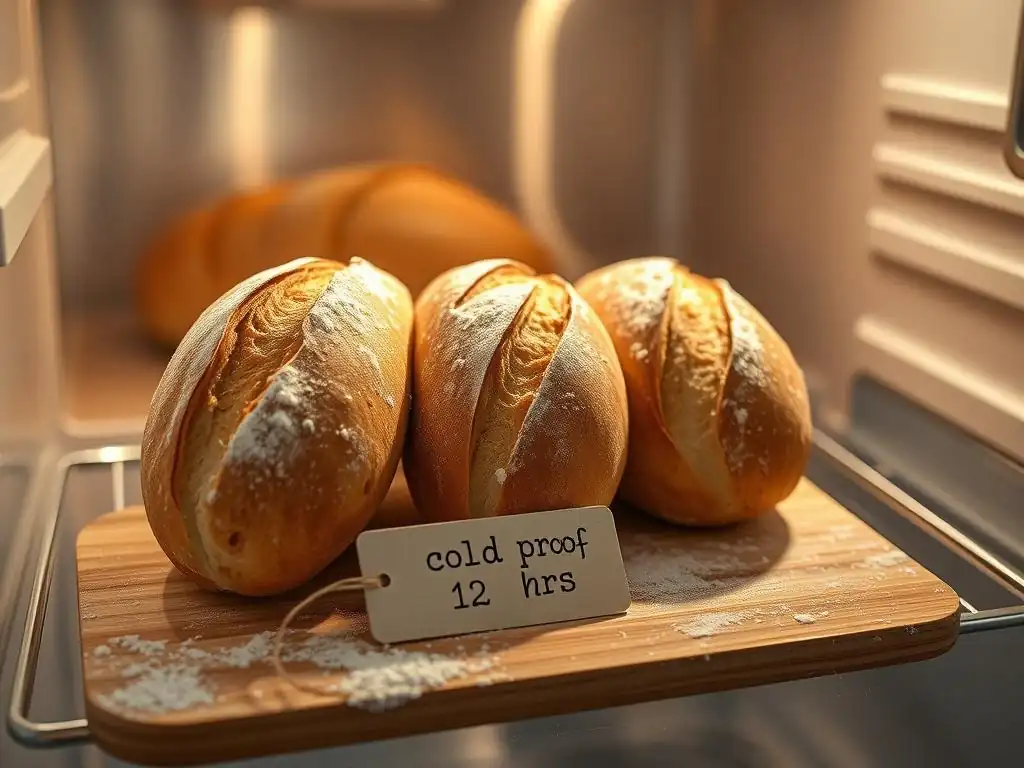
The duration of the cold proof is flexible and depends on your recipe, the amount of yeast used, the dough's initial temperature, and your desired outcome. A common range for the fridge baguette proofing method is anywhere from 12 hours to 48 hours. A minimum of 12 hours is often recommended to see significant flavor development.
Proofing for 18-24 hours is a very popular duration, balancing flavor enhancement with dough manageability. Proofing for 36-48 hours can lead to even deeper flavors and a more open crumb, provided the dough is formulated to withstand such a long fermentation (often requiring minimal yeast).
Observing the dough is key. While in the fridge, the baguettes will expand slowly. They should increase in volume, but not necessarily double, as fermentation is slow. The dough should look slightly puffy and feel soft but still have some structure. A good indicator is often seen when you gently press the dough – it should spring back slowly, leaving a slight indentation. If it springs back immediately, it needs more time. If the indentation remains fully, it might be over-proofed.
Factors Affecting Proofing Time
Several factors influence the optimal duration of the fridge baguette proofing method:
- Yeast Amount: Less yeast requires a longer proofing time to achieve sufficient rise. More yeast allows for a shorter cold proof.
- Dough Temperature: If the dough was very warm when placed in the fridge, it will take longer to cool down, and fermentation will be more active initially, potentially shortening the optimal cold proofing window. Starting with cooler water when mixing can help manage this.
- Refrigerator Temperature: A fridge at 3°C will slow fermentation more than one at 5°C, requiring a potentially longer proof.
- Flour Type: Different flours behave differently. High-protein bread flours might require a slightly longer proof to fully develop structure and flavor.
- Desired Flavor Intensity: Longer cold proofing times generally lead to more complex and tangy flavors.
Understanding these factors helps you adjust the fridge baguette proofing method to suit your specific recipe and desired outcome. It often requires a bit of experimentation to find the sweet spot for your environment and ingredients.
Removing Baguettes from the Fridge: Preparing for Baking
After the cold proofing period, the baguettes are removed from the refrigerator and prepared for baking. This transition is a critical step in the fridge baguette proofing method. How you handle this depends on your desired baking schedule and how proofed the baguettes appear directly out of the fridge.
Some methods suggest baking the baguettes directly from the cold. This works well if the baguettes appear sufficiently proofed in the fridge (puffy but not overly expanded) and can help with scoring and achieving maximum oven spring due to the temperature contrast. Other methods call for letting the baguettes sit at room temperature for a period, anywhere from 30 minutes to 1.5 hours, before baking. This allows the dough to warm up slightly, which can help yeast activity kick back in and potentially improve oven spring.
The optimal approach depends on your specific dough and desired results. Observe your dough: if it looks slightly under-proofed coming out of the fridge, a short bench rest is beneficial. If it looks perfectly proofed, baking cold might be best.
Baking Baguettes After Cold Proofing
Scoring the Baguettes: Achieving the Perfect Crust
Scoring (or slashing) the baguettes just before baking is essential. It serves multiple purposes: it controls where the loaf expands during oven spring, prevents the crust from bursting unpredictably, and creates the characteristic aesthetic of a baguette. Because dough from the fridge baguette proofing method is cold and firm, it is generally much easier to score cleanly than warm, fully proofed dough.
Use a very sharp blade, like a baker's lame or a razor blade, held at a shallow angle (around 20-30 degrees) to the dough surface. Make overlapping cuts along the length of the baguette. For a standard baguette, you might make 3-5 overlapping slashes. The cuts should be decisive and confident, penetrating about 1/2 to 3/4 inch deep. Clean, deep scores allow the dough to open up beautifully during baking, creating 'ears' (the crispy flap of crust along the slash) and contributing to excellent oven spring and a desirable crust texture.
Oven Temperature and Baking Time
Baguettes require a hot oven to achieve maximum oven spring and a crispy crust. Preheat your oven thoroughly, ideally to a temperature between 230°C and 250°C (450°F and 480°F). It's best to preheat for at least 30-60 minutes, and even longer if using a baking stone or steel, to ensure the oven and baking surface are fully saturated with heat.
Baking time for baguettes typically ranges from 20 to 30 minutes, depending on their size, the oven temperature, and your desired crust color. The first 10-15 minutes are critical for oven spring and crust development, often done with steam (see below). After this initial phase, the steam is released, and the baguettes continue to bake until they are deeply golden brown and sound hollow when tapped on the bottom. An internal temperature of around 95-100°C (205-210°F) indicates they are fully baked.
Creating Steam for a Crispy Crust
Steam is crucial for achieving that signature thin, crispy baguette crust. In a professional deck oven, steam is injected. In a home oven, you need to create a steamy environment at the beginning of the bake. The steam keeps the surface of the dough moist initially, allowing it to expand fully before the crust sets. Without steam, the crust forms too quickly, restricting oven spring and resulting in a thicker, tougher crust.
There are several methods for creating steam in a home oven. One common method is placing a cast iron pan or other heatproof container on the bottom rack of the oven while preheating. Just before loading the baguettes, carefully pour hot water into this pan to create a burst of steam. Use about 1 cup of hot water. Be extremely cautious of the hot steam produced.
Using a Lava Rock and Water Steam Method
A highly effective method for generating sustained steam is using lava rocks or a handful of nuts/bolts in a cast iron pan. Place the pan with lava rocks (or bolts) on the bottom rack during preheating. The porous lava rocks (or metal objects) retain and radiate heat effectively. Just before loading the baguettes, carefully pour about 1 cup of boiling water over the hot lava rocks/bolts. This creates a significant burst of steam that lasts for the crucial initial baking period.
Load your baguettes onto the preheated baking stone or steel (or into the baguette pan), close the oven door quickly to trap the steam, and bake for about 10-15 minutes with the steam. After this period, carefully open the oven door to release the steam (stand back! ), remove the steam pan, and continue baking at the same temperature until the baguettes are done. This method, combined with the fridge baguette proofing method, significantly improves crust quality.
Cooling and Enjoying Your Homemade Baguettes
Once baked to a beautiful golden-brown color, remove the baguettes from the oven. It is essential to let them cool completely on a wire rack before slicing and eating. While the temptation to break into a warm baguette is strong, the internal structure and crust are still setting as it cools. Slicing too early can result in a gummy interior.
Cooling on a wire rack allows air to circulate around the entire loaf, preventing the bottom crust from becoming soggy from trapped steam. A typical baguette might take 45-60 minutes to cool sufficiently. The waiting is the hardest part, but allowing your fridge proofed baguettes to cool properly ensures you experience the perfect balance of crispy crust and airy, flavorful crumb that the fridge baguette proofing method helps achieve.
Troubleshooting Common Issues with Fridge Proofed Baguettes
Even with the reliable fridge baguette proofing method, occasional issues can arise. Understanding what might go wrong and how to address it is part of the learning process in achieving consistently great results. Common problems include over-proofing, under-proofing, dough sticking, and uneven baking.
Diagnosing the issue involves looking at the dough's behavior during shaping, scoring, and baking, as well as the final appearance and texture of the loaf. Often, small adjustments to timing, temperature, or handling can resolve these problems and help you perfect your approach to the fridge baguette proofing method. Patience and observation are key.
Over-Proofing in the Refrigerator
Over-proofing in the refrigerator can happen, especially with very long proofing times or if the fridge temperature is too high. While the cold slows fermentation, it doesn't stop it completely. Over-proofed dough will typically look excessively puffy and may even start to flatten out slightly. The surface might appear bubbly or blistered. When you gently poke it, the indentation will remain without springing back at all.
Signs of Over-Proofing and How to Prevent It
Signs of over-proofing include:
- Dough appears significantly expanded, potentially more than doubled.
- Dough feels very soft and fragile, lacking tension.
- Difficulty shaping or scoring cleanly; the dough might tear easily.
- Poor oven spring; the baguette might flatten out rather than rising upwards.
- A dense or collapsed crumb structure.
To prevent over-proofing when using the fridge baguette proofing method:
- Reduce Yeast: Use a smaller amount of yeast, especially for proofing times exceeding 24 hours.
- Verify Fridge Temperature: Ensure your refrigerator is consistently between 3°C and 5°C.
- Adjust Proofing Time: Shorten the cold proofing duration based on your observations.
- Use Cooler Water: Start with cooler water when mixing the dough to slow down initial fermentation before refrigeration.
Under-proofing is also possible with the fridge baguette proofing method, often occurring if the cold proof is too short, the yeast amount is too low for the duration, or the fridge is too cold. Under-proofed dough will look dense and may not have increased much in volume. It will feel firm and tight. When poked, it will spring back immediately and completely.
Signs of Under-Proofing and How to Adjust
Signs of under-proofing include:
- Dough appears dense and hasn't expanded much in the fridge.
- Dough feels tight and difficult to shape or stretch.
- Scores might not open properly during baking.
- Explosive oven spring with significant tearing along the sides (not just the scores).
- A dense, tight crumb structure with very small, uniform holes.
To address under-proofing with the fridge baguette proofing method:
- Increase Proofing Time: Extend the cold proofing duration.
- Slightly Increase Yeast: Use a tiny bit more yeast in your recipe for future batches.
- Allow Bench Rest: If baking directly from the fridge, try letting the baguettes rest at room temperature for 30-90 minutes before scoring and baking to allow fermentation to resume.
- Ensure Fridge isn't Too Cold: Verify your fridge temperature is within the optimal 3-5°C range.
Dough Sticking to the Proofing Surface
Dough sticking to the couche or proofing surface after cold proofing can be frustrating. This typically happens if the surface wasn't adequately floured before placing the shaped baguettes, or if the humidity in the fridge was too high and the dough surface became sticky.
To prevent sticking when using the fridge baguette proofing method:
- Generously Flour Couche/Surface: Use a good amount of flour (rice flour is excellent as it doesn't absorb moisture) on your couche or proofing surface before placing the shaped baguettes.
- Ensure Adequate Covering: Make sure your plastic wrap or bag creates a sufficient barrier to prevent the dough surface from drying out, but also isn't directly touching and potentially sticking to the dough.
- Handle Gently: When transferring from the couche, use a peel or board and a bench scraper to gently ease the baguettes off the cloth.
Uneven Baking and Crust Formation
Uneven baking can result in baguettes that are darker on one side or have an inconsistent crust color and texture. This is usually related to uneven heat distribution in your oven.
To improve even baking with the fridge baguette proofing method:
- Preheat Thoroughly: Ensure your oven is fully preheated, especially if using a stone or steel.
- Rotate Baguettes: Halfway through the baking time (e.g., after 10-15 minutes when you release steam), carefully rotate the baguettes 180 degrees for more even heat exposure.
- Check Oven Calibration: If uneven baking is a persistent issue, your oven temperature might be inconsistent. An oven thermometer can help verify the actual temperature.
- Use a Baking Stone/Steel: Baking on a preheated stone or steel provides consistent heat from below, contributing to better oven spring and crust development.
Tips and Tricks for Successful Cold Fermented Baguettes
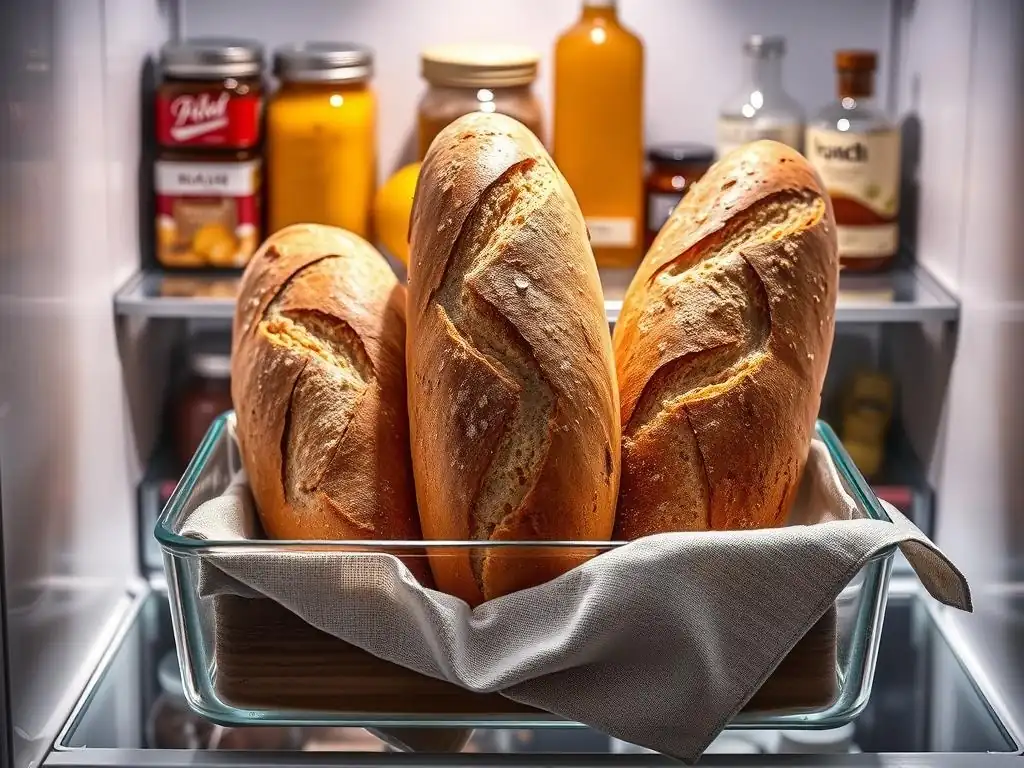
Mastering the fridge baguette proofing method involves more than just following steps; incorporating a few key tips can significantly improve your results. These pointers come from experienced bakers and address common areas where small adjustments make a big difference in the final quality of your cold proofed baguettes.
From selecting the right ingredients to monitoring your dough's condition, these tips will help you fine-tune your fridge baguette proofing method and consistently bake beautiful, delicious baguettes with that sought-after open crumb and crispy crust.
Choosing the Right Flour for Cold Proofing
The type of flour you use has a significant impact on the success of the fridge baguette proofing method. A good quality bread flour with a protein content typically between 11% and 13% is ideal. This higher protein content contributes to a stronger gluten network, which is necessary to support the long fermentation time and high hydration levels common in baguette doughs.
Flour performance can vary by brand and type. Some flours are better suited for long, slow fermentation than others. Look for unbleached bread flour. While all-purpose flour can be used, it generally has lower protein (around 10-11%) and may not develop a strong enough gluten structure to withstand a very long cold proof (24+ hours) without potentially degrading. Using a flour specifically designed for bread baking will yield more reliable and superior results when proofing baguettes in the fridge.
Adjusting Yeast Levels for Longer Proofing Times
One of the most important adjustments when using the fridge baguette proofing method is reducing the amount of yeast compared to a standard room-temperature recipe. Since fermentation is happening over a much longer period (many hours instead of a few), you need significantly less yeast to avoid over-proofing.
For a cold proof of 12-24 hours, you might use as little as 0.2% to 0.5% instant dry yeast relative to the flour weight. For very long proofs (24-48+ hours), this can be reduced even further, sometimes to just a tiny pinch (0.1% or less) or relying solely on the yeast in a pre-ferment like a poolish or levain. Experimentation with your specific recipe, fridge temperature, and desired proofing duration is necessary to find the perfect yeast level. Too much yeast will lead to rapid fermentation even in the cold, risking over-proofing. Too little will result in under-proofing.
Using a Banneton or Couche for Shaping and Proofing
Using a banneton (proofing basket) or a baker's couche (linen cloth) is highly recommended when proofing baguettes, especially with the fridge baguette proofing method. These tools help the shaped dough maintain its form and structure during the proofing period.
A couche, traditionally made of linen, is heavily floured and shaped baguettes are placed seam-side up between folds of the cloth. The cloth absorbs excess moisture from the surface of the dough, helping to form a thin, dry skin that contributes to a crispy crust. Perforated baguette pans also work well, allowing air circulation and supporting the shape. Using these tools ensures your baguettes hold their elegant form during the long, slow rise in the refrigerator, preventing them from spreading out flatly and aiding in achieving that classic baguette shape.
Monitoring Dough Temperature for Consistent Results
While the fridge temperature is controlled, the initial temperature of your dough when it goes into the refrigerator can affect the initial fermentation rate. Dough mixed with warmer water or that has undergone a longer initial room temperature bulk fermentation will take longer to cool down in the fridge and will ferment more actively during that cooling period.
For more consistent results with the fridge baguette proofing method, consider using cooler water when mixing the dough, especially if your kitchen is warm. Aim for a final dough temperature after mixing and kneading of around 24-26°C (75-79°F). This temperature allows for good initial gluten development but won't cause fermentation to run too wild before it gets into the cold. Using a probe thermometer to check the dough's core temperature after mixing and at intervals in the fridge can help you understand how quickly it's cooling and how this affects your proofing timeline.
Beyond the Basics: Exploring Advanced Fridge Proofing Techniques
Once you're comfortable with the standard fridge baguette proofing method, you can explore more advanced techniques that leverage cold fermentation to further enhance flavor and structure or integrate it with other baking methods. The flexibility of cold proofing opens up possibilities for experimentation and refining your baguette baking skills.
These advanced techniques often involve adjusting the timing, temperature, or combining cold proofing with other pre-ferments or methods to achieve specific characteristics in the final loaf. It's a journey of continuous learning and delicious discovery in the world of artisan bread.
Retarding Dough for Different Flavor Profiles
Varying the duration and temperature of the cold proof can significantly alter the flavor profile of your baguettes. A shorter cold proof (12-18 hours) will yield a milder, sweeter flavor profile with less tang. Proofing baguettes in the fridge for a longer period (24-48 hours or even more) allows for greater acid development, resulting in a more complex, slightly sour flavor, closer to that of a naturally leavened bread.
Experimenting with different fridge temperatures within the acceptable range (3-5°C) can also influence flavor. A slightly warmer fridge temperature (closer to 5°C) might encourage slightly faster fermentation and a different balance of acids compared to a colder temperature (closer to 3°C). By playing with these variables in the fridge baguette proofing method, you can tailor the flavor of your homemade baguettes to your personal preference. Keep detailed notes of your experiments to track the outcomes.
Combining Cold Proofing with Other Baking Techniques
The fridge baguette proofing method can be combined with other techniques to enhance the final loaf. For example, using a high-hydration dough (75%+ water) combined with cold proofing can lead to a very open, airy crumb. Using a pre-ferment like a poolish or a small amount of sourdough starter in addition to commercial yeast adds another layer of flavor complexity that is further developed during the cold proof.
Another technique is to use a short, intense burst of heat at the beginning of the bake after cold proofing, sometimes called "thermal mass baking," by using a very hot baking steel or stone. The cold dough hitting the extremely hot surface creates maximum steam and oven spring potential. Exploring these combinations within your fridge baguette proofing method allows you to push the boundaries of what you can achieve with home baking.
Experimenting with Different Hydration Levels
Adjusting the hydration level of your baguette dough (the ratio of water to flour) is another area for experimentation, particularly when using the fridge baguette proofing method. Higher hydration doughs (75-80%+) are typically stickier and harder to handle at room temperature but become much more manageable after cold proofing. These higher hydration doughs tend to produce a more open and irregular crumb structure, which is highly desired in artisan baguettes.
Lower hydration doughs (65-70%) are easier to handle from the start but might result in a slightly less open crumb. They still benefit significantly from the flavor development of cold proofing. Experimenting with hydration levels while using the fridge baguette proofing method allows you to understand how water content affects dough handling, fermentation speed in the cold, and the final crumb structure and texture. Start with a moderate hydration (around 72-75%) and adjust up or down in subsequent bakes.
Conclusion: Mastering the Art of Fridge Proofed Baguettes with BakeWithEase
Embrace the Fridge Baguette Proofing Method for Superior Results
The fridge baguette proofing method is a cornerstone technique for anyone serious about baking exceptional baguettes at home. It offers unparalleled benefits in terms of flavor development, dough handling, scheduling convenience, and achieving that perfect crust and crumb. By allowing fermentation to proceed slowly and steadily in a cold environment, you unlock the full potential of your ingredients, transforming simple dough into a loaf with complex aromas and textures.
We at BakeWithEase encourage you to embrace this technique. While it requires patience and a little planning, the rewards are immense. The ability to bake fresh, artisan-quality baguettes on demand, with a depth of flavor and structure that rivals your favorite bakery, makes the fridge baguette proofing method an invaluable addition to your baking repertoire. It's a technique that truly elevates your bread baking to the next level.
We love seeing the results of bakers who use the fridge baguette proofing method! Sharing your successes is not only rewarding but also helps inspire others in the BakeWithEase community. Did you achieve incredible oven spring? Did you notice a dramatic difference in flavor compared to room temperature proofing? Did the convenience of overnight proofing make your morning easier?
Share photos of your beautiful cold proofed baguettes, describe your process, and let us know what you learned. Your experiences and tips are valuable to fellow bakers embarking on their own journey with the fridge baguette proofing method. Celebrate your achievements and help spread the word about the fantastic results possible with this technique!
Frequently Asked Questions
How does fridge proofing benefit baguettes?
Fridge proofing slows down the fermentation process, leading to a more complex flavor and better crumb structure in your baguette. It also allows for more convenient baking schedules.
What is the ideal temperature for fridge proofing baguettes?
The ideal temperature for fridge proofing baguettes is between 35-40°F (2-4°C). This slows yeast activity without completely stopping it.
How long should I proof my baguette dough in the fridge?
Generally, baguette dough can be proofed in the fridge for 12-24 hours. Longer proofing times can further enhance the flavor development.
Does fridge proofing affect the scoring of the baguette?
Yes, fridge proofing can make the dough easier to score because it's firmer and less sticky. This results in cleaner cuts and better oven spring.
Can I over-proof baguette dough in the fridge?
While less likely than at room temperature, it's still possible to over-proof dough in the fridge. Look for signs like a collapsed or overly acidic dough to avoid this.
Final Reflection: The Cool Rise of the Perfect Baguette
The art of baking the perfect baguette extends far beyond the oven; it begins with a thoughtful proofing process. Mastering this crucial step significantly impacts the final product's texture, flavor, and overall quality, making the fridge proofing method a game-changer for home bakers. This isn't just about technical precision; it's about unlocking the potential of a truly exceptional loaf.
The slow, controlled fermentation that occurs in the refrigerator allows for the development of complex flavors and a more open crumb structure, a characteristic often associated with professional bakeries. This isn't just a technique; it's a testament to the patience and dedication required to achieve culinary excellence. As Julia Child once wisely said, Find something you're passionate about and keep tremendously interested in it.
For me, that passion lies in perfecting the humble baguette, and the fridge proofing method is a key element in that journey. It's a process that allows the simple ingredients to transform into something truly remarkable.
Now, it's your turn. Don't be intimidated by the seemingly complex world of bread baking. Experiment with the fridge proofing method, observe the subtle changes in your dough, and savor the reward of a perfectly risen, beautifully textured baguette. The journey of mastering this technique is as rewarding as the final product itself. Embrace the process, trust the science, and discover the joy of crafting your own perfect loaf. The cool rise awaits.
Unlock the Secrets of Perfectly Proofed Baguettes!
Thanks for taking the time to explore the wonders of fridge proofing your baguettes! You've now learned how to achieve incredible flavor and texture. Ready to bake your best baguette yet?
- Start your next batch today: Grab your ingredients and try our method – you’ll be amazed at the difference! Remember to adjust your baking time accordingly!
- Share your results: Show off your beautiful, perfectly proofed baguettes on social media and tag #BakeWithEase! We'd love to see them!
- Dive deeper: Explore more of our bread-baking tips and recipes on BakeWithEase.com!
What will your next baking adventure be?