
Why Your Baguette Collapsed (and How to Prevent It)

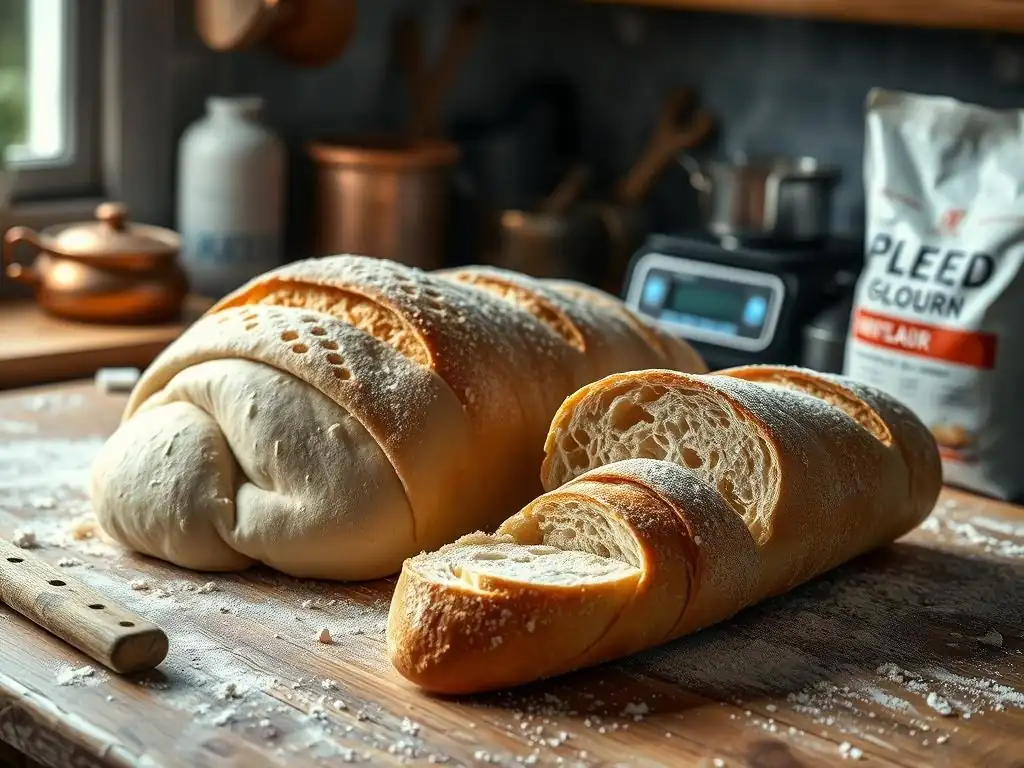
Welcome to BakeWithEase, your trusted guide to baking brilliance! Ever wondered why your baguette collapsed despite following the recipe perfectly? You're not alone! Discover the secrets to achieving that perfect, airy crumb and crispy crust. Dive into our comprehensive guide, "Why Your Baguette Collapsed (and How to Prevent It)," and unlock the solutions to common baguette rising problems. Ready to bake the perfect baguette? Let's get started!
- Why Your Baguette Collapsed (and How to Prevent It) - BakeWithEase.com
- Understanding Baguette Rising Problems: A Baker's Guide
- Troubleshooting Baguette Rising Issues: Identifying the Root Cause
- Solutions for Baguette Rising Problems: Achieving the Perfect Rise
- Preventing Future Baguette Collapse: Long-Term Strategies
- Baguette Baking Troubleshooting Checklist: A Quick Reference Guide
- Frequently Asked Questions
- Final Reflection: The Humble Baguette and the Triumph of Technique
- Unlock the Secret to Perfectly Crisp Baguettes!
Why Your Baguette Collapsed (and How to Prevent It) - BakeWithEase.com
Understanding Baguette Rising Problems: A Baker's Guide
Baking a beautiful baguette is incredibly rewarding, but sometimes, things don't go quite as planned. One of the most frustrating issues bakers face is when their baguette collapses, either before or during baking, resulting in a flat, dense loaf instead of a light, airy one with a crisp crust. Understanding the common culprits behind this issue is the first step towards finding the right Baguette rising problems solution and achieving that perfect structure you're aiming for.
Identifying why your baguette didn't rise properly or collapsed requires a bit of detective work in your baking process. Factors ranging from how you handled the dough to the conditions in your kitchen and oven can all play a role. Pinpointing the exact cause is crucial for implementing effective strategies to prevent it from happening again. Don't worry, mastering the baguette is a journey, and overcoming these challenges is part of becoming a skilled baker.
Common Causes of Baguette Collapse
Several factors can contribute to a baguette's inability to hold its shape and achieve a good rise. Often, it's a combination of issues rather than a single problem. Let's delve into the most frequent reasons bakers encounter this frustrating setback.
Understanding these common causes is fundamental to developing effective Baguette rising problems solutions. By recognizing the signs associated with each issue, you can better diagnose what went wrong in your specific bake and make targeted adjustments for your next attempt.
Over-Proofing: The Number One Culprit
Over-proofing is perhaps the most common reason a baguette collapses. It occurs when the dough has fermented for too long or at too warm a temperature, exhausting the yeast's ability to produce gas and support the dough's structure. Imagine a balloon inflated too much – it becomes fragile and prone to bursting or deflating quickly.
When a baguette is significantly over-proofed, the gluten network, which is responsible for trapping the gases produced by fermentation, becomes weakened and stretched too thin. This results in a dough that feels very soft and slack, lacks elasticity, and may even start to deflate slightly on its own. Trying to score or move an over-proofed baguette often leads to it collapsing entirely, as it lacks the internal strength to maintain its shape.
Weak Gluten Structure: The Foundation of a Good Baguette
A strong, well-developed gluten structure is essential for a baguette to rise properly and hold its shape. Gluten, formed by the proteins in flour when mixed with water and kneaded, creates an elastic network that captures the carbon dioxide gas produced by the yeast. If this network is weak, the dough cannot retain the gas effectively, leading to a poor rise and potential collapse.
Weak gluten can result from several factors, including using a low-protein flour not suited for bread making, insufficient kneading or mixing, or improper hydration levels (too wet or too dry). A dough with weak gluten will often feel sticky or tough but not elastic, and it won't pass the "windowpane test," where a small piece of dough can be stretched thin enough to see light through it without tearing. Addressing weak gluten is a core Baguette rising problems solution.
Improper Scoring Techniques: Releasing Pressure Effectively
Scoring, or slashing the surface of the baguette before baking, isn't just for aesthetics; it serves a crucial functional purpose. It allows the dough to expand in a controlled manner during the initial phase of baking (oven spring). If the scoring is done incorrectly – too shallow, too deep, or at the wrong angle – the dough may burst unpredictably or collapse because the internal pressure isn't released effectively through the intended slashes.
Shallow scores don't provide enough weak points for the dough to expand through, forcing it to find other points of least resistance, which can lead to blowouts or uneven expansion. Conversely, scores that are too deep can cause the dough to collapse immediately if the gluten structure isn't robust enough to support the deep cuts. The angle of the score (typically a shallow, almost horizontal cut) is also key to encouraging the characteristic "ear" and proper oven spring.
Oven Temperature Issues: Baking at the Right Heat
Baking baguettes at the correct high temperature is vital for achieving proper oven spring and setting the crust quickly. If the oven temperature is too low, the dough's surface sets too slowly, and the internal structure may not have enough support to rise before the gases expand and potentially cause a collapse. A typical baking temperature for baguettes is between 450°F and 475°F (about 230°C to 245°C).
An oven that isn't accurately calibrated can also be a problem. An oven set to 450°F might actually be baking at 400°F, significantly impacting the bake. Insufficient preheating time is another common issue; placing dough in an oven that hasn't reached its target temperature means the initial heat shock needed for oven spring isn't delivered effectively. Ensuring accurate and high oven heat is part of the Baguette rising problems solution puzzle.
Troubleshooting Baguette Rising Issues: Identifying the Root Cause
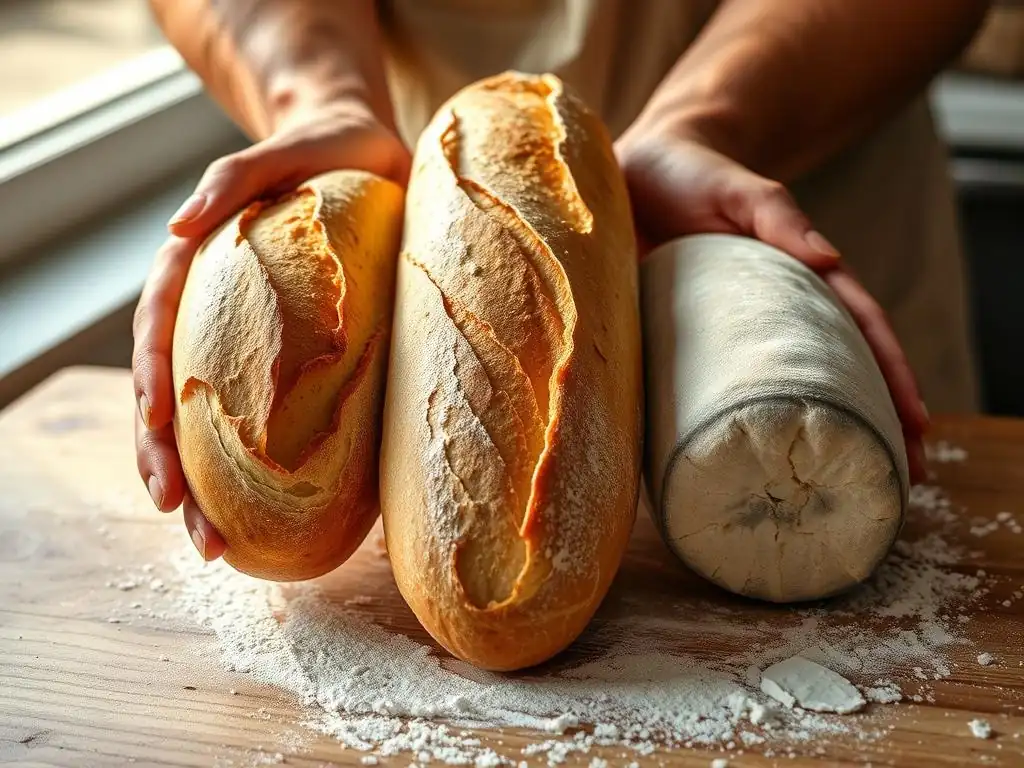
When your baguette collapses, it's time to put on your baker's hat and investigate. By carefully observing your dough at different stages and reviewing your process, you can often identify the specific issue or combination of issues that led to the problem. This systematic approach is key to finding your personal Baguette rising problems solution.
Troubleshooting involves paying close attention to details you might otherwise overlook. Was the dough overly sticky? Did it seem to flatten out quickly after shaping? Did it look like it had deflated before it even went into the oven? These observations provide valuable clues to diagnose the problem correctly.
Examining Your Dough's Texture: A Key Indicator
The texture of your dough throughout the process offers significant insights into its condition. During kneading, does it develop elasticity and smoothness, or does it remain slack and tear easily? After the bulk fermentation, does it feel airy and slightly bubbly, or dense and heavy?
Before shaping, notice if the dough is easy to handle and holds tension, or if it's sticky and difficult to form into a cohesive shape. An overly sticky or overly slack dough often indicates issues with hydration, kneading, or potentially over-fermentation. A dough that feels very tight and resistant might be under-kneaded or under-proofed. Learning to read your dough's texture is a critical skill in addressing Baguette rising problems.
Assessing Proofing Time and Temperature: Finding the Sweet Spot
Proofing time is highly variable and depends significantly on the ambient temperature of your kitchen and the activity of your yeast. Relying solely on the time stated in a recipe without considering the conditions can easily lead to over- or under-proofing. A kitchen that is warmer than average will cause dough to proof much faster.
Instead of strictly following a time, pay attention to the dough's appearance and feel. A properly proofed baguette should look significantly increased in volume (often 1.5 to 2 times its original size, though this varies by recipe and method) and feel light and airy. The "poke test" is a useful indicator: gently poke the dough with a floured finger; if the indentation springs back slowly but not completely, it's likely ready. If it springs back immediately, it needs more time (under-proofed). If the indentation remains completely, it's likely over-proofed. Adjusting proofing is a fundamental Baguette rising problems solution.
Evaluating Scoring Depth and Angle: The Art of the Slash
Look at your baked baguette's crust. Did it burst in unexpected places instead of along the scores? Do the scores look like they opened up properly, or do they seem sealed or insignificant? These visual cues can tell you a lot about your scoring technique.
Consider the tool you used for scoring. Was it sharp enough? A dull blade can drag the dough, collapsing the surface instead of making a clean cut. Reflect on the angle and depth of your cuts. Were they confident, swift slashes, or hesitant, shallow scratches? Practicing on scrap dough can help refine your technique before attempting to score your carefully proofed baguettes. Proper scoring is a vital Baguette rising problems solution component.
Checking Oven Calibration: Ensuring Accurate Baking Temperatures
An inaccurate oven temperature can sabotage even perfectly prepared dough. If you suspect your oven isn't heating correctly, use an inexpensive oven thermometer to check its accuracy. Place it in the center of your oven and see if it matches the oven's display or setting after sufficient preheating time (at least 30-45 minutes).
If your oven consistently runs hot or cold, you'll need to adjust your baking temperature accordingly. For example, if your oven reads 425°F when set to 450°F, you'll know to set it slightly higher next time. Also, ensure you are allowing enough time for the oven, and any baking stones or steels, to fully preheat to ensure that initial burst of heat is available. This is a practical Baguette rising problems solution.
Solutions for Baguette Rising Problems: Achieving the Perfect Rise
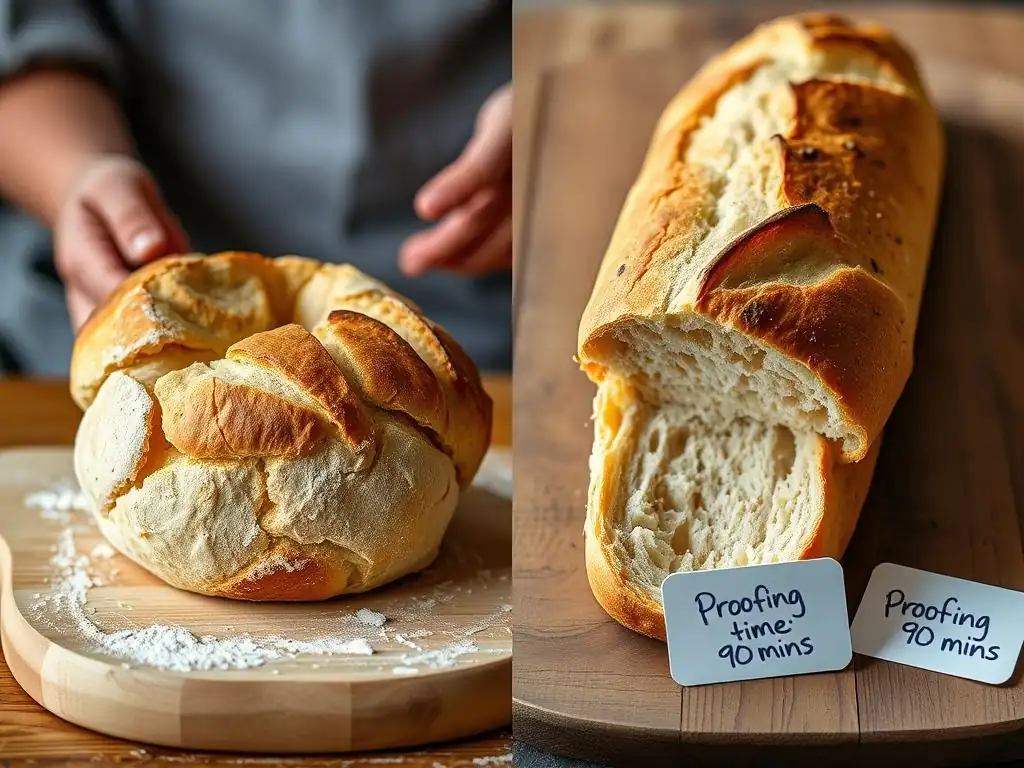
Once you've identified the potential causes of your baguette's collapse, you can implement specific strategies to address them. These solutions focus on improving your technique at various stages of the baking process, from mixing and kneading to proofing and baking. Finding your optimal Baguette rising problems solution might involve adjusting multiple steps.
Adopting these techniques requires practice and attention to detail, but they are essential steps toward consistently baking beautiful, well-risen baguettes. Don't be discouraged if your first few attempts aren't perfect; every bake is a learning opportunity.
Mastering the Art of Proofing Baguettes: Tips and Techniques
Proper proofing is arguably the most critical stage for preventing collapse. It's a balance between allowing enough fermentation for flavor and rise, and not so much that the dough loses its structure.
Finding the "sweet spot" for proofing comes with experience and observation. Remember that proofing time is highly dependent on temperature. In a warm kitchen (around 75°F/24°C), proofing might take 60-90 minutes, while in a cooler kitchen (around 68°F/20°C), it could take 2-3 hours or even longer. Learning to read the dough's readiness is more reliable than following a strict timer.
Recognizing Signs of Proper Proofing: Avoiding Over-Proofing
As mentioned before, the poke test is a reliable indicator. A gentle poke should leave an indentation that slowly springs back, but not completely. The dough should look visibly larger and feel light and airy, but still have some structure and surface tension.
Other signs include the dough looking smooth and domed, not flat or spread out. If you see small bubbles on the surface or the dough looks like it's starting to deflate slightly, it's likely over-proofed. When in doubt, it's often better to slightly under-proof than significantly over-proof, as under-proofed dough will still get some oven spring, while severely over-proofed dough will collapse. This is a key Baguette rising problems solution.
Adjusting Proofing Time Based on Room Temperature: A Baker's Secret
Keep a small thermometer in your kitchen to monitor the ambient temperature. If it's warmer than usual, shorten the proofing time and check the dough's readiness more frequently (e.g., every 15-20 minutes). If it's cooler, be prepared for a longer proof and be patient.
You can also control the proofing environment. A slightly warm oven (turned off, with the light on) or a proofing box can provide a consistent temperature. Alternatively, placing the dough in a slightly cooler spot in the house can slow down proofing if needed. Understanding how temperature affects proofing is a vital Baguette rising problems solution.
Strengthening Gluten Development: Essential for a Strong Baguette
A robust gluten network provides the necessary scaffolding for your baguette to rise tall and maintain its shape. There are several techniques to ensure optimal gluten development.
Paying attention to the flour you use and how you handle the dough during mixing and kneading are fundamental steps. These practices build the foundation for a successful bake and are integral to finding a lasting Baguette rising problems solution.
Kneading Techniques for Optimal Gluten Formation: The Baker's Touch
Whether kneading by hand or using a stand mixer, the goal is to develop the gluten until the dough is smooth, elastic, and passes the windowpane test. For hand kneading, this typically involves 10-15 minutes of vigorous work. With a stand mixer on medium speed, it might take 6-10 minutes, depending on the mixer and dough hydration.
Avoid under-kneading, which leaves the gluten undeveloped. Also, be mindful of over-kneading, which can break down the gluten, although this is less common with typical home equipment and bread doughs. The dough should feel alive and resilient, not tough or slack.
Using High-Protein Flour: Building a Strong Framework
The protein content of flour directly impacts gluten development. Bread flour, which typically has a protein content of 12-14%, is ideal for baguettes because it forms a strong, elastic gluten network capable of trapping gases effectively. All-purpose flour (around 10-11.5% protein) can work, but may result in a less structured loaf, particularly for high-hydration doughs.
Check the protein content on your flour package. Using a flour specifically milled for bread making provides a better chance of developing the strong gluten necessary for a classic baguette structure and is a direct Baguette rising problems solution related to ingredients.
The Importance of Autolyse: Enhancing Gluten Strength
The autolyse technique involves mixing just the flour and water from your recipe and letting it rest for 20-60 minutes before adding the salt and yeast. This simple step allows the flour to fully hydrate and enzymes to begin breaking down proteins, which helps gluten strands align and develop more easily during subsequent mixing or kneading.
An autolyse can significantly improve the dough's extensibility and elasticity with less kneading required. This leads to a stronger, more manageable dough that is better equipped to handle the stresses of proofing and baking, contributing to a better Baguette rising problems solution.
Perfecting Your Baguette Scoring: Creating Beautiful and Functional Slashes
Proper scoring is the final critical step before baking that allows for controlled expansion. Without effective scores, even a perfectly proofed baguette can't achieve its full potential oven spring.
Developing confidence and precision in your scoring technique takes practice. Think of it as guiding the dough's expansion rather than simply cutting it. This skill is a key part of the Baguette rising problems solution process.
Choosing the Right Scoring Blade: Razor Sharp Precision
A sharp blade is non-negotiable for clean, effective scores. A baker's lame (pronounced "lahm") with a razor blade is the standard tool. The sharpness ensures the blade glides through the dough's surface without dragging or tearing it, which can deflate the dough.
Replace your razor blade frequently, ideally every few baking sessions, as even slightly dull blades can make scoring difficult and less effective. A sharp paring knife can work in a pinch, but a lame offers better control and the correct angle.
Mastering Scoring Patterns: From Simple to Intricate
For a classic baguette, the scoring pattern typically consists of several overlapping diagonal slashes running along the length of the loaf. Each slash should be made with a swift, confident motion at a shallow angle (around 20-30 degrees relative to the surface of the dough), aiming to cut just below the surface, about 1/4 to 1/2 inch deep.
The overlap between slashes should be significant, with about one-third of the previous slash covered by the next. This allows the dough to open up along the entire length of the loaf. Practice different angles and depths on less critical loaves or even playdough to get a feel for it.
Optimizing Oven Temperature for Baguette Baking: Achieving a Crispy Crust
High temperature and steam are crucial for achieving the characteristic crispy crust and excellent oven spring of a baguette. Baking at a sufficiently high temperature helps set the crust quickly while the inside is still expanding.
Creating a steamy environment in the oven during the first 10-15 minutes of baking is also vital. Steam keeps the surface of the dough moist and flexible, allowing it to stretch and expand fully before the crust hardens. Without steam, the crust forms too quickly, restricting oven spring and potentially leading to blowouts or a denser crumb.
The Importance of Steam: Creating a Crusty Exterior
There are several ways to create steam in a home oven. One common method is to preheat a baking stone or steel along with a cast iron pan or tray on a lower rack. Just before loading the baguettes, carefully pour a cup of hot water into the hot pan to generate steam.
Another method involves using a Dutch oven or cloche, where the lid traps the moisture released by the dough itself, creating a steamy environment around the loaf. Some bakers spray the oven walls with water, but this is less effective and can damage some ovens. Using steam is a critical Baguette rising problems solution.
Baking at High Temperature: The Key to Oven Spring
As mentioned earlier, preheating your oven to a high temperature, typically 450-475°F (230-245°C), is essential. Ensure your oven is fully preheated, including any baking stones or steels, which can take 45-60 minutes.
The initial high heat causes a rapid expansion of gases within the dough (oven spring). After the first 10-15 minutes, you typically lower the temperature slightly (e.g., to 425-450°F or 220-230°C) and remove the steam source to allow the crust to dry out and become crispy and golden brown. Getting this temperature profile right is a key Baguette rising problems solution element.
Preventing Future Baguette Collapse: Long-Term Strategies
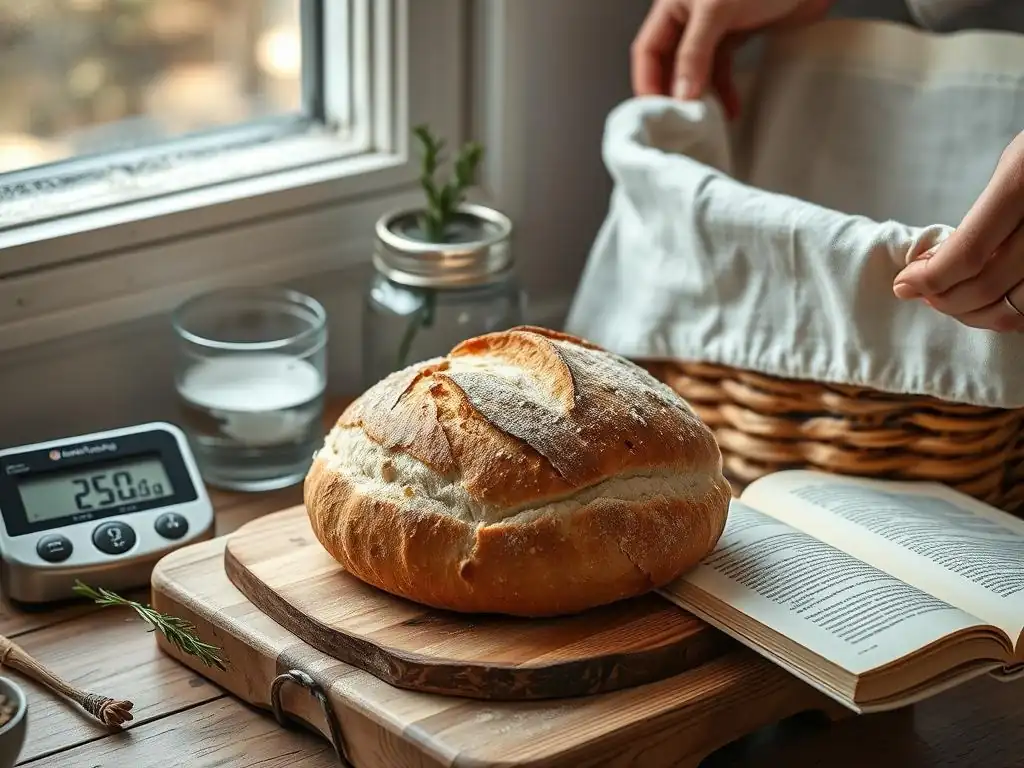
Consistent success in baguette baking comes from refining your process over time. By adopting good habits and continuing to learn, you can significantly reduce the likelihood of encountering Baguette rising problems.
Think of each bake as an experiment. What variables changed? What were the results? This mindset helps you learn from both successes and failures.
Recording Your Baking Process: Learning from Each Batch
Keep a baking journal or notes for each baguette batch. Record details like the hydration percentage of the dough, the type of flour used, ambient kitchen temperature, bulk fermentation time, proofing time, oven temperature settings, and any issues encountered.
Reviewing your notes can help you identify patterns. For instance, you might notice that on warmer days when proofing time was shorter, your baguettes turned out well, but on cooler days when you proofed for the same amount of time, they collapsed (indicating under-proofing on cooler days). This systematic approach is a powerful Baguette rising problems solution tool.
Investing in Quality Baking Tools: Setting Yourself Up for Success
While you don't need expensive equipment to bake great baguettes, having reliable tools makes the process easier and more consistent. A good stand mixer can help ensure proper kneading. An accurate digital scale is essential for precise ingredient measurements, particularly water for hydration.
A razor-sharp lame for scoring and an oven thermometer for verifying temperature are also highly recommended. A baking stone or steel can significantly improve oven spring and crust development. These tools are aids in implementing effective Baguette rising problems solutions.
Continuing Education: Mastering the Art of Baguette Baking
Baking is a skill that improves with practice and learning. Read books, watch videos, and experiment with different techniques. Understanding the science behind baking – the role of yeast, gluten, and temperature – will empower you to troubleshoot effectively and adapt recipes.
Join online baking communities or forums to ask questions and learn from others' experiences. There's always something new to discover in the world of bread baking. Dedication to learning is perhaps the ultimate Baguette rising problems solution.
Baguette Baking Troubleshooting Checklist: A Quick Reference Guide
Here's a quick checklist to help you diagnose and solve Baguette rising problems:
- [ ] Dough Texture: Was the dough overly sticky or slack after proofing? (Potential issue: Over-proofing, weak gluten)
- [ ] Poke Test: Did the indentation spring back immediately (under-proofed) or stay completely (over-proofed)? (Potential issue: Incorrect proofing time/temperature)
- [ ] Proofing Time: Was the proofing time adjusted based on room temperature? (Potential issue: Incorrect proofing time/temperature)
- [ ] Gluten Development: Did the dough pass the windowpane test after kneading? (Potential issue: Weak gluten structure)
- [ ] Flour Type: Was high-protein bread flour used? (Potential issue: Weak gluten structure)
- [ ] Scoring Appearance: Did the scores open cleanly, or did the dough tear or burst elsewhere? (Potential issue: Improper scoring, weak gluten)
- [ ] Scoring Blade: Was the scoring blade sharp? (Potential issue: Improper scoring)
- [ ] Oven Temperature: Was the oven fully preheated to the correct high temperature (e.g., 450-475°F)? (Potential issue: Oven temperature issues)
- [ ] Oven Thermometer: Has the oven calibration been checked recently? (Potential issue: Oven temperature issues)
- [ ] Steam: Was steam generated during the initial baking phase? (Potential issue: Oven temperature issues, lack of oven spring)
- [ ] Baking Log: Are you recording your baking process details? (Solution: Aids in diagnosis and prevention)
Using this checklist can help you pinpoint where your process might have gone wrong and guide you toward the most effective Baguette rising problems solution for your next bake. Happy baking!
Frequently Asked Questions
Why did my baguette collapse during the second rise (proofing)?
The most common cause is over-proofing. This means the dough has fermented for too long, exhausting its gluten structure and ability to hold air. Weak gluten can also be a contributing factor.
How can I tell if my baguette dough is over-proofed?
Over-proofed dough will be excessively soft and sticky. It may deflate easily when touched and won't spring back much when gently poked.
What's the ideal temperature for proofing baguette dough?
Generally, a warm, but not hot, environment is ideal. Aim for around 75-80°F (24-27°C). Too much heat can accelerate fermentation and lead to over-proofing.
How long should I proof my baguette dough?
Proofing time varies depending on temperature and the strength of your starter (if using). Look for the dough to approximately double in size and feel light and airy, but still have some elasticity.
Besides over-proofing, what else could cause a baguette to collapse?
Using too much water (hydration) in the dough can weaken the structure. Also, insufficient gluten development during kneading can result in a weak dough that struggles to hold its shape.
Final Reflection: The Humble Baguette and the Triumph of Technique
The perfect baguette, a symbol of French culinary artistry, is more than just bread; it's a testament to the power of precision and understanding. A collapsed baguette isn't just a culinary mishap; it's a missed opportunity to experience the satisfying crunch and airy interior that defines this iconic loaf. This article has explored the science behind a successful baguette, highlighting the crucial role of hydration, fermentation, and proper shaping. Understanding these elements is key to unlocking the secrets of a consistently perfect rise.
The pursuit of the perfect baguette transcends mere baking; it reflects a deeper appreciation for the interconnectedness of ingredients, process, and outcome. It's a journey of patience and attention to detail, a microcosm of life's larger lessons in perseverance. As the French proverb states, La patience est l'âme de la sagesse
(Patience is the soul of wisdom). This resonates deeply with the baking process, where rushing can lead to disastrous results, while careful attention yields beautiful rewards. The satisfaction of a perfectly risen baguette is a testament to this wisdom, a tangible reward for dedication and understanding.
Now, consider your own "baguettes"—those projects, goals, or aspirations that sometimes seem to collapse under pressure. What are the "ingredients" you're working with? Are you allowing sufficient "fermentation time" for ideas to develop? Are you paying attention to the "shaping" of your efforts? Take the lessons learned from perfecting your baguette and apply them to other areas of your life. Embrace the process, celebrate the small victories, and learn from the occasional collapse. The journey toward mastery, like the journey toward the perfect baguette, is a rewarding one.
Unlock the Secret to Perfectly Crisp Baguettes!
Thanks for taking the time to learn about the art of baguette baking! We hope you gained valuable insights into avoiding that dreaded collapsed loaf. Now it's time to put your new knowledge into practice.
- Master the Perfect Baguette: Try our recommended recipe and technique adjustments (mentioned in the article) immediately. Note the differences!
- Share Your Success (or Struggles!): Post a picture of your baguette creation—whether a triumph or a learning experience—on our BakeWithEase community forum. Let's learn from each other!
- Experiment with Flour Types: Explore different types of flour to see how they impact your baguette's texture and crust. Which flour will yield your perfect loaf?
Ready to bake the best baguette of your life?