
Baguette Shaping: The Right Way to Tension Dough

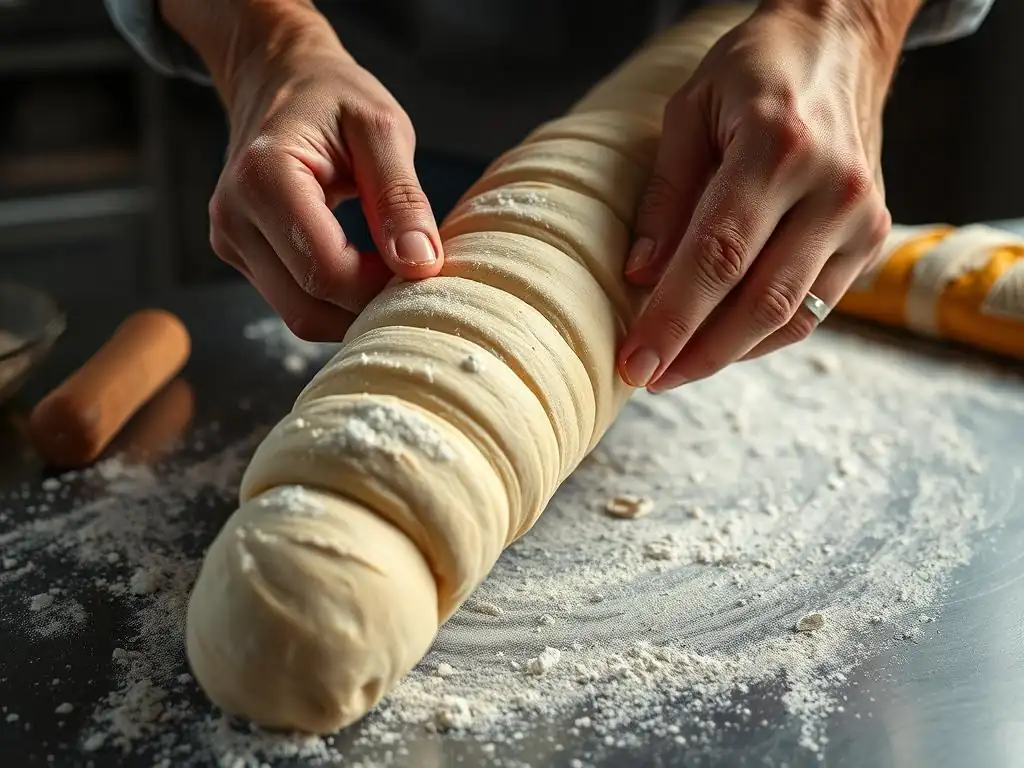
Welcome to BakeWithEase, where delicious dreams rise! Ever wondered about the secret to a perfectly crisp and airy baguette? It all starts with tension. Dive into our guide on Baguette Shaping: The Right Way to Tension Dough and unlock the secrets to achieving that coveted artisanal crust. Discover the techniques that transform simple ingredients into bakery-worthy masterpieces. Ready to create baguettes that are both beautiful and bursting with flavor? Let's get baking!
- Baguette Shaping: The Right Way to Tension Dough for Perfect Loaves
- Introduction to Baguette Shaping and Dough Tension
- Understanding Dough Structure for Baguette Shaping
- Step-by-Step Guide: Baguette Shaping Techniques for Enhanced Dough Tension
- Common Mistakes to Avoid When Shaping Baguettes
- Advanced Tips for Achieving Perfect Baguette Tension
- Troubleshooting Dough Tension Problems in Baguettes
- Baking Your Perfectly Shaped Baguette
- Maintaining Baguette Freshness After Baking
- Conclusion: Mastering Baguette Shaping for Artisan-Quality Bread
-
Frequently Asked Questions
- How important is tension in baguette dough shaping?
- What happens if I don't create enough tension when shaping my baguette?
- Can I overwork the dough and create too much tension?
- What's the best technique to create tension in baguette dough during shaping?
- What ingredients are most important for achieving proper dough tension?
- Final Reflection: Mastering the Tension: A Baker's Journey with Baguette Dough
- Unleash Your Inner Boulanger: Master the Baguette Shape!
Baguette Shaping: The Right Way to Tension Dough for Perfect Loaves
Introduction to Baguette Shaping and Dough Tension
Why Dough Tension is Crucial for Baguette Baking
Achieving the right tension in your baguette dough is arguably one of the most critical steps in crafting those iconic, airy loaves with a perfect crust. Tension isn't just about making the dough tight; it's about building structure and strength within the gluten network. This internal scaffolding is what allows the baguette to hold its elongated shape during proofing and provides the necessary resistance for a dramatic oven spring when it hits the heat. Without adequate tension, the dough can spread outwards rather than expanding upwards and lengthwise, resulting in flat, sad baguettes instead of tall, proud ones.
Furthermore, proper dough tension contributes significantly to the desired open, irregular crumb structure that is the hallmark of a great artisan baguette. The tension creates pockets of resistance within the dough, which, during fermentation and baking, develop into larger, more defined air pockets. Think of it like stretching a rubber band; the energy stored in the stretch helps it snap back. Similarly, the energy from the tension in the dough helps it expand vigorously in the oven. Mastering this aspect of baguette shaping tension dough is a game-changer for your baking results.
The Importance of Proper Shaping Techniques for Baguettes
Shaping is the culmination of all your prior steps – mixing, kneading, and bulk fermentation. It's where you gently organize the dough's structure and lock in the potential for a beautiful loaf. Correct baguette shaping techniques are essential because they directly influence the dough's tension, uniformity, and final appearance. A well-shaped baguette will have consistent thickness along its length, tapered ends, and a smooth, taut surface. This taut surface is key; it helps the crust develop evenly and allows for clean, effective scoring just before baking.
Incorrect shaping can lead to a host of problems: uneven loaves that cook inconsistently, a weak structure that collapses during proofing or baking, and a tight, dense crumb instead of an open one. Learning the precise folds and rolls involved in shaping baguette dough is a skill that refines with practice. It's about understanding how to handle the dough gently yet firmly, encouraging the gluten to align and strengthen without tearing or degassing the dough too much. Each fold and turn builds layers of tension, preparing the dough for its transformation in the oven.
BakeWithEase.com: Your Guide to Mastering Artisan Baguette Techniques
At BakeWithEase.com, we understand the nuances of artisan bread baking, and mastering the art of baguette shaping tension dough is a cornerstone of achieving professional-level results at home. We break down complex techniques into simple, manageable steps suitable for bakers of all experience levels. Our guides cover everything from selecting the right flour and understanding hydration to detailed instructions on fermentation, shaping, and baking.
We provide clear explanations of the science behind baking processes, like how gluten development influences dough tension and why specific shaping methods are used for baguettes. Our goal is to empower you with the knowledge and confidence to tackle challenges like achieving that perfect taut surface or troubleshooting sticky dough. By following our step-by-step tutorials and tips, you'll gain the skills necessary to consistently produce delicious, beautiful artisan baguettes right from your own kitchen.
Understanding Dough Structure for Baguette Shaping
The Role of Gluten in Dough Elasticity and Strength
Gluten, the protein network formed when water is combined with flour and worked, is the backbone of bread dough. It's a complex structure of gliadin and glutenin proteins that, when hydrated and manipulated (through mixing and kneading), link together to form elastic and extensible chains.
This gluten network is what gives dough its ability to stretch without tearing (extensibility) and to spring back into shape (elasticity). For baguettes, a well-developed gluten structure is paramount because it needs to be strong enough to hold the long, thin shape and resist collapse, while also being extensible enough to be shaped without excessive force.
The strength and elasticity of the gluten network directly determine how well you can build tension when shaping baguettes. A dough with weak gluten will be slack and difficult to tension effectively; it will feel lifeless and may tear easily when stretched. Conversely, a dough with overly strong or tight gluten might resist shaping and snap back excessively. The ideal dough for baguette shaping tension dough has a balanced gluten structure – strong and elastic, allowing for controlled stretching and folding to create layers of tension that support the loaf's form and contribute to an open crumb.
Achieving the Right Dough Consistency for Optimal Tension
The consistency of your baguette dough is a key indicator of its readiness for shaping and its potential for developing good tension. Baguette doughs are typically moderately hydrated, often ranging from around 65% to 75% hydration (water weight relative to flour weight). This hydration level allows for sufficient gluten development while still resulting in a dough that is manageable to handle.
A dough that is too dry (low hydration) can be stiff and difficult to shape, potentially leading to a tight crumb. A dough that is too wet (high hydration) can be very sticky and challenging to build tension in without it losing its shape.
The right consistency feels alive, slightly sticky but not unmanageable, and has a smooth, satiny surface after bulk fermentation. When you perform a 'windowpane' test (gently stretching a small piece of dough), it should stretch into a thin, translucent membrane before tearing, indicating good gluten development. This balance of hydration and gluten strength is what provides the foundation for successfully tensioning baguette dough during the shaping process. The dough should have enough body to hold the tension you create, but also be pliable enough to be folded and rolled into the desired shape without excessive effort.
Factors Affecting Dough Tension: Hydration, Mixing, and Fermentation
Several factors influence the potential for dough tension even before you begin shaping. Hydration, as mentioned, plays a significant role; higher hydration generally results in a slacker dough that requires different handling techniques to build tension compared to lower hydration doughs. Mixing is crucial for developing the initial gluten network. Insufficient mixing means a weak network, making it hard to create lasting tension. Overmixing can damage the gluten, leading to a dough that is sticky and lacks strength.
Fermentation also profoundly impacts dough tension. Bulk fermentation allows the gluten network to relax slightly while the yeast produces gas, which stretches the network gently. This process makes the dough more extensible and easier to shape effectively.
Under-fermented dough might be tight and difficult to stretch, while over-fermented dough can become weak, gassy, and prone to tearing, making it challenging to build and maintain tension. The temperature and duration of fermentation cycles, such as a typical bulk ferment of 2-4 hours followed by a cold proof of 12-24 hours, are carefully chosen to optimize dough structure and flavor, setting the stage for successful baguette shaping tension dough.
Step-by-Step Guide: Baguette Shaping Techniques for Enhanced Dough Tension

Preparing Your Workspace and Dough for Shaping
Before you even touch the dough to shape it, ensure your workspace is properly prepared. A clean, dry surface is essential. While some bakers prefer a lightly floured surface, using too much flour can prevent the dough layers from sticking to each other during shaping, hindering tension development. A wooden or stone surface is ideal.
Have a bench scraper handy – it's invaluable for handling and manipulating the dough. Your dough, having just completed its bulk fermentation, should be rested briefly after dividing (a process called bench resting) for about 15-20 minutes. This allows the gluten to relax slightly, making the dough more pliable and easier to shape without tearing, setting the stage for effective baguette shaping tension dough.
The bench rest is a critical, often overlooked step. After dividing the dough into individual portions for each baguette (typically around 250-350 grams), resist the urge to shape immediately. Cover the dough portions loosely with plastic wrap or a clean kitchen towel to prevent them from drying out. This short rest period allows the gluten, which tightened slightly during division, to relax. A relaxed dough is much more receptive to shaping and allows you to build tension smoothly and evenly, creating a stronger final structure for your baguette.
Step 1: Pre-Shaping the Dough into a Rectangle
The first step in shaping a baguette is pre-shaping, which helps organize the dough and starts to build initial tension. Take one portion of dough that has been bench resting. Gently degas it slightly by lightly pressing down on it with the palm of your hand to form a rough rectangle or oval. Avoid pressing out all the gas – you just want to knock it back slightly. Imagine the dough as a cushion; you're just pressing some air out to make it easier to handle.
Now, fold the top edge of the rectangle down towards the center, pressing gently to seal the seam with the heel of your hand. Then, fold the bottom edge up over the folded top edge, again pressing gently to seal the seam. You should now have a rough log shape.
Turn the dough seam-side down and gently cup your hands around it, pulling it towards you slightly to create surface tension underneath. Let these pre-shaped logs rest again, covered, for another 15-20 minutes. This second rest period is crucial for the gluten to relax after the initial manipulation, making the final shaping much easier and more effective for building strong tension when shaping baguettes.
Step 2: The First Fold: Creating Initial Tension
After the second rest, the dough should feel relaxed and slightly puffy. This is when you begin the final shaping process to build significant tension. Take one pre-shaped log, seam-side down. Gently flatten it again into a rectangle, roughly the length you want your final baguette to be, but only about half the width. Be gentle to avoid degassing the dough too much.
Now, starting from the top edge furthest from you, fold the top third of the rectangle down towards the center line. Press gently along the fold with your fingertips to adhere this flap to the dough below. This initial fold starts layering the dough and creates a foundational layer of tension. This step is about organizing the dough's structure and preparing it for the subsequent folds that will build more significant baguette shaping tension dough.
Step 3: The Second Fold: Building More Strength
Following the first fold, take the top edge again (which is now the edge of the folded-down section) and fold it down completely over the remaining dough towards the bottom edge. This action essentially folds the dough in half lengthwise. As you do this, use the heel of your hand or your fingertips to press firmly along the seam to seal it securely. This fold is critical as it significantly increases the tension on the surface of the dough.
As you press and seal the seam, you are creating layers within the baguette and tightening the outer skin. The goal is to trap air within these layers and create a taut surface that will expand beautifully in the oven. Achieving a tight, well-sealed seam here is vital for maintaining the structure and tension throughout proofing and baking. This second fold is where you really start to feel the dough gaining structure and potential for significant tension in baguette shaping.
Step 4: Tapering the Ends for a Classic Baguette Shape
With the dough now folded and sealed into a log shape, it's time to taper the ends to achieve the classic baguette form. Using the palms of your hands and working from the center outwards towards each end, gently roll and press the ends of the log. Apply slightly more pressure towards the very tips to thin them out, creating the characteristic tapered points.
This step not only perfects the shape but also helps distribute the dough evenly along the length and reinforces the tension you've built. Be careful not to roll too aggressively, which could tear the surface or force too much gas out. It's a gentle coaxing motion, guiding the dough into its final elegant shape. Proper tapering ensures that the baguette looks professional and cooks evenly from end to end.
Step 5: The Final Roll: Maximizing Surface Tension
The final step in shaping is the rolling process, which truly maximizes the surface tension and elongates the baguette to its desired length. Place the shaped log seam-side down on your unfloured workspace. Starting from the center, gently roll the dough outwards with the palms of your hands, applying even pressure. Your hands should be slightly cupped, and you should feel the dough elongating beneath them.
As you roll, the surface of the dough will tighten, becoming smooth and taut. The dough should lengthen easily; if it resists, let it rest for a minute or two before continuing. Roll until the baguette reaches your desired length (typically 16-20 inches for a standard baguette). The taut surface created by this final roll is what holds the shape during proofing and provides the necessary structure for oven spring. This final baguette shaping tension dough step is crucial for achieving a beautiful, well-formed loaf.
Common Mistakes to Avoid When Shaping Baguettes
Overworking the Dough: Signs and Solutions
One of the most common mistakes when shaping baguettes is overworking the dough during the shaping process. This happens when you handle the dough too roughly, press too hard, or roll it excessively. Signs of overworking include the dough becoming very tight and resistant to stretching, tearing easily on the surface, or feeling dense and lifeless. Overworking can damage the delicate gluten structure you spent time developing during mixing and fermentation, leading to a dense crumb and poor oven spring.
The solution is to use a light touch and listen to the dough. If the dough resists stretching or rolling, stop and let it rest for 5-10 minutes, covered. This brief rest allows the gluten to relax, making it more pliable. Remember, shaping is about guiding the dough and building tension gently, not forcing it into submission. Pay attention to how the dough feels; it should be elastic but yielding. This gentle approach is key to successfully tensioning baguette dough.
Underworking the Dough: Identifying Weak Tension
Equally detrimental is underworking the dough during shaping, which results in insufficient tension. A dough that hasn't been shaped properly will feel slack and loose, failing to hold its shape during proofing. Signs of underworking include the dough spreading out sideways instead of maintaining its log form, a lack of tautness on the surface, and difficulty achieving a well-defined seam. This lack of internal structure means the dough won't have the strength to rise properly in the oven, resulting in a flat baguette with a potentially dense or irregular crumb.
If you notice your dough is too slack during shaping, you can try gently reshaping it to add more folds and tension. However, be cautious not to overwork it in the process. Ensuring adequate gluten development during mixing and proper bulk fermentation is the best preventative measure against underworked dough. A dough that starts with good underlying structure is much easier to shape effectively and build the necessary baguette shaping tension dough.
Improper Handling Techniques: Preventing Tears and Deflating
Improper handling during shaping can easily lead to tears in the dough's surface or excessive degassing. Tears compromise the structural integrity and can result in uneven expansion during baking. Excessive degassing (pushing too much air out) removes the very bubbles that contribute to an open crumb and a light texture. Rough handling, dragging the dough across the surface, or using too much flour can all contribute to these problems.
To prevent tears and deflation, always handle the dough gently. Use a bench scraper to lift and move the dough rather than pulling or stretching it roughly with your hands. When folding, use the heel of your hand or fingertips to seal seams rather than pressing down heavily across the entire surface. Keep your workspace clean and dry, and use flour sparingly only if absolutely necessary to prevent sticking, as excessive flour can inhibit the dough layers from adhering during shaping, hindering tension development. Mastering these gentle handling techniques is essential for successful baguette shaping tension dough.
Advanced Tips for Achieving Perfect Baguette Tension

Using a Bench Scraper for Efficient Shaping
A bench scraper is more than just a tool for dividing dough; it's invaluable for efficient and effective baguette shaping. After you've performed the folds and sealed the seam, you can use the bench scraper to help create surface tension. Place the scraper behind the dough log and gently push it towards you, tucking the bottom edge slightly underneath the dough. This action helps tighten the surface and encourages the dough to hold its round or oval cross-section before the final roll.
During the final rolling step, you can also use the bench scraper to prevent the dough from spreading sideways. Place one hand on the dough and use the scraper in the other hand to gently guide the dough's edge as you roll. This helps maintain a consistent width and ensures that the rolling action primarily elongates the dough and increases surface tension, rather than just flattening it. Using the bench scraper effectively is a technique that enhances your ability to control and build baguette shaping tension dough.
The Importance of a Light Touch
While the goal is to build tension, the key to success lies in using a light, sensitive touch. You are guiding the dough, not wrestling with it. Applying too much pressure during folding or rolling can force out too much gas, resulting in a dense crumb. Heavy-handed shaping can also lead to tearing or create uneven thickness in the baguette. Think of shaping as a dance with the dough – it requires finesse and responsiveness.
A light touch allows you to feel the dough's resistance and adjust your pressure accordingly. If the dough feels tight, ease up or give it a short rest. If it feels slack, focus on sealing the seams firmly and ensuring the final roll creates a taut surface. Developing a light touch is crucial for preserving the airy structure developed during fermentation and for achieving optimal baguette shaping tension dough without damaging the gluten network.
Developing a Feel for the Dough: Practice Makes Perfect
Perhaps the most advanced tip is to develop an intuitive feel for the dough. This comes with practice and paying close attention to how the dough responds to your touch at different stages of shaping. A well-developed dough that is ready for shaping will have a certain resilience and elasticity. As you fold and roll, you should feel the surface tightening and the dough elongating smoothly.
A dough with insufficient tension might feel loose and floppy, while an overworked dough will feel resistant and possibly tear. Learning to read these subtle cues from the dough is essential for making on-the-fly adjustments to your technique. The more you practice baguette shaping tension dough, the better you will become at sensing when the dough has just the right amount of tension – taut but not tight, smooth, and ready for proofing.
Troubleshooting Dough Tension Problems in Baguettes
Dough is Too Sticky: Handling Hydrated Dough
Highly hydrated baguette doughs (e.g., 75% hydration or more) are inherently sticky, which can make building tension challenging. If your dough feels excessively sticky and difficult to handle, resist the urge to add a large amount of flour to your workspace, as this will prevent the dough layers from sealing properly during shaping. Instead, use a minimal amount of flour, or try using a damp cloth to wipe your hands and the bench scraper periodically.
A common technique for handling sticky dough is to use a bench scraper to help fold and roll. Instead of lifting the dough entirely, use the scraper to fold the edges over and tuck the dough under itself, allowing the surface tension to build from the outside in. Working quickly and confidently also helps. Remember that some stickiness is normal for high-hydration doughs, and with practice, you'll develop the technique to handle them effectively and build the necessary baguette shaping tension dough.
Dough is Too Dry: Adding Moisture Strategically
If your dough feels too dry and stiff after mixing or bulk fermentation, it can be difficult to shape and build tension without tearing. Dry dough lacks extensibility, making it resistant to stretching and folding. This issue is often related to initial hydration levels or environmental factors like low humidity.
While it's difficult to significantly increase hydration after bulk fermentation, you can try misting your hands or the workspace very lightly with water. However, be extremely cautious not to add too much water, which could make the surface gummy or prevent seams from sealing. The best approach is preventative: ensure accurate water measurement during mixing and maintain a humid environment during bulk fermentation if necessary. If the dough is very dry, giving it slightly longer bench rests between shaping steps can help the gluten relax, making it more pliable for tensioning baguette dough.
Dough is Tearing: Gentle Shaping Techniques
Dough tearing during shaping is a clear sign that the gluten network is either underdeveloped, over-fermented, or you are handling it too roughly. If the dough tears easily when you try to fold or roll it, stop immediately. Forcing a tearing dough will only make it worse.
If the dough is tearing, it likely needs to rest. Cover the dough and let it relax for 10-15 minutes. This allows the gluten bonds that might have been stressed or broken to recover slightly. When you resume shaping, use an even lighter touch. Focus on gentle folds and minimal pressure during rolling. Ensure your seams are sealed by pressing along the seam, not pressing down hard on the entire loaf. Preventing tears is crucial for maintaining the structural integrity required for good baguette shaping tension dough and proper oven spring.
Baking Your Perfectly Shaped Baguette

Scoring the Baguette for Oven Spring
Once your baguettes are perfectly shaped and proofed, scoring is the final crucial step before baking. Scoring involves making deliberate cuts on the surface of the dough with a sharp blade (like a lame). These cuts serve a vital purpose: they act as controlled vents, guiding the expansion of the dough as it undergoes rapid growth (oven spring) in the hot oven. Without scoring, the expanding gases would burst through the weakest points of the crust, resulting in uncontrolled cracks and a less attractive loaf.
For a classic baguette, you typically make several diagonal cuts along the length of the loaf. The cuts should overlap slightly, like scales on a fish. The depth and angle of the score are important; aim for a depth of about 1/2 inch and hold the blade at a shallow angle (around 30-45 degrees) to the dough's surface.
This angle helps create the desirable 'ear' or lip on the edge of the cut as the dough expands. Proper scoring works in tandem with the baguette shaping tension dough you've built, allowing the loaf to achieve maximum volume and a beautiful appearance.
Baking Temperatures and Times for Optimal Results
Baguettes are typically baked at high temperatures to achieve a crisp crust and maximize oven spring. A common starting temperature is around 450°F to 500°F (230°C to 260°C). The high heat helps to rapidly set the crust and encourages swift expansion before the crust fully hardens. Baking on a preheated baking stone or steel is highly recommended, as it provides intense, even heat from below, contributing to a good crust and oven spring.
Baking time can vary depending on the temperature, the size of the baguettes, and your oven. A standard baguette usually bakes for 20-30 minutes. The first 10-15 minutes are critical for oven spring, often aided by steam in the oven (achieved by placing a tray of hot water or ice cubes in the bottom of the oven).
The remaining time is for developing the crust color and ensuring the interior is fully cooked. The baguette is done when the crust is a deep golden brown and it sounds hollow when tapped on the bottom. The high heat interacts with the taut surface created by tensioning baguette dough to produce that signature crisp crust.
Achieving a Crisp Crust and Open Crumb
Achieving the perfect balance of a super crisp crust and an open, airy crumb is the ultimate goal of artisan baguette baking. The crisp crust is developed through a combination of high baking temperature, steam in the initial phase of baking, and sufficient baking time to dry out the crust's surface. Steam keeps the crust pliable longer, allowing the dough to expand fully before the crust sets. Once the crust sets, the dry heat finishes the job, making it thin and shatteringly crisp.
The open crumb, on the other hand, is a result of proper ingredient ratios, adequate mixing and fermentation, and crucially, the effective baguette shaping tension dough techniques discussed throughout this guide. The tension built during shaping helps create defined pockets within the dough. During fermentation and baking, these pockets expand with gas, forming the irregular, open structure. A well-developed gluten network supports these air pockets, preventing them from collapsing.
Maintaining Baguette Freshness After Baking
Cooling the Baguette Properly
Once your beautiful baguettes emerge from the oven, the process isn't quite finished. Proper cooling is essential for the texture and flavor to fully develop. Immediately transfer the baked baguettes to a wire rack. Cooling on a rack allows air to circulate around the entire loaf, preventing the bottom crust from becoming soggy from trapped steam.
Resist the temptation to cut into the baguette right away! As the baguette cools, internal steam dissipates, and the structure sets. Cutting too early can result in a gummy interior. Allow baguettes to cool for at least 30-60 minutes, or even longer for larger loaves. This cooling period is vital for the crumb structure to stabilize and the crust to maintain its crispness, preserving the results of your careful baguette shaping tension dough efforts.
Storage Tips for Day-Old Baguettes
Baguettes are best enjoyed within a few hours of baking, but if you have leftovers, proper storage can help maintain quality. The enemy of a crisp crust is moisture. Therefore, avoid storing baguettes in airtight plastic bags, which trap moisture and turn the crust soft and chewy.
For storing at room temperature for a day or two, the best method is often simply leaving the baguette cut-side down on a cutting board, or wrapping it loosely in a clean linen towel or a paper bag. This allows some air circulation while protecting it from drying out completely. If you plan to store it longer, consider freezing, but avoid refrigeration, which tends to dry out the bread quickly.
Reviving Stale Baguettes for Continued Enjoyment
Even a day-old baguette can be brought back to life! The simplest way to revive a slightly stale baguette and restore its crisp crust is to lightly dampen the exterior with water (you can use your hands or a spray bottle) and then reheat it in a hot oven.
Place the baguette directly on the oven rack or on a baking sheet in a preheated oven at around 350-400°F (175-200°C) for 5-10 minutes. The moisture on the surface will turn to steam, re-crisping the crust, while the heat warms the interior. This method works surprisingly well to refresh the delightful texture achieved through careful baguette shaping tension dough and baking.
Conclusion: Mastering Baguette Shaping for Artisan-Quality Bread
Mastering the art of baguette shaping tension dough is a fundamental skill that elevates your home baking from good to truly artisan. It's a process that requires patience, practice, and a keen understanding of how dough behaves. From preparing your workspace and dividing the dough to executing precise folds and the final roll, each step contributes to building the internal structure and external tautness necessary for a beautiful, well-risen baguette.
By focusing on building tension effectively, avoiding common mistakes like over or underworking, and employing gentle handling techniques, you empower your dough to achieve maximum oven spring and develop that coveted open crumb and crisp crust. Remember that every batch of dough is slightly different, influenced by factors like flour type, hydration, and ambient temperature.
Developing a feel for the dough and learning to respond to its cues is the mark of an experienced baker. With dedication and the guidance from BakeWithEase.com, you'll soon be pulling perfectly shaped, tensioned, and baked baguettes from your oven, ready to enjoy the fruits of your labor.
Frequently Asked Questions
How important is tension in baguette dough shaping?
Tension is absolutely crucial. It's what gives baguettes their characteristic crusty exterior and open crumb structure. Without proper tension, the baguette will be flat and dense.
What happens if I don't create enough tension when shaping my baguette?
A lack of tension results in a baguette that spreads out instead of rising. You'll end up with a flat, dense loaf that lacks the desired air pockets inside.
Can I overwork the dough and create too much tension?
Yes, you can! Overworking leads to a tough, dense crumb and a baguette that might tear during baking. Gentle handling is key.
What's the best technique to create tension in baguette dough during shaping?
The "rolling and tucking" method is popular. Gently roll the dough while simultaneously tucking it under itself to create a tight skin on the surface. This creates the necessary tension for a good rise.
What ingredients are most important for achieving proper dough tension?
While technique is paramount, the flour's gluten content and the hydration level of the dough are also critical. Strong bread flour and proper hydration allow for optimal gluten development and tension.
Final Reflection: Mastering the Tension: A Baker's Journey with Baguette Dough
The perfect baguette, with its crisp crust and airy crumb, is more than just a delicious bread; it's a testament to the delicate balance of tension in the dough. This seemingly simple act of shaping is where the magic truly happens, transforming a shapeless mass into a culinary masterpiece. Understanding and mastering this tension is the key to unlocking the full potential of your baguette baking.
The journey of shaping a baguette is a microcosm of the creative process itself. It demands patience, precision, and a deep understanding of the material you're working with. It's a constant dialogue between your hands and the dough, a dance of pressure and release that ultimately determines the final product. The baker's touch is not just a skill, but an art form; it's the embodiment of patience, precision, and a deep respect for the ingredients.
This quote, though not directly about baguettes, perfectly captures the essence of the careful shaping process and the dedication required to achieve excellence.
Now, consider your own baking journey. What tensions do you face in your own creative endeavors? Perhaps it's the struggle to balance innovation with tradition, or the challenge of perfecting a technique. Remember the lessons learned here: patience, precision, and a deep understanding of your "dough"—be it bread, code, or a creative project—are the keys to unlocking your own potential. Embrace the tension, for within it lies the power to create something truly extraordinary.
Unleash Your Inner Boulanger: Master the Baguette Shape!
Thanks for joining us on this journey into the art of baguette shaping! We hope you've gained a deeper understanding of how proper tension creates those beautiful, airy loaves. Now it's time to put your newfound knowledge into practice.
- Shape your masterpiece: Grab that dough and try shaping a baguette using the techniques we discussed. Even a small attempt will boost your confidence!
- Share your success (or even your struggles!): Post a picture of your creation on social media – we'd love to see it, and so would other bakers! Use #BakeWithEaseBaguettes.
- Explore advanced techniques: Consider experimenting with different flours or hydration levels to see how it affects your baguette's shape and texture.
Ready to transform your baking game? What unique twist will you add to your next baguette?