
Baking Baguettes in a Dutch Oven: Is It Possible?

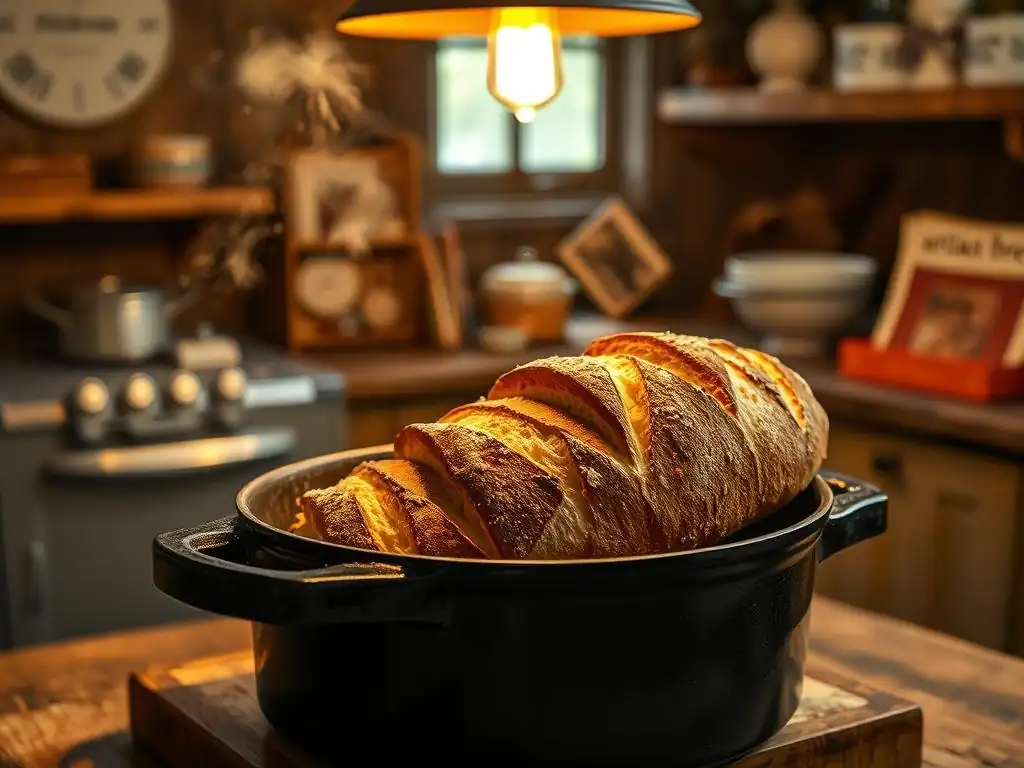
Welcome to BakeWithEase, your secret ingredient for baking success! Ever dreamt of crafting crusty, chewy baguettes at home? You might be surprised to learn that the answer could be hiding in your kitchen cabinet. This week we're diving deep into the world of Dutch oven baguette baking – is it truly possible to achieve that perfect bakery-style loaf using this unexpected method? Prepare to unlock a simple technique that will revolutionize your bread-making game!
- Introduction: Exploring Dutch Oven Baguette Baking
- Understanding the Challenges of Baking Baguettes
- The Benefits of Using a Dutch Oven for Bread Baking
- Dutch Oven Baguette Baking: Making it Work
-
Step-by-Step Guide: Baking Shortened Baguettes in a Dutch Oven
- Recipe: Basic Baguette Dough Recipe
- Step 1: Preparing Your Dutch Oven for Baking
- Step 2: Shaping the Dough for Dutch Oven Baking (Shortened Baguettes)
- Step 3: Proofing the Shaped Baguettes
- Step 4: Scoring the Baguettes for Optimal Oven Spring
- Step 5: Baking the Baguettes in the Dutch Oven
- Step 6: Cooling and Enjoying Your Homemade Baguettes
- Tips and Tricks for Perfect Dutch Oven Baguettes
- Troubleshooting Common Dutch Oven Baguette Baking Problems
- Dutch Oven Baguette Variations and Flavor Combinations
- Conclusion: Mastering Dutch Oven Baguette Baking
- Frequently Asked Questions
- Final Reflection: The Humble Baguette, Reimagined
- Unleash Your Inner Boulanger: Bake the Perfect Baguette!
Introduction: Exploring Dutch Oven Baguette Baking
The Appeal of Dutch Oven Baking for Artisan Bread
Baking artisan bread at home has surged in popularity, and the Dutch oven has become an indispensable tool for many home bakers. Its heavy construction, typically cast iron, provides exceptional heat retention and distribution, mimicking the environment of professional deck ovens. This consistent, high heat is crucial for achieving a beautiful, golden-brown crust and a well-developed internal structure, known as the crumb.
The sealed environment created by the lid during the initial baking phase is perhaps the Dutch oven's greatest asset for bread baking. It effectively traps the moisture released by the dough as it heats up, creating a steamy microclimate around the loaf. This steam is vital because it keeps the surface of the dough pliable for longer, allowing the bread to expand fully (oven spring) before the crust sets.
Without sufficient steam, the crust forms too quickly, restricting expansion and resulting in a denser loaf. For many round or oval loaves, the Dutch oven is a game-changer, simplifying the process of achieving professional-quality results in a standard home oven.
Can You Really Bake a Baguette in a Dutch Oven? Addressing the Question
The short answer is yes, baking baguettes in a Dutch oven is absolutely possible, but it requires some clever adaptation. Traditionally, baguettes are long, slender loaves baked directly on a hot surface like a baking stone or steel, often in ovens equipped with steam injection systems. The challenge with the classic baguette shape is its length – it simply doesn't fit into most standard round or oval Dutch ovens.
However, home bakers have successfully modified both the baguette shape and the baking technique to leverage the benefits of a Dutch oven for achieving that coveted crispy crust and open crumb. This typically involves baking shorter, wider baguettes or even baking multiple smaller baguette-like rolls. The core principle of using the Dutch oven to trap steam and provide high heat remains the key advantage, allowing bakers to produce excellent results for their version of a Dutch oven baguette baking experience.
Understanding the Challenges of Baking Baguettes
The Traditional Baguette Baking Environment: Steam and Oven Spring
Traditional baguette baking relies heavily on two critical factors: intense heat and abundant steam. Professional bakeries use ovens with thick stone soles and steam injectors. The stone sole absorbs and radiates high heat (often 450°F to 500°F or 230°C to 260°C), providing the initial powerful heat transfer needed for oven spring. Simultaneously, steam is injected into the oven chamber.
As mentioned, this steam keeps the dough's surface moist and flexible during the first 10-15 minutes of baking. This flexibility is essential for the dough to expand rapidly as the gases within it heat up – the process known as oven spring. If the crust sets too soon due to lack of steam, the loaf cannot achieve its full volume, resulting in a tighter crumb and a less airy texture, characteristic of a well-baked baguette. Replicating this high-heat, high-steam environment in a home oven without specialized equipment is the primary hurdle.
Why Baguettes Typically Require a Long, Narrow Baking Surface
The characteristic shape of a baguette – long, thin, and typically about 20-26 inches (50-65 cm) in length – is fundamental to its identity and texture. This shape maximizes the ratio of crust to crumb, delivering that satisfying crunch in every bite. Baking multiple baguettes simultaneously in a professional setting requires a long, flat surface, usually a baking stone or the oven deck itself.
This specific requirement poses a direct conflict with the typical dimensions of a Dutch oven, which are designed for round or oval loaves that fit within their confines. Attempting to force a full-sized baguette into a standard Dutch oven is impractical and would ruin the loaf's shape. Therefore, successful Dutch oven baguette baking necessitates a modification of the traditional form factor.
The Shape Constraint: Baguettes and Round Dutch Ovens
The most significant limitation when considering Dutch oven baguette baking is the shape mismatch between the traditional baguette and the standard round or oval Dutch oven. A classic baguette simply cannot lie flat and straight within the diameter or length of most home-sized Dutch ovens. While some very large or rectangular Dutch ovens exist, they are not common in most home kitchens.
This physical constraint means that to utilize the Dutch oven's benefits for baguette-style bread, the baker must alter the shape of the loaf. Instead of a single, long baguette, the dough must be formed into shorter segments, smaller rolls, or even a coiled shape that fits within the pot. This adaptation allows the baker to harness the Dutch oven's steam-trapping capabilities and heat distribution, albeit for a modified version of the classic form.
The Benefits of Using a Dutch Oven for Bread Baking
Consistent Heat Distribution for a Perfect Crust
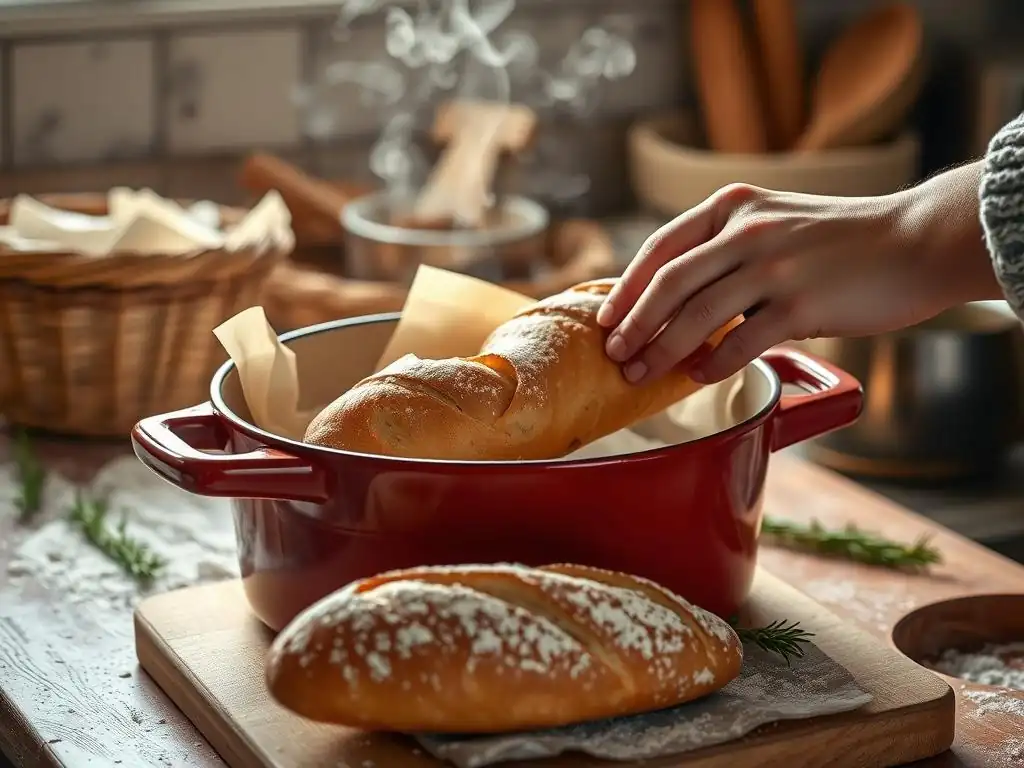
One of the standout advantages of using a Dutch oven for bread baking is its ability to provide exceptionally consistent heat distribution. Made from heavy materials like cast iron, Dutch ovens absorb and retain heat remarkably well. When preheated in a hot oven, the pot acts like a miniature oven within the main oven, radiating intense, even heat from all sides – bottom, top, and sides.
This uniform heat transfer is crucial for developing a thick, crispy crust on the bread. Unlike baking on a flat sheet pan where the bottom might brown faster than the top, the enclosed space and radiant heat of the Dutch oven ensure that the entire surface of the loaf receives consistent heat, leading to a more evenly browned and crackly crust, which is highly desirable in artisan bread and crucial for successful Dutch oven baguette baking.
Trapping Steam: Mimicking a Professional Oven
As previously discussed, steam is paramount for achieving optimal oven spring and a delicate crumb structure in artisan bread. Home ovens typically lack the sophisticated steam injection systems found in professional bakeries. Baking bread on an open tray often results in the crust forming too quickly, limiting the loaf's rise.
The Dutch oven solves this problem by creating a sealed environment. As the dough heats up inside the lidded pot, it releases moisture in the form of steam. The lid traps this steam, surrounding the loaf in a humid cloud.
This steamy atmosphere keeps the surface of the dough moist and elastic, preventing the crust from setting prematurely and allowing the bread to expand fully during the initial phase of baking. This trapped steam is the primary reason Dutch ovens produce such dramatically improved results for home bread bakers, making the prospect of Dutch oven baguette baking much more achievable.
Advantages for Home Bakers: Simple and Effective
For home bakers, the Dutch oven offers a relatively simple and highly effective way to replicate the conditions needed for high-quality artisan bread without expensive specialized equipment. It eliminates the need for complicated steaming methods like placing trays of water or ice in the oven, which can be inconsistent and potentially dangerous.
Using a Dutch oven streamlines the process: preheat the pot, carefully place the dough inside, put on the lid, and bake. This straightforward approach makes achieving excellent crust development and oven spring accessible to bakers of all skill levels. The heavy pot also helps maintain a stable temperature even when the oven door is briefly opened, contributing to a more consistent bake, which is a significant benefit when adapting techniques for Dutch oven baguette baking.
Dutch Oven Baguette Baking: Making it Work
The Key: Shaping Baguettes for Dutch Oven Compatibility
The fundamental challenge of fitting a long baguette into a round pot is overcome by adapting the shape of the dough. Successful Dutch oven baguette baking hinges on reshaping the traditional form factor to fit the constraints of the baking vessel. Instead of aiming for the classic 20+ inch length, the dough must be formed into shorter, fatter loaves or even multiple smaller pieces.
This means the final shape, while using baguette dough, will differ from a traditional baguette. The goal is to create a loaf that can comfortably sit inside the Dutch oven, allowing the lid to be placed securely. This adaptation ensures that the benefits of the Dutch oven – steam and even heat – can be fully utilized, even if the end product isn't a foot-long, slender loaf.
Shortened Baguettes: A Practical Solution for Dutch Ovens
One of the most practical solutions for Dutch oven baguette baking is to create "shortened baguettes." This involves dividing the dough into portions that, when shaped, are significantly shorter than a standard baguette but retain a similar relatively narrow profile. For example, instead of forming one long loaf from a batch of dough, you might divide it into two or three shorter pieces, each perhaps 8-12 inches (20-30 cm) long.
These shorter loaves can then be carefully placed side-by-side or end-to-end (if the Dutch oven is oval) inside the preheated Dutch oven. While they won't have the extreme crust-to-crumb ratio of a very long baguette, they will still benefit immensely from the steamy environment and high heat, developing a wonderful crust and airy interior. This method offers a good compromise between achieving a baguette-like experience and utilizing the Dutch oven effectively.
The Alternative: Baking Baguette Rolls in a Dutch Oven
Another excellent alternative for Dutch oven baguette baking is to bake individual baguette rolls or "demi-baguettes." This approach involves dividing the dough into smaller, individual portions, each shaped like a mini-baguette or a slightly fatter roll. These smaller shapes are much easier to arrange within the limited space of a Dutch oven.
Depending on the size of your Dutch oven and the rolls, you might be able to bake three, four, or even more rolls in a single batch. While not a single, long baguette, these rolls deliver the same great flavor and texture profile – a crispy crust and soft, airy interior – just in a more conveniently sized package. This method is particularly good for ensuring each piece gets maximum exposure to the radiant heat and steam.
Step-by-Step Guide: Baking Shortened Baguettes in a Dutch Oven
Recipe: Basic Baguette Dough Recipe
Here is a simple recipe framework for a basic baguette dough, suitable for making shortened baguettes or rolls for Dutch oven baking. This recipe uses a relatively high hydration for a light, airy crumb.
Ingredients:
- 500g Bread Flour (around 4 cups)
- 350g Water (around 1.5 cups, 70% hydration)
- 10g Salt (around 1.5 teaspoons)
- 3g Instant Yeast (around 1 teaspoon)
Instructions:
- Combine flour, water, salt, and yeast in a bowl. Mix until a shaggy dough forms.
- Let rest for 20-30 minutes (autolyse).
- Perform a series of stretch and folds every 30-45 minutes for 2-3 hours, developing gluten.
- Allow the dough to bulk ferment at room temperature until doubled in size (usually 2-4 hours, depending on temperature).
- Chill the dough in the refrigerator for at least 4-12 hours for better flavor and handling.
This recipe provides enough dough for roughly two to three shortened baguettes or several smaller rolls, perfectly sized for most standard Dutch ovens used in Dutch oven baguette baking.
Step 1: Preparing Your Dutch Oven for Baking
Proper preparation of the Dutch oven is crucial for successful Dutch oven baguette baking. About 45 minutes to an hour before you plan to bake, place your Dutch oven (with the lid on) into your oven. Preheat the oven to a high temperature, typically around 450°F (230°C). The long preheating time ensures that the heavy cast iron is uniformly heated throughout, acting as a powerful heat source when the dough is introduced.
Heating the Dutch oven to this high temperature is key to achieving maximum oven spring and a deep, rich crust color. Handle the hot pot with extreme caution using heavy oven mitts or heat-resistant gloves. Do not attempt to place dough into a cold or insufficiently preheated Dutch oven, as this will negatively impact the bake.
Step 2: Shaping the Dough for Dutch Oven Baking (Shortened Baguettes)
After your dough has completed its bulk fermentation and chilling, gently turn it out onto a lightly floured surface. Divide the dough into the desired number of pieces for your shortened baguettes or rolls (e.g., two or three pieces for shortened baguettes from the recipe above). Avoid degassing the dough too much.
Shape each piece into a short, relatively narrow log. The exact length will depend on the size of your Dutch oven. Aim for a length that allows the loaf to lie flat with a little clearance on the ends or sides so the lid can be placed easily. Typically, 8-12 inches is a good range. Use gentle tension to create a smooth surface and seal the seam underneath. Don't worry about them being perfectly uniform; rustic is part of the charm of homemade bread.
Step 3: Proofing the Shaped Baguettes
Once shaped, the shortened baguettes need a final proof (also called the secondary fermentation or proofing). Place the shaped loaves on a piece of parchment paper or in a proofing basket (banneton) dusted with flour, ensuring they are adequately supported so they don't spread too much. If using parchment, you can create "slings" by placing folds of parchment between the loaves to keep their shape during proofing and transfer.
Cover the loaves loosely with plastic wrap or a kitchen towel to prevent drying. Proof at room temperature for 45-60 minutes, or until they are visibly puffy but still hold their shape and spring back slowly when gently poked. Over-proofing can lead to loaves that collapse when scored or baked. The ideal proofing time can vary based on room temperature and the dough's activity.
Step 4: Scoring the Baguettes for Optimal Oven Spring
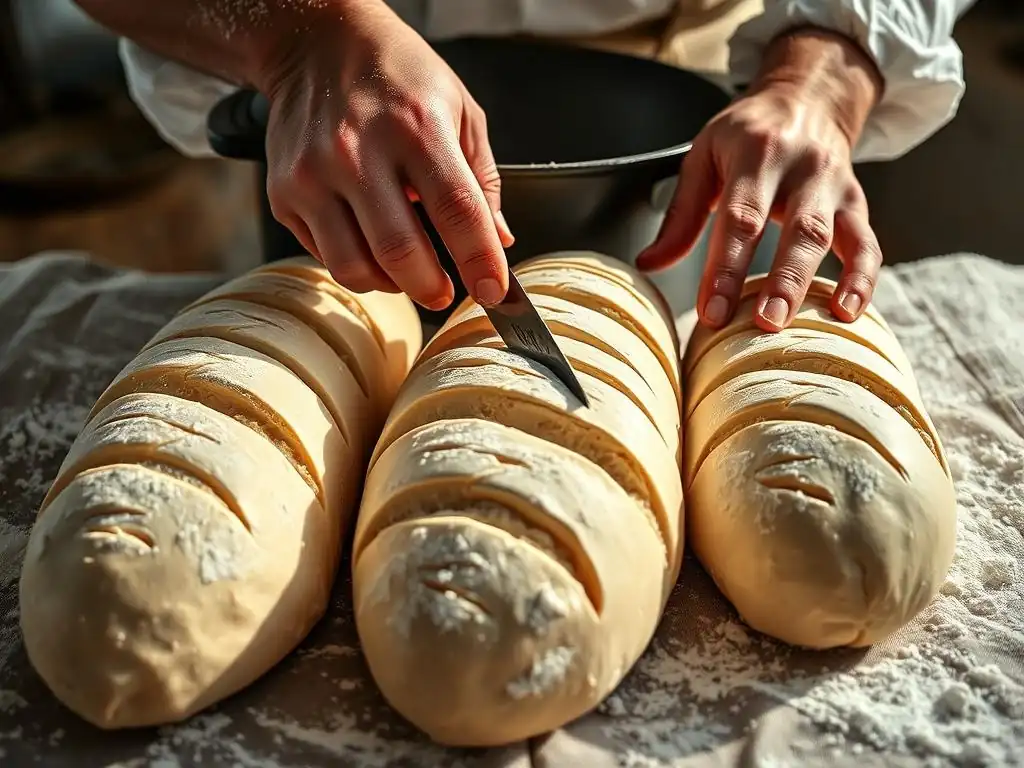
Scoring the dough before baking is a critical step in Dutch oven baguette baking. It serves two main purposes: it provides weak points for the dough to expand predictably during oven spring, preventing uncontrolled bursting, and it adds a beautiful, artistic element to the final loaf. Use a sharp razor blade (lame) or a very sharp knife held at a shallow angle (about 20-30 degrees) to make quick, overlapping slashes along the top of each loaf.
For shortened baguettes, you might make two or three longer slashes down the length of the loaf, or a series of shorter diagonal cuts. The depth of the cuts should be about 1/2 inch (1-1.5 cm). Be decisive and confident with your cuts. Scoring allows the dough to expand upwards and outwards through the slashes in the steamy environment of the Dutch oven, resulting in the characteristic "ear" or bloom along the cuts.
Step 5: Baking the Baguettes in the Dutch Oven
Carefully remove the preheated Dutch oven from your oven using heavy oven mitts. Be extremely cautious as it is very hot. If you proofed on parchment paper, gently lift the loaves using the parchment paper as a sling and lower them into the hot Dutch oven. If using proofing baskets, carefully invert the loaf into the pot, then score it.
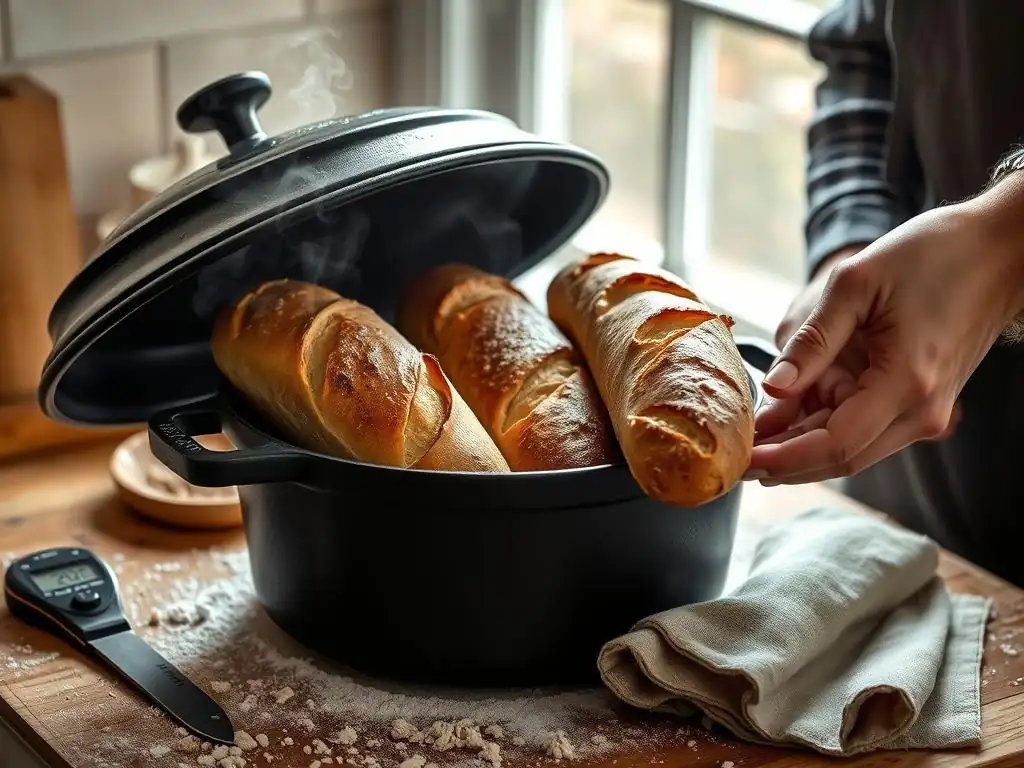
Place the lid back on the Dutch oven securely. Return the lidded pot to the oven. Bake at 450°F (230°C) with the lid on for the initial phase, typically 20-25 minutes. This phase is where the steam trapped inside the pot works its magic, allowing for maximum oven spring. After this initial phase, carefully remove the lid. The loaves should be pale but significantly expanded. Reduce the oven temperature slightly, usually to 425°F (220°C), and continue baking uncovered for another 15-20 minutes, or until the crust is a deep golden brown and the internal temperature reaches around 200-210°F (93-99°C).
Step 6: Cooling and Enjoying Your Homemade Baguettes
Once the shortened baguettes have achieved a beautiful golden color and sound hollow when tapped on the bottom, carefully remove the Dutch oven from the oven. Immediately transfer the baguettes from the hot pot to a wire cooling rack. Cooling on a rack allows air to circulate around the loaves, preventing the bottom crust from becoming soggy and allowing the internal steam to dissipate gradually.
Allow the baguettes to cool completely, or at least until they are warm enough to handle but not piping hot (about 30-60 minutes). Slicing into hot bread can compress the crumb and make it seem gummy. The cooling process finishes the internal structure and sets the crust. Once cooled, slice and enjoy your delicious homemade Dutch oven baguette baking success!
Tips and Tricks for Perfect Dutch Oven Baguettes
Achieving a Crispy Crust: Controlling Moisture
The key to a super crispy crust in Dutch oven baguette baking is managing moisture throughout the process. The initial lidded bake in the Dutch oven provides the essential steam for oven spring and a thin, extensible crust. However, to achieve a truly crispy finish, you must remove the lid for the second half of the bake.
Removing the lid allows the trapped steam to escape and the dry heat of the oven to directly hit the bread's surface. This dries out the crust, allowing it to brown deeply and become crackly. Ensuring your oven is fully preheated and maintaining a high temperature during the uncovered phase are also crucial for developing that desirable crispness. Baking for the full recommended time, or even a few minutes longer if needed, helps ensure the crust is thoroughly dried and browned.
Preventing Sticking: Parchment Paper or Cornmeal
A common issue in Dutch oven baguette baking is the dough sticking to the bottom of the hot pot. This can ruin the shape and make removal difficult. Using parchment paper is a simple and highly effective solution. By proofing your shaped dough on a piece of parchment, you can easily lift the dough and the paper together and gently lower them into the hot Dutch oven. The parchment creates a non-stick barrier.
Alternatively, you can sprinkle the bottom of the preheated Dutch oven with a thin layer of cornmeal or semolina flour just before adding the dough. This creates tiny ball bearings that help prevent the dough from adhering to the hot surface. While effective, parchment paper often offers the easiest and cleanest transfer method for delicate doughs.
Baking Time Adjustments for Dutch Oven Baking
Baking times provided in recipes are often estimates, and you may need to make adjustments based on your specific oven, Dutch oven, and the size/shape of your shortened baguettes or rolls. A good starting point for Dutch oven baguette baking is typically 20-25 minutes with the lid on at a high temperature (like 450°F / 230°C), followed by 15-20 minutes with the lid off at a slightly lower temperature (like 425°F / 220°C).
However, always monitor your bread's color and internal temperature during the uncovered phase. If the crust is browning too quickly, you can reduce the temperature slightly or tent the loaf loosely with foil. If it's not browning enough after 20 minutes uncovered, give it a few more minutes. An internal temperature of 200-210°F (93-99°C) is a reliable indicator that the bread is fully baked through.
Mastering the Art of Scoring for Dutch Oven Baguettes
Scoring is both functional and aesthetic in Dutch oven baguette baking. For shortened baguettes, aim for confident, swift cuts. A lame (razor on a handle) is the ideal tool, but a very sharp knife works. Hold the blade at a low angle (around 20-30 degrees) to the dough surface. This angle helps create a flap of dough that will lift and form an "ear" as the bread expands.
For a shortened baguette, you might make 2-3 overlapping slashes down the length. For rolls, a single slash or a cross pattern can be effective. Practice helps! Don't be discouraged if your first scores aren't perfect. The important thing is that the cuts are deep enough (around 1/2 inch or 1-1.5 cm) to allow the dough to expand without bursting elsewhere. Proper scoring, combined with the steam from the Dutch oven, ensures your shortened baguettes achieve beautiful lift and bloom.
Troubleshooting Common Dutch Oven Baguette Baking Problems
Baguettes Not Rising Properly
If your shortened baguettes or rolls aren't achieving good oven spring in the Dutch oven, several factors could be at play. Insufficient gluten development during the mixing and folding stages can result in a dough that lacks the structure to hold gas and expand. Ensure you are performing enough stretch and folds or kneading until the dough passes the windowpane test.
Another common culprit is proofing issues. The dough might be under-proofed (not enough time for yeast activity) or, more commonly for lack of oven spring, over-proofed. Over-proofed dough has exhausted its rising power before hitting the oven and may even collapse slightly when handled or scored. Ensure you are proofing until the dough is puffy but still has some resilience. Lastly, not preheating your Dutch oven sufficiently means the dough doesn't get that immediate heat burst needed for rapid expansion.
Soggy Crust Issues and Solutions
A soggy bottom crust or a lack of overall crispness after Dutch oven baguette baking is usually related to moisture management. The most common cause is not baking the bread uncovered for long enough after removing the lid. The uncovered phase is crucial for drying out the crust and making it crispy.
Ensure you bake uncovered until the crust is a deep golden brown and feels firm. If the top browns quickly but the bottom remains pale or soft, try placing a baking sheet on a rack below the Dutch oven during the uncovered phase – this can help shield the bottom from direct heat radiating from the oven floor while the top finishes. Also, make sure you cool the bread completely on a wire rack; placing it on a solid surface can trap steam underneath, leading to a soggy bottom.
Baguettes Sticking to the Dutch Oven
As mentioned earlier, sticking is a frequent frustration in Dutch oven baguette baking. If your loaves are sticking despite using parchment paper or cornmeal, double-check your technique. Ensure the Dutch oven is very hot before adding the dough; a properly preheated pot often helps prevent sticking.
If using parchment paper, make sure it covers the entire bottom surface where the dough will rest. If using cornmeal or semolina, ensure you use a generous enough dusting to create a sufficient barrier. For persistent sticking problems, especially with very wet doughs, using parchment paper is generally the most reliable method.
Dutch Oven Baguette Variations and Flavor Combinations
Adding Herbs and Spices to Your Baguette Dough
Elevate your Dutch oven baguette baking by incorporating herbs and spices directly into the dough. This adds wonderful aroma and flavor. You can mix dried herbs like rosemary, thyme, or oregano into the dry flour before adding water. Approximately 1-2 tablespoons of dried herbs per 500g of flour is a good starting point.
Alternatively, you can add fresh, chopped herbs during the stretch and fold process or gently fold them in before the final proofing. Spices like black pepper, garlic powder, or onion powder can also be included. Consider combinations like rosemary and sea salt, or garlic and dried parsley. Ensure the additions are distributed evenly throughout the dough for consistent flavor in every bite of your shortened baguette or roll.
Creating Cheesy Dutch Oven Baguettes
Adding cheese transforms a simple baguette into a rich, savory treat. For cheesy Dutch oven baguette baking, you can incorporate grated hard cheeses like Parmesan, Gruyère, or sharp cheddar into the dough during the final stages of mixing or during the first set of stretch and folds. Approximately 50-100g of cheese per 500g of flour works well, depending on how intense you want the flavor.
Be aware that adding cheese can sometimes affect the dough's structure and rise slightly due to the fat content. For an extra cheesy crust, you can sprinkle more cheese on top of the loaves just before baking them uncovered. The high heat will melt and crisp the cheese, adding another layer of texture and flavor to your Dutch oven baked creation.
Exploring Different Flour Combinations for Unique Flavors
While traditional baguettes are often made with white bread flour, experimenting with different flour combinations can bring unique flavors and textures to your Dutch oven baguette baking. Replacing a portion of the white bread flour with whole wheat flour (e.g., 10-20%) will add nutty notes and a denser crumb.
Using specialty flours like spelt, rye (in small quantities), or even a high-extraction flour (which retains more of the wheat berry's nutrients and flavor than white flour) can significantly alter the taste profile. For example, substituting 50-100g of bread flour with whole wheat or spelt flour in the basic recipe framework can introduce subtle complexities. Always adjust the water slightly when using different flours, as their absorption rates vary.
Conclusion: Mastering Dutch Oven Baguette Baking
Enjoying the Simplicity and Flavor of Homemade Baguettes
Mastering Dutch oven baguette baking is a rewarding endeavor for any home baker. While not producing the exact long shape of a traditional baguette, this technique allows you to create delicious, crusty, and airy bread with relative ease using standard kitchen equipment. The ability to trap steam and provide consistent, high heat within the Dutch oven effectively compensates for the lack of professional bakery ovens.
By adapting the shaping to fit your pot, you can achieve results that rival those from your favorite bakery – a deeply colored, crackly crust and a soft, open crumb. The process itself is quite simple once you understand the basic principles of using the Dutch oven for steam and heat. It’s a testament to how creative adaptation can make classic baking techniques accessible to everyone.
Further Exploration: Advanced Baguette Techniques
Once you are comfortable with basic Dutch oven baguette baking using shortened shapes or rolls, you might explore more advanced techniques. This could include experimenting with higher hydration doughs for an even more open crumb, incorporating a preferment like a poolish or biga for deeper flavor development, or even attempting cold fermentation techniques to improve texture and taste over a longer period.
You might also try different scoring patterns or experiment with baking multiple smaller rolls simultaneously. While a full-sized, foot-long baguette baked on a stone with injected steam remains the classic form, the world of Dutch oven baguette baking offers a fantastic starting point and plenty of room for creativity and refinement in your home kitchen. Enjoy the process and the delicious results!
Frequently Asked Questions
Is it really possible to bake a baguette in a Dutch oven?
Yes, it is! A Dutch oven provides a steam-filled environment that mimics a professional oven, resulting in a crispy crust and airy crumb for your baguette.
What size Dutch oven is best for baking baguettes?
A 5-quart or larger Dutch oven is generally recommended. This provides enough space for the baguette to rise properly and develop its shape without being overly cramped.
Do I need to preheat the Dutch oven before baking the baguette?
Absolutely. Preheating the Dutch oven, both the pot and the lid, is crucial. This creates the intense heat needed for the initial oven spring and helps achieve a beautiful crust.
How do I prevent the baguette from sticking to the Dutch oven?
Using parchment paper is the easiest solution. You can also use a silicone baking mat. Make sure to lift the baguette out carefully after baking.
How long should I bake the baguette with the lid on and off?
Typically, you bake with the lid on for the first 20-25 minutes to trap steam. Then, remove the lid and bake for another 15-20 minutes to achieve the desired golden-brown color and crispness.
Final Reflection: The Humble Baguette, Reimagined
The pursuit of the perfect baguette transcends mere culinary ambition; it's a testament to the enduring power of simple ingredients transformed by technique. This exploration of baking baguettes in a Dutch oven has revealed not only the feasibility of this method but also the surprising depth of flavor and texture it unlocks. The seemingly simple act of baking bread becomes a journey of experimentation and discovery, pushing the boundaries of what's possible in a home kitchen.
The impact of the Dutch oven on the baguette-baking landscape is undeniable. It allows for a level of control and consistency previously unattainable without specialized equipment. This method democratizes the art of bread-making, bringing the crisp crust and airy crumb of a truly exceptional baguette within reach of home bakers everywhere. Bread is the staff of life,
they say, and this method ensures that staff is both delicious and accessible. The journey of mastering this technique is a deeply rewarding one, connecting us to a rich culinary heritage while simultaneously embracing innovation.
Now, consider your own kitchen. What seemingly insurmountable culinary challenges are you ready to tackle? This article has hopefully inspired you to experiment, to push your boundaries, and to discover the joy of creating something beautiful and delicious from simple ingredients. Don't be afraid to try, to fail, and to learn from each attempt. The perfect baguette, like any great endeavor, is a journey, not a destination. Embrace the process, and savor the results.
Unleash Your Inner Boulanger: Bake the Perfect Baguette!
Thanks for taking the time to explore the art of baking baguettes in a Dutch oven! We hope you now feel empowered to tackle this seemingly complex bread. Ready to take your baking skills to the next level?
- Bake your own masterpiece: Try the recipe outlined in the article – we're confident you'll be amazed at the results! Remember to pay close attention to the proofing stage.
- Share your success (or challenges!): Post a picture of your baguette on social media using #BakeWithEaseDutchOvenBaguette and tag us! Let's build a community of bread-baking enthusiasts.
- Experiment with different flours: Once you've mastered the basic recipe, try substituting different types of flour to see how it affects the final product.
So, what unique ingredient will you experiment with in your next baguette attempt? Let's hear your ideas in the comments below!