
Your First Artisan Baguette: A Simple StepbyStep Guide

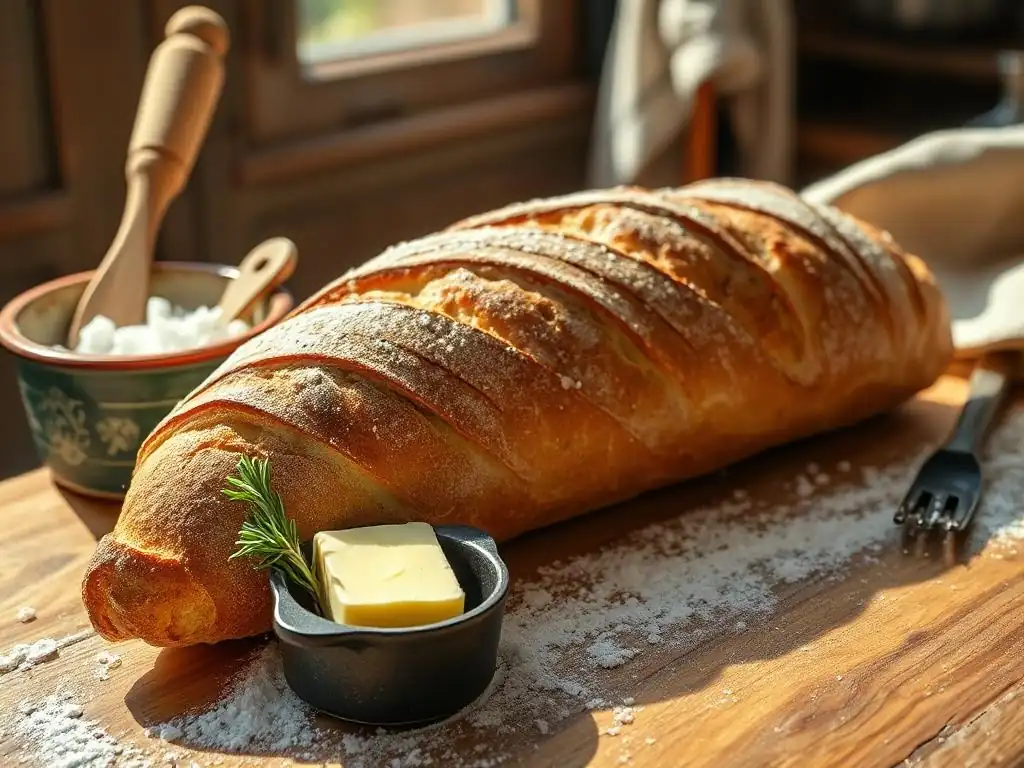
Welcome to BakeWithEase, your friendly guide to the delightful world of baking! Ever dreamed of pulling a perfectly crusty, golden-brown baguette from your own oven? Our easy artisan baguette recipe is your starting point. Discover how simple it can be to create bakery-worthy bread at home, and unlock the secrets to a truly satisfying baking experience. Ready to get started?
- BakeWithEase Presents: Mastering the Easy Artisan Baguette Recipe
- What Makes This Artisan Baguette Recipe So Easy?
- Step 1: Gathering Your Ingredients for the Easy Artisan Baguette
- Step 2: Mixing the Dough for Your Artisan Baguette
- Step 3: The First Rise (Bulk Fermentation) for Your Artisan Baguette
- Step 4: Shaping Your Artisan Baguettes
- Step 5: The Second Rise (Proofing) for Your Easy Artisan Baguette
- Step 6: Scoring Your Artisan Baguettes
- Step 7: Baking Your Artisan Baguettes to Perfection
- Step 8: Cooling and Enjoying Your Homemade Artisan Baguette
- Troubleshooting Your Easy Artisan Baguette Recipe
- Storing Your Artisan Baguette for Maximum Freshness
- Enjoy Your Homemade Artisan Baguette!
-
Frequently Asked Questions
- What makes this baguette recipe "easy" compared to other artisan bread recipes?
- How long does it take to make this easy artisan baguette recipe from start to finish?
- What kind of flour is best for achieving an authentic artisan baguette crust and crumb?
- Can I substitute the active dry yeast with instant yeast or sourdough starter in this recipe?
- What are some tips for getting those characteristic baguette slashes (scores) on the top before baking?
- Final Reflection: The Humble Baguette, A Journey of Discovery
- Unleash Your Inner Boulanger!
BakeWithEase Presents: Mastering the Easy Artisan Baguette Recipe
Welcome to the wonderful world of bread baking! Many bakers dream of pulling a perfectly golden, crusty baguette from their oven. It might seem intimidating, but with the right approach, achieving a delicious artisan baguette at home is absolutely within reach, even for beginners. This guide is designed to demystify the process and show you just how simple it can be.
Forget complex techniques and hard-to-find ingredients. Our goal is to provide you with an easy artisan baguette recipe that focuses on technique and patience, leading you to a truly rewarding baking experience. By breaking down each step, we'll build your confidence and help you create baguettes that rival your favorite bakery. Let's get started on this accessible journey to homemade bread perfection!
What Makes This Artisan Baguette Recipe So Easy?
This particular easy artisan baguette recipe is designed with simplicity and minimal fuss in mind. We focus on key techniques that yield fantastic results without requiring advanced skills or specialized equipment beyond the basics you likely already have in your kitchen. The ingredient list is short and uses common pantry staples, making it accessible for anyone wanting to try their hand at this classic bread.
The process emphasizes gentle handling and allowing time to do the work, rather than relying on intensive kneading or tricky manipulations. By understanding the 'why' behind each step, you'll gain intuition about the dough, which is crucial for successful baking. This approach makes the easy artisan baguette recipe achievable for any skill level, proving that delicious, crusty bread is within reach.
Perfect Artisan Baguette for Beginners
Creating a perfect artisan baguette might sound like a daunting task for someone new to bread baking, but this recipe is specifically tailored to build beginner confidence. We avoid complicated starter cultures or overnight fermentations (though those are great for later!). Instead, we use a straightforward active dry or instant yeast method that is predictable and reliable, significantly reducing the chances of common beginner pitfalls like inactive dough.
This easy artisan baguette recipe breaks down the process into manageable steps: mixing, rising, shaping, and baking. Each stage is explained clearly, focusing on visual cues and tactile sensations so you can learn to read your dough. For instance, instead of demanding hours of vigorous kneading, we incorporate resting periods that develop gluten structure naturally. Our aim is to make your first attempt at an artisan baguette not just successful, but genuinely enjoyable, setting you up for many more baking adventures.
Simple Ingredients for a Classic French Baguette
One of the beauties of a classic French baguette is its simplicity, relying on just a few core ingredients to create complex flavor and texture. For this easy artisan baguette recipe, you will need high-quality bread flour (or all-purpose flour with a slightly higher protein content), water, salt, and yeast. That's it! No milk, eggs, or butter are required, keeping the process clean and focused on the foundational elements of bread making.
Using simple ingredients means the quality of each component truly shines through. For the water, filtered water is often recommended to avoid chlorine which can sometimes affect yeast activity; aim for around 70-75°F (21-24°C) for optimal yeast performance.
While any salt will work, non-iodized salt is often preferred by bakers as iodine can potentially interfere with yeast, though the effect is typically minimal in small quantities. Choosing a good quality bread flour, like King Arthur Baking Company's bread flour with about 12.7% protein, will provide the necessary gluten structure for that characteristic chewy interior and crisp crust, vital for a successful easy artisan baguette recipe.
Step 1: Gathering Your Ingredients for the Easy Artisan Baguette
Before you even think about mixing, having all your ingredients measured out and ready is crucial for a smooth baking process. This mise en place (French for "everything in its place") approach minimizes stress and prevents forgotten ingredients. For this easy artisan baguette recipe, precision in measuring, especially the water and flour, is key to achieving the right dough consistency. Using a kitchen scale is highly recommended for accuracy, as volume measurements (cups) can vary significantly.
Ensure your yeast is active and not expired. If using active dry yeast, you'll typically need to activate it in a small amount of warm water first, looking for foamy proof of life within 5-10 minutes. Instant yeast can often be mixed directly with the dry ingredients. Having your salt measured separately is also a good practice, as adding salt directly onto yeast can sometimes inhibit its activity. This simple preparation step sets the foundation for a successful easy artisan baguette recipe.
The Key Ingredients List for Your First Baguette
Here are the essential ingredients you'll need for this easy artisan baguette recipe, focusing on quality and accuracy:
- Bread Flour: Approximately 500 grams (about 4 cups). A protein content of 12-13% is ideal for structure.
- Water: Approximately 350-375 grams (about 1 ½ cups). Warm water, around 70-75°F (21-24°C), is best. The exact amount can vary slightly based on flour absorption, so start with the lower end and add more if needed.
- Salt: Approximately 10 grams (about 1 ½ teaspoons). Non-iodized fine sea salt or table salt works well.
- Yeast: Approximately 2 teaspoons of instant dry yeast or 2 ½ teaspoons of active dry yeast.
Using a kitchen scale for flour and water ensures consistent results. For instance, 500g of flour measured by volume could be anywhere from 3.5 to 4.5 cups depending on how it's scooped and packed, leading to significant variations in hydration.
Achieving the correct hydration level, typically around 70-75% water relative to flour weight for baguettes, is critical for developing the open crumb structure characteristic of an artisan loaf. This precise measurement, easily done with a scale costing as little as $15-$20, is a small investment that pays dividends in bread baking success, making this easy artisan baguette recipe even more reliable.
Essential Baking Tools for Baguette Success
While an easy artisan baguette recipe aims for simplicity, having a few basic tools can significantly improve your results and make the process smoother. You don't need a professional bakery setup! Here are some tools that are highly recommended:
- Kitchen Scale: As mentioned, essential for accurate ingredient measurement, especially flour and water.
- Large Mixing Bowl: For combining ingredients and the first rise. A capacity of at least 4-6 quarts is helpful.
- Dough Scraper: A bench scraper (metal or plastic) is invaluable for dividing dough, cleaning surfaces, and handling sticky dough. A bowl scraper (flexible plastic) is great for getting every last bit of dough out of the bowl.
- Proofing Basket (Banneton) or Couche: Traditionally, baguettes proof on a linen cloth called a couche. Alternatively, specialized baguette-shaped proofing baskets (bannetons) provide support and help maintain the shape during the second rise. If you don't have these, a well-floured tea towel draped over something supportive (like rolling pins) can work in a pinch.
- Lame or Sharp Knife: For scoring the dough before baking. A razor blade attached to a handle (lame) provides the cleanest cuts.
- Baking Stone or Steel: Placing your baguettes directly on a preheated stone or steel helps create a strong oven spring and a crisp bottom crust. If you don't have one, a heavy baking sheet can work, though results may vary.
- Spray Bottle: For creating steam in the oven, crucial for crust development.
While you can technically make an easy artisan baguette recipe with minimal tools, investing in a kitchen scale and a dough scraper will dramatically improve your consistency and handling. A good bench scraper, often available for under $10, makes dividing and shaping much cleaner and easier than trying to use just your hands.
Similarly, while not strictly necessary, a baking stone (starting around $30) or steel (often $50+) helps replicate the intense heat of a bakery oven floor, contributing significantly to the desired crust and oven spring. These tools make the process more efficient and enjoyable, ultimately contributing to a better final loaf from your easy artisan baguette recipe.
Step 2: Mixing the Dough for Your Artisan Baguette
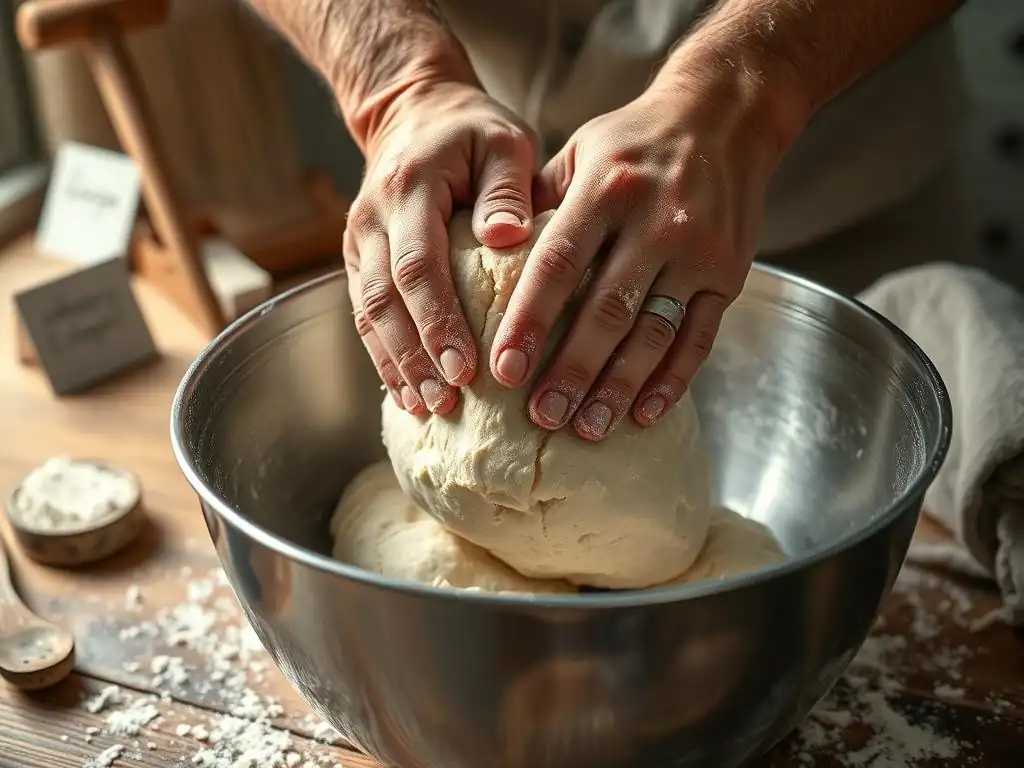
Mixing the dough is the first hands-on step in this easy artisan baguette recipe. The goal here is to combine the ingredients thoroughly and begin the process of gluten development. Unlike some bread recipes that require extensive kneading right away, this method often incorporates a technique called autolyse, which simplifies the initial mixing and makes subsequent handling easier.
Start by combining the flour and water in your mixing bowl. Mix them together with your hands or a wooden spoon until no dry flour remains. It will look shaggy and rough at this stage. This is where the autolyse begins.
The Importance of Autolyse for Baguette Dough
Autolyse is a simple technique involving mixing only the flour and water and letting the mixture rest for a period, typically 20 minutes to an hour. This rest allows the flour to fully hydrate and enzymes naturally present in the flour to begin breaking down proteins, which helps gluten development. For this easy artisan baguette recipe, an autolyse of 20-30 minutes is sufficient and makes a noticeable difference.
During the autolyse period, the gluten begins to form on its own, making the dough less sticky and easier to knead (or fold) later. This step also improves the dough's extensibility, allowing it to stretch without tearing, which is beneficial for shaping baguettes. After the autolyse, you'll notice the dough is smoother and more pliable than immediately after mixing. This simple rest is a powerful tool in developing the structure needed for a classic artisan baguette crumb.
Kneading Techniques for a Smooth Baguette Dough (Easy Method)
After the autolyse, add the salt and yeast to the dough. If you used active dry yeast that was proofed in water, add that water mixture now. If using instant yeast, sprinkle it over the dough along with the salt. Now, incorporate these ingredients into the dough. This can be done by hand or with a stand mixer using the dough hook.
For a truly easy artisan baguette recipe, we recommend a series of stretch and folds rather than continuous, vigorous kneading. After incorporating the salt and yeast, perform a few initial folds to distribute them evenly. Then, every 20-30 minutes during the first rise (Step 3), perform a set of stretch and folds.
To do this, wet your hands slightly, grab the dough on one side, stretch it upwards, and fold it over the center. Rotate the bowl and repeat this 3-4 times until the dough tightens up. This gentle method develops gluten over time, resulting in a smooth, elastic dough perfect for an easy artisan baguette recipe without the effort of traditional kneading.
Step 3: The First Rise (Bulk Fermentation) for Your Artisan Baguette
The first rise, also known as bulk fermentation, is a critical stage in this easy artisan baguette recipe. During this period, the yeast consumes sugars in the flour and produces carbon dioxide gas, which causes the dough to rise and develop flavor. This is also the time when the gluten structure continues to strengthen through enzymatic activity and the stretch and folds you perform.
Place the mixed dough in a lightly oiled bowl, cover it loosely with plastic wrap or a damp towel, and let it rise in a warm spot. An ideal temperature is around 75-80°F (24-27°C), though room temperature (68-72°F/20-22°C) works fine, just slower. The dough should roughly double in size during this stage.
Understanding Bulk Fermentation for Flavor Development
Bulk fermentation is not just about increasing dough volume; it's where much of the complex flavor in your artisan baguette develops. As yeast and bacteria (naturally present in flour) are active, they produce organic acids and other compounds that contribute to the bread's aroma and taste. A longer, slower fermentation, even at room temperature, allows more of these flavor compounds to form compared to a quick, hot rise.
For this easy artisan baguette recipe, a bulk fermentation period of 2 to 3 hours at room temperature is typically sufficient, depending on the ambient temperature and yeast activity. During this time, the dough should become noticeably lighter and airier. Performing the recommended 2-3 sets of stretch and folds during this period helps redistribute yeast and nutrients, equalizes temperature, and further strengthens the gluten network, all contributing to a better crumb and flavor profile in your final easy artisan baguette recipe.
Tips for a Successful First Rise
Ensuring a successful first rise is key to a well-structured and flavorful artisan baguette. Here are a few tips:
- Temperature Matters: Aim for a consistent temperature. Too cold, and the rise will be excessively slow; too hot, and it might rise too quickly, potentially leading to less flavor development and a weaker structure. A proofer setting on an oven (if available), a warm kitchen counter, or even placing the covered bowl in a turned-off oven with the light on can help maintain a steady temperature.
- Visual Cues: Don't rely solely on time; watch the dough. It should visibly increase in volume, often doubling or close to doubling. The surface should look bubbly, and the dough should feel light and airy.
- The Poke Test: Gently poke the dough with a wet finger. If the indentation springs back immediately, it needs more time. If it holds the indentation or springs back very slowly, it's likely ready for the next step. If it collapses, it might be over-proofed (though this is less common during bulk fermentation).
A typical rise might take 2.5 hours at 72°F (22°C). If your kitchen is cooler, say 65°F (18°C), it could take 3.5 hours or longer. Conversely, in a warmer kitchen of 78°F (26°C), it might be ready in just 1.5 hours. Learning to judge the dough by feel and appearance is more reliable than sticking rigidly to a timer, especially for a beginner working on their first easy artisan baguette recipe.
Step 4: Shaping Your Artisan Baguettes
Shaping is perhaps the most visually intimidating step in making an artisan baguette, but with practice and patience, it becomes intuitive. The goal is to create tension on the surface of the dough, which helps the baguettes hold their shape and encourages a good oven spring. This easy artisan baguette recipe breaks shaping into three distinct stages: dividing, pre-shaping, and final shaping.
Turn the dough out gently onto a lightly floured surface. Avoid degassing the dough completely; you want to preserve some of the air bubbles created during the first rise. Use a bench scraper to divide the dough into the desired number of pieces, typically 2 or 3 for home ovens, depending on the size you want. For instance, if using 500g of flour, you might divide it into two 250g pieces or three pieces around 165g each.
Dividing the Dough: Precision for Consistent Baguettes
Accurate division of the dough ensures that your baguettes are relatively uniform in size and bake evenly. Using your kitchen scale again at this stage is highly recommended. Simply weigh the total dough mass and divide by the number of baguettes you plan to make. Cut the dough using a sharp bench scraper, trying to make clean cuts rather than tearing the dough.
For example, if your total dough weighs 850g (after adding salt and yeast weight) and you want two equal baguettes, aim for two pieces around 425g each. Precision here, even within 5-10 grams, helps ensure that when you place them on your baking stone, they require roughly the same baking time. This attention to detail in dividing makes the baking process more predictable and contributes to the overall success of your easy artisan baguette recipe.
Pre-Shaping Techniques for a Perfect Baguette
Pre-shaping is a brief intermediate step that helps align the gluten structure and makes the final shaping much easier. After dividing the dough, gently shape each piece into a rough cylinder or log shape. The goal is to create a bit of surface tension.
A common method is to gently pat each piece into a rectangle, then fold the top third down towards the center and the bottom third up to overlap it, pressing lightly to seal. Then, fold the resulting shape in half lengthwise and gently seal the seam with the heel of your hand. Roll the log slightly to tighten it, creating a cylinder.
Let these pre-shaped pieces rest for 15-20 minutes, covered loosely, to allow the gluten to relax. This rest prevents the dough from resisting the final shaping, which is crucial for achieving that classic baguette form in an easy artisan baguette recipe.
Final Shaping: The Art of the Baguette
The final shaping transforms the pre-shaped logs into the elongated form of a baguette. This step requires a balance of gentle handling and creating sufficient surface tension. On a lightly floured surface (too much flour will prevent the dough from gripping the surface and developing tension), take one rested pre-shaped piece.
Gently flatten the dough into a rectangle again. Fold the top edge down to meet the bottom edge and seal the seam firmly with the heel of your hand. Rotate the dough so the seam is at the top.
Fold the dough in half lengthwise again, bringing the top edge down to meet the bottom edge, and seal the seam very firmly using the heel of your hand. Now, with your hands slightly cupped around the dough, gently roll it back and forth, starting from the center and working outwards, applying gentle pressure to elongate the loaf and create tension on the surface. Aim for a length that fits your baking stone or sheet, typically 12-16 inches (30-40 cm) for home baking.
The final shape should be a tapering cylinder with a taut surface and a well-sealed seam underneath. This technique, while requiring a little practice, is fundamental to getting that iconic shape from your easy artisan baguette recipe.
Step 5: The Second Rise (Proofing) for Your Easy Artisan Baguette
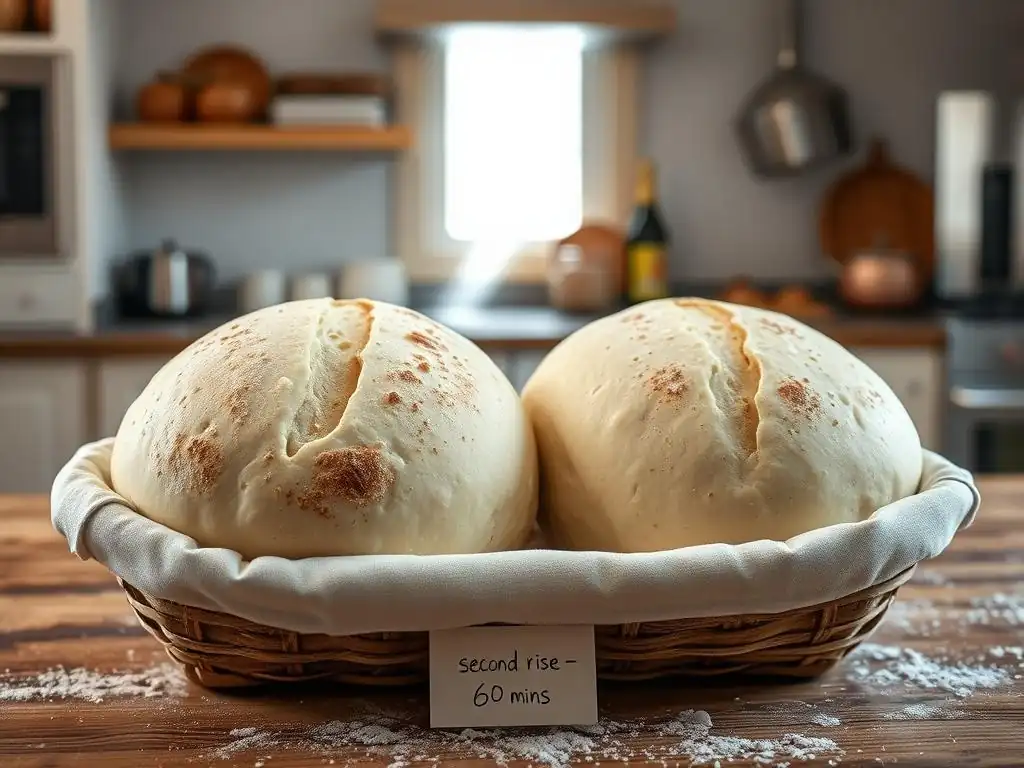
After shaping, your baguettes need a second rise, or proofing, before baking. This is a shorter rise than the bulk fermentation, allowing the dough to lighten up and increase slightly in volume again. Proper proofing is essential for a good oven spring and open crumb. Over-proofing can lead to flat, dense baguettes, while under-proofing can result in dense spots or blowouts during baking.
Place the shaped baguettes onto a floured surface, ideally a couche (linen cloth) or into baguette proofing baskets. If using a couche, create folds between the baguettes to support their shape and prevent them from sticking together as they rise. Cover the baguettes loosely with plastic wrap or a light towel to prevent them from drying out.
Proofing Baskets: Essential for a Beautiful Baguette
While a couche is traditional and effective, baguette-shaped proofing baskets (bannetons) are incredibly helpful for maintaining the baguette's elongated shape during the final rise, especially for beginners working with an easy artisan baguette recipe. These baskets, often made of cane or plastic, are typically lined with cloth or heavily floured.
Placing the shaped baguette seam-side up in a well-floured banneton provides crucial support as the dough expands. The flour prevents sticking, and the basket's structure prevents the dough from spreading outwards instead of upwards. This results in a more uniform shape and a better chance of achieving that classic cylindrical form after baking. A typical baguette banneton might measure around 16-18 inches long and 2-3 inches wide, perfectly supporting a home-sized baguette. Using these baskets simplifies the transfer to the baking surface, as you can simply invert the basket onto your peel or parchment paper.
Proofing Time: How to Tell When Your Dough is Ready
Proofing time is highly dependent on temperature. At a warm room temperature of 75°F (24°C), your baguettes might be ready in 45-60 minutes. In a cooler kitchen, it could take 75-90 minutes. Again, rely on visual cues and the poke test rather than strictly on time.
The baguettes should look visibly puffier, but they should not have doubled in size – perhaps increased by 50-75%. The surface should look smooth and slightly rounded. For the poke test, gently poke the side of a baguette with a wet finger. If the indentation springs back slowly, leaving a small mark, the baguettes are perfectly proofed.
If the indentation springs back quickly, they need more time. If the indentation remains completely and the dough feels very airy and fragile, they might be slightly over-proofed, though you can still bake them, just handle them very gently. Mastering this proofing judgment is key to getting a great result from your easy artisan baguette recipe.
Step 6: Scoring Your Artisan Baguettes
Scoring, or making cuts on the surface of the dough just before baking, is a crucial step for several reasons. It's not just for aesthetics! Scoring controls where the bread expands in the oven, allowing for optimal oven spring and preventing the crust from cracking randomly. It also contributes to the final shape and texture of the baguette.
Use a very sharp blade, like a baker's lame (a razor blade on a handle) or a sharp utility knife. Hold the blade at a shallow angle, almost parallel to the surface of the dough (around 30-45 degrees). Make quick, confident, overlapping cuts along the length of the baguette.
Why Scoring Matters: Controlling Oven Spring
During the first few minutes of baking, the dough experiences a rapid expansion known as "oven spring." This is caused by the sudden burst of activity from the yeast and the expansion of gases and steam within the dough due to the heat. Without scoring, the crust quickly sets, and the expanding dough has nowhere to go, leading to uncontrolled cracking or a lopsided loaf.
Scoring provides weak points on the surface of the dough where the expansion can occur in a controlled manner. As the dough springs, the cuts open up, creating the characteristic 'ears' or flaps on the crust of a well-baked baguette. Proper scoring allows the interior of the baguette to expand fully, contributing to an open, airy crumb structure. For an easy artisan baguette recipe, aiming for 3-5 diagonal, overlapping cuts along the length is standard and effective.
Scoring Techniques for a Professional Look
Achieving clean, professional-looking scores takes a little practice, but it's certainly achievable for your first easy artisan baguette recipe.
Here are some tips:
- Sharp Blade: This is the most important factor. A dull blade will drag the dough instead of cutting cleanly.
- Shallow Angle: Holding the blade at a shallow angle (30-45 degrees) helps create the "ear" as the dough expands. If you cut straight down (90 degrees), the cuts will open but won't form the desired lip.
- Quick, Confident Strokes: Hesitation can lead to jagged cuts. Aim for smooth, swift movements.
- Overlap: Each cut should overlap the previous one by about a third of its length. A typical baguette might have 4-5 overlapping diagonal cuts.
- Depth: Aim for a depth of about ¼ to ½ inch (6-12 mm). Too shallow, and the cuts won't open properly; too deep, and the dough might collapse.
Practice on a piece of scrap dough if you're nervous. The goal is to make cuts that are consistent in angle, depth, and overlap along the entire length of the baguette. This step truly elevates the appearance of your homemade easy artisan baguette recipe.
Step 7: Baking Your Artisan Baguettes to Perfection
Baking is where the magic happens, transforming the proofed dough into a golden, crusty artisan baguette. High heat and steam are the secrets to achieving that coveted thin, crisp crust and excellent oven spring. Preheat your oven well in advance.
For baking baguettes, a high temperature is essential. Preheat your oven to a very hot temperature, typically 450-475°F (230-245°C). If you are using a baking stone or steel, place it on the middle rack during preheating and allow it to heat up for at least 30-60 minutes after the oven indicates it's reached temperature. This ensures the stone or steel is fully saturated with heat, providing a strong thermal boost to the dough when it's placed on it.
Oven Temperature: Achieving a Crisp Crust
A high oven temperature is critical for achieving the characteristic crisp crust of an artisan baguette. The intense heat causes the water on the surface of the dough to evaporate rapidly, creating steam, and helps set the crust quickly while the interior is still expanding. Baking at too low a temperature will result in a thicker, chewier crust and less oven spring.
Aiming for 450°F (230°C) or even 475°F (245°C) is standard for baguette baking. Some bakers even push it to 500°F (260°C) initially, dropping the temperature slightly after the first 10 minutes. This initial blast of high heat is what triggers maximum oven spring. For your easy artisan baguette recipe, starting at 450°F is a reliable approach. Ensure your oven is fully preheated; using an oven thermometer can help verify the actual temperature inside, as built-in thermostats can sometimes be inaccurate by 25-50°F (15-30°C).
Creating Steam: The Key to a Great Baguette
Steam in the oven during the initial phase of baking is arguably the most important factor for developing a thin, crisp, and shiny crust with maximum oven spring. Without steam, the crust forms too quickly and rigidly, preventing the dough from expanding fully and resulting in a dull, thick crust.
There are several ways to create steam in a home oven:
- Cast Iron Pan Method: Place a cast iron pan or other oven-safe pan on the rack below your baking stone during preheating. Just before loading the baguettes, carefully pour about a cup of boiling water into the hot pan and quickly close the oven door.
- Ice Cube Method: Place a shallow metal tray (like a broiler pan) on the bottom rack during preheating. Throw a handful of ice cubes into the hot tray just as you load the baguettes.
- Spray Bottle Method: Generously mist the walls of the oven with water using a spray bottle just before loading the baguettes, and maybe once more a few minutes into baking (be quick! ).
The goal is to create a steamy environment for the first 10-15 minutes of baking. After this initial period, the crust will have set, and you can open the oven to release the steam for the remainder of the baking time to allow the crust to crisp up. Using steam is a non-negotiable step for a successful easy artisan baguette recipe.
Baking Time: Knowing When Your Baguette is Done
Baking time for baguettes typically ranges from 20 to 30 minutes, depending on your oven, the size of the baguettes, and how dark you like your crust. After the initial steamy phase (about 10-15 minutes), carefully open the oven door (releasing the steam), and continue baking.
Look for visual cues: the baguettes should be a deep golden-brown color. The crust should look firm and feel crisp. You can also check the internal temperature; a fully baked baguette will register around 200-210°F (93-99°C) with an instant-read thermometer inserted into the center of the loaf. Another common test is to tap the bottom of the baguette – it should sound hollow. Don't underbake, as this will result in a gummy interior. A well-baked artisan baguette should have a substantial crust and a light, open interior. Trust your senses for this easy artisan baguette recipe.
Step 8: Cooling and Enjoying Your Homemade Artisan Baguette
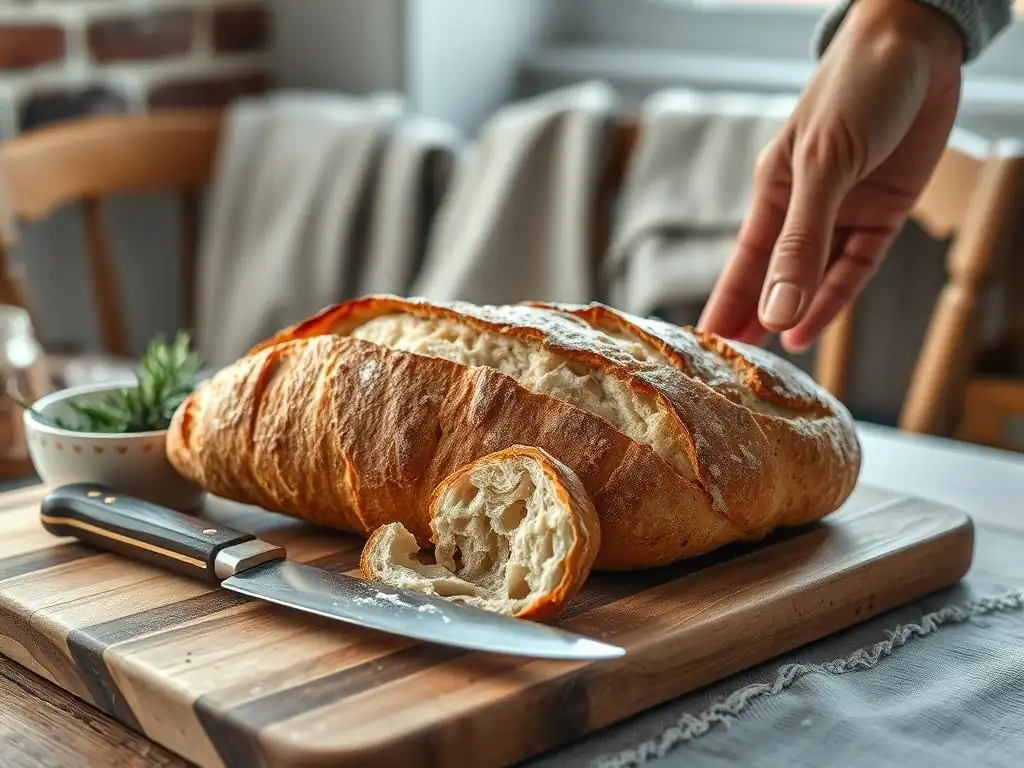
Once your beautiful artisan baguettes are baked to a perfect golden brown, the hardest part is waiting! Immediately transfer the baguettes from the oven to a wire cooling rack. Resist the urge to slice into them right away.
Cooling is a crucial, non-negotiable step in bread baking. It allows the internal structure to set fully and moisture to redistribute evenly throughout the loaf. Cutting into a hot baguette can result in a gummy, dense interior because the starches haven't finished their transformation.
The Importance of Cooling Before Slicing
Allowing your baguettes to cool completely on a wire rack is vital for achieving the desired texture. As the bread cools, moisture from the interior moves towards the crust, helping it crisp up, while the internal crumb structure stabilizes. For baguettes, this cooling period should be at least 30-60 minutes, ideally longer.
Think of it like letting a steak rest after cooking – it makes a significant difference in the final texture and flavor. Cutting into a hot baguette releases steam prematurely, which carries away flavor compounds and disrupts the setting crumb. A baguette cooled for an hour or more will have a much better internal structure, a crisper crust, and a more developed flavor profile. Patience during this final step truly perfects your easy artisan baguette recipe.
Serving Suggestions for Your Freshly Baked Baguette
Once your artisan baguette has cooled sufficiently, it's time to enjoy the fruits of your labor! A freshly baked baguette is incredibly versatile.
Here are a few serving suggestions:
- Simply with Butter: A classic for a reason. The contrast of the crisp crust and soft interior with good quality butter is sublime.
- With Olive Oil and Balsamic Vinegar: A simple yet elegant appetizer.
- For Sandwiches: Slice horizontally for classic sandwiches or diagonally for crostini.
- To Accompany Soup or Salad: Perfect for soaking up delicious broths and dressings.
- Bruschetta: Toast slices and top with fresh tomatoes, garlic, and basil.
- As Part of a Cheese Board: The neutral flavor and great texture make it an ideal vehicle for cheeses and charcuterie.
Sharing your warm, homemade artisan baguette with friends and family is one of the most rewarding aspects of baking. This easy artisan baguette recipe provides the perfect canvas for countless culinary pairings.
Troubleshooting Your Easy Artisan Baguette Recipe
Even with an easy artisan baguette recipe, baking can sometimes present challenges. Don't get discouraged if your first batch isn't perfect! Learning to troubleshoot common issues is part of the baking journey.
Here are a few common problems you might encounter and potential solutions:
- Flat Baguettes: Could be under-proofed or over-proofed, insufficient surface tension during shaping, or not enough steam during baking.
- Dense Crumb: Likely due to under-proofing, insufficient gluten development (not enough stretch and folds), or cutting into the baguette before it's fully cooled.
- Thick/Chewy Crust: Not enough steam during baking, or baking at too low a temperature.
- Cuts Didn't Open: Cuts weren't deep enough, blade wasn't sharp enough, or insufficient steam/oven spring.
- Baguettes Stick to Couche/Basket: Not enough flour used on the couche or in the proofing basket.
Keep notes on your process – oven temperature, proofing times, dough feel – this helps you identify what might have gone wrong and adjust for your next bake. Every bake is a learning opportunity!
Common Problems and Solutions for Beginner Bakers
Let's delve into a couple of specific beginner issues with the easy artisan baguette recipe:
- Problem: The dough is too sticky and hard to handle during shaping.
- Solution: This often indicates slightly too much hydration or not enough gluten development during the first rise. Ensure accurate measurement with a scale (especially water). Make sure you performed the recommended stretch and folds; they build necessary structure. A brief rest (5-10 minutes) after dividing can also make the dough easier to handle. Use just enough flour on your work surface to prevent sticking, but not so much that it inhibits tension.
- Problem: Baguettes spread out sideways instead of rising upwards in the oven.
- Solution: This usually means the dough was either over-proofed (it's lost its structure) or lacked sufficient surface tension from tight shaping. Ensure your proofing time isn't too long (use the poke test!). Focus on creating a taut surface and a well-sealed seam during final shaping. Using a couche or proofing basket provides external support during proofing, helping the baguette hold its shape until it hits the hot oven. Also, ensure your oven is fully preheated and you've introduced sufficient steam.
Addressing these common issues will significantly improve your results and confidence with this easy artisan baguette recipe.
Tips for Improving Your Next Batch of Baguettes
Each time you bake this easy artisan baguette recipe, you'll learn something new. Here are a few tips for continuous improvement:
- Observe Your Dough: Pay attention to how the dough feels at each stage – after mixing, after autolyse, after folds, after proofing. This tactile understanding is invaluable.
- Master Scoring: Practice your scoring technique on scrap dough or even just on paper. A confident, clean score makes a big difference.
- Optimize Steam: Experiment with different steaming methods to find what works best in your oven. Sufficient steam is paramount for the crust.
- Patience is Key: Don't rush the rising or cooling times. Good bread takes time.
- Keep Baking: The more you bake, the better you'll get. Your hands will learn the feel of properly developed and proofed dough.
Even slight adjustments, like increasing the oven temperature by 10°F (6°C) or adding 5 more minutes to the bake time for a darker crust, can refine your results. Embrace the process, and you'll be baking fantastic artisan baguettes consistently.
Storing Your Artisan Baguette for Maximum Freshness
A freshly baked artisan baguette is best enjoyed within a few hours of cooling. However, if you need to store it, the goal is to preserve that wonderful crisp crust and relatively soft interior for as long as possible.
Storing a baguette properly is key to maintaining its unique texture. Unlike softer breads that might benefit from being sealed in plastic, an artisan baguette's crust will turn soft and rubbery if trapped in a non-porous bag.
Keeping Your Baguette Crisp for Longer
To keep your easy artisan baguette recipe results fresh and crusty for up to 24 hours, the best method is typically to store it cut-side down on a cutting board or wrapped loosely in a paper bag. The paper bag allows some air circulation, helping to maintain the crust's texture while preventing it from drying out completely.
For longer storage (2-3 days), you can wrap the cooled baguette tightly in plastic wrap or place it in a sealed bag, but be aware the crust will soften. To revive the crust, you can sprinkle the baguette lightly with water and reheat it in a 350°F (175°C) oven for 5-10 minutes. For storage beyond a few days, freezing is the best option. Allow the baguette to cool completely, then wrap it tightly in plastic wrap followed by aluminum foil or place it in a freezer bag.
Frozen baguettes can last for several months. To enjoy, remove from freezer, unwrap, and reheat in a 400°F (200°C) oven for 15-20 minutes until heated through and the crust is crisp again. Proper storage ensures you can enjoy the fruits of your easy artisan baguette recipe for longer.
Enjoy Your Homemade Artisan Baguette!
Congratulations on baking your first artisan baguette using our easy artisan baguette recipe! You've taken simple ingredients and transformed them into a classic loaf with a beautiful crust and delicious crumb. This achievement is a testament to your patience and willingness to learn.
There's nothing quite like the satisfaction of pulling a warm baguette from your own oven. Slice it, break it, share it, and savor the flavor and texture you created. We hope this step-by-step guide has demystified the process and encouraged you to continue exploring the rewarding world of bread baking. Happy baking!
Frequently Asked Questions
What makes this baguette recipe "easy" compared to other artisan bread recipes?
This recipe focuses on simplified techniques and readily available ingredients, making it approachable even for beginners. We skip complex folding methods and use a direct dough method for ease of baking.
How long does it take to make this easy artisan baguette recipe from start to finish?
The entire process, including mixing, proofing, shaping, and baking, takes approximately 4-5 hours. However, most of this time is hands-off, allowing the dough to develop flavor.
What kind of flour is best for achieving an authentic artisan baguette crust and crumb?
We recommend using bread flour for its high gluten content, which provides the necessary structure for a crispy crust and an open crumb. All-purpose flour can be used in a pinch, but the results may vary.
Can I substitute the active dry yeast with instant yeast or sourdough starter in this recipe?
Yes, you can substitute. If using instant yeast, use the same amount as active dry yeast. For sourdough starter, you'll need to adjust the recipe, typically using around 100-200g of active starter and reducing the commercial yeast.
What are some tips for getting those characteristic baguette slashes (scores) on the top before baking?
Use a sharp lame or knife held at a 45-degree angle. Score quickly and confidently using a single, fluid motion. Ensuring the dough has properly proofed is also crucial for successful scoring.
Final Reflection: The Humble Baguette, A Journey of Discovery
The seemingly simple act of baking a baguette unlocks a world of sensory experience, connecting us to ancient traditions while offering a surprisingly accessible creative outlet. More than just a recipe, mastering the art of the artisan baguette is a testament to patience, precision, and the rewarding magic of transforming simple ingredients into something truly extraordinary. In a world increasingly dominated by convenience, taking the time to craft something beautiful and delicious from scratch offers a powerful antidote.
The journey of making my first artisan baguette was more than just following instructions; it was a deeply satisfying exploration of texture, aroma, and the subtle nuances of flavor. The process itself, from the gentle kneading to the anticipation of the oven's warmth, became a meditative practice. It reminded me of the importance of slowing down and appreciating the simple pleasures in life. The best things in life are simple, but not easy.
This quote perfectly encapsulates the experience of baking a truly good baguette. It's a testament to the effort and care put into the process, a reward that transcends mere sustenance.
Now, it's your turn. Don't be intimidated by the seemingly complex process. Gather your ingredients, embrace the challenge, and experience the joy of creating your own perfect artisan baguette. The satisfaction of that first crusty bite, the aroma filling your kitchen, the pride in your accomplishment – these are rewards that extend far beyond the delicious bread itself. Take the leap, and discover the transformative power of baking.
Unleash Your Inner Boulanger!
Thanks for joining us on this baking adventure! We hope you now feel confident in tackling your first artisan baguette. You’ve gained valuable knowledge and skills – now it’s time to put them to the test!
Here’s what you can do next:
- Bake your own baguette today! Use the recipe and tips from the article to create your masterpiece. Don't be afraid to experiment – even small adjustments can lead to exciting results.
- Share your baking journey: Post a picture of your finished baguette on social media and tag us! Let’s inspire others to start their own baking adventures.
- Try a variation: Explore different flours or add-ins to customize your baguette. What unique flavor combinations will you discover?
Ready to smell that freshly baked bread? What unique twist will you add to your first perfect baguette?