
Underproofing Baguettes: Signs and Solutions

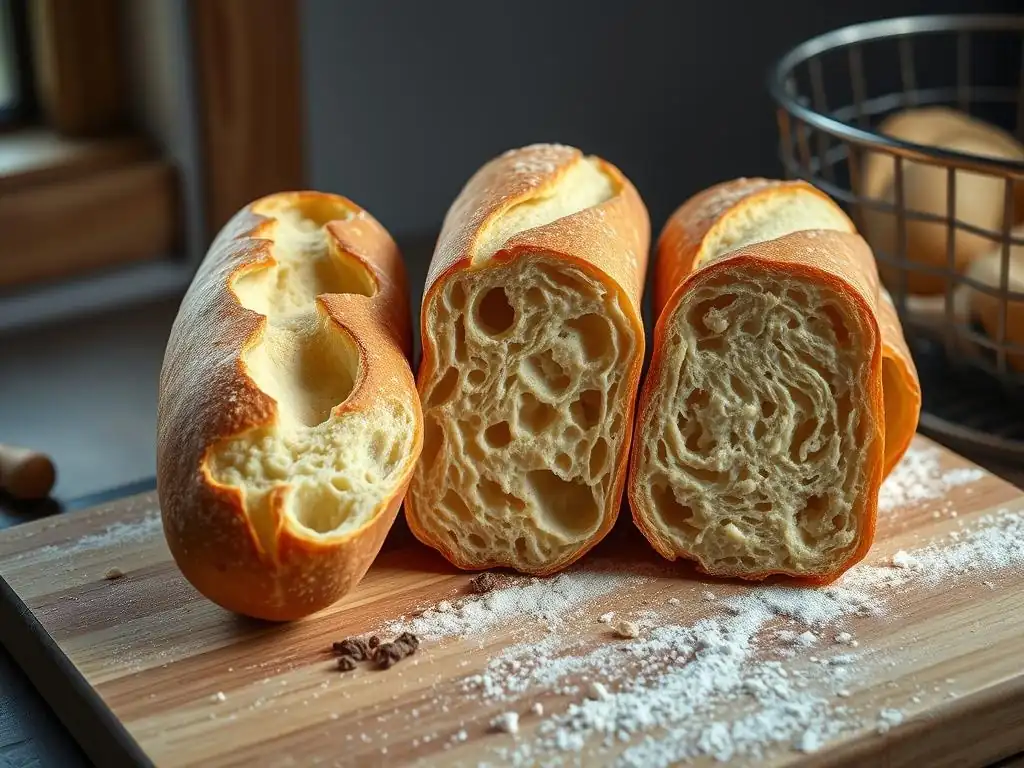
Welcome to BakeWithEase, your guide to baking bliss! Ever wondered why your baguette lacks that airy crumb and signature crust? This article dives deep into underproof baguette troubleshooting tips, revealing the telltale signs of insufficient proofing and offering practical solutions to achieve baguette perfection. Get ready to unlock the secrets to a flawlessly risen loaf!
- Troubleshooting Baguettes: Proofing, Baking, and Texture
- Identifying Proofing Issues in Baguettes
- Common Signs of Underproofed Baguettes
-
Troubleshooting Underproofed Baguettes: Causes and Solutions
- Incorrect Proofing Time
- Temperature Issues During Proofing
- Inadequate Yeast Activity
- Dough Handling Techniques
- Solutions: Optimizing Time, Temperature, Yeast, and Handling
- Excessive Proofing Time
- High Temperature During Proofing
- Overactive Yeast
- Solutions: Reducing Time, Lowering Temperature, and Adjusting Yeast
- Troubleshooting Baguette Baking Issues
- Improving Baguette Proofing: Best Practices
- Perfecting Baguette Baking: Advanced Techniques
-
Frequently Asked Questions
- What are the most common visual signs of an underproofed baguette?
- Why is underproofing a problem specifically for baguettes compared to other breads?
- If I suspect my baguette dough is underproofed, what can I do before baking?
- Can underproofing be corrected after baking, or is the baguette ruined?
- What are some environmental factors that could contribute to underproofing my baguette dough?
- Final Reflection: The Art and Science of a Perfect Baguette
- Unleash Your Inner Baker: Perfect Baguettes Await!
Troubleshooting Baguettes: Proofing, Baking, and Texture
Identifying Proofing Issues in Baguettes
Understanding the Impact of Proofing on Baguette Quality
Proofing is arguably the most critical step in developing the characteristic light, airy crumb and crispy crust of a perfect baguette. It's the stage where the yeast ferments the sugars in the dough, producing carbon dioxide gas that makes the dough rise and develop flavor. The duration and temperature of proofing directly influence the dough's structure, extensibility, and overall readiness for baking. Getting this phase right is essential for achieving that coveted open crumb structure and preventing common issues like a dense interior or poor oven spring.
Proper proofing transforms a dense mass of dough into a light, bubbly structure. During this time, enzymes break down starches into simpler sugars, enhancing flavor, and gluten networks relax, allowing the dough to expand. Rushing this process or letting it go too long can severely compromise the final product. For instance, dough that hasn't proofed long enough (underproofed) will be tight and resistant, while dough that has gone too far (overproofed) will be slack and collapse easily. Mastering the signs of properly proofed dough is key to consistent baguette success.
Key Characteristics of Improperly Proofed Baguettes
Identifying improper proofing comes down to observing the dough's feel, appearance, and behavior. Dough that hasn't proofed correctly will exhibit signs of either being too young (underproofed) or too old (overproofed). These characteristics are distinct and provide crucial clues about what went wrong in the proofing process. Learning to read these signs is a fundamental skill for any baker aiming to master artisan breads.
Common characteristics include issues with dough elasticity, volume increase, and surface appearance. For example, underproofed dough often feels dense and bounces back quickly when poked, showing minimal volume increase. Overproofed dough, conversely, might feel excessively fragile, have a bubbly or even sunken surface, and fail to hold its shape. Recognizing these physical traits allows you to implement effective underproof baguette troubleshooting tips or address overproofing issues promptly.
Common Signs of Underproofed Baguettes
Dense and Heavy Texture
One of the most immediate indicators of an underproofed baguette is a dense, heavy texture in the final baked loaf. Instead of a light, airy feel, the bread will feel solid and compact for its size. This density results from insufficient gas production during proofing and inadequate gluten relaxation, preventing the dough from expanding fully. The bread feels heavy because it contains less trapped air relative to its volume.
This density is often accompanied by a lack of the delicate, almost weightless quality characteristic of a well-proofed baguette. If your baked baguettes consistently feel like a brick rather than a cloud, underproofing is a prime suspect. This is a key area addressed by underproof baguette troubleshooting tips, focusing on allowing the dough sufficient time and warmth to develop properly.
Tight Crumb Structure
An underproofed baguette will typically display a tight, uniform crumb structure with small, evenly distributed holes, rather than the desirable open, irregular holes of an artisan loaf. The lack of sufficient fermentation and gas expansion means that large air pockets cannot form within the gluten network. The dough's structure remains too tight to allow significant expansion during oven spring.
Examining the cross-section of your baked baguette is a straightforward way to diagnose this. If the crumb looks more like sandwich bread than a rustic baguette – small, dense cells throughout – it points strongly towards the dough not having proofed long enough. Addressing this tight crumb is a primary goal of underproof baguette troubleshooting.
Poor Oven Spring
Oven spring is the rapid expansion of the dough that occurs during the first few minutes of baking. In a well-proofed baguette, this expansion is significant, contributing to its final volume and shape. Underproofed baguettes, however, exhibit poor oven spring. The dough is too tight and lacks the necessary gas build-up and relaxed gluten structure to expand dramatically in the oven's heat.
You'll notice the baguettes don't puff up as much as expected. They might brown quickly on the outside but remain relatively flat or small. This lack of vigorous expansion is a tell-tale sign that the dough wasn't sufficiently fermented before hitting the oven. Effective underproof baguette troubleshooting involves ensuring the dough reaches the optimal proofing stage to maximize this crucial baking phase.
Pale Crust Color
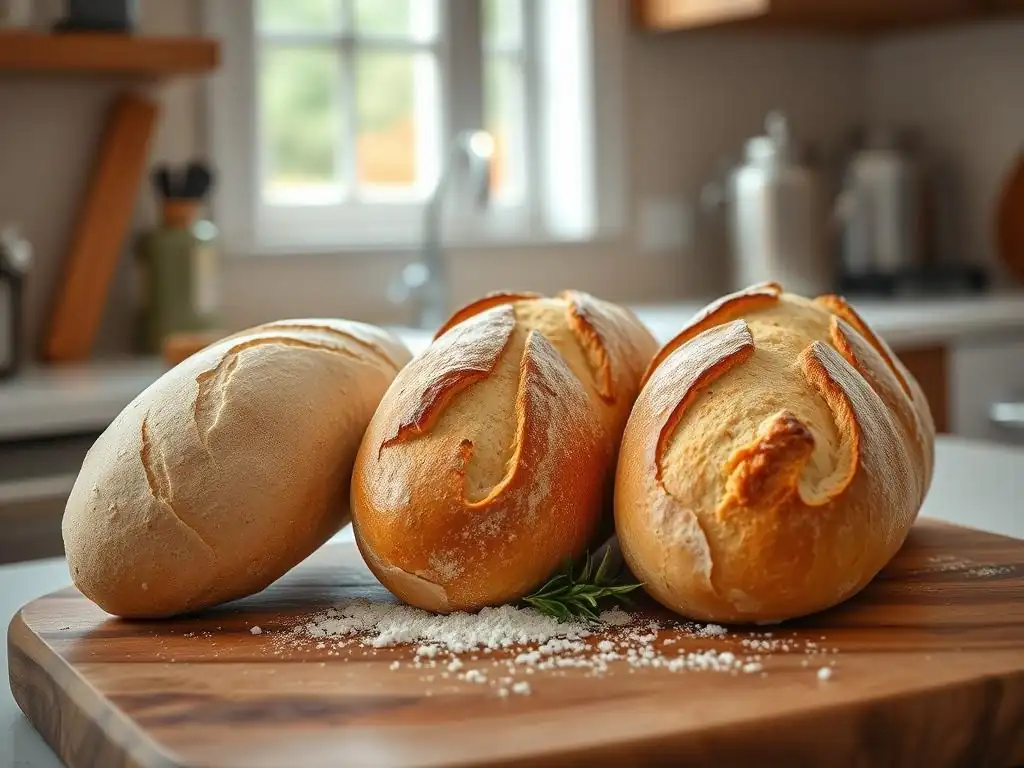
While baking time and temperature play a significant role, the crust color can also hint at proofing issues. Underproofed baguettes often develop a paler crust compared to their properly proofed counterparts. This can be attributed to a few factors: less sugar development during fermentation (as starch breakdown is incomplete), less moisture escaping due to the dense crumb, and potentially shorter baking times due to bakers attempting to compensate for other issues.
A pale, dull crust lacking the deep golden-brown hues and blisters is a visual cue that fermentation might have been cut short. While not the sole indicator, combined with other signs like density and poor oven spring, a pale crust strengthens the case for underproofing.
Uneven Shape
Underproofed dough is stiff and elastic, making it difficult to shape and score cleanly. When baked, this stiffness can result in baguettes with uneven shapes, lacking the graceful curve or consistent thickness of a well-formed loaf. The dough resists expansion, sometimes leading to bursting in unexpected places rather than expanding along the scored cuts.
You might find the baguettes bulge unevenly or retain a slightly misshapen form from handling. The scores might not open up properly, or the loaf might tear elsewhere. This difficulty in achieving a smooth, even shape is another symptom that underproof baguette troubleshooting aims to resolve, often by emphasizing proper dough relaxation during proofing.
Collapsed Structure
Overproofed dough has fermented for too long, causing the gluten structure to weaken and break down. When handled or placed in the oven, the dough may collapse or deflate easily. The internal gas bubbles become too large and fragile to support the dough's structure.
You might notice the shaped baguettes starting to flatten out on the proofing surface, losing their height and roundness even before baking. This structural failure indicates the dough's strength has been compromised by excessive fermentation time.
Flat Shape
Following the collapsed structure, overproofed baguettes typically bake into flat, wide loaves rather than retaining a desirable oval or cylindrical shape. The weakened gluten cannot hold the dough's form against gravity or the initial expansion in the oven.
Instead of rising upwards, the dough spreads outwards. The resulting loaf is often significantly flatter than intended, lacking the height and volume characteristic of a well-made baguette.
Gummy Texture
Overproofed baguettes can sometimes have a gummy or sticky texture in the crumb. This occurs because the breakdown of starches and proteins goes too far during prolonged fermentation. The dough can become overly hydrated internally, leading to a moist, unpleasant chewiness.
While a slight chew is desirable, an overwhelming stickiness or gumminess is a sign that the dough structure has degraded. The crumb may also appear dense in areas where large bubbles collapsed.
Sour or Unpleasant Aroma
As dough ferments, it produces acids, contributing to flavor. However, excessive fermentation, especially at warm temperatures, can lead to an accumulation of organic acids that result in an overly sour or even alcoholic smell and taste.
An overproofed baguette might have a strong, vinegary, or yeasty aroma that is off-putting. The complex, subtle flavors of a properly fermented baguette are replaced by an aggressively sour or stale taste.
Troubleshooting Underproofed Baguettes: Causes and Solutions
Incorrect Proofing Time
The most common cause of underproofed baguettes is simply not allowing enough time for the dough to ferment and rise. Proofing time isn't a fixed number; it depends heavily on factors like temperature, yeast activity, and hydration. Rushing the process, perhaps due to time constraints or misjudging the dough's readiness, directly leads to underproofing. For example, dough proofing at 70°F might take 60-90 minutes, while the same dough at 65°F could take 90-120 minutes or longer. Cutting this time short results in dough that's not ready.
To address this, the primary solution is patience and observation. Instead of relying solely on a recipe's suggested time, learn to read the dough's visual cues and feel. The "poke test" is invaluable: gently press the dough with a floured finger; if the indentation springs back immediately, it needs more time. If it slowly springs back, it's likely ready. If it stays indented, it might be overproofed. Always err on the side of slightly longer proofing if unsure, within reason, especially when tackling underproof baguette troubleshooting.
Temperature Issues During Proofing
Temperature significantly impacts yeast activity. Dough proofing in a cool environment will ferment much slower than dough proofing in a warm one. If your kitchen is cooler than the ideal temperature range for your recipe (often cited around 75-80°F or 24-27°C for faster proofing, or cooler for longer, slower ferments), the dough will take considerably longer to proof. Proofing at 68°F instead of 78°F could easily double the required time. Conversely, proofing too cold (e.g., below 60°F) can make the yeast very sluggish, leading to extreme underproofing unless given many hours.
To optimize temperature, aim for consistency. Use a thermometer to check your proofing environment. If it's too cool, find warmer spots in your home, use a proofing box (see below), or place the dough in a turned-off oven with the light on (which often provides a consistent, low heat around 75-85°F). Avoiding drafts is also crucial. Maintaining the correct temperature range is one of the most effective underproof baguette troubleshooting tips.
Inadequate Yeast Activity
Insufficient or inactive yeast will result in dough that doesn't produce enough gas to rise properly, leading to underproofing regardless of time or temperature. This can happen if the yeast is old, improperly stored, or if the water used to activate it was too cold or too hot (ideally around 105-115°F or 40-46°C for active dry yeast). Using too little yeast for the amount of flour and proofing time can also be a factor; a typical baguette recipe might use 0.5% to 2% yeast by weight of flour, depending on the proofing strategy.
Ensure your yeast is fresh by checking the expiration date and storing it properly (usually in an airtight container in the refrigerator or freezer). If using active dry yeast, bloom it in warm water with a pinch of sugar before adding to the flour to confirm it's alive and active (it should become foamy within 5-10 minutes).
If using instant yeast, you can mix it directly with the dry ingredients, but confirming its freshness periodically is still wise. If consistently facing underproofing, slightly increasing the yeast percentage might help, but addressing storage and activation is usually the first step in underproof baguette troubleshooting.
Dough Handling Techniques
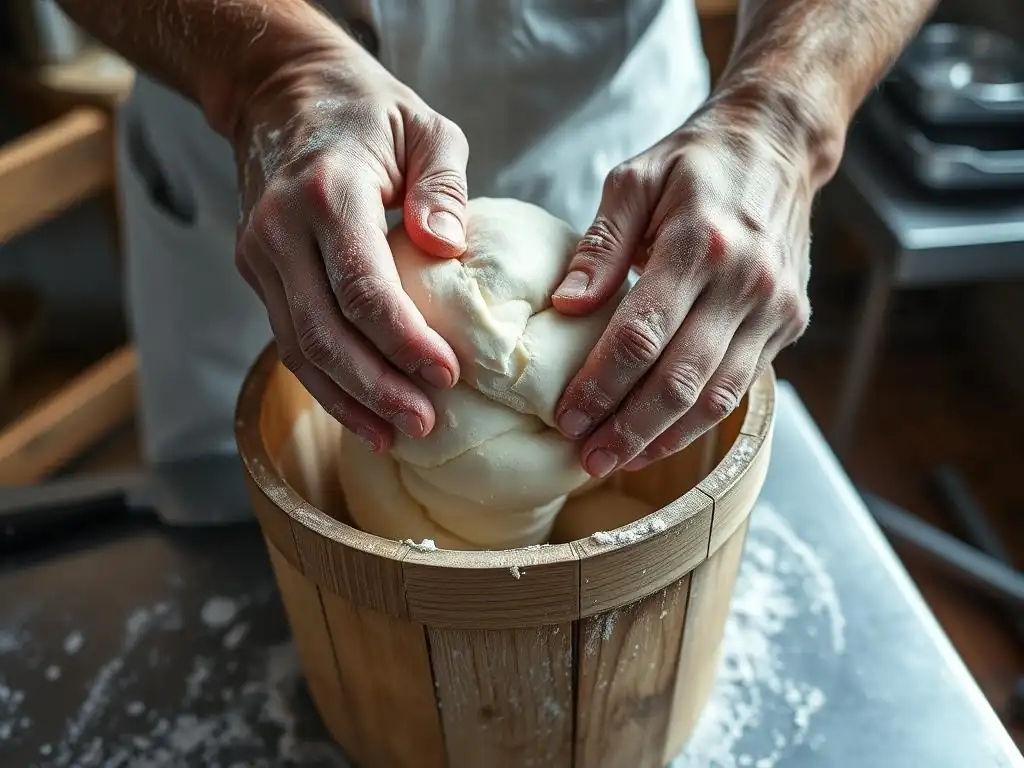
How you handle the dough during mixing, kneading, and shaping also impacts its ability to proof. Insufficient kneading means the gluten network isn't developed enough to capture the gas produced by the yeast, resulting in a dense structure. Over-handling or degassing the dough too aggressively during shaping can expel too much precious CO2, leaving less gas for the final rise and oven spring. A typical baguette dough requires sufficient kneading to pass the windowpane test, indicating a strong gluten network.
Ensure you knead the dough adequately, whether by hand or machine, until it is smooth and elastic. During shaping, be firm enough to create tension on the surface but gentle enough not to completely deflate the dough. Think of it as coaxing the dough into shape rather than forcing it. Allowing adequate rest periods between shaping steps (like a bench rest after dividing) helps relax the gluten, making the dough easier to handle and less likely to be degassed excessively, contributing positively to underproof baguette troubleshooting.
Solutions: Optimizing Time, Temperature, Yeast, and Handling
Solving underproofing issues requires a multi-faceted approach focusing on the key variables: time, temperature, yeast, and handling. Start by verifying your yeast's viability and using the correct water temperature for activation. Next, measure and control your proofing temperature; aim for a consistent environment within the ideal range specified by your recipe or general baking guidelines (often 75-80°F for ambient proofing).
Crucially, shift your focus from strictly following a recipe's time estimate to observing the dough itself. Use the poke test and monitor volume increase (looking for a 50-100% increase depending on the proofing stage and recipe). Ensure your dough is properly kneaded to develop sufficient gluten structure. Finally, practice gentle shaping techniques to preserve the gas developed during the initial fermentation. By systematically addressing each of these factors, you can significantly improve your chances of achieving perfectly proofed baguettes and effectively apply underproof baguette troubleshooting tips.
Excessive Proofing Time
Allowing the dough to proof for too long is the primary cause of overproofing. While patience is a virtue in baking, there's a point of diminishing returns. If the dough continues to ferment past its peak, the gluten structure begins to weaken and collapse under the pressure of the expanding gas bubbles. This is particularly easy to do in warm environments where fermentation is rapid. For instance, dough that might be perfectly proofed in 90 minutes at 75°F could become severely overproofed in the same time frame at 85°F or if left for 2-3 hours at 75°F.
Unlike underproofing where more time is the solution, overproofing requires intervention or starting over. Learn to recognize the signs of readiness using the poke test – an indentation that stays put is a strong indicator of overproofing. If you suspect your dough is approaching overproofing before baking, you might try a gentle reshape if the structure isn't too compromised, or bake it immediately, even if it seems slightly past its prime, to salvage what you can.
High Temperature During Proofing
Just as low temperatures cause underproofing, excessively high temperatures accelerate yeast activity to the point of causing overproofing prematurely. Proofing dough at temperatures significantly above the recommended range (e.g., consistently above 85-90°F or 30-32°C) can cause the dough to double in size very quickly, before sufficient flavor development occurs and potentially before the gluten is ready to handle that much expansion. This rapid rise can lead to a fragile structure that collapses.
Control your proofing environment's temperature. Avoid placing dough in direct sunlight, near hot appliances, or in overly warm rooms. If your kitchen is naturally warm, consider finding a cooler spot, using cooler water when mixing the dough, or even briefly refrigerating the dough (though this shifts to cold fermentation). Monitoring the dough closely in warmer conditions is essential to catch overproofing before it happens.
Overactive Yeast
Using too much yeast for the recipe, or using a very potent batch of yeast, can lead to fermentation happening too quickly, resulting in overproofing. If a recipe calls for 1 teaspoon of instant yeast for 500g of flour for a 1-hour proof, using 2 teaspoons could potentially halve the proofing time, making it very easy to miss the optimal window. Yeast activity varies slightly between brands and batches, and a particularly vigorous batch can surprise you.
Ensure you are accurately measuring your yeast, preferably by weight using a digital scale, as volume measurements can be imprecise. If you consistently find your dough overproofing rapidly despite controlling time and temperature, consider slightly reducing the amount of yeast in your recipe. Conversely, if you're troubleshooting underproofed baguettes, you might slightly increase yeast in a future batch after checking other factors.
Solutions: Reducing Time, Lowering Temperature, and Adjusting Yeast
To prevent overproofing, proactive measures are key. Firstly, be mindful of the proofing time, especially in warmer conditions. Check the dough's readiness frequently using the poke test as it approaches the expected proofing time. Secondly, control the proofing temperature; aim for a consistent, moderate environment (e.g., 70-78°F). If your ambient temperature is high, find a cooler spot or use a proofing box with temperature control.
Thirdly, accurately measure your yeast and consider slightly reducing it if your dough consistently overproofs quickly. Understanding that proofing is complete when the dough reaches a specific stage of development, not just after a set amount of time, is crucial. If you catch dough just as it's starting to overproof, you might try baking it immediately. If it has significantly collapsed, it might be best repurposed into flatbread or discarded, learning from the experience for your next batch.
Troubleshooting Baguette Baking Issues
Uneven Baking
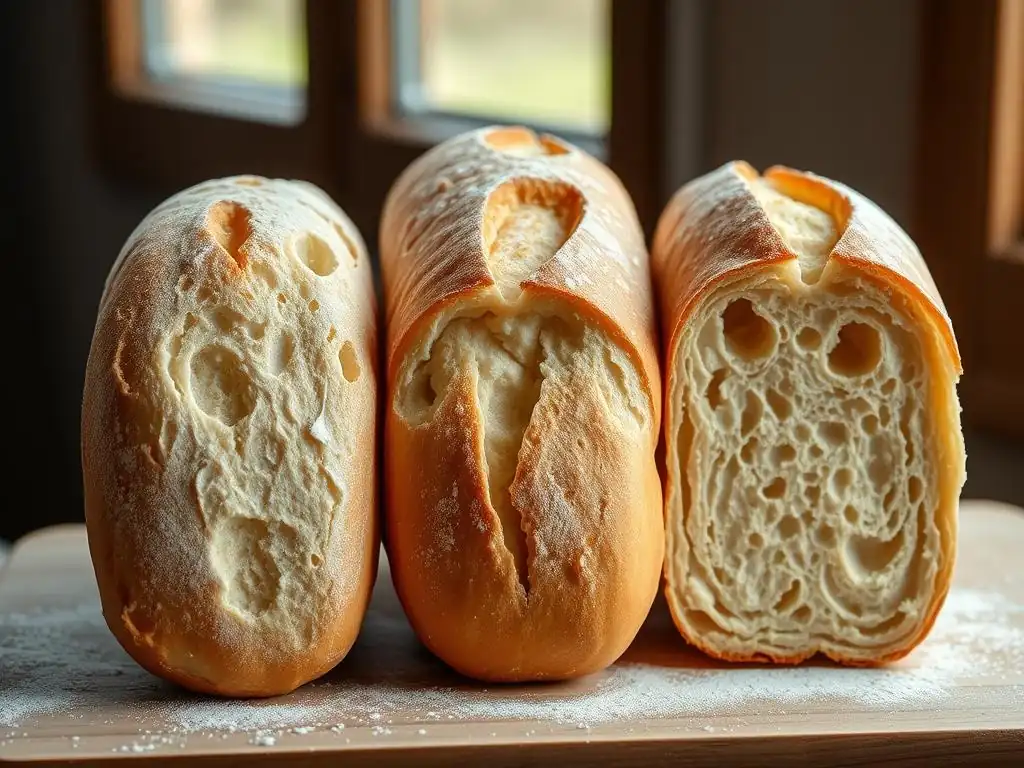
Uneven baking in baguettes can manifest as one end being darker than the other, or one side browning more rapidly. This is often caused by inconsistent oven temperature or uneven heat distribution within the oven. Hot spots can cause parts of the baguette to cook faster, leading to variations in crust color and internal doneness. Placing baguettes too close together on a baking sheet can also impede air circulation, contributing to unevenness.
To combat uneven baking, it's helpful to know your oven's quirks. An oven thermometer can reveal if your oven is calibrated correctly and if there are significant temperature swings. Preheating the oven thoroughly (often for 30-60 minutes after it reaches the set temperature) helps stabilize the heat. Rotating the baking sheet or stone halfway through the baking time can also help ensure even exposure to heat. Using a baking stone or steel can provide more consistent bottom heat, improving overall evenness compared to just a sheet pan.
Crust Problems (Too Thick, Too Thin, Burnt)
Crust issues are common in baguette baking. A crust that is too thick and tough often results from insufficient steam during baking or baking at too low a temperature. Steam is critical in the first part of baking; it keeps the surface moist, allowing the dough to expand fully before the crust sets, resulting in a thin, crisp crust.
Conversely, a pale, thin crust might indicate insufficient baking time or temperature, or lack of sufficient sugar development from fermentation. A burnt crust, while the interior is undercooked, usually points to the oven being too hot, or the baguettes being placed too high in the oven.
Achieving the perfect crust involves managing heat and steam. For a thin, crisp crust, create a steamy environment in your oven during the initial baking phase (e.g., using a steam pan with hot water, or baking in a Dutch oven or cloche). Ensure your oven is properly preheated to a high temperature (often 450-500°F or 230-260°C). If the crust is browning too quickly, you can slightly reduce the oven temperature or loosely tent the baguettes with foil later in the bake. If the crust is too pale, extend the baking time slightly, ensuring the internal temperature is correct.
Internal Temperature Problems
Knowing when a baguette is fully baked internally is key to avoiding a gummy or doughy crumb. While crust color is a good indicator, relying solely on it can be misleading, especially if you've had proofing issues like underproofed baguettes. The internal temperature of a fully baked lean bread like a baguette should typically register between 200-210°F (93-99°C) using an instant-read thermometer inserted into the center of the loaf.
Baking until the internal temperature is reached ensures the starches are fully gelatinized and the crumb is set. If your baguettes look done on the outside but are doughy inside, they need more baking time. Reduce the oven temperature slightly if the crust is already dark, and continue baking until the correct internal temperature is achieved. Conversely, if the interior is dry and dense, they may have been overbaked, or the issue might stem from underproofing affecting the crumb structure.
Improving Baguette Proofing: Best Practices
Accurately Measuring Ingredients
Precision in ingredient measurement is foundational to successful baking, especially for sensitive doughs like baguettes. The ratio of flour to water (hydration), yeast, and salt significantly impacts fermentation rate and dough structure. Using a digital scale to weigh ingredients, particularly flour and water, is far more accurate than using volume measurements. For example, a cup of flour can vary in weight by up to 20% depending on how it's scooped and packed, leading to inconsistent hydration levels batch to batch.
Weighing ensures you are consistently hitting the target hydration (often 65-75% for baguettes), salt percentage (around 1.8-2% of flour weight), and yeast percentage (varying based on proofing time/temperature, but typically 0.5-2%). Consistent measurements eliminate a major variable in troubleshooting, making it easier to identify if issues like underproofed baguettes stem from proofing conditions rather than ingredient ratios.
Mastering the Windowpane Test
The windowpane test is a technique used to assess gluten development in dough. After kneading, take a small piece of dough and gently stretch it between your fingers. If you can stretch it thin enough to see light through it without it tearing, the gluten is well-developed and capable of supporting the gas produced during proofing. If it tears easily before becoming translucent, it needs more kneading.
A properly developed gluten network is essential for trapping the CO2 gas produced by the yeast. Dough that hasn't been kneaded enough (fails the windowpane test) will struggle to rise properly during proofing and oven spring, often resulting in a dense crumb, similar to underproofed baguettes even if given sufficient time. Mastering this test helps ensure your dough has the necessary structure before proofing even begins.
Using a Proofing Box
A proofing box provides a controlled environment for dough fermentation, regulating both temperature and humidity. This eliminates inconsistency caused by ambient kitchen conditions, which can fluctuate significantly throughout the day or between seasons. Many home bakers achieve consistent results by using a dedicated proofing box or creating a makeshift one (like a cooler with a bowl of hot water, or a turned-off oven with the light on).
Maintaining a stable temperature, often in the 75-80°F range for faster ambient proofs or lower for cold fermentation, allows for predictable yeast activity. The humidity helps prevent the dough surface from drying out and forming a skin, which can restrict expansion. Using a proofing box is one of the most effective ways to gain control over the proofing process and avoid issues like underproofed baguettes due to temperature fluctuations.
Monitoring Dough Volume
Monitoring how much the dough increases in volume is a more reliable indicator of proofing progress than time alone. Depending on the recipe and stage (bulk fermentation vs. final proof), dough might be ready when it has increased by 50%, 75%, or even 100% (doubled). Learning to gauge this visual increase is crucial. Using a clear container or marking the initial dough level on your proofing vessel can help you track its progress accurately.
For the final proof of shaped baguettes, the volume increase is often less dramatic than the initial bulk fermentation. They might only increase by 50-75% before baking. Combine volume monitoring with the poke test: the dough should look visibly larger and feel airy, and the indentation from a gentle poke should spring back slowly. Relying on these visual and tactile cues, rather than just a timer, is fundamental to preventing both underproofed and overproofed baguettes.
Perfecting Baguette Baking: Advanced Techniques
Utilizing Steam During Baking
Steam is paramount for achieving the signature thin, crispy crust and excellent oven spring of a baguette. In the high heat of the oven, steam keeps the surface of the dough moist. This delays the formation of the crust, allowing the dough to expand maximally before the surface sets. Once the crust sets, it becomes firm and brittle, contributing to the desired texture. Without adequate steam during the critical first 10-15 minutes of baking, the crust forms too quickly, restricting expansion and resulting in a thicker, tougher crust and potentially less oven spring.
Home bakers can create steam using various methods: placing a pan of hot water or ice cubes on the bottom rack of the oven just before loading the bread, spraying the oven walls with water (use caution), or baking the baguettes inside a preheated Dutch oven or under a cloche. Baking on a preheated baking stone or steel also helps, as the initial burst of heat contributes to oven spring in the steamy environment. Mastering steam application is a key step beyond basic underproof baguette troubleshooting, elevating your crust game.
Scoring Techniques for Optimal Oven Spring
Scoring (or slashing) the surface of the baguette dough just before baking serves a vital purpose: it provides weak points where the dough can expand in a controlled manner during oven spring. Without scores, the rapidly expanding gas would burst through the crust haphazardly, resulting in an uneven shape and potentially a denser crumb where the energy was released unevenly. Proper scoring allows for maximum, directed expansion, contributing to volume and creating the iconic "ears" on the crust.
For baguettes, multiple diagonal cuts (typically 5-7 for a standard length) are made along the top. The cuts should overlap slightly and be made with a sharp blade (like a lame) at about a 30-45 degree angle to the dough surface. The depth of the cut is also important – too shallow and they won't open, too deep and the loaf might collapse. Practicing consistent, clean scores is essential for achieving beautiful, well-risen baguettes after you've successfully navigated underproof baguette troubleshooting.
Cold Fermentation for Enhanced Flavor
Cold fermentation, typically done in the refrigerator for 12-72 hours after the initial bulk fermentation or shaping, is an advanced technique that significantly enhances the flavor and texture of baguettes. The cold temperature slows down yeast activity dramatically but allows enzymes (protease and amylase) to work longer, breaking down proteins and starches into simpler compounds. This process develops more complex flavors and aromas and also tenderizes the dough, making it easier to handle and potentially leading to a more open crumb.
While longer cold fermentation can slow down the rate of rise, it doesn't eliminate the possibility of proofing issues if not managed correctly. Dough that is cold-fermented still needs careful monitoring during a final warm-up period before baking (if any) and requires proper initial fermentation before going into the cold. However, the benefits in terms of flavor complexity – developing those nuanced bready, slightly tangy notes – are substantial and often considered worth the extended time. This technique complements efforts to fix issues like underproofed baguettes by adding depth beyond just achieving the right rise.
Frequently Asked Questions
What are the most common visual signs of an underproofed baguette?
Underproofed baguettes often appear dense and compact, lacking the airy, open crumb structure you'd expect. They may also have a tight, smooth crust that doesn't exhibit much blistering or oven spring.
Why is underproofing a problem specifically for baguettes compared to other breads?
Baguettes rely heavily on proper proofing for their signature light and airy texture, and their shape offers less structural support. Underproofing can lead to a dense and gummy interior, ruining the desired outcome.
If I suspect my baguette dough is underproofed, what can I do before baking?
The best solution is to extend the proofing time. Keep the dough in a warm, humid environment, checking periodically for signs of proper rise, such as increased volume and air bubbles.
Can underproofing be corrected after baking, or is the baguette ruined?
Unfortunately, underproofing cannot be corrected after baking. The bread will remain dense and gummy. It's better to discard it and learn from the experience for your next bake.
What are some environmental factors that could contribute to underproofing my baguette dough?
Cold temperatures are a significant factor. Low room temperature or using cold ingredients can slow down the yeast activity, resulting in underproofing. A lack of humidity can also hinder the rise.
Final Reflection: The Art and Science of a Perfect Baguette
The quest for the perfect baguette is a journey of precision, patience, and a deep understanding of fermentation. A seemingly simple loaf, the baguette reveals its complexity through the subtle nuances of its crumb, crust, and overall structure. Underproofing, a common pitfall, highlights the crucial role of fermentation in achieving that airy, crisp perfection. This article has explored the telltale signs of underproofing and provided practical solutions to guide bakers towards success.
The impact of mastering bread baking, specifically baguettes, extends far beyond the kitchen. It's a testament to the power of understanding fundamental scientific principles applied to a culinary art. The process itself is meditative, requiring focus and attention to detail. The satisfaction of achieving a perfectly proofed baguette, with its beautiful oven spring and delicate texture, is deeply rewarding. Bread making is a metaphor for life. You put in the time, the effort, the care, and you get something beautiful in return.
This sentiment resonates deeply, as the journey of perfecting a baguette mirrors the journey of self-improvement and mastery in any field.
Now, consider your own baking journey. Perhaps you've experienced the frustration of an underproofed baguette. Use this article as a springboard to refine your technique, to experiment with different proofing times and temperatures, and to truly understand the magic of fermentation. Don't be discouraged by setbacks; embrace them as opportunities to learn and grow. The next perfectly proofed baguette awaits – a testament to your dedication and a delicious reward for your efforts.
Unleash Your Inner Baker: Perfect Baguettes Await!
Thanks for taking the time to explore the world of baguette baking with us! We hope you now feel more confident in identifying and tackling underproofing issues. Ready to elevate your baking game?
- Bake a batch of perfect baguettes today! Use what you've learned to create those airy, crispy loaves you've always dreamed of. Experiment with different proofing times and techniques to see what works best for you.
- Share your baking journey! Snap a picture of your freshly baked baguettes and share it on social media using #BakeWithEaseBaguettes – we'd love to see your success!
- Consider keeping a detailed baking journal, noting your dough's consistency, proofing time, and oven temperature. This will be invaluable in refining your technique over time.
What unique ingredient or technique will you try next to perfect your baguette recipe?