
Stretch and Folds for Rye Sourdough: What You Need to Know


Welcome to BakeWithEase, your haven for all things baking! Ever wondered how to achieve that perfect, airy crumb in your rye sourdough? You've landed in the right place. We're diving deep into the secrets of stretch and folds for rye sourdough, a technique that can transform your loaves from dense to divine. Discover how this simple method unlocks superior texture and flavor – and why it's a game-changer for rye bread baking. Intrigued? Let's get started!
- Introduction to Stretch and Folds in Rye Sourdough Baking
- The Science Behind Stretch and Folds: Developing Rye Dough Strength
- Step-by-Step Guide: Performing Stretch and Folds on Rye Sourdough
- Troubleshooting Common Issues with Rye Sourdough Stretch and Folds
- Alternative Techniques for Rye Sourdough Dough Strengthening
- Rye Sourdough Recipes and Stretch and Fold Schedules
- Tips and Tricks for Successful Rye Sourdough Stretch and Folds
- Understanding Rye Sourdough Fermentation and its Connection to Stretch and Folds
- Conclusion: Mastering Rye Sourdough with Effective Stretch and Folds
-
Frequently Asked Questions
- What are stretch and folds and why are they important for rye sourdough?
- How often should I perform stretch and folds on my rye sourdough?
- What's the best way to perform a stretch and fold?
- Can I over-stretch and fold my rye sourdough?
- What are the benefits of using stretch and folds compared to traditional kneading with rye sourdough?
- Final Reflection: The Transformative Power of Stretch and Folds
- Unlock Your Rye Sourdough Potential!
Introduction to Stretch and Folds in Rye Sourdough Baking
Why are Stretch and Folds Important for Rye Sourdough?
Stretch and folds are a fundamental technique in sourdough baking, and for rye sourdough specifically, they play a crucial role in developing structure. Unlike wheat flour, which forms a strong, elastic gluten network, rye flour produces a weaker, less extensible network. Performing stretch and folds helps to align the limited proteins in rye flour, improving the dough's ability to trap gases produced during fermentation.
This results in a loaf with better volume and a more open crumb structure than would otherwise be possible with rye's inherent characteristics. Without these manipulations, a high-percentage rye loaf might turn out dense and gummy.
Moreover, incorporating stretch and folds into your rye sourdough routine allows you to build strength gradually over the bulk fermentation period. This gentle handling prevents tearing the delicate rye dough structure, which is more prone to breaking down than wheat dough. By performing a few sets of stretch and folds early in the fermentation, typically within the first hour or two, you provide essential support to the dough as it rises. This technique is especially beneficial for recipes using a significant percentage of rye flour, perhaps 40% or more, where the unique properties of rye dominate.
Understanding the Unique Properties of Rye Flour
Rye flour differs significantly from wheat flour, primarily in the quality and quantity of its protein. While wheat contains glutenin and gliadin proteins that form gluten when hydrated and manipulated, rye contains similar proteins but in lower amounts, and they form a less cohesive structure. Furthermore, rye flour contains high levels of pentosans, which are complex carbohydrates that absorb large amounts of water. These pentosans compete with the proteins for water and also interfere with protein interaction, further inhibiting strong gluten development.
The high pentosan content gives rye dough its characteristic stickiness and lower elasticity compared to wheat dough. It also means rye dough requires more hydration to achieve a workable consistency. A typical wheat sourdough might use 70-80% hydration, whereas a rye sourdough often thrives at 85-100% hydration or even higher, depending on the type of rye flour (light, medium, or dark). Understanding these properties is key to successfully handling rye dough and appreciating why the stretch and fold technique needs to be adapted for this unique flour.
The Science Behind Stretch and Folds: Developing Rye Dough Strength
Gluten Development in Rye vs. Wheat: Key Differences
The process of gluten development is fundamentally different in rye compared to wheat. In wheat dough, the glutenin and gliadin proteins link together through disulfide bonds when hydrated and kneaded or stretched and folded, creating a strong, elastic network that can trap carbon dioxide gas. This network is robust and can withstand significant manipulation. A strong wheat dough might feel smooth, extensible, and resilient after adequate development.
Rye, however, contains lower amounts of gluten-forming proteins, and more importantly, the structure of these proteins is less capable of forming the same strong, interconnected network as wheat gluten. Additionally, the high levels of alpha-amylase enzymes in rye flour can break down starch more readily, especially in acidic conditions common in sourdough.
This enzymatic activity, combined with the pentosans interfering with protein interactions, results in a dough that is stickier, less elastic, and more prone to breaking down over time. This is why aggressive kneading is often counterproductive for rye dough; gentler methods like stretch and folds are preferred to coax whatever structure is possible from the rye proteins without tearing them.
How Stretch and Folds Improve Rye Dough Structure
While rye doesn't develop the same type of gluten network as wheat, stretch and folds still significantly improve its structure. The action of stretching and folding aligns the existing proteins and pentosans in the dough. Imagine these components as tangled threads; stretching and folding helps to lay them out in a more organized fashion. This alignment creates a more coherent structure, albeit one that is more like a viscous gel supported by aligned components rather than a springy, elastic network.
This improved structure helps the rye dough hold its shape better and provides some resistance to the outward pressure of the expanding gases during fermentation and baking. Each set of stretch and folds reinforces this internal architecture, adding a layer of support. While you won't see the same dramatic development of tension and elasticity as in a wheat dough, you should notice the rye dough becoming slightly less shaggy and gaining a bit more body and surface tension with each set of stretch and folds, especially in recipes with a moderate percentage of wheat mixed with rye.
Benefits of Using Stretch and Folds in Rye Sourdough
Incorporating stretch and folds into your rye sourdough process offers several tangible benefits. Firstly, they contribute to a better loaf volume. By helping the dough build some internal structure, stretch and folds enable the dough to rise more effectively, leading to a taller loaf rather than a flat, dense disc. For instance, a 60% rye loaf might see a 10-15% increase in height compared to one that received no structural development.
Secondly, stretch and folds can lead to a more desirable crumb texture. While pure rye loaves typically have a dense, even crumb, incorporating gentle structure-building techniques can prevent the crumb from being overly tight or gummy. In mixed flour loaves (e.g., 40% rye, 60% wheat), stretch and folds help integrate the rye into the wheat network, resulting in a more open and tender crumb. Finally, performing stretch and folds allows the baker to intimately interact with the dough, observing its development and adjusting the process as needed, leading to greater success with rye sourdough.
Step-by-Step Guide: Performing Stretch and Folds on Rye Sourdough

Preparing Your Rye Sourdough Dough for Stretch and Folds
After mixing your rye sourdough ingredients – your active rye starter, water, rye flour (and any other flours), and salt – allow the dough to rest for a period known as the autolyse or rest period. For rye, a shorter rest of 20-30 minutes is often sufficient, as the pentosans absorb water quickly. This rest allows the flour to fully hydrate, making the dough easier to handle and initiating some enzymatic activity. Ensure your mixing bowl is large enough to accommodate the dough as it rises.
Before you begin the first set of stretch and folds, make sure your hands are wet. Rye dough, especially high-hydration rye sourdough, is notoriously sticky. Wetting your hands creates a barrier between your skin and the dough, preventing it from sticking excessively and allowing you to handle it more cleanly. Have a small bowl of water near your workspace for easy access.
The Wet Hand Technique: Minimizing Stickiness
The wet hand technique is indispensable when performing stretch and folds on rye sourdough. Simply dip your dominant hand (or both hands) into a bowl of clean water, shaking off any excess. Your hands should be damp, not dripping wet. This thin layer of water acts as a lubricant, allowing you to grasp, stretch, and fold the sticky rye dough without it adhering to your fingers.
You will need to re-wet your hands periodically throughout each set of stretch and folds, especially if the dough starts sticking again. Don't be afraid to pause and dip your hands back into the water. This technique is far more effective than trying to use flour to reduce stickiness, as adding dry flour can change the dough's hydration and create dry pockets. Mastering the wet hand technique is fundamental for comfortable and effective rye sourdough stretch and folds.
Performing the First Set of Stretch and Folds
Begin the first set of stretch and folds about 20-30 minutes after mixing or after the autolyse period. With wet hands, reach under the dough on one side of the bowl. Gently lift and stretch the dough upwards, being careful not to tear it. Rye dough is less extensible than wheat, so don't expect a dramatic stretch. Stretch it as far as it comfortably goes, perhaps 6-10 inches depending on the dough volume and hydration.
Once stretched, fold the dough back over itself towards the center of the bowl. Rotate the bowl about a quarter turn and repeat the stretch and fold process. Continue this motion around the bowl until you have completed 4-6 stretches and folds, effectively folding the dough onto itself from all sides. This initial set helps to incorporate air and begin aligning the rye flour structure.
Subsequent Stretch and Fold Sets: Timing and Technique
Subsequent sets of stretch and folds are typically performed at intervals during the first part of the bulk fermentation. For rye sourdough, fewer sets are often needed compared to wheat, and the intervals might be shorter. A common schedule might involve performing sets at 30, 60, and possibly 90 minutes after the first set, for a total of 3-4 sets. The exact timing and number of sets depend on the rye percentage, hydration, and ambient temperature.
For each subsequent set, repeat the wet hand technique. Reach under the dough, gently stretch upwards, and fold back towards the center. As you perform these sets, you should notice the dough gaining a little more body and showing slightly more resistance, though it will remain relatively soft and sticky compared to wheat dough. Pay attention to the dough's feel – if it starts tearing easily, you may have done enough or need to be even gentler.
Observing Dough Changes During Stretch and Folds
Throughout the process of performing rye sourdough stretch and folds, it's crucial to observe how the dough is changing. After the first set, the dough will likely still feel quite shaggy and loose. As you progress through subsequent sets, you should feel it develop a bit more tension and hold its shape slightly better in the bowl. The surface might become a little smoother, although high-rye doughs rarely become completely smooth like a well-developed wheat dough.
Look for signs of structure building – does the dough resist stretching a little more? Does it collapse immediately after being folded, or does it hold some form? Compare the dough's state after the last set of stretch and folds to how it felt after mixing. This observation helps you understand how your specific rye dough recipe responds and whether you need to adjust the number or intensity of future stretch and folds for rye sourdough.
Troubleshooting Common Issues with Rye Sourdough Stretch and Folds
Dough Too Sticky: Solutions and Prevention
Excessive stickiness is a common challenge when working with high-hydration rye sourdough. The primary solution during stretch and folds is the wet hand technique, as described earlier. Ensure your hands are adequately wet before each stretch and fold. If the dough is still very sticky, you might need to use slightly more water on your hands or even wet your bench scraper to help release the dough from the bowl or surface.
To prevent excessive stickiness from the start, ensure you are accurately measuring your ingredients, especially water and flour. Using a scale is highly recommended for consistent results. Also, consider the type of rye flour you are using; different types (light, medium, dark, whole) absorb water differently. If your recipe calls for a high hydration that consistently results in unmanageably sticky dough, slightly reducing the water by 5-10 grams in future batches can make a significant difference in handling during rye sourdough stretch and folds.
Dough Too Slack: Adjusting Your Technique
If your rye sourdough dough feels excessively slack and doesn't seem to gain any structure after multiple sets of stretch and folds, there could be a few reasons. One possibility is insufficient initial mixing or autolyse time, preventing adequate hydration. Another is over-hydration; double-check your recipe's water content relative to the flour weight. Rye dough will always be slacker than wheat, but it should still show some signs of tension building.
Adjusting your technique during the stretch and folds can help. Ensure you are stretching the dough upwards and folding it firmly back onto itself. Make sure you are completing a full set of 4-6 folds each time. If the dough is still very slack after 2-3 sets, you might consider adding an extra set of stretch and folds early in the bulk fermentation, perhaps extending the sets to 4 or even 5 within the first two hours. Additionally, ensuring proper dough temperature (ideally around 75-78°F or 24-26°C) promotes enzymatic activity and fermentation, which indirectly contributes to structure.
Dough Tearing During Stretch and Folds: What to Do
Rye dough is more delicate than wheat dough and can tear if handled too aggressively. If your rye sourdough dough is tearing during stretch and folds, it's a sign you might be stretching it too far or too forcefully. Immediately reduce the amount of stretch you apply. Instead of pulling upwards significantly, focus more on lifting and folding the dough gently onto itself.
If tearing persists, it could indicate that the dough has already developed sufficient structure for a rye loaf, or conversely, that the protein network is breaking down (though this is less common early in fermentation unless over-mixed or over-fermented). Stop performing stretch and folds for that set and proceed with the rest of the bulk fermentation without further manipulation. For future batches, try performing fewer sets of stretch and folds or using an even gentler technique like coil folds, which are often preferred for very delicate or high-hydration doughs.
Alternative Techniques for Rye Sourdough Dough Strengthening
Coil Folds for Rye Sourdough: An Alternative Approach
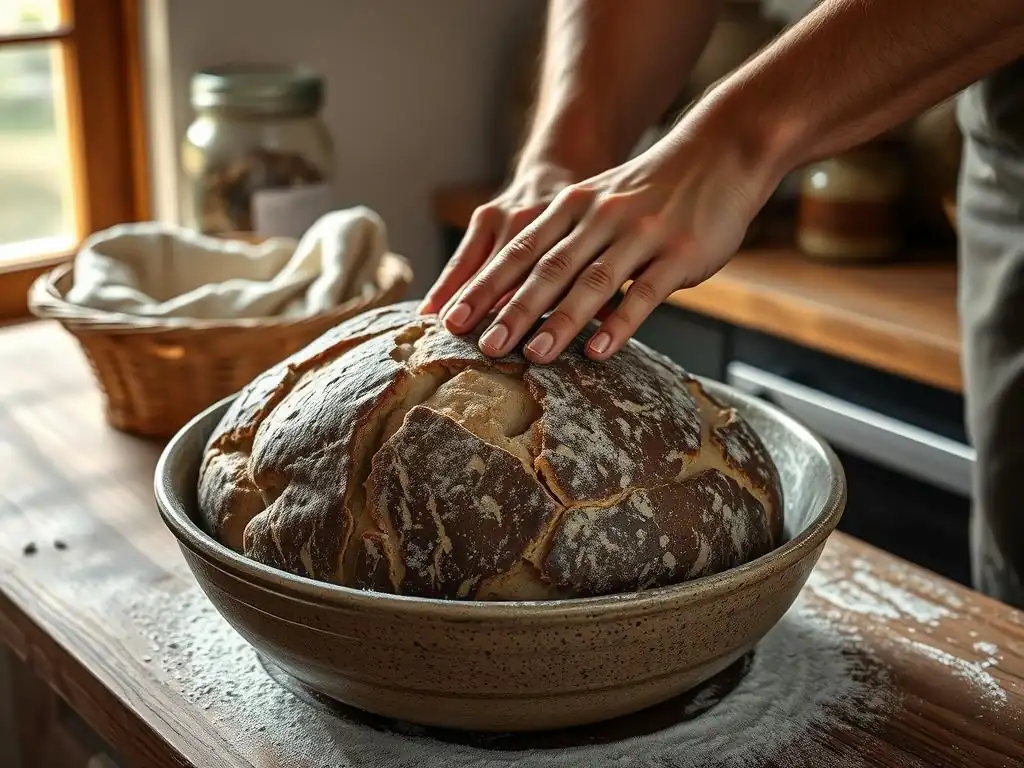
Coil folds offer a particularly gentle method for strengthening high-hydration or delicate doughs like rye sourdough. Instead of stretching the dough upwards, you work with the dough as it rests in a rectangular or square container. With wet hands, slide your hands under the center of the dough and lift it. As you lift, the edges of the dough will naturally fold underneath towards the center due to gravity.
Lower the dough back into the container. Rotate the container 180 degrees and repeat the lift-and-fold motion. This constitutes one set of coil folds (two lifts/folds). Coil folds are less disruptive to the developing structure and are excellent for building tension from the bottom up. Many bakers find coil folds easier to perform with very sticky rye doughs compared to traditional stretch and folds, resulting in effective rye sourdough stretch and folds alternative.
Lamination for Rye Sourdough: Enhancing Dough Strength and Structure
Lamination is a more advanced technique that can be used to build significant strength and create layers in dough, including mixed-flour rye sourdough recipes (e.g., 50% rye or less). After an initial bulk fermentation period (perhaps 1-2 hours), the dough is gently poured or scraped onto a lightly wet or oiled surface. It is then carefully stretched out into a thin, large rectangle, often using wet hands.
Once stretched, the dough is folded into thirds like a letter, then folded again from the ends. This process aligns the dough's structure in multiple directions and can incorporate air pockets for a more open crumb. While lamination is very effective, it requires a dough that has some extensibility. It is generally not suitable for 100% rye doughs, which lack the necessary elasticity and would likely tear excessively. For mixed-flour doughs, it can be a powerful technique to complement or replace some sets of stretch and folds for rye sourdough.
Rye Sourdough Recipes and Stretch and Fold Schedules
40% Rye Sourdough with Caraway Seeds and Stretch and Folds
A popular recipe for beginners venturing into rye baking is a 40% rye, 60% strong wheat flour sourdough. This blend provides the distinct flavor of rye while leveraging the stronger gluten structure of wheat for easier handling and better oven spring. For a recipe using ~400g strong white flour, ~260g whole rye flour, ~500g water (around 75-78% hydration), 13g salt, and 130g active rye starter, a typical stretch and fold schedule might involve 3-4 sets performed every 30-45 minutes during the first 1.5-2 hours of bulk fermentation.
For example, after mixing and a 30-minute rest, perform the first set of 4-6 stretch and folds. Wait 45 minutes, perform the second set. Wait another 45 minutes, perform the third set. Depending on dough development and ambient temperature (aiming for ~75°F), a fourth set might be beneficial 45 minutes later. This schedule allows the wheat gluten to develop alongside the rye structure, leading to a manageable dough that gains noticeable tension with each set of rye sourdough stretch and folds.
100% Rye Sourdough with Sprouted Rye and Extended Fermentation
Working with 100% rye sourdough presents a different challenge, as there is no wheat gluten for support. Recipes often use sprouted rye flour, which can slightly improve texture, and rely on longer, cooler fermentation times. For a 100% rye dough using ~600g whole sprouted rye flour, ~540g water (90% hydration), 12g salt, and 120g active rye starter, aggressive stretch and folds are counterproductive.
Instead of traditional stretch and folds, a 100% rye dough benefits from just 1-2 very gentle sets of coil folds or simple bowl folds within the first hour of bulk fermentation. The focus is not on developing elasticity but on creating a little internal structure to support the loaf.
After these minimal manipulations, the dough is left undisturbed for an extended bulk fermentation (perhaps 4-6 hours at room temperature, followed by a long cold proof of 12-24 hours). The structure in 100% rye relies more on the density provided by the high pentosan content and the alignment achieved through minimal handling rather than a developed gluten network from rye sourdough stretch and folds.
Tips and Tricks for Successful Rye Sourdough Stretch and Folds
Mastering the Gentle Touch: Preventing Over-Handling
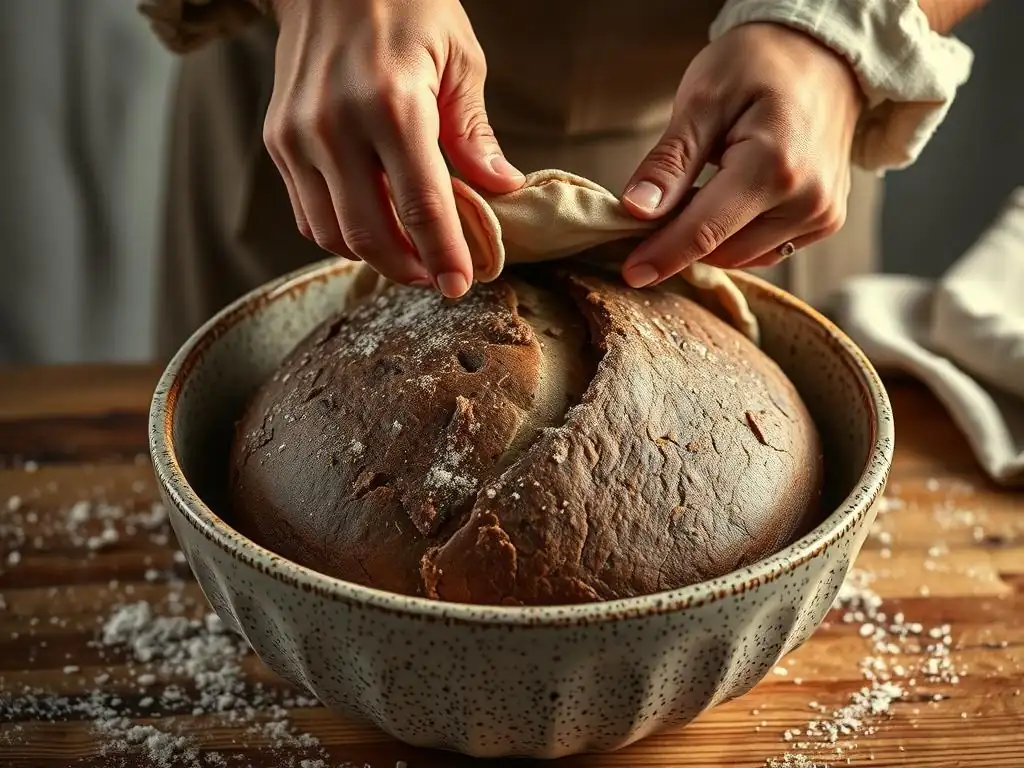
The most important tip for successful rye sourdough stretch and folds is to be gentle. Rye dough is fragile and prone to tearing if stretched too aggressively or manipulated too much. Unlike wheat dough, which benefits from vigorous kneading or stretching, rye requires a soft, coaxing approach. Think of it as aligning fibers rather than building a strong elastic band.
Use wet hands to prevent sticking and allow the dough to release easily. When stretching, lift only until you feel slight resistance; do not force it further. If the dough starts to tear, stop stretching in that direction and move to the next fold, or consider ending the stretch and fold sets early. Over-handling rye dough can break down the limited structure it has, leading to a dense, gummy loaf. A gentle touch is key to effective rye sourdough stretch and folds.
Using a Dough Scraper for Easier Handling
A dough scraper, particularly a flexible plastic one, can be an invaluable tool when performing stretch and folds on sticky rye sourdough. Instead of solely relying on wet hands to release the dough from the bowl, you can use the scraper to help lift the dough from the sides and bottom.
To use it during stretch and folds, slide the wet scraper under a section of the dough stuck to the bowl, using it to gently pry the dough away before grasping it with your wet hand to stretch and fold. You can also use the scraper to help nudge and fold the dough over itself, minimizing direct contact if the dough is exceptionally sticky. This tool makes the process cleaner and less frustrating, especially with high-hydration rye sourdough.
Maintaining Proper Dough Temperature During Fermentation
Dough temperature plays a significant role in the rate of fermentation and enzyme activity, which in turn affects the dough's structure and handling during rye sourdough stretch and folds. Rye flour has high enzymatic activity, particularly amylase, which breaks down starch. This activity is sensitive to temperature. Too high a temperature (above 80°F or 27°C) can accelerate enzymatic breakdown, potentially leading to a very slack dough that is difficult to perform stretch and folds on and may result in a gummy crumb.
Aim for a bulk fermentation temperature between 72-78°F (22-26°C) for most rye or mixed-flour sourdoughs. This temperature range supports healthy starter activity and controlled enzymatic action. If your kitchen is cool, find a warmer spot (like an oven with the light on) or use a proofing box. If it's too warm, consider using cooler water when mixing or performing stretch and folds more frequently but fewer sets, and perhaps finishing fermentation in a slightly cooler spot. Consistent temperature helps ensure predictable dough development and response to rye sourdough stretch and folds.
Understanding Rye Sourdough Fermentation and its Connection to Stretch and Folds
Bulk Fermentation and its Role in Rye Sourdough Development
Bulk fermentation, the first rise after mixing and before shaping, is a critical stage for rye sourdough. During this time, the sourdough starter works to ferment the sugars in the flour, producing carbon dioxide gas that leavens the dough, as well as organic acids that contribute to flavor and help condition the dough. While wheat dough develops significant structure during bulk fermentation through gluten development and gas production, rye dough's development is different.
In rye dough, bulk fermentation allows the limited protein structure to align and the pentosans to fully hydrate and swell, contributing to the dough's body. The acids produced by the starter also help to somewhat inhibit the excessive breakdown of starch by amylase enzymes.
The stretch and folds performed during the early part of bulk fermentation support this process by providing initial structure that allows the dough to hold onto the gas produced. The duration of bulk fermentation for rye sourdough is often shorter than for wheat, typically 2-4 hours at room temperature, depending on the rye percentage and temperature, as rye ferments faster.
Signs of Proper Fermentation in Rye Dough
Identifying the signs of proper fermentation in rye dough requires a different approach than with wheat. Rye dough doesn't typically double in size during bulk fermentation, nor does it show the same dramatic aeration or domed surface. Instead, look for more subtle indicators. The dough should increase in volume by perhaps 30-50%, especially in mixed-flour loaves.
The surface of the dough may show a few small bubbles, and the dough might feel slightly lighter and puffier than when you started. A good indicator is the "jiggle test" – gently shake the bowl; the dough should jiggle slightly but still hold together, not collapse completely. The smell should be pleasantly sour, indicating active fermentation. These signs, combined with the changes observed during rye sourdough stretch and folds, help determine when the bulk fermentation is complete.
Adjusting Fermentation Time Based on Dough Behavior and Stretch and Folds
The number and timing of your rye sourdough stretch and folds should be integrated with your overall fermentation schedule. If you are performing fewer sets of stretch and folds (e.g., only 2 sets), you might need a slightly longer bulk fermentation time to allow the dough to develop sufficient strength and gas. Conversely, if you perform more sets (e.g., 4 sets in a mixed-flour dough), the dough might develop faster, and you might need a slightly shorter bulk fermentation.
Always prioritize the dough's behavior over strict adherence to a timeline. If the dough feels strong enough and shows signs of fermentation progress earlier than expected (perhaps due to a warmer kitchen or a very active starter), proceed to shaping sooner. If it feels slack and hasn't grown much, and the temperature is right, you might extend the bulk fermentation slightly, though adding more stretch and folds late in the process is generally not recommended for rye dough. Observing how the dough responds to the rye sourdough stretch and folds and fermentation environment is key to timing.
Conclusion: Mastering Rye Sourdough with Effective Stretch and Folds
Mastering rye sourdough baking, particularly the technique of stretch and folds, unlocks the potential for delicious, well-structured loaves. While rye flour presents unique challenges due to its different protein structure and high pentosan content, adapting methods like stretch and folds is crucial for success. Remember that rye dough requires a gentler touch and different expectations compared to wheat.
By understanding the science behind rye flour's properties, employing techniques like the wet hand method, and performing gentle stretch and folds or alternatives like coil folds, you can significantly improve your rye sourdough results. Pay close attention to the dough's feel and appearance throughout the process, from the initial mix through the bulk fermentation and rye sourdough stretch and folds. With practice and observation, you'll learn to read your rye dough and know exactly how to handle it to achieve wonderful flavor and texture. Happy baking!
Frequently Asked Questions
What are stretch and folds and why are they important for rye sourdough?
Stretch and folds are a gentle kneading technique that strengthens the gluten in your dough. They are particularly important for rye sourdough because rye flour has lower gluten-forming potential than wheat.
How often should I perform stretch and folds on my rye sourdough?
Generally, perform stretch and folds 3-4 times during the first 1-2 hours of bulk fermentation. This helps build strength without overworking the delicate rye dough.
What's the best way to perform a stretch and fold?
Wet your hands slightly to prevent sticking. Gently grab a portion of the dough, stretch it upwards, and fold it over onto the rest of the dough. Rotate the bowl and repeat until you've stretched and folded all sides of the dough.
Can I over-stretch and fold my rye sourdough?
Yes, it's possible. Over-stretching can lead to a tough and dense loaf. Be gentle and monitor the dough's development; stop when it feels stronger but not overly tight.
What are the benefits of using stretch and folds compared to traditional kneading with rye sourdough?
Stretch and folds are a more gentle method suitable for rye dough, which can become gummy with excessive kneading. They improve dough strength and structure without the risk of overworking the dough.
Final Reflection: The Transformative Power of Stretch and Folds
Mastering the art of stretch and folds is not merely a technical skill in sourdough baking; it's the key to unlocking the full potential of your rye starter and achieving a truly exceptional loaf. The seemingly simple act of gently stretching and folding the dough profoundly impacts its structure, flavor development, and overall texture, resulting in a bread that is both visually stunning and incredibly delicious. This technique is more than just a step in a recipe; it's a conversation between baker and dough, a dance of patience and precision.
The influence of this seemingly small technique on the broader sourdough community is significant. It's a testament to the power of mindful practice and the rewarding journey of perfecting a craft. The subtle nuances of each fold, the feeling of the dough's resistance, and the gradual transformation it undergoes—these are experiences that connect us to a rich history of bread making. Bread making is a process of transformation, both of the ingredients and of the baker.
This quote perfectly encapsulates the profound impact of stretch and folds, not just on the dough itself, but on the baker's understanding and appreciation of the process.
Now, consider your own baking journey. What have you learned about patience, precision, and the interconnectedness of seemingly small actions? I invite you to experiment with different stretch and fold techniques, to observe the subtle changes in your dough, and to savor the unique character of the rye sourdough loaves you create. Embrace the transformative power of this technique, and let it inspire you to explore the endless possibilities within the world of sourdough baking. The journey of mastering stretch and folds is a journey of self-discovery, a testament to the enduring magic of handcrafted bread.
Unlock Your Rye Sourdough Potential!
Thanks for taking the time to explore the fascinating world of rye sourdough baking! You've now learned the secrets to achieving that perfect stretch and fold. Ready to put your new knowledge into practice?
- Master the Perfect Rye Sourdough: Experiment with different hydration levels and folding techniques to find your ideal rye loaf. Detailed instructions are available in our comprehensive guide (link implied).
- Share Your Rye Journey: Show off your stunning loaves and tag us @BakeWithEase on social media! Let's inspire each other.
- Join the BakeWithEase Community: Discover helpful tips and tricks from fellow bakers in our forum (link implied) - your questions are always welcome!
What unique flavor profile will your next rye sourdough creation reveal?