
Why Your Ciabatta Crumb Isn't Open (And How to Fix It)

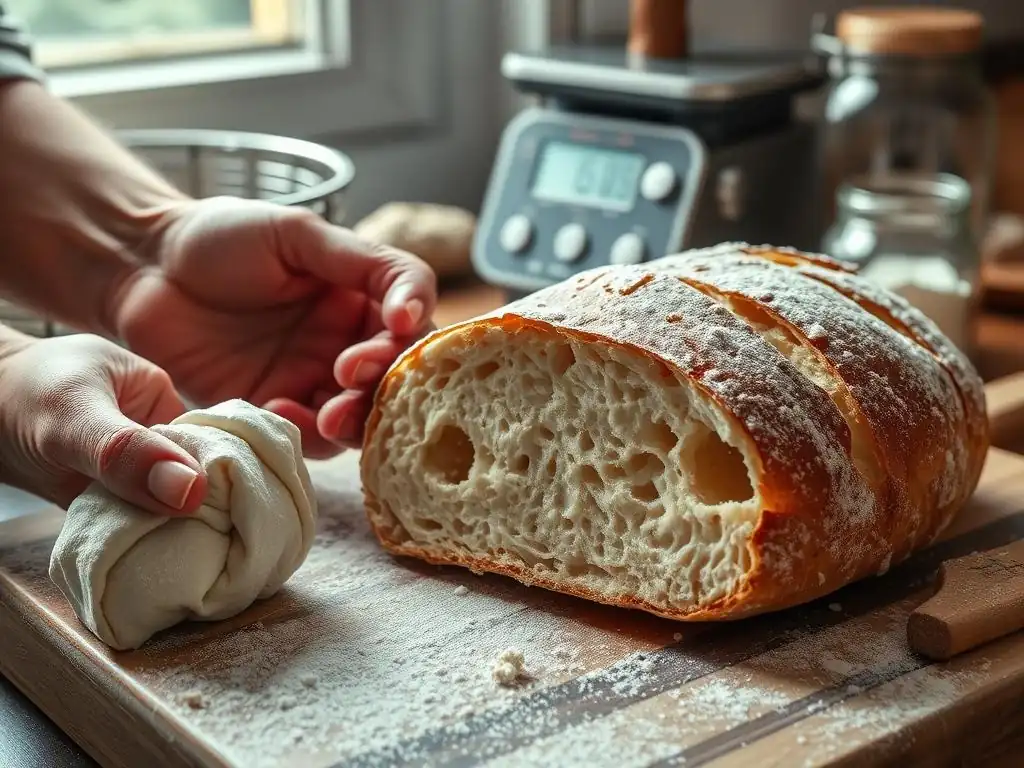
Welcome to BakeWithEase, your culinary companion for unlocking the secrets of exceptional baking! Are you struggling to achieve that coveted, airy interior in your Ciabatta? Is your Ciabatta crumb not open as much as you'd like? You're not alone! Discover the common pitfalls and proven techniques that will transform your next bake, leading to a perfectly open and delightfully chewy Ciabatta. Let's dive in and unveil the secrets!
- Achieving Open Crumb in Ciabatta: A Baker's Guide
- Understanding Open Crumb Ciabatta
- Common Causes of Tight Ciabatta Crumb
- Troubleshooting Ciabatta Crumb Issues
- Advanced Ciabatta Techniques
- Tips for Consistent Ciabatta Baking
- Recipe Adaptations for Enhanced Crumb
- Serving and Enjoying Open Crumb Ciabatta
-
Frequently Asked Questions
- Why is my ciabatta crumb dense and not open as expected?
- What role does hydration play in achieving an open ciabatta crumb?
- How can I ensure proper gluten development for my ciabatta dough?
- What type of flour is best for achieving an open ciabatta crumb?
- How long should I proof my ciabatta dough for an optimal crumb structure?
- Final Reflection: The Pursuit of the Perfect Ciabatta Crumb
- Unlock Your Ciabatta's Crumb: Master the Open Texture!
Achieving Open Crumb in Ciabatta: A Baker's Guide
Achieving that signature airy, open crumb in ciabatta is the hallmark of a successful bake. It's what gives this Italian bread its unique texture and makes it perfect for soaking up olive oil or holding hearty sandwich fillings. However, many home bakers struggle when their ciabatta crumb not open, resulting in a denser, less desirable loaf. This guide will walk you through the characteristics of a great ciabatta crumb, the common pitfalls that lead to a tight structure, and practical troubleshooting steps to help you bake ciabatta with a beautifully open interior.
Understanding Open Crumb Ciabatta
The term "open crumb" refers to the internal structure of the bread, characterized by large, irregular air pockets surrounded by a thin, tender matrix of baked dough. In ciabatta, this open structure is particularly prized. It's not just about visual appeal; it significantly impacts the bread's texture and flavor profile. A well-developed open crumb indicates proper fermentation and gluten development, both crucial for delicious bread.
Characteristics of a Desirable Ciabatta Crumb
A truly desirable ciabatta crumb should feature irregular, large holes interspersed with smaller ones, creating a honeycomb-like appearance. The walls separating these air pockets should be thin and slightly glossy. When you slice through a perfect ciabatta, you'll see this uneven distribution of voids throughout the loaf, from edge to edge.
Contrast this with a tight crumb, where the air pockets are small, uniform, and densely packed, leaving little space between them. For instance, a classic sandwich loaf typically has a tight, even crumb, which is desirable for that style of bread. However, for ciabatta, a tight structure means the bread lacks its characteristic lightness and chewiness, and the ciabatta crumb not open issue is apparent. A great example of a desirable crumb can often be seen in professional Italian bakeries, where loaves display dramatic, cavernous holes.
Importance of Open Crumb for Texture and Flavor
The open crumb structure is fundamental to ciabatta's unique texture. The large air pockets contribute to the bread's lightness despite its often high hydration. They create a delightful chewiness and slight resistance when bitten into, a stark contrast to the soft, uniform texture of a loaf with a tight crumb. This texture is essential for its traditional uses, such as being torn and dipped in olive oil.
Beyond texture, the open crumb influences flavor by allowing for proper development during fermentation and baking. The large surface area created by the air pockets within the loaf facilitates even heat distribution during baking, contributing to a well-developed crust and crumb flavor. Furthermore, the fermentation process, which creates the gases that form these holes, also develops complex flavors and aromas in the dough. A loaf where the ciabatta crumb not open often indicates insufficient fermentation, leading to a bread that is not only dense but also lacks depth of flavor.
Common Causes of Tight Ciabatta Crumb
Several factors can contribute to a ciabatta crumb not open. Identifying the specific cause is the first step to fixing the problem. Often, it's a combination of these issues rather than just one. Understanding these common pitfalls will help you troubleshoot your baking process effectively.
Insufficient Dough Hydration
Ciabatta is traditionally a high-hydration dough, often ranging from 75% to over 85% water relative to the flour weight. This high water content is critical for developing the expansive gluten network needed to trap large gas bubbles. If your dough is too dry, perhaps at 65-70% hydration, it will be much stiffer and less extensible, making it difficult for large air pockets to form and expand during fermentation and baking.
For example, if a recipe calls for 500g of flour and you add only 325g of water (65% hydration), the resulting dough will feel relatively firm and easy to handle compared to a dough made with 425g of water (85% hydration). While a 65% hydration dough can make a good loaf, it will likely have a much tighter, more uniform crumb, similar to a pain de campagne, rather than the characteristic open structure of ciabatta. The lack of sufficient water limits the dough's ability to relax and stretch around the expanding gases.
Underdeveloped Gluten
Gluten is the protein network formed when flour and water are mixed and kneaded or folded. This network provides the structure and elasticity necessary for the dough to trap the carbon dioxide gas produced by the yeast. If the gluten is not sufficiently developed, the dough will lack the strength and extensibility needed to hold large air pockets. It might tear easily or collapse during fermentation or handling.
Think of gluten development as building a flexible, strong balloon. When the yeast produces gas, this "balloon" inflates. If the balloon material (gluten) is weak or incomplete, it can't hold the gas effectively, resulting in small, weak bubbles or collapse. Common reasons for underdeveloped gluten include insufficient mixing or folding, or inadequate rest periods like autolyse. Without proper development, your ciabatta crumb not open because the structure isn't there to support it.
Incorrect Proofing: Over or Under
Proofing, or fermentation, is the process where yeast consumes sugars and produces gas (primarily carbon dioxide) and alcohol, which leavens the dough and develops flavor. The timing and temperature of proofing are crucial. Both under-proofing and over-proofing can lead to a tight ciabatta crumb.
Under-proofing means the dough hasn't had enough time for the yeast to produce sufficient gas to create an open structure. The dough will feel dense and may not have increased significantly in volume. On the other hand, over-proofing occurs when the dough ferments for too long or at too high a temperature.
The gluten structure weakens, and the dough can't hold the gas it has produced. It might look very bubbly initially but then deflate upon handling or in the oven, leading to a dense, collapsed structure where the ciabatta crumb not open as expected. A dough that has more than doubled in volume and feels fragile or starts to recede might be over-proofed.
Inactive or Insufficient Yeast
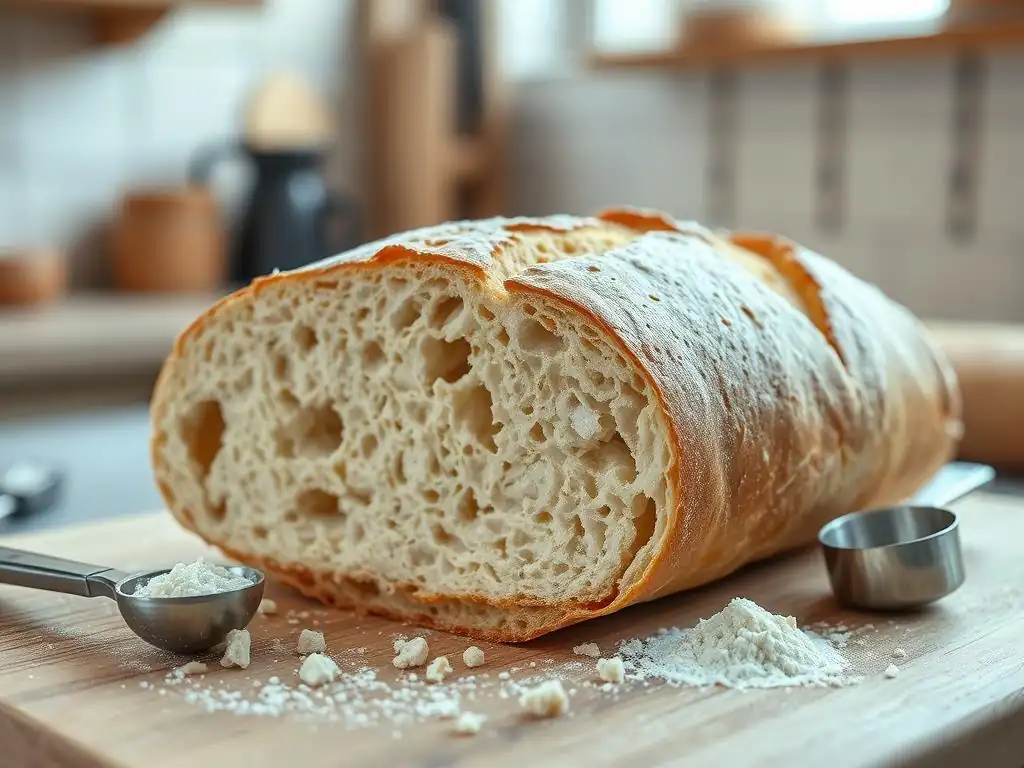
Yeast is the engine of fermentation. If your yeast is old, inactive, or you haven't used enough, it won't produce sufficient gas to leaven the dough properly and create an open crumb. Using too little yeast, even if active, will simply slow down the fermentation process considerably, potentially leading to under-proofing if you don't adjust the time.
For instance, if you use yeast that has expired or wasn't stored correctly (e.g., left open in a humid environment), it might be dead or severely weakened. Adding it to your dough will result in little to no activity, minimal volume increase, and a dense, unrisen loaf.
Similarly, if a recipe calls for 7g of active dry yeast for 500g of flour, but you only use 2g, the fermentation will be significantly slower. While slow fermentation can sometimes enhance flavor, insufficient yeast will simply fail to produce enough gas to open the crumb, leaving you with a ciabatta crumb not open.
Aggressive Dough Handling
Ciabatta dough, especially at high hydration, is very delicate once it has fermented and developed its airy structure. Aggressive handling during shaping or transferring can easily deflate the dough by knocking out the trapped gases. Unlike lower hydration doughs that can withstand kneading and firm shaping, ciabatta requires a gentle touch.
Imagine the dough as a collection of delicate balloons. If you push, punch, or knead it roughly, you'll pop those balloons, releasing the gas that creates the open crumb. For example, forcefully degassing the dough on a floured surface or stretching it too tightly during pre-shaping will collapse the internal structure. The goal with ciabatta shaping is minimal manipulation, preserving as much of the accumulated gas as possible. This includes using ample flour and a dough scraper to handle the sticky dough rather than your hands directly, which can be too rough.
Troubleshooting Ciabatta Crumb Issues
If you've experienced a ciabatta crumb not open, don't despair! By systematically addressing the potential causes, you can significantly improve your results. The troubleshooting steps below focus on adjusting your technique based on the common issues discussed.
Hydration Adjustment
Correct hydration is perhaps the single most critical factor for achieving an open ciabatta crumb. Getting the water-to-flour ratio right is essential for creating the necessary dough consistency.
Determining Ideal Hydration Ratio
For ciabatta, aim for a hydration level of at least 75%, and ideally between 80% and 85% for a classic open crumb. Some recipes push hydration even higher, to 90% or more, for extremely airy results, but these doughs are much more challenging to handle. To calculate hydration, divide the weight of the water by the weight of the flour and multiply by 100. For instance, 400g water + 500g flour = (400/500) * 100 = 80% hydration. Start with 80% if you're new to high hydration and gradually increase as you become more comfortable with the dough's stickiness.
Observe your dough during mixing. It should be very wet, shaggy, and sticky, barely coming together. If it forms a relatively smooth, easy-to-handle ball quickly, it likely needs more water. Don't be afraid of the stickiness; it's a sign you're on the right track for an open crumb. You can always add small amounts of water during the initial mixing phase until the desired consistency is reached, even if it slightly exceeds the recipe's stated amount.
Adapting Hydration Based on Flour
Different flours absorb water differently. Factors like the type of wheat (hard vs. soft), protein content, and even milling process can affect how much water a flour can take up. High-protein bread flours typically absorb more water than all-purpose flours. If you switch flour brands or types, you may need to adjust your hydration level.
For example, a strong bread flour with 12.5% protein might comfortably handle 85% hydration, producing a slack but manageable dough. An all-purpose flour with 10.5% protein might become excessively soupy and difficult to work with at 85% hydration, requiring a slightly lower percentage, perhaps 80-82%, to achieve a similar dough consistency. Pay attention to how the dough feels rather than strictly adhering to a percentage if your flour is different from the recipe's. If your dough feels too stiff relative to descriptions of wet ciabatta dough, incrementally add a tablespoon or two of water during the initial mix.
Gluten Development Techniques
Developing a strong, elastic gluten network is vital for trapping gas and achieving an open crumb. Ciabatta dough is too wet for traditional kneading, so specific techniques are used.
Utilizing Autolyse
Autolyse is a resting period after initially mixing just the flour and water (and sometimes a preferment). This simple step allows the flour to fully hydrate and enzymes to begin breaking down proteins, which kickstarts gluten development without any mechanical work. It makes the dough more extensible and easier to handle later.
Typically, an autolyse for ciabatta involves mixing flour and water until no dry bits remain, then letting the mixture rest for 30 minutes to an hour at room temperature. After this rest, the dough will feel noticeably smoother and more pliable. You then add the salt and yeast (which should be mixed with a small amount of water before adding to the autolysed dough) and proceed with mixing or folding. This initial hydration and rest significantly contribute to a stronger gluten network, helping prevent a ciabatta crumb not open.
Implementing Stretch and Fold Technique
The stretch and fold technique is the primary method for developing gluten in high-hydration doughs like ciabatta. Instead of continuous kneading, the dough rests for periods, and then you gently stretch and fold it over itself. This builds strength and structure without degassing the dough excessively.
Perform stretch and folds directly in the bowl. Wet your hands slightly to prevent sticking. Grab one side of the dough, stretch it upwards gently, and fold it over the rest of the dough. Rotate the bowl and repeat this motion 3-4 times to work the dough from all sides. Allow the dough to rest for 20-45 minutes between sets. Repeat this process 3-5 times over a period of 2-3 hours. This intermittent working and resting allows the gluten to relax and realign, building strength progressively and creating the framework for an open ciabatta crumb.
Assessing Gluten Strength: The Windowpane Test
The windowpane test is a classic method to check if gluten is sufficiently developed. Gently take a small piece of dough and stretch it between your fingers. If you can stretch it thinly enough to see light pass through without tearing, like a translucent windowpane, the gluten is well-developed.
If the dough tears quickly when you try to stretch it thinly, it needs more gluten development. This might mean additional stretch and fold sets or a longer fermentation time to allow the gluten to relax and strengthen. While high-hydration ciabatta dough may not pass the windowpane test as perfectly as a lower hydration dough, you should still be able to stretch it significantly before it tears. If it tears almost immediately, your underdeveloped gluten is likely contributing to a ciabatta crumb not open.
Optimal Proofing Strategies
Correctly managing fermentation time and temperature is crucial for developing flavor and achieving the right amount of leavening for an open crumb. Both bulk fermentation and final proofing need attention.
Managing Bulk Fermentation
Bulk fermentation is the first rise of the dough after mixing and initial folding. This is where the majority of gas production and flavor development occurs. For ciabatta, bulk fermentation is often long and slow, sometimes taking 2-4 hours at room temperature (around 70-75°F or 21-24°C) or even longer in the refrigerator.
During bulk fermentation, the dough should increase significantly in volume, often doubling or even tripling. It should look bubbly and alive. Perform your stretch and folds during the first half of bulk fermentation. Pay attention to the dough's feel and appearance, not just the clock. If your kitchen is cooler, fermentation will take longer; if warmer, it will be faster. Insufficient bulk fermentation is a common reason for a ciabatta crumb not open.
Identifying Over and Under-Proofing
Visual and tactile cues are key to knowing if your dough is proofed correctly. An under-proofed dough will look dense, won't have increased much in volume, and will feel firm or tight. When poked gently, the indentation will spring back immediately. An over-proofed dough will look very puffy, potentially showing signs of collapse around the edges, and may have large bubbles on the surface. When poked, the indentation will remain or collapse completely.
The "poke test" is a good indicator. For ciabatta nearing the end of bulk fermentation or final proofing, a gentle poke should leave an indentation that springs back slowly, about halfway. If it springs back fully, it needs more time (under-proofed). If it stays completely indented or the dough collapses, it's likely over-proofed. Getting this timing right is critical; misjudging proofing is a frequent cause of a ciabatta crumb not open.
Controlling Proofing Temperature
Temperature significantly impacts yeast activity. Warmer temperatures speed up fermentation, while cooler temperatures slow it down. For consistent results, try to maintain a stable proofing temperature. Room temperature (70-75°F or 21-24°C) is standard for bulk fermentation, while final proofing might be slightly warmer or cooler depending on the recipe and desired outcome.
If your kitchen is cold (below 70°F), fermentation will be sluggish, and you'll need longer proofing times. You can try proofing in a slightly warmer spot, like inside a microwave or oven (turned off!) with the light on, which often provides a gentle warmth (around 75-80°F). Conversely, if your kitchen is very warm (above 80°F), fermentation can happen too quickly, leading to over-proofing before sufficient gluten structure develops. In warm conditions, consider using cooler water or slightly reducing yeast quantity to slow things down and prevent a ciabatta crumb not open due to premature collapse.
Yeast Management
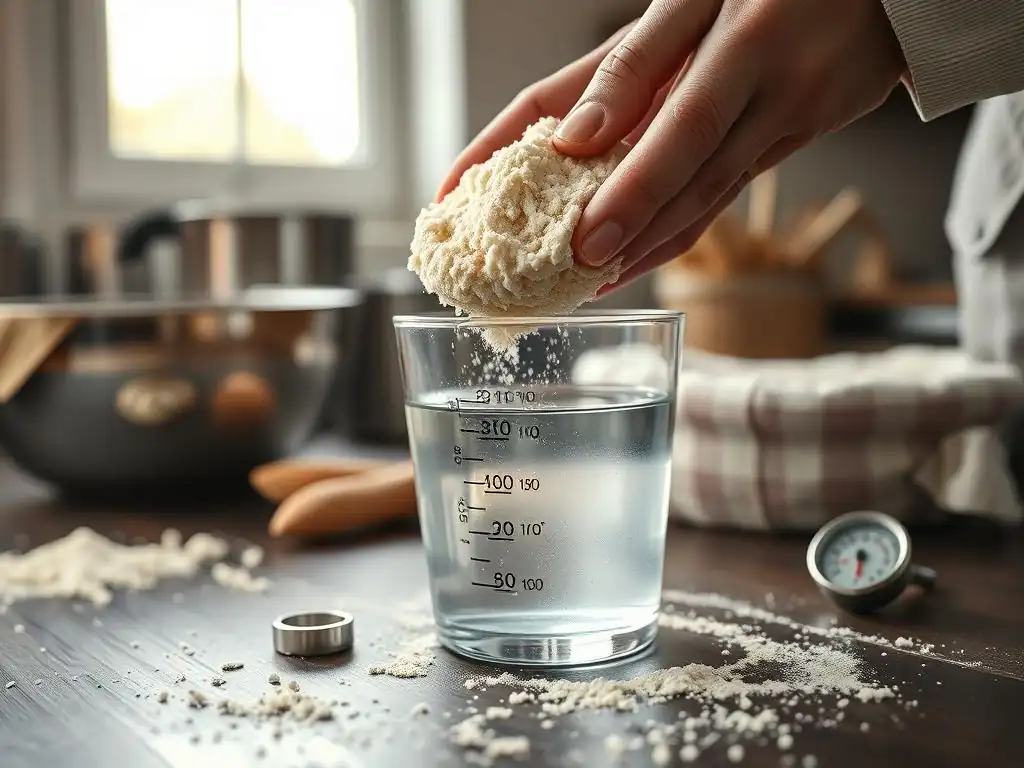
Ensuring your yeast is active and used correctly is a fundamental step in successful bread baking, especially for achieving an airy ciabatta crumb.
Selecting Appropriate Yeast Type
Most ciabatta recipes call for active dry yeast or instant dry yeast. Both work well, but they are used slightly differently. Active dry yeast typically needs to be proofed in warm water (around 105-115°F or 40-46°C) before adding to the dough, whereas instant yeast can often be mixed directly with the dry ingredients.
Using fresh, reliable yeast is key. Check the expiration date on the packet or jar. If you're unsure about active dry yeast, proofing it first is a good test. If it doesn't foam up within 5-10 minutes in warm water with a pinch of sugar, it's likely dead or inactive and won't properly leaven your dough, leading to a ciabatta crumb not open. Instant yeast is generally more reliable and doesn't require proofing, making it convenient for high-hydration doughs where dissolving it first can be tricky.
Verifying Yeast Viability
As mentioned, testing active dry yeast is simple. Dissolve the recommended amount of yeast (e.g., 1 teaspoon) in about 1/4 cup of warm water (105-115°F). Stir in a pinch of sugar. Let it sit for 5-10 minutes. If it becomes foamy and bubbly, it's active and ready to use. If there's little to no activity, discard it and get fresh yeast.
Even instant yeast can lose potency over time, especially if exposed to air or moisture. While you don't typically proof it, if you consistently have issues with rise despite following other steps, your yeast might be the culprit. Storing yeast properly in an airtight container in the refrigerator or freezer extends its shelf life significantly. Using yeast that isn't fully viable will result in insufficient leavening and a dense structure where the ciabatta crumb not open.
Correct Yeast Hydration Practices
When using active dry yeast, hydrating it correctly is important. Use water within the recommended temperature range (105-115°F). Water that is too cool won't activate the yeast, while water that is too hot can kill it. Stir it gently until dissolved, and wait for the foam to appear before adding it to your dough mixture.
For instant yeast, while it can be mixed directly with flour, some bakers prefer to dissolve it in a small amount of the recipe's water first. This ensures it's evenly distributed throughout the very wet ciabatta dough. Use lukewarm water (around 90-100°F or 32-38°C) for this, as hotter water isn't necessary and could harm the yeast if left too long. Proper hydration of the yeast itself ensures it's ready to start working immediately once incorporated into the dough, contributing effectively to gas production and helping achieve that open ciabatta crumb.
Gentle Dough Handling
Once your ciabatta dough has undergone its bulk fermentation and is full of gas, handling it gently is paramount. Rough treatment will deflate the dough, collapsing the delicate structure you've worked hard to build.
Preventing Degassing During Shaping
Unlike breads that require firm shaping and degassing to create a tight crumb, ciabatta needs minimal handling. The goal is to divide the dough and shape it into loaves with as little manipulation as possible. Avoid punching down the dough after bulk fermentation. Instead, gently ease it out of the bowl onto a well-floured surface.
Use a dough scraper to divide the dough into desired loaf sizes. For example, if you have 1000g of dough and want two loaves, divide it roughly in half (500g each). Shape involves gently coaxing the dough into a rectangle or square using floured hands or a scraper, then perhaps a simple fold or two, rather than tightening and degassing as you would a boule or batard. Overworking the dough at this stage is a primary reason for a ciabatta crumb not open despite successful fermentation.
Using a Dough Scraper
A bench scraper or dough scraper is an indispensable tool when working with high-hydration doughs like ciabatta. It allows you to portion, lift, and move the sticky dough without it adhering completely to your hands or the work surface. This facilitates gentler handling.
Keep your bench scraper and hands well-floured. Use the scraper to gently lift and fold the dough during stretch and folds if you prefer not to use wet hands. Use it to scrape the dough out of the bowl and to divide it cleanly. When shaping, use the scraper to help nudge and form the dough pieces on a floured surface or proofing couche. This minimizes direct contact and the risk of pressing out the precious air bubbles, helping preserve the structure for a beautiful, open ciabatta crumb.
Preheating Baking Surface
Baking ciabatta on a preheated surface, like a baking stone or steel, provides a strong burst of heat from below, known as oven spring. This rapid heat transfer helps the dough expand quickly before the crust sets, contributing to a better rise and a more open crumb.
Preheat your oven with the stone or steel inside for at least 30-60 minutes at a high temperature (often 450-500°F or 230-260°C). Transferring the proofed loaves directly onto this hot surface causes them to spring upwards dramatically. If you bake ciabatta on a cold baking sheet, the base heats up slowly, limiting oven spring and potentially resulting in a flatter loaf with a tighter crumb. This strong bottom heat is a key factor in helping the trapped gases expand fully and preventing the ciabatta crumb not open issue during baking.
Advanced Ciabatta Techniques
Once you've mastered the basics, incorporating advanced techniques can further enhance the flavor and openness of your ciabatta crumb. These methods often involve longer fermentation periods or specific baking environments.
Using a Preferment: Poolish or Biga
Incorporating a preferment, such as a poolish or a biga, is a traditional Italian method that significantly improves the flavor, texture, and keeping quality of ciabatta. A preferment is a portion of the dough mixed hours or even a day in advance and allowed to ferment before being added to the final dough.
A poolish is a liquid preferment, typically made with equal weights of flour and water plus a small amount of yeast, fermented at room temperature for 12-16 hours or in the refrigerator for longer. A biga is a stiffer preferment, usually around 50-60% hydration, fermented for a similar duration. Both methods allow for longer, slower fermentation of a portion of the flour, developing more complex flavors and producing organic acids that strengthen the dough's gluten structure.
This added strength and flavor contribute greatly to a more robust and open ciabatta crumb. For instance, a ciabatta made with a 24-hour cold-fermented biga will typically have a more complex taste and a noticeably more open structure than one made with a direct dough method.
Cold Fermentation Benefits
Retarding the dough in the refrigerator (cold fermentation) slows down yeast activity significantly while allowing enzymes to continue their work. This extended, slow fermentation builds flavor complexity and further strengthens the gluten network, making the dough more resilient and capable of trapping larger gas bubbles.
After the initial bulk fermentation at room temperature (perhaps for 1-2 hours with folds), placing the dough in the refrigerator for 12-48 hours can dramatically improve the final crumb structure. The cold temperature allows the gluten to relax and become more extensible over a long period, while the slow yeast activity continues to produce gas and organic acids. When you take the dough out of the fridge, it will be much easier to handle (less sticky) and will have accumulated significant flavor. This cold rest is often the secret behind exceptionally open ciabatta crumb structures seen in bakeries.
Steam Baking for Crust and Crumb
Steam in the oven during the initial phase of baking is crucial for achieving a thin, crispy crust and allowing maximum oven spring. Steam keeps the surface of the dough moist and elastic, preventing it from setting into a crust too early. This allows the loaf to expand fully in the hot oven before the crust forms.
Methods for creating steam include placing a tray of hot water or ice cubes in the bottom of the oven, using a Dutch oven or cloche, or using a dedicated steam oven. For ciabatta baked on a stone, adding a cup of boiling water to a hot tray placed on the bottom rack just as you load the bread is a common technique. The steam allows the dough's surface to remain pliable for the first 10-15 minutes of baking, enabling the loaf to expand dramatically during oven spring.
This expansion is directly linked to achieving a voluminous loaf with a beautifully open ciabatta crumb. Without sufficient steam, the crust forms too quickly, restricting expansion and resulting in a denser interior.
Tips for Consistent Ciabatta Baking
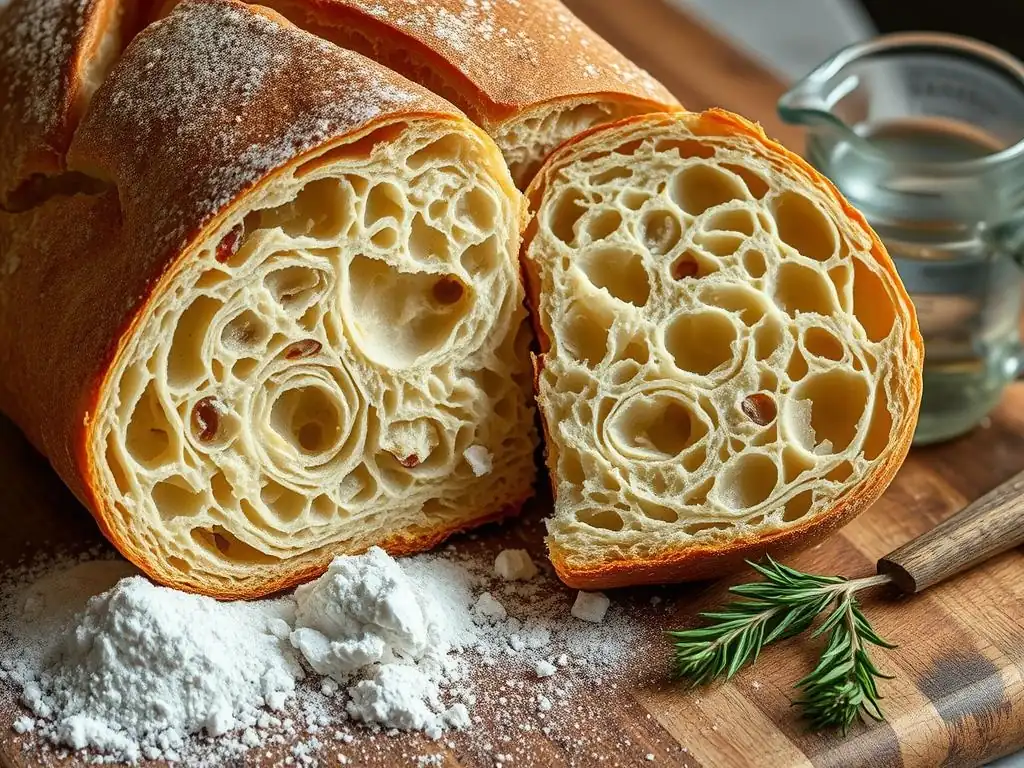
Baking ciabatta with a consistently open crumb requires attention to detail and practice. Implementing a few key habits can make a significant difference in your results.
Accurate Ingredient Measurement
Precision is key in baking, especially with high-hydration doughs like ciabatta where the ratio of water to flour is critical. Using a digital kitchen scale to weigh your ingredients (flour, water, salt, yeast) is far more accurate than using volume measurements (cups and spoons).
For instance, a cup of flour can vary in weight by as much as 20% depending on how it's scooped and settled. This variation can drastically change the hydration percentage. If your recipe calls for 500g of flour and 400g of water (80% hydration), but you accidentally measure only 450g of flour by volume, your actual hydration jumps to nearly 89% (400/450), resulting in a much wetter, potentially unmanageable dough.
Conversely, if you measure 550g of flour, your hydration drops to 73% (400/550), leading to a stiffer dough and potentially a ciabatta crumb not open. Weighing ensures you hit the target hydration every time.
High-Quality Flour Selection
The type and quality of flour you use significantly impact gluten development and water absorption. Using a strong bread flour with a high protein content (typically 12-14%) is recommended for ciabatta. These flours contain more gluten-forming proteins, which are essential for creating the strong, elastic network needed to support a high-hydration dough and an open crumb.
While you can make ciabatta with all-purpose flour, it generally has lower protein (10-11.5%), resulting in a weaker gluten network. This can make handling high hydration dough more challenging and may result in a less open crumb. Look for bread flour specifically labeled as high-protein. Some specialty flours, like Italian "Tipo 00" flour with a moderate protein content but specific milling properties, can also work well, but often require recipe adjustments. Using the right flour provides the foundational structure needed to prevent a ciabatta crumb not open.
Essential Baking Equipment
Having the right tools makes working with sticky ciabatta dough much easier and helps ensure successful results. While you don't need a professional bakery setup, a few key items are highly recommended.
- Digital Scale: For accurate ingredient measurement.
- Large Mixing Bowl: Provides ample space for stretching and folding the dough.
- Bench Scraper: Essential for handling and dividing sticky dough gently.
- Proofing Container: A clear container with volume markings helps monitor bulk fermentation.
- Proofing Couche or Linen: A floured linen cloth supports the shaped loaves during final proofing, preventing them from spreading too much while allowing them to expand upwards.
- Baking Stone or Steel: Provides intense bottom heat for excellent oven spring.
- Peel: Used for transferring the proofed loaves onto the hot baking surface.
- Steam Source: A tray for water or ice, or a Dutch oven/cloche.
Using these tools correctly minimizes rough handling and supports the dough throughout the process, increasing your chances of achieving that coveted open ciabatta crumb. Trying to handle very wet dough without a bench scraper, for example, is notoriously difficult and often leads to degassing.
Recipe Adaptations for Enhanced Crumb
Sometimes, small tweaks to a recipe can make a big difference in the final crumb structure. Consider adapting your favorite ciabatta recipe using these principles.
High-Hydration Ciabatta Recipe
Let's consider a basic ciabatta recipe and how hydration plays a role. A recipe using 500g flour and 350g water (70% hydration) will yield a dough that is relatively easy to handle but will likely produce a tighter crumb. To enhance the open crumb, increase the hydration.
Adapt the recipe to use 500g flour and 425g water (85% hydration). This dough will be noticeably stickier and looser. You'll need to rely heavily on stretch and folds (perhaps 4-5 sets) and potentially incorporate an autolyse period to build sufficient strength. Proofing times might need slight adjustment as wetter doughs sometimes ferment a little faster.
Handling will require generous flouring of your work surface and liberal use of a bench scraper. While more challenging, this higher hydration is a direct path to a more open ciabatta crumb not open issue becoming a thing of the past. Remember that increasing hydration also often pairs well with using a preferment for added strength and flavor.
Serving and Enjoying Open Crumb Ciabatta
Once you've successfully baked a ciabatta with a beautiful open crumb, the best part is enjoying it! The unique texture makes it versatile for many uses.
Serving Ideas and Food Pairings
The airy structure of open crumb ciabatta makes it ideal for showcasing simple, high-quality ingredients. Slice it or tear it into pieces and serve it with a good quality extra virgin olive oil for dipping. The large holes soak up the oil beautifully.
Ciabatta is also the perfect bread for sandwiches. Its sturdy crust and open interior can hold substantial fillings without becoming soggy. Think Caprese sandwiches with fresh mozzarella, tomato, and basil, or hearty Italian cured meats and cheeses. It also makes excellent bruschetta when toasted and topped with diced tomatoes, garlic, and basil. The texture provides a satisfying chew that complements a variety of toppings. Even simply serving warm slices with butter allows the bread's inherent flavor and texture to shine. The goal is to let that wonderful open ciabatta crumb be the star of the meal.
Frequently Asked Questions
Why is my ciabatta crumb dense and not open as expected?
A dense crumb in ciabatta often results from insufficient hydration or undeveloped gluten. Using the wrong type of flour or not allowing enough proofing time can also contribute.
What role does hydration play in achieving an open ciabatta crumb?
High hydration is crucial for an open crumb. The water creates steam during baking, contributing to the large, irregular air pockets characteristic of ciabatta.
How can I ensure proper gluten development for my ciabatta dough?
Proper gluten development requires sufficient mixing or kneading and adequate resting time. This allows the gluten strands to strengthen and trap air, leading to a more open crumb.
What type of flour is best for achieving an open ciabatta crumb?
A strong bread flour with a high protein content is recommended for ciabatta. This provides the gluten structure needed to support the airy crumb.
How long should I proof my ciabatta dough for an optimal crumb structure?
Ciabatta dough requires a longer proofing time than many other breads. This extended proofing allows for maximum expansion and the development of those desirable large holes in the crumb.
Final Reflection: The Pursuit of the Perfect Ciabatta Crumb
The quest for that airy, open crumb in ciabatta isn't just about aesthetics; it's a reflection of our understanding of fermentation, hydration, and the delicate dance between flour and water. A perfectly open crumb signifies mastery over a complex process, a testament to patience and precision in the kitchen. This seemingly simple bread holds within it a world of scientific principles and artistic expression.
The journey to understanding ciabatta's crumb structure has been a fascinating exploration for me, revealing the subtle nuances that separate a dense loaf from a masterpiece. It's a journey that continues to unfold with each bake, each experiment, each slight adjustment to technique. The pursuit of this perfect crumb mirrors our own personal journeys – the striving for excellence, the acceptance of imperfection, and the enduring satisfaction of achieving a goal through dedication and understanding. The best bread is made with love, and a little bit of science.
– Unknown baker
Now, armed with a deeper understanding of hydration, fermentation, and the importance of proper technique, I invite you to embark on your own ciabatta adventure. Don't be discouraged by initial failures; embrace the learning process, experiment fearlessly, and savor the journey towards that perfect, airy crumb. The reward? Not just a beautiful loaf of bread, but a deeper appreciation for the artistry and science behind baking.
Unlock Your Ciabatta's Crumb: Master the Open Texture!
Thanks for taking the time to explore the world of perfect ciabatta with us! We hope you gained valuable insights into achieving that coveted open crumb. Ready to put your new knowledge into practice?
- Bake your dream ciabatta: Try the recipe variations we suggested – experiment with different hydration levels and let us know how it turns out! This is the key to unlocking that perfect texture.
- Share your baking journey: Post a picture of your ciabatta creation on social media and tag us – we’d love to see your results!
- Join our community: Have more ciabatta questions? Discuss your baking experiences and tips with other bread enthusiasts in our comments section below.
So, what unique ingredient or technique will you try to perfect your ciabatta crumb? Let’s hear it!