
Baking Pain de Campagne: French Country Bread Made Simple

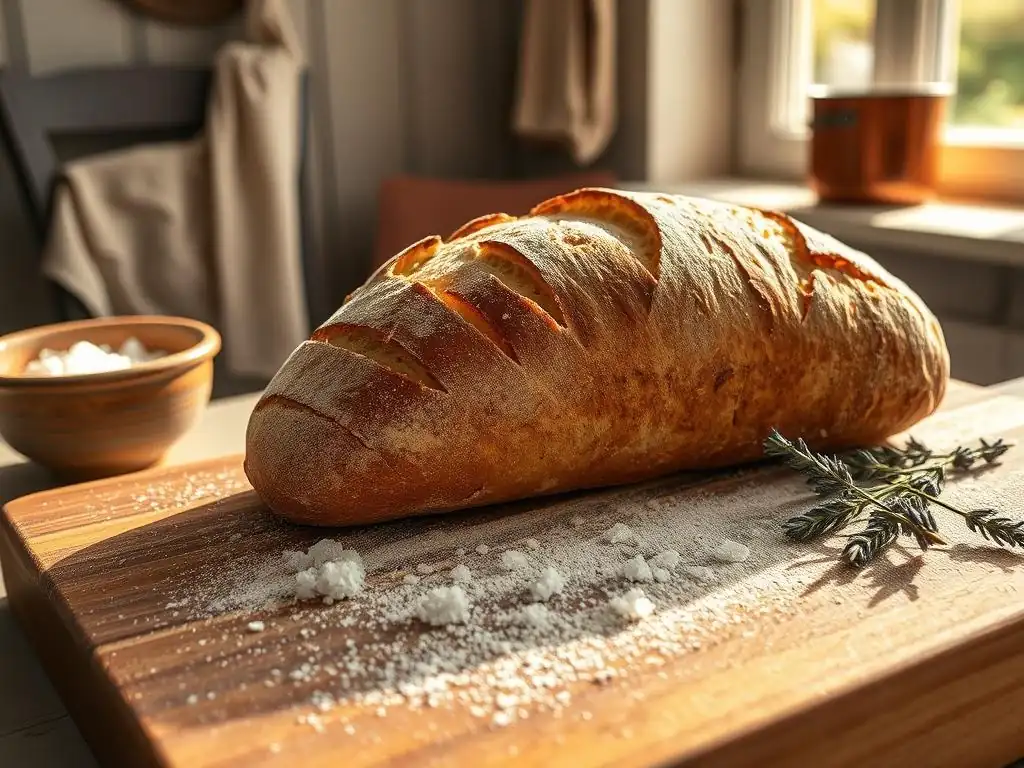
Welcome to BakeWithEase, your kitchen companion for unlocking the joy of baking! Ever dreamt of creating that rustic, golden-crusted loaf you see in French bakeries? This week, we're demystifying the magic of Easy French country bread. Discover how simple it can be to craft a truly authentic Pain de Campagne in your own home, using our straightforward recipe and techniques. Curious to see how? Let's get baking!
- Baking Sourdough Bread at Home
- What is Sourdough Bread? Understanding the Basics
- Simplify Your Baking: A Beginner-Friendly Sourdough Recipe
-
Step-by-Step Guide to Baking Easy Sourdough Bread
- Step 1: Preparing the Levain (Sourdough Starter)
- Step 2: Mixing the Dough for Sourdough Bread
- Step 3: Bulk Fermentation: Developing Flavor and Structure
- Step 4: Shaping Your Sourdough Bread Loaf
- Step 5: Proofing: Preparing the Dough for Baking
- Step 6: Baking Your Easy Sourdough Bread
- Step 7: Cooling and Enjoying Your Homemade Sourdough Bread
- Tips and Tricks for Perfect Sourdough
- Troubleshooting Common Sourdough Baking Problems
- Storing and Enjoying Your Easy Sourdough Bread
-
Frequently Asked Questions
- What exactly is Pain de Campagne, and what makes it "French country bread"?
- How is "Easy French country bread" different from other types of bread?
- What are the key ingredients needed to make this easy Pain de Campagne?
- I'm a beginner baker. Is this recipe truly "easy" enough for me to handle?
- Can I customize this easy French country bread recipe?
- Final Reflection: The Simple Joy of a Perfectly Crusty Loaf
- Unleash Your Inner Boulanger: Bake Your Own Pain de Campagne!
Baking Sourdough Bread at Home
Welcome to the wonderful world of baking easy sourdough bread right in your own kitchen! There's a unique satisfaction that comes from transforming simple ingredients – flour, water, and salt – into a beautiful, tangy loaf using only the power of a wild yeast culture, known as a sourdough starter or levain. This age-old method offers incredible depth of flavor and a delightful texture that's hard to replicate with commercial yeast.
Embarking on your sourdough journey might seem intimidating at first glance, with terms like "bulk fermentation" and "autolyse" sounding complex. However, with a clear, step-by-step guide and a little patience, baking delicious homemade sourdough is absolutely achievable for bakers of all skill levels. This guide will break down the process, making it simple and enjoyable, ensuring you can bake easy sourdough bread consistently.
What is Sourdough Bread? Understanding the Basics
Sourdough bread stands apart from loaves made with commercial yeast due to its unique leavening agent: a live fermented culture of flour and water. This culture, often called a starter or levain, contains naturally occurring wild yeasts and beneficial bacteria (primarily Lactobacillus). These microorganisms work together to ferment the dough, producing carbon dioxide that makes the bread rise, as well as organic acids that contribute to the bread's characteristic tangy flavor and improve its texture and keeping qualities.
Unlike instant or active dry yeast, a sourdough starter is a living ecosystem that requires ongoing care and feeding. This symbiotic relationship between yeasts and bacteria creates a more complex fermentation process, breaking down starches and proteins in the flour more thoroughly. The result is a loaf that not only tastes distinctly different – often described as having a pleasant tang and nuanced aroma – but can also be more digestible for some people compared to bread made with baker's yeast.
Exploring the History and Origins of Sourdough
The history of sourdough baking stretches back thousands of years, predating the isolation and commercial production of baker's yeast. It is widely believed that sourdough fermentation was the original method of leavening bread, discovered perhaps by accident in ancient Egypt around 1500 BC. Legend has it that a batch of dough was left out and naturally fermented overnight due to airborne wild yeasts, leading to a lighter, more palatable bread than the flatbreads previously consumed.
From these ancient beginnings, the technique of keeping a portion of fermented dough (the starter) to leaven the next batch spread across the globe. Different regions developed their own distinct sourdough cultures, often influenced by the local environment, flour types, and climate. For instance, the famous San Francisco sourdough, known for its particularly strong tang, is attributed to specific strains of Lactobacillus found in the Bay Area's unique climate. For centuries, having a robust sourdough starter was essential for any baker, a precious resource passed down through generations.
Defining Characteristics of Authentic Sourdough Bread
Authentic sourdough bread is distinguished by several key characteristics, starting with its leavening. It is leavened solely by a sourdough starter (levain) made from flour and water, without the addition of commercial yeast. This reliance on wild fermentation results in a complex flavor profile that typically includes a noticeable tang, ranging from mild to pronounced depending on the starter's acidity, the fermentation time, and the flour used.
Beyond flavor, the texture of sourdough bread is also unique. A well-baked loaf usually boasts a thick, crispy crust, often achieved through baking in a hot oven with steam. The interior, or crumb, is typically moist and chewy, often featuring an open, irregular structure with varying sizes of air pockets, sometimes referred to as the "open crumb." The combination of the tangy flavor, chewy texture, and rustic crust defines what many bakers strive for when creating easy sourdough bread at home.
Why Bake Sourdough? The Benefits of Homemade Bread
Baking easy sourdough bread at home offers a multitude of rewards, extending beyond just the delicious taste. One significant benefit often cited is improved digestibility. The long fermentation process driven by lactic acid bacteria in the starter helps to break down complex carbohydrates and gluten in the flour. While it doesn't make the bread gluten-free, this breakdown can make it easier for some individuals to digest compared to quickly-fermented commercial loaves.
Furthermore, homemade sourdough can potentially offer nutritional advantages. The fermentation process can increase the bioavailability of certain minerals and nutrients in the flour. Beyond the potential health aspects, there's immense satisfaction in the baking process itself – the tactile experience of working the dough, the anticipation as it ferments and rises, and finally, the incredible aroma that fills your kitchen as your homemade sourdough bakes to a golden-brown perfection. It's a rewarding craft that connects you to a timeless tradition.
Simplify Your Baking: A Beginner-Friendly Sourdough Recipe
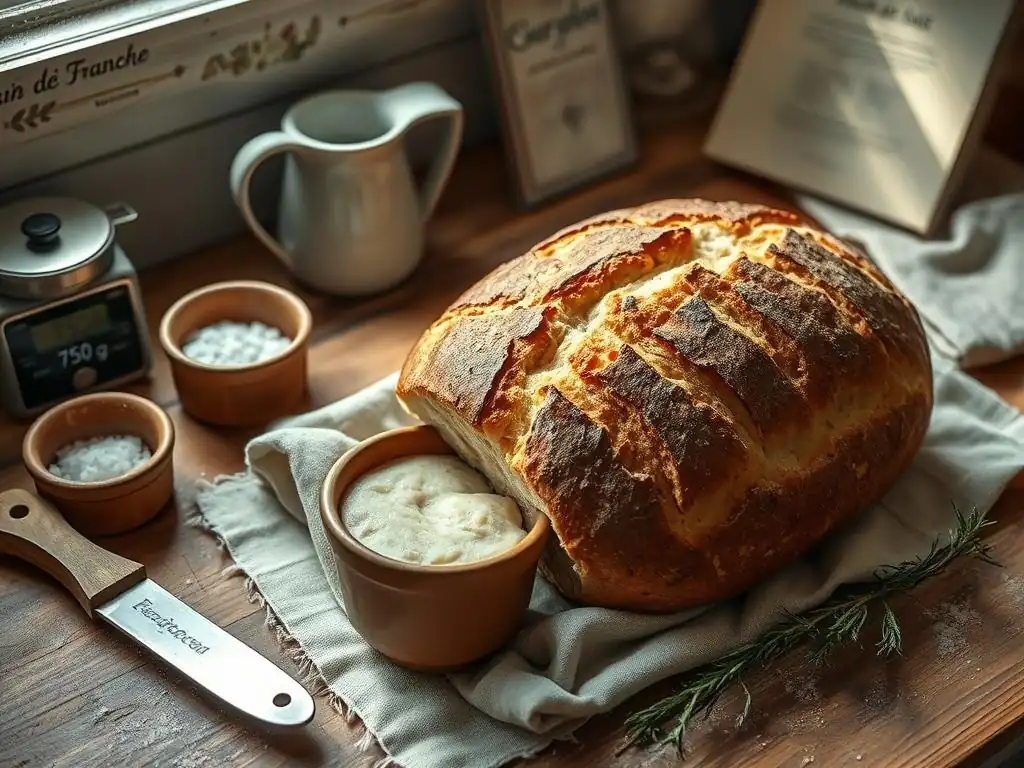
Ready to bake your first loaf of easy sourdough bread? This recipe is designed to be straightforward, focusing on fundamental techniques that yield fantastic results. We'll use common ingredients and equipment, making the process approachable even if you've never worked with a sourdough starter before. The goal is to demystify the steps and show you that delicious, homemade sourdough is well within your reach.
By breaking down the process into manageable stages – from preparing your starter to the final bake – you'll build confidence with each step. Remember, sourdough is a journey, and every loaf teaches you something new. Don't be discouraged by imperfections; they are part of the learning process. This beginner-friendly approach emphasizes consistency and understanding the dough, setting you up for success in baking easy sourdough bread repeatedly.
Ingredients for Simple Sourdough Bread
To bake a standard loaf of easy sourdough bread, you'll need just four core ingredients. The precise quantities can be adjusted based on the size of loaf you desire, but here are approximate amounts for one loaf, often referred to as a "baker's percentage" formula starting with the flour weight. You'll need about 500 grams of strong bread flour, which has a higher protein content essential for developing gluten structure.
You will also need approximately 350 grams of water, ideally non-chlorinated, as chlorine can potentially inhibit your starter's activity. This gives us a hydration level of around 70%, a good starting point for beginners. Crucially, you'll need about 100 grams of active, bubbly sourdough starter (levain) – this is your leavening agent. Finally, you'll need about 10 grams of fine sea salt or kosher salt, which adds flavor and helps control the fermentation rate.
Equipment Needed for Baking Sourdough at Home
Baking easy sourdough bread requires a few key pieces of equipment, some of which you likely already own. A digital kitchen scale is perhaps the most essential tool, as measuring ingredients by weight (especially flour and water) is far more accurate than by volume, leading to more consistent results. You'll also need a large mixing bowl, preferably made of glass or plastic, large enough to accommodate the dough as it ferments and expands significantly.
Other helpful items include a dough scraper or bench knife for handling the sticky dough, a proofing basket (banneton or brotform) or a bowl lined with a floured towel for the final rise, and a sharp blade (like a lame or razor blade) for scoring the dough before baking. For achieving that coveted crispy crust, baking in a Dutch oven or a heavy pot with a lid is highly recommended, as it traps steam around the loaf during the initial phase of baking.
Step-by-Step Guide to Baking Easy Sourdough Bread
Baking easy sourdough bread follows a general timeline, although flexibility is key, adapting to your schedule and your starter's activity. The process involves several distinct stages, each crucial for developing flavor, structure, and rise. We'll walk through each step, providing details to help you understand what's happening and how to achieve the best results.
From activating your starter to the final cooling, patience and observation are your greatest allies. Don't rush the fermentation steps; they are where the magic happens, building the complex flavors and gases needed for a light, airy crumb. Follow these steps, and you'll be well on your way to baking a beautiful, delicious loaf of homemade sourdough.
Step 1: Preparing the Levain (Sourdough Starter)
Your sourdough starter is the heart of your bread. Before you can bake, your starter needs to be active and vigorous, full of bubbles and showing signs of life. This typically means feeding it 4-12 hours before you plan to mix your dough, allowing it to reach its peak activity, often indicated by it doubling or tripling in size and developing a domed top before slowly starting to fall.
To prepare your levain for baking, take a small amount of your mature starter (e.g., 20 grams) and feed it with fresh flour and water. A common feeding ratio is 1:1:1 by weight (starter:water:flour), so you might mix 20g starter with 20g water and 20g flour. Let this mixture sit at room temperature until it is bubbly, active, and approximately doubled in size – this is your active levain ready for mixing into the dough.
Feeding Your Starter for Optimal Rise
Consistent feeding is key to maintaining a healthy, active starter capable of leavening your easy sourdough bread. The standard feeding ratio is 1 part starter to 1 part water to 1 part flour by weight (e.g., 50g starter, 50g water, 50g flour). Use lukewarm water (around 75-80°F or 24-27°C) as it helps the yeast and bacteria become active more quickly.
After feeding, stir the mixture thoroughly until no dry flour remains, then scrape down the sides of the jar and loosely cover it. Leave it at room temperature. An active starter fed this way should typically double or triple in size within 4-8 hours at a room temperature of around 75°F (24°C). You'll know it's ready to use when it's bubbly, has a pleasant, slightly tangy aroma, and passes the float test (a small dollop floats in water).
Reviving a Neglected Starter
If your starter has been dormant in the refrigerator for a while, it will need several feedings to become active enough to bake easy sourdough bread. Take a small amount (e.g., 20-30 grams) of the refrigerated starter and discard the rest (or use it in discard recipes). Feed this small amount with equal parts flour and water by weight, as described above (e.g., 30g starter, 30g water, 30g flour).
Stir well, cover loosely, and leave at room temperature. Wait until it shows significant activity (bubbles, some rise) before feeding again. This might take 12-24 hours for the first feeding. Once it starts showing signs of consistent activity within 8-12 hours after feeding, repeat the feeding process 2-3 times over 1-2 days. This consistent attention will revive the microbial community, making it strong enough to leaven your dough effectively.
Step 2: Mixing the Dough for Sourdough Bread
Mixing the dough for easy sourdough bread involves combining the main ingredients in stages. This process is crucial for beginning the gluten development that gives the bread its structure and chewiness. Unlike commercial yeast doughs that might require vigorous kneading, sourdough often benefits from a gentler approach combined with rest periods.
The goal is to fully hydrate the flour and evenly distribute the starter, water, and salt throughout the mixture. This initial mixing sets the stage for the subsequent fermentation and shaping steps. Proper mixing ensures that the dough has the right consistency and strength to capture the gases produced by the starter, leading to a well-risen loaf.
Autolyse: Hydrating the Flour for a Better Texture
The autolyse step is a simple yet powerful technique used in many sourdough recipes to improve dough handling and texture. It involves mixing only the flour and water together until just combined, without adding the salt or starter. Let this mixture rest for 30 minutes to an hour. During this rest, the flour absorbs the water fully, and enzymatic activity begins to break down starches into sugars and proteins, initiating gluten development without any mechanical work.
Performing an autolyse results in a dough that is smoother, more extensible (stretchy), and less sticky, making subsequent mixing and handling much easier. It also helps create a more open crumb structure in the final bread. For this easy sourdough bread recipe, combine your 500g flour and 350g water in your mixing bowl, mix until no dry spots remain, cover, and let it rest for at least 30 minutes.
Combining the Ingredients: Achieving the Right Consistency
After the autolyse period, it's time to incorporate the active sourdough starter and the salt into the dough. Add the 100g active levain and 10g salt to the autolysed dough. Mix everything together thoroughly. This can be done by hand using the "pincer" method (pinching and squeezing the dough to incorporate ingredients) or by folding the dough over itself repeatedly in the bowl.
Continue mixing until the salt and starter are evenly distributed and the dough starts to come together into a cohesive mass. It will be quite sticky at this stage, which is normal for high-hydration doughs. Work the dough in the bowl for a few minutes until it feels slightly smoother and has some initial resistance. The goal isn't full gluten development yet, but rather a homogenous mixture ready for bulk fermentation.
Step 3: Bulk Fermentation: Developing Flavor and Structure
Bulk fermentation, also known as the first rise, is the longest and arguably most critical stage in baking easy sourdough bread. This is when the wild yeasts and bacteria in your starter are most active, producing carbon dioxide gas that leavens the dough and organic acids that develop the characteristic sourdough flavor and improve the dough's structure and extensibility.
The duration of bulk fermentation varies significantly depending on the ambient temperature and the activity of your starter, but it typically ranges from 4 to 8 hours at room temperature (around 70-75°F or 21-24°C). During this time, the dough will increase significantly in volume (ideally by 50-100%) and develop strength through a series of folds.
The Importance of Stretch and Folds
Stretch and folds are a technique used during bulk fermentation to build strength and structure in the dough without intensive kneading. This process helps align the gluten network, making the dough more elastic and capable of holding its shape and trapping gases. For this easy sourdough bread, you'll perform 3-4 sets of stretch and folds during the first 2-3 hours of bulk fermentation.
To perform a stretch and fold, wet your hands slightly to prevent sticking. Grab one edge of the dough, gently stretch it upwards, and fold it back over the center of the dough. Rotate the bowl a quarter turn and repeat this process with the new edge. Do this 4 times per set (once for each side of the dough). Allow the dough to rest for 30-45 minutes between sets. This gentle handling builds strength progressively.
Identifying Signs of Proper Fermentation
Knowing when bulk fermentation is complete is crucial for baking successful easy sourdough bread. The dough should have increased noticeably in volume, typically by 50% to 100% depending on temperature and starter strength. Visually, the surface should appear smoother and may show small bubbles.
A reliable test is the "poke test." Lightly flour your finger and gently press it into the dough about half an inch deep. If the indentation slowly springs back only partially, the dough is properly fermented and ready for shaping. If it springs back completely, it needs more time. If the indentation stays completely, it might be slightly over-fermented, but you can often still salvage the loaf.
Step 4: Shaping Your Sourdough Bread Loaf
Once bulk fermentation is complete, the dough needs to be shaped into its final form before proofing. Proper shaping creates tension on the surface of the dough, which helps the loaf hold its structure during baking and contributes to a good oven spring. This step involves two main phases: pre-shaping and final shaping.
Handling the dough gently is important during shaping to avoid degassing it too much. The goal is to create a smooth, taut surface on the outside while maintaining the airy structure developed during fermentation. Mastering shaping takes practice, but even imperfectly shaped loaves of easy sourdough bread are delicious!
Pre-Shaping Techniques
After bulk fermentation, gently turn the dough out onto a lightly floured surface. The first step is pre-shaping, which helps to organize the gluten structure and make the final shaping easier. For a standard loaf, you'll typically pre-shape the dough into a rough ball or boule.
Using a bench scraper or your hands, gently round the dough into a loose ball by pulling the edges underneath. Allow the dough to rest, uncovered, for 20-30 minutes. This rest period, called the "bench rest," allows the gluten to relax, making the dough pliable enough for the final shaping without tearing. This simple step significantly improves the final loaf shape.
Final Shaping: Creating a Boule or Batard
After the bench rest, the dough is ready for final shaping into either a round loaf (boule) or an oval loaf (batard). Lightly flour your work surface again. Gently flatten the pre-shaped dough into a rough rectangle or circle, being careful not to push out all the gas.
For a boule, fold the top edge down towards the center, then fold the bottom edge up over the top fold. Then, gently cup your hands around the dough and rotate it against the surface, creating tension on the outside and forming a smooth, tight ball. For a batard, fold one side over to the center, then the other side over that, and finally roll the dough seam-side down, sealing the seam and creating tension along the length. Place the shaped loaf seam-side up in your prepared proofing basket.
Step 5: Proofing: Preparing the Dough for Baking
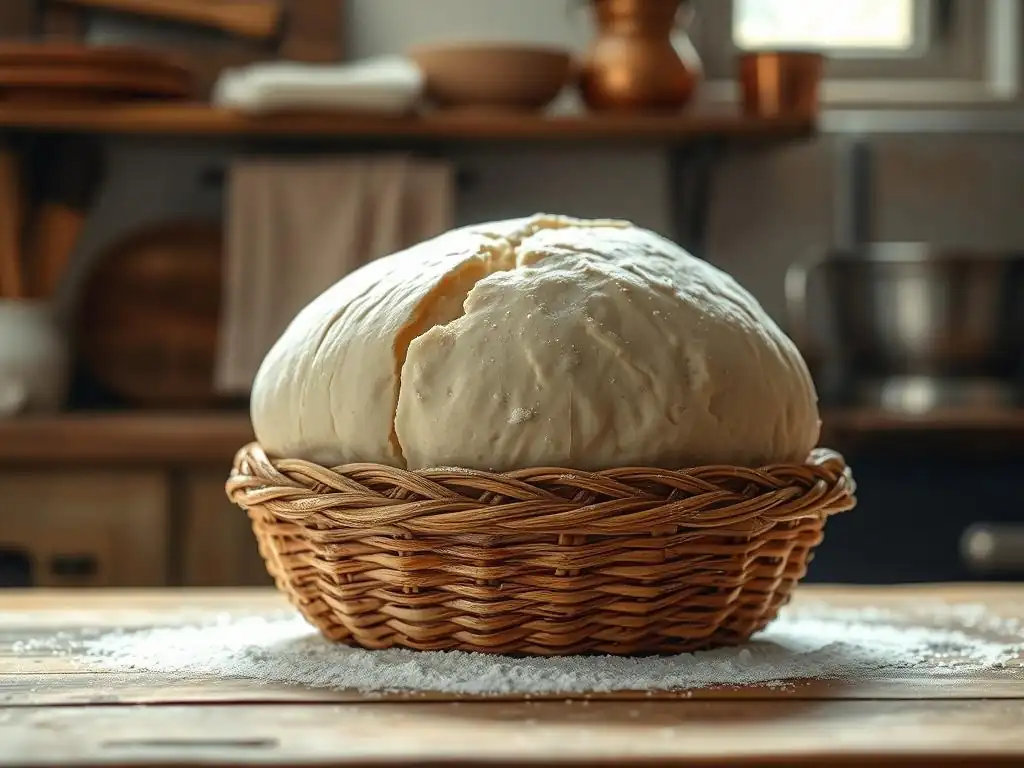
Proofing, also known as the final rise or retarding, is the final fermentation stage before baking your easy sourdough bread. During proofing, the dough continues to ferment slowly, developing more flavor and reaching the optimal state of expansion for baking. This step is typically done in a proofing basket and often takes place in a cool environment, such as the refrigerator.
Cold proofing (refrigeration) slows down the fermentation significantly, allowing for longer flavor development (often 8-12 hours or even up to 24 hours). It also makes the dough easier to handle and score before baking. Alternatively, a shorter proof at room temperature (1-3 hours) is possible, but requires careful monitoring to prevent over-proofing.
Proofing Basket Options: Banneton vs. Brotform
Proofing baskets, commonly known as bannetons or brotforms, are used to support the shaped dough during its final rise and help it maintain its shape. They also impart a lovely pattern on the surface of the loaf. Bannetons are traditionally made from coiled rattan, while brotforms can be made from wood pulp or plastic.
Rattan bannetons are the most common and should be well-floured (rice flour works best as it's less likely to stick) before placing the dough inside. The coils leave rings on the dough's surface. Wood pulp brotforms are more solid and don't typically require heavy flouring, leaving a smoother surface. Both types serve the same purpose: providing structure during proofing and absorbing a small amount of surface moisture, contributing to a better crust on your easy sourdough bread.
Determining When the Dough is Ready to Bake
Knowing exactly when your dough is perfectly proofed is a skill that comes with practice, but there are reliable indicators. The dough should look noticeably larger than when you shaped it, feeling airy and slightly puffy. For a cold-proofed loaf straight from the fridge, it should still feel firm but show some signs of expansion.
The most common test is the "poke test" again, but this time you're looking for a different result. Gently press a floured finger into the side of the dough. If the indentation slowly springs back about halfway, your dough is likely ready to bake. If it springs back fully, it needs more time. If it doesn't spring back at all and feels very fragile, it might be over-proofed (though still potentially bakeable, just handle with extra care).
Step 6: Baking Your Easy Sourdough Bread
Baking is the grand finale where your patient work transforms into a beautiful, edible loaf of easy sourdough bread. The goal is to achieve maximum oven spring, a crispy crust, and a well-cooked interior. This is typically done at a high temperature, often utilizing steam during the initial phase of baking.
Using a preheated Dutch oven is the most common and effective method for home bakers to create the necessary steamy environment that allows the crust to expand fully before setting. This steam keeps the surface pliable, allowing the dough to rise dramatically in the hot oven.
Preheating Your Oven and Dutch Oven
Proper preheating is essential for a successful bake. Place your Dutch oven (with the lid on) in your oven while it's still cold. Preheat your oven to a high temperature, typically around 450-475°F (230-245°C). Allow the oven and the Dutch oven to preheat for at least 30-45 minutes after the oven reaches the target temperature.
This ensures that the Dutch oven is scorching hot, which is critical for providing the initial burst of heat and creating the steamy environment when the lid is on. Baking on a cold Dutch oven will result in significantly less oven spring and a less crispy crust on your easy sourdough bread.
Scoring the Dough: Creating Beautiful Designs
Scoring involves making cuts on the surface of the dough just before it goes into the oven. This serves both a functional and aesthetic purpose. Functionally, scoring allows the dough to expand predictably in the oven, preventing blowouts and directing the oven spring. Aesthetically, you can create beautiful patterns, from simple slashes to intricate designs.
Use a sharp blade, like a lame or a fresh razor blade, held at a shallow angle (around 30 degrees) to the dough surface. Make quick, confident cuts. For a basic boule, a simple cross or a single deep slash works well. For a batard, multiple diagonal slashes are common. Deeper cuts encourage more expansion, while shallow cuts are more decorative.
Baking with Steam: Achieving a Crispy Crust
Baking in a preheated Dutch oven is the easiest way to create the necessary steam for a crispy crust on your easy sourdough bread. Carefully remove the hot Dutch oven from the oven. Gently invert the proofed dough into the hot Dutch oven. Quickly score the dough as desired.
Place the lid back on the Dutch oven and carefully transfer it back into the preheated oven. Bake with the lid on for the first 20 minutes at 450-475°F (230-245°C). This traps the moisture released by the dough, creating steam. After 20 minutes, carefully remove the lid and continue baking uncovered for another 20-25 minutes, or until the crust is deep golden brown and the internal temperature reaches around 200-210°F (93-99°C).
Step 7: Cooling and Enjoying Your Homemade Sourdough Bread
You've done it! You've baked a beautiful loaf of easy sourdough bread. While the aroma is incredibly tempting, resisting the urge to slice into it immediately is crucial for the best texture and flavor. The bread is still undergoing important structural changes as it cools.
Allowing the bread to cool completely on a wire rack ensures that the internal moisture redistributes evenly, preventing a gummy texture. It also allows the flavors to fully develop and the crust to firm up properly. Patience is a virtue in baking, especially in this final step.
The Importance of Cooling Completely
Once your homemade sourdough bread is out of the oven, immediately transfer it to a wire cooling rack. This allows air to circulate around the entire loaf, preventing the bottom crust from becoming soggy from trapped steam. The internal temperature will continue to drop, and the structure of the crumb will set.
Attempting to slice the bread while it's still hot often results in a gummy, dense texture because the starches haven't fully set. For best results, allow a standard-sized loaf to cool for at least 2-3 hours, or even longer for very large loaves, before slicing. This cooling period is essential for achieving the desired chewy crumb and crispy crust of easy sourdough bread.
Serving Suggestions for Sourdough Bread
Once your easy sourdough bread is completely cool, it's ready to be enjoyed in countless ways. Its tangy flavor and sturdy texture make it incredibly versatile. A simple slice toasted and slathered with butter is a classic for a reason, highlighting the bread's natural goodness.
Consider using it as the base for open-faced sandwiches, bruschetta, or simply served alongside soups, stews, or salads. It makes excellent croutons or breadcrumbs if you have any leftover. The slight acidity of sourdough also pairs wonderfully with cheeses, cured meats, and fresh vegetables, making it a perfect accompaniment to many meals.
Tips and Tricks for Perfect Sourdough
Achieving consistently perfect easy sourdough bread involves understanding a few key principles and being willing to experiment slightly. While the basic recipe provides a solid foundation, paying attention to details and adapting techniques can significantly improve your results. Here are some tips to help you elevate your sourdough game.
From mastering the crust to coaxing out deeper flavors, these insights can help you troubleshoot common issues and achieve the characteristics you desire in your homemade loaves. Remember that every kitchen environment and starter is unique, so observing your dough and learning to respond to its cues is vital.
Achieving a Crispy Crust: Secrets Revealed
A hallmark of great easy sourdough bread is a thick, crispy crust that shatters slightly when you slice into it. The primary secret to achieving this at home is baking in a hot, steamy environment. As discussed, a preheated Dutch oven is the most effective tool for trapping steam around the loaf during the crucial first phase of baking.
Ensure your oven and Dutch oven are fully preheated to a high temperature (450-475°F / 230-245°C) for at least 30-45 minutes. Baking with the lid on for the initial 20 minutes creates the necessary steam. Once the lid is removed, continuing the bake at a slightly lower temperature (around 425°F / 220°C) allows the crust to fully brown and crisp up. Some bakers also mist the surface of the dough lightly with water just before baking for an extra boost of steam.
Developing a Complex Flavor Profile
The characteristic tang of easy sourdough bread comes from the lactic acid bacteria in your starter, which produce lactic and acetic acids during fermentation. The balance and intensity of these acids are influenced by several factors, most notably the fermentation time and temperature. Longer, cooler fermentation periods (like cold proofing in the refrigerator for 12-24 hours) tend to develop more acetic acid, resulting in a stronger, more pronounced tang.
Using a blend of flours can also impact flavor. While a basic recipe uses strong bread flour, incorporating a percentage of whole wheat flour (e.g., 10-20%) or rye flour into your dough or starter can add nutty, earthy undertones and contribute to a more complex flavor profile. Experimenting with different flours and adjusting bulk fermentation and proofing times will help you find the flavor balance you prefer in your homemade sourdough.
Substituting Different Types of Flour
While strong bread flour is recommended for beginners due to its high gluten content, you can absolutely experiment with substituting other types of flour in your easy sourdough bread recipe. Substituting a portion of the bread flour with whole wheat flour (start with 10-20% of the total flour weight) will add more flavor, nutrition, and a denser crumb. Keep in mind that whole wheat absorbs more water, so you might need to slightly increase the hydration.
Using rye flour (even a small percentage, like 5-10%) will impart a distinct tangy flavor and contribute to a slightly stickier dough. You can also experiment with adding small amounts of other grains or seeds. Remember that substituting flours, especially those with lower gluten content like rye or spelt, will affect the dough's structure and handling, potentially resulting in a less open crumb than a pure white flour loaf.
Adjusting Baking Time for Different Oven Types
Baking times and temperatures can vary significantly between different oven types. The times suggested in this easy sourdough bread recipe (20 minutes covered, 20-25 minutes uncovered at high heat) are based on a conventional electric or gas oven, often using a Dutch oven. If you have a convection oven, you may need to reduce the temperature by about 25°F (15°C) and potentially shorten the baking time, as convection fans circulate hot air, leading to faster and more even cooking.
Deck ovens or pizza ovens, which bake directly on a hot stone or surface, often require slightly different techniques and timings. If you are not using a Dutch oven and are instead baking on a baking stone with added steam (using a tray of hot water or ice cubes), you might need to adjust the initial steaming time and overall bake time. Always use visual cues (crust color) and internal temperature (200-210°F / 93-99°C) as the most reliable indicators of doneness, regardless of your oven type.
Troubleshooting Common Sourdough Baking Problems
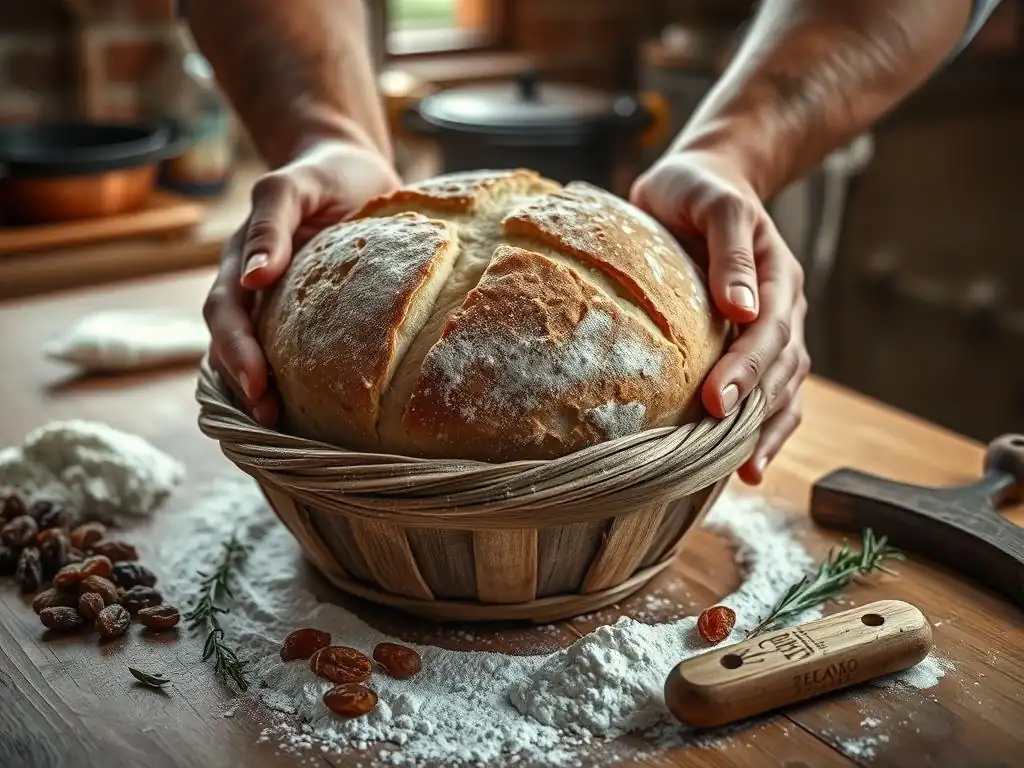
Baking easy sourdough bread, like any craft, comes with a learning curve. It's normal to encounter challenges along the way. Understanding the potential causes of common problems can help you diagnose what went wrong and adjust your technique for your next bake. Don't get discouraged by less-than-perfect loaves; each one is an opportunity to learn.
Identifying the root cause of issues like a dense crumb, flat loaf, or gummy texture is key to improving your results. With a little observation and adjustment, you can overcome these hurdles and consistently bake delicious homemade sourdough.
Dense Bread: Causes and Solutions
A dense crumb in your easy sourdough bread, lacking the desired open structure, can be frustrating. One common cause is an inactive or weak sourdough starter that wasn't strong enough to leaven the dough effectively. Ensure your starter is bubbly and passes the float test before mixing your dough. Another cause is insufficient bulk fermentation; the dough didn't have enough time to develop structure and gas before shaping.
Under-proofing during the final rise can also lead to density, as the dough didn't reach its full potential for expansion. Additionally, insufficient gluten development due to not enough stretch and folds or using flour with too low protein content can contribute to a tight, dense crumb. Ensure you are using strong bread flour and performing enough gentle folds during bulk fermentation.
Flat Loaf: Understanding Why Your Bread Didn't Rise
A loaf of easy sourdough bread that spreads out rather than rising upwards in the oven (poor oven spring) can be caused by several factors. Over-proofing is a frequent culprit; if the dough ferments for too long during the final rise, the gluten structure can weaken and collapse, leaving it unable to hold its shape when baked.
Another reason could be weak dough structure, possibly due to insufficient stretch and folds during bulk fermentation or handling the dough too roughly during shaping, which deflates the gas bubbles. A starter that isn't sufficiently active will also result in a flat loaf, as it can't produce enough gas to lift the dough. Ensure your starter is vigorous, build sufficient strength in the dough, and monitor proofing times carefully.
Gummy Texture: How to Avoid It
A gummy or wet texture inside your easy sourdough bread, even after it looks baked, is often a sign of under-baking or insufficient cooling. If the bread doesn't bake long enough, the starches don't fully gelatinize and set, resulting in a sticky, wet interior. Ensure your oven is accurately calibrated and that you are baking until the internal temperature reaches 200-210°F (93-99°C).
Another significant factor is not allowing the bread to cool completely on a wire rack. Slicing into a hot loaf traps steam and moisture inside, leading to a gummy texture. Resist the urge and let it cool for at least 2-3 hours. Using a very high hydration percentage in your dough can also contribute to a moister, potentially gummier crumb if not baked thoroughly.
Burnt Crust: Prevention and Recovery
A burnt or excessively dark crust on your easy sourdough bread while the interior is still undercooked indicates that the surface is cooking too quickly relative to the inside. This is often caused by baking at too high a temperature for the entire duration or positioning the loaf too close to a heating element.
To prevent a burnt crust when using a Dutch oven, you can reduce the oven temperature slightly after removing the lid for the uncovered bake (e.g., from 475°F to 425°F or 245°C to 220°C). If baking on a stone, you can loosely tent the loaf with aluminum foil for the latter part of the bake to protect the crust. If the crust does get too dark but the inside isn't done, you can try lowering the temperature significantly and continuing to bake, tented with foil if necessary, until the internal temperature is reached.
Storing and Enjoying Your Easy Sourdough Bread
Once your beautiful loaf of easy sourdough bread has cooled completely, proper storage is key to maintaining its freshness, texture, and flavor. Unlike commercial bread with preservatives, homemade sourdough has a shorter shelf life but stores quite well if handled correctly.
Knowing the best ways to store your loaf, how to revive it if it starts to go stale, and creative uses for any leftovers ensures you can enjoy every last crumb of your hard work.
Best Practices for Storing Sourdough
The best way to store easy sourdough bread to maintain its crispy crust and chewy interior depends on how quickly you plan to eat it. For consumption within 1-2 days, simply storing the loaf cut-side down on a cutting board is often sufficient to protect the exposed crumb.
For slightly longer storage (up to 3-4 days), a linen bread bag or a paper bag works well. These allow the crust to breathe, helping to keep it crispier than plastic. Avoid airtight plastic bags or containers at room temperature, as they trap moisture and will soften the crust and can encourage mold growth. If you won't finish the loaf within a few days, freezing is the best option.
Reheating and Refreshing Stale Bread
If your easy sourdough bread has lost its initial crispness and started to become a bit stale, you can often refresh it beautifully. For a whole or half loaf, lightly mist the crust with water (using a spray bottle) and place it directly in a preheated oven at 350-375°F (175-190°C) for 10-15 minutes, or until the crust is crispy again and the interior is warmed through.
Individual slices can be refreshed in a toaster or under the broiler for a few minutes. If the bread is quite hard, a quick dip under running water (just the crust, not soaking the crumb) before refreshing in the oven can work wonders. This process re-activates some of the moisture in the crust, giving it a second life.
Creative Ways to Use Leftover Sourdough Bread
Even if your easy sourdough bread is past its prime for slicing, it's far too delicious to waste! Stale sourdough is perfect for making croutons. Cube the bread, toss with olive oil, herbs, salt, and pepper, and bake until golden and crispy – fantastic on salads or soups.
It also makes excellent breadcrumbs; simply process dried cubes in a food processor. Consider using leftover slices for strata (a savory bread pudding) or panzanella (an Italian bread salad). Sourdough's robust flavor stands up well in these dishes. French toast is another great option, as the slightly stale bread absorbs the custard well, and the sourdough tang adds an interesting twist.
Frequently Asked Questions
What exactly is Pain de Campagne, and what makes it "French country bread"?
Pain de Campagne is a rustic French bread, often referred to as "country bread." It's known for its slightly tangy flavor and hearty crust, typically made with a mix of flours.
How is "Easy French country bread" different from other types of bread?
This recipe focuses on simplicity. Unlike traditional Pain de Campagne, this version uses fewer steps and more readily available ingredients, making it accessible to home bakers.
What are the key ingredients needed to make this easy Pain de Campagne?
The essential ingredients include bread flour, whole wheat flour, water, salt, and yeast. Some variations might include a small amount of rye flour for added flavor.
I'm a beginner baker. Is this recipe truly "easy" enough for me to handle?
Yes! This recipe is designed with beginners in mind. The step-by-step instructions and simplified techniques make it a great starting point for learning to bake bread.
Can I customize this easy French country bread recipe?
Absolutely! You can experiment with different flours, such as adding a bit of rye. You can also adjust the hydration level slightly or incorporate seeds or herbs for added flavor.
Final Reflection: The Simple Joy of a Perfectly Crusty Loaf
The enduring appeal of homemade bread, particularly a rustic French country loaf, lies not just in its delicious taste, but in the tangible connection it fosters with tradition and self-sufficiency. In a world increasingly dominated by convenience, the act of crafting something beautiful and nourishing from simple ingredients remains profoundly satisfying. This journey into baking Pain de Campagne highlights the accessibility of this seemingly complex process, proving that even beginners can achieve impressive results.
The process of kneading, shaping, and watching the dough rise is a meditative experience, a quiet counterpoint to the frenetic pace of modern life. It's a reminder of the slower rhythms of the past, a connection to generations of bakers who have perfected this craft. Bread is the staff of life,
a simple phrase, yet it encapsulates the profound significance of this staple food, its ability to nourish not only the body but also the soul. The impact of this simple act extends beyond the individual; sharing a warm loaf with loved ones creates a shared experience, a moment of connection in an increasingly disconnected world.
Now, consider your own kitchen. Imagine the aroma of freshly baked bread filling your home, the satisfying crackle of the crust as you slice into it. Don't let the perceived complexity deter you. This article has shown you that baking Pain de Campagne is within your reach. Embrace the challenge, experiment with the recipe, and discover the simple joy of creating something delicious and meaningful with your own two hands. The reward? A crusty loaf of bread, and a deeper connection to the timeless art of baking.
Unleash Your Inner Boulanger: Bake Your Own Pain de Campagne!
Thanks for joining us on this delicious journey into the world of Pain de Campagne! We hope you've gained the confidence to tackle this seemingly complex bread. Now it's time to put your newfound skills to the test.
- Bake your own Pain de Campagne! Use the recipe from the article as your guide, and don't be afraid to experiment with different flours or additions. This is your chance to create a truly personal loaf.
- Share your baking journey! Post a picture of your finished loaf on social media using #BakeWithEasePainDeCampagne and tag us — we'd love to see your creations!
- Explore other rustic bread recipes on our website. We've got a whole library of delicious options waiting for you, from sourdough to ciabatta.
Ready to take on the challenge and become a Pain de Campagne master? What unique ingredient will you add to your next loaf?