
Decode Sugar Crystallization: An Essential Skill for Bakers

Welcome to BakeWithEase, where we unlock the secrets to baking success! Ever wondered why your caramel turned grainy or your fudge lost its smooth texture? Today, we're diving deep into the science behind a common baking hurdle: sugar crystallization. Discover essential sugar crystallization tips for beginners and banish grainy textures forever. Ready to master this crucial skill? Let's get started!
- Mastering Caramel: Techniques and Troubleshooting
- Understanding Caramel: A Baker's Essential Guide
- Mastering Caramelization: Essential Techniques for Baking Success
- Caramelization Tips for Beginners: Avoid Common Mistakes
- Caramel in Specific Baking Recipes
- Troubleshooting Caramel Problems: A Baker's Checklist
- Advanced Caramel Techniques for Expert Bakers
- Tools and Equipment for Precise Caramel Control
- The Art of Caramel: Practice Makes Perfect
-
Frequently Asked Questions
- What exactly is sugar crystallization in baking, and why does it happen?
- How can I prevent sugar crystallization when making caramel?
- What role does temperature play in sugar crystallization, and how can I control it?
- Are there specific types of sugar that are more prone to crystallization than others?
- What can I do if my sugar mixture has already crystallized?
- Final Reflection: Mastering the Sweet Science of Sugar Crystallization
- Unlock Your Baking Potential: Master Sugar Crystallization!
Mastering Caramel: Techniques and Troubleshooting
Understanding Caramel: A Baker's Essential Guide
What is Caramel and Why is it Important?
Caramel is essentially sugar that has been heated until it undergoes a chemical transformation, developing a rich, complex flavor and a beautiful amber to deep brown color. This process, known as caramelization, breaks down the sugar molecules, creating hundreds of new flavorful compounds. It's a fundamental ingredient in countless desserts, from simple sauces and candies to complex pastries and confections. Understanding how to make caramel is crucial for bakers because it forms the base of many beloved treats like caramel sauce for ice cream, caramel fillings for cakes, and the crunchy topping on crème brûlée.
Beyond its role as a flavor enhancer, caramel provides unique textures. It can be a soft, chewy candy, a hard, brittle toffee, or a smooth, pourable sauce. Its versatility makes it indispensable in the baker's toolkit. A well-executed caramel can elevate a simple dessert into something extraordinary, adding depth, sweetness, and sometimes a hint of bitterness that balances other flavors. For example, a drizzle of perfectly cooked salted caramel can transform plain vanilla ice cream into a gourmet experience, showcasing the power of this simple yet complex ingredient.
The Science of Caramelization: A Baker's Perspective
Caramelization is a complex non-enzymatic browning reaction that occurs when sugar is heated to high temperatures, typically starting around 320°F (160°C) for sucrose. As the temperature rises, the sugar molecules begin to break apart and react with each other, forming new compounds. These compounds are responsible for the characteristic caramel flavor and color. Initially, the sugar melts, and then as heating continues, water is driven off, and the chemical reactions intensify.
This process is distinct from the Maillard reaction, which involves amino acids and sugars and occurs at lower temperatures (like when baking bread crust or searing meat). Caramelization involves only sugars. As the temperature increases further, different flavor compounds develop. Lighter caramel (around 338°F / 170°C) might have nutty or buttery notes, while darker caramel (reaching 350°F / 175°C or higher) develops more intense, slightly bitter, and smoky flavors. The final temperature is critical; exceeding 360°F (182°C) can quickly lead to burning, producing unpleasant bitter compounds.
Mastering Caramelization: Essential Techniques for Baking Success
Controlling Caramelization: Key Factors to Consider
Achieving the perfect caramel requires careful control over a few key variables. The interaction of these factors dictates the speed of the caramelization process and the final outcome, influencing both flavor and color. Mastering these elements is essential for consistent results in baking.
Understanding how temperature, acidity, and time work together allows bakers to manipulate the caramelization process. For instance, even a slight difference in final temperature can dramatically change the flavor profile, from subtly sweet to deeply complex with hints of bitterness. Similarly, the presence of an acid can alter the sugar's structure, affecting how it melts and caramelizes.
Temperature's Role in Caramelization
Temperature is the single most critical factor in caramelization. The process begins when sugar reaches its melting point and continues as the temperature climbs. For granulated sugar (sucrose), this typically starts around 320°F (160°C). As the temperature increases, the sugar breaks down and forms complex flavor compounds.
- Light Caramel:
320-335°F (160-168°C)- Subtle flavor, light golden color. Good for delicate sauces. - Medium Caramel:
335-350°F (168-175°C)- Richer flavor, amber color. Versatile for many applications. - Dark Caramel:
350-360°F (175-182°C)- Intense, slightly bitter flavor, dark brown color. Used for depth in sauces or candies.
Exceeding 360°F (182°C) rapidly leads to burning, producing acrid, unpleasant flavors. Using a reliable candy thermometer is highly recommended to monitor the temperature precisely.
Acidity and Caramelization
The presence of acids can significantly influence the caramelization process. Acids, such as lemon juice, cream of tartar, or even the acidity naturally present in butter, help to break down sucrose into simpler sugars like glucose and fructose. This process, called inversion, actually lowers the temperature at which caramelization occurs and can help prevent crystallization.
Adding a small amount of acid, like a squeeze of lemon juice or a pinch of cream of tartar, is a common sugar crystallization tip for beginners. For example, a teaspoon of lemon juice per cup of sugar can make the sugar melt more smoothly and reduce the likelihood of forming sugar crystals on the sides of the pan. This technique is often used in wet caramel methods or when making hard candies.
Time and its Impact on Caramel Flavor
Time is intricately linked to temperature in the caramelization process. While temperature determines when caramelization starts and its potential endpoint, the duration at specific temperatures influences the depth of flavor development. Slower caramelization at a slightly lower temperature can sometimes yield more nuanced flavors than rapid heating to the same final temperature.
Once the sugar begins to color, the process accelerates rapidly. It can go from a perfect amber to burnt in mere seconds. This is why attentive monitoring and quick action (like removing from heat or adding liquid) are crucial. The total time from melting to reaching the desired color might only be 5-10 minutes for a dry caramel, depending on the heat level and amount of sugar, emphasizing the need for constant vigilance.
Caramelization Techniques for Different Baking Applications
Different baking needs call for different caramelization methods. The two primary techniques are dry caramelization and wet caramelization, each suited for specific applications and offering unique advantages and challenges.
Choosing the right method depends on the desired outcome – a quick, intense flavor development or a more controlled process less prone to initial burning. Many bakers master both techniques to handle a wide range of recipes, from simple sauces to complex sugar work.
Dry Caramelization
Dry caramelization involves heating sugar alone in a pan with no added water. The sugar melts directly and then begins to brown. This method is faster and produces a more intense flavor profile because the water doesn't need to evaporate first. However, it requires careful attention as the sugar can burn easily, especially around the edges.
To perform dry caramelization:
- Pour a layer of sugar into a heavy-bottomed pan.
- Heat over medium heat without stirring initially.
- As edges melt, gently push melted sugar towards the center with a heatproof spatula or swirl the pan.
- Continue until all sugar is melted and the desired color is reached.
- Immediately remove from heat and carefully add any liquids (like cream or butter), standing back as it will bubble violently.
This technique is often used for making brittle or incorporating caramel flavor directly into batters, like in a tarte Tatin where sugar is caramelized in the pan before adding apples.
Wet Caramelization
Wet caramelization involves dissolving sugar in water before heating. The water helps the sugar melt evenly and provides a buffer, reducing the risk of immediate burning. The sugar mixture is heated until the water evaporates, and then the sugar begins to caramelize as the temperature rises past 212°F (100°C).
Steps for wet caramel:
- Combine sugar and water in a heavy-bottomed pan (a common ratio is 2 parts sugar to 1 part water by weight).
- Heat over medium heat, stirring gently only until the sugar is dissolved.
- Stop stirring once boiling begins to prevent crystallization.
- Boil until the water evaporates and the syrup starts to color, then monitor carefully.
- Cook until the desired color is reached, then remove from heat and add other ingredients if making a sauce.
This method is often preferred for making sauces, glazes, or candies where a smoother, more controlled process is desired. It's often considered a good starting point for beginners learning to handle hot sugar, offering a bit more time before the critical caramelization stage begins.
Salted Caramel
Salted caramel isn't a distinct caramelization technique but rather a popular variation created by adding salt to finished caramel. The salt provides a counterpoint to the sweetness, enhancing the overall flavor complexity. This balance of sweet and salty has become incredibly popular in modern baking.
The salt is typically stirred into the caramel after it has reached the desired color and any liquids (like cream or butter) have been incorporated to make a sauce. The amount of salt can vary, but a common starting point is about 1/2 to 1 teaspoon of flaky sea salt per cup of sugar used to make the caramel. Adding the salt at the end preserves its texture and ensures it dissolves properly without interfering with the sugar's melting process.
Caramelization Tips for Beginners: Avoid Common Mistakes
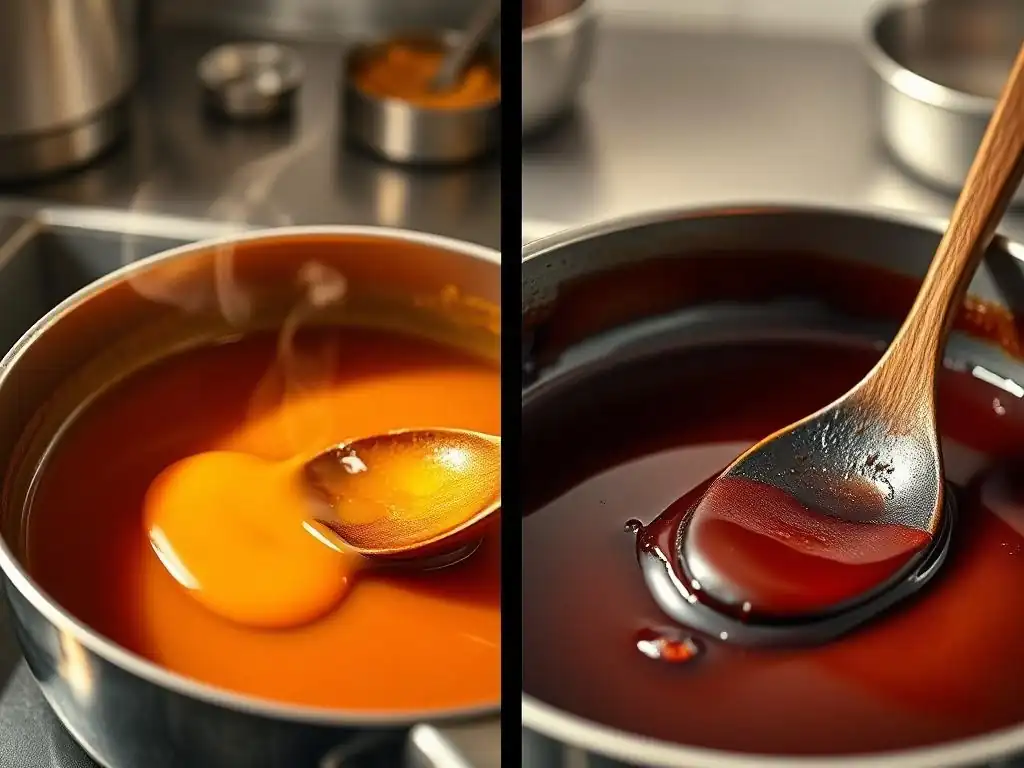
Making caramel can feel intimidating initially, especially dealing with high temperatures and the risk of burning or crystallization. However, with a few key tips and an understanding of common pitfalls, beginners can confidently create delicious caramel. Patience and preparedness are key when starting out.
Focusing on fundamental techniques and learning to recognize the visual cues is vital for new bakers. Don't be discouraged by early failures; even experienced bakers occasionally have a batch go wrong. Understanding why a problem occurred is the first step to preventing it next time, making these sugar crystallization tips beginners can easily implement invaluable.
Common Caramelization Problems and Solutions
Two of the most frequent issues encountered when making caramel are burning and crystallization. Both can ruin a batch and require starting over, but understanding their causes helps in prevention and sometimes, correction.
Addressing these problems proactively, especially preventing sugar crystallization tips beginners can easily follow, saves time and ingredients. A burnt batch is usually unsalvageable, while crystallization can sometimes be fixed if caught early.
Burning: The Enemy of Perfect Caramel
Burning occurs when sugar is heated too high, too quickly, or for too long, particularly past the dark caramel stage (above 360°F / 182°C). Burnt sugar has an acrid, bitter taste and emits a harsh smoke. It's a common mistake, especially with dry caramel or when distracted.
- Cause: Excessive heat, cooking past the optimal temperature, uneven heating.
- Prevention: Use a heavy-bottomed pan for even heat distribution. Monitor temperature with a thermometer. Cook over medium heat, not high. Swirl the pan gently (for dry caramel) or brush down crystals (for wet caramel) to ensure even cooking.
- Solution: Unfortunately, burnt caramel is almost always unsalvageable. The bitter compounds are irreversible. If only a small part is burnt, you might be able to carefully scoop it out, but usually, it's best to discard and start fresh.
Crystallization: Identifying and Correcting the Issue
Crystallization happens when dissolved sugar reverts back to its solid, crystalline state, resulting in a grainy, clumpy texture instead of a smooth liquid caramel. This is a common challenge, particularly for beginners tackling sugar work. Sugar crystallization tips beginners often hear involve controlling stray sugar crystals.
- Cause: Undissolved sugar crystals on the side of the pan falling back into the syrup; stirring the syrup after it has boiled and sugar is dissolved; impurities in the sugar or pan; rapid cooling or jarring the pan.
- Prevention: Ensure all sugar is dissolved before the syrup boils (in wet caramel). Once boiling, do not stir. Use a wet pastry brush to wash down any sugar crystals clinging to the sides of the pan. Use a clean pan and high-quality sugar. Avoid sudden temperature changes or jarring the pan.
- Correction: If crystallization begins, sometimes adding a small amount of hot water (a few tablespoons per cup of sugar used), heating gently, and swirling (without stirring) can redissolve the crystals. This doesn't always work, especially if the whole batch has seized. Prevention is the best approach.
Pro Tips for Preventing Common Caramelization Issues
Beyond the basic techniques, several helpful tricks can significantly improve your chances of making smooth, perfect caramel, especially valuable sugar crystallization tips beginners can adopt from the start. These methods help stabilize the sugar and promote even heating.
Incorporating these simple steps into your caramel-making process can make a huge difference in consistency and quality. They address the common pitfalls of burning and crystallization head-on, leading to more successful batches.
Using Glucose Syrup for Smoothness
Adding a small amount of glucose syrup (or corn syrup) to the sugar and water mixture is an excellent sugar crystallization tip beginners and experienced bakers alike use. Glucose is a different type of sugar molecule that interferes with the ability of sucrose crystals to bond together.
A common ratio is to add about 10-20% glucose syrup relative to the weight of the granulated sugar. For example, for 200g of granulated sugar, you might add 20-40g of glucose syrup. This helps keep the caramel smooth and prevents it from seizing up or crystallizing, making it more stable for sauces and candies.
Adding Butter for Richness
While butter is typically added after the sugar has caramelized to create a sauce, its fat content can also play a small role in preventing crystallization by coating sugar crystals and preventing them from aggregating. More significantly, butter adds richness, flavor, and helps create a smoother, more emulsified sauce.
When adding butter, ensure it's cut into small pieces and added gradually off the heat (or over very low heat) to prevent the caramel from seizing or separating. Adding about 4-6 tablespoons of butter per cup of sugar is common for a rich sauce. The moisture and fat help cool the caramel slightly and stop the cooking process.
The Importance of Even Heat Distribution
Uneven heating is a major culprit for both burning and crystallization. Hot spots in the pan can cause sugar to burn in one area while the rest is still melting or can lead to localized crystallization.
Using a heavy-bottomed, light-colored pan (stainless steel is ideal) helps distribute heat more evenly. The light color allows you to easily monitor the caramel's color change, which is crucial for preventing burning. Ensure your burner size is appropriate for the pan size, and heat the pan evenly before adding sugar (for dry caramel) or starting the heat (for wet caramel). Avoid using thin or dark non-stick pans, which can heat unevenly and make it hard to judge color.
Caramel in Specific Baking Recipes
Caramel is a star ingredient in many classic and contemporary desserts. Its unique flavor and texture profile make it incredibly versatile, pairing well with everything from chocolate and fruit to nuts and dairy. Exploring its use in specific recipes highlights its importance in baking.
Understanding how caramel functions within different recipes provides insight into why specific techniques are used and the desired outcome. Whether it's providing a gooey center or a brittle topping, caramel plays a distinct role.
Caramel and its role in Salted Caramel Brownies
In salted caramel brownies, caramel typically serves as a swirl or layer within the brownie batter, adding a gooey, salty-sweet contrast to the rich chocolate. A soft, pourable caramel sauce is usually made separately and then swirled into the brownie batter just before baking, or sometimes layered between two thin layers of batter.
The caramel needs to be cooked to a medium-amber stage ( around 340-345°F / 170-172°C) to achieve a balance of flavor that complements the chocolate without being too bitter. Adding flaky sea salt after making the sauce is crucial for that characteristic salty pop. The caramel's texture needs to be soft enough to remain slightly gooey after baking, which is often achieved by incorporating butter and cream into the hot caramel.
Caramel and its role in Crème brûlée
Caramel is the signature finishing touch for crème brûlée. It takes the form of a thin, brittle layer of hardened caramel on top of the creamy custard. This is achieved by sprinkling a layer of granulated sugar evenly over the chilled custard and then melting and caramelizing it rapidly using a blow torch or broiler.
The goal is to caramelize the sugar just until it turns a deep amber color and hardens into a glass-like shell when cooled. This typically takes only a minute or two with a blow torch. The contrast between the warm, crunchy caramel and the cold, smooth custard is what makes crème brûlée so delightful. Over-torching will result in a bitter, burnt topping that ruins the delicate custard beneath.
Caramel and its role in Caramel Apples
Caramel apples feature a firm, chewy caramel coating wrapped around a crisp apple. The caramel for apples is cooked to a higher temperature than sauce caramel, typically reaching the firm-ball stage ( around 245-250°F / 118-121°C). This higher temperature results in a thicker, chewier consistency upon cooling.
Making caramel for apples involves cooking sugar, corn syrup (often used to prevent crystallization and add chewiness), butter, and sometimes milk or cream to the precise temperature. Dipping apples requires working quickly before the caramel cools and hardens too much. The caramel needs to be smooth and free of crystals to coat the apples evenly, making solid sugar crystallization tips beginners can use crucial here.
Troubleshooting Caramel Problems: A Baker's Checklist
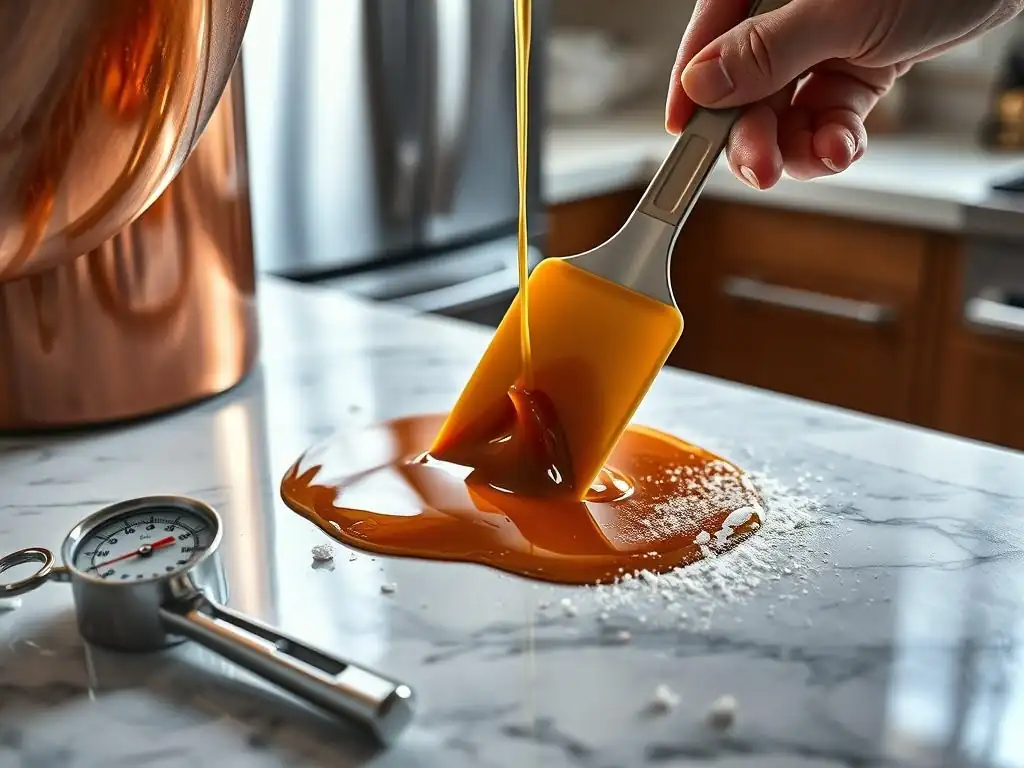
Even with careful technique, caramel can sometimes go wrong. Knowing how to identify issues and attempt fixes can save a batch, or at least help you learn for next time. Having a systematic approach to troubleshooting is key.
A quick checklist can help diagnose the problem and determine the best course of action. Is it burnt? Crystallized? Separated? Each issue has potential causes and limited solutions.
Identifying the Cause of Caramel Issues
Before you can fix a caramel problem (if it's fixable), you need to understand what went wrong.
- Problem: Caramel is dark brown, smoking, smells acrid.
- Cause: Overheated, burnt.
- Problem: Caramel is grainy, clumpy, or seized into a solid mass.
- Cause: Crystallization.
- Problem: Caramel sauce is oily, separated, or won't emulsify after adding butter/cream.
- Cause: Adding cold ingredients too quickly, not stirring vigorously enough when adding liquids, incorrect temperature of caramel or added ingredients.
- Problem: Caramel didn't thicken enough for candy/coating.
- Cause: Not cooked to a high enough temperature.
Knowing the root cause helps prevent the same mistake in the future.
Step-by-Step Guide to Fixing Burnt Caramel
As mentioned, burnt caramel is notoriously difficult, if not impossible, to fix because the chemical changes that cause bitterness are irreversible. However, if you catch it just as it starts to smoke and the edges are darkening excessively while the center is fine, you might attempt a salvage:
- Immediately remove the pan from the heat.
- Carefully and quickly pour the still-good caramel from the center into a clean, heatproof container, trying to leave the burnt bits behind in the pan.
- Do not scrape the bottom of the pan, as this will incorporate burnt bits.
- Proceed with your recipe using the salvaged caramel.
This method is a last resort and only works if a small portion is burnt. Often, the bitter flavor will still permeate the entire batch to some extent.
When to Start Over: Knowing When to Abandon a Batch
Sometimes, the best solution is to cut your losses and start fresh. Knowing when a batch of caramel is unsalvageable saves time and frustration.
Consider starting over if:
- The caramel is significantly burnt and tastes strongly bitter.
- The entire batch has completely crystallized into a solid, opaque mass that won't redissolve even with added hot water.
- A caramel sauce has completely separated into an oily mess that won't come back together after vigorous whisking.
While it's frustrating to discard ingredients, trying to use a faulty batch of caramel will likely ruin the entire dessert you're making. It's better to learn from the mistake and attempt a new batch with more care.
Advanced Caramel Techniques for Expert Bakers
Once comfortable with basic caramelization, experienced bakers can explore more advanced techniques to refine flavors, alter textures, and use specialized equipment. These methods build upon fundamental principles but require a deeper understanding and precision.
Pushing the boundaries of caramel making involves experimenting with different sugars, flavor infusions during the process, and even using vacuum technology to control the cooking environment.
Exploring Different Types of Sugar and their Caramelization Properties
While granulated white sugar (sucrose) is the most common, other sugars caramelize differently, offering unique flavors and characteristics.
- Brown Sugar: Contains molasses, which adds moisture and a distinct flavor. Caramelizes at a lower temperature than white sugar due to the molasses.
- Maple Sugar: Caramelizes to a rich, complex flavor with maple notes.
- Fructose: Caramelizes at a much lower temperature (around
220°F / 105°C) than sucrose, resulting in a sweeter, less complex caramel. Often found in fruits, contributing to their browning when baked. - Isomalt: A sugar substitute often used in sugar sculpture because it's less prone to crystallization and remains clear when caramelized. Caramelizes at a higher temperature than sucrose.
Experimenting with these sugars can yield exciting new flavors and textures in your baking.
Manipulating Caramel for Unique Flavors
Beyond just adding salt, advanced techniques involve infusing flavors during or immediately after caramelization.
- Infused Liquids: Heating cream or butter with aromatics like vanilla beans, star anise, or citrus zest before adding them to the hot caramel.
- Adding Spices/Extracts: Stirring in spices like cinnamon or ginger, or extracts like coffee or almond, after the caramel is off the heat and slightly cooled but still liquid.
- Nut Pastes/Purees: Incorporating finely ground nut pastes or fruit purees into the finished caramel for complex flavor and texture.
These additions must be done carefully to avoid breaking the caramel emulsion or causing it to seize.
Vacuum Caramelization
A highly specialized technique used by some pastry chefs, vacuum caramelization involves cooking sugar in a vacuum environment. Lowering the atmospheric pressure lowers the boiling point of water and the caramelization temperature of sugar.
This allows for caramelization to occur at much lower temperatures (potentially below 212°F / 100°C). The advantage is more precise control over the reaction and the potential to develop different flavor compounds than traditional high-temperature methods, resulting in novel caramel flavors. This requires specialized equipment like a vacuum chamber or rotary evaporator and is not feasible in a home kitchen.
Tools and Equipment for Precise Caramel Control
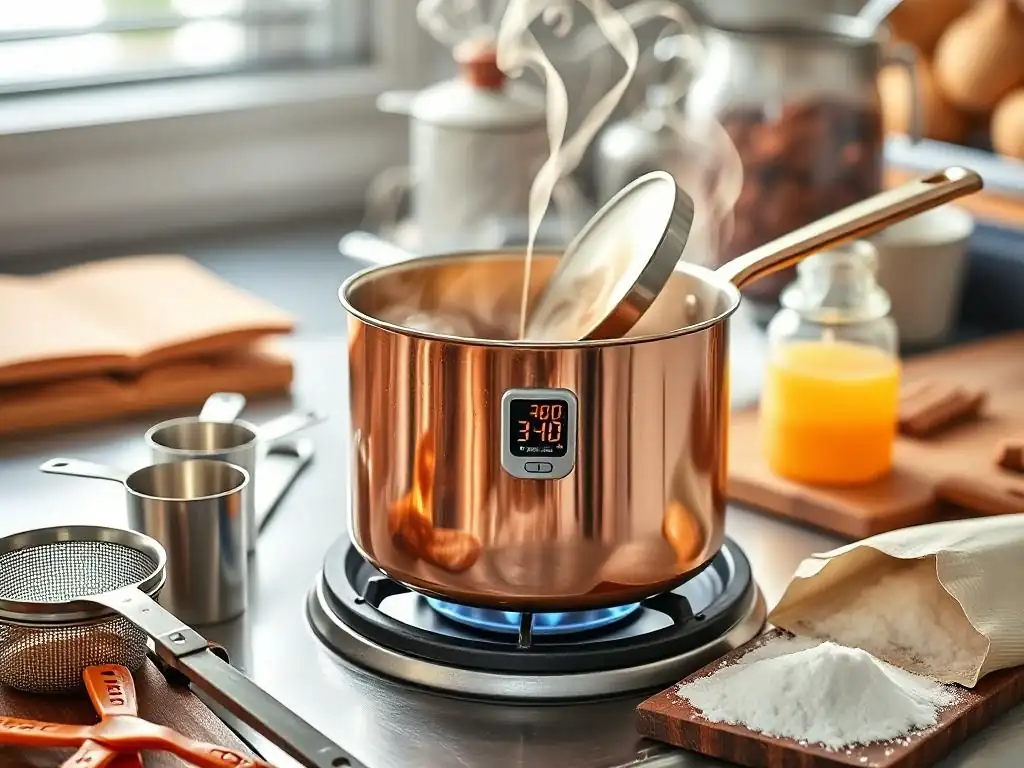
Working with hot sugar requires not only skill but also the right tools. Accurate measurement and temperature monitoring are paramount for consistent, safe caramel making. Investing in a few key pieces of equipment can significantly improve your success rate.
Having reliable tools helps eliminate variables, allowing you to focus on the process itself. This is particularly helpful when implementing sugar crystallization tips beginners need to follow precisely.
Essential Tools for Monitoring Temperature and Color
Precise temperature control is non-negotiable for successful caramel.
- Candy Thermometer: An absolute must-have. Choose one that clips onto the side of the pan and has a clear, easy-to-read scale covering the range needed for sugar work (up to at least
360°F / 182°C). Digital instant-read thermometers can also be used, but a clip-on allows continuous monitoring without holding it. - Heatproof Spatula or Wooden Spoon: Needed for stirring wet caramel initially or gently nudging dry caramel. Must be able to withstand high heat.
- Wet Pastry Brush: Essential for washing down sugar crystals from the sides of the pan when making wet caramel – a crucial sugar crystallization tip for beginners!
Monitoring the color is also key. Using a light-colored stainless steel pan makes judging the amber color much easier than using a dark or non-stick pan.
Choosing the Right Cookware for Caramel Work
The pan you use makes a significant difference in how evenly the sugar heats and caramelizes.
- Heavy-Bottomed Pan: Essential for distributing heat evenly and preventing hot spots that lead to burning. Stainless steel is preferred because its light color allows you to see the caramel's color change accurately.
- Size Matters: Use a pan large enough so the sugar layer isn't too thick (for dry caramel) or the water/sugar mixture doesn't boil over (for wet caramel). A 2-3 quart saucepan is often sufficient for typical home baking quantities.
Avoid using non-stick pans; the dark surface makes color judgment difficult, and the non-stick coating can be damaged by the high heat.
Candy Thermometer Recommendations
When selecting a candy thermometer, look for:
- Accuracy: Read reviews and choose a reputable brand. Inaccurate temperature readings are disastrous for sugar work.
- Range: Ensure it measures up to at least
360°F (182°C). - Clip: A sturdy clip to attach it securely to the side of your pan.
- Clear Scale: Easy-to-read markings, ideally with common candy stages indicated (like soft ball, firm ball, hard crack, caramel).
- Material: Glass or digital options are available. Glass ones are classic but can break; digital ones are fast but require batteries.
Investing in a good quality candy thermometer is perhaps the single best thing a beginner can do to improve their caramel-making success rate.
The Art of Caramel: Practice Makes Perfect
Mastering caramel isn't just about following steps; it's about developing an intuition for the process – recognizing the subtle changes in smell, color, and sound as the sugar transforms. Like any skill in baking, practice is key.
Don't be discouraged by imperfect batches. Each attempt is a learning opportunity. Pay attention to what went wrong and adjust your technique next time. The more you make caramel, the better you'll become at controlling the heat and predicting the outcome.
Experimenting with Caramel Techniques
Once comfortable with the basics, try varying the techniques slightly.
- Make both dry and wet caramel side-by-side to compare their flavors and the process.
- Try making a slightly darker caramel one time and a lighter one the next to taste the difference.
- Experiment with adding different ingredients after caramelization – a bit of sea salt, a splash of whiskey, or some toasted nuts.
These experiments help you understand how small variations impact the final product and discover your preferred methods and flavors.
Developing Your Caramel Skills Over Time
Consistent practice builds confidence and skill. Start with simple caramel sauces, then move on to more complex applications like brittle or caramel candies.
- Keep a baking journal: Note the temperature you reached, the time it took, the pan you used, and the outcome. This helps identify patterns and troubleshoot issues.
- Practice recognizing color changes: Caramel's color is a vital indicator. Learn to distinguish between light amber, medium amber, and dark amber by sight.
- Listen to the sound: The bubbling sound changes as water evaporates and the sugar thickens.
Over time, you'll find yourself relying less on the thermometer and more on your senses, though the thermometer remains an important safeguard.
Resources for Further Learning about Caramel
The world of sugar work is vast! To deepen your understanding of caramel and other sugar techniques:
- Consult reliable baking books focusing on confections and sugar work.
- Explore online baking resources (like BakeWithEase.com!) and reputable culinary websites.
- Look for online courses or videos demonstrating caramel techniques.
Learning from various sources can provide different perspectives and tips, including more advanced sugar crystallization tips beginners might not encounter initially but will find useful as they progress. Continuously seeking knowledge is part of the journey to becoming a great baker.
Frequently Asked Questions
What exactly is sugar crystallization in baking, and why does it happen?
Sugar crystallization is when sugar molecules in a solution re-form into solid crystals. It often happens due to evaporation, agitation, or impurities in the sugar mixture.
How can I prevent sugar crystallization when making caramel?
Prevent crystallization by adding an acid like lemon juice or cream of tartar. These interfere with the sugar molecules' ability to bond and crystallize. Also, avoid stirring once the sugar is dissolved.
What role does temperature play in sugar crystallization, and how can I control it?
Temperature is crucial. High heat accelerates evaporation, increasing the risk of crystallization. Use a candy thermometer to monitor the temperature and avoid overheating your sugar syrup.
Are there specific types of sugar that are more prone to crystallization than others?
Generally, all sugars can crystallize, but granulated sugar is most common. Invert sugar (like corn syrup or honey) is less prone to crystallization because it contains glucose and fructose, which disrupt the sugar lattice.
What can I do if my sugar mixture has already crystallized?
You can try to dissolve the crystals by adding more water and gently heating the mixture. Be careful not to scorch it. Sometimes, starting over with a fresh batch is the best solution.
Final Reflection: Mastering the Sweet Science of Sugar Crystallization
Understanding sugar crystallization isn't just about avoiding grainy textures; it's about unlocking the full potential of your baking. A seemingly simple process, mastering sugar crystallization opens doors to a world of refined textures and flavors, transforming ordinary desserts into extraordinary creations. This knowledge, once considered the domain of experienced pastry chefs, is now readily accessible, empowering home bakers to achieve professional-level results.
The journey of understanding sugar crystallization is a testament to the power of patience and precision in the culinary arts. It's a journey I've personally found both challenging and deeply rewarding. The subtle shifts in temperature, the precise measurements, the careful attention to detail—all contribute to the final outcome. As the old adage goes, The devil is in the details,
and nowhere is this truer than in the delicate dance of sugar molecules. This understanding extends beyond baking; it speaks to a broader appreciation for the scientific principles underlying even the simplest of culinary processes.
Now, it's your turn. Take what you've learned here, experiment with different sugars and techniques, and don't be afraid to embrace the occasional imperfection. Each failed batch is a lesson learned, bringing you closer to mastering this essential skill. Remember the joy of a perfectly smooth caramel, the satisfying crunch of a flawlessly crystallized candy – these are the rewards that await those who dedicate themselves to the sweet science of sugar crystallization. Embrace the challenge, and unlock your potential as a baker.
Unlock Your Baking Potential: Master Sugar Crystallization!
Thanks for diving deep into the world of sugar crystallization with us! We hope you gained valuable insights into preventing those pesky crystals and achieving perfectly smooth results. Now it's time to put your new knowledge into action.
- Experiment with different sugar types and techniques: Try substituting granulated sugar with powdered sugar in your next recipe, or experiment with the cooling techniques discussed in the article. This is your chance to see firsthand how these changes impact your baking.
- Share your crystallization success (or challenges!): Let's build a community of bakers! Share your experiences and photos on social media using #BakeWithEaseCrystals to help others learn.
- Challenge a fellow baker to a crystallization duel: Have a friend try a recipe known for crystallization problems, and see who can master smooth textures! It's a fun, collaborative way to test and improve your skills.
Ready to elevate your baking game? What's the first recipe you'll tackle with your newfound sugar crystallization expertise?