
Mastering Low Hydration Sourdough: Achieving Structure and Flavor

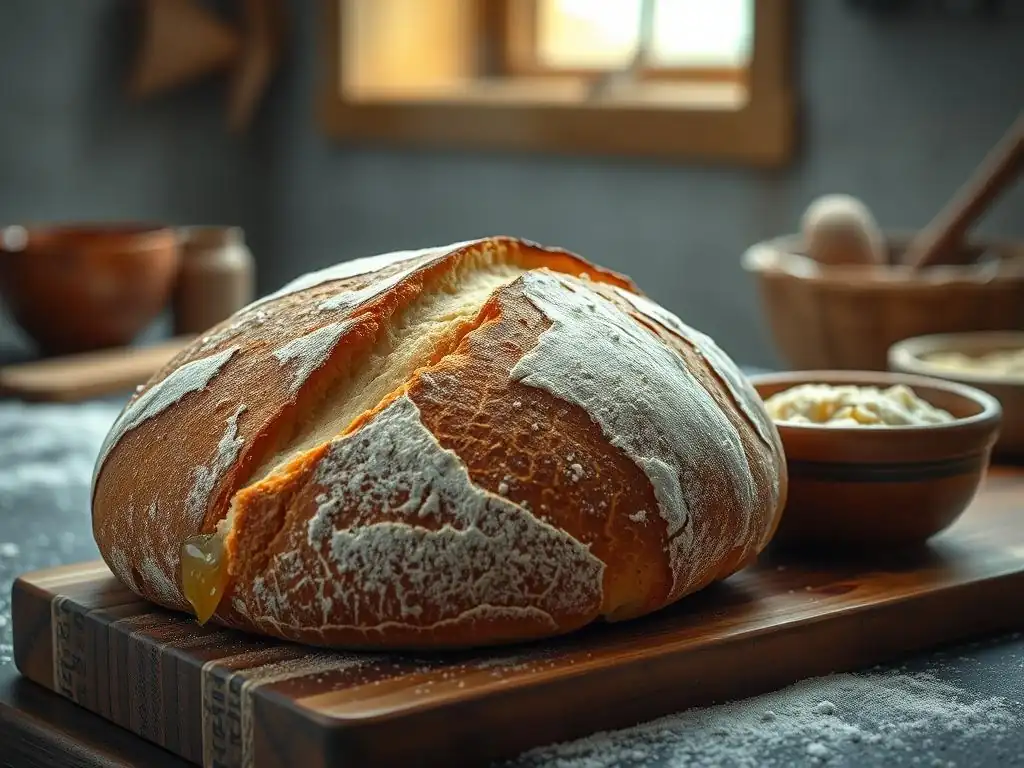
Welcome to BakeWithEase, your trusted companion in the delightful world of baking! Ever wrestled with a sluggish sourdough starter? We're diving deep into the secrets of low hydration sourdough starter recipes, unlocking a world of enhanced flavor and impressive structure. Intrigued? Discover how this simple adjustment can revolutionize your sourdough baking – let's get started!
- Introduction to Low Hydration Sourdough Baking
- The Science Behind Low Hydration Sourdough
- Crafting Your Low Hydration Sourdough Starter
- Baking Bread with a Low Hydration Sourdough Starter
- Flavor Development in Low Hydration Sourdough
- Tips and Tricks for Perfect Low Hydration Sourdough
- Troubleshooting Common Low Hydration Sourdough Problems
- Advanced Low Hydration Sourdough Techniques
- Conclusion: Embrace the Art of Low Hydration Sourdough
-
Frequently Asked Questions
- What is a low hydration sourdough starter?
- Why would I use a low hydration sourdough starter recipe?
- How does a low hydration starter affect the final sourdough loaf?
- What is the ideal hydration percentage for a "low hydration" sourdough starter?
- How do I convert my existing 1:1 sourdough starter to a low hydration starter?
- Final Reflection: The Enduring Allure of Low Hydration Sourdough
- Unleash Your Inner Sourdough Master!
Introduction to Low Hydration Sourdough Baking
Why Bake with a Low Hydration Sourdough Starter?
Baking with a low hydration sourdough starter offers a unique set of advantages that appeal to many bakers, especially those seeking specific textures and handling characteristics in their dough. Unlike high hydration starters, which can be quite loose and challenging to work with, a low hydration starter, often referred to as a stiff starter or pâte fermentée, typically maintains a hydration level below 70% (meaning the water weight is less than 70% of the flour weight).
This lower water content leads to a starter that is thicker, more paste-like, and easier to manage, scoop, and incorporate into doughs without making the final dough excessively wet.
Furthermore, using a low hydration sourdough starter can influence the fermentation process itself. Stiffer starters tend to favor the production of acetic acid over lactic acid. While lactic acid contributes a creamy, yogurt-like tang, acetic acid provides a sharper, more vinegary note. This shift can result in a finished loaf with a distinct, pronounced sourness that many sourdough enthusiasts appreciate. The reduced water activity also slightly slows down microbial activity, which can offer a bit more predictability and control over fermentation times, making it a great technique to explore after mastering basic sourdough methods.
Understanding the Benefits of Low Hydration in Sourdough
Working with low hydration doughs, which naturally stem from using a low hydration starter or formulating recipes with less water overall (often 60-70% hydration for the final dough), provides tangible benefits in dough handling and loaf structure. Doughs with less water are generally less sticky and more manageable during mixing, kneading, and shaping. This makes them particularly forgiving for beginners or those who prefer not to deal with very slack, high-hydration doughs that require more advanced handling techniques like stretch and folds in the bowl.
The reduced water content also significantly impacts the final structure and crust of the baked bread. Lower hydration doughs tend to hold their shape better during proofing and baking, leading to loaves with excellent height and structure. They often produce a tighter, more regular crumb structure compared to the open, irregular holes typical of high hydration loaves. Additionally, low hydration breads frequently develop a thicker, more robust crust, which contributes to a satisfying crunch and helps preserve the loaf's interior freshness for longer.
The Science Behind Low Hydration Sourdough
How Hydration Levels Affect Sourdough Fermentation
Hydration level plays a critical role in the complex microbial ecosystem of a sourdough starter. Water acts as a solvent, facilitating the movement of nutrients and metabolic byproducts for the wild yeasts and lactic acid bacteria (LAB). In higher hydration environments (say, 100% or more), yeast and LAB activity can be very rapid due to the easy availability of water for transport processes. This often leads to faster fermentation and a quicker rise.
Conversely, in a low hydration sourdough starter or dough (typically below 70% hydration), the limited amount of free water slows down the metabolic rate of the microbes. While fermentation is slower, it often results in a different balance of acids produced. The stiffer environment favors the production of acetic acid, which is known for its pungent, vinegary aroma and flavor, contributing significantly to the characteristic "sour" in sourdough. This slower, acid-favoring fermentation can also lead to a more stable dough structure over longer fermentation periods.
The Impact of Reduced Water on Gluten Development in Sourdough
Gluten development is fundamentally dependent on the interaction between water and the proteins (glutenin and gliadin) in flour. Water allows these proteins to hydrate and form the gluten network through mixing or kneading. In doughs with higher hydration, the gluten proteins hydrate more easily and fully, leading to a more extensible, stretchy, and often weaker network that requires careful handling to build strength.
In a low hydration environment, the limited water makes gluten development initially slower and requires more mechanical work (kneading) or time (autolyse/fermentation) to fully hydrate the proteins and build a strong network. However, once developed, the gluten network in low hydration dough is typically tighter and more robust. This strong structure is crucial for trapping the carbon dioxide produced during fermentation, allowing the dough to hold its shape well and achieve good oven spring, contributing to the desirable structure and volume of low hydration sourdough bread.
Crafting Your Low Hydration Sourdough Starter
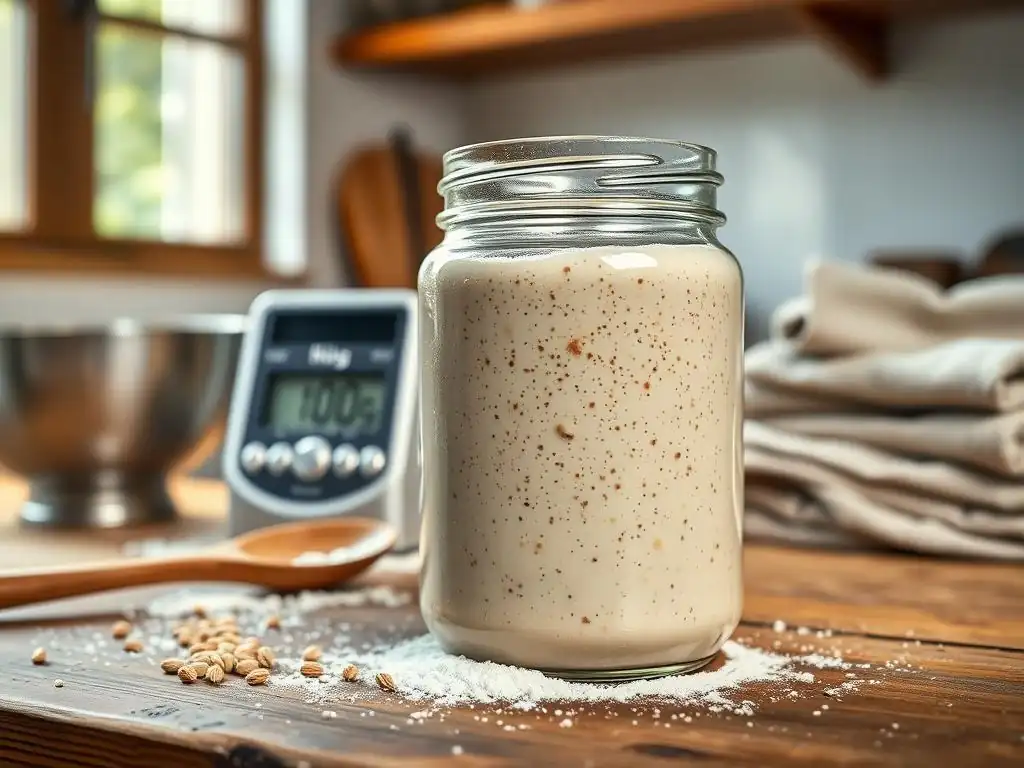
Low Hydration Sourdough Starter Recipe: A Step-by-Step Guide
Creating a low hydration sourdough starter, sometimes called a stiff starter or levain dur, is a straightforward process similar to establishing any sourdough starter, but with a specific ratio of flour to water. A common target hydration for a stiff starter is around 50-60%. This low hydration sourdough starter recipe focuses on a 50% hydration level, meaning for every 100 grams of flour, you use 50 grams of water.
Let's outline the steps for a basic low hydration sourdough starter recipe:
Day 1: Initial Mixing of Flour and Water
To begin your low hydration sourdough starter recipe, you'll need a clean jar or container. Combine 50 grams of unbleached all-purpose flour or rye flour with 25 grams of lukewarm water (around 75-80°F or 24-27°C). Mix thoroughly with a fork or spoon until no dry flour remains and you have a thick, paste-like consistency.
This is your initial low hydration sourdough starter mix. Scrape down the sides of the jar, loosely cover it (a lid resting on top or cloth secured with a band works well to allow air exchange), and leave it at room temperature (ideally 70-78°F or 21-26°C) for 24 hours. You likely won't see much activity on the first day.
Day 2-7: Feeding and Maintenance of the Low Hydration Starter
From Day 2 onwards, you will begin a daily feeding routine for your low hydration sourdough starter. Each day, discard about half of the starter (you can use the discard in other recipes once it's active) and feed the remainder with fresh flour and water at the 50% hydration ratio. For example, if you keep 50 grams of your existing starter, feed it with 50 grams of flour and 25 grams of water.
Mix well to combine the old starter with the new feed. Again, cover loosely and leave at room temperature. You should start seeing small bubbles and perhaps a slight rise and fall around Day 3 or 4.
The starter might also develop a yeasty or slightly alcoholic smell. Continue this daily feeding. By Day 7 (or sometimes later, depending on ambient temperature and flour type), your low hydration starter should become more active, showing a noticeable rise within several hours after feeding and developing a pleasant, tangy aroma.
Recognizing a Healthy and Active Low Hydration Starter
A healthy and active low hydration sourdough starter, essential for a successful low hydration sourdough starter recipe for baking, will exhibit several key signs. After feeding, it should show visible signs of fermentation, such as small bubbles throughout the paste and potentially some larger bubbles on the surface. While it won't double or triple in volume as rapidly or dramatically as a high hydration starter might, a healthy low hydration starter should show a clear increase in volume, perhaps rising by 50% to 100% within 6-12 hours after feeding, especially in a warm environment.
Another indicator is the smell. A vibrant low hydration starter will have a pleasant, tangy, slightly vinegary aroma, indicating healthy acetic acid production. It should not smell strongly of acetone or nail polish remover, which can signify that it's hungry and needs more frequent feeding. The texture will remain stiff but should feel slightly airy or spongy when stirred. You can also perform a "float test" with a small piece, though this is less reliable for stiff starters than for liquid ones; a small piece might float briefly if it's very active.
Troubleshooting Common Issues with Low Hydration Starters
Even with a careful low hydration sourdough starter recipe, issues can arise. One common concern is mold. Mold typically appears as fuzzy or colored spots (green, black, orange) on the surface or sides of the starter. This is a sign that undesirable microbes have taken hold. Unfortunately, if you see mold, it's best to discard the entire starter and begin again, ensuring your jar and tools are scrupulously clean and using good quality flour and non-chlorinated water. Maintaining a consistent feeding schedule and keeping the starter at an appropriate temperature can help prevent mold growth.
Another frequent problem is slow or sluggish fermentation. If your low hydration starter isn't becoming active after a week or more of regular feeding, several factors could be at play. The ambient temperature might be too cool; try moving the starter to a warmer spot (like near a warm appliance or in a turned-off oven with the light on).
The flour might not have enough natural microbes or nutrients; try switching to a different brand or incorporating a small amount of rye flour, which is often rich in microbes. Ensure you are using non-chlorinated water, as chlorine can inhibit microbial activity. Increasing the feeding frequency (feeding twice a day) for a few days can also sometimes give the starter a boost.
Mold Prevention in Low Hydration Sourdough
Preventing mold in your low hydration sourdough starter is primarily about maintaining cleanliness and creating an environment where beneficial microbes thrive. Always use clean jars and utensils when mixing and feeding your starter. Wash them thoroughly with hot, soapy water and rinse well. Ensure the flour you use is fresh and stored properly. Using filtered or non-chlorinated water is also important, as chlorine can inhibit the growth of the wild yeasts and bacteria you want to cultivate.
Storing your low hydration starter at an appropriate temperature is also key. While room temperature (70-78°F) is ideal for active development, storing it in the refrigerator (35-40°F or 2-4°C) significantly slows down activity and reduces the risk of mold if you are not baking frequently. When storing in the fridge, ensure the container is loosely covered but still allows some air exchange, as the starter still produces gas slowly. Regular feeding (even if less frequent when refrigerated, perhaps once a week) helps maintain the starter's health and resilience against unwanted invaders like mold.
Addressing Slow Fermentation in Low Hydration Starters
A sluggish low hydration sourdough starter can be frustrating, but there are effective ways to kickstart its activity. First, evaluate the temperature. If your kitchen is cool (below 70°F), try placing the starter in a warmer location. A proofing box, a warm spot near a refrigerator vent, or an oven with just the light on can provide the necessary warmth (aiming for 75-80°F). Increasing the feeding ratio (using slightly more flour and water relative to the amount of starter you keep) can also provide a nutrient boost, although stick to the low hydration ratio.
Another strategy is to increase feeding frequency. If you're only feeding once a day, try switching to twice a day for a few days. This ensures the microbes have a constant supply of fresh "food." Experimenting with different types of flour can also help; sometimes, adding a small percentage of whole wheat or rye flour (known for their higher microbial content) to your regular feeding flour can invigorate a slow starter. Be patient; sometimes, it just takes time for the microbial population to establish robustly, especially with a low hydration sourdough starter recipe.
Baking Bread with a Low Hydration Sourdough Starter
Developing Your Low Hydration Sourdough Recipe
Developing a successful low hydration sourdough recipe involves understanding how the reduced water content affects the dough's behavior and adjusting accordingly. A typical low hydration sourdough bread recipe might have a total hydration (including the starter's water) ranging from 60% to 70%. This is significantly lower than many popular artisan sourdough recipes that often exceed 75% hydration. The key is to find a hydration level that is manageable for you while still allowing for sufficient gluten development and fermentation.
When creating your recipe, start with a hydration level you are comfortable handling, perhaps around 65%. You can gradually increase or decrease hydration in future bakes as you gain experience. Remember that different flours absorb water differently; whole wheat and rye flours absorb more water than white bread flour. You'll also need to factor in the hydration of your low hydration sourdough starter itself when calculating the total hydration of your dough. Using a kitchen scale for precise measurements is absolutely essential for consistency in developing and replicating your low hydration sourdough recipe.
Calculating Baker's Percentage for Low Hydration Dough
Baker's percentage is a crucial tool for developing and scaling any bread recipe, including a low hydration sourdough recipe. It expresses the weight of each ingredient as a percentage of the total flour weight in the recipe. The total flour weight is always considered 100%. For example, in a simple recipe using 500g flour, 325g water, 10g salt, and 100g of a 50% hydration starter:
- Total Flour = 500g (from main dough) + (100g starter * 0.67, assuming a 50% starter is roughly 67% flour by weight) = 500g + 67g = 567g (This calculation is simplified; correctly, it's 100g starter = 67g flour + 33g water. So total flour = 500g + 67g = 567g)
- Total Water = 325g (from main dough) + (100g starter * 0.33) = 325g + 33g = 358g
- Salt = 10g
Now calculate percentages based on Total Flour (567g):
- Water % = (358g / 567g) * 100% ≈ 63.1%
- Salt % = (10g / 567g) * 100% ≈ 1.8%
- Starter % = (100g / 567g) * 100% ≈ 17.6%
This calculation shows the effective hydration of the final dough is around 63.1%, which clearly falls into the low hydration range. Understanding baker's percentages allows you to easily scale your low hydration sourdough recipe up or down and compare different recipes accurately.
Choosing the Right Flour for Low Hydration Sourdough Bread
The type of flour you choose significantly impacts the outcome of your low hydration sourdough bread. Bread flour, with its higher protein content (typically 12-14%), is an excellent choice as it provides the necessary structure and strength to handle the lower water levels. The strong gluten network developed with bread flour helps trap gases effectively, contributing to good loaf volume and a consistent crumb.
Using a blend of flours can also add complexity and flavor. Incorporating a percentage of whole wheat flour (e.g., 10-20%) will add nutrients, flavor, and color, though you might need a touch more water as whole wheat absorbs more liquid. Rye flour, even in small amounts (5-10%), can dramatically change the flavor profile and affect dough handling due to its different protein structure. Experimenting with different flour combinations within your low hydration sourdough recipe allows you to tailor the bread's characteristics to your preference.
Mixing and Kneading Low Hydration Sourdough Dough
Mixing and kneading low hydration sourdough dough requires slightly different techniques than high hydration doughs because the limited water makes the dough stiffer and less pliable initially. The goal remains the same: to fully hydrate the flour and develop a strong, elastic gluten network capable of trapping fermentation gases. You can mix by hand or machine. Machine mixing on a low speed is often very effective for low hydration doughs as it provides consistent, gentle development without overheating the dough.
When mixing by hand, you might find the dough quite stiff and difficult to handle at first. Techniques like the "pincer method" or simply forceful kneading on a counter can help. Remember to give the dough time to rest between kneading sessions (autolyse or short rests during kneading) to allow the gluten to relax and hydrate more fully. The dough should eventually become smooth, elastic, and pass the windowpane test (stretching a small piece thin enough to see light through it without tearing).
Autolyse Technique for Improved Dough Hydration
The autolyse technique is particularly beneficial when working with a low hydration sourdough recipe. Autolyse involves mixing only the flour and water from the recipe (excluding the starter and salt) and letting the mixture rest for 20 minutes to several hours. During this rest period, the flour hydrates fully, and enzymatic activity begins to break down proteins, which helps in gluten development.
For a low hydration dough, autolyse allows the limited water to distribute more evenly and completely hydrate the flour before the starter and salt are added. This makes the subsequent mixing and kneading much easier, as the gluten network starts to form on its own during the rest. It also reduces the overall kneading time required to achieve a strong dough structure, which is advantageous for low hydration doughs that can sometimes be overworked.
Developing Strength in Low Hydration Sourdough
Developing sufficient strength in a low hydration sourdough is crucial for achieving good structure and oven spring. Unlike high hydration doughs where strength is often built through gentle stretch and folds over several hours, low hydration doughs often benefit from more intensive initial mixing or kneading. Machine kneading for 8-12 minutes on medium speed is effective, or thorough hand kneading for 15-20 minutes.
After initial mixing, the dough's strength can be further enhanced during bulk fermentation through a few sets of stretch and folds or coil folds, spaced 30-60 minutes apart, especially in the first couple of hours. While the dough is stiffer, you should still be able to gently stretch and fold it without tearing excessively. The goal is to build tension and align the gluten strands. A well-developed low hydration dough will feel smooth, elastic, and hold its shape relatively well.
Bulk Fermentation and Shaping of Low Hydration Sourdough
Bulk fermentation, the first rise after mixing, is a critical stage for flavor development and gas production in your low hydration sourdough. Because low hydration doughs ferment more slowly than high hydration ones, bulk fermentation times might be slightly longer, or you might need to maintain a warmer dough temperature (around 75-80°F or 24-26°C) to achieve the desired rise within a reasonable timeframe (often 4-6 hours, but varies).
During bulk fermentation, the dough should increase in volume by about 50-75% (it won't typically double with low hydration). You should also observe signs of fermentation like bubbles on the surface and along the sides of the container. The dough should feel aerated and less dense than when you started. Once bulk fermentation is complete, the dough is ready for shaping.
Monitoring Dough Development During Bulk Fermentation
Monitoring your low hydration sourdough during bulk fermentation requires observation rather than strict adherence to time. Look for visual cues: the dough should visibly increase in volume, although perhaps not doubling as dramatically as higher hydration doughs. Small bubbles should appear on the surface and throughout the dough mass. A poke test can also help; gently poke the dough with a wet finger. If the indentation slowly springs back only partially, the dough is likely ready. If it springs back immediately, it needs more time. If it collapses completely, it's likely over-proofed.
The texture of the dough will also change. It should feel lighter and more aerated compared to its state right after mixing. While recipes might suggest a timeframe (e.g., 4-5 hours), the actual time needed will depend heavily on your starter's activity and the ambient temperature. Aim for the feel and look of properly fermented dough rather than just the clock.
Gentle Shaping Techniques for Preserving Dough Structure
Shaping low hydration sourdough requires a balance of creating tension and handling the dough gently to preserve the gas built during bulk fermentation. Unlike very wet doughs that require minimal handling, low hydration dough is more robust and can tolerate a bit more manipulation. However, aggressive handling can still degas the dough and result in a dense crumb.
Turn the dough out onto a lightly floured surface. For a boule (round loaf), gently pre-shape into a rough ball and let it rest for 15-20 minutes (bench rest). This allows the gluten to relax. Then, perform your final shaping, aiming to create a smooth, taut surface by folding the edges underneath or using a series of folds to build tension. For a batard (oval loaf), shape accordingly, ensuring a tight seam at the bottom. Use minimal flour on your hands and the work surface to avoid incorporating dry flour into the dough, which can affect the final crumb.
Baking Your Low Hydration Sourdough Loaf
Baking is the culmination of your efforts with your low hydration sourdough starter recipe and dough. Low hydration loaves benefit significantly from being baked in a hot oven, ideally within a Dutch oven or on a baking stone with steam. High initial heat promotes maximum oven spring before the crust sets. Preheat your oven to a high temperature, typically 450-500°F (230-260°C), with your baking vessel inside for at least 30-60 minutes.
Carefully transfer your proofed loaf into the hot vessel. If using a Dutch oven, place the lid on for the first part of the bake. This traps steam released by the dough, keeping the crust pliable and allowing the loaf to expand fully (oven spring). After 20-25 minutes with the lid on, remove it to allow the crust to brown and crisp up. Continue baking for another 20-30 minutes until the crust is deeply colored and the internal temperature reaches around 205-210°F (96-99°C).
Oven Spring and Scoring Techniques
Oven spring is the rapid expansion of the dough when it's first placed in the hot oven. It's driven by the production and expansion of gases within the dough. A well-developed low hydration sourdough, properly proofed and baked in a hot, steamy environment, should achieve excellent oven spring, resulting in a tall, well-shaped loaf.
Scoring the loaf just before baking is essential for controlling oven spring. Cuts in the dough allow the loaf to expand predictably at the weakest points, preventing it from bursting randomly. For low hydration doughs, which have a strong surface tension, confident and relatively deep cuts are often needed to allow for maximum expansion. Use a sharp razor blade or lame held at a slight angle. Simple single slashes, cross patterns, or more elaborate designs can be used, but ensure the cuts are decisive.
Achieving a Dark and Crispy Crust
A hallmark of great low hydration sourdough is a thick, dark, and crispy crust. Achieving this requires high baking temperatures and sufficient time for the crust to develop. Baking initially in a steamy environment (like a Dutch oven) keeps the crust soft, allowing for maximum expansion. Once the lid is removed (or steam is released from the oven), the dry heat allows the crust to rapidly dehydrate and brown through the Maillard reaction and caramelization.
Baking until the crust is a deep golden brown, or even chestnut colored, is crucial for flavor and texture. Don't be afraid of a dark crust; it's where much of the flavor resides. If your crust isn't getting dark enough, try extending the baking time after removing the lid or increasing the temperature slightly towards the end of the bake. Cooling the loaf completely on a wire rack is also vital; this allows steam to escape and prevents the bottom crust from becoming soggy.
Flavor Development in Low Hydration Sourdough
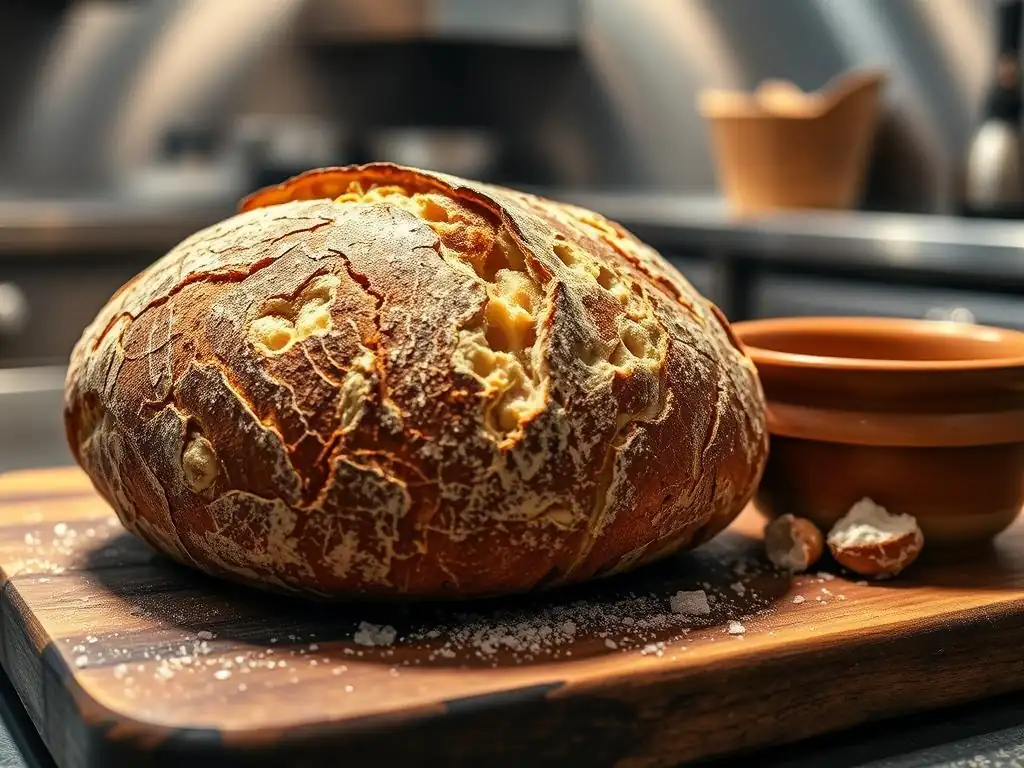
The Role of Acetic Acid in Low Hydration Sourdough
Flavor is a cornerstone of great sourdough, and the unique environment of a low hydration sourdough starter and dough significantly influences the types of acids produced during fermentation. Lactic acid bacteria, key players in sourdough, produce both lactic acid and acetic acid. While lactic acid contributes a milder, creamy tang, acetic acid is known for its sharper, more pungent, vinegar-like flavor.
In a low hydration starter or dough, the stiffer environment and potentially longer, cooler fermentation times favor the production of acetic acid. This is because the bacteria responsible for acetic acid production tend to thrive better in these conditions. This results in a loaf with a more pronounced, sometimes described as "sour" or "acidic," flavor compared to breads made with very wet starters or rapid, warm fermentation. Understanding this allows bakers to manipulate fermentation conditions to adjust the sourness profile of their low hydration sourdough.
Maximizing Flavor Through Long Fermentation
Regardless of hydration, long fermentation is a key factor in developing complex flavors in sourdough bread. For low hydration sourdough, which naturally ferments a bit slower, this extended time is particularly effective. A long bulk fermentation (perhaps 6-8 hours at room temperature, or even longer if the temperature is cooler) allows enzymes to break down starches into simpler sugars, providing more "food" for the microbes and contributing to crust browning.
Cold proofing in the refrigerator (for 12-48 hours) after shaping is another excellent way to maximize flavor development in low hydration sourdough. The cold temperature significantly slows yeast activity, but lactic acid bacteria continue to work, producing more organic acids, including acetic acid. This slow, cold fermentation allows the flavors to deepen and meld, resulting in a more nuanced and complex final loaf.
Experimenting with Different Flours for Unique Flavor Profiles
The type of flour used in both your low hydration sourdough starter recipe and the final dough dramatically impacts the flavor of the baked bread. Using different flours introduces different types of starches, proteins, and minerals, which the sourdough microbes metabolize into a variety of flavorful compounds.
While white bread flour provides a relatively neutral base, incorporating whole grains like whole wheat, rye, spelt, or even ancient grains like Einkorn or Kamut adds layers of nutty, earthy, or sweet flavors. For instance, a low hydration sourdough made with a percentage of rye flour will have a more pronounced tang and earthy notes than one made solely with white flour. Experimenting with flour blends allows you to create a signature low hydration sourdough with a unique and complex flavor profile.
Tips and Tricks for Perfect Low Hydration Sourdough
Maintaining Consistent Hydration Levels
Consistency is key when working with a low hydration sourdough starter recipe and dough. Because the margin for error with water content is smaller in low hydration doughs compared to very wet ones, precise measurements are crucial. Always use a digital kitchen scale to weigh your ingredients (flour, water, salt, starter). Measuring by volume (cups) is inaccurate and can lead to significant variations in hydration from batch to batch.
Additionally, be mindful of factors that affect flour's water absorption, such as humidity and the age of the flour. If using a different brand or type of flour, you might need to slightly adjust the water amount in your low hydration sourdough recipe. Pay attention to the dough's feel during mixing; it should be stiff but not dry or crumbly. If it feels too dry, add a tiny bit more water, perhaps a tablespoon at a time, until the consistency is right.
Understanding Ambient Temperature's Impact
Ambient temperature plays a significant role in the fermentation speed of your low hydration sourdough starter and dough. Warmer temperatures (75-80°F) accelerate microbial activity, leading to faster rises and potentially more lactic acid production (though acetic acid is still favored in low hydration). Cooler temperatures (below 70°F) slow fermentation considerably, which can be beneficial for flavor development but requires longer proofing times.
Be aware of your kitchen's temperature and adjust your fermentation times accordingly. If it's warm, your bulk fermentation and proofing will be shorter. If it's cool, they will take longer. For consistent results with your low hydration sourdough, consider using a proofing box or finding a consistently warm spot in your home. Alternatively, embrace the slower fermentation that cooler temperatures provide, particularly for developing deeper flavors during bulk fermentation or cold proofing.
Advanced Techniques for Enhancing Crust and Crumb
Once you've mastered the basics of a low hydration sourdough starter recipe and baking, you can explore advanced techniques to further enhance your loaves. For an even thicker, crispier crust, consider baking on a baking steel instead of a stone, as steel conducts heat more efficiently. Using lava rocks or a separate tray with hot water in the oven (if not using a Dutch oven) can create extra steam for the initial bake, promoting better oven spring and a thinner, crispier crust.
To influence the crumb structure, you can experiment with the intensity of mixing or kneading. More intensive mixing can lead to a tighter, more regular crumb, while gentle handling and minimal kneading followed by long fermentation can sometimes encourage a slightly more open structure, even in low hydration dough. Autolysing for a longer period (2-3 hours) can also contribute to a better crumb structure by allowing enzymes to work more extensively.
Troubleshooting Common Low Hydration Sourdough Problems
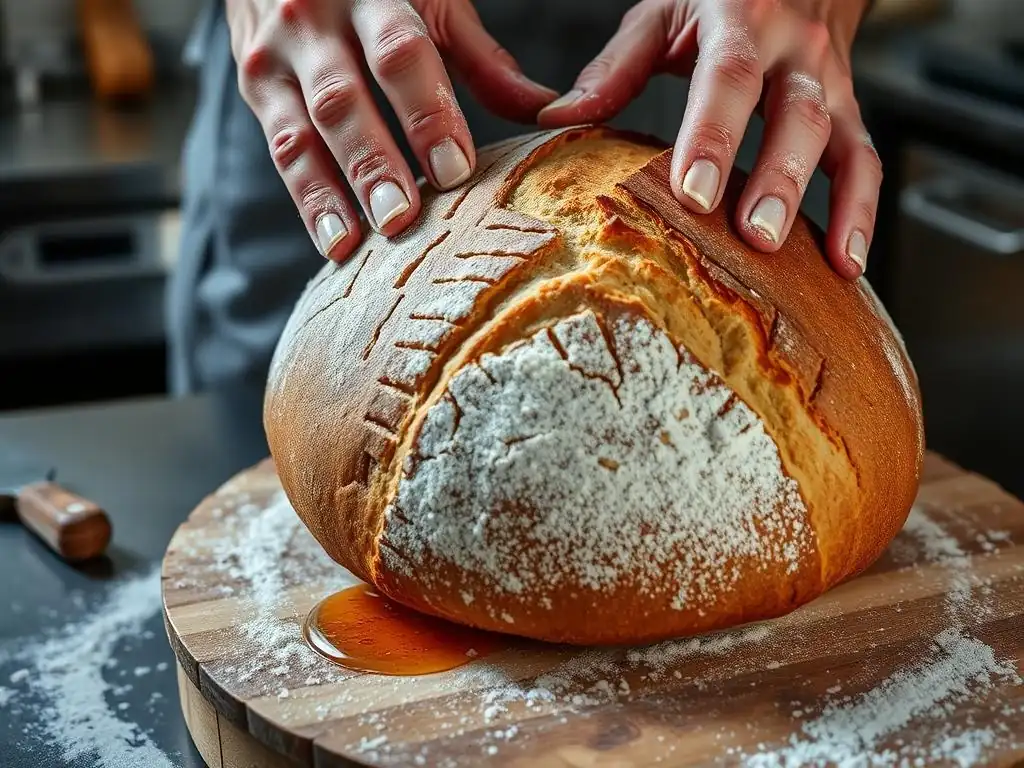
Dense Crumb and How to Avoid It
A dense, heavy crumb is a common issue in sourdough baking, including with low hydration sourdough. Several factors can contribute to this. One primary cause is insufficient fermentation, either during bulk fermentation or proofing. If the dough hasn't developed enough gas before baking, it won't achieve good oven spring, resulting in a tight, dense interior. Ensure your starter is active and that you allow sufficient time for the dough to rise based on temperature and starter activity.
Another cause can be underdeveloped gluten. If the gluten network isn't strong enough to trap the gases produced, the dough won't rise properly. Ensure you are mixing or kneading enough to develop the dough to the point where it is smooth and elastic. Overworking the dough can also lead to a dense crumb by tearing the gluten network. Finally, shaping too tightly or handling the dough too roughly can degas it, leading to a lack of oven spring and a dense interior.
Flat Loaves: Identifying the Causes
Flat loaves in low hydration sourdough can be disheartening. Like a dense crumb, insufficient fermentation is a major culprit. If the dough hasn't built enough strength and gas during bulk fermentation, it will spread out instead of rising upwards in the oven. Ensure your starter is vigorous and your bulk fermentation is complete.
Over-proofing is another common cause. If the dough proofs for too long, the gluten network can break down, and the yeast can exhaust its food supply. The dough will lose its structure and collapse during baking. A poke test can help identify over-proofed dough (it won't spring back). Weak gluten development can also contribute; if the gluten isn't strong enough, it simply can't support the structure of the loaf. Ensure adequate mixing and gentle handling during shaping.
Achieving the Perfect Open Crumb Structure
While low hydration sourdough naturally tends towards a tighter, more regular crumb than high hydration loaves, it's still possible to achieve a relatively open structure. Key factors include using an active low hydration sourdough starter, ensuring sufficient but not excessive bulk fermentation, and developing good gluten strength.
Proper shaping is also crucial; creating surface tension helps the loaf hold its shape and direct oven spring upwards. Finally, high heat and steam in the oven are essential for maximizing oven spring, which directly impacts the openness of the crumb. Baking in a preheated Dutch oven is highly recommended for this. Experimenting with slightly higher hydration levels (within the low hydration range, e.g., 68-70%) and incorporating techniques like autolyse can also help improve crumb structure.
Advanced Low Hydration Sourdough Techniques
Using Pre-Ferments to Boost Flavor and Structure
Incorporating a pre-ferment, such as a poolish (equal parts flour and water, usually with a tiny amount of commercial yeast or starter) or a levain (a build of your sourdough starter specifically for baking), can enhance both flavor and structure in your low hydration sourdough. While your main low hydration sourdough starter is the base, building a levain specifically for your bake allows you to time its peak activity perfectly.
A stiff levain (built at the same low hydration as your main starter, or perhaps slightly higher) can be used. This pre-fermented flour contributes complex flavors and acids developed over its ripening time, adding depth to the final loaf. It also introduces a highly active population of yeast and bacteria, which can boost fermentation power and improve dough structure. You typically build the levain 8-12 hours before mixing the main dough, incorporating its weight into your baker's percentage calculations.
Incorporating Add-ins into Low Hydration Dough
Low hydration doughs are particularly well-suited for incorporating various add-ins like seeds, nuts, dried fruits, or cheese. The stiffer texture of the dough makes it easier to handle and prevents heavy additions from sinking to the bottom during proofing.
When adding ingredients, consider their weight and hydration. Seeds might absorb some water, potentially requiring a slight adjustment to your recipe's overall hydration. It's often best to soak seeds or dried fruits beforehand to prevent them from drawing moisture out of the dough. Gently fold or mix in add-ins during the final stages of mixing or during the first set of stretch and folds to ensure even distribution without tearing the gluten network. A common technique is to incorporate seeds at around 10-20% of the total flour weight.
Cold Proofing Low Hydration Sourdough for Enhanced Flavor
Cold proofing your shaped low hydration sourdough in the refrigerator is one of the most effective ways to develop deep, complex flavors and manage your baking schedule. After shaping, place the loaf in a floured banneton or proofing basket, cover it well (a plastic bag works), and refrigerate at 38-40°F (3-4°C) for 12 to 48 hours.
During this long, cold period, yeast activity slows dramatically, but the acid-producing bacteria continue to work, albeit slowly. This extended fermentation allows organic acids, particularly acetic acid favored by low hydration, to accumulate, resulting in a more pronounced sourness. The cold also firms up the dough, making it easier to score and handle when transferring to a hot oven, which can contribute to better oven spring and a crispier crust.
Conclusion: Embrace the Art of Low Hydration Sourdough
Mastering low hydration sourdough is a rewarding journey that allows you to explore a different facet of the sourdough world. From understanding the science behind why lower water content influences fermentation and gluten development to successfully executing a low hydration sourdough starter recipe and adapting your baking techniques, each step builds your confidence and skill. The result is often a beautifully structured loaf with a sturdy crust and a distinct, tangy flavor profile, offering a satisfying alternative to higher hydration breads.
Embracing low hydration sourdough opens up possibilities for easier handling, different textures, and unique flavors, making it a valuable technique for bakers of all levels. Don't be afraid to experiment with hydration levels, flour types, and fermentation times to find what works best for you and your environment.
Further Resources for Sourdough Baking Enthusiasts
For those eager to continue their sourdough journey, especially with low hydration techniques, there are many resources available. Numerous reputable baking books dedicate sections to stiff starters and low hydration doughs, offering detailed recipes and explanations. Online baking forums and communities are excellent places to ask questions, share experiences, and troubleshoot issues with other enthusiasts.
Websites like BakeWithEase.com provide articles, guides, and recipes covering a wide range of sourdough topics, from maintaining your low hydration sourdough starter to advanced shaping techniques. Exploring educational videos online can also provide visual guidance on dough handling and shaping specific to low hydration doughs.
One of the greatest joys of baking, particularly sourdough, is sharing the fruits of your labor. Once you've successfully baked your low hydration sourdough loaves, share them with friends, family, or neighbors. The process of baking, from nurturing your low hydration sourdough starter recipe to the final slice, is an act of creation and generosity.
Document your bakes – take photos, note your process, and keep track of your hydration levels and fermentation times. This not only helps you learn and improve but also provides a wonderful record of your baking journey. Sharing your experiences and successes, perhaps even your perfected low hydration sourdough starter recipe, can also inspire other aspiring bakers in the community.
Frequently Asked Questions
What is a low hydration sourdough starter?
A low hydration sourdough starter is a starter with a lower water-to-flour ratio than a traditional 1:1 starter. This results in a denser, dough-like consistency often referred to as a stiff starter.
Why would I use a low hydration sourdough starter recipe?
Low hydration starters promote stronger gluten development and can contribute to a more complex flavor profile in your sourdough bread. They also tend to be more tolerant of neglect and slower to over-ferment.
How does a low hydration starter affect the final sourdough loaf?
Using a low hydration starter can result in a loaf with improved structure and oven spring. The increased acidity from the starter can also contribute to a tangier, more complex flavor.
What is the ideal hydration percentage for a "low hydration" sourdough starter?
Generally, a low hydration starter falls within the range of 50-60% hydration. This means you'd use 50-60 grams of water for every 100 grams of flour.
How do I convert my existing 1:1 sourdough starter to a low hydration starter?
Gradually reduce the water content during each feeding. For example, if you normally use 50g water and 50g flour, try 40g water and 50g flour for a few feedings until your starter reaches the desired dough-like consistency.
Final Reflection: The Enduring Allure of Low Hydration Sourdough
Mastering low hydration sourdough is not merely a baking technique; it's a journey into the heart of flavor and texture. The pursuit of that perfect, crisp crust and complex, tangy crumb demands patience, precision, and a deep understanding of the interplay between flour, water, and time. This article has explored the nuances of this challenging yet rewarding process, providing practical steps and insights to help bakers achieve consistent results. But the true significance extends far beyond the recipe itself.
The enduring appeal of low hydration sourdough lies in its ability to connect us to a centuries-old tradition, a testament to the power of simple ingredients transformed by time and careful craftsmanship. It's a process that demands attention, fostering a mindful connection with the ingredients and the process itself. As the renowned baker, Chad Robertson, once said, Bread baking is a meditation. It's a way to connect with something larger than yourself.
This sentiment resonates deeply with the low hydration method, where the subtle shifts in dough behavior demand constant observation and adaptation, a meditative practice in itself.
Now, consider your own baking journey. What have you learned about patience, precision, and the transformative power of time? I encourage you to experiment, to embrace the challenges, and to savor the rewards of mastering this ancient art. Don't be discouraged by initial setbacks; each loaf, whether a triumph or a learning experience, brings you closer to understanding the magic of low hydration sourdough. The journey itself is the reward, and the delicious bread is simply the delightful byproduct.
Unleash Your Inner Sourdough Master!
Thanks for taking the time to explore the world of low-hydration sourdough! We hope you gained valuable insights into achieving that perfect balance of structure and flavor. Ready to put your new knowledge into practice?
- Bake your best loaf yet: Try the low-hydration recipe we outlined, experimenting with different flours and fermentation times to find your perfect sourdough. Note the subtle flavor changes!
- Share your sourdough journey: Post a picture of your creation on social media using #BakeWithEaseLowHydration and inspire others! We love seeing your results.
- Join our baking community: Dive deeper into the art of sourdough by engaging in discussions and sharing tips with fellow bakers in the comments below.
What unique flavor profile will you create with your next low-hydration sourdough?