
How to Use a Cookie Scoop for Perfect Drops


Welcome to BakeWithEase, your kitchen companion for all things baking! Ever wondered how to achieve perfectly uniform cookies every single time? This article delves into the secrets behind achieving consistent results with a simple tool. Discover the key to achieving perfect cookie scoop measurements and unlock a new level of precision in your baking. Are you ready to say goodbye to misshapen cookies and hello to baking perfection? Let's get started!
- How to Use a Cookie Scoop for Perfect Drops: BakeWithEase Guide
- Introduction: Achieving Baking Perfection with a Cookie Scoop
- Understanding Cookie Scoop Sizes and Their Impact on Baking
- Step-by-Step Guide: Using a Cookie Scoop for Consistent Cookie Dough Portions
- Achieving Perfect Cookie Scoop Measurements: Tips and Tricks
- Beyond Cookies: Creative Uses for Your Cookie Scoop in the Kitchen
- Troubleshooting Common Cookie Scoop Problems
- The Best Cookie Scoops for Baking: BakeWithEase Recommendations
- Conclusion: Baking with Confidence Using a Cookie Scoop for Perfect Drops
- Frequently Asked Questions
- Final Reflection: The Sweet Science of the Perfect Cookie
- Unleash Your Inner Baker: Perfect Cookies Await!
Achieving consistently sized and shaped cookies is a cornerstone of successful baking, especially when aiming for those picture-perfect drop cookies. This is where a cookie scoop, also known as a disher or portion scoop, becomes an indispensable tool in your kitchen arsenal.
Unlike using spoons or simply rolling dough by hand, a scoop provides a reliable method for portioning dough, ensuring that each cookie on your baking sheet is roughly the same size and weight. This uniformity is crucial because it guarantees that all cookies bake evenly, preventing some from being overdone while others are still raw in the center.
Beyond just size, using a cookie scoop helps achieve a more consistent shape. As the dough is released from the scoop, it forms a neat mound, which typically spreads into a round cookie as it bakes. This precision elevates the final appearance of your baked goods, making them look professionally made. For anyone striving for perfect cookie scoop measurements and results that are both delicious and visually appealing, mastering the use of a cookie scoop is a fundamental step. It takes the guesswork out of portioning and significantly improves the reliability of your baking outcomes.
Welcome to BakeWithEase's comprehensive guide designed to turn you into a cookie scoop expert! We'll walk you through everything from understanding different scoop sizes and their impact on your baking to step-by-step instructions on how to use the tool effectively. Whether you're a beginner making your first batch of chocolate chip cookies or a seasoned baker perfecting your oatmeal raisin recipe, our aim is to help you achieve reliable, consistent results every time you bake drop cookies.
This guide covers essential techniques like properly filling and leveling the scoop for accurate cookie scoop measurements, preventing dough from sticking, and even exploring creative uses for your scoop beyond just cookies. We'll also touch upon common troubleshooting issues and offer recommendations for finding the right scoop for your needs. By the end of this article, you'll have the knowledge and confidence to use a cookie scoop to produce consistently sized, beautifully baked cookies that will impress everyone.
Cookie scoops are typically labeled with numbers, and understanding this numbering system is key to achieving perfect cookie scoop measurements. The number on a scoop corresponds to how many scoops of that size are needed to fill a U.S. quart (32 fluid ounces). A smaller number indicates a larger scoop size, and a larger number indicates a smaller scoop size.
For example, a #20 scoop means approximately 20 scoops fill a quart, resulting in a larger portion than a #40 scoop, where 40 scoops fill a quart. Common sizes for standard drop cookies range from #40 (about 1.6 tablespoons, producing cookies roughly 2.5 to 3 inches in diameter when baked) to #20 (about 3.2 tablespoons, resulting in cookies around 3.5 to 4 inches).
Understanding this system allows you to select the appropriate scoop for your desired cookie size. If a recipe calls for large, bakery-style cookies, you might opt for a #20 or #24 scoop. For smaller, more delicate cookies, a #50 or #60 scoop might be preferable. Many recipes will specify a recommended scoop size, but if not, consulting a chart or understanding the number system helps you make an informed choice to get the consistent cookie scoop measurements needed for your recipe.
To make selecting the right size easier, here's a simplified reference chart for common cookie scoop sizes and their approximate volume and resulting cookie size:
- #16: ~4 tablespoons (~1/4 cup) - Large cookies (approx. 4+ inches baked)
- #20: ~3.2 tablespoons - Large cookies (approx. 3.5-4 inches baked)
- #24: ~2.7 tablespoons - Standard large cookies (approx. 3-3.5 inches baked)
- #30: ~2 tablespoons - Standard cookies (approx. 2.5-3 inches baked)
- #40: ~1.6 tablespoons - Standard smaller cookies (approx. 2-2.5 inches baked)
- #50: ~1.3 tablespoons - Small cookies (approx. 1.5-2 inches baked)
- #60: ~1 tablespoon - Small cookies/mini muffins (approx. 1.5 inches baked)
This chart provides a useful guideline for achieving accurate cookie scoop measurements based on your desired final cookie size. Keep in mind that the actual baked size can vary slightly depending on the dough's consistency and leavening agents. Using this reference helps ensure your portions are consistent, leading to uniform baking results across the entire batch.
The size of your cookie dough portion directly impacts the required baking time and the final texture of your cookie. Larger portions from a lower-numbered scoop (like a #20) will take longer to bake through compared to smaller portions from a higher-numbered scoop (like a #40).
For instance, a standard chocolate chip cookie recipe might bake for 9-11 minutes using a #40 scoop, but could require 12-14 minutes or more when using a #20 scoop. It's crucial to adjust your baking time based on the scoop size you use, often starting with the minimum time and adding minutes as needed until the cookies are golden brown around the edges and set in the center.
Furthermore, the scoop size affects the cookie's texture profile. Smaller cookies tend to be thinner and crispier, as they spread more relative to their mass and bake faster. Larger cookies, on the other hand, often have a thicker center, resulting in a chewier or softer texture towards the middle while still achieving a crisp edge. By choosing the appropriate scoop size and adjusting baking time accordingly, you can control not only the size but also the desired texture of your cookies, ensuring your perfect cookie scoop measurements lead to the perfect bite.

Before you even pick up your cookie scoop, proper dough preparation is key to achieving smooth, consistent portions. First, ensure your cookie dough is adequately chilled, if the recipe calls for it. Chilled dough is firmer and less sticky, making it much easier to scoop cleanly. If your dough is too warm or soft, it can stick excessively to the scoop and result in uneven portions. Allow the dough to chill in the refrigerator for at least 30 minutes, or longer if specified by the recipe.
Once chilled, briefly stir or knead the dough in the bowl. This helps to redistribute ingredients, especially if it contains mix-ins like chocolate chips or nuts, ensuring that each scoop gets a fair distribution. It also helps to make the dough more pliable and uniform in consistency, which is essential for getting perfect cookie scoop measurements every time. Avoid overworking the dough, but ensure it's cohesive and ready to be portioned smoothly.
Using a cookie scoop effectively is a simple process that yields great results. Start by holding the scoop firmly in your dominant hand. Dip the scoop into the prepared cookie dough, pressing down and forward simultaneously. This motion helps fill the scoop completely and compactly. Scrape the scoop against the side of the bowl to level off any excess dough, ensuring you have a full, even portion.
Once the scoop is filled and leveled, position it directly over the baking sheet. Squeeze the handle to activate the sweep arm, which will push the dough out of the scoop onto the sheet. Practice this motion a few times to get a feel for the amount of pressure needed. The goal is to release a neatly formed ball of dough onto the sheet. Repeat this process for each cookie, maintaining consistent technique for consistent cookie scoop measurements across the entire batch.
One common issue is dough sticking to the scoop, preventing a clean release. Several factors can contribute to this, including dough temperature and consistency. If your dough is too sticky, try chilling it for an additional 15-20 minutes. Sometimes, lightly coating the inside of the scoop with non-stick cooking spray or a tiny amount of oil before you start can also help, especially with very sticky doughs. However, avoid using too much, as this can affect the cookie's spread.
Another tip is to ensure you are filling the scoop completely and leveling it correctly. A partially filled scoop or one with air pockets is more likely to cause sticking. When releasing, apply firm, steady pressure on the handle. If the dough still sticks, you can gently tap the scoop on the edge of the baking sheet while squeezing the handle to encourage release. With practice, you'll find the right balance to achieve clean, effortless releases for accurate cookie scoop measurements.
Properly leveling the cookie scoop is perhaps the most critical step in achieving perfect cookie scoop measurements. After scooping the dough, the top of the scoop should be flat, with no excess dough mounded above the rim. The best way to do this is to press the scoop into the dough, then use the edge of the bowl or a spatula to scrape away any dough that extends above the rim. This ensures that each scoop contains the exact volume of dough the scoop size is designed for.
Skipping the leveling step or simply overfilling the scoop will result in inconsistent portion sizes, leading to uneven baking. Think of it like measuring flour – you level it off for an accurate measurement. The same principle applies here for dough. Taking this extra second to level each scoop guarantees that every cookie starts with the same amount of dough, paving the way for uniformity in size, shape, and bake time across your entire batch.
Preventing Air Pockets for Even Baking
Air pockets within the scooped dough can lead to uneven baking and oddly shaped cookies. When you press the scoop into the dough, try to do so smoothly and firmly to minimize trapping air. If your dough is very dense or has large mix-ins, you might need to press the scoop into different parts of the dough and gently pack it to ensure it's filled solid before leveling.
Another technique to help prevent air pockets and ensure a solid portion is to slightly compress the dough in the bowl before scooping. A few gentle turns or presses with a spatula can help remove larger air pockets from the main dough mass. By taking care to fill the scoop completely and avoid incorporating excess air, you ensure that each portion is uniform in density as well as volume, contributing significantly to perfect cookie scoop measurements and predictable baking results.
While a cookie scoop helps with consistent portioning, the dough's consistency itself plays a large role in how well it scoops and bakes. If your recipe yields a very sticky or very crumbly dough, you might need slight adjustments for optimal scooping. For overly sticky dough, ensure adequate chilling time. If it's still difficult, a tiny bit more flour (a tablespoon or two for a standard batch) can sometimes improve scoop-ability without drastically altering the cookie.
For dough that is too dry or crumbly, it might not hold together well in the scoop. Adding a touch more liquid (like milk or a softened fat) can help bind it. Remember that these are minor adjustments; significant changes can affect the final cookie texture. The goal is a dough that is firm enough to hold its shape in the scoop but pliable enough to release cleanly. Achieving the right dough consistency, combined with using a scoop for perfect cookie scoop measurements, is the ultimate path to cookie perfection.
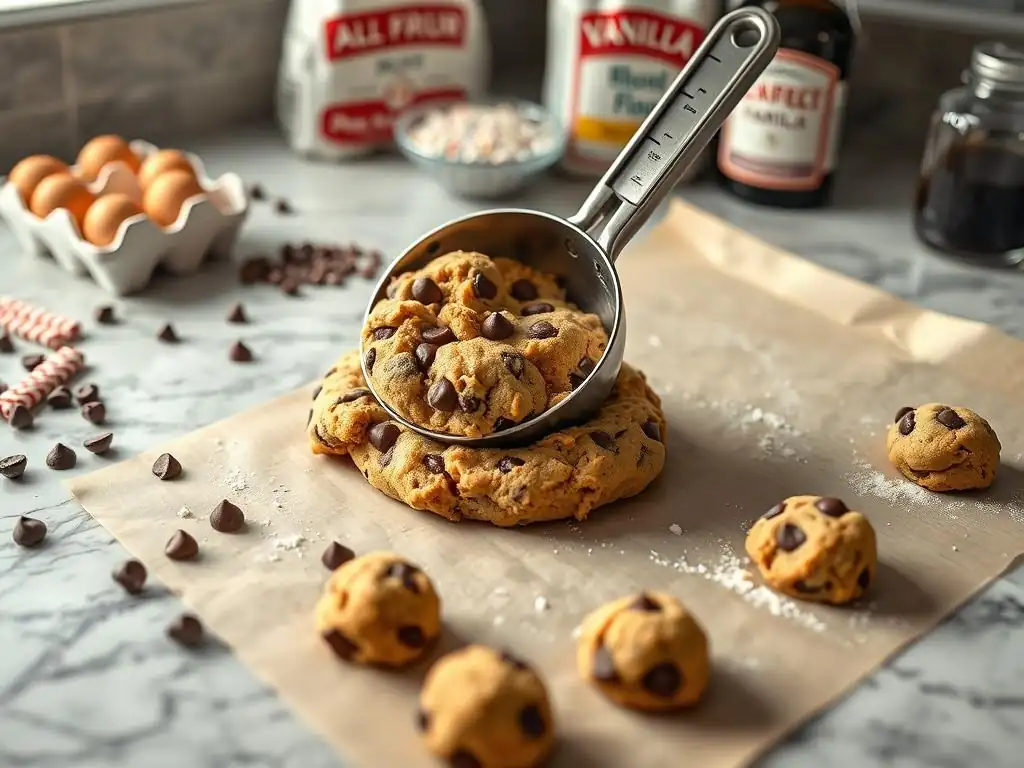
Your cookie scoop isn't just for cookies! It's an excellent tool for portioning batter into muffin or cupcake liners, ensuring each one is filled to a consistent level. This uniformity is important for even baking and presentation. A #16 or #20 scoop (approximately 1/4 cup or 3.2 tablespoons) is often ideal for standard-sized muffin cups, filling them about two-thirds full, which is the typical recommendation to prevent overflow.
Using a scoop allows for quick, clean transfer of batter from the bowl to the pan, minimizing drips and mess. It ensures that all your muffins or cupcakes rise evenly and finish baking at the same time. For mini muffins, a smaller scoop like a #40 or #50 works perfectly. This technique simplifies the process and helps achieve professional-looking baked goods beyond just cookies, leveraging your tool for consistent portion measurements across different recipes.
Scooping Ice Cream Like a Pro
While called a "cookie scoop," many models are essentially disher scoops, which are also the standard tool used for scooping ice cream. The sweep arm makes it easy to release perfectly rounded balls of ice cream. For standard servings, a #16 or #20 scoop is commonly used. Simply dip the scoop into slightly softened ice cream (running the scoop under warm water briefly can help with very hard ice cream), press, and scoop against the side of the container for a rounded shape.
The clean release provided by the scoop's mechanism is particularly useful with frozen desserts, which can be difficult to scoop cleanly with a regular spoon. Using a scoop gives you those classic, round scoops seen in ice cream parlors and helps with portion control. It's a simple trick that makes serving ice cream much easier and more aesthetically pleasing.
The utility of a cookie scoop extends into savory cooking as well. It's fantastic for portioning mixtures like meatball or falafel dough, ensuring each piece is consistently sized. This is crucial for even cooking, whether you're baking, frying, or simmering. A #30 or #40 scoop is often a good size for standard meatballs.
Beyond meatballs, consider using a scoop for portioning pancake batter onto a griddle (a #20 or #24 works well), shaping energy balls, or even creating uniform scoops of mashed potatoes or rice. The consistent volume provided by the scoop ensures that whatever you're portioning cooks evenly and presents beautifully. It's a versatile tool that proves its worth far beyond its name, helping you achieve accurate portion measurements in numerous kitchen tasks.
Dough sticking is the most frequent complaint when using a cookie scoop. As mentioned earlier, the primary culprits are often dough that is too warm or too sticky in consistency. Ensure your dough is adequately chilled according to the recipe. If it's still sticky, chilling for an extra 20-30 minutes can often solve the problem.
If chilling isn't enough, a very light application of non-stick cooking spray or neutral oil inside the scoop can provide lubrication. Dip the scoop into a small amount of oil or spray it once or twice, wiping off any excess before scooping. Also, make sure you are filling the scoop completely and pressing the dough firmly into it; sometimes, a partially filled scoop can cause sticking. If using a scoop with a spring mechanism, ensure it's clean and operating smoothly. Sometimes, dried dough residue can impede its function.
If you're using a cookie scoop but still ending up with uneven cookie sizes, the problem likely lies in inconsistent scooping technique rather than the scoop itself. The most common reasons are not filling the scoop completely, not leveling the dough, or incorporating different amounts of air into each scoop.
Focus on pressing the scoop firmly into the dough until it's overflowing slightly, then use the side of the bowl or a straight edge to level off the top cleanly. This action ensures you are getting a full, consistent volume every time, leading to perfect cookie scoop measurements. Also, try to maintain a consistent pressure when scooping to avoid varying amounts of air pockets. With a little attention to these details, you'll quickly achieve uniform portions and evenly sized cookies.
Proper care ensures your cookie scoop remains a reliable tool for achieving consistent cookie scoop measurements. After each use, clean your scoop promptly. Dried dough can be difficult to remove and can affect the scoop's mechanism. Wash it with warm, soapy water, paying attention to the area around the sweep arm. Use a small brush if necessary to remove any stubborn residue.
Rinse thoroughly and dry immediately to prevent rust, especially if your scoop is made of stainless steel. Some scoops are dishwasher safe, but hand washing is often recommended to maintain the integrity of the spring mechanism and prevent dulling of the metal. Store it in a drawer where the mechanism won't be bent or damaged. Regular cleaning and careful handling will keep your scoop functioning smoothly for years, helping you produce countless batches of perfectly portioned cookies.
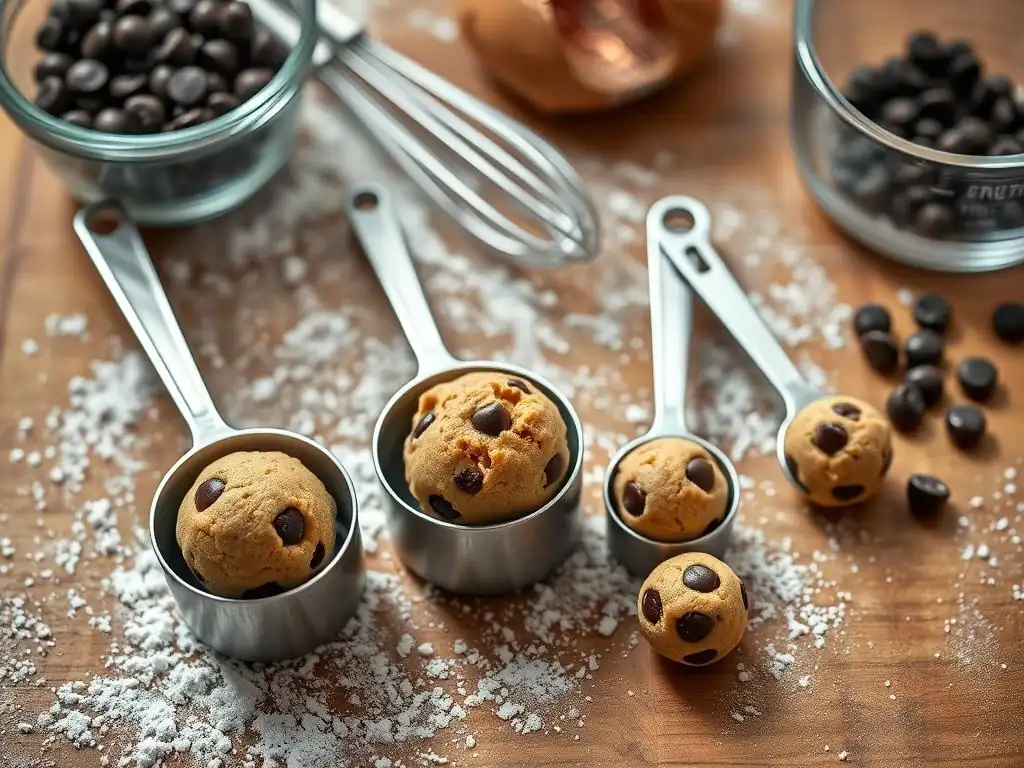
When selecting a cookie scoop for achieving perfect cookie scoop measurements, several features contribute to its performance and durability. Look for a scoop made from sturdy, rust-resistant material like stainless steel. This ensures longevity and makes cleaning easier. The handle should be ergonomic and comfortable to hold, providing a good grip even when scooping firm dough.
The sweep mechanism is perhaps the most critical component. It should operate smoothly and efficiently, cleanly releasing dough without sticking. Look for a well-attached and robust sweep arm. Some scoops have a spring-loaded handle for easy activation, while others have a thumb lever. Both can work well; choose the style you find most comfortable. Consider the size options available from a brand or in a set, as having a few different sizes can be beneficial for various recipes and uses.
While we can't recommend specific brands or models directly, we can describe types of scoops that consistently perform well based on user feedback and common kitchen tool standards.
- For Standard Drop Cookies: Look for scoops in the #30 to #40 range (approximately 2 to 1.6 tablespoons). Scoops with a comfortable, non-slip handle and a smooth thumb or squeeze-handle release mechanism are popular choices. Stainless steel construction is highly recommended for durability and easy cleaning.
- For Large Bakery-Style Cookies: Opt for larger scoops like #16 or #20 (approximately 4 to 3.2 tablespoons). These often benefit from a sturdy squeeze handle that provides good leverage for portioning larger amounts of dough.
- For Mini Cookies or Candies: Smaller scoops in the #50 or #60 range (around 1.3 to 1 tablespoon) are ideal. These smaller scoops often have a simple spring handle and are great for precise, smaller portions.
Investing in a few different sizes of reliable, well-constructed scoops will equip you for a wide range of baking tasks, ensuring accurate cookie scoop measurements no matter the recipe.
High-quality cookie scoops are widely available from various retailers. You can typically find them at kitchen supply stores, department stores with a home goods section, and online marketplaces. When purchasing, check product descriptions for material (preferably stainless steel), size numbering (like #40, #20), and the type of release mechanism. Reading customer reviews can also provide insight into the scoop's durability and ease of use.
Consider purchasing scoops individually or as a set. Sets often include a few common sizes, offering good value if you plan to bake different types of cookies or use the scoops for multiple purposes. Look for retailers that offer detailed product information and clear images so you can assess the scoop's construction. Finding the right source for your scoop is the first step to achieving perfect cookie scoop measurements and consistent baking results.
Mastering the use of a cookie scoop is a simple yet transformative step in your baking journey. By ensuring each portion of dough is consistently sized and shaped, you eliminate one of the main variables that lead to unevenly baked cookies. This consistency results in batches where every cookie is cooked through, has the desired texture, and looks just as appealing as the last.
From understanding the numbering system to employing proper scooping and leveling techniques, you now have the knowledge to achieve perfect cookie scoop measurements every time you bake drop cookies. This tool not only improves the quality of your baked goods but also makes the portioning process faster and cleaner. Embrace the cookie scoop, and get ready to enjoy batch after batch of consistently delicious, beautifully uniform cookies.
Further Resources for Beginner Baking Recipes on BakeWithEase.com
Now that you've mastered the art of using a cookie scoop for accurate cookie scoop measurements, you're ready to tackle even more baking adventures. BakeWithEase.com offers a wealth of resources perfect for beginners and experienced bakers alike. Explore our collection of easy-to-follow drop cookie recipes, each designed with clear instructions.
Dive into our guides on essential baking techniques, understanding ingredients, and troubleshooting common baking issues. Whether you're interested in classic chocolate chip, chewy oatmeal, or delicate sugar cookies, our site provides the recipes and tips you need for success. Continue exploring BakeWithEase.com to expand your baking skills and create delicious treats with confidence.
Frequently Asked Questions
Using a cookie scoop ensures consistent cookie sizes and even baking, which leads to a more uniform and aesthetically pleasing batch. It also saves time and effort compared to manually shaping each cookie.
Consider the recipe's yield and desired cookie size. A smaller scoop (e.g., #60) is ideal for bite-sized cookies, while a larger scoop (e.g., #20) is suitable for larger cookies. Always check the recipe's recommendations.
While possible, it's difficult to achieve consistent sizes with a spoon. You can try, but aim for equal portions using a measuring spoon as a guide. The result will likely be less uniform.
Dipping the scoop in cold water or spraying it lightly with cooking spray before each scoop can help prevent sticking. Also, chilling the dough beforehand can make it easier to handle.
Avoid overfilling the scoop, as this can lead to unevenly shaped cookies. Also, don't press the dough too firmly into the scoop; a gentle fill is sufficient for accurate measurements.
Mastering the cookie scoop isn't just about uniform baking; it's about unlocking the potential for consistent deliciousness. The seemingly simple act of scooping cookie dough holds the key to achieving perfectly sized, evenly baked cookies every single time. This translates to a more enjoyable baking experience, less frustration, and ultimately, happier taste buds.
The impact of precise measurement in baking extends far beyond the individual cookie. It speaks to a broader appreciation for detail and the satisfaction derived from a process executed with care. The difference between ordinary and extraordinary is that little extra.
This quote, while not specifically about baking, perfectly encapsulates the transformative power of attention to detail, as seen in the consistent results achieved through proper use of a cookie scoop. The pursuit of the perfect cookie, in its own way, reflects a larger human desire for control, consistency, and ultimately, perfection in our endeavors.
So, the next time you find yourself reaching for that bag of cookie dough, remember the power of the cookie scoop. Don't just scoop; measure. Don't just bake; create. Take the time to understand the nuances of your tools and the impact of precision. Embrace the journey towards baking perfection, one perfectly measured scoop at a time. The reward? A batch of cookies that are not only visually stunning but also consistently delicious, a testament to your dedication and skill.
Thanks for joining us on this cookie-making adventure! You've now got the secret weapon to perfectly consistent cookies – the humble cookie scoop. Ready to put your new skills to the test?
- Bake a batch of your favorite cookies using your newly mastered scooping technique. Share your results with us!
- Experiment with different cookie doughs and see how the scoop performs with varying consistencies.
- Tell your friends about this game-changing baking tip – let's spread the word!
What delicious cookie creation will you bake first?