
Why Basic Piping is Your Next Baking Skill

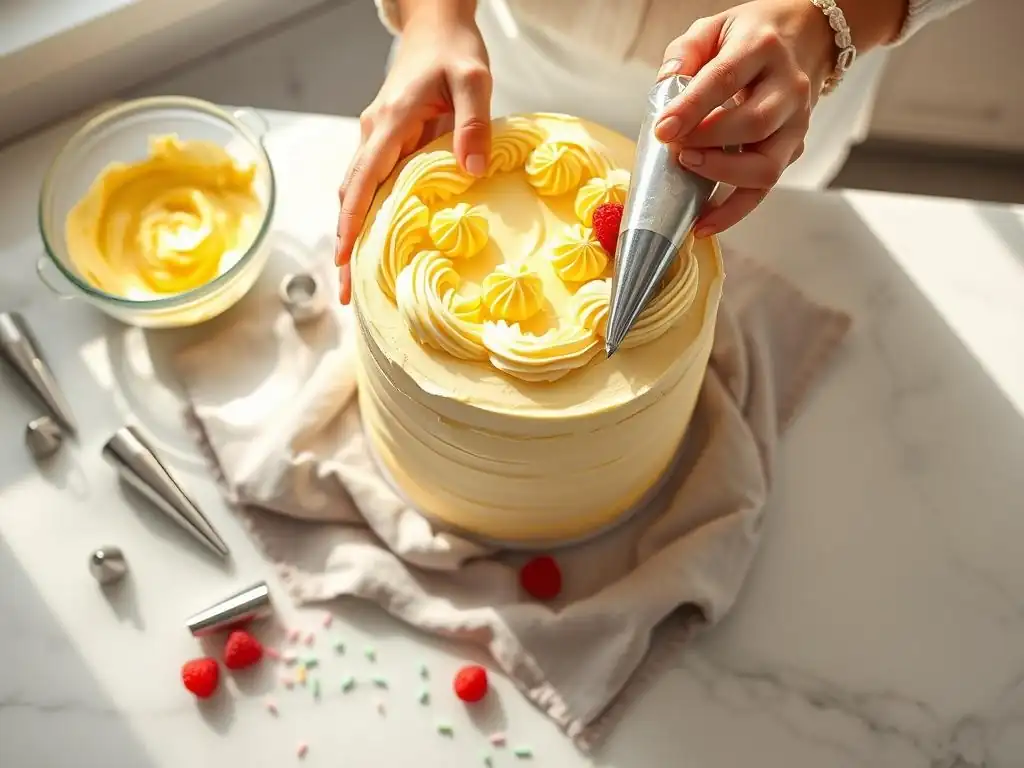
Welcome to BakeWithEase, your partner in creating delicious masterpieces! Ever wondered how to elevate your baked goods from simple to stunning? We're diving into the world of easy buttercream piping techniques – a skill that unlocks a world of decorative possibilities. Discover how even a beginner can achieve professional-looking results and transform ordinary cakes and cookies into edible works of art. Are you ready to learn the secrets? Let's get started!
- Elevate Your Baking with Easy Buttercream Piping Techniques
- The Allure of Buttercream Piping: Beyond Simple Frosting
- Essential Tools for Mastering Easy Buttercream Piping Techniques
- Buttercream Basics: The Foundation for Stunning Piping
- Easy Buttercream Piping Techniques: A Step-by-Step Guide
- Troubleshooting Common Buttercream Piping Problems
- Beyond the Basics: Exploring More Advanced Piping Techniques
- Easy Buttercream Piping Ideas for Your Next Baking Project
- Practice Makes Perfect: Tips for Improving Your Piping Skills
- Where to Find Inspiration and Resources for Easy Buttercream Piping
-
Frequently Asked Questions
- What exactly are easy buttercream piping techniques, and why should I learn them?
- I'm a complete beginner. Are these techniques really easy enough for me to learn?
- What kind of buttercream is best for piping, and where can I find recipes?
- What basic piping tools will I need to get started, and are they expensive?
- How do I avoid common buttercream piping mistakes, such as air bubbles or uneven designs?
- Final Reflection: Mastering the Art of Effortless Elegance
- Unleash Your Inner Pastry Chef: Master Basic Piping!
Elevate Your Baking with Easy Buttercream Piping Techniques
Basic piping skills are often seen as a gateway to more advanced cake and cookie decorating, transforming simple baked goods into stunning creations. Mastering easy buttercream piping techniques is a fundamental step that unlocks a world of possibilities, allowing you to add professional flair to everything from cupcakes to celebration cakes right in your own kitchen. It's a skill that builds confidence and expands your creative horizons in baking.
This article delves into the essentials of easy buttercream piping techniques, guiding you through the necessary tools, the foundational knowledge of buttercream consistency, and step-by-step instructions for simple yet effective designs. Whether you're aiming to pipe elegant swirls on cupcakes or add delicate borders to a cake, these techniques are accessible and rewarding.
Unlock Professional-Looking Desserts at Home
Learning easy buttercream piping techniques allows you to achieve that polished, bakery-quality look without needing years of professional training. With just a few basic tools and a little practice, you can transform a plain cake or a batch of simple cookies into visually appealing desserts that impress your friends and family. Imagine piping perfect rosettes on a birthday cake or adding intricate details to sugar cookies – these skills make it possible.
For instance, a batch of 12 vanilla cupcakes, frosted simply with a spatula, might look nice, but applying a classic star tip swirl using basic piping techniques instantly elevates their appearance dramatically. This simple technique can take less than 30 seconds per cupcake once you have the hang of it, offering a significant return on the time investment in learning the skill. It's about adding that extra touch that makes your homemade treats truly special.
BakeWithEase: Mastering Basic Piping for Stunning Results
At BakeWithEase, we believe that mastering basic piping techniques should be accessible and enjoyable for everyone. Our approach focuses on breaking down these skills into manageable steps, providing clear guidance on choosing the right equipment and understanding the nuances of buttercream. We aim to demystify the process, allowing even beginner bakers to achieve beautiful results.
Our guides on easy buttercream piping techniques emphasize practical tips and common troubleshooting, helping you avoid pitfalls like runny frosting or uneven lines. We understand that consistency is key, both in your buttercream and in your piping practice. By focusing on fundamental techniques like consistent pressure and angle, we help you build the muscle memory needed for smooth, professional-looking decorations on your baked goods.
The Allure of Buttercream Piping: Beyond Simple Frosting
Moving beyond simply spreading frosting with a knife opens up a vast landscape of decorative possibilities. Piping buttercream allows for precision, texture, and form that simple spreading cannot achieve. It's the difference between a functional covering and an artistic expression on your edible canvas.
Buttercream piping is not just about making things look pretty; it also allows for practical benefits like creating dams for fillings, building structural elements, or covering imperfections seamlessly. It adds a layer of sophistication and intentional design to your baked goods, signaling a step up in your baking journey.
Why Piping Skills Are Essential for Intermediate Bakers
For intermediate bakers looking to expand their repertoire, mastering piping skills is a logical next step. You've likely perfected your cake batters, cookie doughs, and perhaps even some basic pastries. Now, it's time to focus on finishing and presentation, and easy buttercream piping techniques are fundamental to this.
Developing proficiency in piping allows you to tackle more complex recipes and decorating projects. It enables you to create layered cakes with piped borders, decorate themed cookies with intricate details, or even begin exploring techniques like piping choux paste or meringue. It builds upon your foundational baking knowledge by adding a crucial decorative dimension, making you a more versatile and capable baker.
From Basic Swirls to Elegant Designs: Expanding Your Baking Repertoire
Beginning with easy buttercream piping techniques like simple swirls and dots lays the groundwork for more intricate designs. Once you're comfortable with the basics of handling a piping bag and controlling pressure, you can easily progress to creating borders, writing messages, and even piping simple flowers.
Consider the classic rosette swirl on a cupcake, achievable with a large star tip (like a 1M). This simple technique, mastered in minutes, is a cornerstone of cupcake decoration. From there, you can explore shell borders with a star tip, elegant ruffles with a petal tip, or delicate lacework with a small round tip. Each basic technique learned adds another tool to your decorating arsenal, progressively expanding your ability to create stunning baked goods.
Essential Tools for Mastering Easy Buttercream Piping Techniques
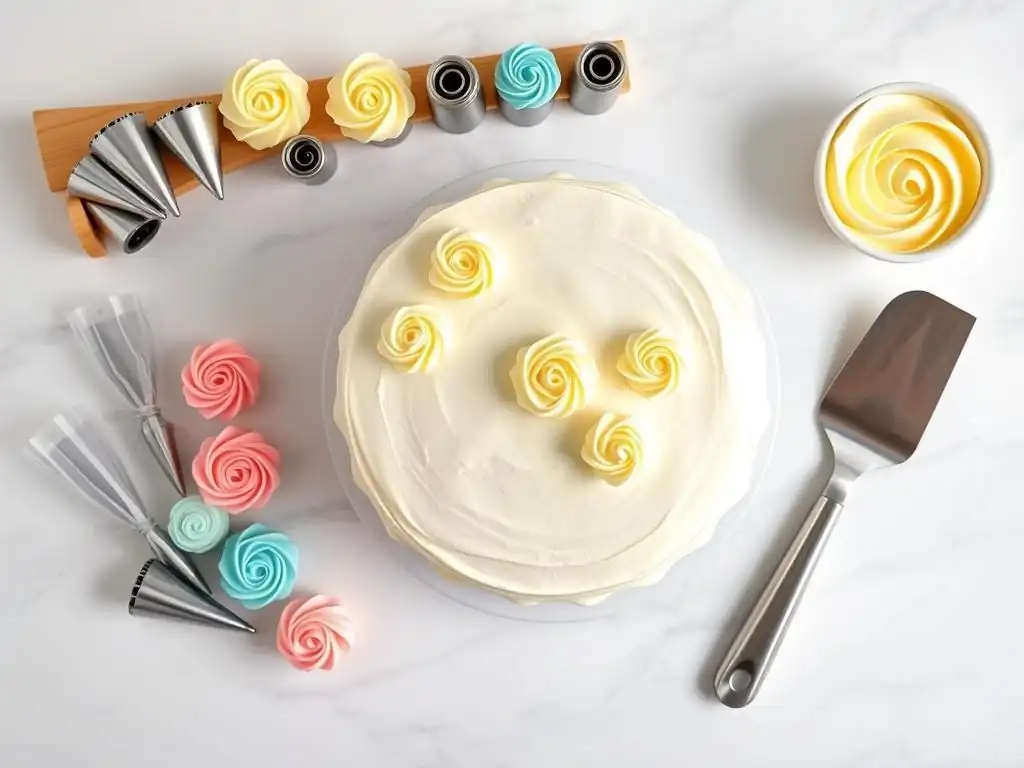
Having the right tools is crucial for successful buttercream piping. Fortunately, the basic equipment is relatively inexpensive and widely available. Investing in a few key items will make learning and practicing easy buttercream piping techniques much more enjoyable and effective.
While you can start with minimal tools, expanding your collection slightly will allow you to explore a wider range of designs. Understanding the function of each tool is key to using them effectively and achieving the best results with your buttercream.
The Right Piping Bags: Choosing Between Disposable and Reusable
Piping bags are the vessels that hold your buttercream, allowing you to control its flow through a nozzle. You have two main options: disposable and reusable. Disposable bags, typically made of plastic, are convenient as they require no cleaning – simply use and discard. They are great for beginners or for projects requiring multiple colors. A pack of 100 medium-sized disposable bags can cost around $10-$15.
Reusable piping bags, often made from coated cotton or silicone, are more environmentally friendly and durable. They require washing after each use but can last for many years. A good quality set of reusable bags might cost $15-$30. For learning easy buttercream piping techniques, either type works well, but many find disposable bags easier for cleanup, especially when working with vibrant colors that might stain reusable bags.
Piping Nozzles Explained: A Guide to Essential Shapes and Sizes
Piping nozzles, also called piping tips, are attached to the end of the piping bag and determine the shape of the buttercream as it's extruded. Starting with a basic set of essential nozzles is recommended for mastering easy buttercream piping techniques. A small set of 4-6 fundamental tips can be purchased for under $20 and will allow you to create a wide variety of designs.
Nozzles come in various sizes and shapes, each producing a distinct effect. Understanding the most common types will help you choose the right one for the desired decoration. Most nozzles are numbered, and charts are widely available online to show the pattern each number creates.
Round Nozzles: Perfect for Lines, Dots, and Outlines
Round nozzles (often numbered 1, 3, 5, 10, 12, etc.) have a simple circular opening. Small round tips (like #1 or #2) are excellent for piping fine lines, writing messages, or creating delicate dots. Medium round tips (#5 to #10) are useful for piping thicker lines, filling in areas, or creating larger dots.
Larger round tips (like #12) can be used for piping mounds of frosting, macarons, or even choux pastry. Mastering consistent pressure with a round tip is fundamental to many easy buttercream piping techniques, as it teaches control over the flow and thickness of the buttercream. A steady hand and even pressure yield smooth, uniform lines and dots.
Star Nozzles: Creating Classic Swirls and Borders
Star nozzles are incredibly versatile and come in two main types: open star (like 1M, 4B, 21) and closed star (like 2D, 32, 199). Open star tips produce defined ridges and are perfect for creating the classic cupcake swirl, shell borders, or zigzags. The popular 1M tip is an open star that creates large, defined swirls and rosettes.
Closed star tips produce more tightly ridged patterns and are often used for creating rosettes with more petals or borders with a different texture. Mastering the simple swirl with a star tip is one of the easiest buttercream piping techniques and is a cornerstone skill for decorating cupcakes and cakes quickly and beautifully.
Petal Nozzles: Crafting Realistic Flowers and Ruffles
Petal nozzles (like 104, 124, 127) are shaped like a teardrop or a curved slit. They are essential for piping realistic buttercream flowers, such as roses, peonies, or carnations. By holding the nozzle with the wider end down and the narrower end up, you can create delicate petals by varying pressure and movement.
These tips are also fantastic for creating ruffled borders or textured swags on the sides of cakes. While piping complex flowers can be more advanced, practicing simple petal movements with a petal tip is a great way to explore more artistic easy buttercream piping techniques and add beautiful, flowing elements to your desserts.
Couplers: Making Nozzle Switching Easy
Couplers are two-part plastic devices that fit inside a piping bag, allowing you to change nozzles without changing the bag of buttercream. The base piece goes inside the bag before filling, with the end of the bag snipped just enough for the coupler threads to poke through. The nozzle is placed over the threads on the outside, and a ring screws on to secure it.
Using couplers is incredibly convenient when you need to use multiple tips with the same color of buttercream, for example, piping a border with a star tip and then writing a message with a round tip on the same cake. A set of standard couplers is a worthwhile investment, typically costing under $10, and makes practicing different easy buttercream piping techniques much more efficient.
Buttercream Basics: The Foundation for Stunning Piping
Even with the best tools, achieving beautiful piped decorations depends heavily on the quality and consistency of your buttercream. Too soft, and your designs will lose their shape; too stiff, and it will be difficult to pipe smoothly. Understanding buttercream is fundamental to mastering easy buttercream piping techniques.
The ideal consistency for piping is firm enough to hold its shape but soft enough to flow smoothly through the nozzle without requiring excessive force. Temperature plays a significant role, so working in a cool environment is often beneficial.
Achieving the Perfect Buttercream Consistency for Piping
The perfect piping consistency is often described as similar to toothpaste or firm peanut butter. If your buttercream is too soft, it might be too warm. Try chilling it in the refrigerator for 10-15 minutes, stirring it every few minutes to check. If it's still too soft after chilling, you might need to add a little more powdered sugar (for American buttercream) or butter (for meringue-based buttercreams). Additions should be made gradually, perhaps 1-2 tablespoons at a time, mixing thoroughly between additions.
If your buttercream is too stiff, it might be too cold or lack enough liquid. Let it sit at room temperature for a bit, or add a tiny amount of milk, cream, or water (start with just a teaspoon) and beat until smooth. Over-beating can sometimes make buttercream too stiff, so ensure it's just mixed until smooth and creamy. The goal for easy buttercream piping techniques is a consistency that flows but maintains crisp edges.
American Buttercream: A Beginner-Friendly Option
American buttercream is one of the easiest buttercreams to make, typically consisting of butter, powdered sugar, milk or cream, and flavoring. It's known for its sweetness and is relatively stable for piping once the correct ratio of butter to sugar is achieved. A common ratio is 1 part butter to 2 parts powdered sugar by weight, plus liquid.
This type of buttercream is excellent for practicing easy buttercream piping techniques because it holds its shape well at room temperature (provided the room isn't excessively warm) and is forgiving. Its slight stiffness makes defined shapes like stars and shells easy to achieve. However, it can crust over if left exposed to air, so keeping it covered is important.
Swiss Meringue Buttercream: A Smooth and Stable Choice
Swiss meringue buttercream is made by heating egg whites and sugar over a double boiler, whipping them into a stiff meringue, and then gradually beating in softened butter. It results in a much less sweet, incredibly smooth, and silky buttercream that is very stable for piping.
While slightly more involved to make than American buttercream, Swiss meringue buttercream is less prone to developing air bubbles and holds intricate shapes beautifully. Its smooth texture makes piping details like ruffles and flowers particularly stunning. It's a fantastic option for refining your easy buttercream piping techniques once you're comfortable with the basics.
Coloring Your Buttercream: Achieving Vibrant and Consistent Hues
Coloring buttercream adds another dimension to your decorating. Gel or paste food coloring is recommended over liquid coloring, as liquid can alter the consistency of the buttercream, making it too thin for piping. Start with a very small amount of gel color on a toothpick and gradually add more until you achieve the desired shade. It's easier to add more color than to take it away.
For vibrant colors, you may need to use a significant amount of gel coloring, especially reds, blacks, or deep blues. Mix the color thoroughly to ensure no streaks remain. If coloring a large batch, divide the buttercream and color smaller portions to ensure consistency across colors or shades. Remember that colors can deepen slightly as they sit.
Easy Buttercream Piping Techniques: A Step-by-Step Guide
Ready to start piping? These basic techniques are the building blocks for countless decorations. Practice them on a piece of parchment paper or the back of a baking sheet until you feel comfortable before moving onto your baked goods. Remember, consistency in pressure and angle is key to mastering these easy buttercream piping techniques.
A practice board (a flat surface covered with parchment paper) is invaluable. You can scrape off the piped buttercream and reuse it, minimizing waste while you hone your skills. Aim for uniform size and shape in your practice runs.
Mastering the Basic Swirl: A Classic Piping Technique
The basic swirl is arguably the most popular and easiest buttercream piping technique for cupcakes.
- Fit a piping bag with a large star tip (like 1M) and fill it with buttercream, about two-thirds full. Twist the top of the bag closed.
- Hold the bag perpendicular (at a 90-degree angle) to the top of the cupcake, with the tip centered.
- Apply steady, even pressure to the bag.
- Starting from the outside edge, pipe a spiral moving inwards, overlapping slightly with the previous layer.
- As you reach the center, gently lift the bag while decreasing pressure to create a peak.
- Release pressure completely and pull the bag straight up.
- Ensure your buttercream is the correct consistency – too soft, and the swirl will collapse; too stiff, and it will be hard to pipe smoothly.
- Try practicing circles of varying sizes on parchment paper to get a feel for the pressure needed.
- Aim for smooth, continuous movement from start to finish.
Creating Simple Borders: Adding a Professional Touch
Borders add a finished look to cakes and can hide imperfections where the cake meets the plate or cake board. Shell borders with a star tip are a classic easy buttercream piping technique.
- Fit a bag with a star tip (like #21 or #32) and fill it.
- Hold the bag at a 45-degree angle to the surface (either the top edge or bottom edge of the cake).
- Apply pressure, allowing the buttercream to fan out slightly as it comes out of the tip, forming the base of the "shell."
- As you release pressure, quickly pull the bag towards you (or away from the starting point) to create the tail of the shell.
- Stop pressure completely and lift.
- For the next shell, start with the beginning of the new shell overlapping the tail of the previous one.
- Practice creating consistent shell sizes and tails on your practice board.
- Maintain the 45-degree angle throughout the process.
- Overlapping the shells consistently creates a smooth, continuous border.
Piping Dots and Lines: Adding Delicate Details
Dots and lines, while seemingly simple, are fundamental easy buttercream piping techniques used for messages, outlines, and simple patterns. They require good pressure control.
- Fit a bag with a small to medium round tip (like #3, #5, or #8) and fill it.
- For dots: Hold the bag perpendicular to the surface. Apply pressure for a moment until the dot is the desired size. Stop pressure and lift straight up.
- For lines: Hold the bag at a slight angle above the surface. Apply steady pressure while moving the bag smoothly across the surface in the desired direction. Maintain consistent speed and pressure for an even line. To end the line, stop pressure and gently pull the bag away.
- Practice piping rows of dots of uniform size.
- Practice piping straight lines, curved lines, and zigzags to develop control.
- The height of the tip above the surface affects the thickness and neatness of the line or dot. Closer to the surface yields flatter results, further away creates more dimension.
Practicing Pressure Control: The Key to Consistent Piping
Pressure control is perhaps the single most important aspect of mastering easy buttercream piping techniques. The amount of pressure you apply to the bag dictates the flow rate of the buttercream, which in turn affects the size and thickness of your piped shapes. Consistent pressure is essential for uniform results, whether you're piping dots, lines, or swirls.
Try this exercise: Fill a bag with buttercream and a round tip. On a flat surface, try to pipe a line while maintaining the exact same pressure from start to finish. Then, try a line where you start with light pressure and gradually increase it. Observe how the line changes thickness. Repeat this with different tips. Developing this awareness of how much pressure you are applying is crucial for executing controlled, beautiful piping designs.
Troubleshooting Common Buttercream Piping Problems
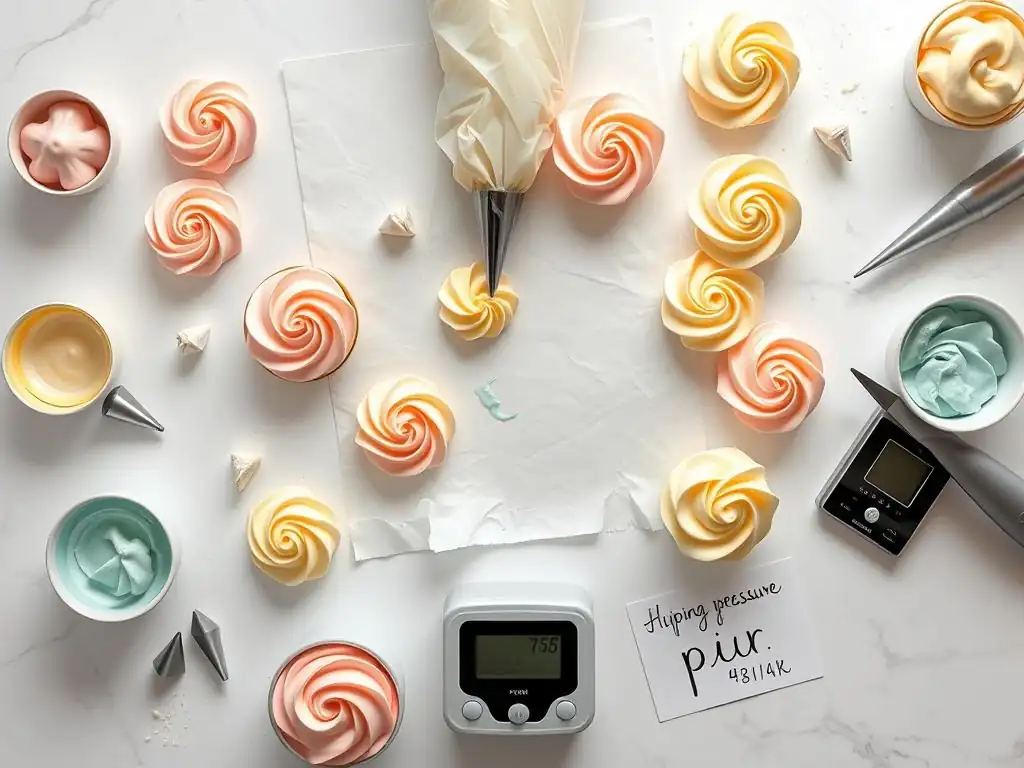
Even with careful preparation, you might encounter issues when piping buttercream. Don't get discouraged – most problems have simple solutions. Knowing how to troubleshoot common issues is part of mastering easy buttercream piping techniques.
- Buttercream too soft?
- Buttercream too stiff?
- Air bubbles causing breaks in your lines?
- Designs looking uneven?
Let's address these common challenges head-on.
Buttercream Too Soft: How to Fix It
If your buttercream is too soft, your piped shapes will droop, lose definition, or melt. This is usually due to warmth, either from the room temperature, warm hands holding the bag, or the ingredients themselves being too warm.
- Solution: Try chilling the buttercream. Place the bowl of buttercream in the refrigerator for 10-15 minutes. Stir it every few minutes to ensure even cooling. Alternatively, place the filled piping bag in the fridge for a few minutes. If it's American buttercream and still too soft after cooling, you can try beating in a tablespoon or two of additional sifted powdered sugar. For meringue-based buttercreams, chilling is usually sufficient.
Buttercream Too Stiff: How to Adjust
Buttercream that is too stiff can be hard to pipe, requiring excessive force, which can tire your hands and lead to uneven results. It might also appear crumbly or break as it comes out of the tip. This is often due to being too cold or having too high a ratio of solid fat to liquid.
- Solution: Let the buttercream sit at room temperature for a while to soften. If it's just slightly too stiff, you can beat it vigorously for a minute or two to warm it up and loosen it. If it's significantly too stiff, especially meringue-based, you might need to add a tiny amount (start with 1 teaspoon) of milk, cream, or even warm melted butter and beat it in until smooth and pliable. Ensure you don't add too much liquid at once.
Air Bubbles in Buttercream: Prevention and Solutions
Air bubbles can cause frustrating breaks in your piped lines and dots, leading to inconsistent designs. They often occur from over-beating the buttercream or incorporating air when filling the piping bag.
- Prevention: When mixing buttercream, especially meringue-based types, beat on low speed for a few minutes at the end to help push out air bubbles. When filling the piping bag, push the buttercream down firmly to avoid trapping air pockets.
- Solution: If you notice air bubbles while piping, scrape the buttercream back into the bowl, stir it vigorously with a spatula (pressing it against the sides of the bowl can help release air), and then refill the bag. You can also try snipping a larger hole in the end of the piping bag and pushing the buttercream through a few times before attaching the tip.
Uneven Piping: Tips for Achieving Smooth Results
Uneven piping – wobbly lines, inconsistent shell sizes, or lopsided swirls – is usually a result of inconsistent pressure, speed, or angle while piping.
- Solution: Focus on maintaining steady, even pressure on the piping bag from start to finish of each piped element. Practice moving your hand at a consistent speed. Ensure you are holding the bag at the correct angle for the technique you are using (e.g., 90 degrees for swirls, 45 degrees for borders). Practicing on a flat surface first, as mentioned earlier, is the best way to build muscle memory for these consistent movements.
Beyond the Basics: Exploring More Advanced Piping Techniques
Once you've mastered the easy buttercream piping techniques, a world of more complex and stunning designs awaits. These techniques build upon the foundational skills of pressure control and tip manipulation.
Exploring these more advanced methods allows you to create truly artistic and elaborate decorations for special occasions. They require patience and practice, but the results are incredibly rewarding.
Piping Flowers: Creating Beautiful Floral Designs
Piping buttercream flowers is a popular advanced technique that allows you to create realistic or stylized blooms directly onto cakes or cupcakes, or onto parchment paper to chill and then transfer. Petal tips (like 104) and flower nail are essential tools.
Techniques range from simple rosettes (a type of star tip swirl) to complex multi-petal roses, peonies, and chrysanthemums. Learning to vary pressure and angle while rotating the flower nail or cake is key. A single buttercream rose, for instance, can take several minutes to pipe, requiring careful layering of petals.
Ruffle Piping: Adding Texture and Dimension
Ruffle piping creates beautiful, flowing textures that add elegance and dimension to the sides of cakes. This technique typically uses a petal tip (like 104 or 125).
By holding the petal tip with the thicker end against the cake and the thinner end slightly away, and moving your hand up and down or side to side while applying pressure, you can create soft, fabric-like ruffles. Varying the pressure and movement allows for different styles of ruffles, from tight waves to loose swags. Piping ruffles around the entire circumference of a standard 8-inch cake can take 20-30 minutes of consistent piping.
Basketweave Piping: A Classic and Impressive Technique
The basketweave technique creates a woven pattern on the side of a cake, resembling a basket. It uses a basketweave tip (which has one smooth edge and one serrated edge, like tip 47) or sometimes a large flat tip.
This technique involves piping alternating horizontal and vertical strips, carefully layering them to create the woven effect. It requires precision and patience to ensure the lines are straight and evenly spaced. Mastering this technique demonstrates excellent control over pressure and line work, building directly on basic piping techniques. Piping a full basketweave on a cake side can be time-consuming, often taking an hour or more for a medium-sized cake.
Easy Buttercream Piping Ideas for Your Next Baking Project
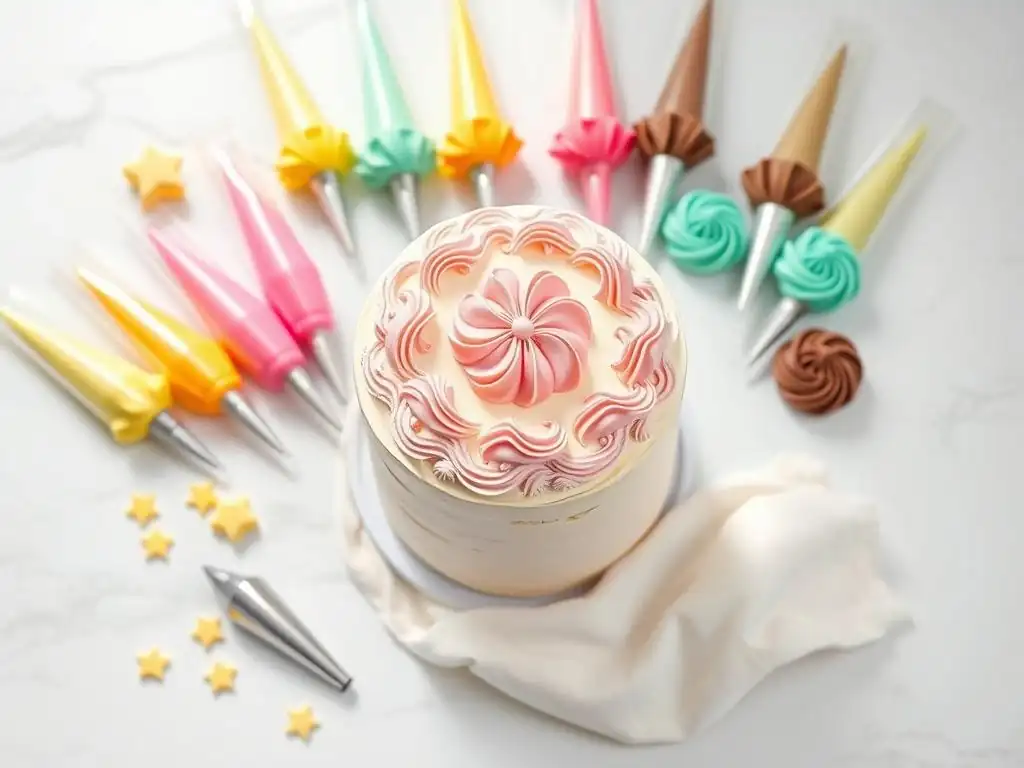
Now that you're familiar with the tools and basic techniques, let's look at how you can apply easy buttercream piping techniques to your next baking project. Even simple piping can transform your baked goods.
Get inspired to try these techniques on various desserts, elevating their visual appeal with minimal effort.
Cake Decorating Ideas: From Simple to Elaborate
For cakes, easy buttercream piping techniques can be used to add simple yet effective decorations.
- Pipe a classic star border around the top and bottom edges of the cake using a medium star tip (like #21).
- Pipe simple dots or pearls around the base or along the top edge using a round tip (#8 or #10).
- Pipe rosettes or swirls across the top surface using a large star tip (like 1M).
- Use a small round tip (#3 or #4) to pipe a simple message like "Happy Birthday."
These basic ideas can be combined or used individually to add a polished look to any cake, whether it's a simple sheet cake or a layered celebration cake.
Cupcake Piping Inspiration: Unique and Creative Designs
Cupcakes are perfect canvases for practicing easy buttercream piping techniques.
- The classic 1M swirl is a perennial favorite.
- Try piping concentric circles with a round tip (#12 or #1A) for a smooth, domed top.
- Use a star tip (#32 or #21) to pipe small shells or stars covering the entire surface for a textured look.
- Pipe multiple small rosettes using a 1M or 2D tip for a bouquet effect.
- Use a petal tip (#104) to pipe simple ruffles or swirls on top.
A batch of 12 cupcakes can be piped with a basic swirl in under 5 minutes once you're comfortable with the technique, showcasing how efficient these skills can be.
Piping isn't just for cakes and cupcakes; it's essential for decorating sugar cookies with buttercream or royal icing. While royal icing is more common for intricate, hard-setting designs, buttercream can be used for softer, more rustic looks.
- Use a small round tip (#3 or #4) to outline cookies before flooding with thinner buttercream (though royal icing is better for flooding).
- Pipe dots, lines, or simple patterns directly onto cooled cookies with slightly firmer buttercream using small round or star tips (#16, #21).
- Pipe small rosettes or stars on top of frosted cookies for added decoration.
Piping on cookies requires finer control, often utilizing smaller tips and focusing on delicate details.
Practice Makes Perfect: Tips for Improving Your Piping Skills
Like any skill, mastering easy buttercream piping techniques requires practice. Don't expect perfection on your first try. Be patient with yourself and focus on consistent effort.
The more you practice, the more comfortable you will become with handling the piping bag, controlling pressure, and creating smooth, even designs.
Consistent Practice Exercises: Building Muscle Memory
Dedicate regular time to practicing basic piping exercises. Even 10-15 minutes a few times a week can make a significant difference.
- Pipe rows of consistent dots using different sized round tips.
- Pipe straight lines, wavy lines, and zigzags.
- Practice piping continuous shell borders.
- Fill a practice board with 1M swirls.
Remember you can scrape the buttercream off a non-porous surface (like parchment paper or a cutting board) and re-bag it for practice, minimizing waste. Focus on the feel of the pressure and movement.
Watching Tutorials and Seeking Inspiration
Visual learning is incredibly helpful for piping. Watch online video tutorials to see how experienced decorators hold the bag, apply pressure, and move their hands. Pay attention to the angle they use for different techniques.
Look at photos of beautifully piped cakes, cupcakes, and cookies for inspiration. Try to identify the tips and techniques used in designs you admire and challenge yourself to replicate them during your practice sessions.
Don't Be Afraid to Experiment: Finding Your Own Style
Once you're comfortable with the basic easy buttercream piping techniques, don't be afraid to experiment. Try combining different tips and techniques. What happens if you use a star tip to pipe dots? Or a round tip to create a wavy border?
Experiment with different buttercream consistencies (slightly softer or firmer) to see how they affect the piped result. Developing your own style comes from understanding the fundamentals and then playing with them creatively.
Where to Find Inspiration and Resources for Easy Buttercream Piping
The baking community is incredibly generous with sharing knowledge and inspiration. There are numerous resources available to help you learn and refine your easy buttercream piping techniques.
From online platforms to in-person classes, you can find guidance and inspiration to continue growing your piping skills.
Online Tutorials and Baking Blogs
Websites like YouTube and various baking blogs host thousands of free tutorials specifically on buttercream piping techniques. Search for terms like "easy buttercream piping," "cupcake swirl tutorial," "basic cake border piping," or "how to pipe a buttercream rose."
Many baking blogs associated with ingredient or tool companies also offer step-by-step photo guides and tips. These resources are accessible anytime and anywhere, making them perfect for learning at your own pace.
Books on Cake Decorating and Piping Techniques
Numerous books are dedicated to cake decorating and buttercream piping. These often provide comprehensive guides to different tips, techniques, and design ideas, often with detailed illustrations or photographs.
Look for books specifically focused on foundational skills or "beginner" cake decorating. They can offer structured lessons and a wide range of designs to practice, building from easy buttercream piping techniques to more complex methods.
Local Baking Classes and Workshops
Check local craft stores, community centers, or specialty cake supply shops for in-person baking or cake decorating classes. Hands-on instruction from an experienced decorator can be invaluable for learning proper technique and getting personalized feedback.
Workshops focusing on specific skills, like "easy buttercream piping techniques" or "cupcake decorating," allow you to practice in a supportive environment and ask questions in real-time.
Frequently Asked Questions
What exactly are easy buttercream piping techniques, and why should I learn them?
Easy buttercream piping techniques are simple methods used to decorate baked goods with buttercream frosting. Learning them allows you to elevate the visual appeal of your creations without needing advanced skills.
I'm a complete beginner. Are these techniques really easy enough for me to learn?
Yes! BakeWithEase focuses on beginner-friendly approaches. Our guides break down complex piping into manageable steps, ensuring success even for those with no prior experience.
What kind of buttercream is best for piping, and where can I find recipes?
A stiff but smooth American buttercream is often recommended for beginners. BakeWithEase.com offers a variety of buttercream recipes, including options specifically formulated for piping.
What basic piping tools will I need to get started, and are they expensive?
You'll typically need piping bags, piping tips (like a star tip or round tip), and a coupler. These tools are generally affordable and readily available at most baking supply stores.
How do I avoid common buttercream piping mistakes, such as air bubbles or uneven designs?
Practice makes perfect! BakeWithEase provides tips on proper bag handling and consistent pressure application. Avoiding overmixing the buttercream is also key to preventing air bubbles.
Final Reflection: Mastering the Art of Effortless Elegance
The ability to pipe buttercream flawlessly isn't just about creating visually stunning cakes; it's about unlocking a world of creative expression and elevating your baking to a new level of artistry. This seemingly simple skill opens doors to intricate designs, personalized touches, and the sheer joy of transforming a plain cake into a masterpiece. In a world saturated with visually driven content, mastering basic piping techniques provides a tangible and rewarding way to stand out.
The impact of simple yet elegant cake decorating techniques on the cultural landscape is undeniable. From the rise of home baking blogs and social media challenges to the increasing popularity of cake decorating classes, the desire to create beautiful and personalized treats is clearly on the rise. The best things in life are homemade,
a sentiment echoed across generations, finds new expression in the meticulous swirls and delicate rosettes of expertly piped buttercream. This isn't just about aesthetics; it's about connecting with a tradition of handcrafted goodness and sharing that joy with others.
Now, it's your turn. Don't let the fear of imperfection hold you back. Grab your piping bag, choose your favorite tip, and experiment! Embrace the learning process, celebrate the small victories, and watch as your confidence grows with each perfectly piped swirl. The journey of mastering buttercream piping is as rewarding as the final result, a testament to your creativity and dedication. So, pick up your piping bag and let your imagination run wild – your next baking masterpiece awaits!
Unleash Your Inner Pastry Chef: Master Basic Piping!
Thanks for taking the time to explore the wonderful world of basic piping! We hope you now feel confident in tackling this essential baking skill. Ready to put your newfound knowledge into practice?
- Try your hand at a simple rosette or star tip design. This is the perfect way to build your confidence and experiment with different pressures and techniques. Don’t be afraid to make a mess – that’s part of the learning process!
- Share your piping creations with us! Use #BakeWithEasePiping on social media – we’d love to see your beautiful (or hilariously imperfect!) results.
- Challenge yourself to bake a piped treat for a friend or family member. A small gesture with a big flavor impact. What better way to show off your skills?
What delicious piped creation will you bake first? Let us know in the comments below!