
Cookies That Pop: Simple Piping Ideas for Beginners


Welcome to BakeWithEase, your companion in conquering the kitchen and creating delectable treats! Ever wished you could transform ordinary cookies into edible works of art? Dive into our world of baking, where we demystify the process, one delicious recipe at a time. Get ready to discover the secrets to achieving stunning results with our easy piping cookie tutorials, perfect for beginners looking to add that extra wow factor to their baked creations.
But that's just the beginning! Explore our diverse collection of recipes and techniques to unlock your full baking potential, from perfecting pastries to mastering magnificent cakes. Ready to bake with ease? Let's get started!
- Introduction to Beginner-Friendly Cookie Piping Tutorials for BakeWithEase
- Getting Started: Essential Tools and Ingredients for Cookie Piping
- Mastering the Basics: Fundamental Piping Techniques for Cookies
- Easy Piping Cookie Tutorials: Step-by-Step Designs for Beginners
- Troubleshooting Common Cookie Piping Problems
- Beyond the Basics: Expanding Your Cookie Piping Skills
- Conclusion: Unleash Your Creativity with Easy Cookie Piping Ideas
-
Frequently Asked Questions
- What exactly are easy piping cookie tutorials, and who are they for?
- Where can I find reliable easy piping cookie tutorials for cookies?
- What essential tools do I need to start with easy piping cookie tutorials?
- How can I ensure my royal icing is the right consistency for easy piping cookie tutorials?
- What are some common mistakes to avoid when following easy piping cookie tutorials?
- Final Reflection: The Sweet Simplicity of Piping Dreams
- Unleash Your Inner Pastry Chef: Piping Perfection Awaits!
Welcome, fellow baking enthusiasts! Diving into the world of cookie decorating can seem daunting, but with the right guidance, it's incredibly rewarding and fun. At BakeWithEase, we believe that beautiful cookies are within everyone's reach, especially with easy piping cookie tutorials designed specifically for beginners. This guide will walk you through the essential steps, tools, and techniques to start making your cookies pop with simple, elegant designs using royal icing. Forget the complex patterns for now; we'll focus on foundational skills that build confidence and deliver stunning results, making your homemade treats the star of any occasion.
Learning basic cookie decorating skills, particularly piping, opens up a whole new dimension in your baking journey. It transforms a simple sugar cookie into a canvas for creativity. Our goal is to demystify piping, showing you how accessible and enjoyable it is.
Whether you're preparing for a holiday, a special event, or just want to add a personal touch to your baking, these easy piping cookie tutorials are your starting point. We'll cover everything from filling a piping bag correctly to creating classic designs like dots and simple borders. Get ready to impress yourself and others with your newfound decorating prowess!
Mastering simple cookie piping techniques is a fundamental skill for any aspiring cookie decorator. It provides the ability to outline shapes, create borders, and add fine details that elevate a plain cookie into a work of art. Unlike flooding, which covers large areas, piping offers precision and control, allowing for intricate patterns and defined edges. These easy piping cookie tutorials focus on building that control, which is crucial for tackling more complex designs later on. It's the difference between a cookie that looks good and a cookie that looks professionally decorated.
Beyond aesthetics, learning piping techniques enhances your understanding of icing consistency and flow, skills vital for all types of cookie decorating. Practicing basic lines and shapes improves your hand-eye coordination and develops the muscle memory needed for steady, even piping. Think of it as learning the alphabet before writing a novel; these simple techniques are the building blocks. Plus, it's incredibly satisfying to see your designs come to life, transforming simple dough into edible masterpieces. Our easy piping cookie tutorials break down each step, making the learning process enjoyable and stress-free.
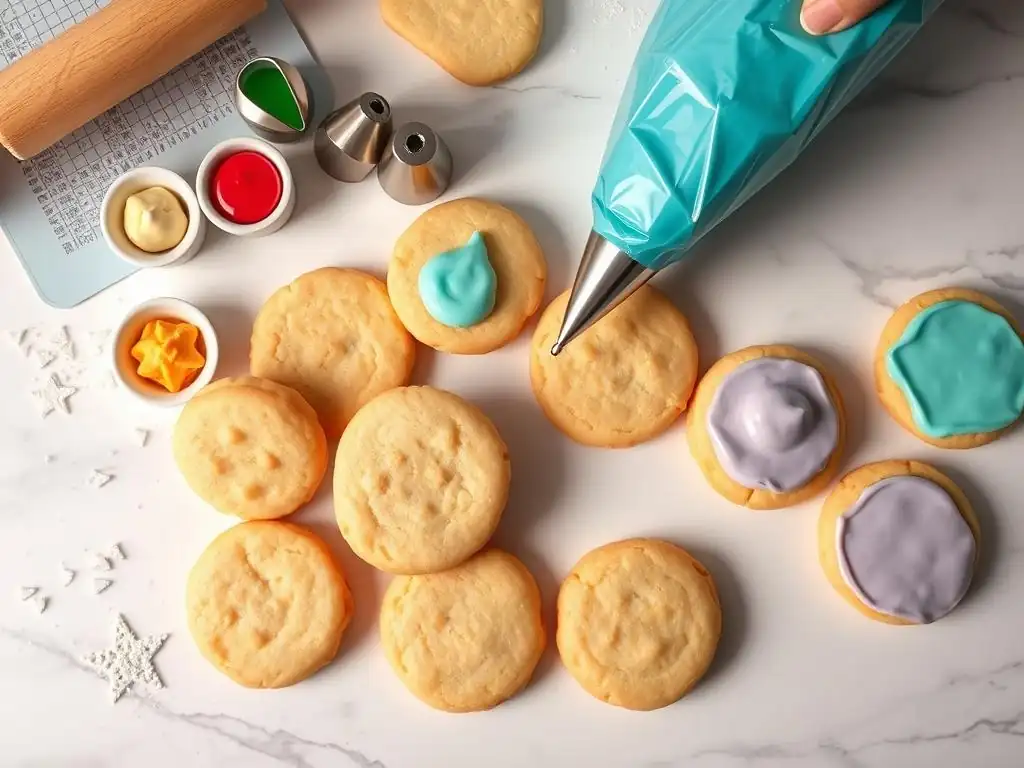
Embarking on your cookie piping adventure requires a few key tools to set you up for success. You don't need a vast collection to start; a few essential items will get you going with these easy piping cookie tutorials. Having the right tools makes the process smoother and helps achieve cleaner, more professional-looking results right from your first attempt. Investing in durable, good-quality tools is a wise choice, as they will serve you well as you grow your skills.
The core tools for beginner cookie piping include piping bags, a few basic piping nozzles (also known as tips), and optionally, couplers. While specialty shops offer a wide array of options, you can find excellent starter sets at most craft stores or online retailers. For instance, a basic set might cost around $15-$25 and include multiple bag types and a selection of popular tips. Having these readily available before you mix your icing is crucial for a seamless decorating session.
Piping Bags: Choosing Between Disposable and Reusable
Piping bags are the vessels that hold your icing and channel it through the nozzle. Beginners often start with disposable piping bags, and for good reason. They are convenient, easy to use, and clean-up is a breeze – simply discard them after use. A pack of 100 disposable bags typically costs around $10-$15, offering great value for frequent decorating. They are particularly useful when working with multiple colors of icing for easy piping cookie tutorials.
Reusable piping bags, often made from nylon or silicone, are an eco-friendly alternative. They require washing after each use, which can be a bit more effort, especially with sticky icing. However, they are durable and can last for years, making them a cost-effective choice in the long run. A set of 2-3 reusable bags might cost $8-$12. For beginners, having a mix might be ideal – disposables for multiple colors and a reusable for large batches of one color.
Piping Nozzles: A Guide to Round, Star, and Petal Tips
Piping nozzles are the small, shaped tips that attach to the end of the piping bag, determining the form of the icing as it's squeezed out. For easy piping cookie tutorials, three basic shapes are indispensable: round, star, and petal. Round tips (like Wilton #1, #2, #3, or #4) are perfect for outlining, writing, dots, and lines. A small round tip (like #2) is excellent for fine details and outlines, while a slightly larger one (#4) works well for dots and thicker lines.
Star tips (open or closed, like Wilton #16 or #21) create various star shapes, shells, and rosettes. A medium-sized star tip is versatile for borders and simple floral elements. Petal tips (like Wilton #101 or #104) are used for ruffles, swags, and flower petals. Starting with just one or two tips of each basic type (maybe one small round, one medium round, and one medium star) is sufficient for many easy piping cookie tutorials and costs only a few dollars per tip or around $10-$15 for a small starter set.
Couplers: Simplifying Nozzle Changes
A coupler is a two-part plastic adapter that allows you to change piping nozzles on the same bag of icing without emptying the bag. One part goes inside the bag before filling, and the other screws onto the outside, holding the tip in place. This is incredibly useful when you need to use different-sized round tips for outlining and then adding details, or switching between a round and a star tip with the same color.
While not strictly necessary for every simple piping task, couplers significantly enhance efficiency, especially when following easy piping cookie tutorials that involve multiple steps or details with the same icing color. A set of standard couplers costs about $5-$8 and fits most standard-sized tips. For beginners, having one or two couplers can make practicing different techniques much easier.
The foundation of successful cookie decorating lies in having the right canvas – a sturdy, delicious cookie – and the perfect medium – smooth, pipeable icing. For easy piping cookie tutorials, a reliable sugar cookie recipe that holds its shape during baking is crucial. A dough that spreads too much will distort your carefully piped designs. Similarly, the icing must have the correct consistency to flow smoothly through the piping tip without being too runny or too stiff.
Many classic sugar cookie recipes work well, but look for ones specifically noted for "no-spread" properties. Royal icing is the go-to choice for detailed piping and flooding due to its ability to dry hard with a smooth, matte finish. Getting the icing consistency right is perhaps the most critical skill in cookie piping, even for the most easy piping cookie tutorials.
Our Go-To Vanilla Sugar Cookie Recipe for Decorating
A reliable no-spread vanilla sugar cookie is the ideal base for your piping practice and projects. Our favorite recipe typically uses a ratio of approximately 3 cups all-purpose flour, 1 cup unsalted butter, 1 cup granulated sugar, 1 large egg, 1 teaspoon vanilla extract, and a pinch of salt. Creaming the butter and sugar thoroughly (for about 3-4 minutes) is key, followed by incorporating the egg and vanilla, then gradually adding the dry ingredients until just combined.
After mixing, chilling the dough is non-negotiable. Wrap the dough in plastic wrap and refrigerate for at least 1-2 hours, or preferably longer, up to 2-3 days. This solidifies the fat, which prevents excessive spreading in the oven. Roll the chilled dough to about 1/4 inch thickness on a lightly floured surface and cut out shapes.
Bake at around 350°F (175°C) for 8-12 minutes, depending on size and thickness, until the edges are lightly golden. Let them cool completely on a wire rack before even thinking about decorating. A batch using these proportions usually yields 2-3 dozen medium-sized cookies, providing ample cookies for practicing easy piping cookie tutorials.
Royal Icing Recipe: Achieving Piping and Flood Consistency
Royal icing is made primarily from powdered sugar, meringue powder (or egg whites), and water or milk. Meringue powder is recommended for beginners as it's safer and easier to work with consistently. A standard recipe might use 4 cups powdered sugar, 3 tablespoons meringue powder, and about 1/2 cup warm water, plus flavorings like vanilla or almond extract. Whisk the powdered sugar and meringue powder together, then gradually add water while mixing on low speed until the icing starts to come together. Increase speed to medium-high and beat for 5-7 minutes until stiff peaks form.
This stiff consistency is perfect for piping outlines and details. To get 'flood' consistency (thinner icing used to fill in outlined areas), gradually add small amounts of water (about a teaspoon at a time) to a portion of the stiff icing, stirring until it reaches the desired flow – it should smooth itself out within 5-10 seconds after drizzling a line back into the bowl.
For easy piping cookie tutorials focusing just on piping, you'll primarily use the stiffer consistency, but understanding how to adjust it is vital for future projects. A batch using these proportions typically makes enough icing to cover 2-3 dozen cookies, depending on the complexity of the design.
Before you tackle specific designs in easy piping cookie tutorials, mastering a few fundamental techniques will make all the difference. These basics involve how you handle the piping bag and control the flow of icing. Think of this section as your warm-up exercises before the main event. Patience and practice are key here; don't be discouraged if your first lines aren't perfectly straight or your first dots aren't perfectly round.
Focus on developing a consistent hand position and pressure. These foundational skills are transferable to any piping project, whether you're decorating cookies, cakes, or cupcakes. Dedicate some time to practicing these on parchment paper before moving onto your cooled cookies. A little practice goes a long way in building confidence for more complex easy piping cookie tutorials.
How to Fill a Piping Bag Efficiently
Filling a piping bag can be messy if not done correctly. The easiest way is to place the piping bag, tip-down (with or without a coupler and tip attached), into a tall glass or cup. Fold the top edges of the bag down over the rim of the glass. This creates a wide opening that stays open, allowing you to spoon or pour the icing in neatly using a spatula or spoon. Fill the bag no more than two-thirds full; overfilling makes the bag hard to handle and control.
Once the icing is in, lift the bag out of the glass. Unfold the top edges and twist the top of the bag tightly just above the level of the icing. This twist serves two purposes: it prevents icing from squeezing out the top and gives you something to hold and apply pressure with. Gently push the icing down towards the tip, removing any large air pockets as you go. This efficient filling method minimizes waste and keeps your hands cleaner, making your easy piping cookie tutorials much more enjoyable.
Achieving Consistent Piping Pressure for Smooth Results
Consistent pressure is the secret to smooth, even lines and uniform shapes. Hold the twisted top of the piping bag with your dominant hand – this hand controls the pressure. Use your non-dominant hand to guide the tip. Squeeze the bag with steady, even pressure from the top down. Avoid squeezing from the middle or bottom, as this can cause inconsistent flow and messy results. The pressure should come from your hand squeezing the twisted part of the bag, pushing the icing down.
Practice squeezing onto a piece of parchment paper. Start squeezing before the tip touches the surface and stop squeezing after you lift the tip away. This prevents blobs at the beginning and end of your lines. Aim for a steady stream of icing. If the line is broken or uneven, you might be applying inconsistent pressure or have an air bubble. Applying consistent pressure takes practice, but it's a fundamental skill for all easy piping cookie tutorials.
Practicing Basic Piping Shapes: Lines, Dots, and Shell Borders
Before decorating actual cookies, practice basic shapes on parchment paper. This allows you to get a feel for the icing consistency, pressure control, and tip movement without the pressure of messing up a cookie. Start with straight lines, both horizontal and vertical. Try piping lines of varying lengths and thicknesses using different tips. Aim for smooth, continuous lines without breaks or wobbles.
Next, practice piping dots. Squeeze the bag with steady pressure, letting the icing build up into a dot. Stop squeezing, then quickly pull the tip straight up. Practice making dots of uniform size. Finally, try a simple shell border using a star tip.
Apply pressure, let the icing build slightly, then drag the tip back slightly while decreasing pressure until it tapers off. Lift the tip. Repeat, overlapping each shell slightly. Mastering these basic shapes on parchment will build the confidence needed for the easy piping cookie tutorials that follow. Aim to fill a small sheet of parchment (say, 8x10 inches) with practice shapes before moving on.
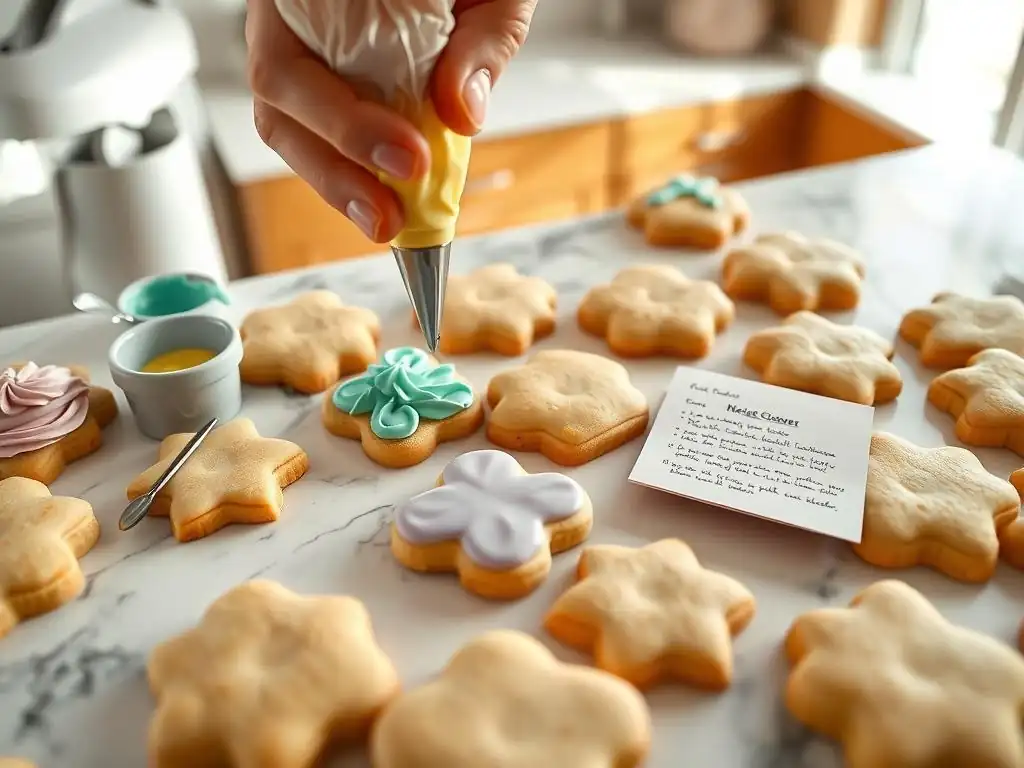
Now that you have your tools ready, your cookies baked, and your icing mixed and bagged, it's time for the fun part – decorating! These easy piping cookie tutorials are designed with beginners in mind, focusing on simple yet effective designs that yield impressive results. We'll use the basic techniques you just practiced to transform plain cookies into delightful treats. Follow each step carefully, and remember that practice makes perfect.
These tutorials are structured to guide you through each design, from preparing the icing color to the final touches. They use common cookie shapes and basic piping tips, making them accessible for anyone starting out. Get ready to see your cookies pop with personality!
This tutorial is perfect for beginners, using just one color of piping consistency icing and a small round tip to create a classic, charming design on heart-shaped cookies. Dots are one of the easiest piping elements to master and can be used to create borders or fill areas.
Step 1: Preparing Red Royal Icing for Dots
For vibrant heart cookies, red is a popular choice. Take about 1/2 cup to 1 cup of your stiff royal icing. Add a small amount of red gel food coloring using a toothpick – gel colors are concentrated and won't add excess liquid to your icing. Start with a tiny amount and add more gradually until you achieve your desired shade of red.
Mix thoroughly with a spatula, scraping down the sides of the bowl, until the color is uniform. Ensure the icing remains at a piping consistency – it should hold a firm peak but still be smooth enough to flow from the tip. If it seems too stiff, add a tiny drop of water; if too loose, stir in a teaspoon of powdered sugar. Once colored, fill a piping bag fitted with a small round tip (like Wilton #2 or #3) about halfway full.
Step 2: Piping the Dots - Spacing and Even Size
Hold the piping bag with the twisted end in your dominant hand and guide the tip with your non-dominant hand. Position the tip about 1/4 inch above the surface of a cooled heart cookie. Apply steady, even pressure to the bag, allowing the icing to build up into a round dot. Once the dot reaches the desired size (aim for about 1/8 to 1/4 inch diameter), stop squeezing and quickly pull the tip straight up. Practice this motion on parchment paper first if needed.
Now, apply this technique to your heart cookies. You can pipe dots evenly spaced around the edge of the heart, creating a simple border, or fill the entire surface of the cookie with a pattern of dots. Aim for consistent size and spacing between dots for a neat look. For a standard 3-inch heart cookie, you might pipe 15-20 dots around the edge or 50-70 dots to fill the surface, depending on their size.
Step 3: Achieving a Clean, Professional Finish
After piping the dots, you might notice small peaks where you lifted the tip. These often settle as the icing dries, especially if your consistency is just right. For stubborn peaks, you can gently tap the cookie on a flat surface or use a dry food-safe brush or toothpick to lightly pat down the peak immediately after piping. This helps the dots retain their round shape and gives your design a smoother, more professional appearance.
Allow the piped dots to dry completely before stacking or packaging the cookies. This usually takes several hours, or even overnight, depending on humidity. Once dry, the dots should be hard to the touch. This simple design is quick to execute and looks lovely, perfect for building confidence with easy piping cookie tutorials.
A scalloped border is a classic and elegant way to finish the edge of a cookie. It uses basic piping techniques with a round tip and adds a lovely frame to any cookie shape. This tutorial focuses on creating a continuous, wavy line around the perimeter.
Step 1: Outlining the Cookie with White Royal Icing
For a clean look, we'll start by outlining the cookie. Take some white stiff royal icing (or any color you prefer for your outline). Fill a piping bag fitted with a small round tip (like Wilton #2 or #3). Hold the bag at a 45-degree angle relative to the cookie surface. Position the tip just above the cookie's edge. Apply steady pressure to let the icing flow, then guide the tip along the edge of the cookie, letting the line of icing fall onto the surface. Don't drag the tip on the cookie.
Pipe a continuous line around the entire perimeter of the cookie, following its shape. When you reach where you started, gently lift the tip while stopping pressure. Aim for a smooth, even line that acts as a boundary for your design. This outline technique is fundamental in many easy piping cookie tutorials, as it contains thinner flood icing or provides a defined edge for piped borders.
Step 2: Piping the Scalloped Border Design
Once the outline is piped, you can immediately add the scalloped border inside the outline (or directly on the edge if you skipped the outline). Using the same piping bag and round tip, position the tip just inside the outline (or along the edge). Pipe a small curve, moving the tip slightly up and then down in a smooth motion. Stop pressure and lift the tip slightly.
Immediately start the next scallop where the first one ended, creating a continuous wavy line. The size and depth of your scallops will depend on the pressure you apply and the range of motion. Practice on parchment first to get a feel for the rhythm. Aim for uniform scallops around the entire cookie edge. For a 3-inch round cookie, you might pipe 12-15 scallops to create a full border.
Step 3: Adding Detail with Edible Pearls (Optional)
To add a touch of elegance to your scalloped border, you can place small edible pearls or sprinkles onto the wet icing immediately after piping. Use tweezers or a toothpick to carefully place a pearl at the peak of each scallop or in the dips between them. The wet icing will act as glue, holding the decorations in place as it dries.
If you don't have edible pearls, you can also pipe a tiny dot of icing at each point for added detail. This optional step adds visual interest and makes the cookie look even more finished. Allow the cookie to dry completely flat for several hours until the icing is hard. This easy piping cookie tutorial demonstrates how simple lines can create beautiful effects.
Rosettes are classic, elegant floral elements created using a star tip. They look impressive but are surprisingly simple to pipe, making them a great addition to your repertoire from these easy piping cookie tutorials.
Step 1: Piping the Center Swirl
For a basic rosette, you'll need a medium-sized star tip (like Wilton #18, #21, or #32) and piping consistency icing. Fill a piping bag fitted with the star tip. Hold the bag perpendicular to the cookie surface, with the tip just above the center of where you want the rosette to be. Apply steady pressure to the bag, letting the icing build up into a small mound.
While maintaining pressure, swirl the tip outwards from the center in a tight spiral motion. This creates the base and center of your rosette. The size of the initial mound and the tightness of the swirl will determine the look of your rosette. Aim for a controlled, circular movement.
Step 2: Adding Petals Around the Center
Once the center swirl is piped, continue the spiral outwards to form the petals. Keep applying steady pressure and continue swirling the tip around the initial center, creating overlapping layers of icing that resemble petals. You can make the rosette as large as you like by continuing the spiral.
As you swirl, keep the tip slightly angled away from the center to give the petals a more natural look. Overlap each layer slightly to create a full, dimensional flower. For a standard rosette on a 3-inch cookie, two to three full rotations around the center are usually sufficient.
Step 3: Refining the Rosette Shape
To finish the rosette, stop applying pressure to the bag and quickly pull the tip away, finishing the spiral. You might have a small peak where you lifted off. You can gently tap the cookie or use a dry brush/toothpick to smooth it down if desired, though the texture of the star tip often hides minor imperfections.
Practice creating rosettes of different sizes on parchment paper to get a feel for the pressure and swirling motion. You can pipe a single large rosette to fill a cookie or pipe multiple smaller rosettes on one cookie. This easy piping cookie tutorial showcases how a simple tip and motion can create a lovely floral design. Allow rosettes to dry completely before handling.
Even with easy piping cookie tutorials, you might encounter a few hiccups along the way. Troubleshooting is a normal part of the learning process. Identifying common issues and knowing how to fix them will save you frustration and help you achieve better results. Don't let minor setbacks discourage you; they are opportunities to learn and improve your technique.
Most piping problems relate to icing consistency, air in the bag, or pressure control. We'll address some of the most frequent issues beginners face and offer simple solutions.
Icing Consistency Issues: Adjusting for Humidity
The most common problem in cookie piping is incorrect icing consistency. If your icing is too stiff, it will be hard to squeeze, may break, and lines will look jagged. If it's too thin, it will lose its shape, spread out, or drip. Icing consistency is highly affected by humidity. On a humid day, you'll likely need slightly less liquid; on a dry day, you might need more.
If your icing is too stiff after mixing, add water very sparingly, a quarter teaspoon at a time, stirring thoroughly between additions until it reaches the desired piping consistency (holds a firm peak but flows smoothly). If your icing is too thin, add powdered sugar, one tablespoon at a time, stirring until the correct consistency is restored. Always mix thoroughly after adding water or sugar and test the consistency on parchment paper before using it on cookies. Adjusting for environmental factors is a key part of mastering easy piping cookie tutorials.
Piping Bag Problems: Preventing Air Bubbles
Air bubbles in your icing can cause frustrating breaks in your piped lines or dots, leading to gaps and unevenness. These often occur during the filling process or if the icing isn't packed down properly in the bag.
To minimize air bubbles, fill the piping bag carefully as described earlier, avoiding whipping air into the icing. After filling and twisting the bag, gently push the icing towards the tip, squeezing out any trapped air. You can also hold the bag tip-up and gently tap the twisted end on your counter to help air bubbles rise to the top.
If you see a bubble forming while piping, stop squeezing briefly, gently squeeze the bag behind the bubble to push it forward, or even snip a tiny bit more off the end of the bag if you didn't use a tip/coupler. Taking a moment to de-air the bag is a simple step that greatly improves the outcome of your easy piping cookie tutorials.
Achieving Smooth Icing: Dealing with Craters
Sometimes, especially when flooding areas or piping large dots, you might notice small holes or craters forming in the icing as it dries. This is often due to air bubbles trapped within the icing or insufficient icing volume causing it to dry too quickly on the surface before the air escapes.
To prevent craters, ensure your icing is mixed thoroughly but not over-whipped, which can incorporate too much air. For flooding, use a slightly thinner flood consistency and ensure you apply enough icing to fully cover the area. Immediately after flooding or piping large dots, gently tap the cookie on the counter several times to help trapped air bubbles rise to the surface and pop.
You can also use a toothpick or scribe tool to gently swirl through the wet icing or poke any visible bubbles to release the air. Addressing these issues helps achieve the smooth finish desired in easy piping cookie tutorials.

Once you've mastered the fundamental techniques covered in these easy piping cookie tutorials and feel comfortable with basic lines, dots, and borders, a whole world of more advanced cookie decorating awaits! Building upon your basic piping skills allows you to explore more intricate designs and techniques.
These next steps involve combining different consistencies, tips, and colors to create more complex and visually stunning effects. While these are beyond the scope of this beginner guide, here's a peek at some exciting possibilities to look forward to as you continue your cookie decorating journey.
Experimenting with Ombre and Marbling Effects
Ombre effects involve blending shades of a single color or transitioning smoothly between two colors on a cookie. This can be achieved by layering different shades of icing in a piping bag or by applying wet-on-wet techniques (piping colors onto wet flood icing and swirling them together). Marbling uses a similar wet-on-wet method, swirling different colors together on a wet flooded surface to create intricate patterns.
These techniques require a good understanding of icing consistency and timing, as the icing needs to remain wet long enough to be manipulated. Practicing flood consistency icing and smooth piping lines is essential before attempting these beautiful effects.
Incorporating Edible Glitter and Luster Dust
Adding sparkle and shine can dramatically enhance your cookie designs. Edible glitter and luster dust are applied to dried or partially dried royal icing to add shimmer and dimension. Luster dust is usually mixed with a clear extract (like vodka or lemon extract, which evaporate quickly) to create a paint that can be brushed onto details.
These elements are perfect for highlighting piped borders, adding shimmer to flooded areas, or creating dazzling details on piped flowers or shapes. They are simple ways to elevate your cookies once your basic piping is clean and consistent.
Exploring Brush Embroidery and Wet-on-Wet Techniques [Mention upcoming tutorials]
Brush embroidery is a beautiful technique that uses slightly thinned royal icing piped in lines, which are then gently pulled inwards with a damp brush to create a delicate, stitched effect resembling embroidery. This technique works best on a dry royal icing base.
Wet-on-wet techniques involve piping wet icing onto a wet flooded surface and using a scribe tool or toothpick to pull through the wet layers, creating patterns like polka dots, hearts, or feathers that sink into the base icing and dry smooth and flat. Both brush embroidery and wet-on-wet require precise icing consistencies and quick work before the base layer dries. Look out for upcoming tutorials on BakeWithEase that will delve into these exciting techniques!
Congratulations on taking the first steps into the wonderful world of cookie decorating with piping! You've learned about essential tools, mastered basic techniques like filling a bag and controlling pressure, and completed your first easy piping cookie tutorials for simple yet effective designs. Remember that every experienced cookie decorator started right where you are now, learning the fundamentals.
Piping royal icing onto cookies is a skill that improves with practice. Don't be afraid to experiment with different tips, colors, and simple design combinations. Even small variations in pressure or angle can create entirely new effects. Use the techniques from these easy piping cookie tutorials as a springboard for your own creative ideas.
Recap of Essential Piping Techniques
We covered the importance of using the right tools – piping bags, basic tips (round, star), and optional couplers. We emphasized the necessity of a good no-spread cookie base and, crucially, achieving the correct piping consistency for royal icing. You learned how to fill a piping bag neatly, apply consistent pressure, and practiced fundamental shapes like lines, dots, and shell borders on parchment paper.
Finally, we walked through step-by-step easy piping cookie tutorials for simple dots, scalloped borders, and basic rosettes on cookies. We also touched on troubleshooting common issues like consistency problems, air bubbles, and craters. These foundational skills are your building blocks for all future cookie decorating endeavors.
The key to mastering cookie piping is practice. Don't expect perfection on your first try, or even your tenth! Bake extra cookies just for practicing. Use parchment paper to hone your lines, dots, and shapes before moving to the cookie surface. Experiment with different icing consistencies slightly to see how they affect the outcome. Try piping the same design with different sized tips.
Experimentation is where creativity truly flourishes. Combine dots with outlines, add a small rosette to a bordered cookie, or try piping simple shapes like leaves or swirls. The more you practice, the more comfortable and confident you'll become with the piping bag, and the more effortless your designs will look. Embrace the process and have fun with it!
We love seeing what our community creates! Once you've tried these easy piping cookie tutorials, we encourage you to share your cookie masterpieces. Baking and decorating are wonderful ways to express creativity and share joy with others. Your decorated cookies, whether they are simple or elaborate, are a testament to your effort and growing skills.
Sharing your work can also inspire other beginners and provide valuable feedback. Take photos of your cookies and share them with friends, family, or on social media using #BakeWithEase. We can't wait to see your cookies pop with your beautiful, hand-piped designs! Keep baking, keep decorating, and keep sharing the sweetness!
Frequently Asked Questions
Easy piping cookie tutorials are step-by-step guides designed to teach beginners how to decorate cookies using simple piping techniques. They are specifically tailored for individuals with little to no prior experience in cookie decorating.
Websites like BakeWithEase.com are a great resource. Look for tutorials that offer clear instructions, visual aids, and easy-to-find ingredients.
You'll typically need piping bags, piping tips (round and star are good starting points), cookie dough, and royal icing. A turntable can also be helpful for smoother decorations.
Royal icing should be smooth and pipeable, holding its shape without spreading too much. Adjust the consistency with small amounts of water until you achieve the desired thickness.
Avoid overfilling your piping bag, using icing that's too thin or thick, and applying too much pressure. Practice on parchment paper first to gain control before decorating your cookies.
Final Reflection: The Sweet Simplicity of Piping Dreams
The art of cookie decorating, once perceived as an intimidating skill, is now more accessible than ever. With a little practice and the right techniques, even beginners can create stunning, professional-looking cookies that bring joy to both the baker and the recipient. This accessibility empowers creativity and allows for personalized expressions of love and celebration.
The impact of simple piping techniques extends beyond the individual cookie; it fosters a sense of community and shared creativity. Learning to pipe opens doors to countless possibilities, from holiday celebrations to personalized gifts. It's a skill that can be shared with friends and family, creating lasting memories around a shared activity. The best things in life are homemade,
a sentiment perfectly embodied in the joy of creating beautiful, delicious cookies. This simple act of baking and decorating connects us to traditions, to loved ones, and to the satisfaction of crafting something beautiful with our own hands.
Now, it's your turn. Don't be intimidated by the seemingly intricate designs you see online. Grab your piping bag, choose your favorite cookie recipe, and experiment! Each swirl, each dot, each carefully placed flourish is a step towards mastering a skill that will bring you endless joy and creative fulfillment. Let your imagination run wild, and remember, the most important ingredient is the love you put into your creations.
Unleash Your Inner Pastry Chef: Piping Perfection Awaits!
Thanks for taking the time to explore the world of cookie piping with BakeWithEase! We hope you've gained some confidence and inspiration to create stunningly delicious treats. Now it's time to put your new skills to the test!
- Master your favorite piping technique: Choose one of the designs from the article and practice until you achieve your desired look. Don't be afraid to experiment with different pressures and angles!
- Share your creations: Show off your piped cookies on social media using #BakeWithEasePiping – we'd love to see your beautiful work!
- Challenge yourself with a new design: Find a cookie piping tutorial online that inspires you and try your hand at something completely new.
Ready to transform ordinary cookies into edible masterpieces? What delicious design will you conquer first?