
Unlock Cake Magic: Your First Steps in Basic Piping

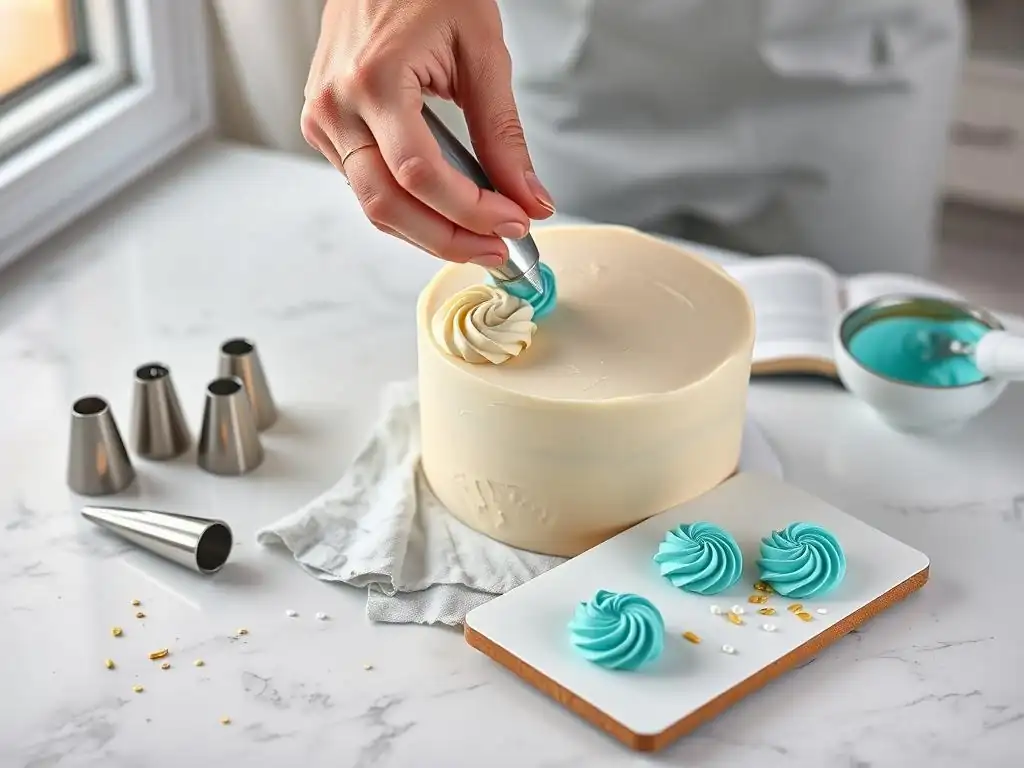
Welcome to BakeWithEase, your trusted guide to baking brilliance! Ever wondered how to transform an ordinary cake into a show-stopping masterpiece? This article cracks the code! We'll unveil the secrets to easy buttercream frosting piping techniques, empowering you to create stunning decorations with confidence. But that's just the beginning – discover how simple techniques can elevate your baking game from beginner to intermediate, and unlock a world of delicious possibilities. Curious to learn more? Let's get started!
- Unlock Cake Magic: Your First Steps in Buttercream Piping
- Introduction to Essential Buttercream Piping Techniques
- Essential Tools for Buttercream Piping
- Preparing Buttercream for Piping
- Mastering Basic Buttercream Piping Techniques
- Common Buttercream Piping Mistakes and Solutions
- Practicing Piping: Simple Projects
- Cleaning and Storing Piping Tools
- Conclusion: Your Cake Decorating Journey
-
Frequently Asked Questions
- What is the easiest buttercream frosting consistency to pipe with for beginners?
- What are the essential tools I need to start learning buttercream piping techniques?
- How do I prevent air bubbles from forming in my buttercream while piping?
- What's the best way to practice my piping techniques before decorating a cake?
- My buttercream keeps melting while I'm piping. What can I do?
- Final Reflection: The Sweet Symphony of Simple Piping
- Unleash Your Inner Cake Artist!
Unlock Cake Magic: Your First Steps in Buttercream Piping
Introduction to Essential Buttercream Piping Techniques
Welcome to Cake Decorating with Buttercream
Embarking on the journey of cake decorating can feel like stepping into a magical world where simple ingredients transform into edible art. At the heart of many beautiful cake designs lies the versatile and delicious medium of buttercream. Learning to pipe buttercream opens up a universe of possibilities, allowing you to add elegant borders, delicate flowers, fun writing, and intricate patterns to your baked creations. It’s a fundamental skill that enhances the visual appeal of everything from simple cupcakes to elaborate layer cakes, making your treats not just tasty but also stunning.
This guide is designed as your friendly introduction to the essential tools and techniques needed to start piping with buttercream. We'll walk through selecting the right equipment, preparing your frosting for optimal results, and practicing some foundational piping methods. Whether you dream of perfectly swirled cupcakes or adding a personalized message to a birthday cake, mastering these initial steps will build a strong foundation for your decorating adventures. Get ready to turn your kitchen into a creative studio and discover the joy of decorating with luscious buttercream.
Why Master Buttercream Piping?
Mastering easy buttercream frosting piping techniques is a game-changer for any home baker looking to elevate their desserts. It’s not just about making things look pretty; piping allows for precise application of frosting, ensuring even coverage and controlled decoration. This control is essential whether you are trying to create sharp edges, fill gaps, or build dimensional designs. Beyond aesthetics, efficient piping saves time and reduces mess compared to spreading frosting with a spatula for intricate details.
Furthermore, understanding basic buttercream piping techniques unlocks the ability to personalize your baked goods for any occasion. Imagine being able to pipe "Happy Birthday" on a cake, create themed decorations for holidays, or add a professional-looking finish to cupcakes for a bake sale. These skills empower you to express creativity and add a personal touch that store-bought decorations often lack. Developing proficiency in these simple techniques provides a rewarding sense of accomplishment and opens the door to more advanced decorating methods as your confidence grows.
Essential Tools for Buttercream Piping
Piping Bags: Choosing the Right Type
Piping bags are the vessels that hold your buttercream, allowing you to control its flow and shape through a tip. There are primarily three types: disposable, reusable plastic, and reusable canvas/nylon. Disposable bags are convenient as they require no cleaning – simply use and discard. They are often made from a thin, flexible plastic that is easy to handle, though some very stiff buttercreams might cause them to split if not handled gently. A roll of 100 standard 12-inch disposable bags is a common starting point for many home bakers, offering plenty of practice opportunities without the wash-up.
Reusable plastic bags are more durable than disposable ones and are a good eco-friendly option. They need to be washed thoroughly after each use, which can sometimes be tricky with greasy buttercream. Canvas or nylon bags are the most traditional and durable.
They can withstand significant pressure and last for years with proper care. However, they also require meticulous cleaning and drying to prevent mold or odors. For beginners focusing on easy buttercream frosting piping techniques, disposable bags are often recommended for their ease of use and minimal cleanup, allowing you to focus purely on the piping motion and technique.
Piping Tips: Essential Nozzles for Beginners
Piping tips, also known as nozzles, are the small metal or plastic attachments that shape the buttercream as it exits the bag. They come in hundreds of shapes and sizes, each designed to create a specific effect. For those starting out with easy buttercream frosting piping techniques, focusing on a few essential tips will cover a wide range of basic decorations.
These tips are typically numbered, with the number indicating the size and shape. Investing in a small set of basic tips (perhaps 5-10 different types) is a great way to get started without feeling overwhelmed by the sheer variety available.
The material of piping tips is usually stainless steel or nickel-plated metal, which are durable and rust-resistant. Plastic tips are also available, often integrated into reusable bags or couplers, but metal tips are generally preferred for their crisp edges and longevity. When selecting your first set, look for a variety that includes round, star, and leaf tips, as these are the most versatile for foundational techniques. Understanding what each basic tip does is key to planning your cake decorations effectively.
Round Tips: Lines, Dots, and Outlines
Round tips are perhaps the most fundamental piping tips and are essential for many easy buttercream frosting piping techniques. They have a simple circular opening and are used to create smooth lines, perfect dots, beads, and for outlining shapes or writing messages. Different sizes of round tips allow for varying thicknesses of lines and dots. For instance, a small tip like a #1 or #2 is ideal for fine writing or delicate details, while larger tips such as a #10 or #12 are great for piping larger dots, filling in areas, or creating simple borders.
Practice with round tips is crucial for developing consistent pressure control, which is vital for achieving uniform lines and dots. Start by practicing simple straight lines and rows of dots on parchment paper. Varying the pressure and the distance between the tip and the surface will demonstrate how these factors affect the outcome. Mastering the basic dot and line with a round tip is a foundational skill that translates directly to more complex piping techniques.
Star Tips: Stars, Shells, and Borders
Star tips are easily recognizable by their serrated or jagged edges. They are incredibly versatile and are used to create classic decorations like stars, rosettes, shells, and various types of borders. Star tips come in two main varieties: open star and closed star. Open star tips (like #1M, #21, #32) have points that flare outwards, producing stars and shells with more distinct ridges. Closed star tips (like #2D, #30, #33) have points that curve inwards, creating stars and rosettes with deeper grooves and a more defined shape.
These tips are fundamental for many popular and easy buttercream frosting piping techniques. The shell border, a classic cake edge decoration, is created by piping connected shells using a star tip. Rosettes, which look like swirls of petals, are typically made by piping a spiral with a star tip, often a large open star like the popular #1M. Experimenting with different sizes and types of star tips will quickly show you the variety of textures and shapes you can achieve, making them indispensable for decorating cupcakes and cakes.
Leaf Tips: Realistic Leaves
Leaf tips are specifically designed to create realistic-looking leaves with a single squeeze of the piping bag. They have a narrow, V-shaped opening, often with a slight curve or indentation along the V to help form the central vein of the leaf. Common leaf tip numbers include #67, #68, #70, and #352. While they might seem specialized, adding leaves is a simple way to enhance floral designs or add natural elements to your cake decorations.
To pipe a leaf, hold the tip with the V-opening perpendicular to the surface. Apply pressure, allowing the buttercream to expand at the base of the leaf, then gradually decrease pressure and pull the tip away to form the pointed end. A slight wiggle as you pipe can help create a more natural, ruffled edge. Practicing different pressures and angles with a leaf tip will allow you to create leaves of varying sizes and shapes, adding depth and realism to your piped flowers and borders.
Basketweave Tip: Creating Woven Patterns
The basketweave tip, often numbered in the #40 to #48 range, has a flat, sometimes serrated edge. It is specifically designed to create patterns that mimic woven baskets or ribbons on the side of a cake. While slightly more advanced than simple dots or stars, the basic application is straightforward and yields an impressive result. The tip has two sides: one smooth and one serrated (or sometimes both are smooth).
To create a basketweave pattern, you typically pipe a vertical strip with one side of the tip, then pipe short horizontal strips over it, alternating which side overlaps the vertical strip to create the woven effect. Consistency in pressure and spacing is key to achieving a neat pattern. While perhaps not the very first technique a beginner tries, understanding the function of a basketweave tip is useful as you progress in easy buttercream frosting piping techniques and look to add more texture to your cake sides.
Couplers: Switching Tips
Couplers are handy plastic devices that allow you to change piping tips on a single bag of buttercream without having to empty the bag. A standard coupler consists of two parts: a base and a ring. The base is inserted into the piping bag before filling, pushed down until it is snug at the narrow end.
A small piece of the bag tip is then snipped off, allowing the coupler base to poke through. The piping tip is placed over the coupler base on the outside of the bag, and the ring screws on to secure the tip in place.
Using couplers is incredibly convenient when you want to use multiple tips with the same color of buttercream. For example, you might use a round tip to outline a design and then switch to a star tip to fill it in, all without changing bags. This saves time, reduces the number of bags you need to prepare, and minimizes wasted buttercream.
Standard size couplers fit most small to medium-sized tips, while large couplers are needed for bigger tips like the #1M. They are an inexpensive addition to your tool kit that greatly enhances the efficiency of your easy buttercream frosting piping techniques.
Spatulas: Achieving a Smooth Base
While not used for the actual piping process, spatulas are essential tools for preparing your cake surface before you begin piping decorations. Offset spatulas, with their angled blades, are particularly useful for applying and smoothing buttercream onto cakes and cupcakes. The offset handle keeps your hand clear of the frosting surface, allowing for smoother, more even coverage. They come in various sizes, from small ones perfect for cupcakes to larger ones for frosting the sides and tops of cakes.
Achieving a smooth, level base coat of buttercream provides a clean canvas for your piping work. It helps your piped designs stand out and look professional. Beyond frosting cakes, spatulas are also used for mixing colors into buttercream, scraping down the sides of your mixing bowl, and carefully transferring piped decorations if needed. Having a couple of different sizes of offset spatulas in your collection is highly recommended as you practice easy buttercream frosting piping techniques, ensuring your base is as perfect as your piped details.
Preparing Buttercream for Piping
The Perfect Buttercream Recipe: Consistency is Key
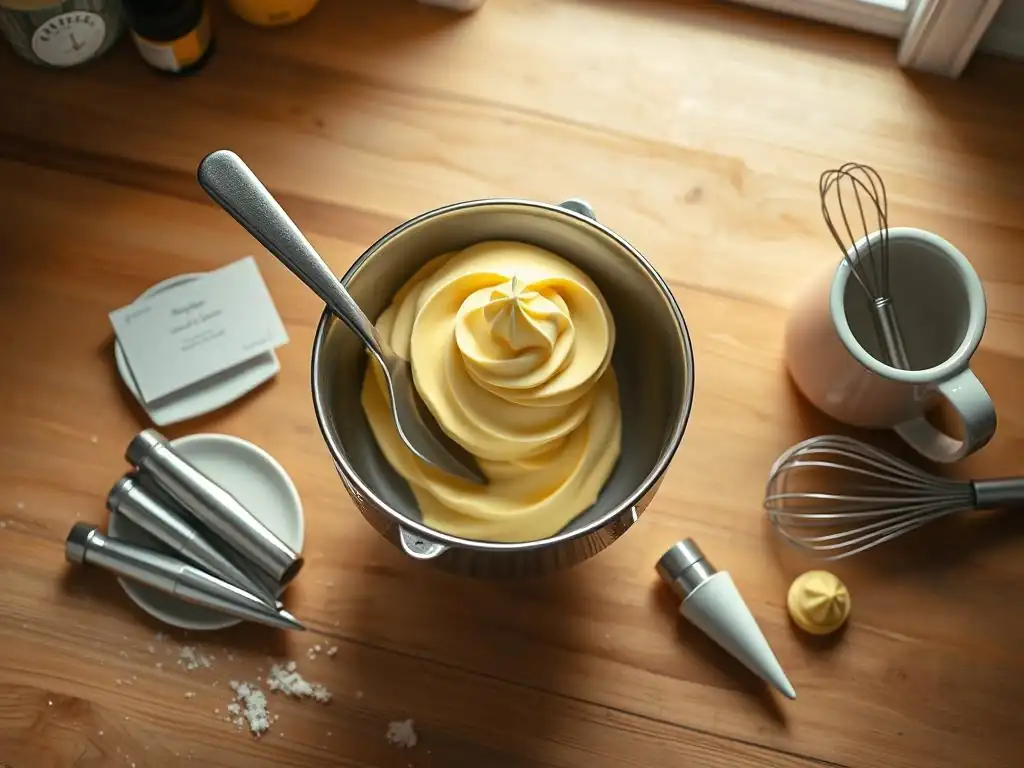
The success of your easy buttercream frosting piping techniques heavily relies on the consistency of your buttercream. Too soft, and your piped shapes will be flat and lack definition; too stiff, and it will be difficult to pipe smoothly and might even split your piping bag.
A good standard American buttercream, made from butter, powdered sugar, milk or cream, and vanilla, is an excellent choice for beginners because it's relatively stable and easy to adjust. A classic ratio might involve about 1 cup (2 sticks) of unsalted butter creamed with 4 cups of powdered sugar, mixed with 2-4 tablespoons of milk or cream and a teaspoon of vanilla extract.
The ideal piping consistency is firm enough to hold a peak when lifted with a spatula but soft enough to flow smoothly through a piping tip under gentle pressure. It should not be greasy or crumbly. Factors like the temperature of your butter, the amount of liquid added, and even the room temperature can affect the consistency.
If your buttercream is too stiff, you can add liquid (milk, cream, or even a tiny bit of water) a teaspoon at a time, mixing well after each addition, until it reaches the desired consistency. If it's too soft, you can beat in more powdered sugar a few tablespoons at a time, or chill the buttercream briefly in the refrigerator (about 15-20 minutes, stirring every 5-10) to firm it up.
Achieving the Right Consistency: Tips and Tricks
Beyond adjusting with liquid or powdered sugar, several techniques can help you achieve and maintain the perfect piping consistency for your easy buttercream frosting piping techniques. Ensure your butter is at the correct temperature – generally room temperature, meaning it's soft enough to indent easily but not melted or greasy. Over-creaming the butter initially can sometimes make the final buttercream too soft, so cream it just until it's smooth and pale yellow before adding sugar.
Sifting your powdered sugar before adding it to the butter can prevent lumps, which can clog piping tips, especially smaller ones. Mix the buttercream on low speed initially when adding powdered sugar to avoid a cloud of sugar dust, then increase speed to beat until smooth and fluffy. If your kitchen is warm, your buttercream may soften quickly as you work.
In this case, pipe in short sessions, returning the bag or bowl of buttercream to the refrigerator for a few minutes to firm up as needed. Sometimes, simply stirring the buttercream vigorously with a spatula for a minute can help smooth it out and make it more pliable for piping.
Coloring Buttercream: Gel vs. Liquid Food Coloring
Adding color to your buttercream is a fun way to customize your decorations. Food coloring comes in various forms, but for buttercream, gel or paste food colorings are generally preferred over liquid ones. Liquid food coloring, often found in small dropper bottles at the grocery store, contains a high amount of water. Adding too much liquid coloring can alter the consistency of your buttercream, making it too soft for piping. Achieving vibrant colors with liquid coloring often requires adding a significant amount, which exacerbates this problem.
Gel or paste food colorings are highly concentrated pigments with little to no water content. This means you only need a tiny amount to achieve bright, vibrant colors without significantly affecting the buttercream's texture. A small dab on a toothpick is usually sufficient to start, and you can add more gradually until you reach the desired shade. When coloring buttercream for easy buttercream frosting piping techniques, always mix the color thoroughly until it is uniform. Remember that colors can deepen slightly as they sit, so it's often best to mix a shade just slightly lighter than your target color.
Loading a Piping Bag: Step-by-Step
Loading a piping bag neatly and efficiently is a small but important skill when practicing easy buttercream frosting piping techniques. A messy bag can lead to frosting squeezing out the wrong end or air bubbles getting trapped. Here’s a simple method:
- Prepare your bag: If using a coupler, insert the base and snip the tip. If not using a coupler, insert the desired tip into the bag and snip the tip of the bag to allow the end of the tip to protrude.
- Fold down the top edge: Fold the top few inches of the piping bag cuff down over your hand. This creates a wide opening and prevents frosting from getting on the outside of the bag near the top.
- Fill the bag: Use a spatula to scoop buttercream into the bag. Aim to fill the bag about half to two-thirds full. Overfilling makes the bag difficult to handle and control pressure.
- Scrape down the sides: Use the spatula to scrape the buttercream down towards the tip, removing any large air pockets trapped against the sides of the bag.
- Unfold the cuff: Unfold the top edge of the bag.
- Twist the top: Gather the top of the bag together and twist it tightly just above the level of the buttercream. This seals the top, preventing frosting from coming out and allowing you to apply pressure evenly down towards the tip.
Following these steps ensures your bag is ready for piping with minimal mess and maximum control.
Mastering Basic Buttercream Piping Techniques
Technique 1: Piping Simple Dots and Beads
Piping dots and beads is the most fundamental of easy buttercream frosting piping techniques and an excellent starting point for beginners. It helps you practice consistent pressure and control.
- How-to: Hold the piping bag (fitted with a round tip, e.g., #5 or #10) vertically, about a quarter-inch above your surface (like parchment paper or a cake). Apply steady, even pressure, allowing the buttercream to build up into a dot. Stop applying pressure and quickly flick the tip away from the dot to create a clean break. For beads, pipe a dot, then continue applying pressure while moving the bag slowly in a straight line, then stop pressure and flick away. Practice making dots of consistent size and spacing, and lines of uniform thickness.
- Practice Goal: Aim to pipe rows of evenly sized dots and straight lines without breaks or wobbly edges. This exercise builds muscle memory for applying steady pressure, a skill critical for all other piping techniques. Spend at least 10-15 minutes just practicing dots and lines before moving on. Notice how varying the pressure or the distance from the surface changes the dot or line shape.
Technique 2: Creating a Classic Shell Border
The shell border is a timeless and elegant way to finish the edge of a cake or cupcake. It's a foundational technique using a star tip.
- How-to: Fit your bag with a star tip (an open star like #21 or #32 works well). Hold the bag at about a 45-degree angle to the surface. Apply firm pressure to pipe a "head" for the shell, then reduce pressure slightly as you pull the bag towards you in a smooth, curved motion, letting the buttercream taper off to a "tail". Stop pressure completely and lift the bag. The tail of the first shell becomes the head of the next one – pipe the next shell so its head slightly overlaps the tail of the previous one, creating a continuous border.
- Practice Goal: Focus on creating shells of consistent size and shape, with smooth transitions between them. The goal is a continuous, overlapping pattern without large gaps or messy overlaps. Practice on parchment paper marked with a straight line or circle before attempting it on a cake. Aim for uniform pressure throughout the piping of each shell to ensure a consistent taper.
Technique 3: Piping Stars and Rosettes
Star tips are perfect for creating individual stars to sprinkle over a cake or cupcake, or swirling rosettes for a beautiful topping.
- How-to (Stars): Using a star tip (any size works), hold the bag vertically, just above the surface. Apply a quick, firm squeeze of pressure, then immediately stop pressure and lift the bag straight up. This should leave a clean, defined star shape.
- How-to (Rosettes): Using a star tip (a large open star like #1M is popular), hold the bag vertically or at a slight angle. Start in the center of where you want the rosette and apply pressure while moving the tip in a circular motion, spiraling outwards. Stop pressure and lift the bag when the spiral is complete.
- Practice Goal: For stars, aim for sharp points and consistent size. Practice piping rows of stars to develop control. For rosettes, work on creating a smooth, continuous spiral that ends neatly. Experiment with starting in the center and spiraling outwards, or starting on the outside and spiraling inwards to see which you prefer.
Technique 4: Writing with Buttercream
Adding text to a cake is a personal touch, and while it can seem intimidating, it's achievable with practice using easy buttercream frosting piping techniques.
- How-to: Use a small round tip (like #1, #2, or #3) for fine writing. The buttercream needs to be smooth and lump-free, perhaps slightly softer than for piping borders but still firm enough to hold its shape. Hold the bag at a comfortable angle (often around 45 degrees). Apply steady, light pressure and lift the tip slightly off the surface as you write, allowing the buttercream to fall onto the cake in a smooth line. This is often called "floating" the lettering. Practice on parchment paper first, perhaps tracing over printed text, before writing on your cake.
- Practice Goal: Focus on maintaining consistent pressure and flow to prevent breaks or blobs in your letters. Practice writing the alphabet, numbers, and simple phrases. Pay attention to spacing and alignment. Writing takes significant practice to become smooth and legible, so be patient with yourself. If the buttercream consistency isn't right (too stiff or too soft), adjust it before continuing.
Common Buttercream Piping Mistakes and Solutions
Air Bubbles: Prevention and Removal
Air bubbles are a common frustration when piping, causing breaks in your lines or gaps in your designs. They occur when air gets incorporated into the buttercream during mixing or loading the bag.
- Prevention: Ensure your buttercream is mixed thoroughly to remove air pockets before loading the bag. When loading, use a spatula to press the buttercream down into the bag, especially towards the tip, working out any trapped air against the sides. Don't whip the buttercream on high speed for too long, as this can incorporate excessive air.
- Removal: If you notice an air bubble while piping, stop, scrape the tip of the bag clean, and gently squeeze the bag to push the bubble out onto a paper towel or back into your bowl. You can also try gently massaging the bag to move the bubble towards the tip. Sometimes, simply piping a bit onto a practice surface will expel the bubble.
Inconsistent Pressure: Maintaining a Steady Hand
Wobbly lines, uneven dots, and inconsistent shell sizes are often the result of inconsistent pressure on the piping bag. Achieving steady pressure is a cornerstone of successful easy buttercream frosting piping techniques.
- Solution: The key is to use the hand holding the twisted top of the bag to apply constant pressure downwards, while the other hand guides the tip. Think of the guiding hand as simply directing the flow initiated by the pressure hand. Practice applying steady pressure on parchment paper, piping long, continuous lines or rows of dots, trying to keep them uniform. If your hand fatigues, take a break. Using the correct buttercream consistency also helps; if it's too stiff, you'll struggle to maintain pressure.
Overfilling the Piping Bag
Filling the piping bag too full makes it cumbersome to handle, difficult to twist securely, and hard to apply even pressure, often leading to buttercream squeezing out the wrong end.
- Solution: As mentioned in the loading section, aim to fill your piping bag only about half to two-thirds full. It's much easier to manage a smaller amount of buttercream and refill the bag as needed than to wrestle with an overstuffed one. If you accidentally overfill, you can try carefully transferring some buttercream into a second bag, or simply accept that the first bag might be harder to work with and plan to fill subsequent bags less full. Remember, efficiency in easy buttercream frosting piping techniques comes from control, not from trying to load as much frosting as possible at once.
Practicing Piping: Simple Projects
Decorating Cupcakes with Basic Techniques
Cupcakes offer a perfect canvas for practicing easy buttercream frosting piping techniques because they are small, individual servings, and mistakes are easily confined to one treat.
- Project Idea: Try frosting a batch of cupcakes using just one or two techniques learned. For instance, practice piping a simple swirl using a large open star tip (#1M) on half the batch. On the other half, practice piping stars or dots all over the surface with a smaller star or round tip. You can also add a simple shell border around the edge of the cupcake top. This allows you to focus on mastering a specific motion repeatedly in a low-pressure environment.
Adding Borders to a Simple Cake
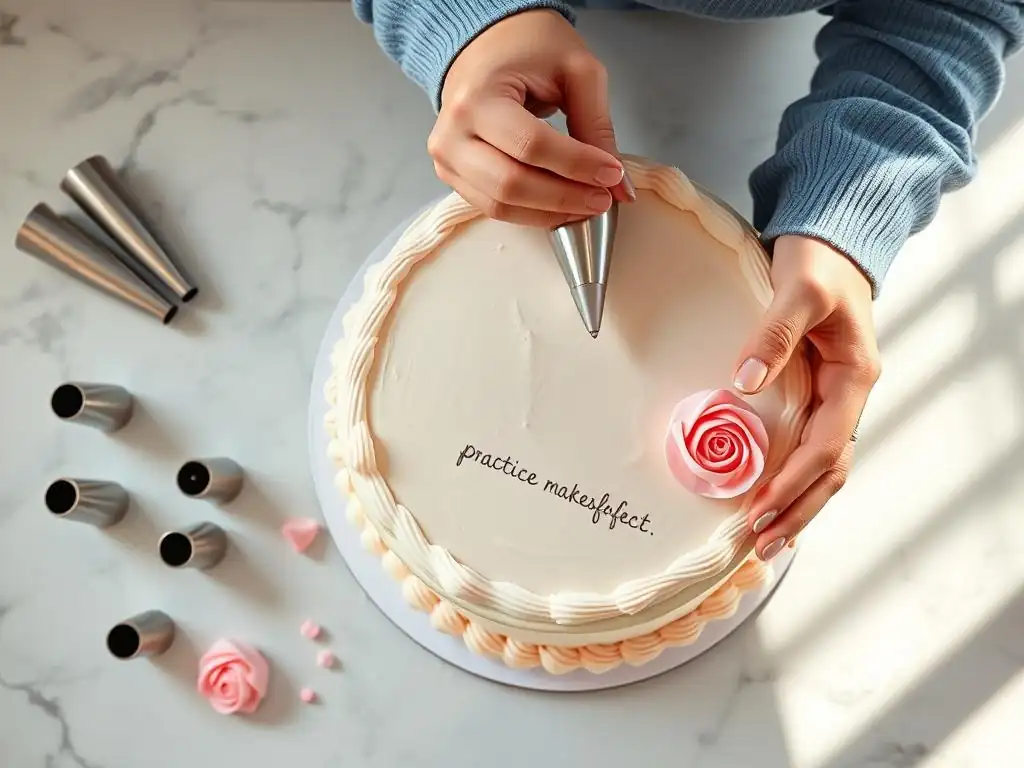
Once you feel comfortable with individual shells or stars, practicing borders on a larger surface like a cake is the next step. You don't need a fancy cake; even a simple 8-inch round or 9x13 inch sheet cake will work.
- Project Idea: Bake or buy a simple cake and give it a smooth crumb coat or final layer of buttercream using your spatula. Then, practice piping a continuous shell border around the top and/or bottom edge using a star tip. Alternatively, try piping a simple rope border or a series of dots around the edge using a round tip. This helps you practice piping along a curved or straight line and joining techniques for continuous patterns. You can even practice on a cake dummy or simply on parchment paper laid over a cake pan.
Creating a Buttercream Swirl Rose
Combining pressure control and circular motion, the buttercream swirl rose is a classic and impressive-looking decoration surprisingly accessible with easy buttercream frosting piping techniques.
- Project Idea: This is often done directly on a cupcake or as a decoration piped onto parchment paper which is then chilled and transferred to a cake. Using a large open star tip like the #1M, start in the center and pipe a tight spiral outwards, or start on the outside and pipe inwards, covering the entire surface. The key is consistent pressure and a smooth, continuous motion. Practice making several roses to get a feel for the pressure and speed needed to create a full, even swirl. You can then use these roses to top cupcakes or arrange them on a larger cake.
Cleaning and Storing Piping Tools
Proper Cleaning for Longevity
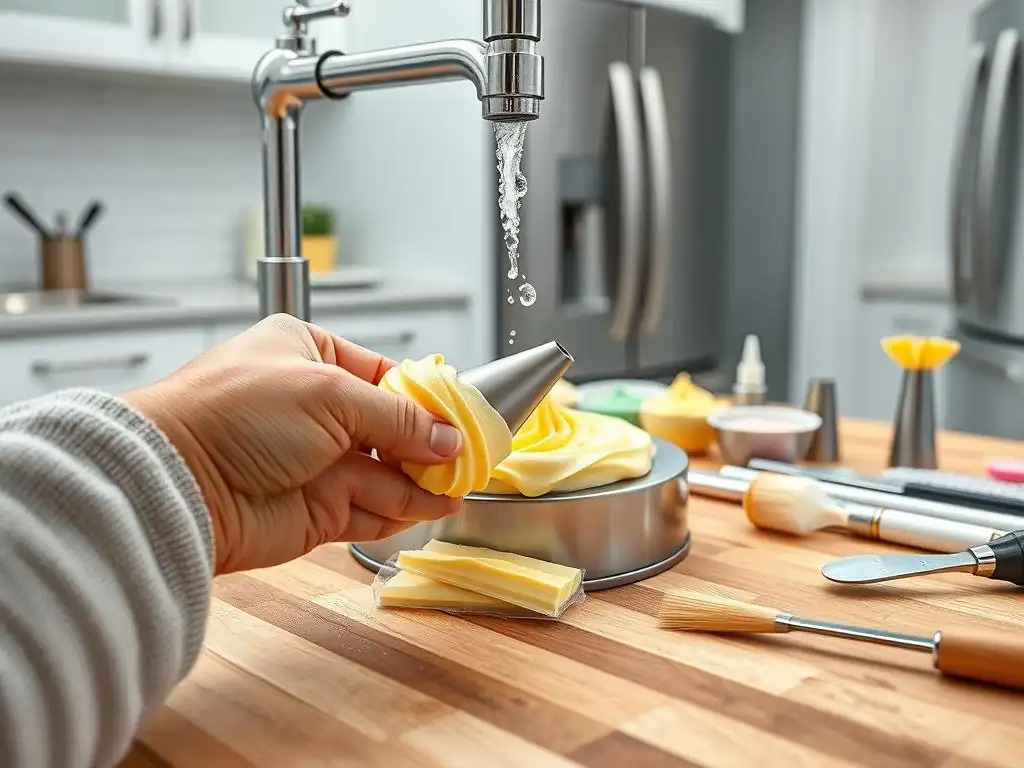
Properly cleaning your piping tools immediately after use is crucial for maintaining their condition and hygiene. Buttercream can become hard and difficult to remove if left to dry in tips and bags.
- Steps: Disassemble any couplers and remove tips from bags. Scrape out as much excess buttercream as possible back into your storage container or trash. Rinse tips, couplers, and reusable bags under warm running water. Use a small brush (like a bottle brush or a specialized tip brush) to get inside the tips and remove any stubborn residue. For reusable bags, turn them inside out to wash thoroughly. Wash everything with warm soapy water, rinse well, and allow to air dry completely before storing. Ensuring tools are bone dry prevents rust on metal tips and mold on reusable bags.
Storing Leftover Buttercream
It's common to have leftover buttercream after decorating, and knowing how to store it properly ensures you can use it for future projects, minimizing waste.
- Storage: Place leftover buttercream in an airtight container. Press a piece of plastic wrap directly onto the surface of the buttercream before putting on the lid – this prevents a crust from forming. Store buttercream in the refrigerator for up to 2 weeks. For longer storage, buttercream can be frozen for up to 3 months. Thaw frozen buttercream overnight in the refrigerator. Before using chilled or frozen buttercream, let it come to room temperature, then re-whip it with an electric mixer for a few minutes (adding a tiny bit of milk or cream if needed) to restore its smooth, pipeable consistency.
Conclusion: Your Cake Decorating Journey
Embrace the Process and Have Fun!
Beginning your journey with easy buttercream frosting piping techniques is about embracing the process and, most importantly, having fun! Don't expect perfection on your first try. Piping is a skill that improves with practice and patience. Every slightly wobbly line or misshapen star is a learning opportunity. View each cake or batch of cupcakes as a chance to experiment and refine your technique. The joy comes from creating something beautiful with your own hands and the delicious reward of enjoying your decorated treats.
Remember to start simple, focus on mastering one technique at a time, and gradually build your skills. Celebrate your progress, no matter how small. Sharing your decorated creations with friends and family adds another layer of enjoyment to the process. So, gather your tools, whip up some buttercream, and let your creativity flow. The world of cake decorating is vast and exciting, and mastering these basic piping skills is your key to unlocking its magic.
Next Steps: Expanding Your Skills
Once you feel confident with these foundational easy buttercream frosting piping techniques – piping dots, shells, stars, rosettes, and basic writing – you're ready to expand your repertoire. Consider exploring different types of buttercream (like Swiss meringue or Italian meringue buttercream), which offer different textures and piping properties. Invest in a few more piping tips, perhaps those for piping leaves, petals (for flowers), or more intricate border designs.
You can also start practicing combining techniques on a single cake, such as adding a shell border and then piping rosettes or stars within it. Look for tutorials on piping basic flowers like drop flowers or simple roses. The skills you've built with basic pressure control and bag handling are transferable to countless other decorating methods. Keep experimenting, keep practicing, and continue to explore the wonderful world of cake decorating!
Frequently Asked Questions
What is the easiest buttercream frosting consistency to pipe with for beginners?
The easiest consistency is often a medium-stiff buttercream. This holds its shape well but is still pliable enough to pipe smoothly, making it ideal for basic shapes and designs.
What are the essential tools I need to start learning buttercream piping techniques?
You'll need a piping bag, a coupler, and a selection of piping tips. A rotating cake stand can also be incredibly helpful for achieving even frosting.
How do I prevent air bubbles from forming in my buttercream while piping?
Make sure to press the buttercream down in the piping bag to eliminate air pockets. Burp the bag by gently squeezing the frosting towards the tip before piping to release any trapped air.
What's the best way to practice my piping techniques before decorating a cake?
Practice on a sheet of parchment paper! You can scrape the buttercream back into the bag and reuse it, allowing you to master basic shapes and techniques without wasting ingredients.
My buttercream keeps melting while I'm piping. What can I do?
Overworking buttercream can cause it to melt. Try chilling the buttercream for a few minutes in the refrigerator to firm it up before continuing. Also, ensure your hands are not too warm.
Final Reflection: The Sweet Symphony of Simple Piping
Mastering basic buttercream piping isn't just about creating beautiful cakes; it's about unlocking a world of creative expression and confidence in the kitchen. The techniques explored in this article – from mastering the consistent pressure to understanding the different piping tips – are surprisingly accessible, proving that even beginners can achieve stunning results. This isn't just about frosting; it's about empowerment.
The joy of creating something beautiful with your own hands is profoundly satisfying, and the impact of this simple skill extends far beyond the finished cake. It's about the quiet moments of focus, the pride in accomplishment, and the sheer delight of sharing something handmade with loved ones. As the culinary writer, Julia Child, once said: Find something you're passionate about and keep tremendously interested in it.
For me, that passion lies in the transformative power of simple baking techniques, and I hope this article has ignited a similar spark in you.
Now, it's your turn. Don't be intimidated by the seemingly complex world of cake decorating. Grab your piping bag, choose your favorite tip, and experiment! Let the creamy swirls and delicate rosettes be a testament to your creativity and a delicious reward for your efforts. The journey of a thousand cakes begins with a single, perfectly piped swirl. Embrace the magic, and let your inner cake artist shine.
Unleash Your Inner Cake Artist!
Thanks for joining us on this sweet journey into cake piping! We hope you've gained the confidence to create beautifully decorated cakes. Ready to take your skills to the next level?
- Master a new piping technique: Try practicing the rose swirl or star tip – you’ll be amazed at how quickly you improve!
- Share your creations: Post a picture of your first piped cake on social media using #BakeWithEase and inspire others!
- Explore our beginner's piping kit: Find everything you need to keep practicing, right here on BakeWithEase.com (Although this should not be a real link for this exercise).
What amazing cake designs will you create next?