
Piping Buttercream: Achieving Smooth, Piped Results

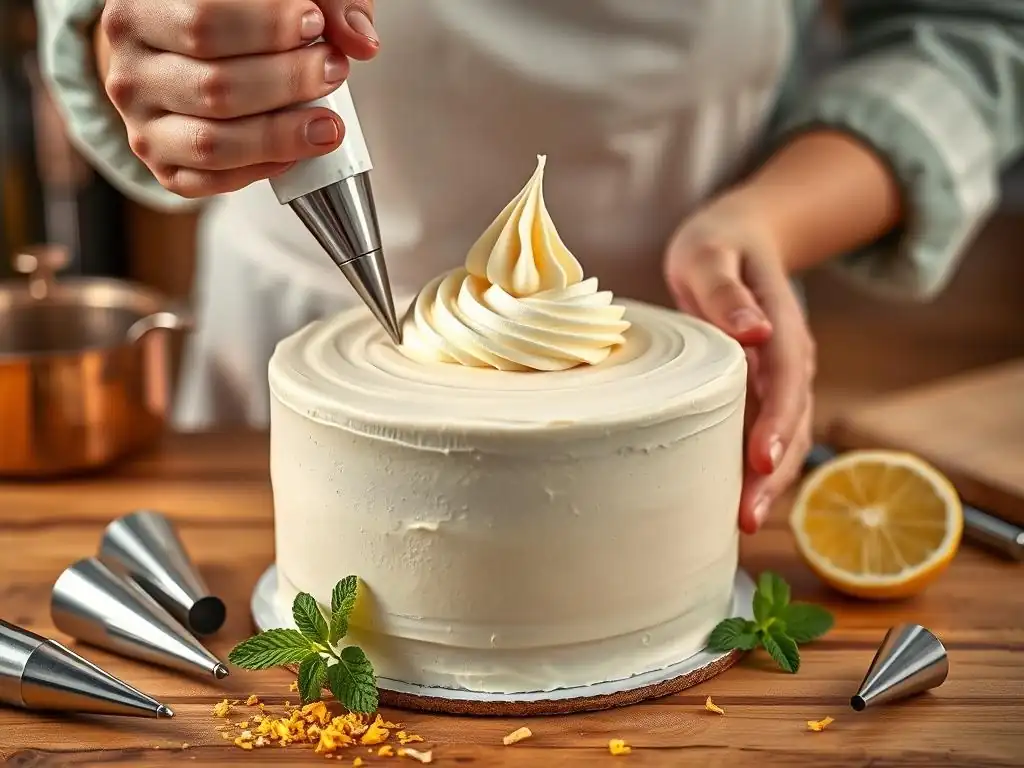
Welcome to BakeWithEase, your haven for all things baking! Ever wondered how to achieve that flawlessly smooth, professional look with your buttercream piping? This is where your journey to stunning cake decorations begins. Dive into our Smooth Buttercream Piping Techniques Tutorial and unlock the secrets to creating beautiful, eye-catching designs. Ready to transform your cakes from ordinary to extraordinary? Let's get piping!
- Piping Buttercream: Achieving Smooth, Piped Results for Professional-Looking Cakes
- Introduction to Smooth Buttercream Piping Techniques
- Essential Buttercream Recipe for Smooth Piping
- Preparing Your Piping Bag and Tools
- Smooth Buttercream Piping Techniques: Step-by-Step Tutorial
- Troubleshooting Common Buttercream Piping Problems
- Advanced Buttercream Piping Techniques for Cake Decoration
- Tips and Tricks for Professional-Looking Buttercream Piping
- Maintaining Your Piping Tools for Optimal Performance
- Conclusion: Elevate Your Cakes with Smooth Buttercream Piping
-
Frequently Asked Questions
- How do I ensure my buttercream is smooth enough for piping?
- What consistency should my buttercream be for optimal piping results?
- What are some common mistakes that lead to bumpy buttercream piping?
- What piping tips are best for achieving smooth, consistent lines?
- How can I prevent air bubbles from ruining my piped buttercream designs?
- Final Reflection: Mastering the Art of Smooth Buttercream Piping
- Unleash Your Inner Pastry Artist: Master Piping Perfection!
Piping Buttercream: Achieving Smooth, Piped Results for Professional-Looking Cakes
Introduction to Smooth Buttercream Piping Techniques
Why Smooth Buttercream Piping Matters for Cake Decorating
Achieving smooth buttercream piping is often the difference between a homemade cake and one that looks like it came from a professional bakery. The ability to pipe buttercream cleanly allows you to create intricate designs, elegant borders, sharp edges, and perfectly formed swirls or rosettes. Whether you're decorating a birthday cake, wedding cake, or just cupcakes for fun, mastering smooth piping techniques elevates the visual appeal significantly. A smooth application ensures that decorative elements stand out and provides a polished finish that impresses everyone.
Beyond aesthetics, proper buttercream piping ensures structural integrity for certain designs. For instance, building tall buttercream layers or creating delicate lattice work requires consistent pressure and smooth flow to prevent collapse or breakage. Learning effective smooth buttercream piping techniques tutorial steps is fundamental for any baker looking to move beyond simply spreading frosting with a spatula and delve into the art of cake decoration with precision and confidence.
Mastering the Basics: Setting the Stage for Perfect Buttercream Piping
Before you even pick up a piping bag, several foundational steps are crucial for successful and smooth buttercream piping. This includes selecting the right type of buttercream, ensuring it's at the correct consistency, gathering your tools (piping bags and tips), and understanding how to fill the bag properly without introducing air bubbles. Think of it as preparing your canvas and paints before starting a painting. Skipping these initial stages often leads to frustration, uneven results, and difficulty in achieving that desired smooth finish.
Getting the basics right involves understanding the properties of different buttercreams and how temperature affects their texture. For example, a buttercream that is too cold will be stiff and difficult to pipe smoothly, potentially tearing the cake surface or causing hand strain. Conversely, a buttercream that is too warm will be runny, losing its shape quickly after being piped. Mastering the basics sets you up for success, allowing you to focus on the actual piping techniques rather than battling with your medium.
Essential Buttercream Recipe for Smooth Piping
Swiss Meringue Buttercream: The Ideal Choice for Piping
Swiss Meringue Buttercream is widely regarded by professional bakers as one of the best types of buttercream for smooth piping techniques tutorial applications. It starts with heating egg whites and sugar over a double boiler until the sugar dissolves, typically reaching around 160°F (71°C), which also ensures safety. This warm mixture is then whipped into a stiff, glossy meringue before softened butter is gradually added and beaten in. The result is a light, silky, and incredibly stable buttercream that holds its shape beautifully when piped, making it perfect for intricate details and smooth buttercream piping.
Compared to American buttercream (which is simply butter and powdered sugar), Swiss Meringue Buttercream is far less sweet and has a much smoother, less grainy texture. This smooth texture is paramount for achieving clean lines and defined shapes during piping. Its stability also means piped designs are less likely to wilt or lose definition, especially in warmer environments, making it a reliable choice for various decorative styles requiring precise buttercream piping.
Achieving the Right Buttercream Consistency for Piping Success
The consistency of your buttercream is perhaps the most critical factor in achieving smooth piped results. It needs to be firm enough to hold its shape but soft enough to flow smoothly through the piping tip without excessive pressure. A good rule of thumb is that the buttercream should resemble the consistency of soft-serve ice cream. If it's too stiff, it will be hard to squeeze, potentially causing the piping bag to burst or resulting in jagged, uneven lines. If it's too soft, your piped shapes will spread and lose definition.
Adjusting consistency often involves small additions and gentle mixing. If your buttercream is too stiff, you can add a tiny amount (start with a teaspoon) of milk, cream, or even softened butter and mix thoroughly. If it's too soft, chilling it in the refrigerator for 10-20 minutes, then re-whipping it briefly, can help. Sometimes, simply letting it sit at room temperature for a few minutes can make a stiff buttercream pliable enough for smooth buttercream piping techniques tutorial practice.
Tips for a Smooth and Silky Buttercream Texture
Achieving a truly smooth and silky texture in your buttercream goes beyond just consistency; it involves technique during preparation and handling. For butter-based buttercreams, ensure your butter is truly softened but not melted. Room temperature butter (around 65-70°F or 18-21°C) creams up beautifully with sugar or meringue, incorporating air evenly for a lighter texture. Over-mixing after adding the liquid can sometimes incorporate too much air or even break the emulsion, leading to a less smooth result.
One excellent tip for ensuring a silky texture, especially with American buttercream, is to sieve your powdered sugar before adding it to the butter. This removes any lumps and ensures a much smoother finish. For all types of buttercream, giving it a final gentle stir with a spatula after whipping can help remove any large air bubbles that might have been incorporated, which are notorious for causing interruptions and imperfections during smooth buttercream piping.
#### Checklist for Silky Buttercream:

*   [ ] Butter is softened, not melted.
*   [ ] Powdered sugar (if used) is sieved.
*   [ ] Ingredients are incorporated gradually.
*   [ ] Buttercream is mixed until smooth and creamy.
*   [ ] Large air bubbles are removed by stirring.
Preparing Your Piping Bag and Tools
Choosing the Right Piping Bag: Material and Size Considerations
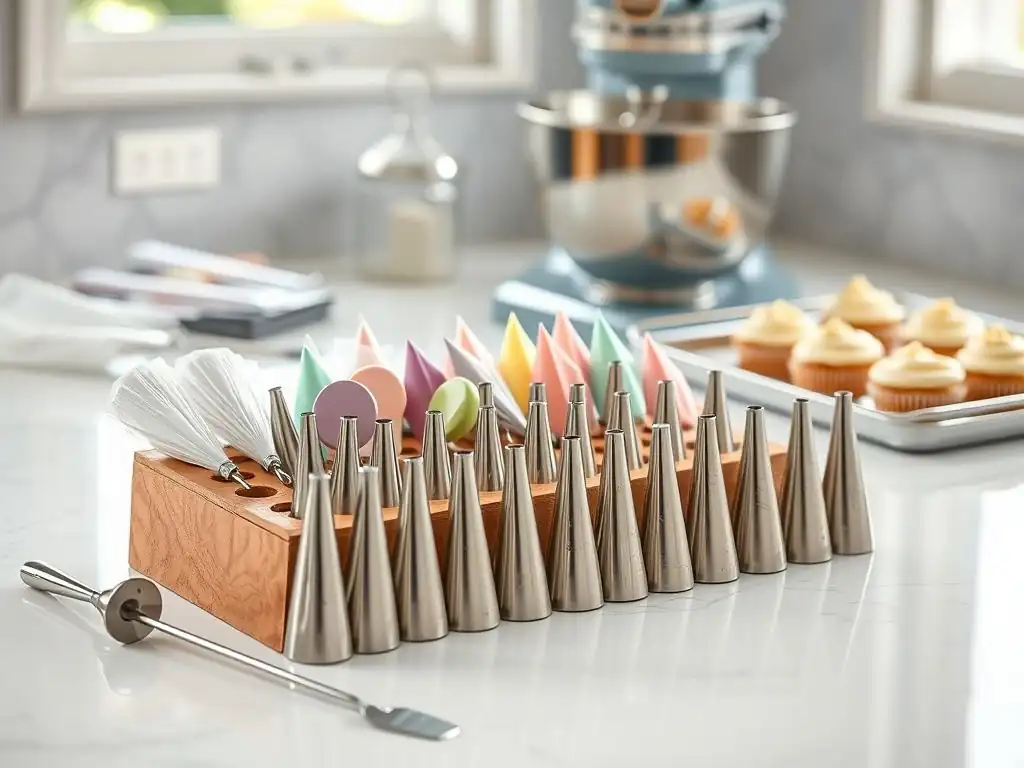
Piping bags come in various materials: disposable plastic, reusable plastic, and canvas/nylon. Disposable bags are convenient for quick clean-up, especially when using multiple colors, and offer good grip. Reusable plastic bags are durable and easy to clean, often preferred for regular use. Canvas or nylon bags are very sturdy but can be harder to clean thoroughly, though they offer excellent grip and control. For smooth buttercream piping techniques tutorial work, the material choice often comes down to personal preference for feel and ease of use.
Size is another important factor. Bags are typically measured in inches, ranging from small (around 8-10 inches) to very large (up to 20 inches). Smaller bags are great for detailed work or small quantities of buttercream, offering more control. Larger bags are better for covering large cakes quickly or piping significant amounts of buttercream, reducing the need for frequent refills. Having a variety of sizes on hand is beneficial for different buttercream piping tasks.
Selecting the Ideal Piping Tip for Your Desired Design
Piping tips, also known as nozzles, are what shape the buttercream as it exits the bag. They come in countless shapes and sizes, each creating a different effect. Common types include round tips for dots and lines, star tips for swirls and rosettes, petal tips for flowers, leaf tips for greenery, and basketweave tips for textured surfaces. For smooth buttercream piping, a simple round tip (like Wilton #12 or #1A for larger swirls) is essential for basic lines and dots, while open or closed star tips (like Wilton 1M or 2D) are perfect for classic rosettes and stars.
When selecting a tip, consider the scale of your design and the desired effect. A small round tip (like #3) is perfect for fine writing or delicate details, while a large round tip (#1A) is ideal for piping dollops on cupcakes or filling macaron shells. Using the correct tip is fundamental to executing specific smooth buttercream piping techniques tutorial steps accurately and achieving the intended visual outcome. Many tips are numbered, and referencing tip guides can help you choose the right one for your project.
Properly Filling Your Piping Bag: Avoiding Air Pockets
Properly filling your piping bag is crucial for uninterrupted and smooth buttercream piping. Air pockets are the enemy of smooth lines; they cause breaks and sputtering in your design. To fill a bag, first insert your chosen piping tip (or use a coupler if you plan to change tips). If using a disposable bag without a coupler, you'll need to snip off the end just enough for the tip to peek through. Fold the top of the bag down over your hand, creating a cuff.
Use a spatula or spoon to scoop the buttercream into the bag. Push the buttercream down towards the tip, trying to avoid trapping air against the tip or the sides of the bag. Fill the bag only about two-thirds full. Overfilling makes the bag difficult to control and can cause buttercream to squeeze out the top.
Once filled, unfold the cuff and twist the top of the bag closed. Gently squeeze the bag over a bowl until buttercream comes out smoothly, pushing out any trapped air. This preparation step is vital for maintaining consistent pressure and achieving smooth buttercream piping.
Smooth Buttercream Piping Techniques: Step-by-Step Tutorial
Technique 1: The Basic Swirl – Perfecting the Foundation
The basic swirl is a fundamental smooth buttercream piping technique used extensively on cupcakes and as a base for larger cake decorations. It requires consistent pressure and controlled movement. To execute, hold the piping bag with the twisted end in your dominant hand, applying steady pressure. Use your non-dominant hand to guide the tip. Start by piping a small dot in the center of your cupcake or cake area.
Then, keeping the pressure constant, begin piping in a circular motion, starting from the center dot and spiraling outwards. As you reach the edge of the cupcake or the desired size, gently sweep the piping tip inward towards the center and release pressure simultaneously to create a clean finish. Practice maintaining even pressure throughout the swirl; this consistency is key to achieving a smooth piped appearance without breaks or variations in thickness.
Technique 2: Achieving Smooth Rosettes with Buttercream
Rosettes are a classic and beautiful buttercream piping design, often created using a star tip (like a 1M or 2D). Achieving smooth rosettes depends on consistent pressure and a fluid motion. Hold the bag perpendicular to the cake surface. Start in the center of where you want the rosette to be. Apply firm, steady pressure and begin piping in a tight circular motion, spiraling outwards from the center.
As you complete the circle and reach the desired size, ease up on the pressure and lift the bag away cleanly. The goal is a continuous, smooth flow of buttercream that forms a clear, defined floral shape. Practicing this smooth buttercream piping technique tutorial step helps build muscle memory for the pressure and motion needed to create uniform rosettes across a cake or batch of cupcakes.
Technique 3: Creating Sharp Lines and Edges with Buttercream Piping
Piping sharp lines and edges requires a steady hand, a round tip, and consistent pressure. This smooth buttercream piping technique is essential for geometric designs, writing, or outlining areas. Hold the piping bag at a consistent angle relative to the surface (often 45 degrees for lines). Apply steady pressure to start the flow of buttercream.
Move the tip along the desired path at a constant speed while maintaining the same pressure. To end the line cleanly, stop moving the tip slightly before you release the pressure, then quickly lift the bag straight up.
For edges, such as around the base or top of a cake, hold the bag at a consistent angle (often 90 degrees or slightly less) and pipe along the edge, using your non-dominant hand to help guide the tip and maintain a steady distance from the cake. Practice piping lines of various lengths and curves on parchment paper to perfect this smooth piping skill.
Technique 4: Piping Smooth Buttercream Borders
Borders frame a cake and add a finishing touch. Common border buttercream piping techniques include shells, ropes, and beads. For a shell border (often using a star tip), hold the bag at a 45-degree angle. Apply pressure to create the base of the shell, then gradually decrease pressure as you pull the tip forward slightly, ending with a tail. For the next shell, overlap the tail of the previous one.
A rope border (using a round tip) involves piping a line, then piping another line partially over the first, alternating directions slightly to create a twisted effect. Bead borders are simply consistent dots piped side-by-side using a round tip. Achieving smooth buttercream piping for borders relies on consistent pressure and rhythm as you move around the cake. Practice these patterns on a flat surface before attempting them on your cake.
Troubleshooting Common Buttercream Piping Problems
Air Bubbles in Buttercream: Prevention and Solutions
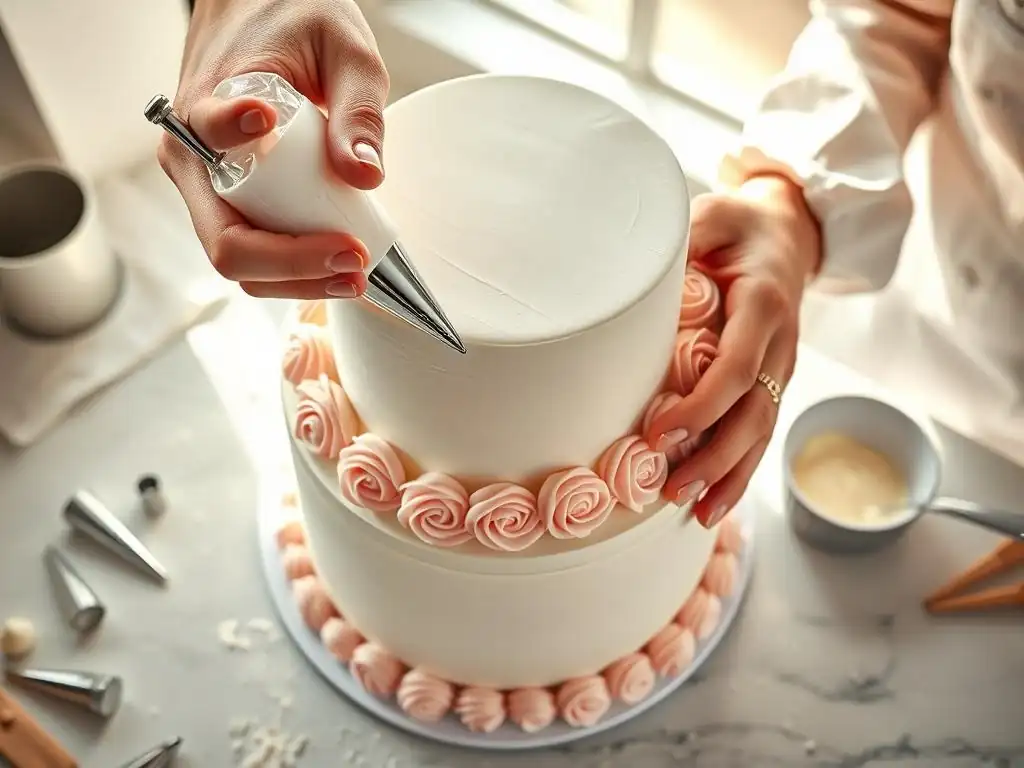
Air bubbles are a frequent frustration when trying to achieve smooth buttercream piping. They cause breaks and inconsistent flow, ruining the look of your design. Prevention is key: ensure your buttercream is mixed thoroughly but not over-whipped, and always remove large air pockets by stirring the buttercream with a spatula after mixing and before filling the bag.
If you encounter air bubbles while piping, there are a couple of solutions. You can gently massage the piping bag to try and work the bubble towards the tip or back up into the bag. Alternatively, you can stop piping, release the pressure, and squeeze the buttercream into a separate bowl or onto a piece of parchment paper until the bubble passes. Then, resume piping. For persistent bubbles, emptying the bag, stirring the buttercream again vigorously with a spatula, and refilling the bag often resolves the issue, allowing you to continue your smooth buttercream piping techniques tutorial practice.
Buttercream Too Soft or Too Stiff: Adjusting Consistency
The wrong consistency is a major hurdle to smooth piping. If your buttercream is too soft, your piped designs will slump and lose their shape almost immediately. This often happens if the kitchen is too warm or the buttercream was over-softened. The easiest fix is to chill the entire piping bag (or the bowl of buttercream) in the refrigerator for 10-20 minutes. Take it out, gently massage the bag (or re-whip the bowl contents briefly), and test the consistency. Repeat if necessary.
If your buttercream is too stiff, it will be hard to pipe, potentially causing hand cramps, tearing the bag, or resulting in jagged, uneven lines. This usually means it's too cold.
Allow the buttercream to sit at room temperature for a while, or gently warm the bowl slightly (e.g., over a warm water bath for just a few seconds). For a stiff butter-based buttercream, you can also knead the bag gently with your hands to warm it slightly, or stir in a tiny amount of liquid (like milk or cream), one teaspoon at a time, mixing thoroughly until the desired smooth piping consistency is reached.
Uneven Piping: Maintaining Consistent Pressure
Uneven piping – where the thickness of the line or the size of the shape varies – is usually a result of inconsistent pressure on the piping bag. To achieve smooth buttercream piping, you need to apply steady, constant pressure throughout the entire stroke or shape. The pressure should come from your dominant hand, specifically from squeezing the twisted top of the bag. Your non-dominant hand is primarily for guiding the tip.
Practice is the best way to overcome uneven piping. Spend time piping lines, dots, and swirls on parchment paper, focusing solely on maintaining consistent pressure. Observe how variations in pressure affect the output. This deliberate practice helps build the muscle memory required for applying steady pressure naturally, leading to much more uniform and smooth piped results.
Piping Tip Clogging: Clearing Obstructions
Piping tips can occasionally become clogged, interrupting the flow of buttercream and making smooth piping impossible. Clogging is often caused by small lumps in the buttercream (undissolved sugar, bits of cold butter), trapped air bubbles, or sometimes even crumbs from the cake itself if you're piping directly onto a frosted surface.
If a tip clogs, stop piping immediately. Gently try to squeeze a bit harder to force the obstruction through. If that doesn't work, you may need to stop, remove the tip (if using a coupler), and clear the blockage using a toothpick or a small skewer.
If the buttercream itself seems lumpy, you might need to scrape it back into a bowl, give it a vigorous stir with a spatula, and then refill the bag. Ensuring your buttercream is smooth and free of lumps before filling the bag is the best way to prevent this issue during your smooth buttercream piping techniques tutorial efforts.
Advanced Buttercream Piping Techniques for Cake Decoration
Creating Textured Buttercream Effects
Beyond simple lines and swirls, smooth buttercream piping can be used to create a variety of interesting textures on a cake surface. Using different tips and techniques can mimic fabrics, ruffles, or even wood grain. For example, a petal tip can create beautiful ruffles by holding the tip with the wider end against the cake and piping in a wavy motion while moving along the cake side. A basketweave tip creates a woven pattern by piping alternating horizontal and vertical strips.
Another popular textured effect is the "grass" or "fur" effect, achieved with a multi-opening tip. This technique involves holding the bag perpendicular to the surface and applying quick bursts of pressure while pulling the bag straight up, creating short strands. Mastering these advanced buttercream piping textures requires practice with pressure control and understanding how each tip interacts with the buttercream.
Piping Buttercream Flowers: A Detailed Guide
Piping buttercream flowers, such as roses, hydrangeas, and chrysanthemums, is a hallmark of advanced smooth buttercream piping techniques. These often utilize specific tips like petal tips (for roses), star tips (for chrysanthemums), or multiple small round tips clustered together (for hydrangeas). Rose piping, for instance, typically involves piping a cone-shaped base on a flower nail and then using a petal tip to pipe overlapping petals around the cone, rotating the nail as you go.
Creating realistic and beautiful flowers requires significant practice to control petal shape, size, and placement. The consistency of the buttercream is absolutely critical here; it must be firm enough to hold the delicate petal shapes but soft enough to flow smoothly without tearing. Many bakers dedicate substantial practice time to perfecting just one type of buttercream flower before moving on to others, honing their smooth buttercream piping skills specifically for these intricate designs.
Using Multiple Colors for Intricate Buttercream Designs
Incorporating multiple colors adds complexity and visual interest to piped buttercream designs. There are several methods for achieving multi-color effects using smooth buttercream piping techniques. The simplest is filling separate bags with different colors and switching between them. For designs like rainbows or stripes within a single piped element, you can spread different colors of buttercream side-by-side on a piece of plastic wrap, roll it up into a log, and then insert the log into a piping bag.
For a marbled effect, lightly swirl two or more colors together in a bowl before filling the bag, being careful not to overmix. When piping, the colors will blend slightly, creating a beautiful marbled pattern. Using multiple colors in buttercream piping allows for vibrant and dynamic cake decorations, from multi-colored rosettes to intricate floral arrangements and patterned borders.
Tips and Tricks for Professional-Looking Buttercream Piping
Chilling Your Cake for Easier Piping
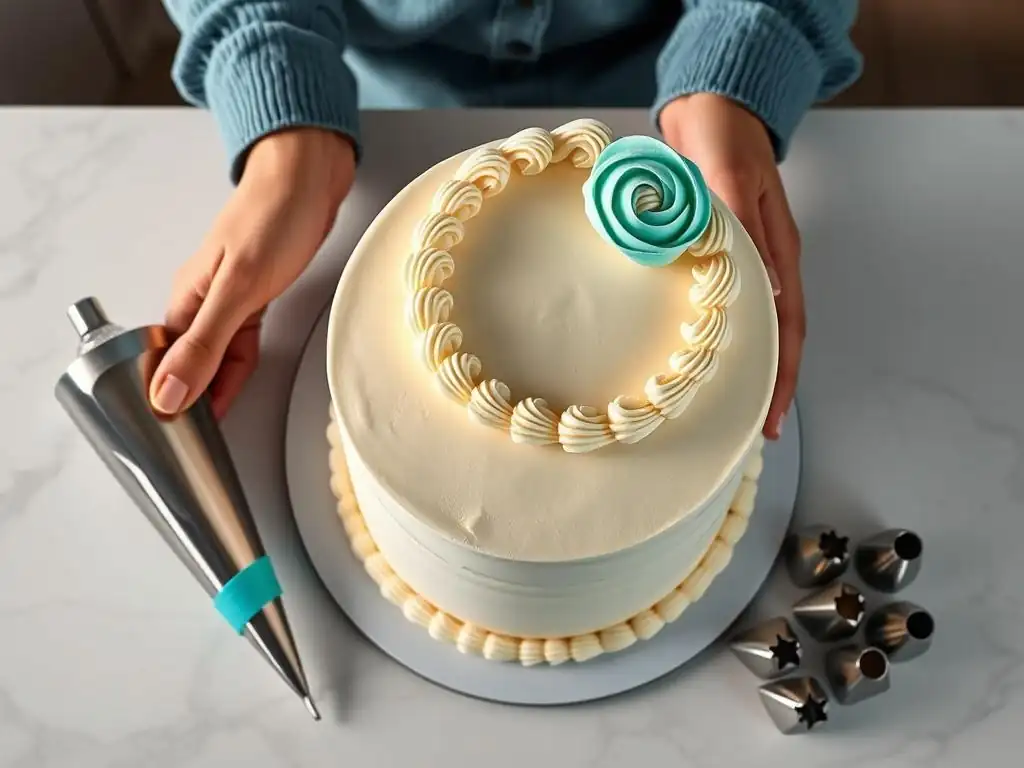
Chilling your cake before piping can significantly improve your results, especially when applying smooth buttercream piping to the sides or top. A cold cake provides a firm surface that is less likely to tear or crumble when the piping tip touches it. This is particularly helpful when piping delicate details, lines, or borders directly onto a frosted cake.
Placing your crumb-coated or fully frosted cake in the refrigerator for 20-30 minutes (or even the freezer for 10-15 minutes) until the surface is firm to the touch creates an ideal base. This allows you to correct small mistakes more easily and ensures that your piped elements stand out cleanly against the chilled background, contributing to a more professional finish for your smooth buttercream piping techniques tutorial projects.
Using a Turntable for Even Coverage
A cake turntable is an invaluable tool for achieving smooth piped results, especially when piping borders, swirls on top of round cakes, or applying textures to the sides. A turntable allows you to rotate the cake smoothly and continuously while you keep your piping hand relatively still, ensuring consistent application and even spacing of your piped design.
For piping borders around the base or top edge, using a turntable allows you to maintain a steady angle and pressure as the cake spins, resulting in a seamless and uniform border. When piping swirls on top, rotating the cake while keeping the tip centered helps create a perfect spiral. Integrating a turntable into your buttercream piping process is a simple step that yields noticeably better, more even results.
Practicing Your Piping Techniques Regularly
Like any skill, mastering smooth buttercream piping techniques requires practice, practice, and more practice. Don't expect perfection on your first try! Use parchment paper or the back of a baking sheet to practice different tips, pressures, and motions. You can scrape the piped buttercream back into the bag and reuse it for practice (though it might incorporate more air over time).
Dedicated practice sessions help you build muscle memory, improve your control over pressure and movement, and become familiar with how different tips perform. Even just 10-15 minutes of practice before decorating a real cake can make a big difference in your confidence and the quality of your smooth piped results. Think of it as warming up before a performance.
Maintaining Your Piping Tools for Optimal Performance
Cleaning Your Piping Bags and Tips Properly
Properly cleaning your piping tools is essential for hygiene and ensuring they are ready for your next smooth buttercream piping session. As soon as you finish piping, empty any remaining buttercream from the bag and tip. Rinse them immediately with warm water to remove as much residue as possible before it hardens. Buttercream, especially if it contains butter, can be greasy and difficult to remove once dried.
For reusable bags and tips, wash them thoroughly with hot, soapy water. Use a small brush (like a bottle brush or a specialized tip cleaning brush) to get inside the tips and remove any trapped buttercream. Rinse completely and allow them to air dry fully before storing. Disposable bags can simply be discarded after use. Clean tools ensure a smooth flow of buttercream and prevent contamination, which is key for consistent smooth piping.
Storing Your Piping Tools to Prevent Damage
Storing your piping tools correctly helps protect them and keeps them organized for easy access when you're ready for more smooth buttercream piping techniques tutorial practice. Piping tips, especially those with intricate shapes, can be easily bent or damaged if stored loosely in a drawer.
Consider using a dedicated storage container for your tips, such as a small plastic box with compartments or a specialized tip storage case. Many bakers keep their tips organized by type or size. Reusable piping bags should be stored clean and dry, often folded neatly. Proper storage prevents damage to the tips that could affect your ability to achieve smooth piped results and keeps your workspace tidy.
Conclusion: Elevate Your Cakes with Smooth Buttercream Piping
Recap of Key Buttercream Piping Techniques
Mastering smooth buttercream piping techniques is a journey that transforms your baking from simple treats into edible works of art. We've covered the importance of starting with a smooth, consistent buttercream, preferably one like Swiss Meringue Buttercream, and how to adjust its texture. We've explored preparing your tools, from selecting the right bag and tip to properly filling the bag to avoid air bubbles.
Key techniques like the basic swirl, smooth rosettes, creating sharp lines, and piping even borders form the foundation of this skill. We also touched upon troubleshooting common issues like air bubbles, incorrect consistency, and uneven pressure, providing solutions to keep your piping smooth and consistent. Finally, we looked at advanced techniques, helpful tips like chilling the cake and using a turntable, and the importance of practice and tool maintenance.
Encouragement for Continuous Learning and Experimentation
Achieving smooth buttercream piping is a skill that improves with practice and patience. Don't be discouraged by initial imperfections. Every attempt, every swirl, every line you pipe is a step towards greater mastery. Experiment with different buttercream recipes, explore various tips, and try new designs. The world of cake decorating is vast and full of creative possibilities waiting to be explored through the art of smooth piping.
Keep practicing the techniques discussed in this smooth buttercream piping techniques tutorial. Try different variations and combine techniques to create unique designs. The more you practice, the more intuitive buttercream piping will become, allowing you to effortlessly create beautiful, professional-looking cakes that taste as wonderful as they look. Happy piping!
Frequently Asked Questions
How do I ensure my buttercream is smooth enough for piping?
The key is to cream the butter and sugar thoroughly for several minutes until light and fluffy. You also want to ensure the powdered sugar is finely ground and sifted to prevent grittiness.
What consistency should my buttercream be for optimal piping results?
Buttercream should be firm enough to hold its shape but soft enough to flow smoothly through the piping tip. A good test is to pipe a swirl; it should hold its shape with minimal drooping.
What are some common mistakes that lead to bumpy buttercream piping?
Common mistakes include using cold butter, not creaming the ingredients long enough, and using too much liquid. Also, ensure your piping bag is free of air bubbles.
What piping tips are best for achieving smooth, consistent lines?
Round tips are generally best for creating smooth lines. Consider using a larger round tip for filling and a smaller round tip for detailed work.
How can I prevent air bubbles from ruining my piped buttercream designs?
Burp the piping bag by squeezing gently to release any trapped air before you start piping. Also, avoid overfilling the bag, as this can trap air. Work in small batches to maintain consistent pressure.
Final Reflection: Mastering the Art of Smooth Buttercream Piping
The pursuit of perfectly piped buttercream is more than just a culinary skill; it's a testament to patience, precision, and the enduring power of beautiful presentation. In a world saturated with visually driven content, the ability to create flawlessly smooth buttercream designs holds significant weight, impacting everything from professional baking businesses to the joy of creating stunning homemade cakes. This skill elevates the simple act of baking into an art form, transforming ordinary desserts into edible masterpieces.
The journey to mastering smooth buttercream piping is a deeply rewarding one, mirroring life's own pursuit of perfection. It's about understanding the nuances of ingredient ratios, the subtle art of temperature control, and the unwavering commitment to practice. The process itself is meditative, a quiet dance between the baker and their ingredients. As the late Julia Child wisely said, Find something you're passionate about and keep tremendously interested in it.
This sentiment perfectly encapsulates the dedication required to achieve truly exceptional results in buttercream piping, a skill that continues to inspire and delight bakers of all levels.
Now, it's your turn. Consider the lessons learned within this tutorial—the importance of proper technique, the significance of quality ingredients, and the transformative power of practice. Don't be afraid to experiment, to embrace the occasional imperfection, and to find joy in the process. The path to mastering smooth buttercream piping is a journey of continuous learning and self-discovery, and the delicious rewards are well worth the effort. So, grab your piping bag, gather your ingredients, and let your creativity flow. The world awaits your perfectly piped creations.
Unleash Your Inner Pastry Artist: Master Piping Perfection!
Thanks for joining us on this buttercream journey! We hope you now feel confident and equipped to create stunning piped decorations. Ready to put your new skills to the test?
- Practice your piping techniques: Grab your bag, tips, and buttercream, and try creating some of the designs we discussed. Don't be afraid to experiment!
- Share your creations: Show us your piped masterpieces on social media using #BakeWithEasePiping – we'd love to see your progress!
- Challenge yourself with a new piping technique: Try a design you haven't attempted before – roses, swirls, or even a full cake border!
What stunning design will you create first? Let us know in the comments!