
Your First Piped Cake Design: A StepbyStep Guide

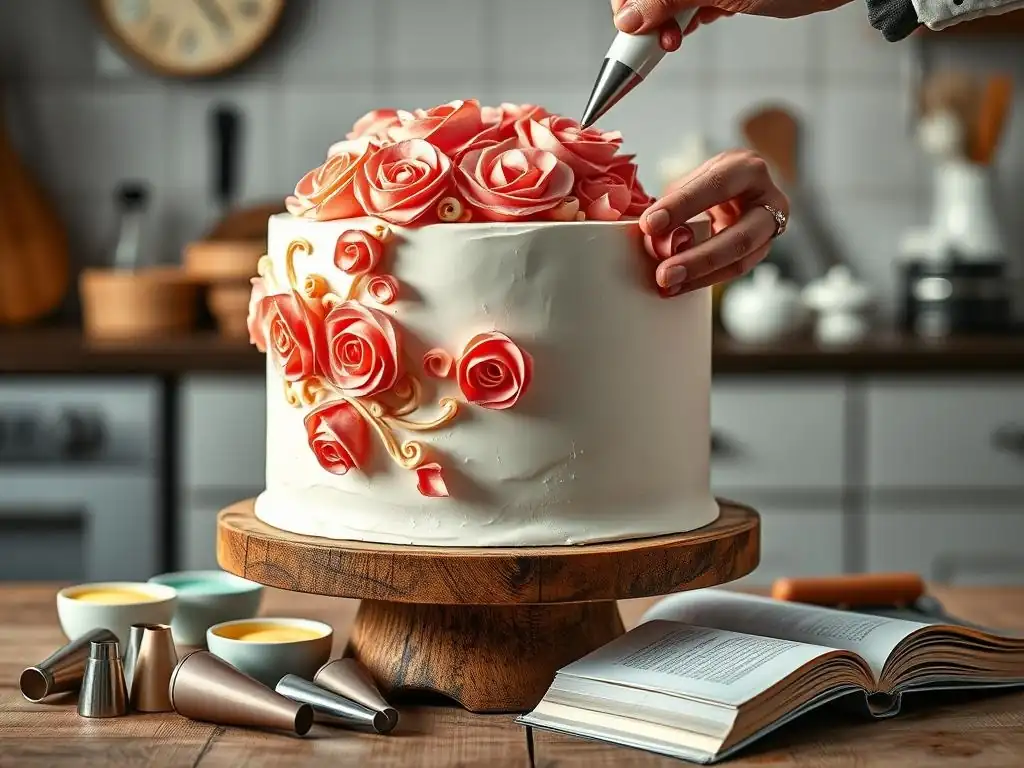
Welcome to BakeWithEase!
Ready to transform ordinary cakes into edible masterpieces? You've landed in the right place. This guide dives into the world of piped cake decorating for beginners, unlocking the secrets to creating stunning designs, even if you've never held a piping bag before. Discover the essential tools, foolproof techniques, and inspiring ideas to elevate your baking game. So, grab your icing and let's embark on this sweet adventure together!
- Your First Piped Cake Design: A Step-by-Step Guide for Beginners
- Introduction to Piped Cake Decorating for Beginners:
- Preparing for Your First Piped Cake Decorating Project
-
Step-by-Step Guide: Creating Simple Piped Cake Designs
- Step 1: Crumb Coating Your Cake: Creating a Smooth Canvas
- Step 2: Applying the Final Frosting Layer: Achieving a Professional Finish
- Step 3: Filling Your Piping Bag: Techniques for No-Mess Filling
- Step 4: Mastering Basic Piping Techniques for Beginners
- Step 5: Designing Your First Piped Cake: Simple Ideas and Inspiration
- Tips and Tricks for Successful Beginner Cake Piping
- Piped Cake Decorating Ideas and Inspiration
- Conclusion: Continuing Your Cake Decorating Journey
-
Frequently Asked Questions
- What are the essential tools for a piped cake decorating beginner?
- What type of frosting is best for piping designs?
- How do I prevent air bubbles in my piping bag?
- What's a good starting design for a beginner learning piped cake decorating?
- How can I achieve smooth buttercream frosting on my cake before piping?
- Final Reflection: The Sweetness of Creation and the Joy of Learning
- Unleash Your Inner Cake Artist!
Your First Piped Cake Design: A Step-by-Step Guide for Beginners
Introduction to Piped Cake Decorating for Beginners:
Why Learn Piped Cake Decorating?
Learning piped cake decorating for beginners opens up a world of creative possibilities right in your own kitchen. It's a skill that allows you to transform a simple baked cake into a personalized masterpiece, perfect for birthdays, holidays, or just because. Beyond the aesthetic appeal, mastering basic piping skills provides a deep sense of accomplishment and the ability to add a unique, homemade touch to any celebration. Think of the joy of presenting a beautifully decorated cake that you crafted yourself, a tangible expression of your effort and creativity.
Furthermore, developing your piped cake decorating skills can be surprisingly cost-effective compared to ordering custom cakes from a bakery. While a professional custom cake might start from $50-$100 or more depending on complexity, the cost of ingredients for a delicious homemade cake and frosting, plus a basic piping set, can often be less than $20-$30 for a standard size cake. This allows you to enjoy stunning, personalized desserts without breaking the bank, making homemade piped cakes an excellent value.
Your Resource for Mastering Basic Piping Skills
BakeWithEase.com is dedicated to helping you master essential baking techniques, including the fundamental skills needed for piped cake decorating. We understand that starting out can feel daunting, but with the right guidance and practice, creating beautiful piped cake designs is well within your reach. Our focus is on breaking down complex processes into simple, manageable steps, perfect for the absolute beginner.
This guide is specifically designed to walk you through the initial stages of piped cake decorating, focusing on the tools, preparation, and basic techniques you need to know. We'll cover everything from choosing your first piping bag and tips to creating classic designs like stars and rosettes. By the end of this article, you'll have the confidence and knowledge to attempt your very first piped cake design, setting a solid foundation for future decorating adventures.
Preparing for Your First Piped Cake Decorating Project
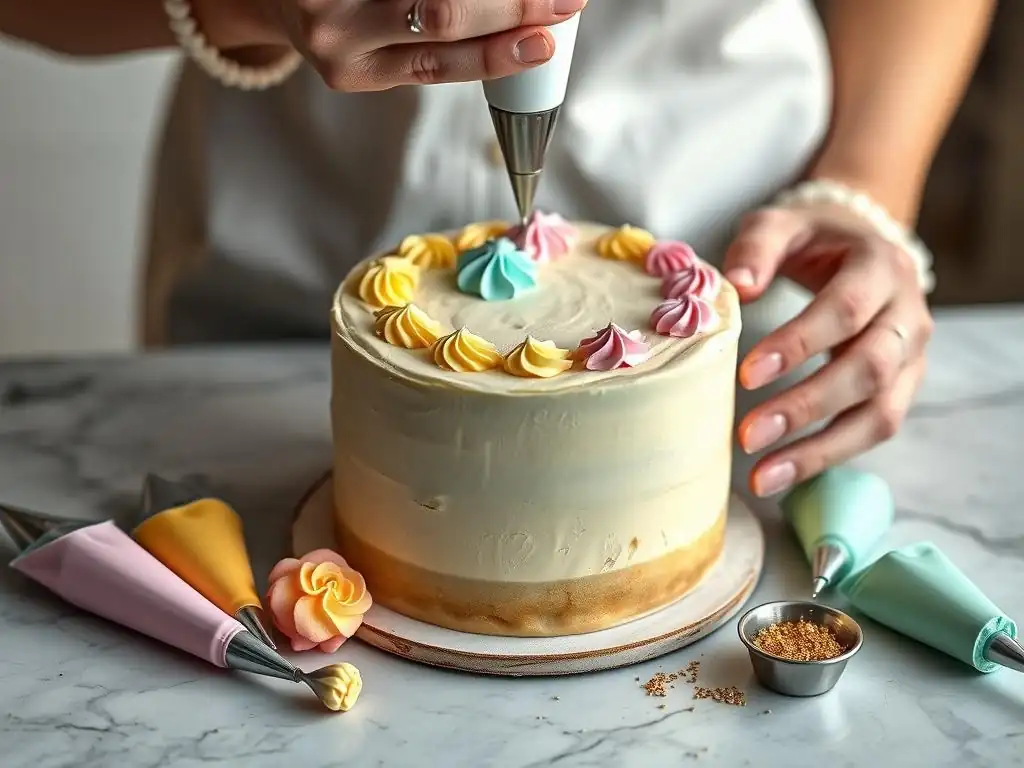
Essential Tools and Equipment for Beginner Cake Piping
Getting started with piped cake decorating for beginners doesn't require a huge investment in specialized tools. A few key pieces of equipment will make the process significantly easier and more successful. Understanding what each tool does and choosing the right ones is the first step towards creating beautiful piped cake designs.
Investing in a basic set of tools, often available for around $15-$30, will equip you with the essentials needed for many simple piped cake designs. While professional decorators might use dozens or even hundreds of tips, a beginner can achieve impressive results with just a handful of versatile ones. Focus on acquiring durable, easy-to-clean tools that will last through many baking projects.
Piping Bags: Choosing the Right Type
Piping bags are the vessel for your frosting. They come in various materials, each with pros and cons. Disposable piping bags are made of plastic and are convenient as they require no cleaning – simply use and discard. They are an excellent choice for beginners as they are inexpensive and readily available. A pack of 100 disposable bags can often be purchased for under $10.
Reusable piping bags are typically made from canvas, nylon, or silicone. They are more environmentally friendly and durable than disposable bags. While they require washing after each use, a good quality reusable bag can last for years. For a beginner who plans on decorating frequently, investing in a sturdy reusable bag or two can be worthwhile. Both types come in different sizes; an average 12 or 14-inch bag is suitable for most beginner projects.
Piping Tips: Essential Shapes
Piping tips are small nozzles inserted into the piping bag that shape the frosting as it's squeezed out. For piped cake decorating beginners, focusing on a few fundamental tip shapes is key. A good starter set often includes a large open star tip (like the Wilton 1M or Ateco 824), a closed star tip (like Wilton 2D), a round tip (like Wilton #12 or #4), and possibly a leaf tip (#352).
The large open star tip (1M) is incredibly versatile, perfect for creating swirls, rosettes, stars, and simple borders. The round tip (#12) is great for dots, beads, writing, and filling in areas. With just these two or three tips, you can create a surprising variety of piped cake designs. Many starter kits include these essential tips, offering a cost-effective way to acquire them.
Couplers: Making Tip Changes Easy
A coupler is a two-part plastic piece that allows you to change piping tips on a single bag without emptying the frosting. The base is placed inside the piping bag before filling, with the tip of the bag cut to expose the threaded part of the coupler. The piping tip is then placed over the threads on the outside of the bag, and the ring part of the coupler is screwed on to secure the tip.
Using a coupler is particularly useful for beginners who want to experiment with different tips using the same color frosting. It saves time and reduces the number of bags you need to prepare. A standard coupler fits most small to medium-sized tips, covering the range commonly used by piped cake decorating beginners. A set of couplers is usually inexpensive, often included in beginner kits or available separately for a few dollars.
Spatulas and Palette Knives: Smoothing and Shaping
While not strictly piping tools, spatulas and palette knives are essential for preparing your cake for piping. An offset spatula (with a bent handle) is ideal for applying and smoothing frosting onto the cake's surface. A 6-inch or 8-inch offset spatula is a versatile size for beginner projects.
A palette knife, which is typically straighter and narrower than an offset spatula, can also be used for smoothing small areas or applying frosting, but its primary use in decorating is often for spreading frosting or lifted decorations. Having both an offset spatula for general smoothing and a smaller straight spatula or palette knife for detail work is beneficial for achieving a smooth base layer before you begin your piped cake decorating.
Cake and Frosting Preparation: The Foundation of Beautiful Piped Cakes
Successfully executing your first piped cake design relies heavily on the preparation of both the cake and the frosting. A stable, well-chilled cake and frosting with the correct consistency are fundamental. Skipping these crucial steps can lead to frustration and make the piping process much more challenging, especially for piped cake decorating beginners.
Taking the time to properly prepare your cake and frosting ensures you have the best possible canvas and medium to work with. This foundation allows you to focus on learning and practicing your basic piping skills without battling issues like crumbling cake or runny frosting. A little extra effort in preparation pays off significantly in the final result of your piped cake designs.
Baking a Cake Suitable for Decorating
For piped cake decorating beginners, choosing a sturdy cake recipe is advisable. Delicate or very moist cakes can be prone to crumbling, making the crumb coating and final frosting layers difficult to apply smoothly. Recipes like a classic vanilla or chocolate butter cake, pound cake, or even a stable sponge cake are good choices. These cakes hold their shape well and can support the weight of frosting and decorations.
Ensure your cake is completely cooled before you even think about frosting it. Attempting to frost a warm cake will melt the frosting, leading to a messy outcome. For best results, bake your cake ahead of time and chill it in the refrigerator for at least 30 minutes, or even freeze it briefly (15-20 minutes). A cold cake is much easier to handle, level, and crumb coat without creating excessive crumbs.
Making or Choosing the Right Frosting for Piping
Not all frostings are suitable for piping intricate designs. A good piping frosting needs to be stable enough to hold its shape when squeezed through a tip. American buttercream (butter, powdered sugar, liquid, flavoring) is a popular choice for piped cake decorating beginners because it's relatively easy to make, holds peaks well, and is forgiving. Swiss or Italian meringue buttercreams are also excellent but can be slightly more temperamental for a novice.
Avoid frostings that are too soft or contain large chunks of ingredients. Cream cheese frosting can work, but often needs to be quite firm or stabilized to hold detailed shapes. Simple glazes or whipped cream are generally too soft for defined piping work. Aim for a frosting specifically designed for decorating; most standard buttercream recipes found online or in cookbooks are suitable. A typical batch of buttercream for a standard 8-inch two-layer cake might require around 1 cup of butter and 4-6 cups of powdered sugar.
Achieving the Perfect Frosting Consistency for Piping
The consistency of your frosting is paramount for successful piping. It needs to be firm enough to hold a defined shape but soft enough to flow smoothly through the piping tip without requiring excessive force. If your frosting is too stiff, it will be hard to pipe and may tear your bag; if it's too soft, your piped shapes will lose definition and sag.
You can adjust frosting consistency easily. If it's too stiff, beat in a very small amount of liquid (like milk, cream, or water), adding just half a teaspoon at a time until the desired consistency is reached. If it's too soft, beat in more powdered sugar, again, adding just a tablespoon or two at a time.
The ideal piping consistency should hold a stiff peak when a spoon or spatula is lifted out, but still feel smooth and easy to stir. Chilling the frosting for 10-15 minutes in the refrigerator can also help firm it up if it's slightly too soft from mixing.
Step-by-Step Guide: Creating Simple Piped Cake Designs
Creating your first piped cake design as a beginner is an exciting milestone! This step-by-step guide will walk you through the fundamental process, from preparing your cake surface to piping basic decorations. We'll focus on simple, achievable designs that are perfect for practicing your basic piping skills and building confidence.
Remember that practice makes perfect in piped cake decorating. Don't expect your first attempts to look flawless. The goal is to understand the process, get comfortable with the tools, and learn how to control the flow of frosting. Each attempt will help you improve your technique and achieve smoother, more consistent piped cake designs.
Step 1: Crumb Coating Your Cake: Creating a Smooth Canvas
Before you apply your final layer of frosting or begin any piped cake decorating, it's essential to crumb coat your cake. The crumb coat is a very thin layer of frosting applied all over the cake. Its purpose is to trap any loose crumbs, preventing them from getting into your final, visible layer of frosting. This step is crucial for achieving a clean, professional finish on your piped cake designs.
To apply a crumb coat, place your chilled cake on a cake stand or turntable. Apply a small amount of frosting to the top and sides using an offset spatula. Spread it thinly, working the crumbs into this initial layer. Don't worry about making it perfectly smooth; the goal is just to cover the cake completely and seal in the crumbs. Once coated, chill the cake in the refrigerator for at least 15-30 minutes until the crumb coat is firm to the touch. This sets the crumbs and provides a stable base for the next steps.
Step 2: Applying the Final Frosting Layer: Achieving a Professional Finish
After the crumb coat has chilled and hardened, it's time to apply the final, thicker layer of frosting. This layer will be the background for your piped cake designs, so aim for a smooth, even finish. Apply a generous amount of frosting to the top and sides of the cake using your offset spatula.
Use the spatula to smooth the frosting, rotating the cake stand as you go. For the sides, hold the spatula vertically against the cake and rotate the stand. For the top, use the spatula to smooth from the center outwards or use a bench scraper held against the side and top edge simultaneously for sharp edges. Don't stress about absolute perfection, especially as a piped cake decorating beginner, but aim for a surface that is reasonably smooth and free of large gaps or ridges before you start piping.
Step 3: Filling Your Piping Bag: Techniques for No-Mess Filling
Properly filling your piping bag minimizes mess and makes piping much easier. If you're using a coupler, make sure it's assembled with the bag tip cut to the correct size. If you're not using a coupler and inserting the tip directly, push the tip into the bag and cut the end of the bag so that the tip is exposed but fits snugly.
To fill the bag, fold the top few inches of the bag down to create a cuff. Hold the bag with the cuffed edge around your hand, creating a wide opening. Use a spatula or spoon to scoop frosting into the bag, pushing it towards the tip. Fill the bag no more than two-thirds full; overfilling makes it difficult to handle and control. Unfold the cuff and twist the top of the bag closed, just above the level of the frosting. This twist is where you will apply pressure to push the frosting out.
Step 4: Mastering Basic Piping Techniques for Beginners
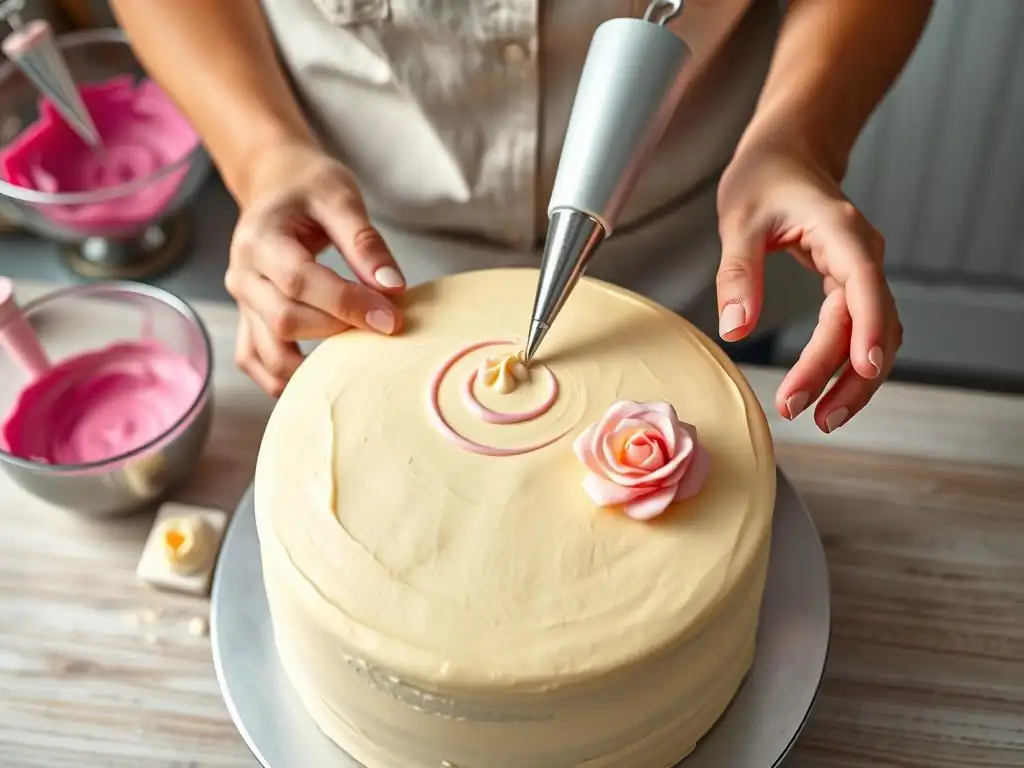
Now for the fun part: piping! Getting a feel for controlling the bag and the flow of frosting is key. Hold the twisted end of the bag in your dominant hand, applying steady, gentle pressure. Guide the tip with your other hand if needed. Practice on a piece of parchment paper first to get a feel for the pressure required to achieve different shapes.
Maintaining consistent pressure is one of the biggest challenges for piped cake decorating beginners. Start with gentle pressure and increase it until the frosting flows smoothly. To stop piping, ease pressure and lift the bag away with a slight flick of the wrist to create a clean break.
Piping Stars: A Classic Technique
Stars are perhaps the easiest and most versatile piped cake design for beginners, typically made with a star tip (like the 1M or 2D). To pipe a simple star, hold the bag perpendicular to the cake surface, with the tip just above it. Apply firm, steady pressure to the bag until the frosting expands to the desired size of your star.
Maintain pressure while holding the tip still for a second to let the frosting build up. Then, quickly ease pressure and lift the bag straight up. This should leave a well-defined star shape. Practice piping rows and clusters of stars on parchment paper until you feel comfortable with the pressure and lift motion.
Piping Rosettes: Adding Elegance
Rosettes are beautiful swirled shapes, often made with the same star tips used for stars (1M is excellent for large rosettes). To pipe a rosette, hold the bag perpendicular to the cake surface. Start in the center of where you want your rosette. Apply pressure and pipe in a circular motion, moving outwards from the center in a spiral.
Complete the circle, ending back near where you started. Release pressure and pull the bag away. The frosting will create a lovely swirl pattern resembling a rosebud. Practice piping rosettes of different sizes on parchment paper before attempting them on your cake.
Piping Dots and Beads: Creating Textural Details
Dots and beads are simple yet effective ways to add detail or create borders, typically piped with a round tip (like #4 or #12). For a basic dot, hold the bag perpendicular to the surface, tip just above. Apply gentle, steady pressure until the dot reaches your desired size.
Release pressure and lift the bag straight up. For a string of beads, pipe a dot, then move the bag slightly while maintaining pressure to connect the next dot as you pipe it. This creates a continuous line of rounded shapes. Vary the pressure and tip size to create dots and beads of different sizes.
Piping Simple Borders: Framing Your Cake Design
Borders frame your cake and give it a finished look. Simple borders are great for piped cake decorating beginners. Shell borders, made with a star tip (like 1M or 2D), are a popular choice. To pipe a shell, hold the bag at a slight angle (around 45 degrees) to the cake surface. Apply pressure to create a base, then move the bag forward slightly while maintaining pressure, letting the frosting fan out behind the tip.
As you near the desired length of your shell, gradually ease pressure and pull the bag away, allowing the tail of the shell to taper off smoothly. Pipe the next shell so it slightly overlaps the tail of the previous one, creating a continuous chain around the edge of the cake. Practice this motion on parchment paper first to get the hang of the angle and pressure control.
Step 5: Designing Your First Piped Cake: Simple Ideas and Inspiration
With your basic piping skills practiced, it's time to plan your first piped cake design. Keep it simple and focus on mastering one or two techniques. Overwhelming yourself with too many elements can be discouraging. The goal is to create something you're proud of using your newfound skills.
Remember, even professional decorators started with basic piped cake designs. Experiment with placement and size on your practice parchment before committing to the cake. This allows you to visualize the final look and make adjustments.
Creating a Simple Border and Rosette Design
A classic and achievable first piped cake design for a beginner is a simple border combined with a few rosettes on top. Use a star tip (like 1M) to pipe a shell border or a row of stars around the base or top edge of the cake. This defines the cake's shape.
Then, use the same tip to pipe rosettes on the top surface. You could pipe one large rosette in the center, or several smaller rosettes scattered across the top. This design utilizes just one or two basic techniques but creates a visually appealing and finished look. It's an excellent way for a piped cake decorating beginner to practice consistent pressure and shape formation.
Adding Sprinkles for Extra Flair
Sprinkles are a beginner's best friend! They can easily add color, texture, and cover up minor imperfections in your piped cake designs. After piping your frosting elements, you can immediately add sprinkles while the frosting is still soft.
Consider adding sprinkles just around the border, scattering them across the top, or applying them to the sides of the cake before piping begins. A gentle press can help them adhere to the frosting. Just a small amount of sprinkles can elevate the look of even the simplest piped cake.
Using Multiple Colors for a More Dynamic Look
Once you're comfortable piping with one color, try incorporating two or three colors into your piped cake design. This adds visual interest and allows for more creative expression. You can prepare separate piping bags for each color you want to use.
Alternatively, for a marbled effect, you can stripe the inside of a piping bag with different colors of frosting before filling it with the main color. Or, simply add dollops of different colors side-by-side into a single bag – as you pipe, the colors will blend slightly, creating a unique look. Using multiple colors, even with simple piped shapes, makes your cake look more dynamic and festive.
Tips and Tricks for Successful Beginner Cake Piping
Beyond the step-by-step process, a few extra tips and tricks can significantly improve your experience and results when learning piped cake decorating as a beginner. These insights address common challenges and offer simple solutions to help you achieve smoother, more consistent piped cake designs.
Patience is key! Don't get discouraged if your first attempts aren't perfect. Every baker, no matter how experienced, had to start somewhere. Focusing on these tips will help you navigate common pitfalls and build confidence as you practice your basic piping skills.
Achieving Smooth and Consistent Piping Lines
Consistency in your piping comes down to two main factors: frosting consistency and bag pressure. Ensure your frosting is the right texture – not too stiff, not too soft. As you pipe, try to maintain steady, even pressure on the twisted end of the bag. Avoid squeezing too hard and then too lightly, which results in uneven shapes.
Holding the bag correctly is also important. Use your dominant hand to apply pressure at the top, near the twist, and your non-dominant hand to guide the tip if needed. Keep the tip slightly above the surface you are piping on unless you are specifically trying to attach the frosting firmly (like for dots or the start of a shell). Practice on parchment paper focusing only on maintaining steady pressure and a consistent flow until you can pipe straight lines or even swirls of uniform thickness.
Avoiding Common Piping Mistakes: Troubleshooting Guide
Several issues commonly arise for piped cake decorating beginners. One is the frosting being too warm, especially from warm hands holding the bag, which makes it soft and greasy. If this happens, stop piping, remove the frosting from the bag, stir it, and chill it for 10-15 minutes before attempting to pipe again.
Another common mistake is inconsistent pressure, leading to shapes that are fatter in some spots and thinner in others. This requires practice focusing on steady squeezing. Tearing piping bags can happen if the frosting is too stiff or if you're applying too much pressure. Ensure your frosting is pliable and consider using sturdier bags. If air bubbles appear in your piping, gently squeeze the bag to push the air out before continuing.
Practicing Piping Techniques on Parchment Paper
This tip cannot be stressed enough for piped cake decorating beginners: practice on parchment paper! Before piping directly onto your beautifully frosted cake, scoop some frosting into a bag and practice your techniques on a piece of parchment paper placed on a flat surface.
Practice piping stars, rosettes, dots, lines, and borders. You can scrape the frosting off the parchment paper and put it back into the bag to reuse it for more practice (though avoid doing this too many times as it can incorporate air or warm the frosting). Practicing allows you to get a feel for the pressure, motion, and consistency without the pressure of working on the final cake. You can practice for just 10-15 minutes and see a noticeable improvement in your control.
Storing Your Decorated Cake Properly
Once your piped cake design is complete, proper storage is essential to keep it looking its best. For most cakes decorated with buttercream, refrigeration is recommended, especially if the frosting contains butter or dairy that could soften at room temperature.
Store the cake in an airtight cake carrier or loosely cover it with plastic wrap, being careful not to press against the piped decorations. Chilling helps the piped frosting set and maintain its shape. Take the cake out of the refrigerator about 30-60 minutes before serving (depending on room temperature) to allow the frosting and cake to soften slightly for optimal taste and texture. Cakes decorated with firm buttercream can often sit at cool room temperature for a few hours if needed, but refrigeration is safest for longer storage.
Piped Cake Decorating Ideas and Inspiration
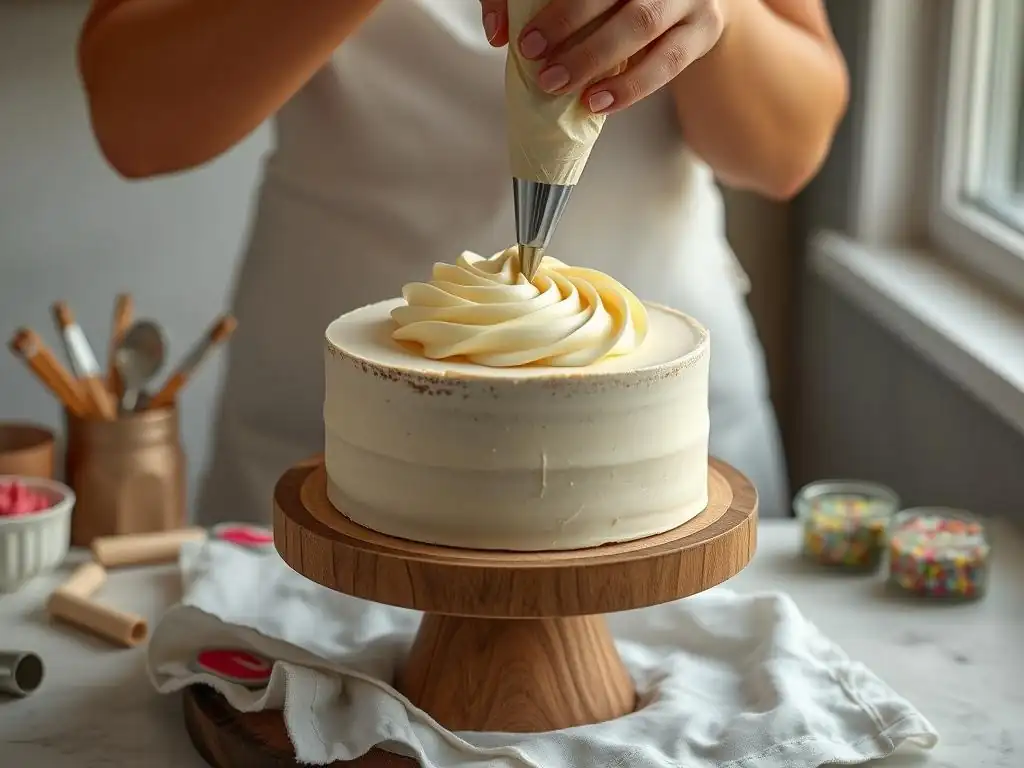
As you gain confidence with basic piping skills, you'll naturally look for new piped cake designs to try. The possibilities are vast, even with just a few tips. Exploring different combinations of techniques and colors can lead to unique and beautiful creations.
Don't be afraid to adapt ideas you see online or in books. Think about how you can achieve a similar look using the basic tips you have. Piped cake decorating is a skill that grows with experimentation and creativity.
Simple Cake Designs
Beyond the border-and-rosette combo, consider other simple piped cake designs. A cake covered in uniform stars using a 1M tip is quick and creates a lovely texture. A cake covered in small dots of varying sizes using a round tip provides a modern, minimalist look.
You could also use a star tip to pipe simple vertical or horizontal lines across the sides of the cake for a striped effect. A single large swirl on top of cupcakes or mini cakes using a 1M tip is another easy win for piped cake decorating beginners. These designs are easy to execute but look impressive.
Incorporating Different Piping Tip Shapes and Sizes
Once you have a few tips, start experimenting with how they look when used for different purposes. A round tip can make dots, lines, or even fill in areas smoothly. A star tip can make stars, rosettes, shells, or textured fills.
Consider getting a few more tips as you progress, perhaps a leaf tip (#352) to add simple green leaves to floral designs, or a petal tip (#104) to practice ruffles or simple petals. Using tips of different sizes (e.g., a large round tip and a small round tip) allows you to create variations within a single design element, adding visual depth.
Exploring Color Combinations
Color is a powerful tool in piped cake decorating. Simple piped shapes can look stunning when executed in vibrant or complementary colors. Consider using a single color palette with varying shades for a sophisticated look, or go bold with contrasting colors for a fun, festive cake.
You can divide your frosting into separate bowls and color each portion using gel food coloring (gel colors are concentrated and won't add too much liquid to your frosting). Start with a small amount of color and add more gradually until you achieve the desired hue. Experiment with piping the same design element (like stars or dots) in different colors placed next to each other on the cake.
Conclusion: Continuing Your Cake Decorating Journey
Celebrating Your First Piped Cake Creation
Congratulations on completing your first piped cake design! Take a moment to admire your work and celebrate this achievement. You've successfully navigated selecting tools, preparing your cake and frosting, and executing basic piping techniques. This first cake is a testament to your willingness to learn and try something new.
Remember the joy and satisfaction of creating something beautiful with your own hands. Share your cake with friends and family, and be proud of the effort you put in. Every baker remembers their first decorated cake, and this is the start of your own decorating story.
Next Steps: Expanding Your Cake Decorating Skills
Now that you've mastered the basics of piped cake decorating as a beginner, you can continue to expand your skills. Practice the techniques you've learned to improve consistency and control. Consider trying new, slightly more complex tips like petal tips or basketweave tips.
Explore different types of frosting suitable for piping, such as Swiss meringue buttercream or ganache. Look for tutorials on slightly more advanced designs, like simple floral arrangements or lettering. The world of cake decorating is vast and full of creative possibilities, and you now have a solid foundation to build upon.
Your Partner in Baking Success
At BakeWithEase.com, we are committed to being your partner throughout your baking and decorating journey. From providing simple recipes to breaking down techniques like piped cake decorating for beginners, our goal is to empower you to create delicious and beautiful baked goods with confidence.
We offer resources, tips, and guides for all levels, whether you're just starting out or looking to refine your skills. Keep practicing, keep experimenting, and most importantly, keep baking with ease! We look forward to supporting you as you explore new techniques and create many more wonderful piped cake designs.
Frequently Asked Questions
What are the essential tools for a piped cake decorating beginner?
The essential tools include piping bags, various piping tips (like a star or round tip), gel food coloring, and an offset spatula. Having a turntable can also be very helpful for achieving a smooth finish.
What type of frosting is best for piping designs?
Generally, buttercream frosting is the most popular and easiest to work with for piping. It holds its shape well and can be colored easily.
How do I prevent air bubbles in my piping bag?
After filling your piping bag, gently press the frosting down to remove any trapped air. Twist the top of the bag securely to prevent the frosting from leaking out.
What's a good starting design for a beginner learning piped cake decorating?
Simple borders, rosettes, or dots are excellent starting points. Practice these basic techniques on parchment paper before decorating your cake. Focus on consistency.
How can I achieve smooth buttercream frosting on my cake before piping?
Use an offset spatula to apply a thin "crumb coat" of frosting to seal in crumbs. Chill the cake, then apply a thicker layer of frosting and smooth it with the spatula. A warm spatula helps.
Final Reflection: The Sweetness of Creation and the Joy of Learning
Mastering the art of piped cake decorating isn't just about creating beautiful designs; it's about unlocking a creative spirit and finding joy in the process. This step-by-step guide aimed to demystify the seemingly complex world of piped cake decorating for beginners, providing a foundation for anyone eager to explore this rewarding skill. The techniques discussed, from mastering basic piping techniques to understanding frosting consistency, are fundamental building blocks for a lifetime of cake decorating adventures.
The impact of cake decorating extends far beyond the deliciousness of the final product. It's a tangible expression of creativity, a way to personalize celebrations, and a skill that fosters patience and precision. The best things in life are homemade.
This sentiment perfectly captures the essence of creating something beautiful with your own two hands. The satisfaction derived from transforming simple ingredients into a visually stunning and delicious cake is unparalleled, and I hope this guide has helped you experience that joy firsthand.
Now, it's your turn. Don't be afraid to experiment, to embrace imperfections, and to let your creativity flow. Pick up a piping bag, choose your favorite frosting, and let your imagination guide you. Each piped rose, each perfectly swirled border, represents a step forward in your creative journey. Remember the techniques you've learned, practice regularly, and most importantly, have fun! The world of piped cake decorating awaits – embrace the sweetness of creation.
Unleash Your Inner Cake Artist!
Thanks for joining us on this delicious journey into piped cake decorating! We hope you gained the confidence to create stunning designs. Ready to take your skills to the next level?
- Master your first rose: Practice the techniques from the tutorial, focusing on perfecting your rose swirl. Try different piping tips and pressures to discover your signature style.
- Share your creation: Post a picture of your finished cake on social media using #BakeWithEasePiping and tag us – we’d love to see your masterpiece!
- Explore further: Check out our other cake decorating tutorials on the BakeWithEase website for even more inspiration and techniques.
What surprising element will you add to your next piped cake design?