
Royal Icing Ready: Basic Piping for Cookie Decorating


Welcome to BakeWithEase, where the joy of baking comes alive! Ever wondered how to achieve those flawlessly decorated cookies you see online? This week, we're diving deep into the world of royal icing piping techniques. Unlock the secrets to beautiful lines, intricate details, and stunning cookie designs. Get ready to transform your baking from simple to sensational – let's get piping!
- Mastering Royal Icing: Essential Piping Techniques for Exquisite Cookies
- Introduction to Royal Icing Piping
- Royal Icing Recipe and Preparation
- Mastering Fundamental Royal Icing Piping Techniques
- Essential Royal Icing Piping Tools and Equipment
- Practicing Core Royal Icing Piping Skills: Beginner-Friendly Designs
- Troubleshooting Common Royal Icing Piping Challenges
- Royal Icing Cookie Decorating Ideas for Beginners
- Advanced Royal Icing Piping Techniques
- Conclusion: Enhancing Cookie Artistry with Royal Icing Piping
-
Frequently Asked Questions
- What is royal icing, and why is it ideal for cookie decorating?
- What consistency of royal icing is best for outlining cookies?
- What are the basic piping bags and tips needed for royal icing decoration?
- How do I prevent air bubbles from forming in my royal icing while piping?
- What are some essential techniques for achieving clean lines and intricate designs with royal icing?
- Final Reflection: Mastering the Art of Royal Icing Piping
- Unleash Your Inner Cookie Artist!
Introduction to Royal Icing Piping
Cookie decorating with royal icing is a delightful and rewarding craft that allows bakers to transform simple baked goods into edible works of art. It involves using a special icing, royal icing, which hardens to a smooth, opaque finish, creating a perfect canvas for intricate designs. This technique is especially popular for holidays, celebrations, and personalized gifts, offering endless creative possibilities from simple outlines and flood fills to complex patterns and dimensional details. Mastering basic royal icing piping techniques is the foundational step for anyone looking to elevate their cookie game beyond simple sprinkles or buttercream swirls.
The journey into royal icing cookie decoration begins with understanding the unique properties of this icing. Unlike buttercream, which remains soft, royal icing dries completely firm, making decorated cookies stackable and durable. This characteristic is what enables the creation of sharp lines, smooth surfaces, and delicate details that hold their shape.
Learning the core royal icing piping techniques, such as outlining, flooding, and creating basic shapes, opens the door to a world where your cookies can tell a story, celebrate an event, or simply bring a smile with their beautiful appearance. It's a skill that combines precision with artistic flair, accessible to anyone with a little practice and patience.
Royal icing offers several distinct advantages that make it the preferred medium for detailed cookie decoration. Its ability to dry hard provides a durable finish that protects the design and allows for easy packaging and transport without smudging. This is a significant benefit, especially when preparing cookies for sale, gifting, or events. Furthermore, the smooth, matte surface created by properly dried royal icing serves as an ideal base for layering colors and designs, allowing for incredible depth and detail that other icings cannot easily achieve.
Another key advantage lies in its versatility in consistency. Royal icing can be easily adjusted from a thick, stiff consistency perfect for outlining and piping details to a thinner, flood consistency that spreads smoothly to fill areas. This range of consistencies is crucial for executing various royal icing piping techniques effectively. Additionally, royal icing takes color exceptionally well, producing vibrant and consistent hues, and it can be flavored subtly without affecting its structural integrity. These properties combined make royal icing an incredibly powerful tool for intricate and lasting cookie artistry.
Royal Icing Recipe and Preparation
A reliable royal icing recipe is the cornerstone of successful cookie decorating. A classic recipe typically involves confectioners' sugar (powdered sugar), a liquid (like water, milk, or lemon juice), and a stabilizer (such as meringue powder, egg whites, or pasteurized egg whites). Meringue powder is a popular choice for home bakers as it's easy to use and shelf-stable, providing structure and helping the icing dry hard. A common ratio might be 4 cups (about 450-500g) of confectioners' sugar to 3 tablespoons of meringue powder and about 1/2 cup (120ml) of water, though liquid amounts vary depending on desired consistency.
To prepare, whisk the confectioners' sugar and meringue powder together in a large bowl to combine and remove any lumps. Gradually add the liquid while mixing on low speed with an electric mixer. Once the mixture is combined, increase the speed to medium-high and beat for 5-7 minutes, or until the icing is thick, glossy, and holds stiff peaks. Be careful not to overbeat, as this can incorporate too much air, leading to bubbles. This stiff consistency is a starting point; you will adjust it with more liquid to achieve the desired consistency for various royal icing piping techniques.
Achieving Optimal Royal Icing Consistency for Piping
The consistency of your royal icing is paramount for executing different royal icing piping techniques effectively. There are generally three main consistencies: stiff, medium, and flood. Stiff consistency is like toothpaste and is used for piping details that need to hold their shape, like roses or borders. Medium consistency, often described as having the consistency of peanut butter, is versatile and good for outlining and some detail work. Flood consistency, resembling honey or thick syrup, is used to fill in outlined areas smoothly.
To adjust the consistency, start with the stiff icing and gradually add small amounts of liquid (water is most common) while stirring gently. For outlining and detail work, you want a consistency where a ribbon of icing dropped back into the bowl disappears within about 10-15 seconds (often called 10-15 second icing). For flooding, you need a thinner consistency where a ribbon disappears within 5-10 seconds (5-10 second icing).
Test the consistency by lifting your spoon or whisk; the rate at which the icing incorporates back into the bowl is your guide. Always add liquid slowly; you can add more, but you can't easily remove it if you add too much.
Coloring Royal Icing: Techniques for Vibrant and Consistent Results
Coloring royal icing requires attention to detail to achieve vibrant and consistent hues without affecting the icing's texture or drying properties. Gel food coloring is highly recommended over liquid food coloring. Gel colors are concentrated, meaning you need only a small amount to achieve intense colors, and they don't add excess liquid that can alter the icing's consistency. Liquid food colors are less vibrant and require larger quantities, which can make your icing too thin and affect its drying time and hardness.
When coloring, it's best to add the color after you have achieved your desired consistency for piping or flooding, as adding color can slightly thin the icing. Start with a tiny amount of gel color on a toothpick and mix it thoroughly into the icing. Gradually add more color until you reach the desired shade.
Remember that royal icing often dries a shade or two darker than it appears when wet, so you might aim for a slightly lighter shade initially. For consistent color across multiple batches or different consistencies, measure your color additions carefully. Always use clean tools when switching colors to prevent cross-contamination.
Mastering Fundamental Royal Icing Piping Techniques

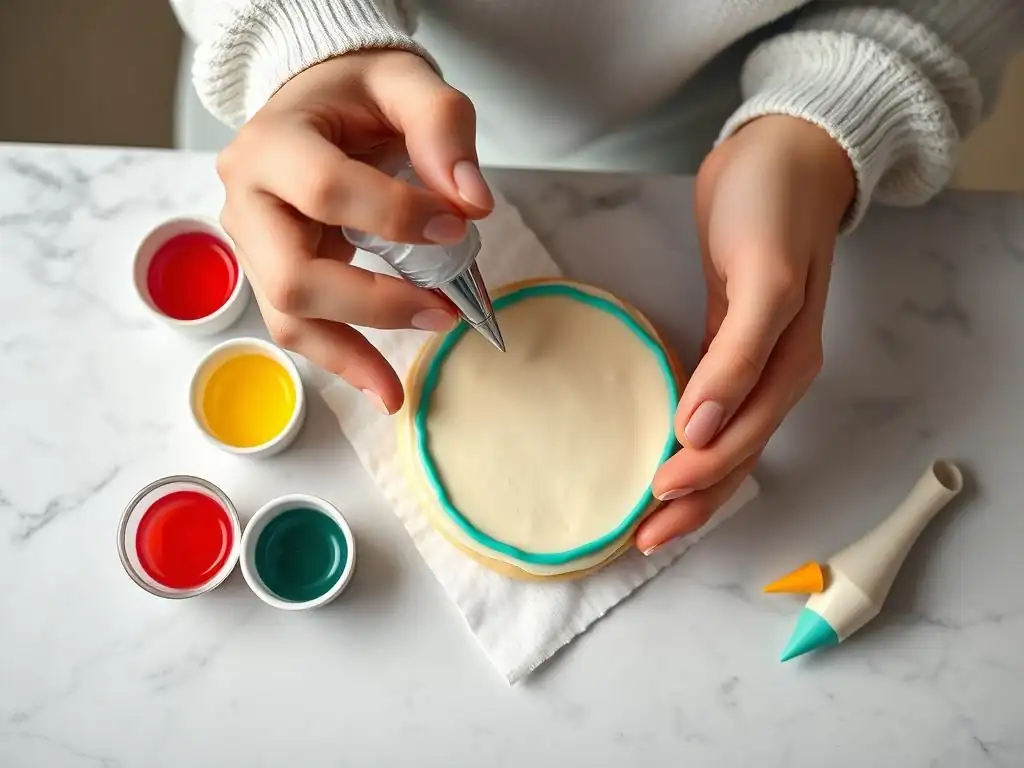
Outlining is the crucial first step in many royal icing cookie designs, creating a barrier that holds the flood icing within the desired area. For outlining, you typically use a medium-consistency royal icing (10-15 second icing) and a small round piping tip, such as a PME #1.5, #2, or Wilton #2 or #3. The goal is a smooth, consistent line that follows the edge of the cookie or an internal design shape.
To outline, hold the piping bag at a 45-degree angle just above the surface of the cookie. Apply steady, even pressure to the bag to release the icing. Don't drag the tip on the cookie; instead, let a line of icing fall onto the cookie as you guide the bag along the desired path.
This technique, called "floating" the line, helps create a smooth, uniform outline. Start and end your lines by gently easing pressure on the bag and quickly lifting straight up to avoid tails. Practice on parchment paper first to get a feel for the pressure needed and the movement required for straight lines and curves.
Flooding is the technique used to fill in the areas outlined with royal icing, creating a smooth, flat base layer. This requires a thinner, flood-consistency royal icing (5-10 second icing). After your outline has dried for at least 15-30 minutes to set and create a barrier, you can begin flooding. Use a piping bag with a slightly larger round tip (like a #2 or #3) or simply snip a small opening in the tip of the piping bag.
Starting from the edges and working inwards, gently squeeze the bag to fill the outlined area with the flood icing. Don't overfill, but use enough icing to cover the area completely. Use a scribe tool or toothpick to gently spread the icing to the edges and pop any air bubbles that rise to the surface.
Work quickly, as the flood icing will start to set. Once filled, gently shake or tap the cookie to help the icing settle and create a perfectly smooth surface. Allow the flooded layer to dry completely (typically 8-24 hours depending on humidity and icing thickness) before adding any further layers or details using royal icing piping techniques.
Wet-on-Wet Royal Icing Designs: Creating Seamless Patterns
Wet-on-wet is a captivating royal icing piping technique where you pipe designs onto a wet flood coat of royal icing. Because both layers are wet, the piped design sinks slightly into the base layer, creating a smooth, seamless pattern that is level with the flooded surface. This technique is perfect for creating polka dots, swirls, marbling effects, and simple flowers or leaves directly within the base color.
To execute wet-on-wet designs, first flood your cookie with your base color using flood-consistency icing. While the base layer is still wet and glossy (immediately after flooding is best), pipe your design elements onto the wet surface using different colors of flood-consistency icing. For example, to create polka dots, pipe dots onto the wet base. To marble, pipe lines or swirls and then gently drag a scribe tool through them. The key is speed; you must apply the design colors before the base layer begins to crust or set, usually within 5-10 minutes of flooding.
Essential Royal Icing Piping Tools and Equipment
Having the right piping tips is essential for executing various royal icing piping techniques. Small round tips are fundamental. A set including sizes from PME #00, #0, #1, #1.5, #2, and #3, or their Wilton equivalents (#1, #2, #3), covers most outlining and detail work. The smaller tips (#00, #0, #1) are used for very fine details and lettering, while slightly larger tips (#2, #3) are versatile for outlining and basic piping.
Beyond round tips, other shapes are useful. Star tips (like Wilton #16 or #21) can create ruffled borders or small star-shaped details. Leaf tips (like Wilton #352) are perfect for piping simple leaves. Petal tips (like Wilton #101 or #104) are used for piping ruffles and simple flowers like roses. Investing in a basic set of these varied tips will significantly expand your repertoire of royal icing piping techniques and designs. Ensure tips are clean and dry before use.
Selecting the Ideal Piping Bags for Royal Icing
Choosing the right piping bags is crucial for comfort and control when working with royal icing piping techniques. Disposable piping bags are a popular choice for their convenience and ease of cleanup, especially when using multiple colors. Look for bags made from durable, flexible plastic that won't tear easily under pressure. Sizes from 10-inch to 12-inch are generally good for handling and provide enough capacity for one color without being too bulky.
Reusable piping bags, made from materials like canvas or silicone, are an eco-friendly option. They are very durable but require thorough washing and drying after each use to prevent bacterial growth. Whichever type you choose, ensure the material is flexible enough to allow you to feel the consistency of the icing and apply consistent pressure. Using couplers with your piping bags is also highly recommended; they allow you to change piping tips on the same bag of icing without emptying it, which is incredibly convenient.
Beyond piping bags and tips, several other tools are indispensable for mastering royal icing piping techniques. A scribe tool, which is essentially a needle attached to a handle, is perhaps the most crucial. It's used to manipulate flood icing, spread it into tight corners, pop air bubbles, and drag through wet icing for marbling or other wet-on-wet effects. A toothpick can serve a similar purpose, but a dedicated scribe tool offers better control and a finer point.
Other helpful tools include small offset spatulas for spreading thicker icing or transferring cookies, tweezers for placing small sprinkles or edible decorations, and a turntable for rotating cookies while decorating for easier access to all sides. A fan or dehydrator can also be useful to speed up the drying process of royal icing, especially in humid environments, reducing drying times from 8-24 hours to potentially 2-4 hours for a flood coat, minimizing the risk of color bleeding or craters.
Practicing Core Royal Icing Piping Skills: Beginner-Friendly Designs
Creating Dots and Lines with Royal Icing: Precision Practice
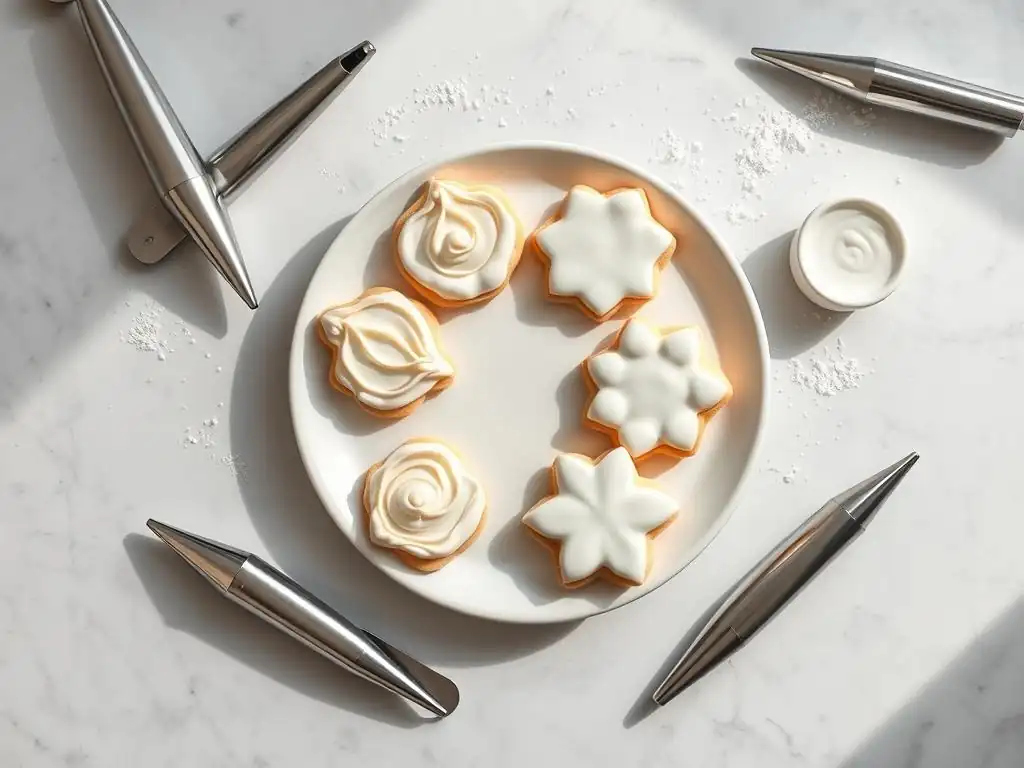
Mastering basic dots and lines is fundamental to developing control over royal icing piping techniques. These simple elements form the basis for many complex designs. To practice dots, use a small round tip (like #1 or #2) and medium-consistency icing. Hold the bag perpendicular to your surface (parchment paper is great for practice). Apply quick, firm pressure, then stop squeezing and lift straight up. The goal is a round, neat dot without a peak or tail. Practice making dots of different sizes by varying the pressure and duration of the squeeze.
For lines, use the same tip and consistency. Hold the bag at a 45-degree angle, lift the tip slightly above the surface, apply steady pressure, and move your hand smoothly in a straight or curved line, letting the icing fall onto the surface. Practice piping straight lines, wavy lines, zigzags, and circles. Consistency in pressure and speed is key to achieving uniform lines. Dedicate time to practicing these foundational royal icing piping techniques before moving on to more complex designs.
Piping borders around the edges of cookies is a practical application of line piping and adds a polished finish. A simple outline border uses the same technique as piping a straight line, following the contour of the cookie. For this, a medium-consistency icing and a #2 or #3 round tip work well. Ensure your outline connects neatly where it started, creating a closed barrier if you plan to flood.
Beyond simple outlines, you can pipe decorative borders using different tips and consistencies. A shell border, piped with a star tip (#16 or #21) and medium-stiff icing, involves piping small shells that overlap slightly around the edge. A rope border, using a round tip and stiff icing, involves piping overlapping curved segments. Practice maintaining consistent pressure and angle as you move around the cookie's edge to achieve clean, professional-looking borders. These royal icing piping techniques add structure and visual appeal.
Crafting Simple Flowers and Shapes with Royal Icing: Easy Designs
Once you're comfortable with lines and dots, you can practice piping simple shapes like flowers, hearts, or stars directly onto cookies or practice surfaces. Small flowers can be created using a small star tip (#16) by piping a cluster of small stars for a simple rosette, or using a leaf tip (#352) to pipe simple leaves. Using a petal tip (#101) with stiff icing and a specific wrist motion allows you to create simple ruffled petals that can form a basic rosebud.
For shapes like hearts or stars, you can pipe the outline using a small round tip (#2 or #3) and then fill them in using the flooding technique. Alternatively, for dimensional shapes, use stiff icing and a round tip to build up the shape layer by layer. Practice piping these simple shapes repeatedly to build muscle memory and gain better control over the icing flow and tip movement, essential skills for mastering royal icing piping techniques.
Troubleshooting Common Royal Icing Piping Challenges
Preventing Air Bubbles in Royal Icing: Solutions for Smooth Application
Air bubbles are a common frustration when working with royal icing, as they can disrupt smooth surfaces and precise lines. They often occur from overmixing the icing or from incorporating air while stirring or coloring. To prevent bubbles, mix your royal icing on a lower speed after the initial whipping phase. When stirring in color or adjusting consistency, do so gently with a spatula, pressing the icing against the side of the bowl to help push out trapped air.
If you notice bubbles in your icing within the piping bag, gently massage the bag to encourage them to move towards the tip. Before piping, squeeze a little icing onto a practice surface to expel any large bubbles near the opening. While flooding, use your scribe tool to gently swirl through the icing to release trapped air and pop any bubbles that rise to the surface. Tapping the cookie gently after flooding also helps bubbles surface and burst, leading to a smoother finish. Consistent gentle handling is key to minimizing air bubbles when applying royal icing piping techniques.
Clearing Clogged Piping Tips: Quick Fixes for Uninterrupted Decorating
Piping tips can occasionally become clogged with dried icing, sugar lumps, or air bubbles, interrupting your decorating flow. If your tip is clogged, stop piping immediately. First, try gently squeezing the bag behind the tip to force the blockage out. If that doesn't work, use a scribe tool or a thin needle to carefully poke through the tip opening from the outside, dislodging the obstruction.
If the clog persists, you may need to remove the tip (if using a coupler) or empty the icing from the bag to clear the blockage more thoroughly. Rinse the tip under warm water to dissolve any dried icing. If you don't have a coupler, you might need to snip the end of the bag to access the tip or switch to a new bag and tip.
To prevent future clogs, ensure your confectioners' sugar is sifted, mix your icing thoroughly to avoid lumps, and keep your icing covered when not in use to prevent it from drying out in the bowl or bag. Proper preparation significantly reduces issues when using royal icing piping techniques.
Addressing Royal Icing Bleeding: Prevention and Correction Strategies
Color bleeding occurs when colors migrate into adjacent colors on your cookie, creating blurry or muddy lines. This is often caused by applying a new color or layer before the underlying layer is sufficiently dry, using too much liquid food coloring, or high humidity. To prevent bleeding, ensure each layer of royal icing is completely dry before adding the next color or detail. This can take anywhere from 8 to 24 hours, sometimes longer in humid conditions. Using a fan or dehydrator can help speed up drying time significantly, often reducing it to 2-4 hours.
Using high-quality gel food colors helps prevent bleeding as they contain less liquid. Avoid using excessive amounts of color. If you experience minor bleeding, you can sometimes carefully scrape away the affected area with a sharp craft knife or scribe tool once the icing is fully dry, then touch it up with a small amount of fresh icing. However, prevention is the best strategy. Patience and ensuring proper drying time between steps are crucial for sharp, clean designs when using royal icing piping techniques.
Seasonal cookies offer fantastic opportunities for beginners to practice basic royal icing piping techniques. For example, simple Christmas tree shapes can be outlined and flooded with green icing, then decorated with piped dots (ornaments) in various colors using a small round tip. Snowflake cookies can be flooded white, and then simple lines and dots can be piped on top once dry for a classic look. For Halloween, pumpkin shapes can be flooded orange, and simple black lines can be piped for the ridges and stem.
Valentine's Day hearts are perfect for practicing outlining and flooding in red or pink, then adding simple white dots or small piped details once the flood layer is dry. Easter egg shapes allow for colorful flood bases and simple striped or polka dot patterns using the wet-on-wet technique. Focusing on simple shapes and limited colors for seasonal designs makes practicing royal icing piping techniques approachable and fun for beginners.
Decorated cookies make wonderful personalized gifts, and royal icing piping techniques are ideal for adding names, messages, or specific motifs. Simple sugar cookies cut into shapes relevant to the recipient's interests (like a favorite animal, hobby item, or initial) can be the base. Flood the cookies in a suitable color and let them dry completely.
Once dry, use a small round tip (like a #1 or #2) and medium-consistency icing to pipe names, initials, or simple messages. Practice lettering on parchment paper first to get a feel for the flow and spacing. You can also pipe small, relevant details like a tiny heart, star, or flower. Personalized cookies require careful, steady hands, making them excellent practice for fine motor control with royal icing piping techniques.
Even simple round or square sugar cookies can be transformed with basic royal icing piping techniques. Instead of just flooding, you can add decorative elements that elevate the plain shape. Pipe a simple border around the edge using a contrasting color or a different tip. Once the flood coat is dry, pipe a simple pattern like stripes, plaid lines, or geometric shapes.
You can also use royal icing to attach sprinkles, edible glitter, or dragées to the cookie surface while the icing is still wet. Piping simple vines and leaves along the edge, or adding piped dots in a decorative pattern across the surface, are other easy ways to add visual interest. These simple enhancements using basic royal icing piping techniques can turn an ordinary cookie into something special.
Advanced Royal Icing Piping Techniques
Introduction to Overpiping and Dimensional Decorating: Adding Depth and Texture
Once you have mastered the fundamental royal icing piping techniques, you can explore more advanced methods like overpiping and dimensional decorating. Overpiping involves piping a design, letting it dry, and then piping another layer of icing directly on top of the first. This adds height, depth, and texture to your designs, allowing you to create raised patterns, filigree, or lace-like effects. It requires precise control and patience, as each layer must dry before the next is applied.
Dimensional decorating takes this further, using very stiff royal icing to pipe elements that stand up from the cookie surface, such as intricate flowers, leaves, or even 3D figures. This often involves using specific tips designed for petals, leaves, or grass, and mastering the correct consistency and pressure to build these shapes. These advanced royal icing piping techniques allow for truly stunning and detailed cookie creations.
Exploring Various Piping Nozzles and Their Effects: Expanding Design Possibilities
Expanding your collection of piping nozzles and learning how to use them opens up a vast array of design possibilities beyond simple lines and flood fills. Specialty tips like basketweave tips (Wilton #47) for creating woven patterns, grass tips (Wilton #233) for realistic texture, or specific flower tips (like the 1M open star for swirls or the 104 petal tip for ruffles and roses) allow you to achieve different textures and shapes.
Experimenting with different nozzles requires understanding how the shape of the tip affects the flow and form of the icing. Practicing with various tips and different icing consistencies will help you discover their unique effects and how to incorporate them into your royal icing piping techniques to create more complex and visually appealing cookies.
Recap of Fundamental Royal Icing Piping Skills
Mastering royal icing piping techniques is an exciting journey that begins with understanding the basics. We've covered preparing royal icing to the correct consistencies – stiff for structure, medium for outlining and details, and flood for filling. Essential techniques like outlining to create barriers, flooding to achieve smooth surfaces, and wet-on-wet for seamless patterns are the building blocks of most royal icing cookie designs.
We also explored the indispensable tools, including various piping tips, suitable piping bags, and the versatile scribe tool. Practicing fundamental skills like piping consistent dots and lines, clean borders, and simple shapes is crucial for building control and confidence. Addressing common challenges like air bubbles, clogged tips, and color bleeding ensures a smoother decorating process. By focusing on these foundational royal icing piping techniques, beginners can steadily improve their skills and create beautiful decorated cookies.
The world of royal icing cookie decorating is vast and full of inspiration. As you continue to practice your royal icing piping techniques, look for resources that can help you expand your skills and find new design ideas. Online communities and social media platforms are filled with talented cookie decorators sharing their work and tutorials. Websites like BakeWithEase.com offer guides and recipes tailored for bakers of all levels.
Consider exploring tutorials that demonstrate specific techniques you want to learn, such as creating specific types of flowers, intricate patterns, or working with multiple colors. Don't be afraid to experiment with different tips, colors, and design combinations. The more you practice your royal icing piping techniques, the more confident and creative you will become, turning every cookie into a potential masterpiece.
Frequently Asked Questions
Royal icing is a hard-drying icing made from powdered sugar, meringue powder, and water. It's ideal because it creates a smooth, stable surface perfect for intricate designs and details that won't smudge.
A slightly thicker consistency, often referred to as "outline consistency," is best. This helps create crisp, defined borders that prevent the flood icing from running off the edge of the cookie.
What are the basic piping bags and tips needed for royal icing decoration?
You'll need piping bags (disposable or reusable), a coupler, and a variety of small round tips (sizes 1-3 are common) for outlining and detail work. Star tips can add texture.
How do I prevent air bubbles from forming in my royal icing while piping?
To prevent air bubbles, gently tap the filled piping bag on the counter before piping to release trapped air. Also, use a smooth, consistent pressure while piping to avoid introducing new air.
What are some essential techniques for achieving clean lines and intricate designs with royal icing?
Practice consistent pressure on the piping bag and maintain a steady hand. Use a scribe tool or toothpick to gently guide the icing and pop any remaining air bubbles for a flawless finish.
Final Reflection: Mastering the Art of Royal Icing Piping
The delicate dance of royal icing on a cookie is more than just a pretty picture; it's a testament to patience, precision, and the enduring power of handcrafted beauty in a fast-paced world. In a time dominated by mass production and digital imagery, the ability to create something beautiful and intricate with your own two hands holds a unique and increasingly valuable appeal. This article explored the fundamental techniques of royal icing piping, providing a foundation for anyone eager to embark on this rewarding creative journey.
The impact of this seemingly simple skill extends far beyond the decorated cookie itself. It's a gateway to a world of artistic expression, fostering creativity and mindfulness. The process of carefully controlling the icing, creating consistent lines and intricate designs, is a meditative practice in itself. As the renowned artist Georgia O'Keeffe once said, I found I could say things with color and shapes that I couldn't say any other way.
This sentiment perfectly captures the unique power of visual artistry, and royal icing piping offers a readily accessible path to that expression.
Now, it's your turn. Don't just admire the beautifully iced cookies; grab your piping bag, gather your ingredients, and experiment! Embrace the learning curve, celebrate the small victories (and the perfectly piped roses! ), and let the joy of creation guide you. The world awaits your uniquely decorated cookies, and the journey of mastering royal icing piping is a rewarding one that will continue to bring you joy and creative fulfillment for years to come.
Thanks for joining us on this sweet journey into royal icing piping! We hope you've gained the confidence to create beautiful, edible masterpieces. Now it's time to put your new skills to the test!
- Dive into your cookie decorating project: Grab your supplies and try your hand at creating the designs you've envisioned. Don't be afraid to experiment!
- Share your creations: We'd love to see your beautifully iced cookies! Post a picture on social media and tag us – let's inspire each other!
- Consider trying a new piping technique from our advanced tutorials. There's always something new to explore!
What unique design will you create with your newfound royal icing skills?