
Practice Makes Piped Perfect: Simple Drills to Improve

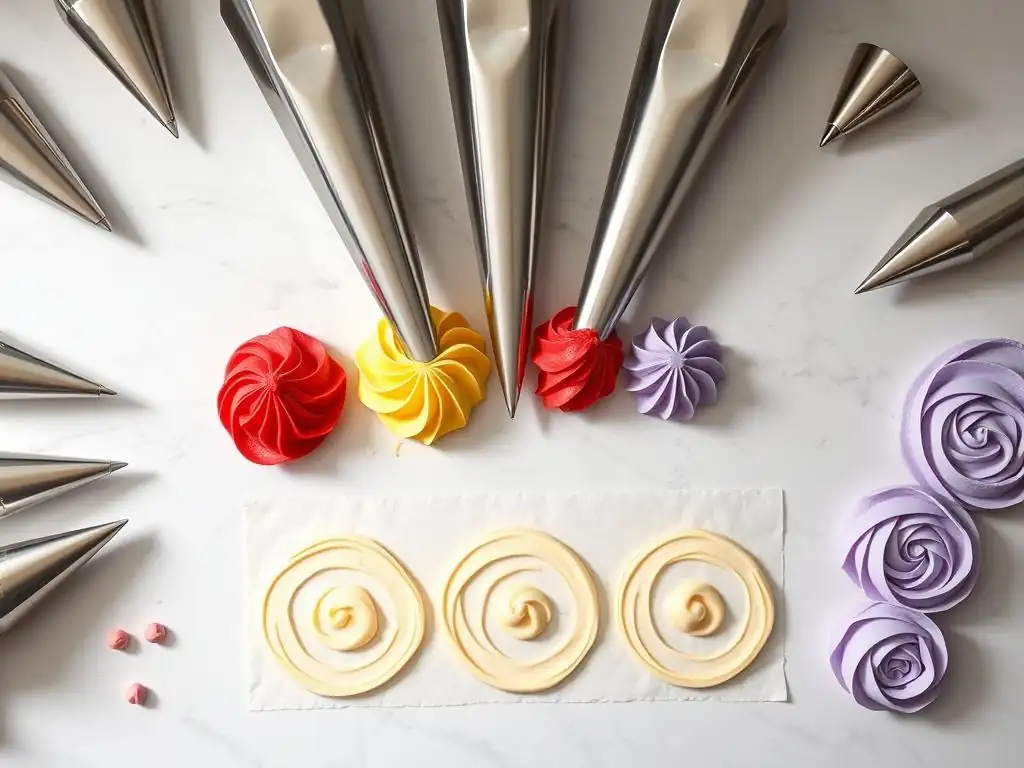
Welcome to BakeWithEase, where we believe everyone can create stunning baked goods! Are you ready to take your decorating skills to the next level? This week, we're diving deep into the crucial element that separates wobbly lines from professional swirls: Piped frosting consistency drills. Discover how mastering this seemingly simple technique can unlock a world of intricate designs and elevate your baking from delicious to dazzling. Intrigued? Let's get started and transform your piped dreams into reality!
- Practice Makes Piped Perfect: Simple Drills to Improve Your Frosting Skills
- Introduction to Perfect Piped Frosting: Why Drills Matter
- Understanding Frosting Consistency for Piping Success
- Essential Piped Frosting Consistency Drills for Beginners
- Advanced Piped Frosting Consistency Drills for Intermediate Bakers
- Tips and Tricks for Optimizing Your Piped Frosting Consistency
- Troubleshooting Common Piped Frosting Issues
- Tools and Equipment for Perfect Piped Frosting
- Conclusion: Mastering Piped Frosting Consistency Through Practice
-
Frequently Asked Questions
- What are "Piped Frosting Consistency Drills" and why are they important?
- How do these drills differ from simply practicing frosting recipes?
- What kind of frosting is best suited for these practice drills?
- How often should I practice these "Piped Frosting Consistency Drills"?
- What equipment do I need to perform these frosting drills effectively?
- Final Reflection: Mastering the Art of Piped Perfection
- Unlock Your Inner Pastry Chef: Take the Next Step!
Practice Makes Piped Perfect: Simple Drills to Improve Your Frosting Skills
Introduction to Perfect Piped Frosting: Why Drills Matter
Mastering the art of decorating cakes, cupcakes, and cookies often hinges on one crucial skill: piping frosting. While it might look simple, achieving smooth lines, defined shapes, and intricate patterns requires practice. Just like learning to play a musical instrument or a sport, repetition through specific exercises, or "drills," is key to developing the muscle memory and control needed for flawless frosting application. These structured practice sessions allow you to isolate specific techniques, refine your hand movements, and build confidence before tackling a full decorating project.
Think of these piped frosting consistency drills as your workout for baking. They help you understand how pressure, angle, and frosting consistency interact to create different effects. By dedicating even just 10-15 minutes a few times a week to these simple exercises, you'll see a significant improvement in your piping skills. You'll gain better control over the flow of frosting, learn to handle your piping bag more comfortably, and ultimately produce more professional-looking baked goods, making your decorating efforts more rewarding and less frustrating.
Understanding Frosting Consistency for Piping Success
Achieving the right frosting consistency is arguably the most critical factor in successful piping. Frosting that is too stiff won't flow smoothly and can be difficult to pipe, leading to jagged lines and tired hands. Conversely, frosting that is too soft will lose its shape, resulting in slumped designs and a messy finish. The ideal consistency is firm enough to hold its shape when piped but soft enough to flow easily and smoothly through the piping tip. It should resemble a thick, spreadable paste, similar to peanut butter at room temperature.
Different types of frosting naturally have varying consistencies. Buttercream, for instance, tends to be quite stable for piping, especially American buttercream which contains powdered sugar and butter. Cream cheese frosting is often softer and may require chilling to achieve a pipeable consistency. Royal icing, used for intricate details and flooding, starts as a liquid and sets hard, requiring precise consistency control for different applications like outlining or filling. Understanding these inherent differences is the first step in mastering piped frosting consistency.
The Role of Frosting Consistency in Piping Design
The consistency of your frosting directly dictates the type of design you can achieve. For sharp, defined edges like those needed for stars, shells, or detailed borders, a medium-stiff consistency is essential. This allows the frosting to hold the intricate shape of the piping tip as it leaves the bag. For techniques that require smooth, flowing lines, such as writing or creating delicate swirls, a slightly softer consistency is preferable, as it ensures a continuous flow without breaks or jagged edges.
For flooding techniques, where you fill in outlined areas (common in cookie decorating with royal icing), the consistency needs to be significantly thinner – almost like thick syrup. This allows it to spread and level out smoothly. If the flooding consistency is too thick, it won't spread evenly, leaving peaks or uneven surfaces. If it's too thin, it might run off the edge of your design. Mastering piped frosting consistency drills helps you recognize and adjust your frosting to suit the specific design you're attempting.
Achieving the Ideal Piped Frosting Texture: A Guide
To achieve the ideal texture for piping, start with a well-made frosting recipe. For buttercream, ensure your butter is at the correct temperature (usually room temperature, but not melted) and that you sift your powdered sugar to avoid lumps. Gradually add liquid (milk, cream, or water) sparingly until the desired consistency is reached. A common ratio for a good piping consistency buttercream might be 1 cup (2 sticks) of unsalted butter creamed with 4 cups of sifted powdered sugar, then adding 2-4 tablespoons of milk or cream as needed.
If your frosting is too stiff, add liquid (milk, cream, or even a tiny amount of softened butter) one teaspoon at a time, mixing thoroughly after each addition until it reaches the desired flow. If it's too soft, the most common solution is to add more sifted powdered sugar, a tablespoon at a time, mixing until incorporated.
Chilling the frosting can also temporarily firm it up, which is particularly useful for frostings prone to softening quickly, like cream cheese frosting or those made in a warm kitchen. These adjustments are part of the piped frosting consistency drills you'll naturally perform as you practice.
Common Frosting Consistency Problems and Solutions
One frequent issue is frosting that is too airy or contains bubbles. This often happens from overmixing or incorporating too much air during the initial beating of butter and sugar. To fix this, stir the frosting by hand with a spatula after mixing, pressing it against the sides of the bowl to force out air pockets. Another problem is grainy frosting, usually caused by undissolved sugar. Ensuring your powdered sugar is sifted and mixing the frosting long enough (sometimes beating it on low speed for several minutes) can help dissolve the sugar crystals.
Sometimes, frosting separates or looks greasy. This can occur if the butter is too warm or if liquids are added too quickly. For buttercream, try chilling it slightly and then re-beating it. If it's severely separated, gently warming a small portion over a double boiler and then incorporating it back into the main batch can sometimes help. These troubleshooting steps are crucial for maintaining the correct piped frosting consistency needed for successful decorating.
Essential Piped Frosting Consistency Drills for Beginners
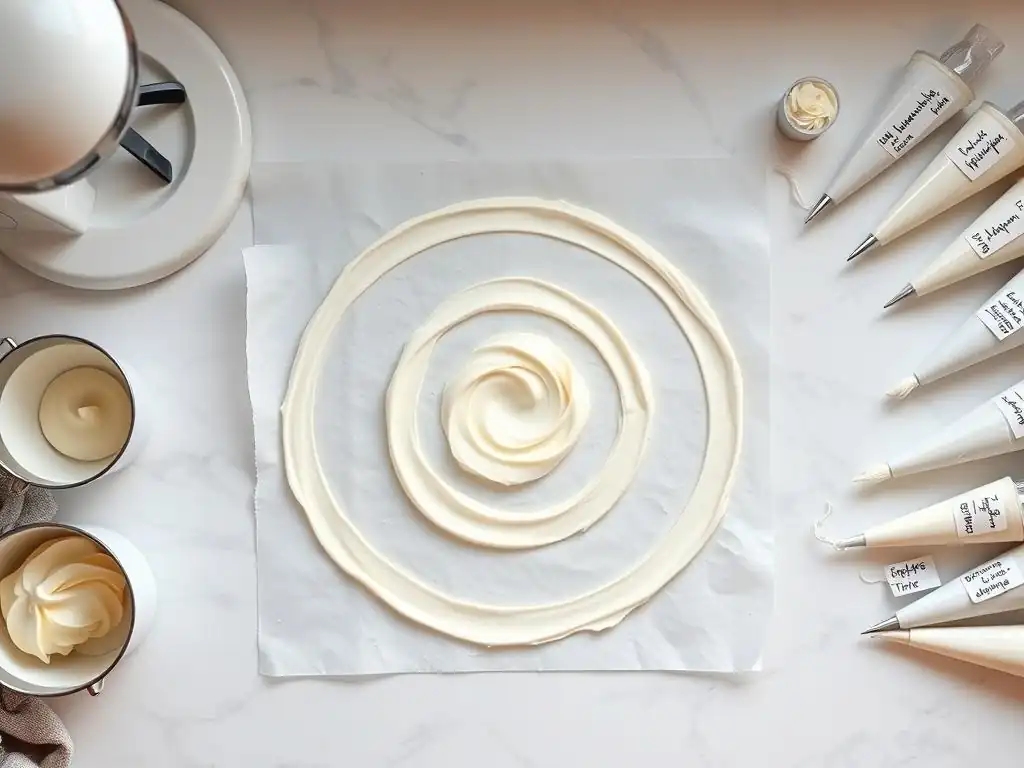
Starting with basic piped frosting consistency drills helps build fundamental control and confidence. These exercises focus on mastering the feel of the piping bag and understanding how pressure affects the flow. You don't need fancy equipment or a finished cake; a baking sheet lined with parchment paper or even an upside-down cake pan works perfectly as a practice surface. Remember, you can scrape the frosting back into the bag and reuse it for practice!
These initial piped frosting consistency drills lay the groundwork for all future decorating techniques. By focusing on simple elements like lines, dots, and basic shapes, you develop the fine motor skills and hand-eye coordination necessary for more complex designs. Consistent practice with these drills is far more effective than occasionally attempting elaborate decorations without a solid foundation.
Drill 1: The Pressure Control Exercise
This drill is fundamental to mastering piped frosting consistency. It teaches you to apply steady, even pressure to the piping bag, which is essential for smooth, consistent lines and shapes. Start with a medium-sized round tip (like Wilton #12 or #1A). Hold the bag at a 45-degree angle just above your practice surface.
Mastering Consistent Pressure for Smooth Lines
To master this, select a point on your practice sheet and begin squeezing the bag with constant pressure. As frosting flows out, move your hand steadily in a straight line or a gentle curve, maintaining the same pressure throughout. The key is to keep the thickness of the line uniform from start to finish. Practice piping parallel lines, aiming for even spacing and consistent width. If the line gets thicker or thinner, it means your pressure is fluctuating. Aim to pipe lines at least 6-8 inches long without variation.
Practicing Starts and Stops with Frosting
Controlling when the frosting begins and ends is as important as maintaining consistent pressure. To start a line, apply firm pressure until the frosting flows freely, then begin moving. To stop, cease moving your hand before you stop squeezing pressure entirely, then quickly release the pressure and pull the bag straight up. This technique minimizes tails or messy ends. Practice piping short lines, focusing solely on clean starts and stops. Aim for sharp cut-offs without pulling or smearing the frosting.
Troubleshooting Pressure Control Issues
If your lines are inconsistent, you might be squeezing too hard or not hard enough, or varying your grip. Try holding the bag higher up, using your dominant hand to apply pressure and your non-dominant hand to guide. If your hand fatigues quickly, you might be using too much force; the frosting consistency might be too stiff, or you might need to warm the bag slightly in your hands. For jerky lines, focus on slowing down your movement and making it fluid. These piped frosting consistency drills highlight areas needing improvement.
Drill 2: The Star Tip Practice
The star tip (like Wilton #1M or #21) is one of the most versatile piping tips, used for everything from simple stars to rosettes and borders. This drill focuses on creating consistent, well-defined stars, which requires a specific pressure and lift technique.
Creating Uniform Stars with Piped Frosting
Using a star tip, hold the bag perpendicular (90 degrees) to your practice surface, with the tip just touching the surface. Apply firm, even pressure, letting the frosting build up into a star shape. Once the star reaches your desired size (say, about 1/2 inch in diameter), stop squeezing completely before lifting the bag straight up. This allows the tip to cleanly break away from the frosting, leaving a defined star shape. Practice piping rows of stars, aiming for uniform size and shape.
Varying Star Sizes and Shapes
Once you can create uniform stars, practice varying their size by adjusting the amount of pressure and how long you squeeze. Less pressure and a shorter squeeze create smaller stars; more pressure and a longer squeeze create larger ones. You can also experiment with pulling the bag slightly to the side as you lift to create different effects, like a pulled star or a simple shell shape. This variation within piped frosting consistency drills helps you understand the range of effects possible with a single tip.
Addressing Common Star Piping Mistakes
A common mistake is pulling the bag away before releasing pressure, which results in a peak or "tail" on the star. Remember the stop-squeeze-then-lift technique. Another issue is inconsistent pressure, leading to stars of varying sizes and definition. Ensure your hand applies steady pressure throughout the squeeze. If the star looks messy or doesn't hold its shape, your frosting might be too soft; chill it briefly. If it's hard to squeeze, the frosting is too stiff; adjust the consistency.
Drill 3: The Rosette Technique Drill
Rosettes are classic, elegant piped decorations often used on cupcakes and cakes. They are essentially stars that are swirled. This drill uses a star tip (like Wilton #1M or #21) and builds upon the basic star technique.
Achieving Perfect Rosettes: A Step-by-Step Guide
Start with the star tip held perpendicular to your surface. Begin by piping a small star base at the center of where you want your rosette. Without lifting the tip, maintain steady pressure and swirl the bag in a circular motion around the central star. Move outwards slightly as you swirl to create the layered look of the rosette. Once the rosette is the desired size, stop squeezing before lifting the bag away, just like with the star drill. Practice piping rows of rosettes, aiming for consistent size and swirl pattern.
Variations of Rosette Piping Techniques
While the most common rosette is a simple swirl, you can vary the technique. Swirling clockwise or counter-clockwise creates different looks. You can also start the swirl on the outside and move inwards to create a different style of rosette. Experiment with different star tip sizes (larger tips create larger rosettes) and even different tip types, like a closed star tip (Wilton #2D), which creates rosettes with more defined petals. These variations add complexity to your piped frosting consistency drills.
Avoiding Rosette Piping Pitfalls
A common issue is not creating a solid base star before swirling, which can lead to a weak center. Ensure you start with that initial squeeze. Another pitfall is inconsistent pressure during the swirl, resulting in uneven thickness. Maintain steady pressure throughout the circular motion. If your rosette collapses or doesn't hold its shape, your frosting is likely too soft; chill it. If the swirl is jagged or broken, the frosting might be too stiff, or you might not be applying enough consistent pressure.
Drill 4: The Line and Dot Drill
This drill focuses on two fundamental elements: piping straight lines and uniform dots. Mastering these seems simple, but they are the building blocks for many complex designs, including writing and borders. Use a small to medium round tip (like Wilton #3 to #12).
Creating Straight Lines and Even Dots with Frosting
For lines, hold the bag at a 45-degree angle just above your surface. Apply steady pressure and move your hand in a straight line. Try to keep the tip elevated slightly off the surface as you move; this allows the frosting to fall naturally into a smooth line rather than being dragged. For dots, hold the bag perpendicular (90 degrees) to the surface, with the tip just touching. Apply firm, quick pressure, letting the frosting build up into a dot, then stop squeezing before lifting straight up. Practice piping rows of straight lines and separate rows of uniform dots.
Practicing Different Line Thicknesses
With a single round tip, you can vary the line thickness by adjusting the pressure you apply. Light pressure creates thinner lines, while firmer pressure creates thicker ones. Practice piping lines of varying thicknesses next to each other using the same tip to see how pressure affects the outcome. You can also switch between different sized round tips (e.g., #3, #8, #12) to practice piping lines of inherently different thicknesses, further refining your control over piped frosting consistency.
Mastering Dot Spacing and Size
Once you can create uniform dots, practice piping them in a straight line with consistent spacing between them. Try to make the distance between each dot equal to the diameter of the dot itself. This requires careful hand-eye coordination and rhythmic pressure control. Also, practice creating rows of dots of different sizes (small, medium, large) by varying the duration and intensity of your squeeze. These piped frosting consistency drills build precision.
Advanced Piped Frosting Consistency Drills for Intermediate Bakers
Once you're comfortable with the basic drills, you can move on to more complex techniques that require greater control and understanding of how different tips interact with frosting consistency. These drills often combine pressure control, angle, and movement in more intricate ways.
These advanced piped frosting consistency drills push your skills further, introducing patterns and textures that elevate your decorating. They often require a slightly firmer frosting consistency than basic lines or dots to maintain their intricate shapes.
Drill 5: The Basketweave Pattern Practice
The basketweave is a classic cake decorating technique that creates a woven texture. It typically uses a basketweave tip (like Wilton #47 or #48), which has one smooth edge and one serrated edge. This drill requires precision and consistent line work.
Mastering the Basketweave Piping Technique
Start by piping a vertical "anchor" strip using the smooth side of the tip against the cake (or practice surface). Then, switch to piping short, horizontal strips over the anchor strip, using the serrated side up. Pipe the first horizontal strip, then pipe the next one a short distance below, overlapping the anchor slightly.
Leave a gap, then pipe another vertical strip parallel to the first, but this time pipe the horizontal strips under this new anchor strip, filling the gaps from the first set of horizontals. Continue alternating between piping horizontal strips over and under the vertical anchors to create the woven effect.
Creating Intricate Basketweave Designs
You can vary the look of the basketweave by changing the size of the tip, the width of the strips, and the spacing between them. For a tighter weave, pipe narrower strips closer together. For a looser weave, use wider strips and more space. You can also angle your vertical or horizontal strips slightly for different effects. A firmer buttercream consistency works best for basketweave to ensure the strips hold their defined shape. Practicing these variations within your piped frosting consistency drills helps you achieve different textures.
Correcting Basketweave Errors
Common errors include inconsistent strip width or spacing, leading to an uneven pattern. Focus on maintaining steady pressure and moving your hand at a consistent speed. If the strips aren't looking defined, your frosting might be too soft; ensure it's firm enough to hold the edge of the basketweave tip. If the pattern looks messy, you might be overlapping too much or too little. Practice on a flat surface first before attempting this directly on a curved cake side.
Drill 6: The Ruffle Border Drill
Ruffles create a soft, elegant border. This technique typically uses a petal tip (like Wilton #104 or #125), which is teardrop-shaped, with one narrow end and one wide end.
Achieving Delicate Ruffle Borders with Frosting
Hold the petal tip with the narrow end pointing outwards (away from where the ruffle will lie) and the wide end touching the surface. Apply steady pressure and gently move the bag up and down or side to side in a wavy motion as you pipe along the border. The frosting will fan out from the wide end, creating the ruffle effect. Keep the wide end anchored near the surface while the narrow end leads the movement.
Varying Ruffle Sizes and Styles
You can create different types of ruffles by changing the size of the petal tip (larger tips make larger ruffles), the amount of pressure (more pressure creates fuller ruffles), and the speed and pattern of your wavy movement. A tighter, faster wave creates smaller, more delicate ruffles, while a slower, broader wave creates larger, more dramatic ones. You can also angle the tip differently or layer multiple ruffle rows for a tiered effect. Experimenting with these variables is part of mastering piped frosting consistency for delicate details.
Troubleshooting Ruffle Border Problems
If your ruffles aren't fanning out correctly, ensure you are holding the tip with the wide end down and the narrow end out. If they look flat or lose definition, your frosting is likely too soft; it needs to be firm enough to hold the ruffle shape. If the ruffles are jagged, you might be moving too quickly or applying inconsistent pressure. Practice the wavy motion slowly first without piping, then add the frosting.
Drill 7: The Calligraphy Piping Drill
Piping lettering requires significant control over pressure, flow, and movement, especially when aiming for elegant calligraphy styles. This drill typically uses small round tips (like Wilton #1, #2, or #3).
Practicing Lettering with Piped Frosting
Start by practicing basic strokes: straight lines, curves, circles, and loops. Hold the bag at a 45-degree angle, slightly elevated from the surface. Apply steady pressure and move your hand fluidly to create the stroke. For elegant scripts, vary the pressure slightly – heavier pressure for downstrokes (thicker lines) and lighter pressure for upstrokes (thinner lines). Practice piping the alphabet in both uppercase and lowercase, focusing on consistent stroke thickness and spacing.
Mastering Different Calligraphy Fonts
Once comfortable with basic strokes, try mimicking different font styles. Look at examples of calligraphy or lettering and try to replicate the shapes and flourishes with frosting. Some fonts require sharp angles, while others are very fluid and rounded. Using different tip sizes can also change the look of the lettering; a #1 tip is great for fine details, while a #3 tip is better for larger, bolder text. This is one of the more challenging piped frosting consistency drills, requiring patience.
Addressing Common Lettering Mistakes
A frequent error is inconsistent line thickness, especially in scripts, due to fluctuating pressure. Focus on smooth, controlled squeezes. If your letters look shaky, you might be holding the bag too tightly or moving too fast; relax your grip and slow down. Broken or jagged lines often indicate frosting that is too stiff or air bubbles in the bag; ensure your frosting is smooth and the right consistency, and remove air bubbles before piping. Practice on a flat surface until your letters are consistent before piping on a curved cake.
Tips and Tricks for Optimizing Your Piped Frosting Consistency

Beyond the drills, several factors influence how well your frosting pipes. Paying attention to these details can significantly improve your results and make your practice more effective. These insights are gathered from years of experience and countless batches of frosting.
Maintaining the right temperature and consistency of your frosting throughout the decorating process is key. Even the best piped frosting consistency drills won't yield perfect results if the frosting isn't properly prepared and handled.
Storing Frosting Properly to Maintain Consistency
If you make frosting ahead of time, store it in an airtight container at room temperature for a day or two, or in the refrigerator for up to a week. Before piping, let refrigerated frosting come back to room temperature. You'll likely need to re-whip or stir it thoroughly to restore its smooth, pipeable consistency. Sometimes adding a tiny splash of milk or cream and re-mixing can help bring it back to life. Never try to pipe cold, stiff frosting directly from the fridge.
Adjusting Frosting Consistency for Different Piping Tips
Not all tips require the exact same consistency. Very fine tips (like #1 or #2) used for detailed writing or fine lines require a slightly softer, very smooth consistency to prevent clogging. Larger tips (like #1M or basketweave tips) can handle a slightly firmer consistency, which helps them hold their shape better for bolder designs. As you practice your piped frosting consistency drills, you'll develop an intuition for these subtle differences and learn to adjust your frosting accordingly.
The Importance of Room Temperature for Frosting
Room temperature plays a crucial role in frosting consistency, especially with butter-based frostings. If your kitchen is too warm (above 75°F or 24°C), your frosting will soften quickly, potentially losing its shape as you pipe. If your kitchen is cool, the frosting might become too stiff. Aim for a comfortable room temperature. If working in a warm environment, you might need to chill your piped frosting consistency practice frosting periodically or use a recipe that is more stable at higher temperatures, such as a shortening-based frosting or a meringue-based buttercream like Swiss or Italian meringue.
Troubleshooting Common Piped Frosting Issues
Even with careful preparation, you might encounter issues while piping. Knowing how to quickly address these problems can save your decorating project. These are common roadblocks faced by beginners and experienced bakers alike.
Learning to troubleshoot is an essential part of mastering piped frosting consistency. Don't get discouraged by setbacks; view them as learning opportunities.
Frosting Too Stiff: How to Soften It
If your frosting is too stiff to pipe smoothly, it's usually because it's too cold or lacks enough liquid. To soften it, add liquid (milk, cream, or even a tiny amount of softened butter or vegetable oil) one teaspoon at a time. Mix thoroughly after each addition, either by hand with a sturdy spatula or on low speed with an electric mixer, until the desired consistency is reached. Be patient; it's easier to add more liquid than to remove it. Warming a small portion gently over a double boiler and mixing it back in can also help.
Frosting Too Soft: How to Thicken It
Frosting that is too soft will lose its shape when piped. This is often due to too much liquid, too little powdered sugar, or being too warm. The easiest way to thicken it is to add more sifted powdered sugar, one tablespoon at a time, mixing until incorporated. You can also add a small amount of cornstarch (a teaspoon or two per batch) to help absorb excess moisture, though this can slightly alter the texture. Alternatively, chilling the frosting in the refrigerator for 15-30 minutes will often firm it up enough to pipe.
Air Bubbles in Frosting: How to Remove Them
Air bubbles can cause breaks in your piped lines and uneven shapes. They are usually incorporated during mixing. To remove them, scoop the frosting into your piping bag, then twist the top tightly. Holding the tip end up, gently squeeze the bag towards the twisted end. This pressure helps force air bubbles up and out through the tip. You can also simply stir the frosting vigorously by hand with a spatula before filling the bag, pressing it against the sides of the bowl to push out air.
Tools and Equipment for Perfect Piped Frosting
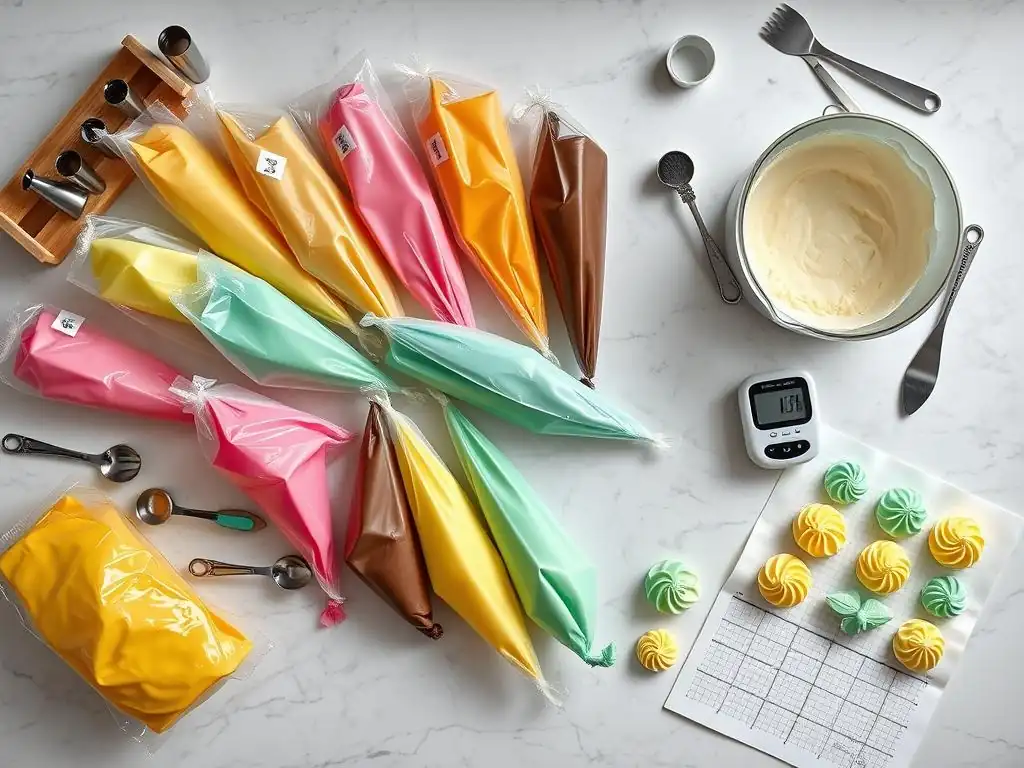
Having the right tools makes a big difference in your piping success and makes practicing your piped frosting consistency drills much easier. While you don't need every tip and bag imaginable, a few essential items are key.
Investing in quality piping equipment is worthwhile if you plan to do a lot of decorating. Good tools provide better control and are more durable.
Piping Bags: Choosing the Right One
Piping bags come in various materials and sizes. Disposable plastic bags are convenient and easy to clean up. Reusable bags, made of canvas or silicone, are more environmentally friendly and often more durable. Choose a size appropriate for the amount of frosting you'll be using; an 12-inch or 16-inch bag is versatile for most tasks. Ensure the bag is strong enough not to burst under pressure, especially when working with stiffer frostings or small tips.
Piping Tips: Understanding Different Types
Piping tips come in hundreds of shapes and sizes, each creating a unique effect. They are typically numbered. Common types include:
- Round tips: For lines, dots, writing, and filling (e.g., #1, #3, #12, #1A).
- Star tips: For stars, shells, rosettes, and borders (e.g., #18, #21, #1M).
- Petal tips: For ruffles, flowers, and swags (e.g., #104, #125).
- Leaf tips: For piping leaves (e.g., #352).
- Basketweave tips: For creating woven patterns (e.g., #47, #48).
Starting with a basic set of round and star tips is sufficient for practicing most piped frosting consistency drills.
Couplers: Making Tip Changes Easy
A coupler is a two-part plastic piece that fits inside a piping bag and allows you to change piping tips without changing the bag or emptying the frosting. The base piece goes inside the bag before filling, with the narrow end pushed through a cut hole at the tip of the bag.
The piping tip fits over the outside of the base, and a ring screws on to hold the tip securely in place. This is incredibly useful for practicing multiple techniques or using different tips with the same color of frosting during your piped frosting consistency drills or actual decorating projects.
Conclusion: Mastering Piped Frosting Consistency Through Practice
Achieving beautiful piped frosting decorations isn't a magical talent; it's a skill developed through dedicated practice. By focusing on specific piped frosting consistency drills, you build the necessary muscle memory, hand control, and understanding of how frosting behaves. These simple exercises, repeated regularly, are the fastest way to see significant improvement in your piping skills, transforming messy attempts into confident, clean results.
The Importance of Regular Practice for Piping Success
Consistency is key, not just in your frosting but in your practice routine. Spending short, focused sessions on piped frosting consistency drills several times a week is far more beneficial than sporadic, long attempts. Treat your practice sheet as a canvas for experimentation, allowing yourself to make mistakes and learn from them. The more you practice, the more intuitive the movements become, and the less you'll have to think about the mechanics, allowing you to focus on the creative aspects of decorating.
Continuing Your Piped Frosting Journey at BakeWithEase.com
BakeWithEase.com is here to support your baking and decorating adventures. As you continue to hone your piped frosting consistency skills with these drills, explore our extensive collection of recipes, from classic buttercreams perfect for piping to stable ganaches and royal icing guides. We offer step-by-step instructions and tips for bakers of all levels. Keep practicing, keep exploring, and enjoy the rewarding process of creating beautiful, delicious baked goods.
Frequently Asked Questions
What are "Piped Frosting Consistency Drills" and why are they important?
These drills are exercises designed to help you achieve the perfect consistency for piping frosting. They're important because the right consistency is crucial for creating beautiful and stable decorations.
How do these drills differ from simply practicing frosting recipes?
While recipes provide ingredients and instructions, these drills focus specifically on manipulating and testing the frosting consistency. This allows you to fine-tune your technique beyond just following a recipe.
What kind of frosting is best suited for these practice drills?
American buttercream is often recommended because it's relatively forgiving and easy to adjust. However, you can adapt the drills to other frostings like Swiss meringue buttercream or cream cheese frosting, understanding their unique properties.
How often should I practice these "Piped Frosting Consistency Drills"?
Regular practice, even for short periods, is more effective than infrequent long sessions. Aim for 15-30 minutes a few times a week to develop muscle memory and a feel for the right consistency.
What equipment do I need to perform these frosting drills effectively?
You'll need frosting, piping bags, various piping tips, and parchment paper. A turntable or rotating surface can also be helpful for practicing borders and more complex designs.
Final Reflection: Mastering the Art of Piped Perfection
The pursuit of flawlessly piped frosting isn't just about aesthetics; it's about precision, control, and the satisfaction of creating something beautiful with your own hands. In today's visually-driven world, the ability to execute intricate piping techniques holds significant value, whether you're a professional baker or a passionate home cook. This skill translates to everything from stunning wedding cakes to charming cupcakes, impacting both professional success and personal creative expression.
The journey to mastering piped frosting consistency is a testament to the power of consistent practice and mindful attention to detail. It's a process that mirrors many aspects of life – the more effort you invest, the greater the reward. As the old adage goes, Practice doesn't make perfect, but it makes permanent.
This rings especially true in the world of piping, where repetition helps build muscle memory and refine technique, leading to increasingly refined and beautiful results. The subtle nuances of pressure, speed, and angle become second nature, transforming the act of piping from a challenge into a meditative and enjoyable experience.
Now, it's your turn. Consider the simple drills outlined in this article, and commit to incorporating them into your baking routine. Don't be discouraged by initial imperfections; embrace them as stepping stones on your path to mastery. Each piped rose, each perfectly formed swirl, represents a step closer to achieving your own piped perfection. Remember the joy of the process, the satisfaction of improvement, and the beautiful creations that await you. Start practicing today, and unlock the artistry within.
Unlock Your Inner Pastry Chef: Take the Next Step!
Thanks for taking the time to explore these piping techniques! We hope you gained valuable insights and feel more confident in your baking skills. Now it's time to put your new knowledge into action.
- Master a new piping technique today: Choose one of the drills from the article and practice it for 15 minutes. Focus on precision and consistency. You'll be amazed at how quickly you improve!
- Share your creations: Post a picture of your piped masterpiece on social media and tag #BakeWithEase – let's inspire each other!
- Experiment with different nozzles and icings: Try substituting your usual icing with something completely new, or find a nozzle you’ve never used before and see what you create!
Ready to transform your baking game? What's your favorite piping technique and why?