
Shell Shocked No More: Easy Steps to Piping Classic Borders

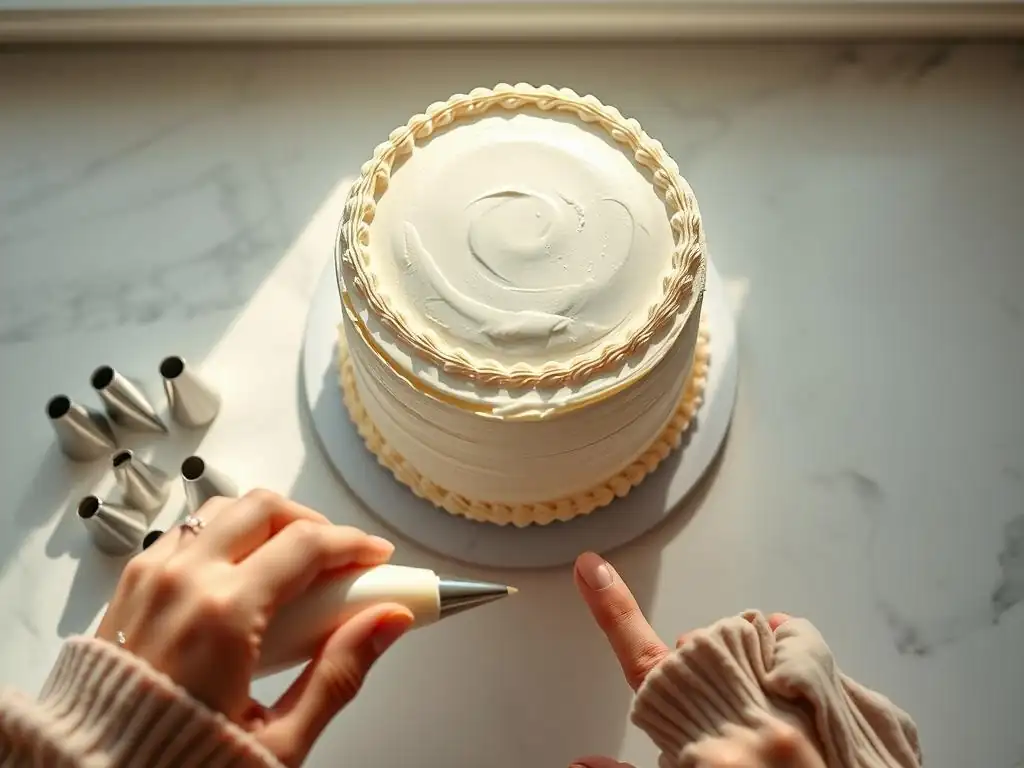
Welcome to BakeWithEase, your haven for all things baking! Ever dreamt of flawlessly decorating your cakes with elegant borders? It's easier than you think! Dive into our guide to easy buttercream border piping, where we demystify the techniques and secrets to creating stunning finishes. Ready to transform your cakes from simple to spectacular? Let's get started!
- Elevating Cake Decorating: Mastering Essential Piping Techniques
- Introduction to Buttercream Border Piping
- Essential Tools & Materials for Buttercream Borders
- Step-by-Step Guide: Piping Fundamental Buttercream Borders
- Buttercream Border Troubleshooting: Identifying and Resolving Issues
- Advanced Buttercream Border Techniques & Design Ideas
- Maintaining Your Piping Equipment for Longevity
- Conclusion: Showcasing Your Exquisite Buttercream Borders!
-
Frequently Asked Questions
- How easy is it really to learn buttercream border piping from this guide?
- What specific types of borders does the article cover, focusing on "easy buttercream border piping"?
- What kind of buttercream is best for achieving clean and crisp borders using these techniques?
- Does the article offer tips for troubleshooting common issues, like uneven piping or buttercream that's too soft?
- Where can I find the ingredients and equipment needed to create these borders, as mentioned on BakeWithEase.com?
- Final Reflection: Mastering the Art of Buttercream Borders
- Unleash Your Inner Piping Artist!
Elevating Cake Decorating: Mastering Essential Piping Techniques
Introduction to Buttercream Border Piping
Why Master Buttercream Borders? Enhancing Cake Aesthetics and Presentation
Mastering buttercream borders is a fundamental skill that instantly elevates the look of any cake, transforming a simple bake into a professional-looking masterpiece. A well-executed border provides a clean finish, covering any slight imperfections where the cake meets the board and adding a decorative frame that draws the eye.
It's the finishing touch that makes a cake look complete and polished, crucial whether you're baking for a special occasion or just practicing your skills. Learning easy buttercream border piping techniques opens up a world of design possibilities, allowing you to create everything from classic, elegant edges to fun, textured trims.
Beyond just aesthetics, borders serve a practical purpose. They can help contain fillings or drips on top of the cake and define different sections or layers. Developing proficiency in piping these decorative edges builds confidence and control, essential for tackling more complex cake decorating projects in the future. With a few basic tools and a little practice, anyone can learn how to pipe beautiful, consistent borders, making every cake presentation-ready. Focusing on easy buttercream border piping is the perfect starting point for aspiring cake decorators.
BakeWithEase.com: Your Guide to Perfect Piping
Welcome to BakeWithEase.com, your trusted resource for mastering the art of baking and decorating! We understand that piping can seem intimidating at first, but with the right guidance and practice, you'll be creating stunning buttercream borders in no time. Our goal is to break down complex techniques into simple, manageable steps, making easy buttercream border piping accessible to everyone, regardless of experience level.
At BakeWithEase.com, we provide clear, step-by-step instructions, helpful tips, and troubleshooting advice to help you achieve perfect results. We cover everything from preparing your buttercream to mastering different piping styles, ensuring you have the knowledge and confidence to tackle any cake decorating project. Let us be your guide on the journey to creating beautiful cakes with exquisite buttercream borders.
Essential Tools & Materials for Buttercream Borders
Buttercream Basics: Achieving Optimal Piping Consistency
The key to successful easy buttercream border piping lies in the consistency of your buttercream. It needs to be smooth, pliable, and hold its shape well without being too stiff or too soft. If it's too stiff, it will be difficult to pipe smoothly and might crack; if it's too soft, your borders will lose definition and melt. A good piping consistency is often described as similar to firm peanut butter or toothpaste – firm enough to hold peaks but soft enough to flow easily through a piping tip under gentle pressure.
To achieve this, start with a well-made buttercream recipe, whether it's American, Swiss Meringue, or Italian Meringue. If it's too stiff, add a tiny amount of milk, cream, or even water, a teaspoon at a time, mixing thoroughly until the desired consistency is reached. If it's too soft, chilling it briefly in the refrigerator (5-15 minutes, checking frequently) can help firm it up. For American buttercream, adding a tablespoon or two of sifted powdered sugar can also help stiffen it slightly. Always mix your buttercream well before piping to remove any air bubbles and ensure uniformity.
Piping Bags: Selecting the Ideal Size and Material
Piping bags come in various sizes and materials, and choosing the right one is important for comfortable and efficient easy buttercream border piping. Sizes are typically measured in inches, ranging from small 8-inch bags for fine detail work to large 18-inch or 20-inch bags for covering large areas or piping large borders. For most standard border work on cakes up to 10 inches in diameter, a 12-inch or 14-inch bag is usually a good, versatile choice, holding enough buttercream without being overly cumbersome.
Materials include disposable plastic, reusable plastic, and canvas. Disposable bags are convenient as they require no cleaning and are ideal for using multiple colors. Reusable plastic bags are more durable and environmentally friendly, while canvas bags are very sturdy but can be harder to clean and may require conditioning. For easy buttercream border piping practice, disposable bags are often preferred for their ease of use and cleanup. Ensure the bag is strong enough to withstand the pressure of piping thicker buttercream.
Piping Tips: Understanding Shapes and Their Effects
Piping tips, also known as nozzles, are essential for creating different border designs and are perhaps the most exciting part of easy buttercream border piping. They come in countless shapes and sizes, each producing a unique effect. For classic borders, some essential tips include star tips (open or closed, like #1M, #21, #32) for textured stars or shells, round tips (like #12, #A1) for dots or beads, and specialty tips for specific designs like ropes or basketweave.
The size of the tip dictates the size of the piped element. A small star tip like a #18 will produce small, delicate shells, while a large star tip like a #1M will create large, bold stars or swirls. Understanding which tip creates which effect is crucial for planning your border design. For beginners focusing on easy buttercream border piping, a medium open star tip (#21 or #32) and a medium round tip (#12) are excellent starting points as they are versatile and forgiving.
Couplers: Facilitating Quick Tip Swaps
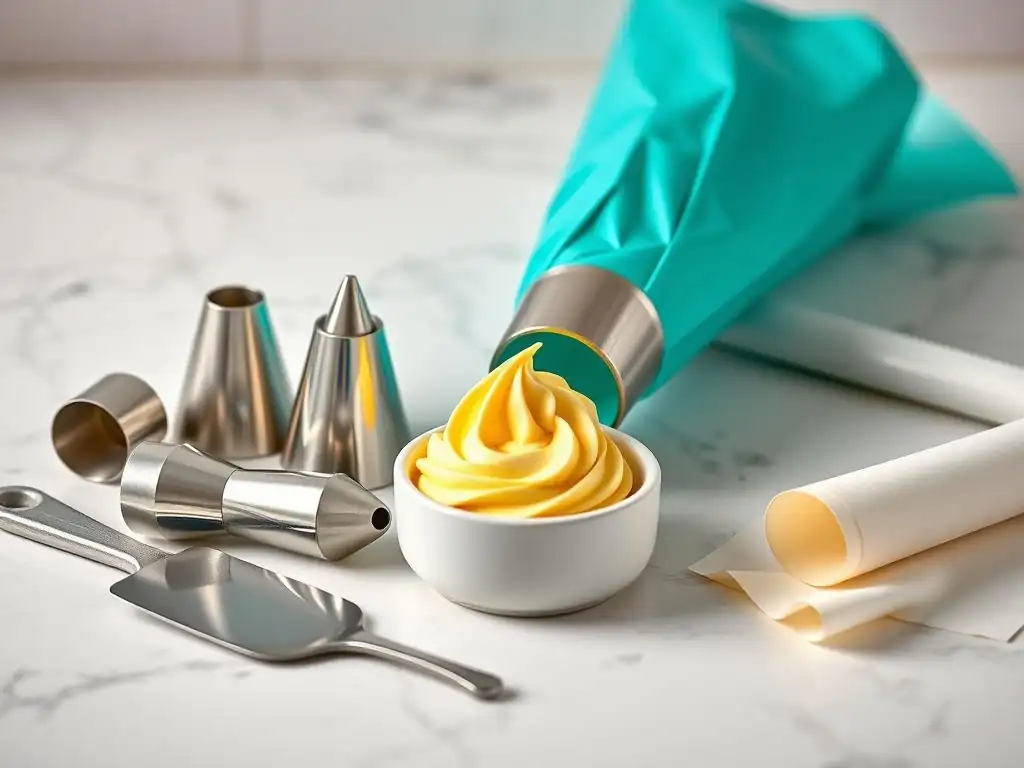
A coupler is a small, two-piece plastic or metal device that allows you to change piping tips on the same bag of buttercream without emptying the bag. This is incredibly useful when you want to use the same color buttercream for different border styles or details on a single cake, making your easy buttercream border piping process much more efficient. The base of the coupler is inserted into the piping bag before filling, with the narrow end sticking out. The bag is then snipped just below this narrow end.
To use, place the desired piping tip over the narrow end of the coupler, outside the bag. The second piece, a ring, screws onto the base inside the bag, securing the tip firmly in place. When you want to change tips, simply unscrew the ring, swap the tip, and screw the ring back on. This convenience saves time and reduces the number of piping bags you need, streamlining your easy buttercream border piping projects.
Turntable: Ensuring Smooth and Even Application
A cake turntable, also known as a revolving cake stand, is a highly recommended tool for achieving smooth, consistent, and easy buttercream border piping around the base or top edge of a cake. It allows you to rotate the cake smoothly as you pipe, rather than having to awkwardly move yourself or the cake. This continuous motion is key to creating seamless borders like shells, ropes, or stars that flow evenly around the cake's circumference.
Using a turntable helps maintain a consistent angle and pressure as you pipe, which is essential for uniform results. Simply place your cake (preferably on a cake board) on the turntable, position yourself comfortably, and rotate the table with one hand while you pipe with the other. This simple tool significantly improves the quality and ease of your buttercream border piping, especially for beginners learning to maintain a steady hand and flow.
Step-by-Step Guide: Piping Fundamental Buttercream Borders
Step 1: Preparing Your Buttercream and Piping Bag
Achieving the Ideal Buttercream Consistency for Defined Borders
As mentioned earlier, the consistency of your buttercream is paramount for creating defined and attractive borders. Before you even think about filling your bag, ensure your buttercream is smooth, free of lumps, and has that perfect piping consistency – not too stiff to cause hand strain or cracking, and not too soft to sag. Take a moment to test a small amount by piping a practice line or shape on a piece of parchment paper or the inside of a bowl.
Does it hold its shape? Is it easy to squeeze? Adjust if necessary by adding a tiny amount of liquid or powdered sugar, or by chilling, as detailed in the "Buttercream Basics" section.
Once the consistency is right, stir the buttercream vigorously with a spatula for a minute or two. This helps remove any trapped air bubbles, which can cause frustrating gaps or splatters when you're piping. A smooth, air-free buttercream flows much more predictably, making your easy buttercream border piping efforts much more successful and resulting in cleaner, more professional-looking lines and shapes.
Filling the Piping Bag Efficiently
Filling a piping bag neatly and efficiently is a small but crucial step in easy buttercream border piping. Start by preparing your bag: if using a coupler, insert the base and snip the end; if using a tip directly, drop the tip into the bag and snip the end just enough for the tip to peek through. Then, fold the top edges of the piping bag down, creating a cuff around your hand. This cuff helps keep the top edge clean while you fill it.
Using a spatula or bench scraper, scoop the buttercream into the bag. It's often easiest to do this by holding the cuffed bag in one hand and using the other hand to fill, pushing the buttercream down towards the tip. Fill the bag no more than two-thirds full. Overfilling makes the bag hard to handle and control, and the warmth of your hand can prematurely soften the buttercream. Once filled, unfold the cuff and twist the top of the bag tightly shut. This twisted end is where you'll apply pressure to push the buttercream out.
Step 2: Mastering Basic Piping Techniques
The Star Border: Creating a Textured Edge
The star border is one of the most popular and easy buttercream border piping techniques, creating a lovely textured edge that's both simple and effective. It's typically piped using an open or closed star tip. To create individual stars, hold the piping bag at a 90-degree angle to the cake surface (either the top or the side edge). Apply steady pressure, letting the buttercream build up into a star shape. Stop squeezing and pull the bag straight up quickly to create a clean peak.
For a continuous star border, like the classic shell border variation, you'll use a similar motion but overlap each piped star slightly. Hold the bag at about a 45-degree angle to the cake. Pipe a star, then ease pressure slightly as you pull the tip back slightly, creating a tail. Start the next star overlapping the tail of the previous one. This creates a continuous, textured line. Practice on parchment paper first to get a feel for the pressure and motion needed for consistent stars.
The Shell Border: Producing a Classic Scalloped Effect
The shell border is a timeless classic, often used around the base or top edge of a cake for an elegant, scalloped look. It's a variation of the star border, typically piped with an open or closed star tip, creating a shape reminiscent of seashells. To pipe a shell, hold the piping bag at about a 45-degree angle to the cake surface, with the tip pointing slightly downwards and towards you. Apply firm, steady pressure to start the shell, letting the buttercream build up.
As the shell grows, gradually ease pressure and pull the bag back and slightly downwards in a curved motion, creating a trailing tail. Stop squeezing completely as you finish the tail. For a continuous border, overlap the head of the next shell over the tail of the previous one. This technique requires consistent pressure and a smooth, controlled motion to ensure uniform shells. Practice is key to mastering the rhythm and pressure control for perfect, easy buttercream border piping of shells.
The Rope Border: Adding a Twisted, Dimensional Element
The rope border adds a beautiful, twisted, and dimensional look to a cake's edge. It's slightly more advanced than simple stars or shells but still falls under essential easy buttercream border piping techniques with practice. While there are specific rope tips, you can often achieve a lovely effect using a large closed star tip or even a large round tip. The key is the motion.
To pipe a rope border, start by piping a short, curved line (like a comma). Then, starting where the first line ended, pipe another curved line that overlaps the first one, curving in the opposite direction. Continue this pattern, overlapping each new curve onto the end of the previous one, alternating the direction of the curve. This creates the twisted, rope-like appearance. Maintaining consistent pressure and curve size is crucial for an even rope. Practice the overlapping motion on a flat surface before attempting it on your cake.
The Rosette Border: Forming Elegant Floral Accents
Rosettes are lovely, simple swirls that resemble small roses, adding elegant floral accents to a cake. They are incredibly versatile and can be piped individually or right next to each other to form a continuous border. Rosettes are typically piped using an open or closed star tip, such as a #1M or #2D. This is another very approachable easy buttercream border piping technique.
To pipe a rosette, hold the piping bag perpendicular (90 degrees) to the surface where you want the rosette. Start piping in the center and, maintaining steady pressure, swirl outwards in a circular motion. Stop squeezing when you reach the desired size and lift the bag away. For a continuous rosette border, pipe rosettes side-by-side, letting them touch or slightly overlap. You can also pipe them along the top edge, letting them spill slightly over the side. The speed of your swirl and the pressure will affect the size and tightness of the rosette.
Step 3: Piping a Straight and Consistent Border
Utilizing a Turntable for Uniform Results
As highlighted earlier, a turntable is your best friend for piping straight and consistent borders, significantly simplifying easy buttercream border piping. Once your cake is centered on the turntable, position yourself comfortably so you can reach the entire circumference of the cake easily without stretching. Hold the piping bag correctly, with the twisted end firmly in your hand and the tip positioned where you want the border to start.
Begin piping your chosen border design (stars, shells, etc.) while simultaneously rotating the turntable smoothly with your other hand. The goal is to maintain a consistent distance from the edge of the cake and a consistent angle of the piping bag relative to the cake surface as you turn. This continuous, synchronized movement ensures that the border is applied evenly around the entire cake, without bumps, dips, or changes in size or shape.
Maintaining Consistent Pressure and Speed Control
Consistency in pressure and speed is vital for achieving a uniform and professional-looking border. In easy buttercream border piping, fluctuating pressure will result in parts of the border being larger or smaller, while inconsistent speed will lead to uneven spacing or overlapping. Once you start piping a section of the border, try to maintain the same squeezing pressure on the bag throughout that segment.
Similarly, the speed at which you move the piping bag (or rotate the turntable) should be steady. For continuous borders like shells or ropes, synchronize your piping motion (squeeze, pull back, release) with the rotation of the turntable. For individual elements like stars or rosettes piped side-by-side, maintain a consistent rhythm between piping each element and moving to the next spot. Practice on parchment paper first to develop muscle memory for consistent pressure and speed before working on the cake.
Addressing Common Piping Errors
Even with careful preparation, common errors can occur during easy buttercream border piping. Uneven borders often result from inconsistent pressure or speed, or not using a turntable. Gaps or breaks can happen if you lose pressure or stop moving too abruptly. Squashed or misshapen elements might mean the buttercream is too soft or you're holding the bag at the wrong angle.
If you make a mistake, don't panic! For small errors on a crusted buttercream, you might be able to gently scrape it off with a small palette knife or spatula and try again. For larger errors, it's often best to carefully remove the section of the border where the mistake occurred using a small spatula, smooth the underlying buttercream if needed, and re-pipe that section.
Sometimes, chilling the cake briefly can make removing errors cleaner. Learning to identify why an error happened (e.g., "my shells are too flat, maybe my angle is wrong?") is key to improving your easy buttercream border piping skills.
Buttercream Border Troubleshooting: Identifying and Resolving Issues
Uneven Borders: Achieving Uniformity and Balance
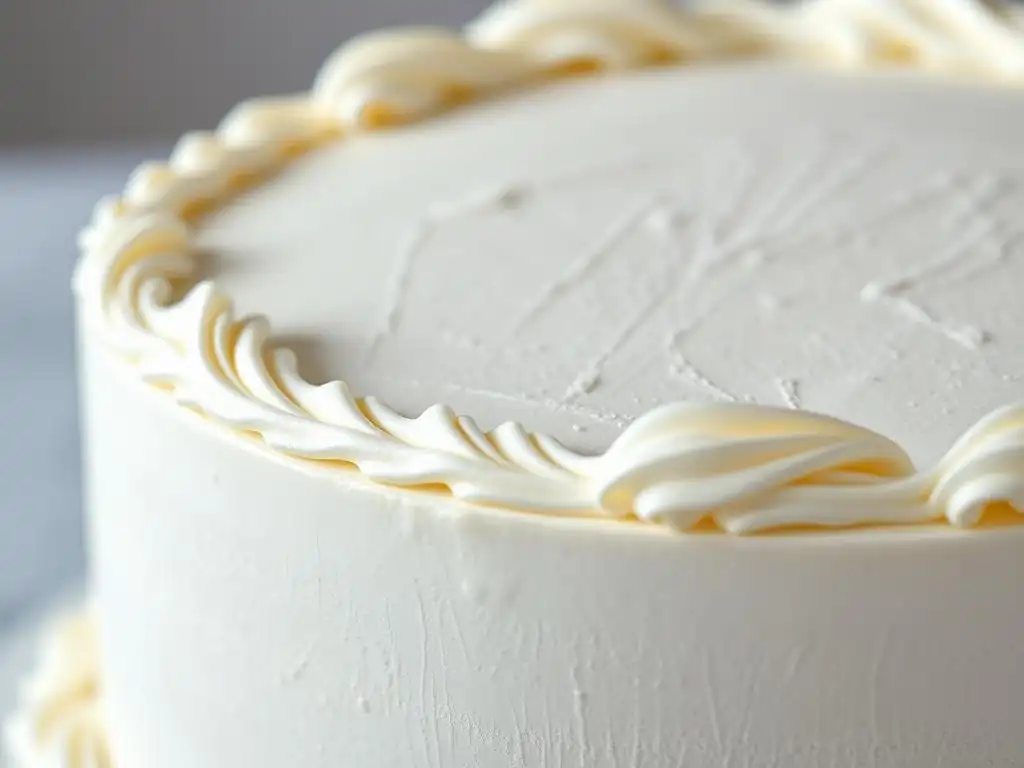
Uneven borders are a common frustration when learning easy buttercream border piping. One section might be larger or smaller than another, the spacing might be off, or the overall height and depth might vary. This is almost always due to inconsistencies in pressure, speed, or angle while piping. Without a turntable, it's harder to maintain a consistent distance from the cake edge and a smooth flow.
To achieve uniformity, focus on applying steady, even pressure to the piping bag from start to finish of each border section. Use a turntable and rotate it smoothly at a constant speed while you pipe, keeping your piping hand relatively still in relation to your body, moving only to guide the tip along the cake's edge.
Practice piping lines or shapes of the same size and consistency on parchment paper before attempting the border on your final cake. Pay attention to the angle you hold the tip; keeping it consistent is crucial for uniform shapes, especially for shells and ropes.
Buttercream Cracking: Preventing and Repairing Imperfections
Buttercream cracking while piping or shortly after can be frustrating. This often happens when the buttercream is too stiff or cold. If your buttercream is too firm, it doesn't flow smoothly and can break or crack as it's forced through the tip. Cracking can also occur if you're working in a very cold environment or if the cake itself is excessively cold.
To prevent cracking, ensure your buttercream is at the optimal piping consistency – smooth and pliable. If it feels too stiff, allow it to warm up slightly at room temperature or add a very small amount of liquid (milk, cream, or water), mixing thoroughly. Avoid over-chilling your cake immediately before piping if possible, as the cold surface can cause the buttercream to seize and crack.
If minor cracks appear after piping, you can sometimes gently smooth them with a lightly dampened finger or a small, warm palette knife, but this can be tricky and may affect the definition of the design. Adjusting consistency beforehand is the best prevention for easy buttercream border piping.
Buttercream Consistency Problems: Adjusting for Optimal Flow
Getting the buttercream consistency just right is arguably the most critical factor for successful easy buttercream border piping, yet it's a common source of issues. Buttercream that is too soft will result in borders that sag, lose definition, or melt into the cake, especially in warm conditions. Buttercream that is too stiff will be hard to pipe, cause hand cramps, lead to cracking, or produce jagged, uneven shapes.
If your buttercream is too soft, you can try chilling it in the refrigerator for 10-20 minutes, stirring it every few minutes to check the firmness. For American buttercream, adding a tablespoon or two of sifted powdered sugar can also help stiffen it. If it's too stiff, add liquid very sparingly – a teaspoon at a time – mixing thoroughly until it reaches a smooth, pliable consistency. Humidity and temperature can affect buttercream consistency, so you may need to make slight adjustments based on your working environment.
Air Bubbles: Minimizing and Eliminating Air Pockets
Air bubbles trapped in your buttercream can cause frustrating interruptions while you're piping, leading to gaps or splatters in your otherwise perfect border. These bubbles often get incorporated during the mixing process. While some air is inevitable, excessive bubbles can ruin the smooth flow needed for easy buttercream border piping.
To minimize air bubbles, mix your buttercream on a lower speed towards the end of the mixing process. Before filling your piping bag, take the time to "de-bubble" the buttercream. You can do this by pressing the buttercream firmly against the sides of your mixing bowl with a spatula, working out the air pockets. Once it's in the piping bag, you can sometimes gentle squeeze and manipulate the bag to push air pockets towards the tip to be piped out on a practice surface before starting your border on the cake.
Advanced Buttercream Border Techniques & Design Ideas
Combining Border Styles for Complex Designs
Once you've mastered the fundamental easy buttercream border piping techniques like stars, shells, ropes, and rosettes, you can start combining them to create more complex and visually interesting border designs. For example, you could pipe a simple shell border around the base of the cake and a row of rosettes around the top edge. Or, you might use a rope border as the primary design and accent it with small stars or dots piped with a round tip.
Another approach is to layer borders. You could pipe a base border of one style, perhaps a simple round bead border, and then pipe a different style, like small shells or stars, directly on top of or slightly above the first border. Experiment with different tip sizes and combinations to see what effects you can create. Combining techniques adds depth and sophistication to your cake decorations, taking your easy buttercream border piping skills to the next level.
Incorporating Color and Texture Variations
Adding color and varying texture can dramatically enhance the impact of your buttercream borders. You can use different colors for different border styles on the same cake, or use multiple shades of the same color for an ombré effect. For a simple ombré border, fill one side of your piping bag with a darker shade of buttercream and the other side with a lighter shade or white. As you pipe, the colors will blend gradually, creating a beautiful gradient effect.
Texture can be varied by using different piping tips (star vs. round vs. specialty tips) or by using different buttercream consistencies (a slightly stiffer buttercream will hold sharper peaks). You can also add edible elements like sprinkles, dragees, or sanding sugar directly onto a freshly piped border for added sparkle and texture. Consider piping a border and then using a small offset spatula or comb to create additional texture on the piped buttercream itself before it crusts. These variations make easy buttercream border piping even more exciting and creative.
Creating Custom Border Designs: Basketweave Border Technique
The basketweave border is a classic custom technique that creates a woven texture around the side of the cake, resembling a basket. While it looks intricate, it's achievable with practice using a flat or basketweave piping tip (often numbered #44 or #48). This technique relies on layering horizontal and vertical strips of buttercream.
Start by piping a vertical strip of buttercream about an inch or two long. Then, pipe two or three short horizontal strips across the vertical strip, leaving a small gap between them. Next, pipe another vertical strip right next to the horizontal strips, overlapping the ends of the horizontal strips.
Now, pipe two or three more horizontal strips in the gaps you left previously, overlapping the second vertical strip. Continue this pattern around the cake: pipe a vertical strip, then short horizontals in the gaps of the previous vertical, then another vertical, then short horizontals in the new gaps. Maintaining consistent strip length, width, and spacing is key to a neat basketweave, making it a rewarding technique to master after easy buttercream border piping basics.
Adapting Borders to Various Cake Shapes and Sizes
Easy buttercream border piping isn't limited to round cakes! You can adapt border techniques to suit squares, rectangles, hearts, or even irregularly shaped cakes. For square or rectangular cakes, you'll need to pay special attention to the corners. For continuous borders like shells or ropes, you might need to slightly adjust your motion or overlap at the corners to maintain a smooth transition.
For individual elements like stars or rosettes, simply pipe them around the perimeter, adjusting the spacing slightly as you approach corners to ensure even distribution. For shapes with sharp points, like hearts or stars, you can often make the element at the point slightly larger or use a cluster of smaller elements to emphasize the shape. Practice piping on a piece of parchment paper cut to the shape of your cake board to visualize and plan how your border will look on the specific shape.
Maintaining Your Piping Equipment for Longevity
Thoroughly Cleaning Piping Bags and Nozzles
Proper cleaning is essential for the longevity and hygiene of your piping equipment. After each use, empty any remaining buttercream from the bag and tip. For disposable bags, simply discard them. For reusable bags (plastic or canvas) and tips, rinse them immediately under warm running water to remove as much buttercream as possible before it hardens. Buttercream, especially with butter, can be greasy and difficult to remove once dried.
Wash reusable bags and tips in hot, soapy water. Use a small brush (like a bottle brush or a specialized piping tip brush) to scrub inside the tips and bags, ensuring no residue is left behind. Pay special attention to the intricate shapes inside star and specialty tips. Rinse thoroughly to remove all soap. This diligent cleaning prevents clogs and ensures your equipment is ready for your next easy buttercream border piping project.
Properly Storing Piping Tips and Accessories
Once cleaned and thoroughly dried, proper storage keeps your piping tips organized and protected. Allowing tips to air dry completely before storing is crucial to prevent rust, especially with metal tips. Many bakers use small plastic storage containers with dividers, tackle boxes, or specialized piping tip organizers to keep tips sorted by size or type. Storing them upright can also help with drying.
Couplers and other small accessories should be stored together with the tips. Reusable piping bags should be completely dry before folding or rolling them up for storage to prevent mildew or odors. Store all your piping equipment in a clean, dry place, away from dust and moisture. Organized storage not only protects your investment but also makes it much easier to find the right tip for your next easy buttercream border piping adventure!
Conclusion: Showcasing Your Exquisite Buttercream Borders!
You've taken the essential steps to master easy buttercream border piping, from understanding your tools and achieving the right buttercream consistency to practicing fundamental techniques like stars, shells, ropes, and rosettes. You've learned how to prepare your bag, utilize a turntable for consistency, troubleshoot common issues like unevenness and cracking, and even explored ways to combine techniques and add color for more advanced designs.
Piping beautiful buttercream borders is a skill that truly transforms your cakes, adding that professional finish that impresses everyone. It takes practice, patience, and a willingness to learn from mistakes, but the results are incredibly rewarding. Don't be afraid to experiment with different tips and techniques. Every piped border is an opportunity to hone your skills and express your creativity. Keep practicing your easy buttercream border piping, and soon you'll be showcasing exquisite borders on all your baked creations!
Achieving Buttercream Border Mastery with BakeWithEase.com
At BakeWithEase.com, we are dedicated to helping you achieve your baking and decorating goals. We believe that mastering essential skills like easy buttercream border piping should be an enjoyable and accessible process. Our detailed guides, step-by-step instructions, and helpful tips are designed to support you every step of the way, from your very first wobbly star to confident, consistent shell borders and beyond.
We encourage you to revisit this guide, practice the techniques outlined, and explore our other resources on BakeWithEase.com for more recipes, tips, and decorating inspiration. With the knowledge and techniques you've gained here, you're well on your way to creating stunning cakes with beautiful buttercream borders that taste as good as they look. Happy piping from all of us at BakeWithEase.com!
Frequently Asked Questions
How easy is it really to learn buttercream border piping from this guide?
The guide focuses on easy-to-follow steps and beginner-friendly techniques. It breaks down the process, making it manageable even for those with little to no experience.
What specific types of borders does the article cover, focusing on "easy buttercream border piping"?
While the title mentions shell borders, the article likely also covers other basic borders like dots, ropes, and simple swirls. The focus is on achievable designs for beginners using easy buttercream border piping techniques.
What kind of buttercream is best for achieving clean and crisp borders using these techniques?
A stiff American buttercream is generally recommended. It holds its shape well and is easy to work with for creating defined borders. Proper consistency is key to success.
Does the article offer tips for troubleshooting common issues, like uneven piping or buttercream that's too soft?
The guide likely includes tips on adjusting buttercream consistency and maintaining proper piping bag pressure. Addressing these issues is crucial for achieving a professional finish with easy buttercream border piping.
Where can I find the ingredients and equipment needed to create these borders, as mentioned on BakeWithEase.com?
The BakeWithEase website emphasizes easy-to-find ingredients. Basic baking supplies like butter, sugar, piping bags, and tips are readily available at most grocery stores and online retailers.
Final Reflection: Mastering the Art of Buttercream Borders
The ability to pipe elegant buttercream borders is no longer a skill reserved for professional bakers; it's a delightful technique accessible to everyone. With a little practice and the right guidance, anyone can transform a simple cake into a stunning masterpiece. This article has demonstrated that achieving beautiful, classic buttercream borders is easier than you might think, empowering home bakers to elevate their creations.
The impact of mastering even basic piping techniques extends far beyond the visual appeal of a cake. It's about the joy of creation, the satisfaction of transforming simple ingredients into something beautiful, and the pride in presenting a homemade treat that reflects your personal touch. The best things in life are homemade.
This sentiment resonates deeply, and the ability to create beautiful buttercream borders allows us to express that sentiment tangibly. It's a skill that connects us to a rich tradition of baking and allows for personal expression through artistry.
Now, it's your turn. Don't be intimidated by the seemingly intricate world of buttercream piping. Pick up your piping bag, choose your favorite tip, and experiment! Embrace the process, learn from your mistakes, and celebrate your successes. Remember, every perfectly piped rose, every flawlessly executed shell, is a testament to your dedication and creativity. The journey of mastering buttercream borders is as rewarding as the final result. So, grab your frosting and let your creativity bloom!
Unleash Your Inner Piping Artist!
Thanks for joining us on this piping adventure! We hope you've gained the confidence to create stunning, classic borders for your cakes and cupcakes. Now it's time to put your new skills to the test!
- Master the art of the perfect shell: Practice your piping technique with different nozzles and consistencies until you achieve your desired look. Challenge yourself to create a border masterpiece this weekend!
- Share your creations! Post a photo of your piped border on social media using #BakeWithEaseBorders and inspire others. We'd love to see your baking triumphs!
- Explore our other cake decorating tutorials for even more piping techniques and delicious inspiration.
Ready to transform your baking from good to amazing? What classic border design will you tackle first?