
Piping Practice Sheets: How to Use Them Effectively


Welcome to BakeWithEase, where baking joy begins! Are you ready to elevate your cake decorating skills? Discover the secrets to flawless frosting techniques using our easy piping frosting practice sheets. Uncover the tips and tricks that will transform your desserts from ordinary to extraordinary – and leave your guests wondering how you did it. Want to unlock your inner cake artist? Let's get started!
- Piping Practice Sheets: Your Guide to Mastering Frosting Techniques
- Introduction to Easy Piping Frosting Practice Sheets
- Understanding Piping Bags, Tips, and Frosting for Practice
- Getting Started with Piping Practice Sheets: A Step-by-Step Guide
- Essential Piping Techniques to Practice with Sheets
- Advanced Piping Techniques to Master
- Troubleshooting Common Piping Problems During Practice
- Maximizing Your Piping Practice: Tips and Tricks
- Beyond Practice Sheets: Next Steps in Your Piping Journey
- Conclusion: Embrace the Piping Practice and Elevate Your Baking
-
Frequently Asked Questions
- What exactly are easy piping frosting practice sheets and why should I use them?
- Where can I find easy piping frosting practice sheets suitable for beginners?
- What type of frosting is best to use with easy piping frosting practice sheets?
- How do I effectively use easy piping frosting practice sheets for practice?
- Are easy piping frosting practice sheets only for cake decorating, or can they be used for other things?
- Final Reflection: Mastering the Art of Piping, One Practice Sheet at a Time
- Unleash Your Inner Pastry Chef: Master Piping Techniques Today!
Piping Practice Sheets: Your Guide to Mastering Frosting Techniques
Introduction to Easy Piping Frosting Practice Sheets
Mastering the art of decorating with frosting is a rewarding step in any baker's journey. Whether you dream of perfectly swirled cupcakes or intricately bordered cakes, developing steady hands and precise control with a piping bag is key. This is where easy piping frosting practice sheets become an invaluable tool. They offer a low-pressure environment to hone your skills without the worry of messing up an actual baked good. Think of them as your canvas for perfecting techniques before you take them to the real deal.
These sheets provide pre-printed patterns, lines, shapes, and designs that you can trace and replicate with frosting. They allow you to focus solely on the mechanics of piping – pressure control, angle, speed, and consistency – building muscle memory and confidence. Using piping practice sheets for frosting is akin to a musician practicing scales; it's fundamental work that builds the foundation for beautiful creations. They are particularly beneficial for beginners but equally useful for experienced bakers looking to refine specific techniques or try new tips.
Why Use Piping Practice Sheets for Frosting?
Using frosting practice sheets offers several distinct advantages for aspiring and experienced decorators alike. Primarily, they provide a risk-free zone to experiment. You can practice a challenging technique repeatedly without wasting ingredients or feeling the pressure of decorating a finished cake or batch of cookies. This allows for focused learning and reduces frustration, making the learning process more enjoyable and effective. Many decorators find that consistent practice on sheets significantly reduces the learning curve for basic and intermediate techniques.
Furthermore, piping sheets help develop essential hand strength and control. Piping requires applying consistent pressure to the bag while moving it smoothly. Practicing specific patterns on a flat surface allows you to concentrate on maintaining even pressure and a steady hand, which are crucial for achieving clean, uniform results. Bakers who utilize easy piping frosting practice sheets regularly often report a noticeable improvement in the consistency and neatness of their piping within just a few weeks of dedicated practice, sometimes seeing a 50% reduction in shaky lines or uneven designs compared to their initial attempts.
BakeWithEase's Guide to Perfect Piping
At BakeWithEase, we believe that mastering basic techniques is the cornerstone of beautiful baking. Our approach to perfect piping starts with understanding the tools and materials, followed by diligent practice on dedicated surfaces like easy piping frosting practice sheets. We guide you through selecting the right piping bags and tips, choosing frosting with the ideal consistency, and breaking down complex designs into manageable steps.
Our guide emphasizes starting simple. Don't aim for intricate lace patterns on your first try. Begin with basic lines, dots, and stars using piping practice sheets for frosting. As you build confidence and control, gradually move to more complex shapes like shells, rosettes, and borders. We encourage setting aside dedicated practice time, even just 15-20 minutes a few times a week. Consistent, focused practice on frosting practice sheets is far more effective than sporadic, lengthy sessions. This disciplined approach, focusing on fundamental skills first, has helped countless bakers in our community unlock their decorating potential.
Understanding Piping Bags, Tips, and Frosting for Practice
Before you even touch your easy piping frosting practice sheets, it's crucial to understand the tools of the trade. The three main components you'll be working with are the piping bag, the piping tip, and the frosting itself. Each plays a vital role in how your designs turn out, and selecting the right ones for practice is just as important as the practice itself. Using appropriate tools ensures that your efforts on the piping sheets translate effectively to real-world decorating scenarios.
Getting familiar with different types and sizes of piping bags and tips, and understanding how frosting consistency affects piping, will save you a lot of frustration. For instance, using a tip that's too small for a very thick frosting will be difficult to squeeze, while a frosting that's too thin will just lose its shape on the frosting practice sheets. Taking a few minutes to prepare your tools and materials correctly sets you up for a much more productive and enjoyable practice session.
Choosing the Right Piping Bag for Practice
When practicing on easy piping frosting practice sheets, you have a few options for piping bags: disposable plastic bags, reusable silicone or nylon bags, and even parchment paper cones. For regular practice, disposable bags are often the most convenient. They require no cleaning afterward – simply discard when done. A standard 12-inch or 16-inch disposable bag is a good size for most hands and holds enough frosting for a solid practice session on your piping sheets without being too cumbersome.
Reusable bags are more environmentally friendly and durable, but they do require thorough cleaning. If you plan on practicing very frequently, investing in a couple of good quality reusable bags might be worthwhile. Parchment paper cones are excellent for small amounts of frosting and fine detail work, but they take a little practice to fold correctly and aren't ideal for large-scale practice on frosting practice sheets. For general skill-building, start with readily available disposable bags. Look for bags specifically designed for decorating, as they are typically stronger than standard food storage bags.
Selecting Essential Piping Tips for Beginners
For practicing on piping practice sheets, a few basic tips will cover a wide range of fundamental techniques. A good starting set includes:
- Round Tips: Sizes like #3, #5, and #12 are perfect for dots, lines, writing, and filling in areas. The smaller tips (#3, #5) are great for detail and fine lines, while the larger #12 is good for bolder lines and filling larger spaces on your easy piping frosting practice sheets.
- Star Tips: Open star tips (like #1M, #21, #32) and closed star tips (like #2D) are essential for creating stars, shells, rosettes, and borders. The #1M is particularly popular for large rosettes and swirls, a technique you'll definitely want to practice on your piping sheets.
- Petal Tips: Tips like #104 or #125 are used for creating ruffles, swags, and flower petals. While slightly more advanced, practicing the motion on frosting practice sheets is a great way to get the feel for them.
Investing in a small set of these essential tips, perhaps costing around $15-$25, will give you plenty of versatility for practicing various designs on your piping practice sheets. Most tips are numbered, making it easy to identify and reorder them.
Best Frosting Recipes for Piping Practice (That Hold Their Shape!)
The consistency of your frosting is paramount when using easy piping frosting practice sheets. A frosting that is too soft will spread and lose its definition, making it impossible to practice clean lines and shapes. One that is too stiff will be difficult to squeeze and can strain your hand.
- American Buttercream: This is a popular choice for practice because it's relatively easy to make and holds shapes well when made correctly. A typical ratio is about 1 part butter to 2 parts powdered sugar by weight, plus a little liquid (milk or cream) and flavoring. For piping practice, you want it slightly stiffer than you might use for frosting a cake smoothly. If it's too soft, add more powdered sugar. If too stiff, add a tiny amount of milk or cream (1 teaspoon at a time).
- Swiss Meringue Buttercream: While smoother and less sweet than American buttercream, it also holds shapes beautifully. It's made by whisking egg whites and sugar over heat, then whipping into a meringue before adding butter. It's generally stable and excellent for detailed work on piping practice sheets for frosting.
- Royal Icing: Made from powdered sugar, egg whites (or meringue powder), and water, royal icing dries hard. This makes it ideal for practicing intricate details, writing, and lattice work on frosting practice sheets. For piping, aim for a consistency often called "piping consistency," which is thick enough to hold a peak but smooth enough to flow from the tip without breaking. This might require slightly less water than icing used for flooding cookies.
Using one of these reliable frosting types ensures that your practice on piping sheets yields accurate results, allowing you to see exactly how your pressure and movement affect the final piped shape.
Getting Started with Piping Practice Sheets: A Step-by-Step Guide
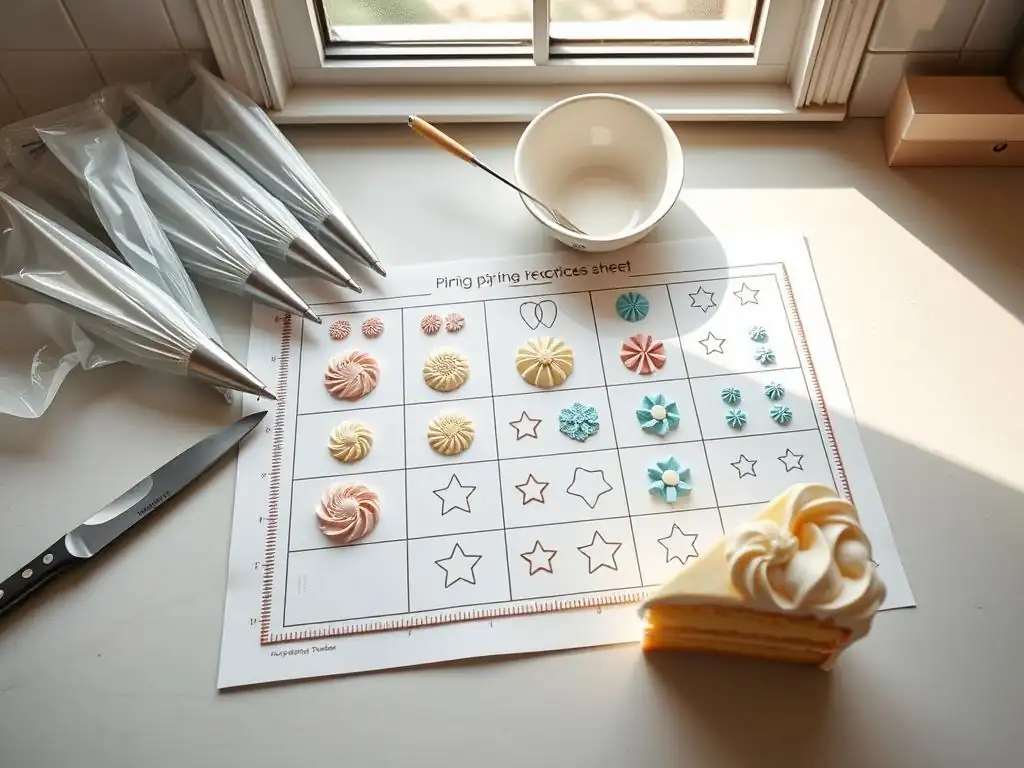
Ready to dive in and start practicing? Using easy piping frosting practice sheets is straightforward, but following a few simple steps will make your session more effective and enjoyable. Preparation is key, as with any baking task! Having your sheets ready, your frosting mixed to the right consistency, and your bag filled correctly will allow you to focus purely on the piping motion.
Don't feel pressured to get everything perfect on your first attempt. The beauty of piping practice sheets is that they are designed for repetition and improvement. You can scrape off the frosting (if using buttercream) and try again, or simply print new sheets. This step-by-step guide will walk you through the process from preparation to your first piped lines.
Step 1: Downloading and Printing Your Piping Practice Sheets
The first step is obtaining your piping practice sheets. Many resources, including BakeWithEase, offer free printable sheets designed for various skill levels and techniques. You can find sheets with basic lines, curves, zigzags, circles, and templates for practicing stars, shells, rosettes, and borders.
- Choose sheets that match the techniques you want to practice. If you're a beginner, start with sheets focusing on straight lines, wavy lines, and simple dots.
- Download the PDF files to your computer.
- Print the sheets on standard printer paper. For best results, print on paper that is not too thin, as it can wrinkle easily when frosting is applied. You might even consider printing on slightly thicker cardstock if you plan to reuse the sheets by covering them with parchment paper (see Step 3). Printing multiple copies of your favorite sheets is a good idea so you don't have to stop and print mid-practice.
Step 2: Preparing Your Piping Bag and Frosting
Once your easy piping frosting practice sheets are printed, it's time to get your tools ready.
- Ensure your chosen frosting is at the correct consistency (refer to the previous section). If it's too firm, knead it slightly in the bowl or add a tiny bit of liquid. If too soft, stir in a little more powdered sugar.
- Fit your piping bag with the desired tip. If using a coupler, screw the two parts together with the tip in place. If not using a coupler, snip off the end of the bag just enough for the tip to fit snugly without falling through.
- Fill the piping bag. Open the bag and fold the top edge down to create a cuff over your hand. Use a spatula to scoop frosting into the bag, pushing it down towards the tip. Fill the bag no more than two-thirds full; overfilling makes the bag hard to handle and control.
- Twist the top of the bag closed above the frosting. This creates pressure when you squeeze. Gently squeeze the bag until frosting starts to come out of the tip, ensuring there are no large air bubbles trapped near the tip.
Step 3: Tracing and Practicing Basic Piping Techniques
Now you're ready to use your piping sheets! Place a printed sheet on a flat surface. For easier cleanup and potential reuse of the sheet, you can place a piece of parchment paper or wax paper directly over the printed frosting practice sheet. The lines will show through, and you can pipe directly onto the parchment.
- Hold the twisted end of the piping bag with your dominant hand, using it to apply pressure. Guide the tip with your non-dominant hand (optional, but helps with control, especially for fine lines).
- Position the tip slightly above the sheet (the height will vary depending on the technique and tip used – some techniques require the tip to touch the surface initially, others don't).
- Apply steady, even pressure to the bag while moving the tip along the lines or within the shapes on the easy piping frosting practice sheets.
- Focus on maintaining consistent pressure and speed to create uniform lines and shapes. Lift the bag quickly when ending a line or shape to create a clean break.
- Start with simple exercises like straight lines, zigzags, and dots. Fill entire lines on the piping sheets before moving to the next. Practice until your lines are relatively straight and consistent in thickness.
Essential Piping Techniques to Practice with Sheets
Once you've mastered basic lines and dots on your easy piping frosting practice sheets, it's time to move onto fundamental decorative techniques. These are the building blocks for countless cake and cupcake designs. Practicing these on frosting practice sheets allows you to perfect the motion and pressure required for each before applying them to baked goods.
Focusing on these techniques will significantly build your confidence and control. Remember that repetition is key. Spend dedicated time on each technique using your piping sheets until you feel comfortable and consistent results.
Mastering the Star Tip: Creating Stars and Shells
The star tip is one of the most versatile tips in a decorator's toolkit, and easy piping frosting practice sheets often include specific templates for practicing star and shell shapes.
- Stars: Using an open or closed star tip (like #21 or #1M), hold the bag perpendicular to the piping sheet. Apply firm, consistent pressure until the star reaches the desired size. Stop squeezing, then lift the bag straight up. Practice making stars of uniform size and height across your frosting practice sheets.
- Shells: Shells are a classic border technique. Hold the bag at about a 45-degree angle to the piping sheet, with the narrowest point of the star tip facing forward. Apply pressure to create the base of the shell, then slowly decrease pressure while pulling the tip forward in a slight curve, creating a tail. Stop squeezing completely and lift away. Practice making continuous rows of overlapping shells on your piping sheets, focusing on consistent size and smooth tails. Many piping practice sheets for frosting have curved lines specifically for practicing shell borders.
Practicing Rosettes: A Beginner's Guide
Rosettes are beautiful, simple swirls that are perfect for decorating cupcakes or as accents on a cake. The #1M star tip is ideal for creating large, lovely rosettes, and you can practice the motion easily on your piping sheets.
Hold the bag with a #1M tip perpendicular to the easy piping frosting practice sheet. Start in the center of where you want the rosette to be. Apply consistent pressure and pipe a tight circle, spiraling outwards from the center. Once you reach the desired size, stop squeezing and pull the bag tip towards the center of the swirl to create a neat finish.
Practice this motion on your frosting practice sheets, focusing on keeping the swirl tight and consistent. Try making rosettes of different sizes by varying how far you spiral outwards. You'll find templates on piping sheets specifically designed for practicing rosette placement and size.
Lines, Dots, and Swirls: Building Blocks of Piping
Even the most complex piped designs are often built upon basic lines, dots, and swirls. Perfecting these on your piping practice sheets is crucial.
- Lines: Using a round tip (#3, #5, or #12), hold the bag at a slight angle above the sheet. Apply consistent pressure and move the bag smoothly in a straight or curved line. Practice varying pressure to see how it affects line thickness. Piping sheets have numerous straight and curved lines to trace.
- Dots: Using a round tip, hold the bag perpendicular to the frosting practice sheet. Apply a quick burst of pressure to create a dot, then stop squeezing and lift straight up. Practice making dots of uniform size, and try making rows or patterns of dots on your piping sheets.
- Swirls (Cupcake Style): Using a large star tip like #1M, start in the center of a circle template on your easy piping frosting practice sheet (mimicking the top of a cupcake). Apply firm pressure and pipe a continuous spiral outwards and upwards, building height. Finish by pulling the tip towards the center or edge. Practice achieving a smooth, continuous swirl and consistent height on your piping sheets.
Creating Borders and Edges with Piping Practice
Borders are essential for finishing the edges of cakes and adding a professional touch. Piping practice sheets for frosting often include templates that mimic cake edges, allowing you to practice these techniques horizontally or vertically.
Techniques like shells (as mentioned above), zigzags, beads (large dots placed side-by-side), and ropes can all be practiced on piping sheets. For a simple zigzag border, use a star tip and move the bag back and forth while applying steady pressure along a line template on your frosting practice sheet. For a bead border, use a round tip and pipe uniform dots right next to each other, just touching. Practicing on the flat surface of the piping sheets helps you get the motion and spacing right before attempting it around the curved edge of a real cake.
Advanced Piping Techniques to Master
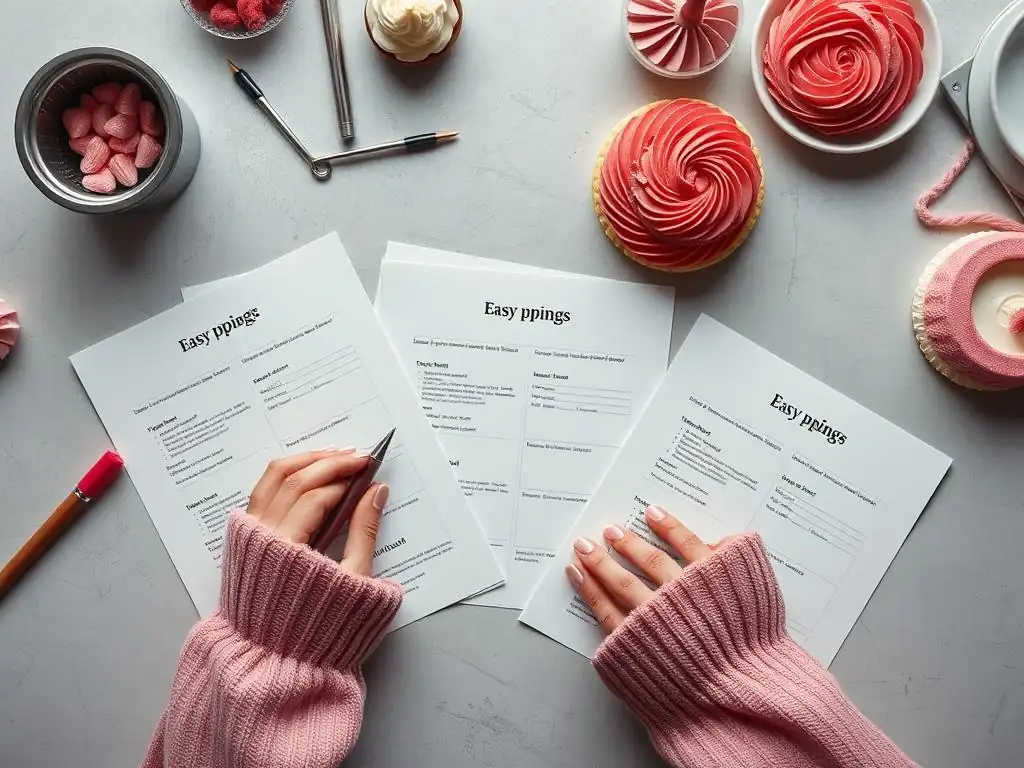
Once the basic techniques feel comfortable on your easy piping frosting practice sheets, you can begin exploring more advanced methods. These techniques often involve combining basic skills, working with multiple colors, or achieving very precise control. Practicing these on piping sheets is still highly recommended before tackling them on a finished project.
These advanced techniques require more finesse and control, which is why dedicated practice on frosting practice sheets is so beneficial. You can experiment and refine your approach without the pressure of a looming deadline or a cake waiting to be decorated.
Working with Multiple Colors in Piping
Adding multiple colors to a single piping bag can create beautiful effects like swirls, stripes, or color blocks. Practicing this on piping practice sheets allows you to see how the colors blend and flow without committing to a full cake design.
- Striped Effect: Load your piping bag with one color of frosting. Then, using a small spatula or spoon, smear stripes of a second color up the inside wall of the bag before adding the main color. As you pipe onto your easy piping frosting practice sheet, the second color will emerge as stripes.
- Marbled Effect: Place dollops of two or more colors of frosting onto a piece of plastic wrap. Gently swirl them together once or twice (don't overmix). Roll the plastic wrap into a log and place it seam-down into your piping bag. As you pipe onto your frosting practice sheets, the colors will marble together.
Experiment with different color combinations and loading techniques on your piping sheets to see the resulting effects.
Creating Intricate Designs and Patterns
Piping sheets can also serve as templates for practicing intricate patterns like lattice work, basketweave, or detailed floral elements. While these require significant control, breaking them down into smaller steps on the easy piping frosting practice sheets makes them more approachable.
For lattice work, practice piping parallel lines in one direction, then piping crossing lines in the other direction with consistent spacing on your piping sheets. For basketweave, you pipe vertical strips, then short horizontal strips over and under the verticals, alternating the pattern. Many piping practice sheets for frosting include grids or specific patterns to help you practice the spacing and layering required for these designs. It might take dozens of attempts on the piping sheets to get the rhythm and spacing just right for techniques like basketweave.
Achieving Smooth and Consistent Piping Lines
Achieving perfectly smooth and consistent lines, especially for outlining or writing, is a hallmark of skilled piping. This requires exceptional control over pressure and movement, which is best developed through repeated practice on piping practice sheets.
Hold the piping bag at a consistent angle and height above the frosting practice sheet. Apply continuous, even pressure, and move your hand smoothly and steadily along the desired path. Try to let the frosting fall onto the sheet rather than pushing it out. For writing, imagine the frosting is flowing from the tip like ink from a pen. Practice writing the alphabet and drawing freehand shapes on your piping sheets. Focus on maintaining the same line thickness throughout. This level of control often requires hundreds of hours of practice, making piping sheets an essential tool for dedicated learners.
Troubleshooting Common Piping Problems During Practice
Even with easy piping frosting practice sheets, you might encounter some common challenges. Don't get discouraged! These problems are part of the learning process. Identifying and addressing them during practice on your frosting practice sheets is much better than facing them on a finished cake.
Understanding the root cause of common issues will help you adjust your technique or your frosting. Using piping sheets provides a safe environment to experiment with solutions.
Frosting Consistency Issues: Too Thick or Too Thin?
Frosting consistency is perhaps the most frequent challenge when using piping practice sheets.
- Too Thin: If your piped shapes are spreading out, losing their definition, or looking blobby on the piping sheet, your frosting is likely too thin. This can happen if there's too much liquid (milk, cream, extract) or if the frosting is too warm. Solution: Stir in more powdered sugar, a tablespoon at a time, until the desired stiffness is reached. If warmth is the issue, refrigerate the frosting for 10-15 minutes, then stir it before using.
- Too Thick: If the frosting is difficult to squeeze from the bag, breaks or tears as it comes out, or looks rough and jagged on the easy piping frosting practice sheet, it's too thick. Solution: Stir in liquid (milk, cream, or even just a tiny bit of water) a half-teaspoon at a time, mixing thoroughly until the frosting is smooth and pipes easily.
Practice adjusting consistency on a small batch of frosting and test it on your piping sheets until you find the sweet spot.
Piping Bag Grip and Pressure Control
Issues with your grip or inconsistent pressure can lead to shaky lines, uneven shapes, or hand cramping when using piping sheets.
- Shaky Lines/Uneven Shapes: This often results from inconsistent pressure or an unsteady hand. Solution: Ensure you are twisting the top of the bag tightly to create even pressure from the start. Use your dominant hand to apply pressure from the twisted top, and consider using your non-dominant hand to gently guide the tip for finer control, especially when practicing on frosting practice sheets.
- Hand Cramping: This can happen if your frosting is too stiff or if you're squeezing too hard from the wrong part of the bag. Solution: Check your frosting consistency – it might be too thick. Ensure you are squeezing from the twisted top of the bag, using the weight of your hand and forearm rather than just your fingers. Take breaks when practicing on piping sheets if your hand starts to ache.
Preventing Air Bubbles in Your Frosting
Air bubbles are frustrating because they cause breaks or spurts in your piped lines on the easy piping frosting practice sheets.
- Cause: Air can get incorporated when mixing the frosting or when filling the piping bag.
- Solution 1 (During Filling): When filling the bag, try to push the frosting down towards the tip evenly with a spatula, avoiding trapping large pockets of air.
- Solution 2 (Before Piping): Once the bag is filled and twisted, gently squeeze the bag over the bowl or a piece of parchment paper until frosting comes out smoothly, pushing out any initial air bubbles. You can also hold the bag tip-up and gently tap the bag on the counter to help air bubbles rise to the top (twisted end).
- Solution 3 (During Piping): If you encounter an air bubble while piping on your piping sheets, stop squeezing momentarily, push the frosting back up slightly in the bag, and then resume piping. You might need to squeeze out a small bit of frosting to clear the bubble.
Regular practice on frosting practice sheets will help you become more aware of these issues and how to correct them quickly.
Maximizing Your Piping Practice: Tips and Tricks
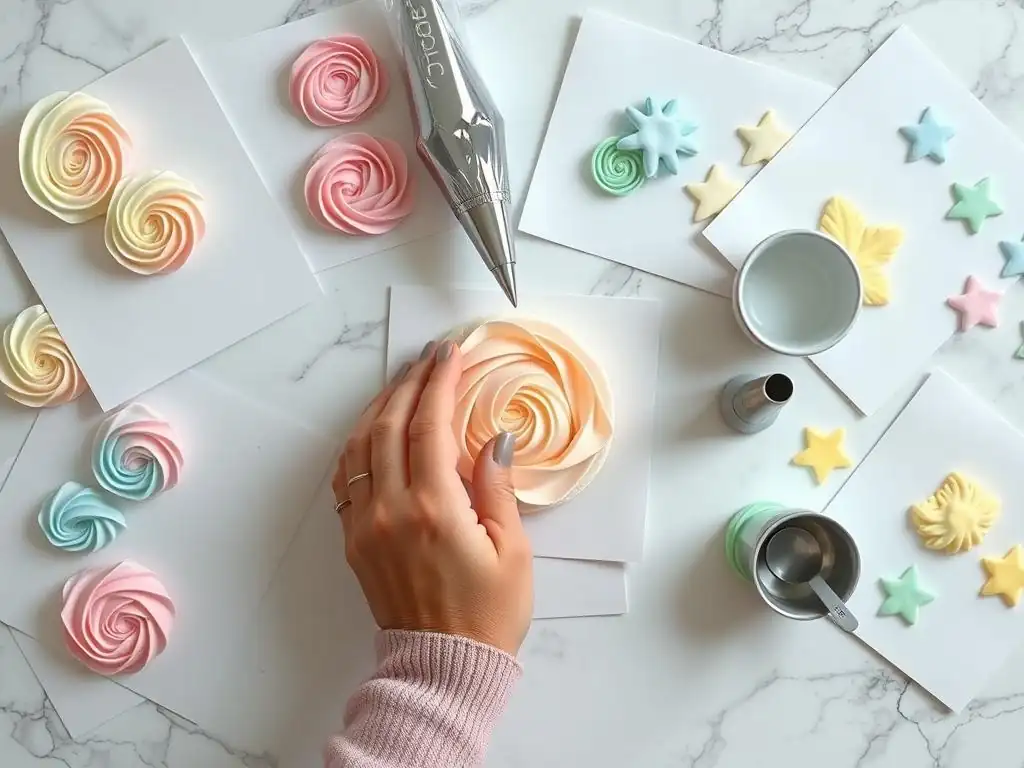
Using easy piping frosting practice sheets is a fantastic starting point, but how can you get the most out of your practice sessions? A few strategic approaches can help you improve more quickly and stay motivated. It's not just about the quantity of practice, but the quality and how you track your progress.
Incorporating these tips into your routine will make your time spent with piping sheets more effective and enjoyable, accelerating your journey towards mastering frosting decoration.
Regular Practice Schedule for Skill Improvement
Consistency is far more important than duration when it comes to building muscle memory and fine motor skills for piping.
- Instead of practicing for two hours once a month, aim for shorter, more frequent sessions. Even 15-30 minutes of focused practice on your frosting practice sheets several times a week can yield significant results.
- Schedule your practice time just like you would any other activity. Put it in your calendar.
- Choose a time when you are relatively focused and won't be easily interrupted.
Regularly engaging with your piping sheets keeps your skills sharp and allows for steady, incremental improvement rather than sporadic bursts. Many bakers find that practicing for 20 minutes daily for a week results in noticeably better control than practicing for over two hours in a single session.
Using Stencils and Templates for Complex Designs
While easy piping frosting practice sheets provide line art to trace, you can also use stencils or create your own templates for more complex designs.
- Place a plastic or paper stencil directly onto your piping sheet or parchment paper covering the sheet. Pipe frosting over the stencil cutouts to create shapes or patterns. This helps practice filling areas evenly and controlling the flow of frosting.
- Draw your own designs or patterns on paper and place them under parchment paper on your piping sheets. This allows you to practice piping specific elements for a planned cake design, like monograms, logos, or custom floral arrangements, before attempting them on the actual cake.
Using stencils and custom templates on your frosting practice sheets expands the possibilities for practice beyond the pre-printed lines.
Documenting Your Progress and Identifying Areas for Improvement
Seeing how far you've come is a powerful motivator. Documenting your practice sessions on piping sheets helps you track progress and identify areas that still need work.
- Keep a folder of your completed easy piping frosting practice sheets (or the parchment paper you piped on). Date each sheet.
- Alternatively, take photos of your piped practice designs.
- Review your past practice sheets or photos periodically. Look for improvements in line consistency, shape uniformity, and overall neatness.
- Note which techniques you still find challenging. Dedicate more practice time on your piping sheets to those specific areas. For example, if your shells are still inconsistent, spend your next few practice sessions focusing solely on shells on your frosting practice sheets.
This reflective practice turns your time with piping sheets into a structured learning experience, helping you target your efforts effectively.
Beyond Practice Sheets: Next Steps in Your Piping Journey
Mastering techniques on easy piping frosting practice sheets is a crucial step, but it's just the beginning! The ultimate goal is to confidently apply your new skills to decorate real cakes, cupcakes, cookies, and other baked goods. Transitioning from the flat surface of piping sheets to the curved or vertical surfaces of actual desserts requires a slight adjustment, but the foundation you've built will make this transition much smoother.
As you grow more comfortable, you can continue to challenge yourself with new designs and techniques. And remember, the baking community is a wonderful source of inspiration and support as you continue your piping journey beyond the piping sheets.
Applying Your Skills to Real Cakes and Cupcakes
Once you feel confident with a technique on your piping practice sheets, it's time to try it on a real baked item.
- Start with low-stakes projects, like decorating a batch of cupcakes. Cupcakes are smaller and easier to handle than a large cake, making them perfect for translating skills from easy piping frosting practice sheets to 3D surfaces.
- Begin by practicing the techniques you feel most confident with on your frosting practice sheets, such as simple swirls, stars, or borders around the base of a cupcake.
- When moving to cakes, practice on a dummy cake first if you're nervous about decorating a real one. A foam dummy cake provides the same surface and angles as a real cake but can be scraped off and reused endlessly, similar to using parchment paper over your piping sheets.
The transition requires adjusting your angle and hand position for curved surfaces, but the pressure control and motion you practiced on piping sheets will be directly applicable.
Exploring Different Piping Techniques and Designs
The world of piping is vast! Once you're comfortable with the basics learned on your piping practice sheets, there are countless other techniques and designs to explore.
Consider trying:
- Floral piping (roses, leaves, mums) using specific flower tips and flower nails.
- Brush embroidery.
- Lace patterns.
- Figure piping.
Many of these advanced techniques can still be broken down and practiced in stages on easy piping frosting practice sheets before attempting them on a final project. For instance, you can practice piping individual petals or leaf shapes on your piping sheets before assembling them into a full flower on a cake.
Joining the BakeWithEase Community for Inspiration and Support
Learning to pipe is a journey, and connecting with other bakers can provide inspiration, tips, and encouragement. The BakeWithEase community is a great place to share your progress, ask questions, and see the amazing creations others are making.
- Share photos of your practice sessions on frosting practice sheets or your decorated baked goods.
- Ask for advice on troubleshooting specific piping problems.
- Find inspiration for new techniques or designs to try.
- Celebrate your successes and learn from the experiences of others who are also mastering piping skills, perhaps having started with easy piping frosting practice sheets just like you.
Being part of a supportive community makes the learning process more fun and helps you stay motivated as you continue to practice and improve.
Conclusion: Embrace the Piping Practice and Elevate Your Baking
Mastering frosting decoration is a skill that adds immense joy and creativity to baking. Easy piping frosting practice sheets are an indispensable tool on this journey, providing a fundamental, low-stakes way to build the necessary control, confidence, and muscle memory. From simple lines and dots to intricate rosettes and borders, practicing on piping sheets lays the groundwork for beautiful results on real cakes and cupcakes.
Embrace the process of practice. Dedicate regular time, focus on one technique at a time, and don't be afraid to make mistakes – that's what the frosting practice sheets are for! With consistent effort and the right tools and techniques, you'll see remarkable improvement in your piping skills. So grab your piping bag, choose your favorite piping practice sheets for frosting, and start your journey to becoming a piping pro. Your future baked creations will thank you!
Frequently Asked Questions
What exactly are easy piping frosting practice sheets and why should I use them?
Piping practice sheets are templates with patterns to help you improve your frosting skills. They're useful for developing muscle memory and achieving cleaner lines before decorating a real cake.
Where can I find easy piping frosting practice sheets suitable for beginners?
BakeWithEase.com offers printable piping practice sheets specifically designed for beginners. You can also find them online through search engines or on sites like Pinterest and Etsy.
What type of frosting is best to use with easy piping frosting practice sheets?
A stiff buttercream frosting is ideal because it holds its shape well and is easy to work with. Avoid runny frostings that will spread too quickly and make it difficult to follow the patterns.
How do I effectively use easy piping frosting practice sheets for practice?
Place the sheet under parchment paper and pipe directly onto the parchment following the lines. Scrape the frosting back into the bag and repeat, focusing on consistent pressure and smooth movements.
Are easy piping frosting practice sheets only for cake decorating, or can they be used for other things?
While primarily used for cake decorating, you can also use them to practice piping techniques for cupcakes, cookies, and other desserts. The skills learned are transferable to various decorating applications.
Final Reflection: Mastering the Art of Piping, One Practice Sheet at a Time
The pursuit of perfectly piped frosting is more than just a culinary skill; it's a testament to patience, precision, and the joy of creation. In today's visually-driven world, the ability to decorate cakes and pastries with elegant frosting designs is increasingly valued, whether for professional endeavors or personal enjoyment. This article has explored the simple yet powerful tool of practice sheets, demonstrating how accessible and effective they are in honing your piping skills.
The impact of readily available resources like practice sheets extends beyond the individual baker. They democratize access to a skill once considered the exclusive domain of professional pastry chefs. This accessibility fosters creativity and self-expression, allowing anyone to transform simple baked goods into stunning works of art. The best way to learn is by doing,
and practice sheets provide the perfect canvas for experimentation and improvement. This sentiment resonates deeply with me, as I've witnessed firsthand the transformative power of dedicated practice in mastering this seemingly intricate skill.
Now, it's your turn. Consider the possibilities unlocked by consistent practice. Don't be afraid to experiment with different piping techniques, nozzles, and frostings. Embrace the imperfections along the way, for they are stepping stones to mastery. Grab your practice sheets, your favorite frosting, and embark on a journey of creative expression. The beauty of perfectly piped frosting awaits, and the only limit is your imagination.
Unleash Your Inner Pastry Chef: Master Piping Techniques Today!
Thanks for taking the time to explore the world of piping with us! We hope you've gained valuable insights into perfecting your cake decorating skills. Now it's time to put your knowledge into action.
- Practice your favorite piping techniques: Grab your piping bags, frosting, and practice sheets, and start experimenting! Focus on mastering at least one new technique today.
- Share your creations: Show off your progress on social media using #BakeWithEasePiping – let's inspire each other!
- Challenge a friend to a piping duel: Turn practice into a fun competition – who can create the most impressive rose?
Ready to transform your baking from good to gorgeous? What's the first piping technique you're going to master?