
Meringue Peaks: Piping Techniques for Delicate Toppings

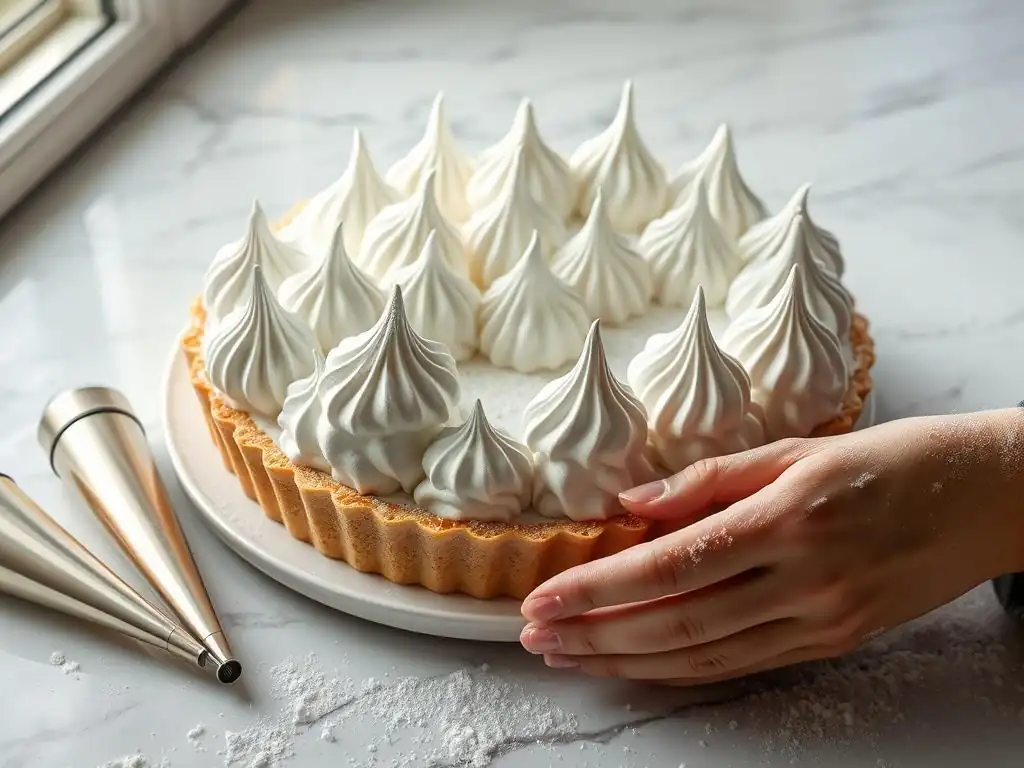
Welcome to BakeWithEase, where we believe everyone can create stunning desserts! Discover the secrets to transforming simple ingredients into extraordinary baked goods. Are you ready to elevate your dessert game? This week, we're diving deep into the art of perfecting meringue peaks piping techniques. Learn the essential skills and insider tips to create those picture-perfect, swoon-worthy meringue toppings. Intrigued? Let's get baking!
- BakeWithEase: Mastering Meringue Peak Piping for Exquisite Desserts
- Understanding Meringue: The Foundation for Perfect Peaks
- Essential Piping Tools for Meringue Mastery
- Mastering Meringue Peak Piping Techniques: A Step-by-Step Guide
- Baking Your Meringue Peaks to Perfection
- Troubleshooting Common Meringue Piping Problems
- Advanced Meringue Piping Techniques
- Perfecting Meringue Peaks: Recap and Best Practices
-
Frequently Asked Questions
- How crucial is the temperature of the egg whites for achieving stable meringue peaks?
- What type of piping bag and tip is recommended for creating intricate meringue designs?
- What is the best way to prevent my meringue from weeping or becoming soggy after piping?
- What are some common mistakes to avoid when piping meringue, especially for beginners?
- Can I add flavorings or colors to my meringue before piping, and if so, what precautions should I take?
- Final Reflection: The Art and Science of the Perfect Meringue Peak
- Unleash Your Inner Pastry Chef: Master the Meringue!
BakeWithEase: Mastering Meringue Peak Piping for Exquisite Desserts
Elevate Your Baking: A Guide to Perfect Meringue Peaks
Creating beautiful, stable meringue peaks is a hallmark of many classic desserts, from the airy topping on a lemon meringue pie to delicate meringue cookies and impressive pavlovas. Achieving that perfect balance of crispy exterior and soft, cloud-like interior requires understanding the science behind meringue and mastering the art of piping. This guide on BakeWithEase will walk you through the essentials, from selecting the right ingredients and tools to mastering the fundamental piping techniques that will transform your baked goods into stunning edible art.
Perfecting meringue peaks piping techniques is a skill that develops with practice, but starting with a solid foundation makes the journey much smoother. We'll explore how different types of meringue behave under pressure, how subtle changes in your hand motion or piping tip can dramatically alter the final look, and how to troubleshoot common issues like spreading or weeping. By focusing on precision and consistency, you'll gain the confidence to tackle any recipe calling for piped meringue, adding elegance and texture to your sweet creations.
Understanding Meringue: The Foundation for Perfect Peaks
Types of Meringue: Italian, French, and Swiss Meringue Explained
Meringue is essentially a foam made from whipped egg whites and sugar, but the method of combining these ingredients results in three distinct types, each with unique properties. French meringue, the simplest, involves whipping cold egg whites with granulated sugar added gradually until stiff peaks form. It's the least stable and typically baked immediately, commonly used for cookies or pavlova bases. It often uses a ratio of about 2 parts sugar to 1 part egg white by weight.
Swiss meringue is made by whisking egg whites and sugar together over a hot water bath until the sugar dissolves and the mixture reaches about 130-140°F (55-60°C), then whipping it off the heat until cool and stiff. This gentle heating process denatures the egg white proteins, resulting in a more stable, glossy meringue ideal for frostings or as a topping that can be lightly browned.
Italian meringue is the most stable, created by pouring a hot sugar syrup (heated to 240-245°F / 115-118°C) into whipping egg whites in a slow, steady stream. It's often used for buttercream, mousses, or as a raw topping that only requires torching, offering incredible structure for complex piping.
Key Ingredients for Stable Meringue: Sugar, Egg Whites, and Cream of Tartar
The success of your meringue, and thus your ability in perfecting meringue peaks piping techniques, hinges on the quality and proper handling of a few key ingredients. Fresh, room-temperature egg whites are crucial; older eggs tend to whip better, but freshness ensures safety. Ensure absolutely no trace of fat (like egg yolk or oil) is present, as fat prevents the egg whites from foaming properly. Using metal or glass bowls is often recommended over plastic, which can harbor greasy residues.
Sugar plays a vital role in stabilizing the whipped egg whites by absorbing moisture and providing structure. Granulated sugar is standard for French meringue, while superfine or caster sugar dissolves more easily, which is beneficial for Swiss meringue. Cream of tartar, a form of tartaric acid, or a few drops of lemon juice or vinegar, acts as a stabilizer. For example, adding just 1/8 teaspoon of cream of tartar per large egg white helps strengthen the protein structure, allowing the meringue to reach higher volume and maintain stiff peaks that hold their shape beautifully when piped.
Achieving Stiff Peaks: The Secret to Piping Success
Reaching the "stiff peak" stage is non-negotiable for successful meringue piping. This occurs when the whipped egg whites stand straight up when the whisk is lifted, with only the very tip potentially curling slightly. Under-whipping will result in a weak, runny meringue that spreads rather than holds a piped shape. Over-whipping, conversely, causes the proteins to break down, leading to a grainy texture and potential separation, also unsuitable for crisp, defined peaks.
The process usually begins by whipping egg whites on medium speed until frothy, then gradually increasing speed as sugar is added slowly. For French meringue, add sugar a tablespoon at a time, allowing it to dissolve between additions. For Swiss and Italian, the sugar is incorporated differently as described above. Watch the meringue closely as it approaches the stiff peak stage; it will become glossy and opaque. Stop whipping as soon as the peaks hold their shape firmly to ensure you have the ideal consistency for perfecting meringue peaks piping techniques.
Essential Piping Tools for Meringue Mastery
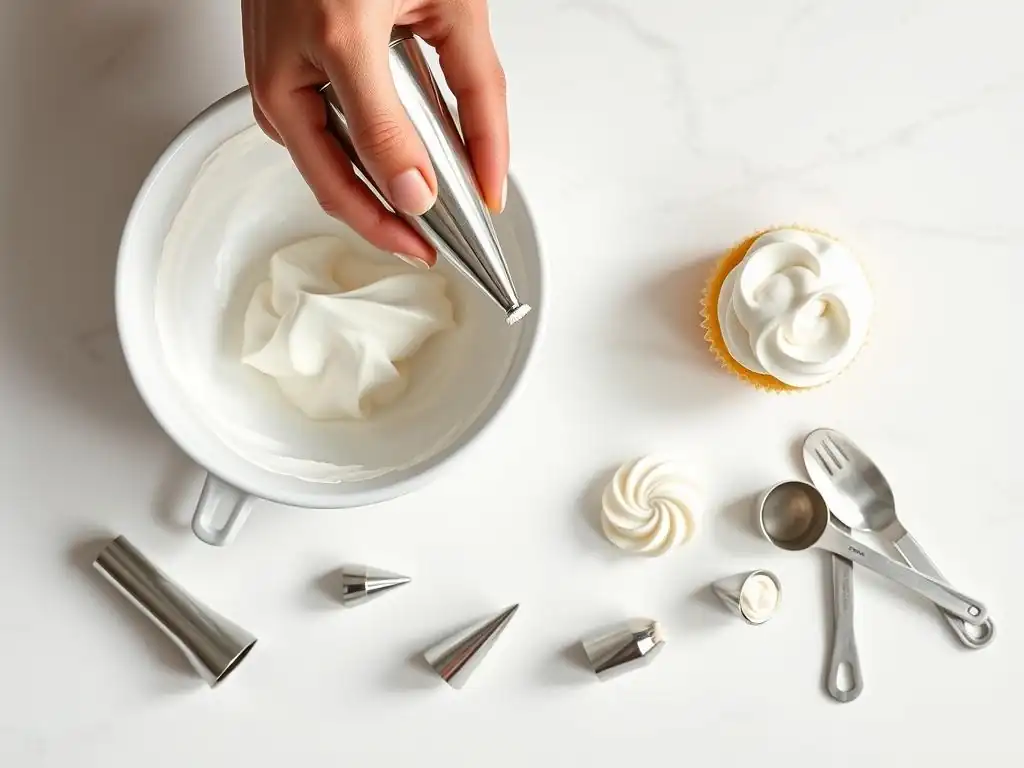
Choosing the Right Piping Bag: Disposable vs. Reusable
Selecting the appropriate piping bag is the first step in effectively piping meringue. Disposable piping bags, usually made of plastic, are convenient as they require no cleaning. They come in various sizes, with larger bags being suitable for bigger batches of meringue. While practical for home bakers, they can be less sturdy than reusable options and contribute to waste.
Reusable piping bags are typically made from coated cotton or silicone. They are more durable and environmentally friendly. Silicone bags are often non-slip and easy to clean, while coated cotton bags offer good grip. Reusable bags require thorough washing and drying after each use to prevent bacterial growth and ensure no residual fat contaminates future meringues. The choice often comes down to personal preference, budget, and frequency of use, but both types are effective for perfecting meringue peaks piping techniques.
Selecting the Best Piping Nozzles for Meringue Peaks: Star, Round, and Specialty Tips
The piping nozzle, or tip, determines the shape of your meringue peaks. A few basic types are essential for beginners learning to pipe meringue. Star tips (open or closed) are perhaps the most popular for meringue, creating beautiful fluted peaks with ridges. A small open star tip like a #1M or #21 is versatile for swirls and rosettes, while larger ones make bolder statements.
Round tips create smooth, rounded peaks or dots. A small round tip (#10 or #12) is perfect for creating petite meringue kisses, while larger ones can be used for larger, smooth swirls. Specialty tips, such as petal tips or basketweave tips, can create more elaborate textures and patterns. When starting out, mastering the star and round tips provides a solid foundation for perfecting meringue peaks piping techniques before experimenting with more complex designs.
Preparing Your Piping Bag for Meringue: A Step-by-Step Guide
Properly preparing your piping bag ensures a smooth piping experience and prevents messy leaks.
- Choose your tip: Select the desired piping nozzle.
- Insert the tip: If using a coupler, attach the two parts through the bag opening and screw the ring on the outside. If not using a coupler, drop the tip into the bag and push it down firmly. For bags without a pre-cut hole, snip off just enough of the tip to allow the narrow end of the nozzle to poke through. Start small; you can always cut more.
- Fold the top: Fold the top edge of the piping bag down to create a cuff. This helps keep the opening wide and clean as you fill it.
- Fill the bag: Use a spatula to gently scoop the meringue into the bag. Avoid overfilling, as this makes the bag difficult to handle and control. Fill it about two-thirds full.
- Unfold and twist: Unfold the cuff and push the meringue down towards the tip, removing any air pockets. Twist the top of the bag securely to seal the meringue inside. This twisted section is where you will apply pressure when piping, which is key to perfecting meringue peaks piping techniques.
Mastering Meringue Peak Piping Techniques: A Step-by-Step Guide
Technique 1: The Classic Swirl - Creating Simple and Elegant Peaks
The classic swirl is a fundamental technique for topping cupcakes, pies, or creating individual meringue cookies. It results in elegant, ridged peaks using a star tip.
Achieving Consistent Swirls: Pressure Control and Bag Angle
Consistency in size and shape is key to beautiful swirls. Hold the twisted end of the piping bag firmly in your dominant hand, using your other hand to guide the bag. Start piping by applying steady, even pressure. Begin at the center of where you want the swirl to be, holding the bag vertically or at a slight angle (around 90 degrees or 45 degrees, depending on the desired look). Pipe a dot, then move the bag in a circular motion, spiraling outwards or upwards while maintaining pressure.
As you complete the swirl, gradually release pressure and lift the bag straight up to create a clean peak at the top. Practice on a piece of parchment paper until you can create consistently sized and shaped swirls. The amount of pressure determines the thickness of the meringue being piped, and the speed of your circular motion affects the height and number of ridges in the swirl. Mastering this control is vital for perfecting meringue peaks piping techniques.
Troubleshooting Swirl Imperfections: Tips for Smooth, Even Peaks
Common issues with swirls include uneven thickness, wobbly lines, or peaks that don't stand up straight. Uneven pressure is often the culprit for wobbly lines; focus on applying consistent pressure throughout the entire swirl motion. If the meringue seems to break or look rough, your meringue might be slightly over-whipped or not smooth enough; ensure sugar is fully dissolved, especially in Swiss or Italian meringue.
Peaks that flop over might indicate under-whipped meringue or a meringue that is too warm (especially French meringue, which is best piped immediately). Ensure your meringue is whipped to firm stiff peaks and that you release pressure cleanly at the end of the swirl before lifting the bag. For smoother ridges, ensure your star tip is clean and free of dried meringue.
Technique 2: The Spiked Peak - Adding Texture and Height
Spiked peaks add dynamic texture and height, often used for dramatic toppings on tarts or individual meringue cookies. They are typically created with a star tip and a quick upward motion.
Creating Sharp Spikes: Quick Release and Upward Motion
To create a spiked peak, hold the piping bag with a star tip vertically above the surface where you want the spike. Apply firm, steady pressure to create a base of meringue. While still applying pressure, quickly lift the bag straight up, pulling a column of meringue upwards.
As the meringue reaches the desired height, quickly stop applying pressure and flick your wrist slightly, or simply lift the bag straight up very rapidly. This quick release, combined with the upward motion, causes the meringue to stretch and break cleanly at the tip of the nozzle, leaving a sharp, distinct spike. The speed of the upward pull and the sudden stop of pressure are key to achieving that pointed tip.
Varying Spike Height and Density: Experimenting with Different Looks
The height of the spike is determined by how far you pull the bag up before releasing pressure. A short pull creates a small spike, while a longer pull creates a taller, more dramatic one. The density of the spikes depends on how closely you pipe them together. Piping them close creates a fluffy, cloud-like texture covering the surface, while spacing them further apart results in more defined, individual spikes.
Experiment with different tip sizes and pulling speeds to achieve various effects. A smaller tip creates finer spikes, while a larger tip makes bolder ones. Perfecting meringue peaks piping techniques with spikes adds a beautiful textural element that catches light and provides visual interest.
Technique 3: The Rosette Meringue - A More Elaborate Design
Rosettes are beautiful, floral-like shapes that add a touch of elegance. They are typically piped using an open or closed star tip.
Piping Rosettes: Overlapping Layers for a Floral Effect
To pipe a rosette, hold the piping bag with a star tip vertically or at a slight angle over the surface. Start in the center and apply pressure, piping a small dot or base. Then, without lifting the bag, move in a tight circular motion around the center point, overlapping the meringue as you go.
Maintain consistent pressure and speed as you circle outwards. The size of the rosette is determined by how many times you circle and how far out you go. Once the rosette reaches the desired size, stop applying pressure and lift the bag away cleanly from the side of the rosette to finish the shape. Practice piping on parchment paper first to get a feel for the motion and pressure needed to create evenly layered rosettes.
Adding Color to Rosettes: Creating Ombre and Multicolored Effects
Adding color can make meringue rosettes even more stunning. For a solid color, gently fold gel food coloring into the finished meringue until evenly distributed. For ombre or striped effects, you can paint stripes of gel food coloring inside the piping bag before adding the meringue.
To create ombre rosettes, paint one or two stripes of dark food coloring along the inside wall of the piping bag. Then, fill the bag with plain white meringue. As you pipe, the meringue will pick up the color from the sides, creating a gradient effect from dark to light. For multicolored rosettes, you can stripe the bag with multiple colors. Remember that gel colors are highly concentrated, so start with a small amount and add more as needed to achieve the desired shade without deflating the meringue.
Baking Your Meringue Peaks to Perfection
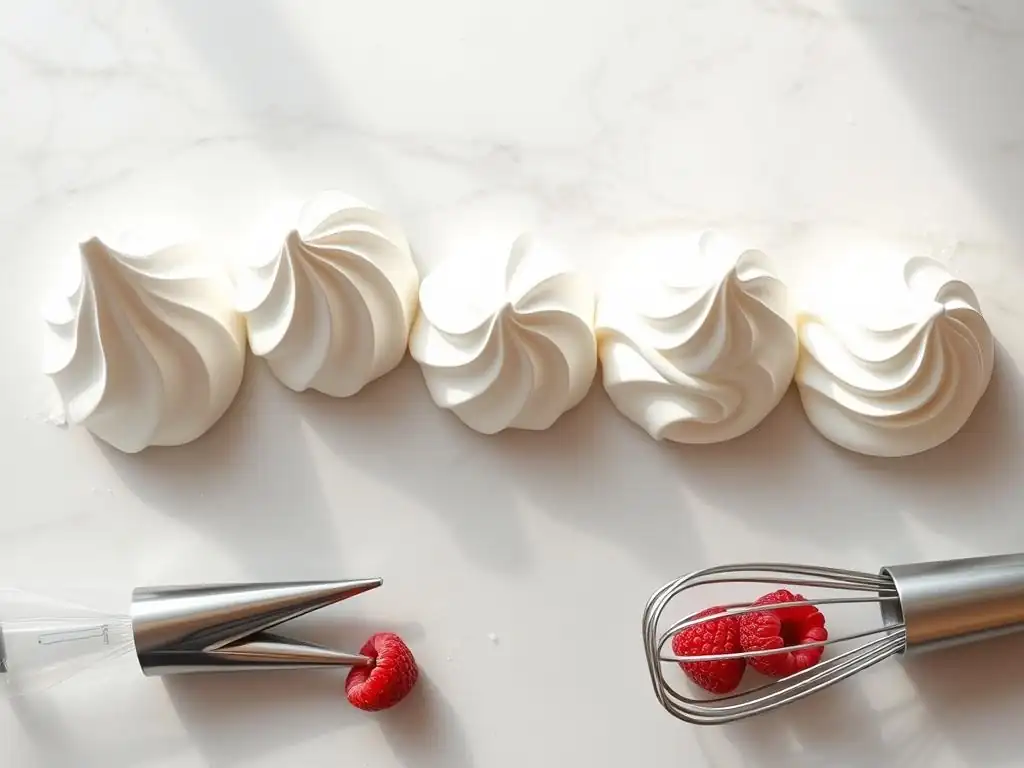
Oven Temperature and Baking Time: Achieving a Crispy Exterior and Soft Interior
Baking meringue peaks isn't like baking a cake; it's more akin to drying them out at a low temperature. High heat will cause the sugar to caramelize and the meringue to brown too quickly, or even crack and collapse. The ideal oven temperature for meringue is typically very low, ranging from 200°F to 250°F (90°C to 120°C). The exact temperature depends on the size of your meringue pieces and your oven.
Baking time is also extended at these low temperatures. Small meringue kisses might take 45 minutes to an hour, while larger pavlovas or substantial meringue toppings can take 1.5 to 2.5 hours or even longer. The goal is for the meringue to feel firm and dry to the touch on the outside and easily lift off the parchment paper. Some recipes call for turning off the oven after baking and letting the meringues cool completely inside with the door slightly ajar, which further helps to dry them out and prevent cracking.
Preventing Cracking and Browning: Tips for Even Baking
Cracking in meringue often occurs due to rapid temperature changes or too high a baking temperature. To prevent this, ensure your oven temperature is accurate (an oven thermometer can be helpful) and avoid opening the oven door frequently during baking. Letting the meringue cool gradually inside the turned-off oven is also a key step in preventing thermal shock that can lead to cracks.
Browning is a result of the Maillard reaction and sugar caramelization at higher temperatures. Keeping the oven temperature low is the primary way to prevent unwanted browning, aiming for a pale, often white or cream-colored meringue. If your oven has hot spots, rotating the baking sheet halfway through the baking time can help ensure even drying and prevent some peaks from browning while others remain pale.
Cooling Meringue Peaks: Avoiding Shrinkage and Softening
Proper cooling is just as important as baking for achieving perfectly crisp meringue peaks. Once baked and the oven is turned off, it's often best to leave the meringues inside the oven as it cools down gradually. This slow cooling process helps prevent shrinkage and maintains their crisp texture. Removing them too soon into a cooler, potentially humid environment can cause them to cool too quickly, leading to shrinkage or softening ("weeping").
Store completely cooled meringues in an airtight container at room temperature. Humidity is the enemy of crisp meringue; moisture from the air will cause them to become soft and sticky. Ensure they are fully cooled before storing to prevent condensation buildup in the container. Properly stored, baked meringue peaks can last for several days, maintaining their delightful crunch.
Troubleshooting Common Meringue Piping Problems
Meringue Spreading: Addressing Weak Peaks and Runny Consistency
If your beautifully piped meringue peaks spread out on the baking sheet instead of holding their shape, the most likely culprit is an under-whipped meringue. The egg whites did not reach the stiff peak stage necessary to create a stable structure capable of supporting its own weight when piped.
To fix this (before piping), you would need to continue whipping the meringue until it reaches stiff peaks. If it has already been piped and is spreading, there's little you can do for that batch other than potentially baking it longer at a very low temperature to dry it out as much as possible, although it won't have defined peaks. Ensure all equipment is grease-free, sugar is fully dissolved (especially in Swiss/Italian), and you are whipping to the correct consistency when starting a new batch, which is crucial for perfecting meringue peaks piping techniques.
Meringue Weeping: Preventing Moisture Absorption and Softening
Meringue "weeping" refers to the formation of sugary liquid beads or pools on the surface or base of baked meringue. This is usually caused by sugar not being fully dissolved, or the meringue absorbing moisture from the air, especially in humid conditions. French meringue is particularly susceptible to weeping.
Using superfine sugar or ensuring granulated sugar is completely dissolved (as in Swiss or Italian meringue) can help. Baking at a low temperature for a sufficient time to thoroughly dry the meringue is also key. Storing cooled meringue in an airtight container immediately helps protect it from ambient humidity. If weeping occurs after baking, it's often unavoidable for that batch, but understanding the causes helps prevent it in the future.
Uneven Peaks: Correcting Inconsistent Piping Pressure
Piping uneven peaks, where some are tall and defined while others are short or lopsided, is typically a result of inconsistent pressure on the piping bag or variations in the speed and angle of piping. If you squeeze harder in some areas than others, more meringue will be expelled, leading to uneven thickness and height.
Practice is the best way to achieve consistent pressure. Hold the twisted end of the bag firmly and use steady, even pressure throughout the piping motion. Pay attention to maintaining the same angle and speed for each peak or swirl. If using stiff meringue (like Italian), it might require more consistent, firm pressure than a softer French meringue. Focusing on these elements is vital for perfecting meringue peaks piping techniques with uniform results.
Advanced Meringue Piping Techniques
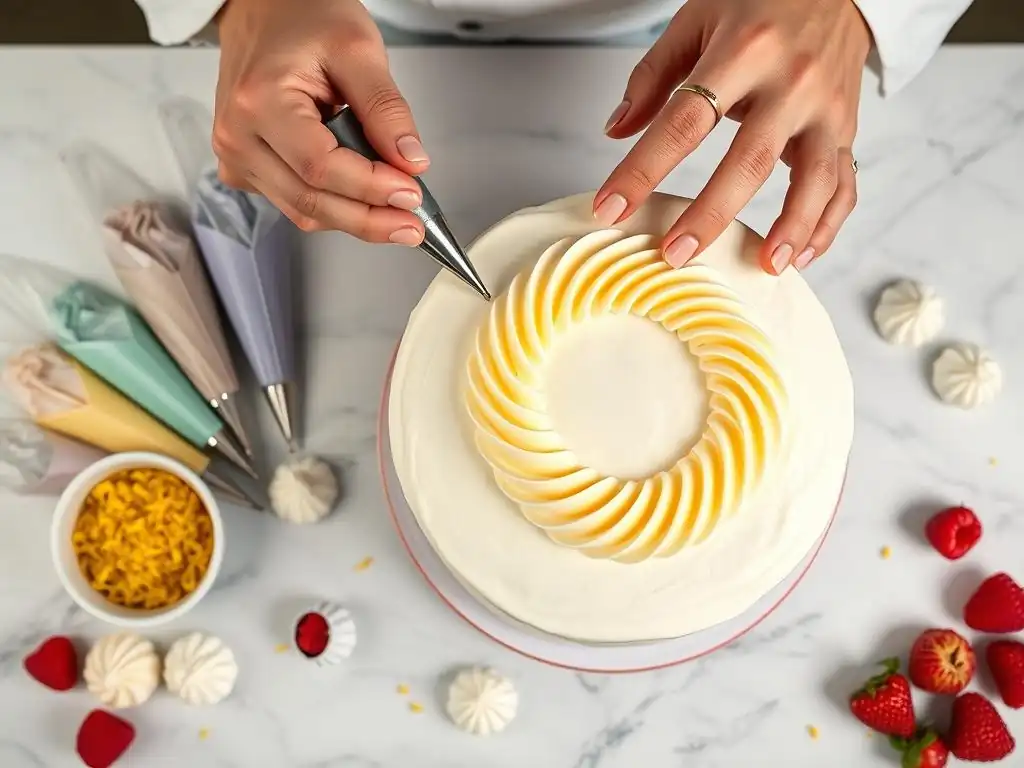
Creating Meringue Kisses: Small, Bite-Sized Delights
Meringue kisses are small, often conical, bite-sized meringues. They are typically piped using a round tip or a small star tip for a slightly ridged surface. To create them, hold the bag vertically just above the baking sheet, apply pressure to create a small mound, then quickly stop pressure and lift straight up to form a peak.
Varying the amount of pressure and the speed of the lift allows you to create kisses of different sizes. They are baked at a low temperature until crisp all the way through. Coloring or flavoring the meringue before piping can create fun variations, making these simple shapes a canvas for creativity while practicing your skills in perfecting meringue peaks piping techniques.
Piping Meringue Flowers: More Complex Floral Designs
Piping meringue flowers involves using specific tips, such as petal tips, and mastering more intricate hand movements. Petal tips have one narrow edge and one wider edge; by controlling the angle of the tip and pressure, you can create realistic petals.
Common meringue flowers include roses, hydrangeas, or basic blossoms. These require building up layers of meringue petals or dots to form the flower shape. For instance, a rose might start with a central cone of meringue, with petals piped around it. Mastering these designs takes practice and a good understanding of how the meringue flows from different tips, building upon the basic control learned from perfecting meringue peaks piping techniques.
Using Templates for Intricate Meringue Patterns
For highly intricate or uniform meringue designs, such as lattice patterns or specific shapes, using a template can be invaluable. You can draw your design onto parchment paper, then flip the parchment over so the drawing is visible through the paper.
Place this template on your baking sheet and pipe the meringue directly onto the parchment, following the lines of the template. This method is particularly useful for creating components of a larger dessert, like meringue fences or decorative elements. Ensure the meringue is stiff enough to hold the fine details of the pattern.
Perfecting Meringue Peaks: Recap and Best Practices
Key Takeaways for Stunning Meringue Toppings
Achieving stunning meringue peaks relies on a few critical factors: using clean, grease-free equipment; ensuring your egg whites are whipped to the correct stiff peak consistency; selecting the appropriate meringue type for your application; and mastering basic piping pressure and motion. Low and slow baking is essential for a crisp, dry finish without browning or cracking.
Proper cooling and airtight storage are also vital for maintaining texture. Don't be discouraged by initial imperfections; perfecting meringue peaks piping techniques takes practice. Each attempt provides valuable lessons in pressure control, consistency, and understanding how your meringue behaves.
Resources for Further Learning
To continue your journey in perfecting meringue peaks piping techniques, explore various online tutorials and videos that demonstrate specific techniques in action. Experiment with different meringue recipes (French, Swiss, Italian) to understand their unique properties and how they pipe differently. Practice piping on parchment paper before tackling your final dessert. Consider investing in a variety of piping tips to expand your design capabilities. BakeWithEase.com offers additional guides and recipes that feature meringue, providing more opportunities to hone your skills and create beautiful, delicious desserts.
Frequently Asked Questions
How crucial is the temperature of the egg whites for achieving stable meringue peaks?
The temperature is very important! Egg whites whip best at room temperature, allowing them to incorporate more air for a stable, voluminous meringue. Cold egg whites won't whip as well.
What type of piping bag and tip is recommended for creating intricate meringue designs?
A disposable piping bag is recommended for easy cleanup. A star tip (various sizes) is ideal for creating classic swirls and rosettes, offering precise control.
What is the best way to prevent my meringue from weeping or becoming soggy after piping?
Ensure the meringue is fully cooked and dry before piping. Using a low oven temperature for an extended period helps prevent this. Storing piped meringues in an airtight container is also key.
What are some common mistakes to avoid when piping meringue, especially for beginners?
Overfilling the piping bag can lead to loss of control. Also, avoid uneven pressure while piping, which can result in inconsistent designs. Practicing on parchment paper first is helpful.
Can I add flavorings or colors to my meringue before piping, and if so, what precautions should I take?
Yes, but add flavorings sparingly to avoid deflating the meringue. Gel food coloring is preferred over liquid, as it won't alter the consistency as much.
Final Reflection: The Art and Science of the Perfect Meringue Peak
Mastering the art of meringue peaks isn't just about achieving a visually stunning dessert; it's about understanding the delicate balance between science and artistry that elevates baking from a task to a true craft. The precise techniques detailed in this article—from the careful whisking of egg whites to the controlled pressure of the piping bag—are crucial not only for achieving those coveted stiff peaks, but also for unlocking the potential of countless delicious creations. The seemingly simple meringue is, in fact, a testament to the power of precision and attention to detail.
The journey of perfecting meringue peaks is a deeply personal one. It's about embracing the imperfections, learning from each failed attempt, and ultimately finding joy in the process of creation. The best things in life are worth fighting for,
and the same holds true for achieving that perfect, glossy peak. The subtle nuances in texture, the satisfying firmness, the sheer elegance of a well-piped meringue—these are rewards that resonate far beyond the simple act of baking. It's a reflection of patience, dedication, and a deep appreciation for the transformative power of ingredients.
Now, it's your turn. Don't be afraid to experiment, to push your boundaries, and to discover your own unique style of piping. Embrace the challenges, celebrate the successes, and most importantly, savor the journey of perfecting your meringue peaks. The path to mastery is paved with practice and passion, and the rewards—both culinary and personal—are immeasurable. So grab your whisk, your piping bag, and your freshest eggs, and let the adventure begin!
Unleash Your Inner Pastry Chef: Master the Meringue!
Thanks for taking the time to explore the art of meringue piping with us! We hope you now feel confident in creating those perfect, delicate peaks. Ready to put your new skills to the test?
- Bake a masterpiece! Try piping your own meringue cookies or a stunning pavlova using the techniques we've shared. Experiment with different nozzles and designs to find your signature style.
- Share your creations! Post a picture of your meringue masterpiece on social media and tag us – we'd love to see your baking journey!
- Explore further meringue magic: Dive deeper into the world of meringue by experimenting with different flavors and adding color to your creations.
What unique flavor combination will you create with your perfectly piped meringue?