
The Art of the Rosette: Basic Piping for Beautiful Swirls

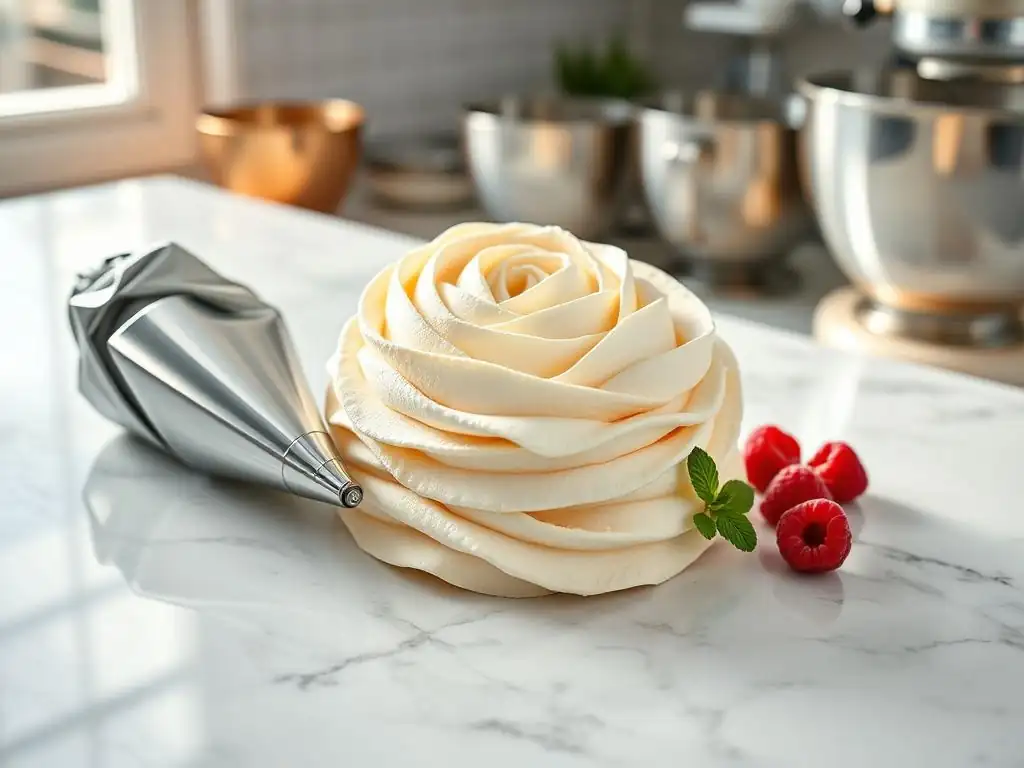
Welcome to BakeWithEase, your guide to unlocking baking bliss! Ever dreamt of creating picture-perfect desserts that look as good as they taste? This week, we're diving into the captivating world of rosette piping. Discover our easy rosette piping techniques and transform ordinary cakes and cupcakes into stunning works of edible art. Intrigued? Let's get started and unveil the secrets to achieving those elegant swirls!
- Mastering the Art of Rosette Piping: A Comprehensive Guide - BakeWithEase
- Introduction to Rosette Piping: Elevate Your Cakes and Cupcakes
- Essential Tools for Rosette Piping Success
- Mastering the Rosette Piping Technique: A Step-by-Step Guide
- Rosette Piping Variations: Exploring Different Styles
- Troubleshooting Common Rosette Piping Problems
- Advanced Rosette Piping Techniques: Tips and Tricks for Professional Results
- Rosette Piping Ideas and Inspiration
- Conclusion: Unleash Your Creativity with Rosette Piping
-
Frequently Asked Questions
- What is a rosette in baking, and why is it a popular decorating technique?
- What essential tools do I need to get started with easy rosette piping techniques?
- What kind of frosting works best for creating rosettes, and how should I prepare it?
- What is the fundamental technique for piping a rosette, and how can I avoid common mistakes?
- Where can I find more resources and inspiration for mastering easy rosette piping techniques?
- Final Reflection: Mastering the Rosette: A Sweet Journey of Skill and Self-Expression
- Unleash Your Inner Pastry Artist: Master the Rosette!
Mastering the Art of Rosette Piping: A Comprehensive Guide - BakeWithEase
Introduction to Rosette Piping: Elevate Your Cakes and Cupcakes
What is Rosette Piping and Why Learn It?
Rosette piping is a fundamental cake decorating technique that involves creating beautiful, swirled patterns resembling roses or swirls using a piping bag and a specific nozzle. It's one of the most popular and visually striking ways to decorate cakes, cupcakes, and even cookies. Learning easy rosette piping techniques can instantly transform a simple baked good into a professional-looking masterpiece, adding elegance and flair without requiring advanced artistic skills. It's a gateway technique for many aspiring decorators, providing a solid foundation for more complex piping work.
Mastering easy rosette piping techniques opens up a world of decorating possibilities. Beyond simple aesthetics, it allows for creative expression, enabling you to cover entire cakes, create stunning borders, or add delicate accents to cupcakes. For instance, a batch of vanilla cupcakes can be elevated dramatically with a simple swirl of buttercream, making them perfect for parties, celebrations, or just a beautiful treat. The relative simplicity of the motion, combined with the impressive visual result, makes it a highly rewarding skill to acquire for any home baker.
Rosette Designs: A Versatile Decoration Technique
Rosette designs offer incredible versatility in cake and cupcake decoration. While the classic rosette is a tight swirl resembling a rosebud, variations abound. By adjusting pressure, starting point, and the size of the nozzle, you can create large, loose swirls or small, delicate blossoms. This technique isn't limited to buttercream; it works beautifully with ganache, whipped cream, and even some firmer icings like royal icing (though consistency is key).
The adaptability of rosette piping means it can be used for almost any occasion or theme. You can create a field of colorful rosettes for a vibrant birthday cake, use white or pastel rosettes for an elegant wedding or baby shower, or even make mini-rosettes as decorative elements on cookies or cake pops. For example, a popular design involves covering a cake entirely in rosettes, often using two or three shades of the same color for a beautiful ombré effect, requiring hundreds of individual swirls on a standard 8-inch cake.
Essential Tools for Rosette Piping Success
Piping Bags: Choosing Between Disposable and Reusable
When tackling easy rosette piping techniques, the right piping bag is crucial. You have two main options: disposable or reusable. Disposable bags, often made of plastic or cellophane, are convenient as they require no cleaning – simply use and discard. They are particularly useful when working with multiple colors or flavors, saving significant cleanup time. A standard pack might contain 100 bags, making them cost-effective for frequent use.
Reusable piping bags are typically made from canvas, nylon, or silicone. They are more durable and environmentally friendly but require thorough washing and drying after each use. Silicone bags are flexible and easy to handle, while nylon bags are sturdy and often preferred by professionals for their grip. While the initial cost of reusable bags is higher, they last for years, making them a worthwhile investment for regular bakers. Many bakers keep a mix of both, using disposable for small jobs or multiple colors and reusable for larger tasks or single colors.
Piping Nozzles: Achieving Different Rosette Styles (Specifically 1M and 2D)
The piping nozzle, also known as a piping tip, is what shapes the buttercream as it's extruded from the bag. For easy rosette piping techniques, two tips are absolute workhorses: the Wilton 1M and the Ateco 2D. The Wilton 1M is an open star tip, characterized by deep, defined teeth. It produces a classic, slightly spiky swirl that resembles a star or a loose rose when piped in a circular motion. This is arguably the most popular tip for cupcake swirls and standard rosettes.
The Ateco 2D, an equivalent to the Wilton 2D, is a closed star tip. Its teeth are closer together and curve slightly inwards, resulting in a more ruffled, intricate swirl. When used for rosettes, it creates a fuller, more petal-like appearance compared to the 1M. Both tips make achieving beautiful swirls relatively easy, but the 1M is often considered slightly more forgiving for beginners learning easy rosette piping techniques due to its larger opening. Trying both allows you to see which style you prefer for your designs.
Couplers: Facilitating Easy Nozzle Switching
A coupler is a simple, two-part plastic device that fits inside the piping bag and allows you to easily change piping nozzles without changing the bag or emptying its contents. The base part goes inside the bag before filling, with the end of the bag snipped to expose the threads. The nozzle is placed over the threads on the outside, and the ring part screws on to secure it.
Using a coupler is particularly useful when you want to use the same color buttercream but create different effects on a single cake or batch of cupcakes. For instance, you might use a 1M tip for large rosettes and then switch to a smaller star tip (like a 4B) for smaller accent swirls or borders, all with the same bag of buttercream. This saves time and reduces waste, making your easy rosette piping techniques even more efficient.
Preparing Your Piping Bag for Optimal Performance
Properly preparing your piping bag is a crucial step for successful rosette piping. If using a reusable bag, ensure it is clean and completely dry. If using a disposable bag, you'll need to trim the tip.
The amount to snip off depends on whether you're using a coupler or inserting the tip directly. For a coupler, snip just enough so the threads of the inner piece are exposed but the ring can still screw on securely over the nozzle. For inserting a tip directly, snip off just enough so the widest part of the tip is visible and can't fall through, typically about 1/2 to 3/4 of an inch for standard rosette tips like the 1M or 2D.
Once the bag is ready, fold down the top edge to create a cuff. This makes filling the bag much easier and helps prevent buttercream from spilling over the top, keeping your hands clean and reducing waste. Holding the bag with the cuff open, you're now ready to add your prepared buttercream. This simple preparation step ensures a smoother piping process and contributes to achieving those beautiful, consistent rosettes.
Mastering the Rosette Piping Technique: A Step-by-Step Guide
Step 1: Preparing Your Buttercream for Piping Perfection
Achieving the Ideal Buttercream Consistency for Sharp Definition
The consistency of your buttercream is perhaps the most critical factor for successful rosette piping. Too soft, and your rosettes will be floppy and lose their shape, slumping rather than holding that defined swirl. Too stiff, and it will be difficult to pipe smoothly, potentially causing hand cramps and uneven results. The ideal consistency for easy rosette piping techniques is firm enough to hold stiff peaks when lifted with a spatula, but smooth and pliable when stirred. It should feel like thick peanut butter or softened ice cream.
If your buttercream is too soft, you can try chilling it in the refrigerator for 10-15 minutes, stirring it every 5 minutes to ensure even cooling. If it's too stiff, add a tiny amount (start with half a teaspoon) of milk, cream, or clear extract and mix thoroughly until the desired consistency is reached. Avoid adding too much liquid at once; it's easier to add more than to fix overly thin buttercream. Properly prepared buttercream is essential for achieving sharp, beautiful rosettes.
Coloring Your Buttercream: Gel vs. Liquid Food Coloring
When coloring buttercream for rosette piping, using gel food coloring is highly recommended over liquid. Liquid food coloring can alter the consistency of your buttercream, making it too thin and difficult to pipe firm rosettes, especially if you need vibrant colors that require adding a significant amount of dye. Gel colors are highly concentrated, meaning you need only a small amount to achieve rich, vibrant hues, and they do not significantly affect the texture of the buttercream.
To color buttercream with gel, dip a toothpick into the gel color and then swirl the toothpick into the buttercream. Mix thoroughly. Add more color using a fresh toothpick until the desired shade is achieved. Remember that colors often deepen slightly as they sit, so it's better to under-color slightly at first. For deep reds or blacks, it's often best to use specific "no-taste" or "super red/black" gel colors designed for intense pigmentation without affecting flavor or consistency.
Step 2: Filling Your Piping Bag Without Air Pockets
Filling your piping bag correctly is essential for smooth, consistent piping and avoiding frustrating air bubbles that can break your rosettes. With the top edge of the bag cuffed down (as prepared earlier), use a spatula to scoop your prepared buttercream and place it into the bag. Push the buttercream down towards the tip using the spatula, trying to avoid trapping air. Fill the bag no more than two-thirds full. Overfilling makes the bag difficult to handle and control, leading to messy results and hand fatigue.
Once the buttercream is in, uncuff the top of the bag. Gather the top edge together and twist it tightly closed just above the level of the buttercream. This twisted end is where you will apply pressure while piping. Ensuring the buttercream is packed down and the top is twisted tightly helps push the buttercream smoothly through the tip and minimizes the chance of air pockets interrupting your beautiful swirls.
Step 3: The Rosette Piping Motion: A Visual and Detailed Guide
Starting Point and Consistent Pressure Application
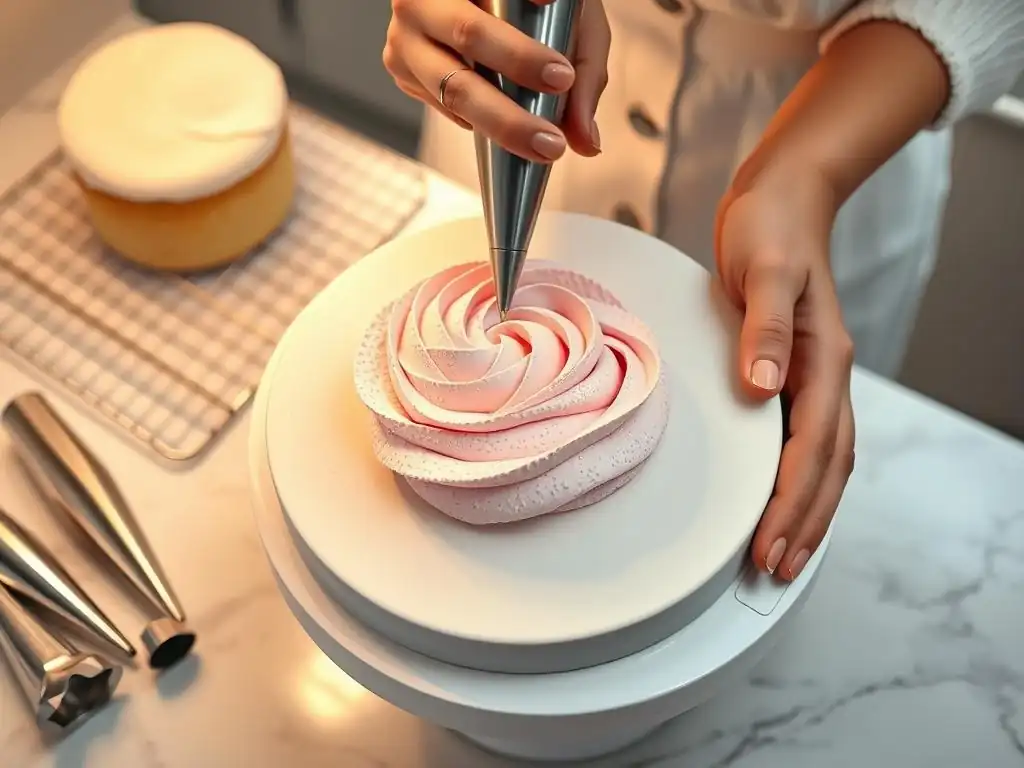
The basic motion for easy rosette piping techniques involves starting at the center point where you want your rosette to be and piping in a continuous circular motion outwards or inwards. Hold the twisted end of the bag firmly in your dominant hand, using your other hand to guide the tip. Position the tip directly above your desired starting point, usually touching or just slightly above the surface you are decorating (cake or cupcake).
Apply firm, consistent pressure with your dominant hand. This steady pressure is key to ensuring a smooth, even flow of buttercream, which is necessary for a well-formed rosette. If your pressure is uneven, the swirl will look choppy or inconsistent. Think of it like squeezing toothpaste – maintain steady pressure for an even ribbon.
Creating the Swirl: Maintaining a Fluid, Circular Motion
Once you've applied consistent pressure, begin moving the tip in a circular motion. For a classic rosette, start in the center and move outwards in a spiral, or start on the outside and spiral inwards. Keep the tip close to the surface throughout the process. The speed of your movement, combined with the pressure, will determine the size and tightness of the swirl. A slower movement with steady pressure will build up more buttercream in one spot, creating a fuller swirl, while a faster movement will create a thinner, more spread-out swirl.
Maintain a fluid, continuous motion. Avoid stopping and starting midway, as this will create breaks in your rosette. Practice this smooth, circular movement on a flat surface like parchment paper before attempting it on your final project. Aim for overlapping layers as you swirl to build the rosette shape. For instance, if starting from the center and moving outwards, your second pass around the center should slightly overlap the first layer of buttercream you piped.
Ending the Rosette: Achieving a Clean, Tapered Finish
Ending the rosette cleanly is just as important as starting it correctly. Once you have completed your circular motion and achieved the desired size for your rosette, gently decrease the pressure on the piping bag while simultaneously flicking the tip away from the surface in the direction your swirl ended. For example, if you ended your swirl by moving clockwise, flick the tip slightly clockwise and away.
This combination of decreasing pressure and flicking the tip creates a tapered end that blends seamlessly into the swirl, giving your rosette a professional finish without an abrupt stop or messy peak. With practice, this ending motion will become smooth and almost automatic, resulting in clean, beautiful swirls every time you use easy rosette piping techniques.
Step 4: Practicing Rosette Piping: Essential Tips for Beginners
Practice Surfaces: Using Parchment Paper and Turntables
Practice makes perfect, especially when learning easy rosette piping techniques. Before piping directly onto your cake or cupcakes, dedicate time to practicing the motion on a flat surface. Parchment paper is an excellent practice surface. Simply lay it flat and pipe your rosettes onto it. The buttercream can often be scraped off the parchment paper and re-used for practice (though it might incorporate some air over time).
Using a turntable during practice can also be incredibly helpful, especially if you plan to decorate cakes. Place the parchment paper on the turntable. As you pipe, you can slowly rotate the turntable with your non-piping hand, which helps maintain a smooth, consistent circular motion, particularly for larger rosettes or covering the sides of a cake. Piping on parchment paper allows you to experiment with pressure, speed, and starting/ending points without the pressure of potentially ruining your final product. You can practice dozens or even hundreds of rosettes to build muscle memory.
Rosette Piping Variations: Exploring Different Styles
Creating Variations: Adjusting Pressure for Different Rosette Styles
Once you've mastered the basic rosette motion, you can create numerous variations by simply adjusting the pressure you apply to the piping bag. Applying lighter, less consistent pressure while moving the tip quickly in a loose circular motion can create a more rustic, freeform swirl. This style is popular for a more relaxed or "shabby chic" look on cupcakes.
Conversely, applying firm, steady pressure while moving the tip slower and in tighter circles will result in a more compact, defined rosette with sharper edges, resembling a tightly closed rosebud. Experimenting with pressure variations on your practice surface will quickly show you how much control you have over the final appearance of your swirls. For example, a single Wilton 1M tip can create everything from a loose, open swirl covering an entire cupcake top to a smaller, tighter rosette cluster on a cake border, simply by varying pressure and speed.
Exploring Color Variations: Ombre and Two-Toned Rosettes
Adding color variations can make your rosette piping even more striking. An ombré effect, where colors gradually transition from dark to light or one color to another, is popular for cakes covered in rosettes. This is achieved by dividing your buttercream and coloring batches in progressively lighter shades of the same color. When piping, you transition from the darkest shade at the bottom of the cake (or outer edge) to the lightest at the top (or center), creating a beautiful gradient.
For two-toned rosettes, you can load your piping bag with two different colors of buttercream side-by-side. This often works best with larger tips. Carefully place one color of buttercream along one side of the bag and the second color along the other side. As you pipe, the two colors will emerge from the tip simultaneously, creating a swirl with stripes of both colors. This technique adds visual interest and depth to your easy rosette piping techniques.
Combining Rosettes: Integrating with Other Piping Techniques (e.g., Shell Borders)
Rosettes don't have to stand alone; they can be beautifully integrated with other piping techniques to create complex and stunning designs. For instance, you could pipe a shell border around the base of a cake using a star tip (like a 21 or 32) and then top the cake with rosettes. Shell borders provide a finished edge and complement the swirl of the rosettes.
Another common combination is using rosettes as the main decoration on cupcakes and adding smaller details with different tips. You might pipe a large rosette using a 1M tip and then use a small round tip (like a 3 or 4) to add dots or pearls around the base. Combining techniques adds texture and complexity, showcasing a wider range of piping skills alongside your easy rosette piping techniques.
Troubleshooting Common Rosette Piping Problems
Buttercream Issues: Correcting Soft, Stiff, or Grainy Buttercream
Buttercream consistency is the most frequent culprit for rosette piping problems.
- Soft/Melting Buttercream: If your rosettes are slumping, your buttercream might be too warm or too soft. This often happens in warm kitchens or from handling the bag too much. Try chilling the filled piping bag in the refrigerator for 10-15 minutes. If it's still too soft, you may need to add a little more powdered sugar (start with a tablespoon) and mix thoroughly to stiffen it slightly.
- Stiff Buttercream: If the buttercream is hard to squeeze or breaks as it comes out, it's too stiff. Add a very small amount of liquid (milk, cream, or extract), about 1/2 teaspoon at a time, and mix until smooth and pliable.
- Grainy Buttercream: Graininess is usually due to undissolved powdered sugar. Ensure you sift your powdered sugar before mixing. If it's already mixed and grainy, you can sometimes improve it by beating the buttercream longer on low speed or gently warming a small portion and mixing it back in, but prevention through sifting is best.
Addressing these consistency issues is paramount for achieving sharp, well-defined rosettes using easy rosette piping techniques.
Nozzle Problems: Addressing Clogging and Uneven Flow
Clogging or uneven flow from the nozzle can ruin the look of your rosettes. This is often caused by small lumps in the buttercream (like unincorporated powdered sugar or bits of flavoring) or air bubbles trapped in the bag. If the nozzle seems clogged, stop piping, remove the tip (if using a coupler), and check for blockages. You can use a skewer or toothpick to gently dislodge anything stuck.
To prevent future clogging and ensure even flow, always ensure your buttercream is smooth and lump-free before filling the bag. Pushing the buttercream down firmly in the bag and twisting the top tightly also helps prevent air bubbles, which can cause sputtering and uneven flow. If you're using a closed star tip (like the 2D) with particularly stiff buttercream, the tighter opening can be more prone to clogging than an open star like the 1M.
Rosette Shape: Achieving Uniformity and Avoiding Air Bubbles
Achieving uniform rosette shapes requires consistent pressure and speed, as discussed earlier. If your rosettes are different sizes or shapes, focus on maintaining the same pressure and performing the circular motion at a steady pace for each one. Practice on parchment paper helps build this consistency.
Air bubbles appearing as gaps or bursts in your piped rosettes are a common issue. These occur when air gets trapped in the piping bag. To avoid this, ensure you pack the buttercream down when filling the bag and twist the top tightly to push the buttercream towards the tip.
If you see a large air bubble, gently squeeze the bag before piping to try and push the bubble out. Sometimes, you might need to stop piping, untwist the bag, and manually push the air bubble towards the tip before re-twisting and continuing. Eliminating air bubbles is key to smooth, perfect swirls when practicing easy rosette piping techniques.
Advanced Rosette Piping Techniques: Tips and Tricks for Professional Results
Maintaining Consistent Pressure: Using a Piping Bag Holder
Maintaining consistent pressure is fundamental for professional-looking rosettes, especially when piping many of them. As your hand tires, pressure can become uneven. While practice builds strength and endurance, using a piping bag holder can provide extra support and help maintain steady pressure over longer periods. These holders typically cradle the bag, allowing you to use both hands more effectively to guide the tip and apply pressure consistently from the top of the bag.
For extensive piping projects, like covering an entire tiered cake in rosettes, managing hand fatigue is crucial. A piping bag holder, or even simply switching hands or taking short breaks, can make a significant difference in the uniformity of your rosettes. It allows you to focus on the motion and placement rather than struggling to maintain squeeze pressure.
Controlling Piping Speed: Matching Speed to Buttercream Consistency
Controlling your piping speed in relation to your buttercream consistency is an advanced nuance of easy rosette piping techniques. With a very stiff buttercream, you might need to move slightly slower to allow the buttercream to be properly extruded from the tip. With a softer buttercream, you might need to move a bit faster to prevent it from spreading or losing shape as you pipe.
Learning to intuitively match your piping speed to the buttercream's flow rate comes with experience. Pay attention to how the buttercream is coming out of the tip – is it building up too quickly, or is it too thin? Adjusting your speed accordingly will help you create perfectly formed rosettes every time, maximizing the potential of your easy rosette piping techniques.
Practicing for Perfection: Regular Practice for Skill Enhancement
The most effective advanced technique is simply consistent practice. Regular practice builds muscle memory, improves control over pressure and speed, and allows you to quickly identify and correct issues with your buttercream consistency or piping motion. Even piping just a dozen rosettes on parchment paper a few times a week can significantly enhance your skills.
Consider setting a goal, such as piping 50 uniform rosettes in a row without stopping. This type of focused practice isolates the core motion and helps refine it. Over time, the easy rosette piping techniques will become second nature, allowing you to pipe beautiful swirls effortlessly and consistently, achieving professional-level results on all your baked goods.
Rosette Piping Ideas and Inspiration
Rosettes on Cakes: Creating Elegant Cake Designs
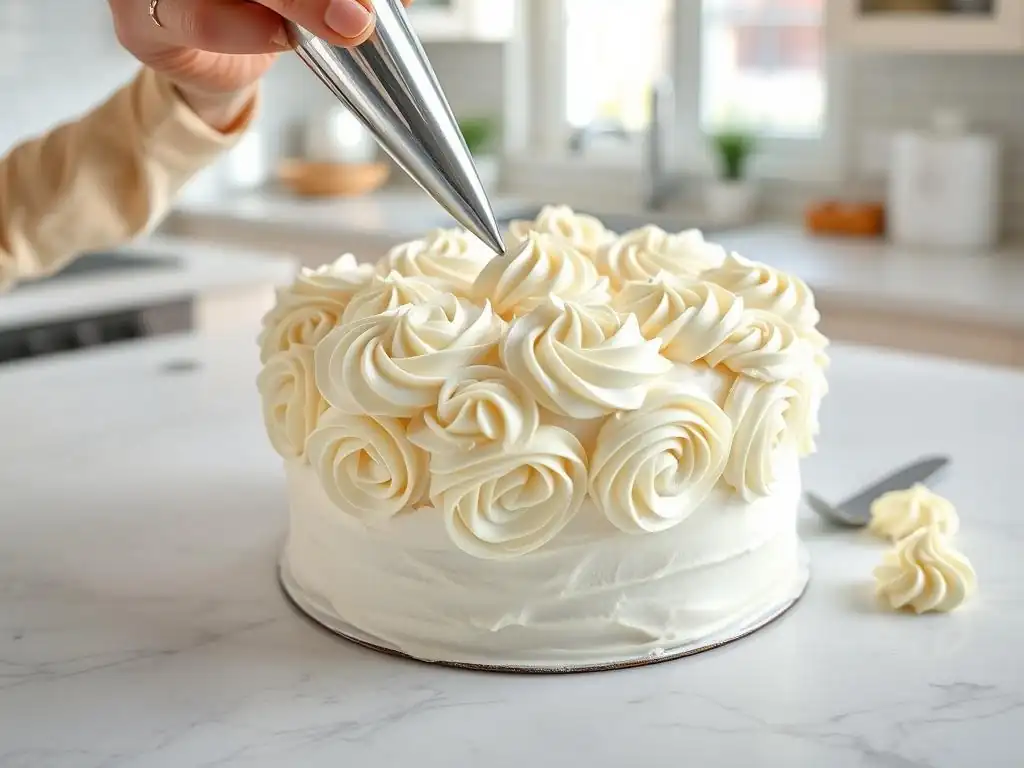
Rosettes are a fantastic way to decorate cakes, offering endless design possibilities. A popular approach is the all-over rosette cake, where the entire surface is covered in swirls. This can be done with a single color for a classic look, multiple shades for an ombré effect, or even different colors for a vibrant, playful design. For an 8-inch round cake, covering the top and sides entirely might require piping anywhere from 150 to 300 individual rosettes, depending on their size.
Beyond full coverage, rosettes can be used as elegant accents. Pipe a single large rosette as a focal point on top of a smooth cake, or create a cluster of smaller rosettes as a decorative element. They also work beautifully as a top border or arranged in patterns, such as a diagonal sweep across the cake face. Rosettes add texture and sophistication, turning a simple cake into a stunning centerpiece using relatively easy rosette piping techniques.
Rosettes on Cupcakes: Adding a Professional Touch
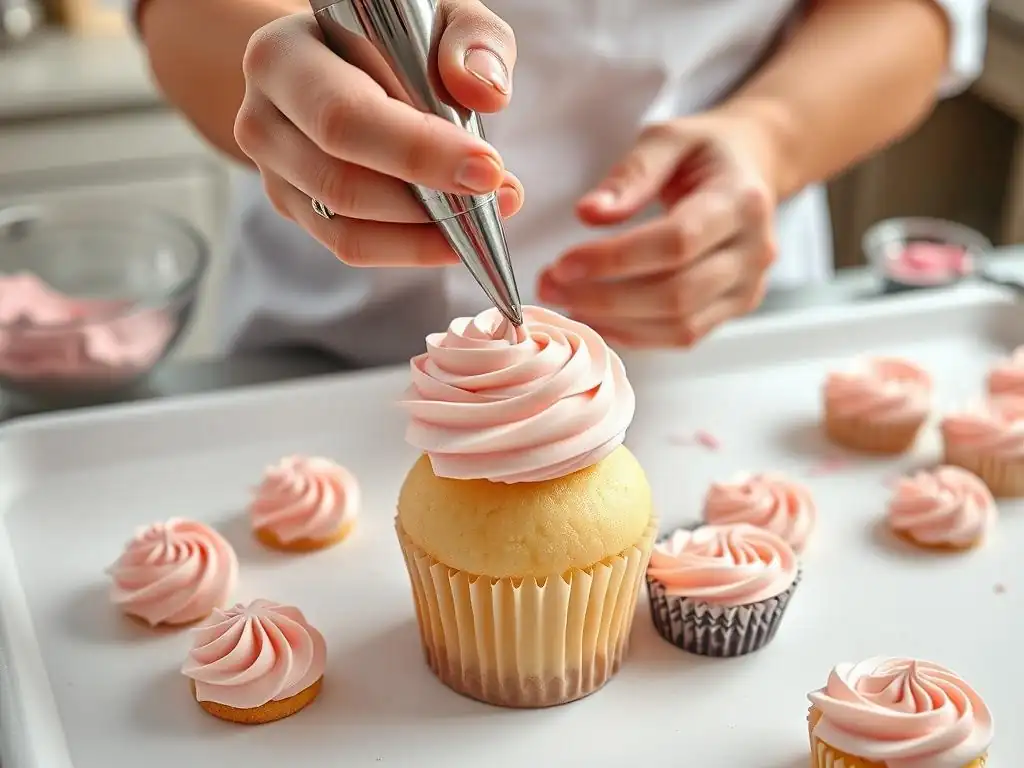
Rosettes are arguably most commonly seen and perfected on cupcakes. A single, large rosette piped on top of a cupcake using a 1M or 2D tip is a simple yet incredibly effective way to add a professional finish. It covers the cupcake completely and provides a generous amount of delicious buttercream.
You can vary the rosette style on cupcakes – a tight, tall swirl for a classic look, or a looser, more spread-out swirl for a rustic feel. Combining colors, adding sprinkles, or topping with a cherry or candy further enhances the visual appeal. Piping rosettes on cupcakes is an excellent way to practice your easy rosette piping techniques on a smaller scale before tackling larger cakes. A standard batch of 12 cupcakes provides ample opportunity for repetition and refinement.
Using Rosettes: Creating Borders, Accents, and Floral Arrangements
The versatility of rosettes extends beyond simply covering surfaces. They can be used to create beautiful borders along the top or bottom edge of a cake. Piping a continuous line of overlapping rosettes creates a textured, decorative edge. Smaller rosettes can serve as delicate accents, placed strategically on a cake or cookie.
Furthermore, rosettes are a key component in creating buttercream floral arrangements. Larger rosettes can act as the main "roses," while smaller rosettes or different piping techniques (like leaves using a leaf tip or small buds with a round tip) fill in the arrangement. You can pipe rosettes directly onto the cake or pipe them onto parchment paper squares and chill them until firm, then transfer them to create a more complex 3D arrangement. Mastering easy rosette piping techniques is truly a foundation for many beautiful decorating possibilities.
Conclusion: Unleash Your Creativity with Rosette Piping
Learning easy rosette piping techniques is a valuable skill for any baker looking to elevate their cake and cupcake decoration. From understanding the essential tools like piping bags and the ever-popular 1M and 2D nozzles to mastering the core piping motion, you have the foundation to create stunning swirls. While practice is key, the relative simplicity of the technique means beautiful results are well within reach for beginners.
Don't be discouraged by initial imperfections; every uneven swirl is a step towards mastery. Experiment with different buttercream consistencies, explore color variations, and combine rosettes with other piping styles. Whether you're topping a single cupcake, covering an entire cake, or building an intricate floral design, easy rosette piping techniques offer a rewarding and visually appealing way to showcase your baking skills. So grab your bag and tip, prepare your buttercream, and start swirling your way to beautiful baked creations!
Frequently Asked Questions
What is a rosette in baking, and why is it a popular decorating technique?
A rosette is a swirled floral decoration created using piping. It's popular because it's relatively easy to learn and adds a beautiful, elegant touch to cakes, cupcakes, and other desserts.
What essential tools do I need to get started with easy rosette piping techniques?
You'll need a piping bag, a star piping tip (specifically a 1M or 2D tip is recommended), and your frosting of choice. Ensure you have a smooth, consistent frosting for best results.
What kind of frosting works best for creating rosettes, and how should I prepare it?
Buttercream frosting is generally preferred due to its stability and ability to hold its shape. Make sure your buttercream is smooth and free of air bubbles to avoid imperfections in your rosettes.
What is the fundamental technique for piping a rosette, and how can I avoid common mistakes?
Start in the center and pipe a continuous swirl outwards, overlapping each layer slightly. Avoid stopping and starting which can create breaks. Applying consistent pressure is also key.
Where can I find more resources and inspiration for mastering easy rosette piping techniques?
BakeWithEase.com offers step-by-step guides and tutorials. Look for examples of different rosette styles and practice variations to develop your own unique designs.
Final Reflection: Mastering the Rosette: A Sweet Journey of Skill and Self-Expression
The art of the rosette, once a seemingly intricate skill, is now within everyone's reach. This accessible piping technique, explored throughout this article, offers a gateway to a world of creative cake decorating, transforming simple desserts into stunning works of art. The ease of mastering basic rosette techniques empowers even novice bakers to elevate their creations and experience the joy of personalized artistry.
The enduring appeal of the rosette lies not just in its visual elegance, but in its symbolic power. It represents the potential for growth and beauty found in simple beginnings. From humble beginnings, a single swirl blossoms into a breathtaking pattern, mirroring the transformative power of dedication and practice. As I explored the various techniques, I was reminded of the quote by The difference between ordinary and extraordinary is that little extra.
This rings true for rosette piping; the seemingly small details—consistent pressure, smooth movements, and the right piping tip—make all the difference in achieving perfection.
Now, it's your turn to embrace the beauty and simplicity of rosette piping. Don't be intimidated by the initial steps; each swirl you create is a step towards mastering a new skill and expressing your unique creativity. Pick up your piping bag, choose your favorite frosting, and let your imagination guide you. The journey of creating beautiful rosettes is a rewarding one, filled with the sweet satisfaction of accomplishment and the joy of sharing your creations with others. Let the art of the rosette inspire you to explore your own creative potential, one swirl at a time.
Unleash Your Inner Pastry Artist: Master the Rosette!
Thanks for taking the time to explore the beautiful world of rosette piping! You've now got the skills to create stunning cake decorations. Ready to put your new knowledge into practice?
- Practice your piping technique: Grab your favorite icing and try creating your own rosettes. Experiment with different sizes and pressures to find your perfect swirl!
- Share your creations: Post a picture of your rosette masterpieces on social media and tag us! We'd love to see your baking journey!
- Challenge yourself: Try a more complex design, maybe incorporating your rosettes into a full cake!
Ready to create your next baking masterpiece? What rosette design will you tackle first?