
Piping 101: Essential Skills Every Baker Needs

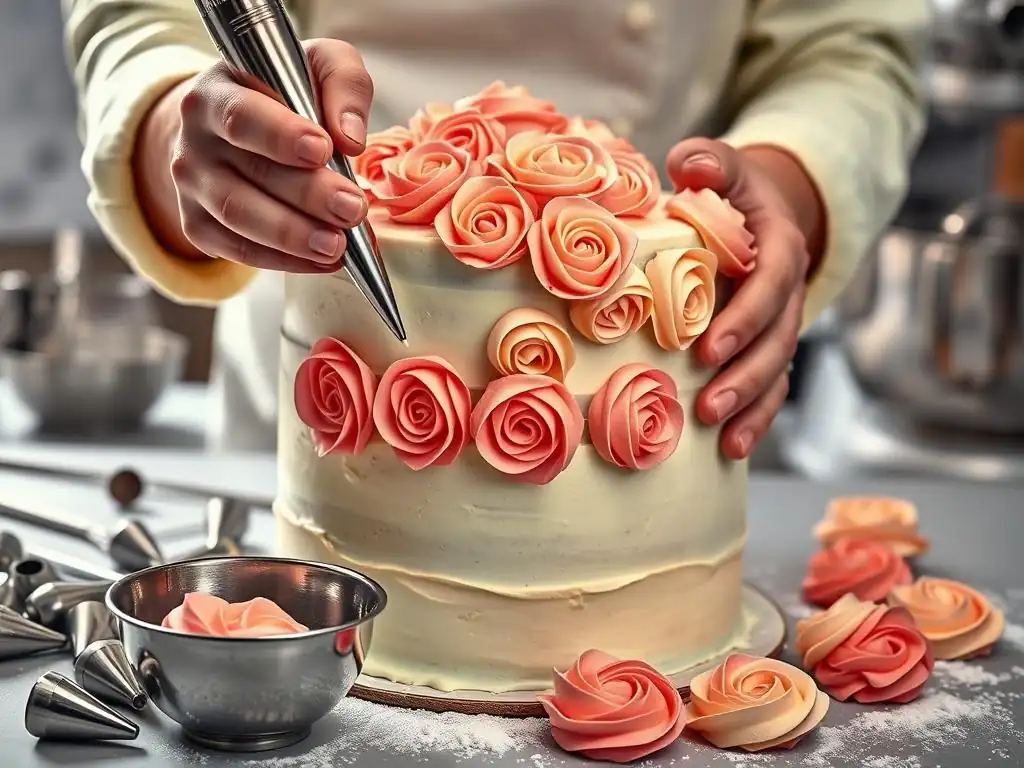
Welcome to BakeWithEase, your kitchen companion for unlocking baking brilliance! Ever wondered how to achieve those flawless, professional-looking swirls of frosting? This article delves into the secrets of how to pipe buttercream frosting like a pro. Discover essential techniques, must-have tools, and simple tips that will transform your desserts from delicious to dazzling. Get ready to elevate your baking game – let's get piping!
- Cake Decorating with Buttercream: A Comprehensive Guide
- Introduction to Buttercream Application: Leveling, Crumbing, and Smoothing
- Essential Tools for Buttercream Application and Smoothing
- Preparing Your Buttercream for Application
- Basic Buttercream Application Techniques: Step-by-Step
- Advanced Buttercream Techniques: Textures and Designs
- Troubleshooting Common Buttercream Application Problems
- Tips for Practicing and Refining Your Buttercream Skills
- Buttercream Application Ideas and Inspiration
- Cleaning and Storing Buttercream and Tools
- Conclusion: Elevating Your Cakes with Buttercream Artistry
-
Frequently Asked Questions
- How do I achieve smooth buttercream frosting when piping?
- What are the essential piping tips for a beginner?
- How do I prevent air bubbles from ruining my piped frosting designs?
- What is the best way to fill a piping bag without making a mess?
- How do I store leftover buttercream frosting after piping?
- Final Reflection: Mastering the Art of Piping, One Swirl at a Time
- Unleash Your Inner Pastry Chef!
Cake Decorating with Buttercream: A Comprehensive Guide
Introduction to Buttercream Application: Leveling, Crumbing, and Smoothing
Buttercream is a beloved medium in cake decorating, offering a smooth canvas for intricate designs or simply a delicious coating. Mastering its application is fundamental for any baker looking to elevate their creations from homemade treats to professional-looking showstoppers. This guide delves into the essential skills needed to prepare your cake and buttercream for flawless application, covering everything from basic leveling to achieving that perfectly smooth finish. Whether you're just starting out or refining your technique, understanding these foundational steps is key to beautiful cakes.
Achieving a polished look isn't just about aesthetics; proper buttercream application also ensures your cake remains fresh and stable. A well-executed crumb coat, for example, traps loose crumbs, preventing them from marring the final layer of frosting. Learning how to pipe buttercream frosting smoothly onto the cake sides and top before scraping can also simplify the smoothing process significantly, providing an even layer to work with. This initial preparation work, though seemingly simple, dramatically impacts the final appearance and texture of your decorated cake.
Preparing Your Cake for Buttercream
Before a single dollop of buttercream touches your cake, proper preparation is crucial. This starts with ensuring your cake layers are completely cooled. Warm cakes will cause buttercream to melt and slide, making smooth application nearly impossible.
Ideally, cakes should cool in their pans for about 10-15 minutes before being transferred to a wire rack to cool completely, which can take several hours. For best results, some bakers even chill or freeze their cake layers briefly (30 minutes to 1 hour in the freezer) to firm them up, making them easier to handle and less prone to crumbling during leveling and frosting.
Once cooled, the layers may need leveling. Often, cakes bake with a slight dome in the center. Trimming this dome off with a serrated knife or cake leveler creates a flat surface, essential for stacking layers evenly and preventing leaning. A level cake provides a stable foundation, ensuring that when you apply buttercream, it coats the cake uniformly without thick or thin spots caused by uneven surfaces. This careful preparation step sets the stage for successful buttercream application and a visually appealing final product.
Importance of Proper Buttercream Application
Properly applying buttercream goes beyond just making a cake look nice; it serves several practical purposes. Firstly, it acts as a protective barrier, sealing in moisture and keeping the cake fresh for longer. A well-coated cake is less likely to dry out quickly. Secondly, it provides a smooth, even surface for further decoration, whether you plan to add piping, fondant, or other embellishments. Trying to decorate a cake with unevenly applied buttercream is like trying to paint on a bumpy wall – the results will be inconsistent and frustrating.
Furthermore, understanding how to apply buttercream correctly is fundamental to mastering decorative techniques, including how to pipe buttercream frosting for borders, swirls, or intricate designs. The base layer needs to be firm and smooth to support these additions. An example is the popular semi-naked cake trend: achieving the desired sparse, streaky look requires precise application and removal of a thin layer of buttercream, highlighting the importance of control and technique even when not aiming for a perfectly smooth finish. Without these foundational skills, achieving any desired look, from rustic to refined, becomes significantly more challenging.
Essential Tools for Buttercream Application and Smoothing
Having the right tools at your disposal makes a world of difference when working with buttercream. While it might seem like you can get by with just a knife, specialized tools are designed to make the process easier, faster, and yield professional-looking results. Investing in a few key items will dramatically improve your ability to apply and smooth buttercream effectively.
From spatulas designed for spreading to scrapers that create crisp sides, each tool plays a specific role in the buttercream application process. Understanding what each tool is for and how to use it correctly is the next step after preparing your cake. These tools are not just for advanced decorators; even basic smoothing benefits greatly from using the appropriate equipment.
Offset Spatulas: Sizes and Uses
Offset spatulas are indispensable for applying buttercream to cakes. Their unique design, with a blade that is offset from the handle, allows you to spread frosting without your knuckles dragging through it. They come in various sizes, typically ranging from 4 inches (small) to 12 inches (large).
- Small offset spatulas (4-6 inches) are excellent for applying buttercream to cake layers, filling between layers, and working on smaller cakes or cupcakes. They offer more control for delicate tasks.
- Medium offset spatulas (8-10 inches) are versatile all-rounders, suitable for most standard cake sizes (6-10 inches in diameter). They are great for applying the initial crumb coat and the final layer of frosting.
- Large offset spatulas (10-12 inches) are ideal for smoothing the top of larger cakes (10-12+ inches) or applying frosting quickly to large surfaces. For instance, a 10-inch spatula can cover the radius of an 8-inch cake top in a single sweep, minimizing lines. Many bakers find having at least a medium (8-inch) and a large (10 or 12-inch) offset spatula covers most needs.
Cake Scrapers: Metal vs. Plastic
Cake scrapers, also known as bench scrapers or side scrapers, are essential for achieving smooth, straight sides on your buttercream-coated cakes. They are flat, rigid tools held vertically against the cake's side while rotating the cake on a turntable.
- Metal scrapers are typically made of stainless steel. They are durable, easy to clean, and their weight can sometimes help maintain steady pressure. The edge is often very sharp, allowing for precise smoothing and the creation of sharp edges at the top. A standard metal scraper might be around 6-8 inches tall, ideal for cakes up to that height. One popular model is about 8 inches tall and 4 inches wide.
- Plastic scrapers are lighter and come in a wider variety of shapes and edge patterns (straight, serrated, patterned). They are generally less expensive than metal scrapers. While they work well for basic smoothing, achieving ultra-sharp edges might be slightly more challenging than with a metal scraper due to their flexibility. A common plastic scraper size is similar to metal, around 8 inches tall. Many decorators start with a basic plastic scraper before upgrading. Both types require holding them at a consistent 90-degree angle to the cake board for best results.
Turntables: Finding the Right Rotation
A cake turntable is practically non-negotiable for applying and smoothing buttercream efficiently. It allows you to easily rotate the cake while holding your spatula or scraper steady, resulting in a much smoother and more even finish compared to trying to move around a stationary cake.
Turntables range from simple plastic models to heavy-duty metal ones with ball bearings. Plastic turntables are affordable and lightweight, suitable for occasional use or smaller cakes. However, they may not rotate as smoothly or stably as metal ones. Metal turntables, often made of aluminum or cast iron, are heavier, providing excellent stability and incredibly smooth rotation.
They can support larger, heavier cakes without wobbling. A good quality metal turntable can cost significantly more, potentially $50-$100+, whereas a plastic one might be $15-$30. The smooth, consistent spin of a quality turntable allows for continuous application or scraping strokes, which is key to achieving a seamless buttercream finish.
Bench Scrapers: Smoothing Large Surfaces
While often used interchangeably with "cake scraper," a traditional bench scraper (also called a dough scraper or chopper) is a flat, rectangular metal blade with a handle along one edge. Its primary use in baking is for portioning dough or cleaning work surfaces, but its flat, straight edge makes it useful for certain buttercream tasks as well.
A bench scraper's rigid, wide blade (often 6 inches wide or more) can be effective for applying and smoothing buttercream on the top surface of a cake, similar to a large offset spatula but potentially offering a firmer edge. Some bakers also use them for scraping excess buttercream from their work surface or even transferring measured ingredients. While not a dedicated cake side scraper in the same way a tall cake scraper is, its flat edge is valuable for ensuring large, flat areas of buttercream are level and smooth.
Preparing Your Buttercream for Application
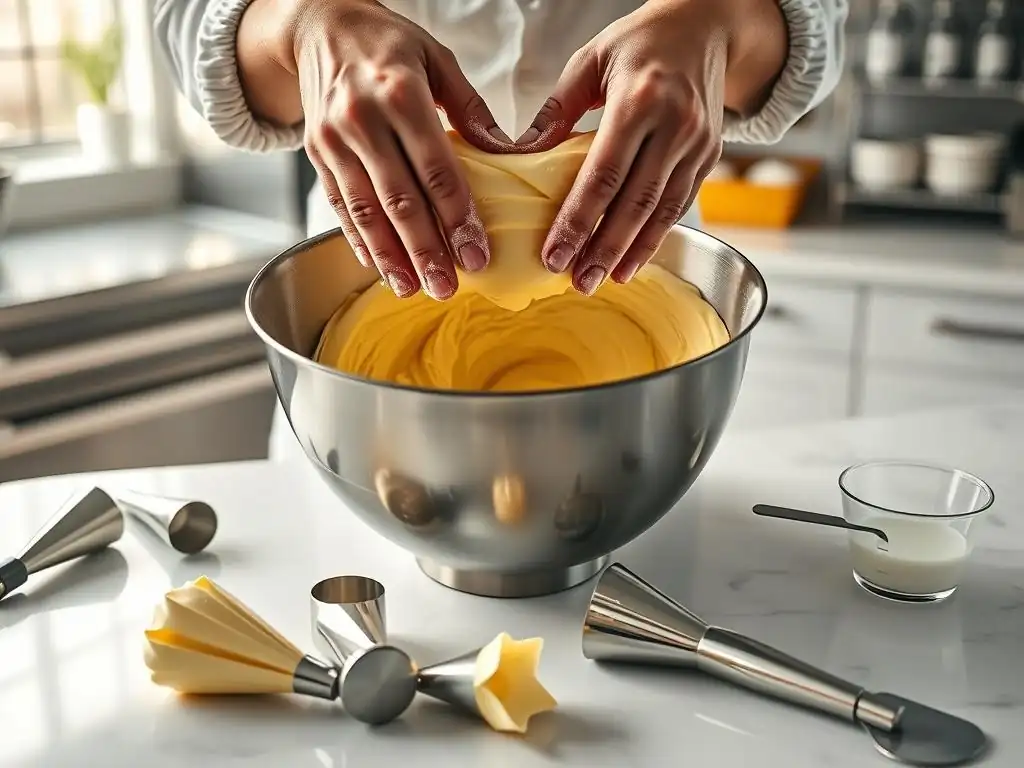
The success of your buttercream application hinges significantly on the consistency and quality of the buttercream itself. Even the best tools and techniques won't yield perfect results if your frosting is too stiff, too soft, or full of air bubbles. Taking the time to prepare your buttercream properly is a vital step.
This preparation involves checking and adjusting the consistency, incorporating colors evenly, and ensuring any flavors are well distributed. Think of it as getting your paint ready before you start your canvas. A well-prepared buttercream is smooth, pliable, and holds its shape when needed, making it a joy to work with.
Achieving the Right Buttercream Consistency for Spreading
The ideal consistency for spreading buttercream onto a cake is often described as similar to peanut butter or thick pudding. It should be soft enough to spread smoothly without tearing the cake, but firm enough to hold its shape and not slide off the sides. American buttercream, for example, typically requires adding liquid (milk, cream, or water) to reach the desired consistency after initial mixing. Start with just a tablespoon or two at a time and mix thoroughly until the buttercream is smooth and easily spreadable with a spatula.
If your buttercream is too stiff, it will be hard to spread and may pull at the cake. If it's too soft (perhaps due to a warm kitchen), it will be runny and won't hold its shape for smoothing or piping. You can stiffen overly soft buttercream by chilling it in the refrigerator for 15-30 minutes, stirring every so often.
Conversely, stiff buttercream can be softened by mixing it on low speed or placing the bowl over a warm (not hot) water bath for a minute, then stirring. Removing air bubbles by mixing on low speed for several minutes is also key for a smooth finish.
Coloring Buttercream: Techniques and Considerations
Coloring buttercream allows you to add visual appeal and match themes. Gel food coloring is generally preferred over liquid food coloring because it is highly concentrated and adds very little moisture, which can alter the buttercream's consistency. Start with a small amount of gel color on a toothpick and mix it into the buttercream, adding more gradually until you achieve the desired shade.
For deep or vibrant colors, like dark red or black, you may need to use a significant amount of gel color. This can sometimes affect the taste or texture slightly. For instance, achieving a true red might require using a specific "no-taste red" color.
When coloring large batches, it's often easier to color the entire batch at once rather than trying to match colors later. Remember that colors can deepen slightly over time, especially vibrant ones, so aim for a shade slightly lighter than your final goal. For example, if you need a medium pink, you might stop adding color when it looks like a light-medium pink, knowing it will intensify.
Incorporating Flavors into Buttercream
Buttercream is a perfect vehicle for adding various flavors beyond the basic vanilla or almond extract. Extracts, emulsions, zests, fruit purees, chocolate, and even spices can be incorporated to complement the cake flavor. Add extracts or emulsions (like clear vanilla, lemon, or butter flavor) during the final stages of mixing, starting with a teaspoon or two and adjusting to taste. Emulsions are water-based and provide more intense, stable flavor than alcohol-based extracts.
For incorporating fruit purees or chocolate, ensure they are cooled and relatively thick so they don't thin the buttercream too much. Melted chocolate should be cooled to near room temperature before whisking into the finished buttercream. If adding something like raspberry puree, you might need to reduce the liquid slightly by cooking it down first.
A standard recipe for vanilla buttercream might use 1-2 teaspoons of vanilla extract per batch made with 1 pound of butter and 4 pounds of powdered sugar, but this can be adjusted based on preference and the strength of the extract used. Experimenting with flavor combinations, such as adding a pinch of cinnamon or instant coffee granules, can add an extra dimension to your frosting.
Basic Buttercream Application Techniques: Step-by-Step
Once your cake and buttercream are ready, it's time to start applying the frosting. This process typically involves several key steps: leveling the cake layers, applying a crumb coat, and then applying and smoothing the final coat. Mastering these basic techniques is fundamental to creating a clean, professional-looking cake.
These steps build upon each other, with each stage serving a specific purpose. Skipping or rushing any step can compromise the final result. While it takes practice, following a systematic approach will help you achieve smoother, more polished cakes.
Leveling a Cake: Ensuring a Flat Surface
Leveling is the process of removing the domed top from a baked cake layer to create a flat, even surface. This is crucial for stacking multiple layers squarely and preventing the cake from leaning.
- Ensure the cake is completely cooled. If slightly warm, it's more likely to crumble.
- Place the cake layer on a flat surface or your turntable.
- Using a long, serrated knife or a specialized cake leveler tool, position the blade parallel to your work surface at the desired height (just below the top of the dome).
- If using a knife, use a gentle sawing motion to slice through the cake, keeping the knife level. For a cake leveler, adjust the wire to the desired height and pull it through the cake.
- Remove the trimmed dome. You now have a level cake layer ready for frosting and stacking. Aim to remove just enough to create a flat surface, typically removing 1/2 to 1 inch from the center of the cake.
Crumb Coating: Sealing in Crumbs
The crumb coat is a thin layer of buttercream applied to the entire cake before the final layer. Its primary purpose is to trap any loose crumbs, sealing them to the cake so they don't get mixed into your final, visible frosting layer.
- Place your leveled cake layer (or the first layer if stacking) on your cake board or serving plate.
- Apply a small amount of buttercream to the top and sides of the cake using an offset spatula.
- Spread the buttercream thinly and evenly, working it into the cake's surface to pick up any loose crumbs. Don't worry about getting it perfectly smooth; the goal is simply coverage.
- Use your offset spatula to scrape away any excess, leaving a thin layer.
- Once the entire cake is covered, chill the cake in the refrigerator for 15-30 minutes (or freezer for 10-15 minutes) until the crumb coat is firm to the touch. This firm layer creates a stable base for the final coat. A typical 8-inch round cake might require about 1/2 to 3/4 cup of buttercream for a crumb coat.
Achieving a Smooth Final Coat: Techniques and Tips
Applying the final coat of buttercream is where you create the smooth, polished surface. This layer is thicker than the crumb coat and requires more attention to detail. Learning how to pipe buttercream frosting directly onto the cake before smoothing can make this step easier by ensuring even coverage.
- Once the crumb coat is firm, apply a generous amount of buttercream to the top and sides of the cake using an offset spatula. You can use a piping bag with a large round tip (like a Wilton 1A or 4B) to pipe buttercream frosting evenly around the sides and then fill the top, which helps ensure uniform thickness.
- Use your offset spatula to roughly spread the buttercream over the entire surface, ensuring full coverage with no cake showing through.
- For the sides, hold a cake scraper (metal or plastic) perpendicular to the cake board and against the side of the cake. Apply gentle, even pressure and rotate the turntable smoothly. The scraper will remove excess buttercream and smooth the surface. Scrape, wipe the excess buttercream from the scraper, and repeat until the sides are smooth.
- For the top, use a clean offset spatula. Starting from the outer edge, gently pull the spatula towards the center of the cake, removing any buttercream "lip" that formed at the top edge while smoothing the sides. Wipe the spatula and repeat, working your way around the cake until the top is smooth and flush with the sides.
- For an extra smooth finish, you can heat your scraper or spatula slightly in hot water, dry it completely, and then use it to do a final pass over the chilled buttercream surface. This slightly melts the surface, creating a glass-like finish. An 8-inch cake might need 3-4 cups of buttercream for the final coat.
Masking Imperfections: Hiding Blemishes in Buttercream
Even with careful technique, minor imperfections can occur in your buttercream finish – small air bubbles, tiny tears, or uneven spots. Don't despair! Buttercream is forgiving, and there are ways to mask these blemishes.
- Small air bubbles: Use a hot, dry offset spatula or scraper to gently smooth over the area. The heat helps to soften the buttercream slightly and release the trapped air. Alternatively, you can use a pin to pop the bubble and then smooth over the spot.
- Small tears or gaps: Apply a tiny bit more buttercream to the affected area with a small offset spatula and then re-smooth using a scraper or the spatula.
- Uneven spots: If an area is slightly uneven after scraping, you can apply a bit more buttercream and re-scrape that section. It's often easier to add and re-smooth than to try and fix a spot that's too thin.
- Strategic decoration: Ultimately, if a persistent blemish remains, you can strategically place decorations like piping, sprinkles, edible flowers, or even a piece of fruit over the spot to hide it. For example, a small tear near the bottom edge could be covered by a simple piped border.
Advanced Buttercream Techniques: Textures and Designs
Once you've mastered the art of smooth buttercream application, you can explore more advanced techniques to add texture and intricate designs to your cakes. These methods move beyond a simple smooth finish and allow for greater creativity and artistic expression.
These techniques often utilize different tools or manipulation methods to create visually stunning effects. They require a bit more practice and control but open up a whole new world of cake decorating possibilities.
Creating Textured Buttercream Finishes: Spatula Techniques
Textured finishes offer a rustic, artistic, or modern look without requiring perfect smoothness. Spatulas are key tools for creating many popular textures.
- Swirls: Use a small offset spatula. After applying the final coat, hold the spatula flat against the side or top of the cake and make gentle swirling motions, lifting the spatula slightly as you go to create peaks and valleys.
- Waves/Ripples: Use an offset spatula or the back of a spoon. Drag the edge of the tool horizontally or vertically across the buttercream, applying varying pressure to create wave-like patterns.
- Palette Knife Painting: Apply thicker patches of different colored buttercream to the cake's surface. Use a palette knife (a flexible, often triangular blade) to gently spread and blend the colors, creating a painterly effect. For example, applying blue, white, and green buttercream and using a palette knife to blend them can create an ocean wave effect. A common technique is applying buttercream roughly and then using a small offset spatula held at a 45-degree angle to create short, overlapping strokes around the entire cake.
Achieving Sharp Edges on Buttercream Cakes
Sharp edges give a cake a clean, modern, and professional look. While challenging, they are achievable with practice and the right tools, particularly a stiff buttercream and a good metal scraper.
- Apply the final coat of buttercream, ensuring you have slightly more frosting than you need, especially along the top edge. You want a slight "lip" of frosting protruding above the cake top.
- Smooth the sides using a tall, straight metal scraper held at a perfect 90-degree angle to the turntable. Scrape, wipe, and repeat until the sides are smooth and straight. This process will push excess buttercream up, enhancing the lip.
- Once the sides are smooth, use a clean offset spatula (preferably a small, straight one). Starting from the outer edge of the top lip, place the spatula flat against the lip and gently pull it towards the center of the cake. This action brings the lip inward and creates a crisp edge. Wipe the spatula and repeat around the entire top edge.
- For extra sharpness, chill the cake for 15-30 minutes after smoothing the sides. Then, use a hot, dry metal scraper or offset spatula to do a final pass over the chilled buttercream, cleaning up the edges. This technique requires consistent pressure and angle.
Using Stencils for Buttercream Designs
Buttercream stencils allow you to transfer patterns onto the side or top of a cake, creating intricate designs without freehand piping. They are typically made of plastic or acrylic.
- Ensure your cake has a smooth, firm buttercream finish (preferably chilled for at least 30 minutes).
- Hold the stencil firmly against the side of the cake, ensuring it is flush against the surface. You might need a few pins to secure it or have a helper hold it steady.
- Apply a thin, even layer of buttercream (or royal icing, which is often preferred for stenciling due to its firmness) over the stencil openings using an offset spatula or scraper. Ensure all openings are filled.
- Scrape off any excess buttercream from the surface of the stencil using a bench scraper or straight edge, leaving only the buttercream that has gone through the pattern.
- Carefully and slowly peel the stencil straight away from the cake to reveal the design. Repeat around the cake as needed, aligning the stencil pattern. Practice on a flat surface first to get the feel of applying and scraping the buttercream.
Buttercream Painting: Creating Artistic Effects
Buttercream painting involves using buttercream tinted with various colors as "paints" to create artistic designs directly on the cake's surface. This can range from abstract strokes to detailed illustrations.
- Cover your cake with a smooth base layer of buttercream, typically white or a light neutral color. Chill the cake until the base layer is firm.
- Prepare small batches of buttercream tinted with different colors using gel food coloring. You want a slightly softer consistency than your base coat, similar to soft-serve ice cream, so it spreads easily with a brush or palette knife.
- Apply the colored buttercream using food-safe brushes, palette knives, or even small spatulas. You can create broad strokes, fine lines, or blend colors directly on the cake. For instance, you could paint floral motifs or abstract swatches of color.
- For more detailed work, you might sketch a design onto the chilled buttercream using a sharp scribe tool before painting. You can also use this technique on a flat buttercream surface on parchment paper, let it chill and firm up, and then transfer the "painted" piece onto the cake. This method requires a steady hand and artistic vision, similar to painting on a canvas.
Troubleshooting Common Buttercream Application Problems
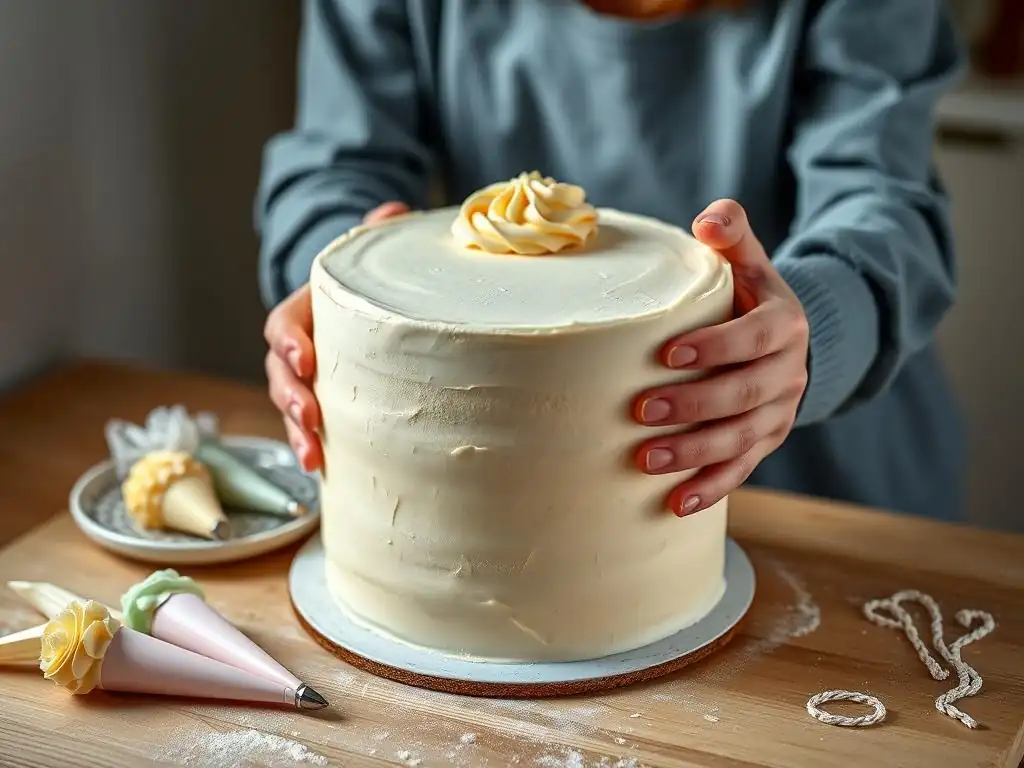
Even experienced bakers encounter issues when working with buttercream. Understanding common problems and how to fix them is part of mastering the craft. Most problems relate to buttercream consistency, temperature, or technique.
Don't get discouraged if your first few attempts aren't perfect. Identifying what went wrong is the first step to improving. With a little know-how, many common issues can be quickly remedied.
Preventing Cake Crumbs in Buttercream
Crumb contamination is one of the most common and frustrating issues. It happens when loose cake crumbs mix into your smooth final buttercream layer, creating visible specks.
- Solution: The best prevention is a thorough crumb coat. Apply a thin layer of buttercream to the entire cake to trap crumbs before applying the final coat. Chill the crumb coat until it is firm. This creates a barrier.
- Technique: When applying the final coat, use a generous amount of buttercream and avoid pressing your spatula or scraper directly against the cake surface. Instead, let the tool glide over the surface of the frosting you are applying. If you see a crumb on your spatula or scraper, wipe it clean before continuing. For example, if you are smoothing the side of a cake and see a crumb picked up by your scraper, stop, wipe the scraper clean on a separate bowl or paper towel, and then continue smoothing.
Fixing Air Pockets and Bubbles
Air bubbles can appear in buttercream, especially if it's been overmixed or whipped at high speed. These bubbles can cause unsightly pockmarks on your smooth surface.
- Solution: The best way to prevent air bubbles is to mix your finished buttercream on low speed for several minutes (5-10 minutes is often recommended) using the paddle attachment. This "degasses" the buttercream, forcing the air out.
- Fixing on the cake: If you notice small bubbles while smoothing, you can often smooth over them with your spatula or scraper. For larger, persistent bubbles, use a sharp pin or tip of a knife to gently pop the bubble, then use a warm, dry offset spatula to smooth the area. For a cake covered in many small bubbles, chilling the cake and then doing a final pass with a hot, dry scraper can help smooth them out.
Addressing Buttercream Sliding or Melting
Buttercream that is too soft, or a cake that is too warm, can lead to the buttercream sliding off the sides or becoming too difficult to smooth properly.
- Solution: This is usually a temperature issue. Ensure both your cake and buttercream are at the correct temperature. Your cake should be completely cool (or chilled/frozen briefly). Your buttercream should be soft enough to spread but firm enough to hold its shape.
- Fixing: If the buttercream is too soft, or the cake is warming up too quickly (especially in a warm environment), stop working and chill the cake (with the problematic buttercream on it) in the refrigerator for 15-30 minutes until the buttercream firms up. You may need to remix your buttercream if the entire batch is too soft by adding a bit more powdered sugar or chilling it. Working in a cooler room helps significantly. For instance, if your kitchen is above 75°F (24°C), consider turning on air conditioning or working during a cooler part of the day.
Achieving a Consistent Buttercream Thickness
An uneven layer of buttercream can make the cake look lopsided and affect the cake's structure if layers are stacked.
- Solution: Applying the buttercream evenly from the start is key. Using a piping bag to pipe buttercream frosting in consistent horizontal lines around the sides and filling the top evenly before smoothing helps achieve uniform thickness. This provides a consistent amount of frosting for your scraper to work with.
- Fixing: When smoothing the sides with a scraper, ensure you apply consistent pressure from top to bottom and maintain a steady angle (90 degrees). If you notice a thin spot, add a little more buttercream to that specific area with a small offset spatula and re-scrape the section. Don't try to fill a thin spot by pressing harder with the scraper elsewhere; this will just create more unevenness. Aim for a buttercream layer roughly 1/4 to 1/2 inch thick for standard coverage.
Tips for Practicing and Refining Your Buttercream Skills
Mastering buttercream application takes practice. Like any skill, repetition and experimentation are key to improving your technique and gaining confidence. Don't expect perfection on your first try.
Setting aside dedicated time for practice, even without a real cake, can accelerate your learning process. The more you handle the tools and the buttercream, the more intuitive the process becomes.
Practice on Dummy Cakes: Mastering Techniques
Using dummy cakes (styrofoam cake forms) is an excellent way to practice buttercream application without wasting ingredients or having to bake multiple cakes.
- Benefits: Dummy cakes are reusable, stable, and come in standard cake sizes and shapes. You can practice leveling, crumb coating (even if just a thin layer to simulate), applying the final coat, smoothing sides, creating sharp edges, and trying various textures repeatedly.
- How to Practice: Cover the dummy cake with a thin layer of shortening or a very thin, firm layer of buttercream. Then, apply a batch of buttercream as you would to a real cake. Practice smoothing the sides and top. Once you've practiced, scrape the buttercream off the dummy cake, place it back into your mixing bowl, and re-whip it briefly to remove air before practicing again. This allows you to get many repetitions in with just one batch of frosting. You can practice how to pipe buttercream frosting lines directly onto the dummy before smoothing to get the feel of even application.
Experimenting with Different Tools and Textures
Don't be afraid to try different types and sizes of spatulas and scrapers. Each tool feels slightly different and can produce unique results.
- Spatula Exploration: Try using a small offset spatula for applying frosting between layers and a larger one for the top. Experiment with both metal and plastic scrapers to see which you prefer for smoothing sides and achieving sharp edges. Some bakers find a flexible plastic scraper better for textured finishes, while a rigid metal one is preferred for sharp edges.
- Texture Play: Once you're comfortable with basic smoothing, dedicate practice time to trying out different textures like swirls, waves, or comb patterns (using a textured scraper). Practice on a practice board (like a large tile or cutting board) or a dummy cake. This helps you understand the right angle and pressure needed for each technique before attempting it on a finished cake.
Studying Professional Cake Designs for Inspiration
Looking at cakes decorated by professionals can provide valuable inspiration and insight into different application techniques.
- Observation: Analyze photos of cakes online or in books. Pay attention to how the buttercream is applied – is it perfectly smooth? Is there a specific texture? Are the edges sharp or rounded? How is the color applied?
- Reverse Engineering: Try to figure out how a particular look was achieved. If you see a cake with a beautiful textured swirl, think about what tool might have been used and the motion required. If you see perfectly sharp edges, consider the steps needed (crumb coat, ample frosting, metal scraper, chilling, hot spatula). Many professional bakers share process videos online, which can be incredibly helpful for seeing techniques in action, including how to pipe buttercream frosting onto the cake for coating or decoration.
Buttercream Application Ideas and Inspiration
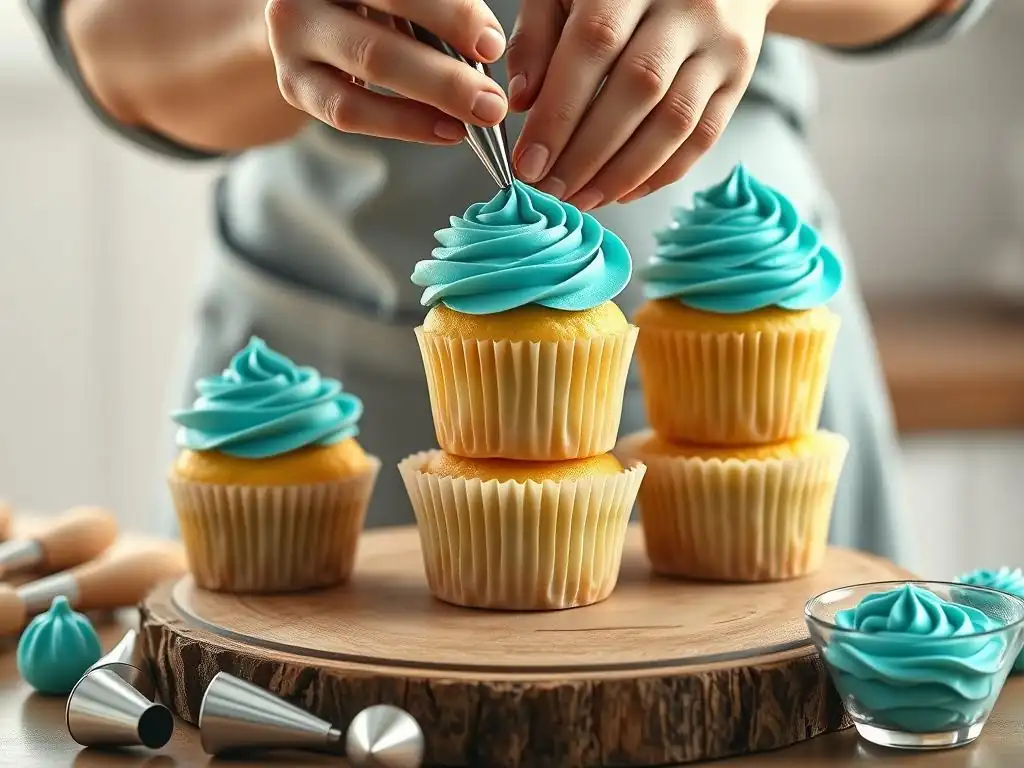
Buttercream offers incredible versatility in cake design. Beyond a simple smooth coat, you can use it to create a wide array of looks, from minimalist to highly decorative. Exploring different styles can spark ideas for your own creations.
These examples showcase how varying the application method can dramatically change the cake's aesthetic, demonstrating the power of mastering these techniques.
Naked Cakes: Minimalist Buttercream Application
Naked cakes are characterized by their minimal buttercream, where the cake layers and fillings are partially or fully visible.
- Technique: This style involves applying a very thin layer of buttercream, often just enough to fill the gaps between layers and provide a sheer coating on the sides. Some versions have no buttercream on the sides at all, only between layers.
- Look: The look is rustic, organic, and highlights the texture and color of the cake itself. Achieving this requires precise leveling and stacking, as the cake layers are so prominent. The buttercream layer on the sides is often scraped back significantly, sometimes leaving just enough to catch crumbs and provide a hint of frosting. It's about controlled, minimal application.
Semi-Naked Cakes: Partially Covered Designs
Semi-naked cakes are a popular variation where a thin layer of buttercream is applied and then partially scraped away, allowing some of the cake to show through but still providing more coverage than a fully naked cake.
- Technique: Apply a thin crumb coat and chill. Then, apply a slightly thicker final coat. Use a cake scraper to scrape away most, but not all, of the buttercream from the sides, creating streaks and allowing patches of cake to show through. The top is usually fully frosted and smoothed.
- Look: This style offers a balance between the rustic look of a naked cake and the polished finish of a fully frosted one. It's versatile and works well with various decorations like fresh flowers or fruit. The amount of buttercream scraped off can be adjusted to create different effects, from heavily streaked to just slightly revealing the cake beneath.
Buttercream Swirls and Rosettes: Decorative Finishes
Beyond coating, buttercream is perfect for decorative piping using a piping bag and tips. Learning how to pipe buttercream frosting is a fundamental skill for adding borders, swirls, rosettes, and other embellishments.
- Swirls/Rosettes: Use a piping bag fitted with a star tip (open or closed, e.g., Wilton 1M or 2D). Hold the bag perpendicular to the surface and apply steady pressure while moving the bag in a circular motion starting from the center outwards to create a rosette, or in a continuous spiral for a swirl.
- Borders: Use various tips (star, round, shell) to pipe decorative borders along the top or bottom edge of the cake. This not only adds decoration but can also hide any imperfections where the cake meets the board or where the top meets the sides. Learning how to pipe buttercream frosting consistently is key to uniform rosettes or borders. A single batch of buttercream can often produce dozens of rosettes on cupcakes or cover the border of a multi-tiered cake.
Cleaning and Storing Buttercream and Tools
Properly cleaning your tools and storing leftover buttercream are essential for maintaining your equipment and minimizing waste. Good habits here make the next baking session much easier.
Taking care of your tools ensures they last longer and perform better. Storing buttercream correctly means you'll have frosting ready for spontaneous baking projects or for fixing mistakes on a finished cake.
Proper Cleaning of Spatulas and Scrapers
Buttercream can be greasy and sticky, requiring thorough cleaning to remove all residue.
- Immediate Cleaning: The easiest time to clean tools is immediately after use, before the buttercream hardens. Scrape off as much excess buttercream as possible using a bench scraper or paper towel.
- Washing: Wash spatulas, scrapers, and turntables in warm, soapy water. Use a brush or sponge to remove all traces of grease. For stubborn residue, a degreasing dish soap can be helpful. Metal tools are usually dishwasher safe, but check manufacturer instructions. Plastic tools are often hand-washed to prevent warping or discoloration. Ensure all tools are thoroughly dried to prevent rust (for metal) or water spots.
Storing Leftover Buttercream: Maintaining Freshness
Buttercream can often be stored and reused, saving time and ingredients. The method depends on how long you plan to store it.
- Short-Term Storage (Room Temperature): If using within a day or two and your kitchen isn't excessively warm, airtight container on the counter is often fine for butter-based buttercreams (like American buttercream). However, check the ingredients; frostings with fresh cream or eggs (like Swiss or Italian meringue buttercream) should be refrigerated.
- Medium-Term Storage (Refrigerator): Store buttercream in an airtight container in the refrigerator for up to 1-2 weeks. Before using, let it come to room temperature and re-whip it briefly with a paddle attachment on low speed to restore its smooth consistency and remove any stiffness or air pockets from chilling. You might need to add a tablespoon of liquid to help it loosen up.
- Long-Term Storage (Freezer): Buttercream freezes exceptionally well. Store in a freezer-safe, airtight container for up to 3-6 months. To use, thaw overnight in the refrigerator, then let it come to room temperature. Re-whip thoroughly until smooth and pliable. Freezing is a great way to save that extra batch or practice buttercream. Label containers with the date and flavor.
Conclusion: Elevating Your Cakes with Buttercream Artistry
Mastering buttercream application is a journey that transforms your cakes from simple baked goods into works of art. From the foundational steps of leveling and crumb coating to the finesse of achieving a smooth finish or experimenting with textures, each technique builds upon the last, expanding your creative possibilities. The ability to confidently apply buttercream provides a perfect canvas for further decoration, including learning how to pipe buttercream frosting for intricate details or simple elegance.
With practice, the essential skills of spreading, smoothing, and scraping will become second nature. Don't be afraid to experiment with different tools, practice on dummy cakes, and seek inspiration from others. Every cake you decorate is an opportunity to refine your skills and develop your unique style. Embrace the learning process, and soon you'll be creating stunning cakes that taste as good as they look, impressing friends, family, and maybe even yourself.
Continuing Your Journey in Cake Decorating
Your exploration of cake decorating doesn't end with mastering smooth buttercream. There's a vast world of techniques waiting to be discovered, from intricate piping designs using various tips to working with other mediums like ganache, fondant, or royal icing. Consider exploring classes, online tutorials, or books to learn new skills.
Practice the techniques discussed here regularly. Try different types of buttercream (like meringue-based ones) and see how they handle differently. Challenge yourself with new designs or cake sizes. The more you bake and decorate, the more confident and skilled you will become. Remember that every baker, even professionals, started with the basics. Keep practicing, keep creating, and enjoy the delicious and beautiful results of your growing buttercream artistry.
Frequently Asked Questions
How do I achieve smooth buttercream frosting when piping?
Achieving smooth buttercream involves ensuring your buttercream is the right consistency. Avoid air pockets by mixing the buttercream properly, and practice your piping technique to ensure even pressure for a seamless look.
What are the essential piping tips for a beginner?
Beginners should start with round tips for simple outlines and drop flowers. A star tip is also a good choice for creating classic swirls and borders, offering a versatile and forgiving design.
How do I prevent air bubbles from ruining my piped frosting designs?
Tap your piping bag gently on the counter to release trapped air. Also, ensure your buttercream is properly mixed to avoid incorporating excessive air during the mixing process.
What is the best way to fill a piping bag without making a mess?
Fold the top of the piping bag over your hand to create a cuff. Place the bag in a tall glass for support while you fill it with buttercream, ensuring you don't overfill it.
How do I store leftover buttercream frosting after piping?
Leftover buttercream can be stored in an airtight container in the refrigerator for up to a week. Allow it to come to room temperature and re-whip it before using to restore its smooth consistency.
Final Reflection: Mastering the Art of Piping, One Swirl at a Time
The ability to expertly pipe buttercream frosting is no longer just a niche skill; it's a fundamental element of modern baking, transforming ordinary cakes into breathtaking masterpieces. From the intricate details of a wedding cake to the simple elegance of cupcakes, piping elevates the entire baking experience, adding a touch of artistry that captivates both the baker and the recipient. This accessibility to beautiful, professional-looking desserts empowers home bakers to create truly special treats.
The impact of mastering piping techniques extends far beyond the kitchen. It's a testament to the power of patience, precision, and practice – qualities that translate to success in many other areas of life. The satisfaction derived from creating something beautiful with your own hands is immeasurable. As the renowned pastry chef, Jacques Torres, once said, Baking is about precision, but it's also about passion. You have to love what you do.
This sentiment perfectly encapsulates the journey of learning to pipe, a process that requires dedication but yields immense personal reward.
Now, it's your turn to embrace the challenge. Don't be intimidated by the initial learning curve; remember the joy of creating something beautiful, the satisfaction of mastering a new skill, and the delicious results that await. Pick up your piping bag, choose your favorite frosting, and let your creativity flow. The world of piped desserts is vast and exciting; explore its possibilities, experiment with different techniques, and most importantly, have fun! Your next baking project awaits.
Unleash Your Inner Pastry Chef!
Thanks for joining us on this baking journey! We hope you’ve gained valuable insights into the art of piping. Ready to put your new skills to the test?
- Master a new piping technique: Try practicing the star tip or shell border you learned today – a simple cupcake can become a masterpiece!
- Share your creations: Show us your piping progress on social media using #BakeWithEasePiping. We'd love to see your beautiful bakes!
- Explore advanced piping techniques: Dive deeper into our comprehensive recipe library for even more challenging (and rewarding!) piping projects.
What delicious design will you pipe next?