
Troubleshooting Air Bubbles in Your Piping Bag

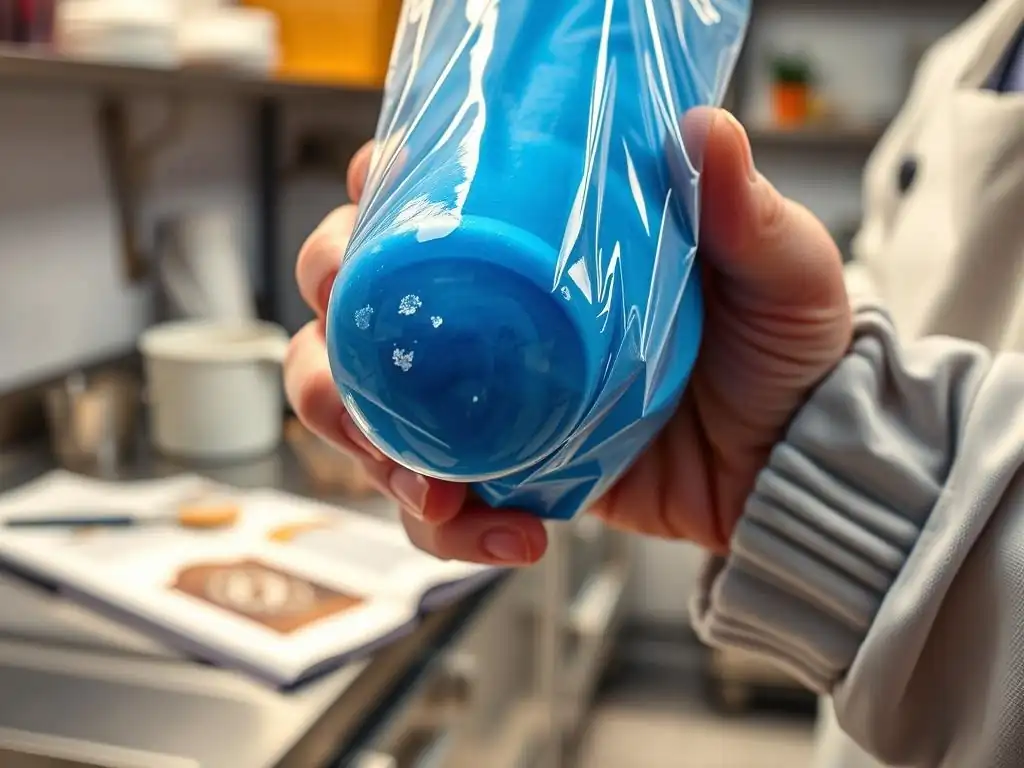
Welcome to BakeWithEase, where we transform baking challenges into delicious triumphs! Ever battled those frustrating air bubbles in your piping bag? They can ruin even the most beautifully decorated creations. Discover the secrets to achieving smooth, professional finishes in our latest guide, designed to help intermediate bakers master this essential skill. Read on to unlock the simple techniques that will make air bubbles a thing of the past and elevate your decorating game!
- Troubleshooting Air Bubbles in Your Piping Bag: A BakeWithEase Guide
- Understanding Air Bubbles in Piping Bags: Why They Happen
- The Frustration of Air Bubbles: Impact on Your Baking
- Piping Bag Air Bubble Fix: Proven Techniques for Smooth Piping
- Advanced Piping Techniques: Further Preventing Air Inclusion
- Dealing with Stubborn Air Bubbles: What to Do When All Else Fails
- Maintaining a Bubble-Free Piping Bag: Tips for Consistent Results
- Troubleshooting Specific Frosting Types: Addressing Unique Challenges
- Common Mistakes to Avoid: Preventing Air Bubbles from Forming
- Mastering Piping: Beyond Air Bubble Fixes
- Frequently Asked Questions
- Final Reflection: Mastering the Art of the Flawless Piping Bag
- Conquer Those Pesky Air Bubbles!
Troubleshooting Air Bubbles in Your Piping Bag: A BakeWithEase Guide
Welcome to BakeWithEase! Dealing with air bubbles in your piping bag can be one of the most frustrating challenges when you're trying to create beautiful, smooth decorations on cakes, cupcakes, or cookies. These little pockets of air can ruin intricate designs, cause uneven lines, and generally make your piping experience less enjoyable. But don't worry, mastering the art of piping, including a reliable piping bag air bubble fix, is absolutely achievable with the right techniques and understanding. Let's dive into why these bubbles form and how you can banish them for good.
Understanding Air Bubbles in Piping Bags: Why They Happen
Air bubbles aren't just random occurrences; they are a result of how frosting is prepared, handled, and loaded into the piping bag. Understanding the underlying reasons helps you prevent them before they even become an issue. It's all about minimizing the opportunity for air to get trapped within the frosting or icing.
The Science Behind Air Traps in Frosting and Piping
Frosting, especially buttercream and whipped cream-based varieties, is essentially an emulsion of fats, sugars, liquids, and sometimes air. When you mix ingredients, you inevitably incorporate some air. The consistency of the frosting plays a significant role; thicker frostings tend to trap air more easily than thinner ones. Think about whipping cream – you intentionally incorporate air to make it light and fluffy. While desirable for texture in some cases, this trapped air becomes problematic when forced through a narrow piping tip.
Furthermore, the physical properties of the frosting mean it doesn't flow perfectly smoothly into every nook and cranny of the piping bag. As you fill the bag, small voids can form, especially near the tip or along the seams, which are then filled with air rather than frosting. When pressure is applied, this trapped air is forced out, creating bursts that disrupt the flow of the frosting, leading to gaps or sudden splatters in your carefully piped lines or swirls.
Common Causes of Air Pockets During Piping
One of the most frequent causes is improper filling of the piping bag. Scooping frosting directly into the bag without care often introduces significant amounts of air. Imagine using a spoon to plop frosting in – this creates pockets and layers that trap air between them. A related issue is using a bag that is too full, which makes it harder to manage and increases the likelihood of air getting pushed down towards the tip as you squeeze.
Another common culprit is the consistency of the frosting itself. If your frosting is too stiff or has been overmixed, it can hold onto air bubbles more stubbornly. For instance, a very firm buttercream might contain many tiny air pockets from whipping. Similarly, if the frosting is too warm, it can separate slightly, creating tiny voids where air can accumulate. Even the act of squeezing the bag can sometimes introduce air, especially if you release pressure and then re-squeeze repeatedly without maintaining a consistent flow.
The Frustration of Air Bubbles: Impact on Your Baking
Encountering air bubbles mid-decoration can quickly turn a relaxing baking session into a frustrating ordeal. The visual impact on your finished product can range from slightly annoying inconsistencies to completely ruined designs, undermining all your hard work in baking the treat itself.
Uneven Frosting and Decorating Issues
Air bubbles inevitably lead to an uneven flow of frosting. As you pipe a line or fill a space, a sudden burst of air will create a gap or a blob where the continuous stream should be. This is particularly noticeable when piping straight lines, borders, or filling in areas with a smooth layer of frosting. Instead of a clean, consistent application, you get a bumpy, irregular surface.
Consider piping a simple shell border around a cake. Each shell should be uniform in size and shape, tapering smoothly. If an air bubble comes through, that particular shell might have a sudden break in its curve, a flat spot, or even a splat of frosting as the air is expelled. This inconsistency across the border diminishes the overall polished look of the cake, making it appear less professional or carefully finished.
Ruined Designs: The Cost of Air Bubbles
For more intricate designs, the impact of air bubbles is even more severe. Piping delicate details like lettering, fine lines, or small stars requires a continuous, consistent flow of frosting. A single air bubble can completely break a letter, distort a fine line, or cause a star tip to produce a misshapen blob instead of a crisp point.
Imagine piping a name or message on a cake. You're halfway through a letter 'S' when a bubble bursts, leaving a gap or a mess. Often, fixing this requires scraping off the offending section and attempting to re-pipe it, which can be difficult without smudging the surrounding decoration.
In the worst cases, particularly with complex lace work or detailed images, a series of air bubbles can make the entire design look messy and amateurish, potentially forcing you to abandon or significantly alter your original plan. A reliable piping bag air bubble fix is crucial for saving your carefully planned aesthetics.
Piping Bag Air Bubble Fix: Proven Techniques for Smooth Piping
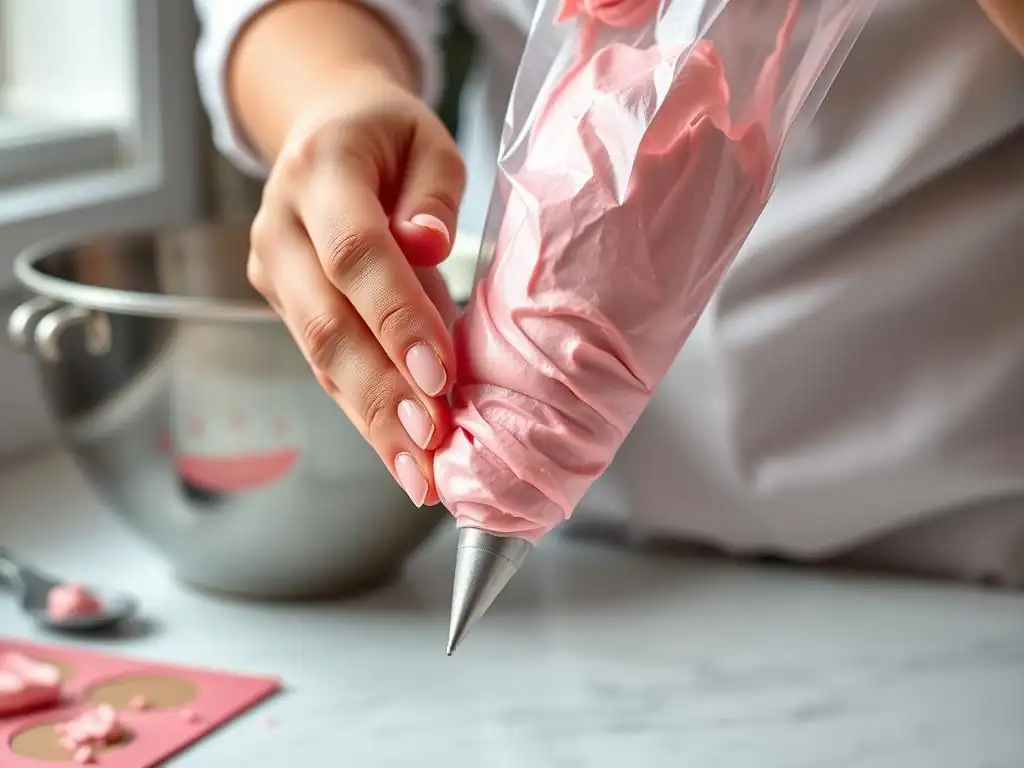
Fortunately, preventing and eliminating air bubbles is a skill you can develop. A good piping bag air bubble fix starts with prevention during filling and includes simple techniques to release any air that does get trapped. These methods are widely used by professional bakers for consistent, smooth results.
Technique 1: The Initial Fill - Preventing Air Entrapment
The first step to a bubble-free piping experience happens before you even start decorating. How you fill your piping bag is critical in minimizing the amount of air that gets trapped within the frosting. Taking a moment to fill the bag properly can save you a lot of frustration later on.
Proper Filling Method: Minimizing Air from the Start
A highly effective method is to place the piping bag, with the tip already inserted (or the end cut for a coupler), into a tall glass or container. Fold the top edges of the bag down over the rim of the glass, creating a wide opening. This provides stability and allows you to use both hands to fill the bag.
Using a spatula or spoon, add frosting in large dollops, pushing it down towards the tip as you go. Avoid simply dropping spoonfuls in; instead, scrape the frosting against the side of the bag, encouraging it to flow down smoothly and fill the space without creating large voids. Fill the bag only about half to two-thirds full; an overstuffed bag is harder to manage and more prone to trapping air.
Once you've added the desired amount of frosting, gently unfold the edges of the bag from the glass. Before twisting the top, hold the bag upright and gently tap the bottom of the bag against your counter a few times. This helps settle the frosting and encourages any large air pockets near the bottom to rise.
Then, gather the top of the bag and twist it down firmly towards the frosting. This twisting action pushes the frosting down into the tip and forces air upwards and out the top. Ensure the twist is tight to maintain pressure and prevent frosting from escaping the wrong way.
Using a Spatula for Air-Free Filling
Using an offset spatula or a bench scraper is excellent for achieving a smooth, air-free fill. Instead of scooping frosting into the bag, you can use the spatula to "sweep" the frosting into the opening of the bag. Place a good amount of frosting on the spatula and then use the edge to scrape it into the bag, pressing it against the side as you do. This technique helps eliminate large air pockets by ensuring the frosting is packed relatively densely as it enters the bag.
Another spatula technique involves spreading a layer of frosting onto a piece of plastic wrap or parchment paper. Roll the frosting up tightly within the wrap/paper, creating a log. Twist the ends of the log. Cut one end off and simply insert the log into the piping bag. This method is particularly useful for multi-colored designs or when preparing bags ahead of time, and it drastically reduces the chance of incorporating air during the filling process itself because the frosting is already in a relatively compact form.
Technique 2: Burping the Bag - Releasing Trapped Air
Sometimes, despite your best efforts during filling, a few stubborn air bubbles might still find their way into the bag. The "burping" technique is specifically designed to locate and expel these trapped pockets of air before they reach the tip and ruin your work.
Squeezing Technique: Gently Releasing Air Pockets
Once your bag is filled and twisted shut, hold the bag vertically with the tip pointing upwards (or into a bowl). Gently squeeze the bag, applying steady pressure. Observe the frosting as it moves down towards the tip. If there are air bubbles, you will likely see them as gaps or sudden movements within the frosting. Continue squeezing gently. The air will rise to the top of the bag, away from the tip. Once you see frosting consistently coming out of the tip, you know the air has been expelled from that section.
This gentle squeezing should be done before you start piping onto your baked goods. It's a quick check to ensure a smooth flow. If you encounter a bubble while piping, stop squeezing, lift the bag slightly, and gently massage the area where you suspect the bubble is. Then, point the tip away from your project (perhaps into a scrap bowl) and squeeze again until frosting comes out smoothly. This prevents the disruptive burst of air onto your finished surface.
Rolling the Bag: Forcing Air Towards the Top
Another effective way to burp the bag is by using a rolling motion. After filling and twisting the top, lay the piping bag flat on a clean surface. Starting from the tip end, gently roll the bag upwards towards the twisted end. This action applies even pressure along the length of the bag, forcing any trapped air pockets to move upwards towards the opening.
As you roll, you'll see the frosting consolidate and any air move ahead of the roll. Once you reach the twisted end, the air will be trapped at the very top. You can then untwist the bag slightly to release the air, or if the twist is tight, the air will simply stay trapped above the frosting level, away from the tip. This method is particularly good for longer bags or when you suspect air is distributed throughout the frosting rather than just near the tip.
Technique 3: The "Tap and Shake" Method - Settling the Frosting
Sometimes, air bubbles are very small or dispersed throughout the frosting. The tap and shake method helps these tiny bubbles consolidate or rise to the top, allowing the frosting to settle into a more uniform mass within the bag. It's a simple yet effective final check before you begin piping.
Gentle Tapping to Release Bubbles
After filling and twisting the bag, hold it with the tip facing downwards (over a bowl or your counter). Gently tap the tip end of the bag against the surface a few times. The force of the tapping, combined with gravity, helps the frosting settle down towards the tip and encourages any trapped air bubbles within the frosting mass to rise upwards. Think of it like tapping a bottle of soda to make the bubbles rise.
This tapping should be gentle but firm enough to cause a slight jolt. Avoid aggressive banging, which could damage the tip or burst the bag. Focus the tapping motion on the tip end of the bag. You might even see small bubbles pop at the surface of the frosting inside the bag as you do this.
Shaking the Bag to Consolidate Frosting
Complementing the tapping, a gentle shaking motion can also help. Hold the twisted end of the bag firmly and give the bag a few gentle shakes downwards. This motion helps the frosting settle more compactly within the bag, reducing the space available for air pockets. It's less about creating bubbles (like shaking whipped cream) and more about using inertia to help the frosting fill the bag evenly and force existing air upwards.
Combine the tapping and shaking: Tap the tip down a few times, then give a gentle shake. Repeat this process a couple of times. You should feel the frosting settling more firmly in the bag. This simple technique can significantly reduce the number of small air bubbles that make it to the piping tip during your decorating session, contributing to a smoother piping bag air bubble fix process.
Advanced Piping Techniques: Further Preventing Air Inclusion
Beyond the basic filling and burping methods, incorporating certain advanced techniques and considerations into your piping routine can further minimize the likelihood of air bubbles forming in the first place. These tips relate to equipment choice and frosting preparation.
Using a Coupler: Ensuring a Tight Seal and Consistent Flow
A coupler is a two-part plastic or metal piece that allows you to easily change piping tips without changing the bag. When using a coupler, the base is placed inside the bag before filling, pushed down to the cut opening, and the tip is secured on the outside with the ring. This setup creates a very tight seal between the bag and the tip.
This tight seal is beneficial for preventing air bubbles because it reduces the possibility of air getting sucked back into the tip area as you release pressure. More importantly, when filling a bag with a coupler, you ensure the frosting is pushed down and fills the coupler's cavity completely before attaching the tip. This pre-filling of the coupler helps eliminate a common spot where air can get trapped right at the critical exit point. Using a coupler contributes to a more consistent flow and minimizes interruptions caused by stray air pockets.
Frosting Consistency: Achieving the Right Texture for Smooth Piping
The consistency of your frosting is paramount for smooth piping and minimizing air bubbles. Frosting that is too stiff can trap a lot of air during mixing and is harder to force through the tip smoothly, increasing the chance of air getting caught. Frosting that is too thin might flow too quickly or separate, also leading to inconsistent results.
The ideal consistency is typically described as smooth and spreadable, like peanut butter, but firm enough to hold its shape when piped. If your frosting seems too stiff, try adding a tiny bit of liquid (like milk, cream, or water) one teaspoon at a time, mixing thoroughly until the desired consistency is reached. If it's too soft, you might need to add more powdered sugar or chill it slightly. Achieving the right texture allows the frosting to flow more easily and uniformly through the piping bag, reducing the opportunity for air pockets to form or persist.
Bag Material Matters: Choosing the Right Piping Bag for the Job
Piping bags come in various materials: disposable plastic, reusable plastic, and canvas. The material can subtly affect your piping experience and the likelihood of air bubbles. Disposable bags are convenient but can sometimes be slippery or stretch inconsistently. Reusable plastic bags offer more grip and durability. Canvas bags are very durable but require thorough cleaning.
For minimizing air bubbles, the key is a bag that allows for consistent pressure and doesn't have seams that could potentially trap air. High-quality disposable bags or durable reusable plastic bags often work best. They allow you to maintain steady pressure, which helps push the frosting through smoothly and reduces the chance of air getting trapped in the bag's material or seams. Ensure the bag is cut correctly for your tip or coupler, creating a snug fit that prevents air from entering around the tip.
Dealing with Stubborn Air Bubbles: What to Do When All Else Fails
Even with the best techniques, sometimes a persistent air bubble just won't go away. Before you lose your cool (and your beautiful design), there are a couple of last-resort methods you can try to address those stubborn pockets of air. These are best used cautiously to avoid making things worse.
The Pin Prick Method: Releasing Trapped Air Directly
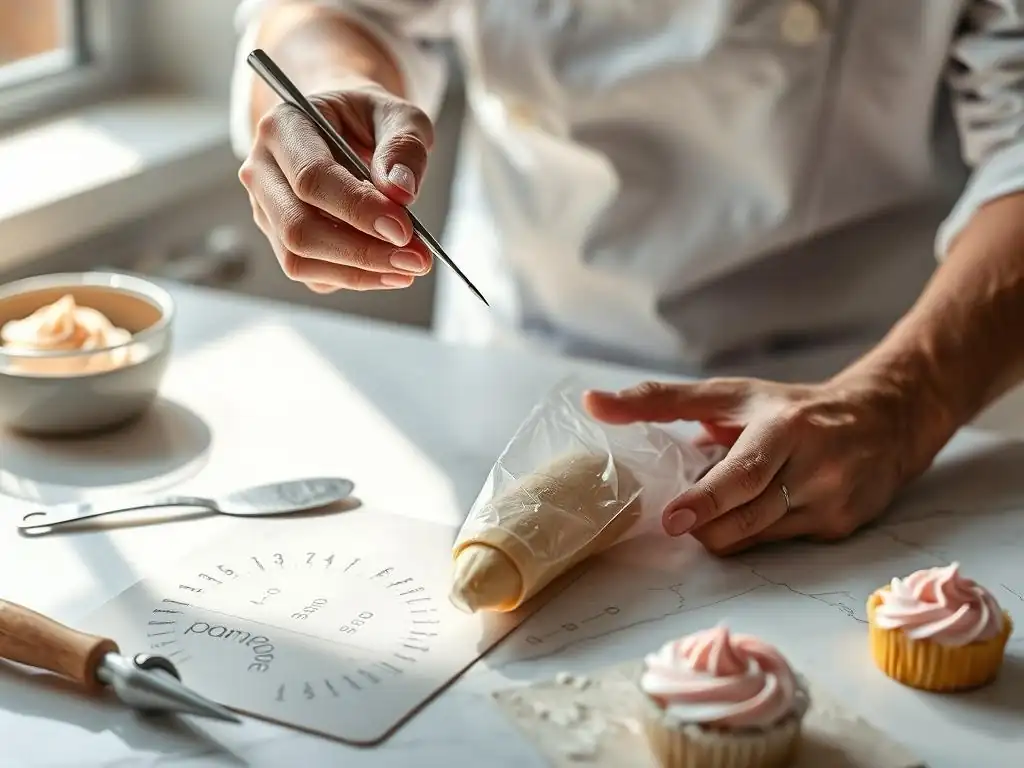
If you can see a large air bubble trapped within the frosting inside the piping bag, away from the tip, you can sometimes release it using a pin or a sharp skewer. Carefully insert the pin into the bag at the location of the bubble. Wiggle the pin slightly to create a small opening and allow the trapped air to escape.
This method requires precision and a bit of luck. It's best done on thicker bags where the hole won't easily tear. Be extremely careful not to puncture the bag in a way that creates a leak for the frosting. This technique is risky and should only be attempted if you can clearly identify a large bubble and are willing to potentially sacrifice the bag if it goes wrong. It's a targeted piping bag air bubble fix for visible, trapped pockets.
Refilling and Restarting: When to Give Up and Start Over
Sometimes, you've tried everything – burping, tapping, rolling – and the air bubbles just keep coming, or the frosting flow is hopelessly inconsistent. In such cases, the most effective, albeit frustrating, solution is to stop, scrape the frosting out of the bag, and restart the process.
Empty the bag back into your frosting bowl. Take this opportunity to examine the frosting. Is the consistency off? Did you overmix it initially?
You might need to give the frosting a gentle stir with a spatula to help release any incorporated air before refilling. Then, wash and dry your piping bag and tip (or grab a fresh one) and carefully refill using the proper techniques discussed earlier. While it's a setback, refilling ensures you start with a properly prepared bag and frosting, significantly increasing your chances of a smooth, bubble-free piping experience on your second attempt. Think of it as a reset button for your piping bag air bubble fix strategy.
Maintaining a Bubble-Free Piping Bag: Tips for Consistent Results
Achieving consistently smooth piping is a skill that improves with practice and attention to detail. Beyond fixing bubbles as they appear, adopting habits that prevent their formation in the first place is key to mastering the piping bag air bubble fix and enjoying effortless decorating.
Proper Storage of Frosting: Preventing Air Absorption
How you store your frosting before and even during a piping session can influence air bubble formation. If frosting is left exposed to air for extended periods, it can dry out slightly on the surface, and when you stir it back together, you can inadvertently fold in air. Storing frosting in an airtight container is crucial.
If you're working with a large batch of frosting and only filling your piping bag partially, keep the remaining frosting covered tightly with plastic wrap pressed directly onto the surface before sealing the container. This prevents a crust from forming and minimizes air contact. When you need to refill your bag, give the stored frosting a gentle stir with a spatula (avoid whipping motions) to ensure uniformity before scooping it into the bag using proper filling techniques.
Practice Makes Perfect: Developing Your Piping Skills
Ultimately, becoming proficient at piping with minimal air bubbles comes down to practice. The more you pipe, the better you become at feeling how the frosting should flow and recognizing when something is off, like an impending air bubble. Start with simple exercises on parchment paper: practice piping straight lines, zigzags, swirls, and dots.
Pay attention to the pressure you apply to the bag. Consistent, steady pressure is vital for a smooth flow and helps prevent air from getting trapped as you pipe. Learn to feel the frosting moving through the bag and tip. When you encounter an inconsistency, pause and try a gentle squeeze away from your project to see if an air bubble is the culprit. Regular practice builds muscle memory and intuition, making the techniques for a piping bag air bubble fix second nature.
Troubleshooting Specific Frosting Types: Addressing Unique Challenges
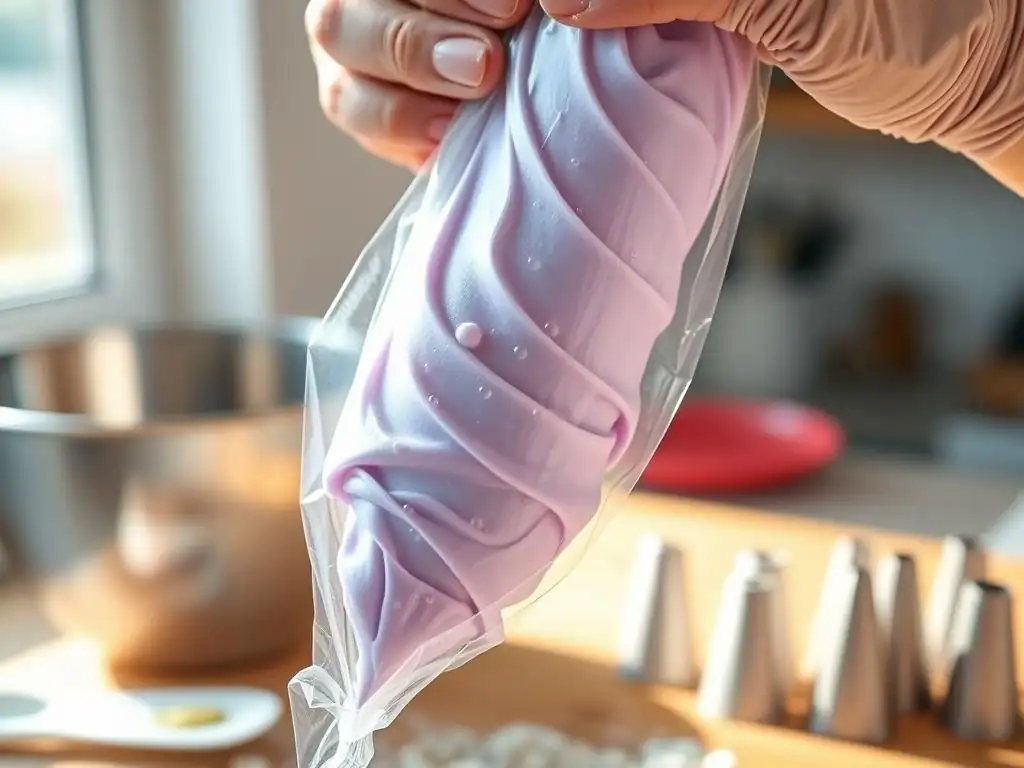
Different types of frosting have varying densities, textures, and tendencies to trap air. While the general principles of a piping bag air bubble fix apply across the board, there are specific considerations for common frosting types.
Buttercream: Tips for Eliminating Air in Buttercream Frosting
Buttercream, especially American buttercream made by creaming butter and powdered sugar, is notorious for trapping air during the whipping process. To minimize air bubbles in buttercream destined for piping, consider the mixing speed. While you need to cream the butter and sugar, try finishing the mixing on a lower speed for a minute or two. This helps to de-aerate the frosting, breaking down some of the tiny air pockets that were incorporated at higher speeds.
Before filling your piping bag, gently stir the buttercream with a spatula. Press the buttercream against the sides of the bowl to help force out any visible air bubbles. Some bakers even press the finished buttercream through a sieve to achieve an ultra-smooth, air-free consistency, though this is more labor-intensive. Ensuring your butter is at the correct room temperature (soft but not melted) also helps create a smoother consistency from the start, reducing the need for excessive whipping that incorporates air.
Royal Icing: Preventing Air Bubbles in Royal Icing Decorations
Royal icing, made from powdered sugar, egg whites (or meringue powder), and liquid, can also develop air bubbles, particularly when mixed or colored. Overmixing royal icing, especially with a stand mixer on high speed, can whip a lot of air into it. For piping consistency royal icing, mix on a low speed until just combined and smooth. Avoid whipping it until it's fluffy.
When coloring royal icing, gently stir in gel colors by hand rather than beating them in with a mixer. If you see small bubbles on the surface of your mixed icing, let it sit covered with a damp cloth for 10-15 minutes before transferring it to the piping bag. This resting period allows many of the surface bubbles to dissipate.
When filling the bag, fill it slowly and gently to avoid introducing new air. For very fine detail work with royal icing, some decorators will even tap the filled bag gently on the counter for several minutes to encourage tiny bubbles to rise.
Cream Cheese Frosting: Managing Air in Cream Cheese Frosting
Cream cheese frosting, typically a mix of cream cheese, butter, powdered sugar, and vanilla, is generally softer than buttercream and can be prone to incorporating air if overmixed or if the cream cheese isn't properly softened. Ensure your cream cheese and butter are properly softened to room temperature before mixing. This allows them to cream together smoothly without requiring excessive beating that introduces air.
Mix the frosting until just combined and smooth. Avoid whipping it for too long after adding the powdered sugar. If the frosting seems to have a lot of air, gently stir it with a spatula for a minute or two, pressing it against the sides of the bowl.
Because cream cheese frosting is often softer, it tends to settle in the bag more easily, and large air bubbles are less common than in stiffer buttercreams. However, filling the bag carefully and using the tapping method can still help ensure a smooth flow for your piping bag air bubble fix efforts.
Common Mistakes to Avoid: Preventing Air Bubbles from Forming
Knowledge is power, especially when it comes to preventing common issues like air bubbles in piping bags. Being aware of these pitfalls can help you avoid them and ensure a smoother piping experience from the outset.
Overmixing Frosting: A Recipe for Air Bubbles
One of the most common mistakes is simply overmixing your frosting, particularly buttercreams or anything involving creaming butter. While you need to mix ingredients thoroughly to combine them and achieve a smooth consistency, beating frostings on high speed for extended periods, especially after adding powdered sugar, whips excessive air into the mixture.
Aim to mix only until your ingredients are just combined and the frosting is smooth. For buttercreams, this might mean creaming butter and sugar until fluffy initially, but once powdered sugar is added, mix on a lower speed until smooth, scraping down the bowl frequently. Stop mixing as soon as the desired consistency is reached. Less mixing often means less trapped air, making your piping bag air bubble fix efforts much easier.
Using Warm Frosting: The Importance of Temperature Control
The temperature of your frosting significantly impacts its consistency and its tendency to trap or release air. Frosting that is too warm can become soft or even slightly separated, making it harder to handle and more likely to have voids where air can get trapped. Warm frosting also flows too quickly and can lead to messy piping.
Ensure your frosting is at a stable room temperature, cool enough to hold its shape but warm enough to be pliable. If your kitchen is warm, you might need to chill your frosting slightly in the refrigerator before using it. Just be sure to stir it gently after chilling to bring it back to a workable consistency without re-incorporating air. Using frosting at the proper temperature promotes a smooth, consistent flow through the piping bag.
Impatience: Taking the Time to Properly Prepare Your Bag
In the rush to start decorating, it's tempting to quickly scoop frosting into the bag and get going. However, impatience during the bag filling and preparation stage is a major contributor to air bubbles. Skipping the steps of properly opening the bag in a glass, carefully scraping frosting in, and taking a moment to burp the bag before starting will almost guarantee you'll encounter frustrating air pockets.
Take an extra minute or two to fill the bag correctly, pushing the frosting down as you go. Spend a few seconds gently tapping and squeezing the bag to expel visible air. This small investment of time upfront will save you significant frustration and rework later. Mastering the piping bag air bubble fix is as much about patient preparation as it is about technique.
Mastering Piping: Beyond Air Bubble Fixes
Eliminating air bubbles is a crucial step towards achieving beautiful piping results, but it's just one aspect of mastering this versatile decorating technique. Continuing to learn and refine your skills will open up a world of creative possibilities in your baking.
Resources for Improving Your Piping Skills
BakeWithEase.com offers a wealth of resources to help you improve your piping abilities. Explore our collection of step-by-step tutorials for various piping techniques, from basic swirls and stars to more complex flowers and lettering. We provide guides on choosing the right piping tips for different effects, understanding frosting consistencies for specific applications, and planning your cake decoration designs.
Look for articles and videos that demonstrate proper hand position, pressure control, and movement techniques. Practice these techniques on parchment paper until you feel comfortable before moving to your baked goods. Consider investing in a piping practice board, which allows you to practice designs repeatedly without using up frosting. Continuous learning and practice are key to elevating your piping from functional to fabulous.
Joining the BakeWithEase Community: Sharing Tips and Techniques
You're not alone in your baking journey! Join the BakeWithEase community to connect with other bakers, share your creations, ask questions, and learn from the experiences of others. Our forums and social media channels are great places to troubleshoot issues, like persistent air bubbles, and discover new tips and tricks from fellow enthusiasts.
Sharing your successes and challenges within the community can provide valuable feedback and support. Perhaps another member has a unique piping bag air bubble fix technique they've discovered, or they can offer advice on adjusting your frosting consistency based on their experience. Learning from and supporting each other makes the process of mastering skills like piping more enjoyable and rewarding. Happy piping!
Frequently Asked Questions
Troubleshooting Air Bubbles in Your Piping Bag
Air bubbles typically form when filling the piping bag or due to inconsistent pressure applied during piping. They can also result from the consistency of the frosting itself.
How can I prevent air bubbles when filling a piping bag?
To prevent air bubbles, try using a spatula to press the frosting against the side of the bag as you fill it. Avoid overfilling and gently squeeze the bag to release trapped air.
What's the best way to release air bubbles after filling the piping bag?
After filling, twist the top of the bag tightly and then gently squeeze the bag, starting from the top and working your way down. You can also use a pin to carefully pop any visible bubbles.
Can the type of frosting affect the formation of air bubbles?
Yes, certain frostings, especially those that are very thick or contain a lot of air incorporated during mixing, are more prone to air bubbles. Consider adjusting the frosting consistency if necessary.
What happens if I ignore air bubbles in my piping bag?
Ignoring air bubbles can lead to uneven piping and imperfections in your decorations. You might experience sudden bursts of air that disrupt your design and leave gaps in the frosting.
Final Reflection: Mastering the Art of the Flawless Piping Bag
The battle against air bubbles in your piping bag is not just a minor inconvenience; it's a crucial step in achieving professional-looking baked goods. A single, errant bubble can ruin the delicate swirl of a rose, the crisp lines of a border, or the smooth surface of a perfectly piped frosting. Mastering this seemingly small detail elevates your baking from hobby to artistry.
The persistent struggle with air bubbles highlights the importance of meticulous attention to detail in baking. It's a reminder that even the smallest imperfections can significantly impact the final product. The devil is in the details,
a phrase often used in various fields, rings especially true in the precise world of cake decorating. This seemingly simple technique of removing air bubbles speaks volumes about the dedication and patience required to create truly beautiful and impressive baked goods. It's a lesson that extends beyond the kitchen, reminding us that careful preparation and attention to detail are key to success in any endeavor.
So, the next time you fill your piping bag, take a moment to reflect on the process. Remember the techniques we've explored – the gentle tapping, the careful squeezing, the strategic use of a spatula. Don't just pipe; craft. Embrace the challenge of eliminating those pesky air bubbles, and watch as your baking transforms from good to truly exceptional. The journey to mastering the perfect pipe is a journey of precision, patience, and ultimately, artistic expression. Let the flawless swirls and crisp lines be a testament to your dedication and skill.
Conquer Those Pesky Air Bubbles!
Thanks for taking the time to learn how to banish air bubbles from your piping bag! We hope you found the tips and tricks helpful and are ready to create flawlessly decorated treats. Now, let's put that knowledge into action:
- Master the Perfect Fill: Practice your filling technique using the methods we discussed. Focus on a smooth, consistent fill to minimize air pockets. This is your key to success!
- Share Your Success: Show off your beautifully piped creations on social media using #BakeWithEaseNoBubbles! We'd love to see your results.
- Experiment with Different Fillings: Try experimenting with different consistencies of frosting or batter to see how it affects air bubble formation. This is a fun way to refine your skills.
Ready to take your piping skills to the next level and say goodbye to those annoying air bubbles forever?