
Your Piping Toolkit: A Beginner's Guide to Bags and Tips

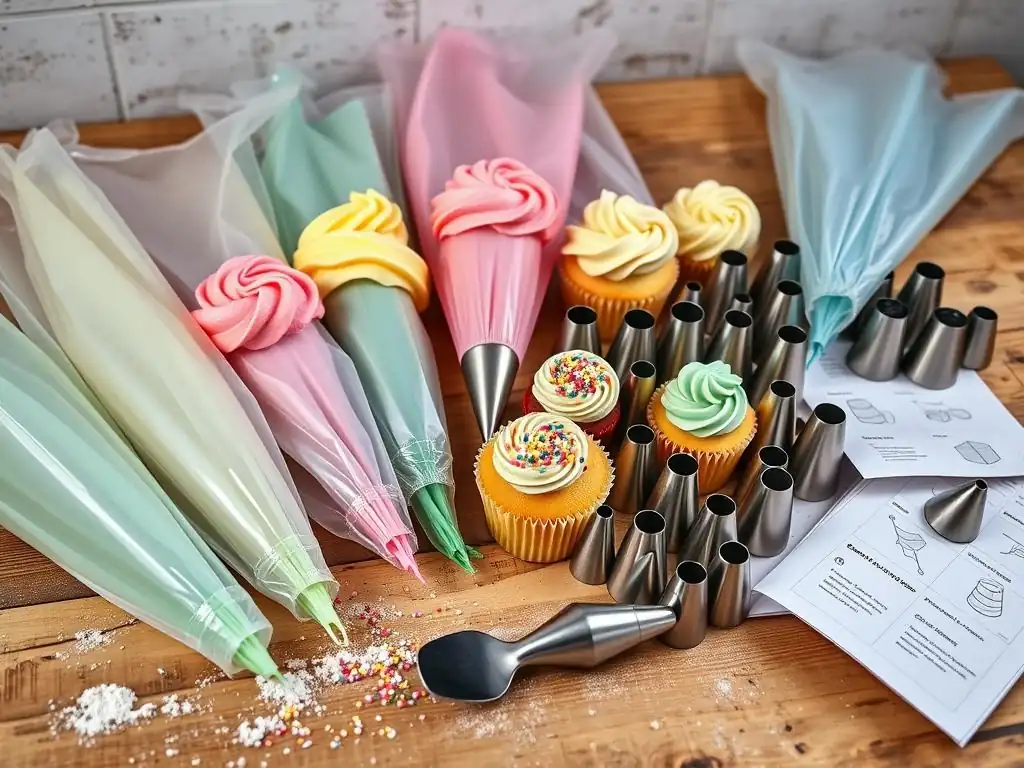
Welcome to BakeWithEase, your kitchen companion for all things baking! Ever wondered how those perfectly swirled frostings are achieved? Dive in as we demystify the art of decorating with our guide, "Your Piping Toolkit: A Beginner's Guide to Bags and Tips." Discover how to elevate your treats from simple to stunning with our beginner piping bag tips and learn the secrets that professional bakers use. Ready to create edible masterpieces? Let's get started!
- Your Piping Toolkit: A Beginner's Guide to Bags and Tips for Cake Decorating
- Introduction to Piping: Essential Tools for Cake Decoration
- Understanding Piping Bags: Choosing the Right One for You
- Exploring Piping Tips: A Beginner's Overview
- Preparing Your Piping Bag: A Step-by-Step Guide
- Filling the Piping Bag: Preventing Air Pockets and Messes
- Basic Piping Techniques: Getting Started with Frosting
- Cleaning and Storing Your Piping Bags and Tips
- Troubleshooting Common Piping Problems
- Advanced Piping Techniques to Explore Later
- Conclusion: Embracing the Art of Piping
- Frequently Asked Questions
- Final Reflection: Mastering the Art of Piping, One Squeeze at a Time
- Unleash Your Inner Pastry Chef!
Your Piping Toolkit: A Beginner's Guide to Bags and Tips for Cake Decorating
Introduction to Piping: Essential Tools for Cake Decoration
Why Master Piping? Elevating Your Baking Creations
Mastering piping techniques is a game-changer for any home baker looking to elevate their desserts from simply delicious to visually stunning. It's the skill that allows you to transform a plain frosted cake into a masterpiece adorned with intricate borders, delicate flowers, or personalized messages. Piping isn't just about aesthetics; it also allows for precise application of frostings, creams, or even meringue, ensuring even layers and consistent texture, which is crucial for achieving professional-looking results. For beginners, understanding the basics of piping bag tips opens up a world of creative possibilities right in your own kitchen.
Think about the difference between spreading frosting with a spatula versus piping swirls or rosettes. The piped designs add height, texture, and visual interest that a flat surface simply can't achieve. Learning these fundamental skills, starting with beginner piping bag tips and bags, builds confidence and expands your baking repertoire significantly. It allows you to tackle more complex decorating projects, impress friends and family, and find immense satisfaction in creating edible art. Even simple cupcakes can become extraordinary with just a few well-executed piping techniques.
The Beginner's Guide Focus: Bags and Tips
This guide is specifically designed to walk you through the foundational elements of piping: the bags and the tips. Before you can pipe that perfect swirl or delicate leaf, you need to understand the tools themselves – what they are, how they work, and which ones are best suited for someone just starting out. We'll demystify the various types of piping bags available, from disposable options for convenience to reusable ones for sustainability, discussing their pros and cons.
We will then dive into the world of piping tips, focusing on the essential shapes that every beginner should have in their toolkit. You'll learn about the anatomy of a tip and how different shapes produce different effects, from simple dots and lines to more elaborate stars and petals. Understanding these basic beginner piping bag tips is the crucial first step in developing your piping skills. We'll cover how to prepare your bag, fill it correctly, and introduce basic techniques to get you started on your cake decorating journey.
Understanding Piping Bags: Choosing the Right One for You
Disposable Piping Bags: Convenience and Hygiene
Disposable piping bags, often made from food-grade plastic or polyethylene, are a popular choice, especially for beginners or those baking frequently. Their primary advantage lies in their ease of use and cleanup – simply use them and throw them away. This eliminates the need for washing greasy bags, saving significant time and effort. This hygiene factor is particularly appealing when working with different colors or types of frosting, as it prevents cross-contamination of flavors or colors.
While convenient, disposable bags can vary in quality. Thicker, more durable bags are less likely to burst under pressure, which is a common frustration for beginners. Look for bags labeled as heavy-duty or anti-burst. A standard roll of 100 bags might cost around $10-$20, making them relatively inexpensive for individual use, though the cost can add up over time compared to reusable options. They are ideal for small projects, multiple colors, or when you need to quickly switch between different frostings or fillings.
Reusable Piping Bags: Durability and Sustainability
Reusable piping bags are typically made from sturdy materials like silicone or plastic-coated nylon. Their main benefits are durability and environmental friendliness. A good quality reusable bag can last for years with proper care, making it a more sustainable and cost-effective option in the long run compared to constantly buying disposable bags. They are often more robust and can withstand higher pressure, which is useful when working with thicker frostings or doughs.
Cleaning reusable bags requires more effort than simply tossing them. They need to be thoroughly washed, often inside out, to remove all traces of grease and sugar, and then dried completely to prevent mold or mildew growth. While some are dishwasher safe, hand washing is often recommended for longevity. A set of 2-3 reusable bags might cost between $15-$30, a higher initial investment but one that pays off over time. They are excellent for larger projects, frequent use, and when working with a single color or type of frosting for extended periods.
Fabric Piping Bags: Traditional Choice for Experienced Bakers
Fabric piping bags, traditionally made from closely woven cotton or linen that is often coated or treated, represent a classic choice in the baking world. These bags are known for their flexibility and grip, conforming well to the hand and providing excellent control, which is why many experienced decorators favor them. The natural give of the fabric can sometimes make it easier to feel the pressure you are applying.
However, fabric bags require the most meticulous cleaning. Their porous nature means they can harbor bacteria if not washed and dried thoroughly immediately after use. They are generally not recommended for beginners due to the cleaning challenge and the fact that they can stain easily, especially with vibrant food colors. While durable, they may eventually fray or wear out with heavy use. Their cost can range from around $8-$15 per bag, similar to or slightly less than reusable bags made from synthetic materials, but their maintenance is a significant consideration.
Piping Bag Sizes: Matching the Bag to Your Project
Piping bags come in a variety of sizes, typically measured in inches along the longest edge or diagonally from the tip to the opening. Common sizes range from small 8-inch or 10-inch bags to large 16-inch or 18-inch bags, and even larger ones up to 24 inches. Choosing the right size depends on the amount of frosting or filling you need to use and the scale of your decorating project.
For small detail work or when using multiple colors for cupcakes, smaller bags (8-12 inches) are ideal. They are easier to handle and control when working with smaller quantities of frosting. For decorating larger cakes, piping borders, or filling pastries, medium to large bags (14-18 inches) are more efficient as they hold more frosting, reducing the need for frequent refills.
Using too small a bag for a large job is frustrating, while using too large a bag for delicate work can make control difficult. For beginners, a 12-inch or 14-inch bag is a versatile starting point for practicing basic piping bag tips techniques.
Exploring Piping Tips: A Beginner's Overview
The Anatomy of a Piping Tip: Parts and Functionality
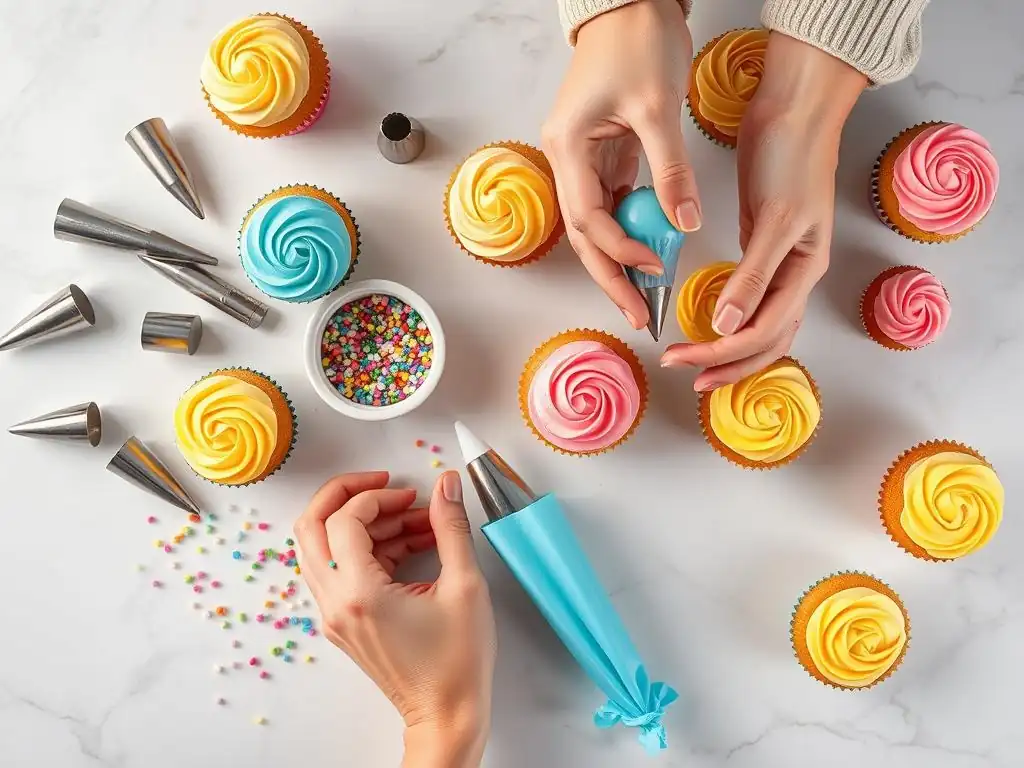
Understanding the basic structure of a piping tip helps in selecting the right one for your desired effect. Most metal piping tips are small, conical metal pieces, typically made from stainless steel, though plastic versions also exist. They have a wide base that fits inside the piping bag and a narrow opening at the other end through which the frosting is extruded. The shape of this opening determines the pattern of the piped frosting.
Key parts include the base (the wider end), the body (the conical section), and the tip (the narrow opening). The shape of the tip opening (round, star, slit, etc.) and the size of the opening are the primary factors that dictate the final piped design. For instance, a small round opening creates fine lines or dots, while a large open star creates bold swirls or rosettes. Learning to associate the tip shape with the resulting pattern is fundamental for beginner piping bag tips mastery.
Essential Piping Tips for Beginners: A Starter Set
For those just starting out with piping, investing in a large, comprehensive set of tips right away can be overwhelming and unnecessary. A small starter set focusing on a few versatile shapes is much more practical. These essential tips will allow you to practice fundamental techniques and create a wide variety of common decorations. A good beginner set might include a few sizes of round tips, a couple of open and closed star tips, and possibly a leaf or petal tip.
Many starter sets are available from brands like Wilton, Ateco, or Fat Daddio's, often including the most popular sizes. For example, a Wilton Method Course 1 Student Kit often includes tips like the #1A (large round), #12 (medium round), #21 (open star), #1M (open star), #104 (petal), and #352 (leaf). These tips cover a wide range of basic techniques and are excellent for practicing beginner piping bag tips applications like borders, stars, swirls, and simple flowers.
Round Piping Tips: Versatile for Lines and Dots
Round tips are arguably the most fundamental piping tip shape and an absolute essential for any beginner piping bag tips collection. They have a simple circular opening and are incredibly versatile. Different sizes of round tips produce lines and dots of varying thicknesses. A very small round tip (like #1 or #2) is used for fine details, writing text, or creating delicate outlines.
Medium round tips (like #5 or #12) are great for piping dots of different sizes, filling in areas, or creating simple bead borders. Large round tips (like #1A or #1M, although #1M is also a star tip, large round tips are similar in function for swirls) are perfect for piping large, smooth swirls on cupcakes, filling pastries, or creating bold, smooth borders. Mastering consistent pressure with a round tip is a foundational skill for all other piping techniques.
Star Piping Tips: Creating Shells and Stars
Star tips are another cornerstone of beginner piping bag tips. They have a serrated opening, which can be open or closed, creating patterns with ridges. Open star tips (like #18, #21, #32, or #1M) produce stars, shells, zigzags, and rosettes with distinct points. The number of points and the depth of the serrations vary between tips, affecting the final look.
Closed star tips (like #30, #35, #199, or #2D) have points that curve inward slightly, creating patterns with more defined ridges and a slightly different texture, often producing a more ruffled or swirled effect, excellent for piping rosettes or dollops on cupcakes. Practicing basic movements like pulling straight up for a star or moving sideways while maintaining pressure for a shell border are key techniques with these tips.
Leaf Piping Tips: Realistic Foliage for Cakes
Leaf tips have a V-shaped opening, designed to create realistic-looking leaves. They are typically held with the V-opening perpendicular to the surface. Applying pressure while pulling away and then releasing pressure quickly creates a tapered leaf shape. Varying the pressure and movement allows for leaves of different sizes and textures.
While perhaps not the absolute first tip a beginner buys, a leaf tip (like #67, #68, or #352) is a valuable addition once you've mastered round and star tips. It allows you to add natural elements to floral designs or create decorative foliage borders. Learning to control the pressure with this specific tip is a great way to refine your piping control with beginner piping bag tips.
Petal Piping Tips: Elegant Floral Designs
Petal tips have a narrow, flat opening that is wider at one end and narrower at the other (or sometimes curved). These tips are primarily used for creating flower petals, ruffles, and ribbons. By holding the tip with the wider end closer to the cake surface and rotating the cake or moving the tip while applying pressure, you can form various types of petals, from simple roses to ruffles and borders.
Common petal tips include #104, #124, or #127. The size and curve of the tip determine the size and shape of the petal or ruffle. Mastering the angle and movement with a petal tip takes practice, but it's essential for creating beautiful floral decorations, a rewarding skill to develop after getting comfortable with basic beginner piping bag tips.
Specialty Piping Tips: Expanding Your Decorating Options
Beyond the essential shapes, there's a vast world of specialty piping tips designed for specific effects. These include basketweave tips (flat or serrated openings for creating woven patterns), grass/hair tips (multiple small holes for creating textured effects), ruffle tips (complex openings for layered ruffles), and numerous others for specific flowers or patterns.
While not necessary for beginners, becoming familiar with the existence of specialty tips is useful. As you gain confidence with basic beginner piping bag tips, you might explore tips like the #233 (grass tip) for adding texture to cupcakes or the #47 (basketweave) for unique borders. They offer exciting ways to expand your decorating skills once you've mastered the fundamentals.
Preparing Your Piping Bag: A Step-by-Step Guide
Cutting the Piping Bag: Achieving the Perfect Fit
Properly cutting your piping bag is crucial for ensuring the tip fits snugly and doesn't slip out under pressure. If using a disposable bag without a coupler, you'll place the tip inside the bag first, pushing it down towards the narrow end. Then, holding the tip in place, mark where the bottom of the tip reaches the bag. Remove the tip and cut off the very end of the bag just below this mark. The opening should be slightly smaller than the base of your piping tip.
If using a reusable bag or a disposable bag with a coupler, you might follow a slightly different process depending on the coupler type. For a standard two-piece coupler, you'll insert the base part of the coupler into the bag first, push it down, and then cut the bag just below the threads of the coupler base. This ensures the coupler base sits securely and the tip can be screwed onto the outside ring. Cutting the bag too large is a common beginner mistake, leading to messy leaks.
Attaching the Piping Tip: Secure and Stable
Once the bag is cut, inserting the tip securely is the next step. If not using a coupler, simply push the chosen piping tip firmly into the cut opening of the bag from the inside. The tip's base should fit snugly against the cut edge of the bag, with the narrow end of the tip protruding cleanly from the bottom. Give it a gentle tug to ensure it's secure.
If using a coupler, insert the coupler base into the bag and secure it by cutting the bag as described above. Then, place the desired piping tip over the coupler base on the outside of the bag. Finally, screw the coupler ring over the tip and onto the threaded base inside the bag, tightening it just enough to hold the tip firmly in place without overtightening, which could damage the coupler or bag. This method is particularly useful for beginner piping bag tips practice as it allows you to switch tips easily without changing bags.
Using a Coupler: Switching Tips with Ease
A coupler is a simple, inexpensive tool that revolutionizes piping efficiency, especially for beginners or when using multiple tips with the same color frosting. A standard coupler consists of two parts: a base that goes inside the bag and a ring that screws onto the base from the outside, holding the tip in place. The key advantage is the ability to switch piping tips on the same bag of frosting without emptying or cutting a new bag.
To use a coupler with your beginner piping bag tips, insert the coupler base into the bag and cut the bag just below the threads. Add your frosting to the bag. When ready to pipe, place the desired tip over the coupler base on the outside of the bag and screw the ring on tightly. To switch tips, simply unscrew the ring, remove the tip, place a new tip on the coupler base, and screw the ring back on. This saves time, reduces waste, and makes practicing different techniques with the same color much more convenient.
Filling the Piping Bag: Preventing Air Pockets and Messes
The Hand-Over-Hand Method: A Clean Technique
Filling a piping bag cleanly is essential to prevent frosting messes and minimize air pockets, which can cause breaks in your piped lines. The hand-over-hand method is a clean and controlled way to fill bags, particularly useful for smaller amounts of frosting or when using multiple colors. Start by folding down the top edge of the piping bag to create a cuff. Hold the bag with one hand, using your thumb and forefinger to keep the cuff open.
Using a spatula or spoon, scoop frosting into the bag, directing it towards the tip end. Fill the bag about half to two-thirds full – overfilling makes the bag difficult to control and more likely to burst. As you add frosting, use the spatula to gently push it down towards the tip, helping to eliminate air pockets. Once filled, unfold the cuff and twist the top of the bag closed just above the frosting level. This twisted section is where you will apply pressure while piping. This technique minimizes frosting getting on the outside of the bag.
The Glass Method: For Larger Batches of Frosting
When working with larger quantities of frosting, like for a whole cake or a batch of cupcakes, the glass method is often more efficient. This method uses a tall glass or container to hold the piping bag open while you fill it. Start by placing the piping bag, tip down, into a tall glass or jar. Fold the top edge of the bag over the rim of the glass to create a wide opening, similar to lining a trash can with a bag.
With the bag held open by the glass, use a spatula to scoop large amounts of frosting into the bag, directing it towards the bottom. The glass provides stability and keeps the opening wide for easy filling. Fill the bag about half to two-thirds full.
Once filled, lift the bag out of the glass, unfold the cuff, and scrape down any frosting clinging to the sides of the bag using a clean spatula. Twist the top of the bag closed as described in the hand-over-hand method. This technique is great for quickly filling bags when practicing beginner piping bag tips on a larger scale.
Tips for Avoiding Air Bubbles in Your Piping Bag
Air bubbles are the bane of smooth piping. They cause frustrating gaps and breaks in your lines and designs. One primary cause is incorporating air into the frosting during mixing or when filling the bag. To minimize air bubbles, ensure your frosting is well-mixed and smooth before putting it into the bag. If your frosting is very stiff, you might need to beat it slightly to soften it and remove trapped air.
When filling the bag, use your spatula to gently push the frosting down towards the tip as you fill. Once the bag is filled and the top is twisted, hold the bag tip-down and gently tap the tip against your work surface a few times. This helps any trapped air bubbles rise to the top.
You can also gently squeeze the bag while holding the tip closed with your finger; this pressure can help force air bubbles upwards. Before you start piping on your final product, give a small test squeeze onto a piece of parchment paper to push out any remaining air. Consistent filling technique is key to smooth piping for beginner piping bag tips.
Basic Piping Techniques: Getting Started with Frosting
Applying Consistent Pressure: The Key to Smooth Piping
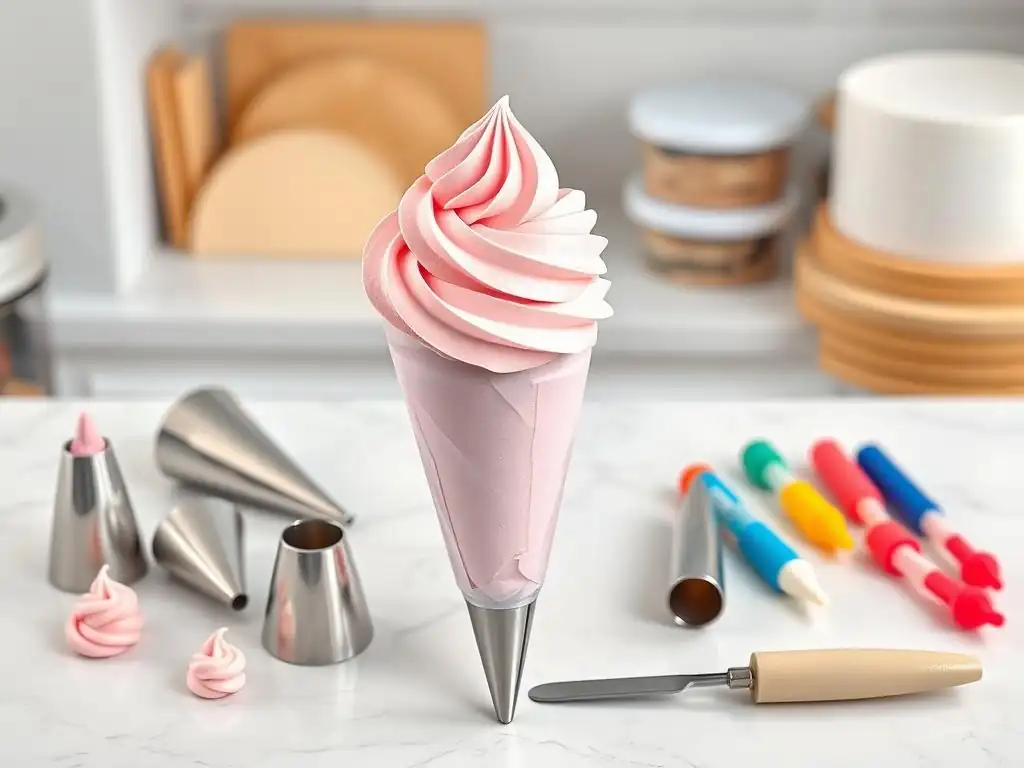
Consistency is everything in piping. The most fundamental skill, regardless of the tip shape or design you're attempting, is applying steady, even pressure to the piping bag. The hand holding the twisted end of the bag is your control hand – this is where you apply the pressure to push the frosting out. The other hand (the guiding hand) supports the bag near the tip and directs the flow, but it should not be squeezing the bag.
Practice squeezing the bag with your control hand using only the palm and fingers, maintaining constant pressure. Think of it like squeezing toothpaste – you want a steady stream, not bursts and stops. Start by practicing on a piece of parchment paper or the back of a baking sheet. Just squeeze and hold the bag steady for a few seconds to see how the frosting comes out. Then try moving the bag while maintaining that same pressure. Developing this muscle memory is crucial for all beginner piping bag tips techniques.
Creating Lines and Borders with a Round Tip
Once you can apply consistent pressure, practicing simple lines and borders with a round tip is an excellent starting point. Use a medium-sized round tip, like a #12. Hold the bag at about a 45-degree angle to your surface. Apply steady pressure and lift the tip slightly away from the surface as the frosting begins to flow, letting the line of frosting fall naturally onto the surface. Guide the bag smoothly in a straight line or a curve while maintaining pressure.
To stop the line cleanly, stop squeezing, then quickly pull the bag straight up and away. Practice piping straight lines, wavy lines, circles, and dots of consistent size. For a simple bead border, pipe a series of connected dots, overlapping each one slightly onto the tail of the previous dot. These exercises, using basic beginner piping bag tips, build the control and coordination needed for more complex designs.
Piping Stars and Shells with a Star Tip
Star tips are perfect for creating textured decorations like stars, rosettes, and shell borders. Use an open star tip like a #21 or #1M. To pipe a simple star, hold the bag at a 90-degree angle (straight up) just above the surface. Apply steady pressure, letting the frosting build up into a star shape. Stop squeezing and lift the bag straight up.
To pipe a shell border, hold the bag at about a 45-degree angle with the tip slightly above the surface. Apply steady pressure, letting the frosting build up into the base of the shell. As the frosting flows, move the bag slightly forward while decreasing pressure until the frosting tapers off into a tail. Stop squeezing and lift away. Each new shell should overlap the tail of the previous one. Practicing these techniques with star-shaped beginner piping bag tips helps you understand how different tip shapes behave.
Practicing Your Piping Skills: Exercises for Beginners
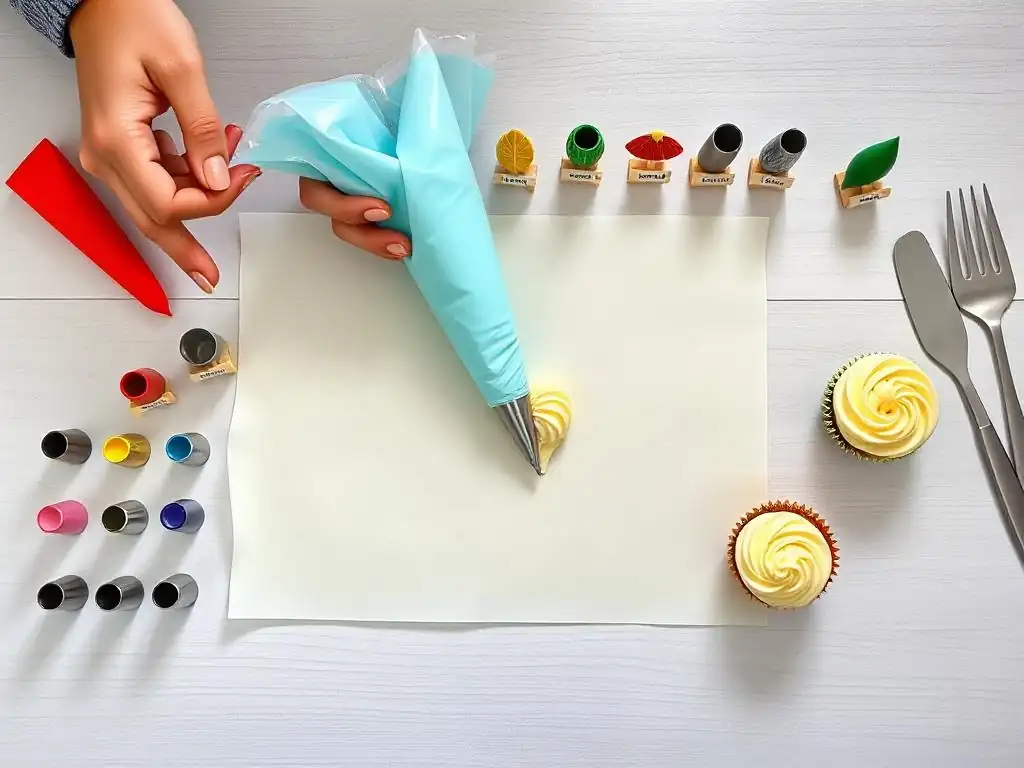
Consistent practice is the only way to improve your piping skills. Don't expect perfection on your first try! A great way to practice without wasting frosting is to use a batch of buttercream or royal icing on a piece of parchment paper or wax paper placed on a flat surface like a cutting board or baking sheet. You can pipe your designs onto the paper, then simply scrape the frosting back into the bag and reuse it.
Spend time practicing the basic techniques: piping straight lines, wavy lines, dots of different sizes, stars, and shells. Try piping your name or simple shapes. Focus on maintaining consistent pressure and smooth movement. As you get more comfortable with these beginner piping bag tips exercises, you can move on to more complex patterns or try piping directly onto cakes or cupcakes. Even just 15-20 minutes of practice a few times a week can make a significant difference in your control and confidence.
Cleaning and Storing Your Piping Bags and Tips
Proper Cleaning Techniques: Preventing Bacteria Growth
Proper cleaning of your piping equipment is essential for hygiene and extending the life of your tools. As soon as you finish piping, empty any remaining frosting back into its container or discard it. For reusable bags and tips, rinse them immediately under warm water to remove as much frosting residue as possible before it dries and hardens.
For thorough cleaning, use hot, soapy water and a small brush (like a bottle brush or a dedicated pastry brush) to scrub the inside of the bag and get into the crevices of the tips. Pay extra attention to star tips and other tips with intricate openings where frosting can get trapped. Rinse thoroughly with hot water. For fabric bags, you may need to wash them inside out. Silicone bags can often be turned completely inside out for easy scrubbing. Ensure all grease is removed, as lingering oils can affect future frosting batches.
Dishwasher Safe vs. Hand Washing: A Guide
Many modern reusable piping bags and most metal piping tips are labeled as dishwasher safe, which can be a convenient option for cleaning. However, hand washing is often recommended for the best results and to potentially extend the lifespan of your tools. Dishwashers, especially on high heat cycles, can sometimes cause plastic or silicone bags to degrade faster over time.
If using a dishwasher for metal tips, place them in a utensil basket or a small mesh bag to prevent them from falling through the racks. For bags, drape them over prongs or place them securely so water can circulate freely inside and out. Always check the manufacturer's instructions for specific cleaning recommendations. Regardless of the washing method, the most critical step after washing is thorough drying.
Storing Piping Tips: Keeping Them Organized and Protected
Storing your piping tips properly keeps them organized, prevents them from getting lost, and protects their delicate shapes from getting bent or damaged. There are several effective storage solutions available. Small plastic containers with compartments are ideal for sorting tips by size or type. Many piping tip sets come with their own storage cases.
Another popular method is using a dedicated piping tip organizer or container, which often have pegs or slots specifically designed to hold tips upright. Small jewelry boxes or tackle boxes with dividers can also be repurposed. For very frequently used tips, some bakers keep them in a small jar or cup near their workspace. Whatever method you choose, ensure the tips are completely dry before storing them to prevent rust (for metal tips) or mildew. Keeping your beginner piping bag tips organized makes decorating much smoother.
Extending the Life of Your Piping Bags: Maintenance Tips
Beyond proper cleaning and storage, a few maintenance tips can help extend the life of your piping bags. For reusable bags (silicone or nylon), avoid cutting the opening larger than necessary, especially if you plan to use a coupler. Overstretching the material around the tip or coupler base can weaken it over time.
Handle bags carefully, avoiding excessive force or sharp objects that could puncture the material. Store bags flat or loosely rolled, rather than tightly folded or crumpled, which can create creases and weaken the material. For fabric bags, ensure they are completely dry and stored in a well-ventilated area to prevent mildew. Regularly inspect your bags for signs of wear, such as small tears or thinning material, and replace them when they show significant damage to avoid frustrating bursts mid-decoration.
Troubleshooting Common Piping Problems
Clogged Piping Tips: Causes and Solutions
A clogged piping tip is a frustrating interruption to smooth piping. This usually happens when small bits of undissolved sugar, lumps of butter, or crumbs get stuck in the narrow opening of the tip. Using frosting that is too cold or has an inconsistent texture can also contribute.
If your tip clogs, stop piping immediately. Try gently squeezing the bag with extra pressure to force the clog through. If that doesn't work, you'll need to clear it manually.
Use a toothpick, a thin skewer, or the end of a small brush to carefully poke through the tip opening from the outside to dislodge the blockage. If the frosting itself seems lumpy, you may need to scrape the frosting back into a bowl, re-mix it briefly, or even strain it if necessary, before refilling the bag. Ensuring your frosting is smooth and free of debris before filling the bag is the best prevention for beginner piping bag tips.
Air Bubbles in Your Frosting: Prevention and Removal
As discussed earlier, air bubbles cause frustrating breaks in your piped lines. They occur when air is trapped in the frosting during mixing or filling. Prevention involves ensuring your frosting is well-creamed and pushing frosting down in the bag as you fill it.
If you encounter an air bubble while piping, you'll see a gap in your line or design. Stop piping, point the bag upwards, and gently squeeze the frosting back down towards the tip. Sometimes gently tapping the tip on the surface helps. You can also try squeezing a small amount of frosting onto a scrap piece of parchment paper to push the bubble out before continuing your design. Consistent technique when filling the bag is the best defense against this common issue for beginner piping bag tips.
Inconsistent Piping Pressure: Tips for Improvement
Inconsistent pressure results in lines or shapes that are thick in some places and thin in others, or shaky rather than smooth. This is a common challenge for beginners as they develop hand strength and control. It stems from uneven squeezing of the bag's control end.
The solution is practice, practice, practice! Use the exercises mentioned earlier (lines, dots, stars) on parchment paper. Focus solely on maintaining steady pressure. Pay attention to how the frosting flows out. Are you squeezing from your palm, or just your fingers? Are you releasing pressure inadvertently? Try holding the bag in slightly different ways until you find a comfortable grip that allows for consistent squeezing. Remember, the guiding hand near the tip directs but doesn't squeeze. Developing steady pressure is key to mastering beginner piping bag tips.
Frosting Too Stiff or Too Soft: Adjusting Consistency
The consistency of your frosting significantly impacts how well it pipes. If frosting is too stiff, it's difficult to squeeze, can strain your hand, and may cause the bag to burst or the tip to clog. If it's too soft, your piped designs will lose their shape, melt, or droop.
If frosting is too stiff, add a very small amount (start with half a teaspoon) of milk, cream, or water and mix it thoroughly. Add more liquid sparingly until the frosting reaches a pipeable consistency – it should hold its shape but flow smoothly under pressure. If frosting is too soft, you can try chilling it in the refrigerator for 10-15 minutes to firm it up.
If chilling isn't enough, you may need to add a small amount of powdered sugar or a bit more shortening/butter (depending on the frosting type) to thicken it. Always test the consistency on a scrap surface before piping onto your final creation. Adjusting consistency is a vital skill when working with beginner piping bag tips.
Advanced Piping Techniques to Explore Later
Using Multiple Piping Bags: Achieving Color Blends
Once you're comfortable with basic piping, you can explore using multiple bags to create stunning color effects. The simplest method is filling separate bags with different colors and using them side-by-side. For color blends within a single piped element, you can fill one bag with two or three different colors side-by-side (using the glass method helps with this). As you pipe, the colors will blend together as they exit the tip, creating beautiful swirls.
Another technique is using a coupler specifically designed for multiple colors, which fits multiple smaller bags (each with a different color) into a single larger bag connected to one tip. This allows for precise multi-color piping. Experimenting with color placement in the bag opens up a whole new dimension of decorating possibilities beyond basic beginner piping bag tips.
Creating Intricate Designs: Advanced Piping Tips and Techniques
As your skills grow, you'll naturally want to explore more intricate designs. This involves using a wider variety of specialty tips, practicing finer control, and combining different techniques. For example, mastering the use of small round tips for detailed writing or delicate lacework, or using complex petal tips to create realistic buttercream flowers like roses or peonies.
Advanced techniques also include things like pressure piping (using varying pressure to create different effects within a single stroke), brush embroidery (piping an outline and then using a damp brush to pull the frosting inward), and working with different consistencies of frosting for different parts of a design. These techniques build upon the foundational control learned with beginner piping bag tips.
Working with Different Frosting Types: Adjusting Your Approach
Not all frostings pipe the same way. Buttercream is the most common and forgiving for piping, but even buttercreams vary (American, Swiss meringue, Italian meringue, etc.). Royal icing is excellent for fine details and dries hard, perfect for writing or intricate patterns, but it requires very specific consistency. Cream cheese frosting or whipped cream can be softer and may require chilling or a different piping approach.
As you advance, you'll learn how to adjust your piping technique and frosting consistency based on the type of frosting you're using. Some frostings hold sharp edges better than others, some are more prone to melting, and some require different tips to achieve the best results. Understanding these nuances comes with practice and experimentation beyond the initial stages of using beginner piping bag tips.
Conclusion: Embracing the Art of Piping
Building Confidence with Beginner Piping Bag Tips
Starting your piping journey with basic beginner piping bag tips and bags is the perfect way to build confidence and foundational skills. Don't be intimidated by elaborate cake decorations you see online. Every skilled decorator started exactly where you are now, learning how to fill a bag, hold it correctly, and apply consistent pressure.
Focus on mastering the essential tips – the round, star, leaf, and petal shapes. Practice the basic techniques like lines, dots, stars, and shells. Your early attempts might not be perfect, and that's completely okay! The key is to keep practicing, learning from any mistakes, and celebrating your progress. Each smooth line or well-formed star is a step forward in your decorating journey.
Your Journey to Cake Decorating Mastery Begins Now!
Equipped with the knowledge of selecting and preparing your piping bags and essential beginner piping bag tips, you are ready to embark on the rewarding art of cake decorating. Remember that piping is a skill that improves with practice and patience. There's no single "right" way to hold the bag, only the way that feels comfortable and gives you the most control.
So grab your bags, your tips, and some frosting, and start experimenting! Whether you're decorating a simple batch of cupcakes or attempting your first layered cake, the fundamental techniques you've learned here will be your guide. Have fun, be creative, and enjoy the process of transforming your baked goods into beautiful, edible creations. Your journey to cake decorating mastery truly begins now with these essential beginner piping bag tips.
Frequently Asked Questions
What are the essential piping bag tips for beginners starting out?
For beginners, the most essential tips are a round tip for outlining and filling, a star tip for decorative borders, and a leaf tip for creating realistic leaves. These offer versatility for a range of baking projects.
How do I properly fill a piping bag to avoid messes?
Fold the top of the bag down to create a cuff, insert your tip, and place the bag in a tall glass. Then, spoon your frosting or filling into the bag, being careful not to overfill it. Unfold the cuff and twist the top to seal it, avoiding air pockets.
What's the best way to hold a piping bag for steady decorating?
Hold the bag with your dominant hand near the twisted top to apply pressure. Use your other hand to guide the tip and control the direction of the piping. Practice consistent pressure for even lines and designs.
How do I clean my piping bags and tips effectively?
Wash reusable piping bags with warm soapy water, and use a bottle brush to clean inside the tips. Ensure everything is completely dry before storing to prevent mold growth. Disposable bags are, of course, single-use.
What kind of frosting works best for piping detailed designs?
A stable frosting like American buttercream or Swiss meringue buttercream is ideal for detailed piping. These frostings hold their shape well and are less prone to melting at room temperature, ensuring crisp designs.
Final Reflection: Mastering the Art of Piping, One Squeeze at a Time
The ability to create beautiful, intricate designs with frosting is no longer a skill reserved for professional bakers; it's a creative outlet accessible to anyone willing to learn. This beginner's guide has explored the fundamental tools – piping bags and tips – highlighting their versatility and the endless possibilities they unlock. From simple rosettes to elegant swirls, the journey of mastering piping is a rewarding one, filled with delicious results.
The impact of accessible baking tutorials and readily available equipment has democratized the art of cake decorating. It's no longer an exclusive skill, but a shared passion, connecting people through creativity and the joy of shared treats. This resonates deeply with me, as I've witnessed firsthand the transformative power of baking, both in terms of personal expression and the fostering of community. The best way to find yourself is to lose yourself in the service of others.
– Mahatma Gandhi – While not directly about baking, this quote speaks to the joy of sharing the skills and creations born from this craft.
Now, it's your turn. Don't be intimidated by the seemingly complex world of piping bags and tips. Start small, experiment with different techniques, and most importantly, have fun! Embrace the mess, celebrate the successes, and learn from the inevitable mishaps. The journey of mastering piping is a continuous one, filled with opportunities for growth and self-expression. So grab your bag, choose your tip, and let your creativity flow. The delicious possibilities are endless.
Unleash Your Inner Pastry Chef!
Thanks for taking the time to explore the world of piping bags and tips with us! We hope you now feel confident and excited to decorate your baked goods like a pro. Ready to put your new skills to the test?
- Master a new piping technique: Choose your favorite frosting recipe and practice one of the techniques we covered today. Even small improvements will make a big difference!
- Share your creations: Show us your piping masterpieces! Use #BakeWithEasePiping on social media to share your progress and inspire others.
- Explore advanced techniques: Dive deeper into the world of piping by researching different nozzle types and exploring more complex decorating styles.
What delicious treat will you decorate first with your newfound piping skills?