
Simple Decorating Ideas for Fall Pies

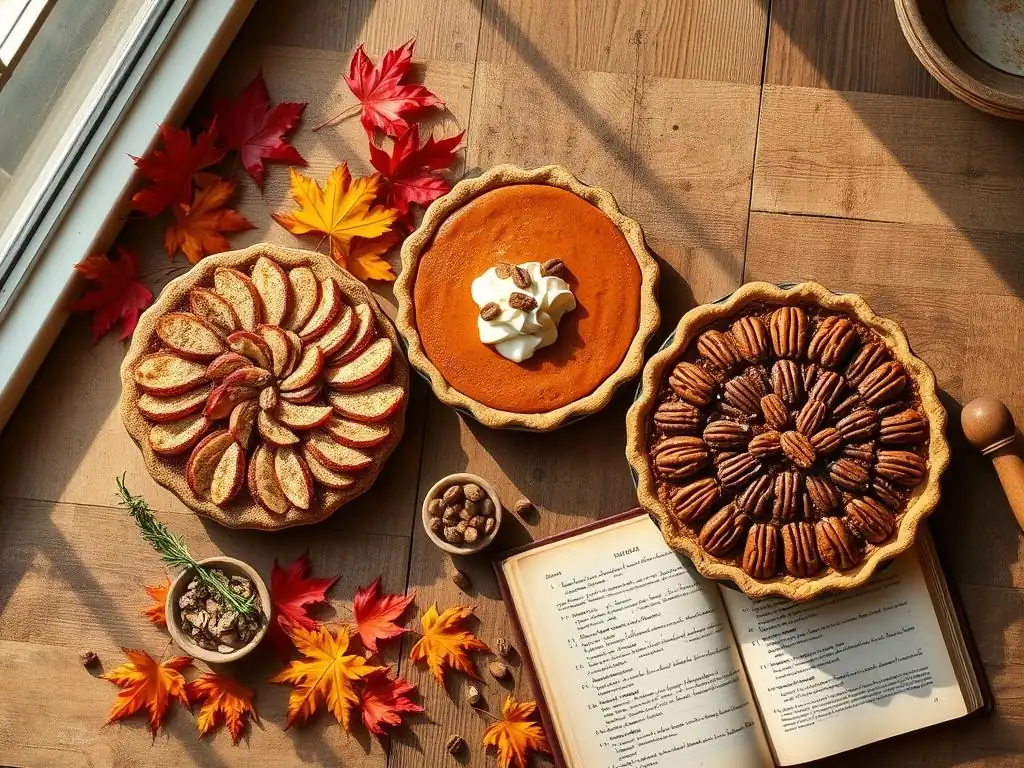
Welcome to BakeWithEase, where the joy of baking meets effortless execution! Are you ready to transform your fall pies from simple desserts into stunning autumnal masterpieces? Discover our delightful collection of Fall pie decorating tutorials and unlock the secrets to creating edible works of art. But that's just the beginning… what other seasonal baking wonders await? Read on to ignite your creativity and become the pie-decorating pro you've always dreamed of being!
- Simple Decorating Ideas for Fall Pies: BakeWithEase Tutorials
- Introduction to Fall Pie Decorating Tutorials
- Easy Fall Pie Crust Decorating Techniques
- Creative Fall Pie Toppings and Embellishments
- Advanced Fall Pie Decorating Techniques
- Fall Pie Decorating Tutorials for Specific Pies
- Essential Tools for Fall Pie Decorating
- Tips for Baking a Perfect Fall Pie for Decorating
- Conclusion: Enjoying Your Beautifully Decorated Fall Pies
-
Frequently Asked Questions
- What are some beginner-friendly fall pie decorating ideas?
- Where can I find step-by-step tutorials for decorating fall pies?
- What are some common mistakes to avoid when decorating fall pies?
- What ingredients are best for creating edible fall pie decorations?
- How can I make my fall pie decorations stand out?
- Final Reflection: The Enduring Charm of a Perfectly Decorated Fall Pie
- Unleash Your Inner Pie Artist: Decorate Your Autumn Masterpiece!
Simple Decorating Ideas for Fall Pies: BakeWithEase Tutorials
Introduction to Fall Pie Decorating Tutorials
Welcome to Fall Baking Season at BakeWithEase.com
As the leaves change color and the air grows crisp, it's time to welcome fall baking season! At BakeWithEase.com, we know there's nothing quite like the aroma of a freshly baked pie warming your home. This season, we're focusing on everyone's favorites: apple and pumpkin pies. While the filling is key, making your pie look as good as it tastes adds an extra layer of joy to your baking experience. Our simple Fall pie decorating tutorials are designed for every skill level, helping you create stunning desserts with ease.
Whether you're a seasoned baker or just starting out, adding a decorative touch to your fall pies can seem daunting. But it doesn't have to be complicated! We'll guide you through techniques that are simple yet incredibly effective, transforming a basic pie into a showstopper. Think beyond just a fork-crimped edge – imagine intricate lattices, charming leaf cut-outs, and elegant braided crusts. These Fall pie decorating tutorials will equip you with the skills to impress your family and friends.
Why Decorate Your Fall Pies?
Decorating your fall pies elevates the baking experience from simply making a dessert to creating edible art. A beautifully decorated pie isn't just appealing to the taste buds; it's a feast for the eyes, too. It shows care and attention to detail, making your homemade pie feel truly special. For example, a simple lattice top on an apple pie adds visual texture and allows the bubbling fruit filling to peek through, hinting at the deliciousness within.
Beyond aesthetics, pie decorations can sometimes serve a practical purpose. Venting the top crust with decorative cuts or a lattice design allows steam to escape during baking, preventing the crust from puffing up unevenly or cracking. Adding a sturdy, braided edge provides a robust rim that helps contain the filling and prevents spills. So, while the primary goal of our Fall pie decorating tutorials is beauty, these techniques often contribute to a better-baked pie overall.
Elevate Your Apple and Pumpkin Pies with Simple Techniques
Autumn is synonymous with apple and pumpkin pies. These classic fall treats are the perfect canvas for simple yet striking decorations. Forget overly complex designs; our focus is on techniques that are accessible and achievable for home bakers. We'll show you how to turn basic pie dough into beautiful patterns and textures that complement the rich flavors of your fall fillings.
For instance, transforming a plain double-crust apple pie into something special can be as simple as cutting out a few leaf shapes from the top crust scraps and arranging them artfully. For pumpkin pie, which typically has a single crust, the focus shifts to the edge and the surface after baking, using techniques like stencils or creative whipped cream application. These Fall pie decorating tutorials are designed to make your baking process enjoyable and the results visually delightful.
Easy Fall Pie Crust Decorating Techniques
Lattice Pie Crust Designs for Beginners
Creating a lattice top might look complicated, but it's surprisingly straightforward once you understand the basic weaving pattern. It's a classic design for fruit pies, allowing steam to escape while providing a beautiful view of the filling. For beginners, starting with simple, evenly spaced strips is key. You'll need two sheets of pie dough, one for the bottom crust and one for the top. After placing your filling in the bottom crust, cut the second sheet into even strips, usually about 3/4 to 1 inch wide.
The process involves laying half the strips parallel across the pie, then folding back alternating strips to weave the perpendicular strips through. For example, lay down strips 1, 3, 5, 7... Fold back strips 1, 5, 9... Lay a perpendicular strip. Unfold 1, 5, 9... Fold back 3, 7, 11... Lay another perpendicular strip. Repeat until complete. This simple weaving creates the iconic lattice pattern. Ensure the strips are long enough to extend to the edge of the pie plate so you can crimp them into the bottom crust.
Classic Lattice Pie Crust Tutorial
To make a classic lattice, roll out your top crust dough to about 1/8-inch thickness. Using a ruler and a pastry wheel or knife, cut 12 to 14 strips of equal width (e.g., 1 inch wide). Place your filled bottom crust pie on a baking sheet. Lay 6-7 strips evenly spaced in one direction across the top of the filling, extending over the edge. Now, starting from one side, gently fold back every other strip halfway.
Place one of the remaining strips perpendicularly across the pie where you folded back the others. Unfold the folded strips over the perpendicular strip. Now, fold back the other set of alternating strips. Place another perpendicular strip next to the first.
Unfold the strips. Continue this process, alternating which strips you fold back, until the entire pie is covered with a woven lattice. Trim the ends of the strips even with the bottom crust edge and crimp to seal. For a golden finish, brush the lattice with an egg wash (one egg whisked with a tablespoon of water) before baking.
Diamond Lattice Pie Crust Variation
A slight variation on the classic lattice creates a diamond pattern, offering a more intricate look with minimal extra effort. Instead of laying your initial strips parallel to the pie plate's edge, lay them diagonally. Cut strips of equal width as before, but this time arrange half of them diagonally across the filling, extending over the edge. The angle doesn't need to be precise, but aim for roughly 45 degrees.
Once the first set of diagonal strips is in place, follow the same weaving process as the classic lattice, but use the remaining strips laid diagonally in the opposite direction. This creates intersecting diagonal lines that form diamond shapes where they overlap. As with the classic lattice, trim the ends and crimp to seal the edges. This variation provides a beautiful, slightly more complex look perfect for showcasing the vibrant color of a berry or cherry pie, as well as classic apple.
Leaf Cut-Outs: Adding Autumnal Charm
Leaf cut-outs are perhaps the most iconic and simple way to add seasonal charm to your fall pies. They require minimal skill and utilize excess pie dough, reducing waste. You can use store-bought cookie cutters in various leaf shapes (maple, oak, aspen) or even freehand cut shapes with a small knife. This technique is perfect for single-crust pies like pumpkin or pecan, where decorations are placed on the edge or surface, or for decorating the top crust of a double-crust pie before or after baking.
To make the leaves look more realistic, you can add vein details. After cutting out the leaf shape, use a small knife or skewer to gently press lines onto the dough, mimicking leaf veins. Be careful not to cut all the way through the dough. These decorative leaves can be brushed with egg wash and baked separately on a baking sheet until golden brown (usually 8-12 minutes at 375°F/190°C), then placed on a baked pie. Alternatively, they can be placed directly on the top crust before baking.
Using Leaf Cookie Cutters for Pie Crust Decorations
Using cookie cutters is the easiest method for creating uniform leaf shapes. Simply roll out your leftover pie dough scraps or a separate sheet of dough to about 1/8-inch thickness. Press the leaf-shaped cookie cutter firmly into the dough to cut out the shape. Gently lift the cut-out leaf. If the dough is sticky, lightly flour the surface or the cutter. You can use different sizes of leaf cutters for variety.
Once the leaves are cut, you can add vein details as mentioned above. A small paring knife or the back of a butter knife works well for this. Arrange the leaves on your pie as desired. For a single-crust pumpkin pie, arrange them around the edge before baking. For a double-crust pie, place them on the top crust, perhaps along the edge or clustered in the center, before baking. Brushing them with an egg wash before baking will give them a lovely sheen and golden color.
Arranging Leaf Cut-Outs on Your Fall Pies
The arrangement of your leaf cut-outs can significantly impact the final look of your fall pie. For a single-crust pie like pumpkin or pecan, a classic arrangement is to place the leaves overlapping slightly around the outer edge of the pie, creating a beautiful border. You might place them pointing inwards towards the center or outwards. For a 9-inch pie, you might need anywhere from 15 to 25 leaves depending on their size and how much they overlap.
On a double-crust pie, leaf cut-outs can be used in several ways. You can scatter them artfully across the top crust, focusing on empty spaces if you've used a partial top crust design. Alternatively, you can create a specific pattern, such as a ring of leaves around the center vent or a cluster of leaves at one side.
For a really special touch, create enough leaves to completely cover the top of the pie, overlapping them like fallen leaves, leaving small gaps for venting. Remember to vent the pie somewhere, even if you cover most of the top with leaves.
Braided Pie Crust Edges: A Simple Elegance
A braided pie crust edge adds a touch of sophistication and structure to any pie. It looks impressive but is relatively simple to achieve once you master the three-strand braid technique used in hair or bread. This type of edge is sturdy, helping to prevent filling from bubbling over and creating a beautiful frame for your pie's surface. It's particularly stunning on single-crust pies like pumpkin or pecan, or on fruit pies with a lattice or crumble topping.
To create a braided edge, you'll need strips of pie dough, similar to making a lattice, but often slightly thinner (around 1/2 inch wide). The length of the strips will depend on the circumference of your pie plate – you'll likely need several strips joined together to make one long braid. The key is consistency in the width of your strips and even tension while braiding to create a uniform look.
Step-by-Step Guide to Braiding Pie Crust
Start by rolling out leftover pie dough scraps or a fresh piece of dough to about 1/8-inch thickness. Cut several strips, each about 1/2 inch wide. You will need enough strips to create a braid long enough to go around the entire circumference of your pie plate. Lightly moisten the ends of strips with water and press them together to create longer strips as needed. You'll need sets of three strips for braiding.
Take three strips and pinch one end together firmly. Begin braiding as you would hair: take the right-hand strip and cross it over the middle strip. Then take the left-hand strip and cross it over the new middle strip. Repeat this process, keeping the tension even, until you have a braid of the desired length. You may need to make multiple braids. Gently attach the braid(s) to the edge of your bottom pie crust, pressing lightly to adhere. Trim any excess dough. For a seamless look, you can gently pinch together the ends of braids where they meet.
Variations on Braided Pie Crust Edges
While the classic three-strand braid is the most common, you can experiment with variations for different effects. A simpler option is a two-strand twist, where you twist two strips of dough together like rope before attaching them to the edge. This creates a slightly less intricate but still attractive border. You could also try a four-strand braid for a wider, flatter braid, though this requires a bit more practice to keep the strands organized.
Another variation is to combine the braid with other techniques. For example, you could create a braided edge and then add small leaf cut-outs or tiny berry shapes along the braid for extra detail. You could also use different colored doughs (perhaps by adding a tiny amount of cocoa powder to one portion for a darker shade) to create a two-toned braid, adding visual interest. These Fall pie decorating tutorials offer a starting point for your creativity.
Creative Fall Pie Toppings and Embellishments
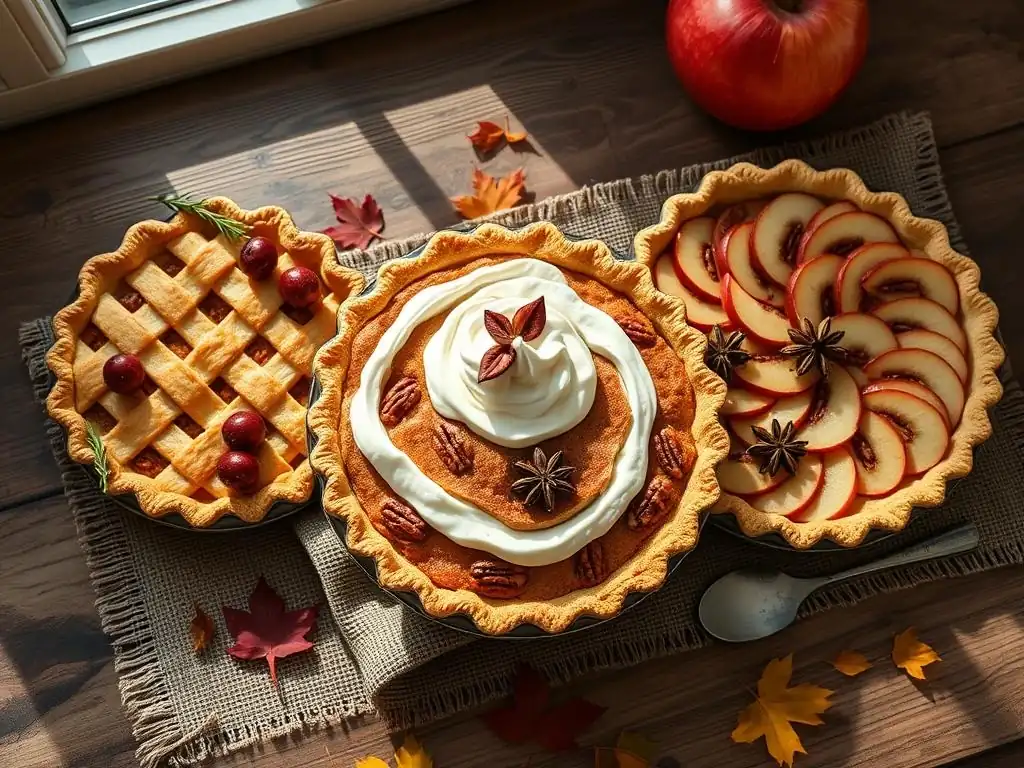
Cinnamon Sugar Designs: A Sweet and Simple Touch
Adding a sprinkle of cinnamon sugar is a classic way to finish a pie, especially apple. However, you can turn this simple step into a decorative element by creating patterns on your top crust before baking. This technique works best on solid top crusts or partially covered pies. It's incredibly easy, requires no special skills, and adds both visual appeal and a burst of warm, sweet flavor.
To prepare your cinnamon sugar, mix about 1/4 cup granulated sugar with 1 to 2 teaspoons ground cinnamon. The ratio can be adjusted to your preference. Ensure your top crust is in place on the pie. You can brush the crust lightly with milk or egg wash before sprinkling the cinnamon sugar to help it adhere better and create a slightly caramelized finish.
Creating Patterns with Cinnamon Sugar
Creating patterns with cinnamon sugar can be as simple or as intricate as you like. For a basic design, you can simply sprinkle the mixture evenly over the entire top crust. For a slightly more decorative approach, use your fingers to create swirling patterns or divide the pie top into sections (like wedges) and sprinkle cinnamon sugar only in certain sections.
For more defined patterns, you can use the tines of a fork or the tip of a knife to lightly score lines or shapes into the dough before sprinkling. The cinnamon sugar will settle into these lines, making the pattern stand out after baking. For example, you could score diagonal lines in a criss-cross pattern for a faux-lattice effect, or create concentric circles. Sprinkle the cinnamon sugar generously over the scored lines, then gently brush away excess from the areas you want to remain plain crust.
Stencils for Cinnamon Sugar Pie Decorating
Using stencils is an excellent way to create intricate and consistent designs with cinnamon sugar. You can purchase pie stencils specifically designed for this purpose, often featuring fall themes like leaves, pumpkins, or acorns. Alternatively, you can use general baking stencils or even create your own by cutting shapes out of parchment paper.
Place your stencil carefully on the unbaked top pie crust. Hold it firmly in place or secure it with a few small pieces of tape if needed (ensure tape is not over the pie area). Sprinkle the cinnamon sugar mixture evenly over the stencil, making sure to get into all the cut-out areas. Gently lift the stencil straight up to reveal your design. This technique is perfect for adding a central motif to your pie.
Nut Streusel Topping for Fall Pies
A nut streusel topping is a fantastic alternative to a traditional top crust, especially for fruit pies like apple or pear, or even certain pumpkin pie variations. It provides a wonderful crunchy texture contrast to the soft filling and is incredibly easy to make. A basic streusel recipe usually involves flour, sugar, butter, and nuts, combined until crumbly.
For a standard 9-inch pie, a good starting point for streusel is: 1 cup all-purpose flour, 1/2 cup packed light brown sugar, 1/4 cup granulated sugar, 1/2 teaspoon ground cinnamon, 1/4 teaspoon ground nutmeg, 1/4 teaspoon salt, 1/2 cup (1 stick) cold unsalted butter, cut into small cubes, and 1 cup chopped nuts (pecans, walnuts, or almonds are great fall choices). Combine the dry ingredients, then cut in the cold butter using your fingers, a pastry blender, or a food processor until the mixture resembles coarse crumbs. Stir in the chopped nuts.
Making a Delicious Nut Streusel
The key to a good streusel is using cold butter and not overmixing. You want a crumbly texture, not a paste. Combine the dry ingredients (flour, sugars, spices, salt) in a bowl. Add the cold, cubed butter. Work the butter into the dry ingredients until the mixture forms pea-sized crumbs. You can use your fingertips to rub the butter into the flour mixture, use a pastry blender, or pulse briefly in a food processor.
Once the butter is incorporated and the mixture is crumbly, stir in your chopped nuts. Pecans and walnuts are classic choices for fall, adding a rich, earthy flavor that pairs well with apples and pumpkin spice. Ensure the nuts are evenly distributed throughout the crumb mixture. Taste a tiny bit of the raw streusel (minus the butter) if you like, to adjust spice levels.
Applying Streusel to Apple and Pumpkin Pies
Applying streusel is perhaps the easiest part of using this topping. Once your pie filling is in the bottom crust, simply crumble the streusel mixture evenly over the top. For a thick, substantial topping, use all the streusel mixture. For a lighter topping, use less. Ensure the streusel is distributed relatively evenly so it bakes consistently.
Streusel toppings are most commonly used on apple pies or other fruit pies. For pumpkin pie, a streusel can be added before baking, but it will sink slightly into the filling. A popular technique for pumpkin pie is to bake the pie most of the way, then sprinkle a finer streusel mixture over the top for the last 15-20 minutes of baking. This creates a distinct layer of crunchy topping. Always place a baking sheet under your pie when baking with a streusel topping, as butter may melt and bubble over the edges.
Whipped Cream and Caramel Drizzle
While not a crust decoration, whipped cream and caramel drizzle are quintessential fall pie embellishments, especially for pumpkin and pecan pies. They are applied after the pie is baked and cooled. These simple additions can transform a plain pie slice into a decadent dessert. Making your own whipped cream is easy and tastes far superior to store-bought versions, and a homemade caramel drizzle adds a rich, buttery sweetness.
For whipped cream, you only need heavy cream (at least 30% milk fat), sugar (confectioners' sugar is best for texture), and vanilla extract. For caramel, you'll need sugar, water, butter, and cream. These elements provide moisture, richness, and sweetness that perfectly complement the spiced fillings of fall pies.
Homemade Whipped Cream Recipe
Making homemade whipped cream takes just a few minutes. You'll need 1 cup of very cold heavy whipping cream, 2 tablespoons of confectioners' sugar (also known as powdered sugar), and 1/2 teaspoon of pure vanilla extract. Chill your mixing bowl and whisk attachment (or beaters) in the freezer for 10-15 minutes beforehand; this helps the cream whip up faster and firmer.
Pour the cold heavy cream into the chilled bowl. Start beating on medium speed until soft peaks form. This means when you lift the whisk, the cream holds a soft shape that curls over. Gradually add the confectioners' sugar and vanilla extract. Increase the speed to high and continue beating until stiff peaks form. The cream should hold its shape firmly when the whisk is lifted. Be careful not to overbeat, or you'll end up with butter! Use immediately or store in the refrigerator for a few hours.
Perfecting the Caramel Drizzle Technique
A simple caramel drizzle can be made with just sugar and water, but adding butter and cream makes it richer and more stable. For a quick sauce, combine 1 cup granulated sugar and 1/4 cup water in a saucepan over medium heat. Stir until the sugar dissolves, then stop stirring. Cook, swirling the pan occasionally, until the syrup turns an amber color. This takes about 8-10 minutes.
Carefully remove from heat and whisk in 4 tablespoons of unsalted butter until melted. The mixture will bubble vigorously. Slowly and carefully whisk in 1/2 cup of warm heavy cream until smooth. Be cautious as the mixture will steam. If the caramel hardens slightly, return to low heat and stir until smooth. Let it cool slightly before drizzling over your cooled pie. For clean lines, use a spoon or transfer the caramel to a piping bag with a small round tip.
Advanced Fall Pie Decorating Techniques
Marzipan Decorations for Fall Harvest Pies
Marzipan, a paste made primarily from almonds and sugar, is like edible modeling clay. It's smooth, pliable, and takes color well, making it perfect for creating detailed, three-dimensional decorations for your fall harvest pies. While working with marzipan requires a bit more finesse than pie dough, the results can be stunning, adding a professional touch to your desserts.
You can buy ready-made marzipan or make your own. To color marzipan, knead in small amounts of gel food coloring until you achieve the desired shade. Use colors like green for leaves, orange for pumpkins, and red or yellow for apples. Keep the marzipan covered with plastic wrap when not working with it, as it can dry out quickly. Dust your work surface and hands lightly with confectioners' sugar to prevent sticking.
Working with Marzipan: Tips and Tricks
Marzipan can be rolled, cut, and molded just like clay. Roll it out thinly using a rolling pin dusted with confectioners' sugar. Use cookie cutters or a knife to cut out shapes like leaves, pumpkins, or apples. To create dimension, you can use sculpting tools (like those used for fondant or clay) or even household items like toothpicks or the back of a knife to add details like veins on leaves or ridges on pumpkins.
To attach marzipan decorations to a baked and cooled pie, use a tiny amount of corn syrup or edible glue brushed onto the back of the decoration. Marzipan can be fragile, so handle pieces gently. For a realistic look, you can brush finished marzipan pieces with edible food dusts (like green for leaves or red for apples) using a soft brush. Allow decorations to air dry slightly before placing them on the pie.
Creating Marzipan Leaves, Pumpkins, and Apples
To create marzipan leaves, roll out green or yellow marzipan thinly. Use leaf-shaped cutters or cut freehand shapes. Use a knife or veining tool to press vein patterns onto the leaves. Gently curl the edges slightly for a natural look. For marzipan pumpkins, roll orange marzipan into small balls. Use a toothpick or the back of a knife to press indentations around the sides, creating the pumpkin's segments. Add a small brown stem made from brown marzipan.
For marzipan apples, roll red or yellow marzipan into small balls. Use a toothpick to make a small indentation at the top and bottom. Insert a tiny brown marzipan piece or a small piece of pretzel stick for the stem. You can add a tiny green leaf cut-out next to the stem. These small marzipan pieces can be arranged artfully on the surface of a cooled pumpkin or pecan pie, or even placed around the edge of a fruit pie.
Stenciled Pie Crust Designs with Cocoa Powder
Stenciling isn't just for cinnamon sugar; it can also be used with cocoa powder on a baked pie crust for a sophisticated, contrasting design. This technique works beautifully on light-colored crusts and is perfect for adding intricate patterns or messages. It's applied after the pie has been baked and cooled completely.
You'll need a fine-mesh sieve or sifter and unsweetened cocoa powder. The key to a crisp design is using a good quality stencil and applying the cocoa powder carefully and evenly. This method is particularly effective on solid top crusts or on the surface of a baked custard pie like pumpkin pie (though it works best if the surface is firm and not sticky).
Using Stencils for Intricate Pie Designs
Choose a stencil with a design that fits the size and shape of your pie. Fall-themed stencils with leaves, acorns, or even words like "Welcome Fall" work well. Place the cooled, baked pie on a flat, stable surface. Carefully position the stencil directly on the pie crust or surface. Ensure it lies flat against the surface to prevent powder from slipping underneath.
Hold the stencil firmly in place with one hand, or use small weights around the edges if the pie surface allows. Dip a fine-mesh sieve or sifter into unsweetened cocoa powder. Hold the sieve a few inches above the stencil and gently tap or shake it to evenly dust the open areas of the stencil with a thin layer of cocoa powder. Don't apply too much at once; a thin, even layer is best.
Achieving Crisp Lines with Cocoa Powder
To get crisp, clean lines when stenciling with cocoa powder, ensure your pie surface is completely cool and dry. Any moisture can cause the cocoa powder to clump or bleed. Position the stencil carefully and hold it firmly against the surface throughout the dusting process. Use a light hand when applying the cocoa powder; a thin layer is sufficient to create the design.
Once you've dusted the area, carefully lift the stencil straight up and away from the pie. Avoid sliding it, as this can smudge the design. If there are any smudges or excess powder outside the design, you can try to gently clean them up with a very small, dry pastry brush, but it's often best to aim for clean application from the start. This technique is a simple way to add a striking visual element using basic pantry ingredients, enhancing your Fall pie decorating tutorials repertoire.
Painting Pie Crust with Egg Wash and Food Coloring
Painting your pie crust with colored egg wash before baking is a creative way to add vibrant hues and artistic flair. This technique allows for more freeform designs than stenciling and results in a beautiful, slightly glossy finish. It works best on solid top crusts or decorative elements like cut-outs placed on top.
You'll need an egg, water, and gel food coloring. Gel colors are preferred over liquid colors because they are more concentrated and won't add excess moisture to the egg wash. You can mix different colors to create a fall palette – yellows, oranges, reds, browns, and greens. Use clean pastry brushes of various sizes for painting.
Creating Beautifully Colored Pie Crust Decorations
To make your colored egg wash, whisk together one large egg with 1 tablespoon of water or milk in a small bowl. Divide this mixture into several smaller bowls – one for each color you plan to use. Add a tiny amount of gel food coloring to each bowl and mix thoroughly until the color is uniform. Start with a small amount of color; you can always add more to deepen the shade.
You can paint directly onto the unbaked pie crust or on cut-out decorations before placing them on the pie. For example, you could paint pie crust leaves green, yellow, and red before arranging them on top of an apple pie. Ensure your dough is cold when painting, as warmer dough can become sticky. The color will intensify slightly as it bakes.
Painting Techniques for Fall-Themed Pies
There are various painting techniques you can use on your pie crust. For a simple approach, paint entire sections or cut-outs with solid colors. For example, paint the "stem" of a pumpkin design brown and the rest orange. For more detailed work, use fine brushes to paint intricate patterns or details onto a solid crust. You could paint veins on leaf cut-outs or add dots and swirls.
You can also use a wash technique by diluting the colored egg wash slightly more and brushing it over a larger area for a translucent effect. Another approach is to use the colored egg wash to highlight embossed designs or patterns pressed into the dough. Experiment with different brush strokes and color combinations to create unique Fall pie decorating tutorials results. Remember to bake the pie as directed after painting.
Fall Pie Decorating Tutorials for Specific Pies
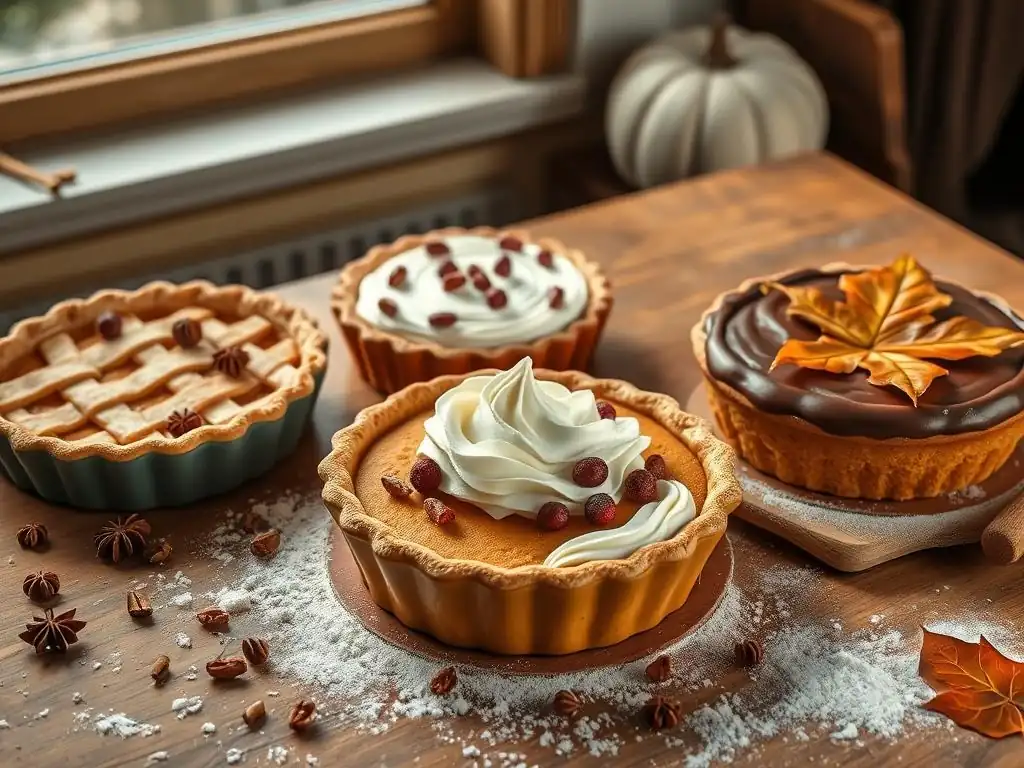
Decorating Apple Pie: Classic and Creative Ideas
Apple pie is a quintessential fall dessert, and its double-crust nature offers ample opportunity for decoration. Classic apple pie decorations often involve the top crust, whether it's a full crust with vents or a lattice design. These serve the practical purpose of allowing steam from the bubbling apples to escape, preventing a messy overflow.
Beyond the basic crust, you can add decorative elements like leaf cut-outs made from the same pie dough. These can be placed on top of a full crust, woven into a lattice, or arranged around the edge. Another popular technique is to arrange thinly sliced apples on top of the filling before adding a top crust, creating a beautiful pattern visible through a lattice or cut-out top.
Apple Slices Rosettes
Creating apple slice rosettes on top of your apple pie filling before adding a lattice or partial top crust is a visually stunning technique. You'll need thinly sliced apples (about 1/8 inch thick) – firmer apple varieties work best. Toss the slices with a little lemon juice to prevent browning.
Arrange the slices, overlapping slightly, in a circular pattern starting from the outside edge of the pie and working inwards. You can create one large rosette covering the entire pie or smaller rosettes. Once the apple slices are arranged, add your lattice or top crust over them. As the pie bakes, the apple slices will soften and the rosette pattern will become more defined through the crust openings.
Apple Pie Leaf Designs
Using pie dough leaf cut-outs on an apple pie adds a clear seasonal theme. After preparing your bottom crust and filling, place your chosen top crust (full, lattice, or partial). Use leftover dough or a separate piece to cut out various leaf shapes. Add vein details with a knife.
Arrange the leaves on the top crust before baking. You can scatter them randomly, create a border around the edge, or cluster them in the center. For a cohesive look, brush the leaves with egg wash before baking so they turn golden brown along with the rest of the crust. This simple addition enhances the fall theme of your apple pie.
Decorating Pumpkin Pie: Simple and Elegant
Pumpkin pie, with its smooth, creamy filling and single crust, presents different decorating opportunities compared to fruit pies. The focus often shifts to the edge of the crust and the surface of the filling after baking. Simple elegance is usually the goal, complementing the rich, spiced filling without overpowering it.
Classic pumpkin pie decoration involves perfectly crimping the edge of the single crust. Beyond that, post-baking decorations like whipped cream swirls, stenciled spice patterns, or strategically placed garnishes are popular. Since the filling is baked uncovered, any pre-baking decoration on the surface would sink.
Pumpkin Pie Spice Stencils
Adding a stenciled design using pumpkin pie spice or ground cinnamon onto the surface of a cooled pumpkin pie is a quick and effective way to add visual interest and reinforce the flavor profile. You'll need a stencil (fall-themed or geometric) and a fine-mesh sieve.
Place the stencil carefully on the cooled pumpkin pie surface. Hold it flat against the surface. Lightly dust the open areas of the stencil with pumpkin pie spice, cinnamon, or a mix of both using the sieve. Lift the stencil gently and straight up. This creates a beautiful, fragrant design on the smooth surface of the pie.
Whipped Cream Swirls and Garnishes
Whipped cream is a classic accompaniment to pumpkin pie, and how you apply it can be decorative. Instead of just dolloping it on, use a piping bag fitted with a star tip (like an open or closed star tip, e.g., Wilton 1M or 2D) to pipe elegant swirls around the edge of the pie or in the center.
For extra flair, garnish the whipped cream swirls. A sprinkle of cinnamon, nutmeg, or chopped pecans works well. You could also place small, edible decorations like candied cranberries, chocolate shavings, or tiny marzipan pumpkins on top of the whipped cream. These simple additions elevate a plain slice of pumpkin pie.
Decorating Pecan Pie: Adding Visual Appeal
Pecan pie, with its rich, gooey filling studded with pecans, also benefits from simple decorative touches. Like pumpkin pie, it's typically a single-crust pie, so edge decoration is important. The surface, however, offers a unique opportunity to arrange the pecan halves in decorative patterns before baking.
Arranging pecans artfully not only looks beautiful but also ensures an even distribution of nuts in each slice. Post-baking, a simple chocolate or caramel drizzle can add another layer of flavor and visual appeal to the glossy surface.
Arranging Pecans in Decorative Patterns
Before pouring the filling into the bottom crust, or immediately after, arrange pecan halves on the bottom of the crust and/or float them on top of the filling. A common pattern is to arrange the halves in concentric circles starting from the center and working outwards. You can place them flat side down for a smoother look or pointed side up for more texture.
Another pattern is to arrange them in a single layer covering the entire surface, or create a specific motif in the center. Ensure the pecans are submerged slightly in the filling so they don't burn during baking. The filling will set around them, holding the pattern in place.
Chocolate Drizzle on Pecan Pie
Once the pecan pie is baked and cooled, a simple chocolate drizzle adds a touch of decadence and visual contrast. You can use melted semi-sweet or dark chocolate. For a quick drizzle, melt about 1/2 cup of chocolate chips with a teaspoon of shortening or coconut oil in a microwave-safe bowl, stirring every 30 seconds until smooth.
Transfer the melted chocolate to a small Ziploc bag, snip off a tiny corner, and drizzle it back and forth across the top of the cooled pie in a random or patterned manner. Alternatively, use a spoon for a thicker, more rustic drizzle. The dark chocolate contrasts beautifully with the golden-brown pecans and adds another layer of flavor.
Essential Tools for Fall Pie Decorating
Having the right tools can make pie decorating much easier and more enjoyable. You don't need a lot of fancy equipment to create beautiful fall pies, but a few key items can significantly help with techniques like cutting, shaping, and applying decorations.
Basic tools like a good rolling pin, a sharp knife or pastry wheel, and measuring cups and spoons are essential for any pie making. For decorating specifically, certain cutters, stencils, and piping equipment can elevate your results.
Recommended Pie Crust Cutters and Stamps
Pie crust cutters and stamps are fantastic for creating consistent, decorative shapes from your dough. Leaf-shaped cookie cutters are a fall baking staple and widely available in various sizes. Fluted pastry wheels or cutters create a wavy edge on strips for lattices or borders.
Specialized pie crust cutters or stamps can press patterns directly into the dough before baking. These often come in sets with fall themes like acorns, small pumpkins, or leaves. Ensure the cutters are sharp enough to make clean cuts without distorting the dough. Lightly flouring the cutters can help prevent sticking.
Stencils for Pie Decorating: Where to Find the Best
Pie stencils, used with cocoa powder or cinnamon sugar, offer intricate designs without needing advanced skills. You can find pie stencils at baking supply stores, craft stores, and online retailers. Look for stencils made from food-safe plastic or metal.
Many online retailers offer a wide variety of stencils, including seasonal fall designs. Consider stencils that are slightly larger than the area you want to cover, giving you flexibility in placement. You can also find stencils with messages, geometric patterns, or holiday themes that can be adapted for fall.
Piping Bags and Tips for Whipped Cream and Frosting
For applying whipped cream or other soft toppings decoratively, piping bags and tips are indispensable. You can use reusable silicone or disposable plastic piping bags. For whipped cream, larger tips are usually preferred, such as star tips (like Wilton 1M or 2D) or round tips (like Wilton 1A).
A basic set of piping tips will give you options for different swirl shapes. Practice on a piece of parchment paper before piping directly onto your pie. Ensure your whipped cream is stiff enough to hold its shape when piped. These tools are simple to use and offer a professional finish to your post-baking decorations.
Tips for Baking a Perfect Fall Pie for Decorating
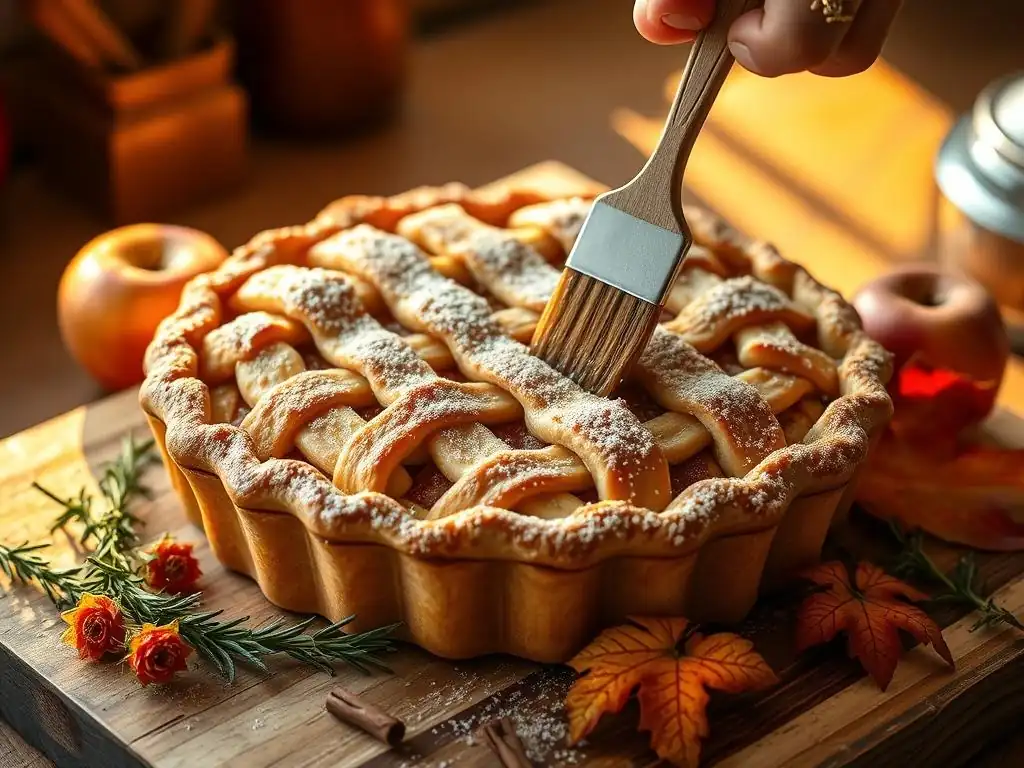
While decorating is fun, the foundation of a great pie is a perfectly baked crust and filling. A well-baked pie provides a stable and attractive base for your decorative efforts. Several factors contribute to a successful bake, from handling the dough correctly to ensuring the bottom crust is cooked through.
Key elements include using cold ingredients for the crust, not overworking the dough, blind baking if necessary for wet fillings, and baking at the correct temperature for the right amount of time. Paying attention to these basics ensures your pie is not only beautiful but also delicious.
Achieving the Perfect Pie Crust Texture
A tender, flaky pie crust is the goal. This is achieved by keeping your fat (butter or shortening) very cold and cutting it into the flour until it forms pea-sized pieces. These cold fat pieces create steam pockets during baking, resulting in flaky layers. Avoid overmixing the dough once water is added; mix only until it just comes together.
Handling the dough as little as possible keeps the gluten from developing too much, which would result in a tough crust. Chill the dough thoroughly before rolling it out – at least 30 minutes, but preferably longer. This makes the dough easier to handle and helps maintain the cold fat pieces.
Preventing a Soggy Bottom Crust
A soggy bottom crust is a common pie problem, especially with wet fruit fillings. To prevent this, ensure your oven is preheated properly, often to a relatively high temperature initially (like 400-425°F or 200-220°C) for the first 15-20 minutes to help set the bottom crust quickly.
For very wet fillings, consider blind baking the bottom crust partially before adding the filling. This involves baking the bottom crust weighted down with pie weights or dried beans until it's partially cooked before filling and finishing the bake. Using a glass or metal pie plate (which conduct heat better than ceramic) can also help brown the bottom crust. Ensure your filling isn't too wet; sometimes draining excess liquid from fruit is necessary.
Cooling and Preparing Your Pie for Decoration
Allowing your pie to cool properly before decorating is crucial, especially for decorations applied after baking (like stenciling or whipped cream). Fruit pies should typically cool for at least 2-3 hours, or until they are just warm or at room temperature, to allow the filling to set properly. Custard pies like pumpkin need to cool completely, often for several hours or overnight in the refrigerator, to firm up.
Attempting to decorate a warm pie, especially with techniques involving powder or soft toppings, can lead to melting, smudging, or the decoration sinking into the filling. Ensure the pie plate is on a stable surface when decorating. If adding decorations before baking, ensure they are securely attached to the crust.
Conclusion: Enjoying Your Beautifully Decorated Fall Pies
You've put in the effort to bake a delicious fall pie and added beautiful decorations using our simple Fall pie decorating tutorials. Now it's time to admire your handiwork and, more importantly, enjoy eating it! Whether you chose a classic lattice, charming leaf cut-outs, or elegant stenciling, your homemade pie is sure to be a hit.
Sharing a beautifully decorated pie is a wonderful way to celebrate the season with family and friends. The extra touch of decoration shows care and makes the moment feel more special. Don't be afraid to try new techniques next time – practice makes perfect, and each pie is an opportunity to learn and grow as a baker.
We love seeing what you bake! Share photos of your beautifully decorated fall pies on social media. Tag BakeWithEase.com or use relevant hashtags like #BakeWithEase #FallBaking #PieDecorating #ApplePie #PumpkinPie. Your creations can inspire other bakers in our community to try their hand at these Fall pie decorating tutorials.
Don't worry if your first attempt isn't perfect; the most important thing is that you tried and had fun in the kitchen. Every baker has pies that don't turn out exactly as planned. The flavors of fall are forgiving, and even a rustic-looking pie tastes incredible when it's homemade.
More Fall Baking Tutorials at BakeWithEase.com
Ready to explore more fall flavors and techniques? BakeWithEase.com is your ultimate resource for all things baking. From mastering flaky crusts to creating delicious fillings, we have tutorials and recipes for every level. Check out our other Fall baking tutorials for ideas on cookies, cakes, breads, and more.
Explore our sections on Seasonal Baking for recipes specific to autumn, including pumpkin bread, apple cider donuts, and spiced muffins. We're constantly adding new content to help you bake with ease and confidence. Keep practicing your Fall pie decorating tutorials and enjoy the sweet rewards of your efforts!
Frequently Asked Questions
What are some beginner-friendly fall pie decorating ideas?
Start with simple lattice crusts, leaf-shaped cutouts, or a sprinkle of cinnamon sugar. These techniques are easy to learn and add a touch of fall flair without being overly complicated.
Where can I find step-by-step tutorials for decorating fall pies?
BakeWithEase.com offers a range of fall pie decorating tutorials, including video guides and detailed written instructions. Search specifically for "Fall pie decorating tutorials" on the site.
What are some common mistakes to avoid when decorating fall pies?
Avoid using too much liquid when adding decorations, as this can make the crust soggy. Also, be sure to vent the pie properly to prevent it from bursting.
What ingredients are best for creating edible fall pie decorations?
Consider using ingredients like pie dough scraps, cinnamon sticks, nuts, and fresh fruit to create visually appealing and delicious decorations. These are often readily available and add to the fall theme.
How can I make my fall pie decorations stand out?
Experiment with different colors and textures. Use egg washes for a glossy finish, and consider adding edible glitter or sanding sugar for a touch of sparkle.
Final Reflection: The Enduring Charm of a Perfectly Decorated Fall Pie
The art of decorating a fall pie isn't just about aesthetics; it's about celebrating the season's bounty and sharing the warmth of homemade goodness. In a world increasingly dominated by fast food and pre-packaged treats, the simple act of crafting a beautiful, delicious pie becomes a powerful statement of intentionality and care. It's a reminder to slow down, appreciate the details, and connect with the comforting traditions of autumn.
The influence of visually appealing food on our enjoyment is undeniable. We eat with our eyes first, and a beautifully decorated pie elevates the entire experience, transforming a simple dessert into a centerpiece of celebration. The best things in life are simple, but not easy.
This quote perfectly encapsulates the effort and reward inherent in creating a stunning fall pie. From the carefully arranged leaves to the perfectly piped cream, each detail contributes to a final product that speaks volumes about the maker's skill and passion. It's a testament to the enduring power of handcrafted beauty in a fast-paced world.
This fall, I encourage you to embrace the joy of pie decorating. Don't be intimidated by the seemingly complex techniques; start small, experiment with different designs, and most importantly, have fun! Let the vibrant colors and textures of autumn inspire your creativity.
The process itself is a meditative act, a chance to disconnect from the digital world and reconnect with the simple pleasures of creating something beautiful and delicious to share with loved ones. The result? A pie that's not just a dessert, but a work of art, a symbol of the season, and a cherished memory in the making.
Unleash Your Inner Pie Artist: Decorate Your Autumn Masterpiece!
Thanks for joining us on this delicious journey into fall pie decorating! We hope you've gained some fun and creative inspiration. Now it's time to put those skills to the test!
- Craft your dream pie: Choose your favorite fall flavors and put your newly acquired decorating techniques to work! Don't be afraid to experiment—that's where the magic happens!
- Share your creations: Show off your stunning pie artistry on social media using #BakeWithEaseFallPies. Let's inspire each other!
- Challenge a friend:Invite a friend to a pie-decorating competition – the winner gets bragging rights (and the first slice, of course! ).
Ready to transform a simple pie into a work of edible art? What unique fall-inspired design will you create?