
Easy Troubleshooting for Common Fall Baking Problems


Welcome to BakeWithEase, your haven for transforming kitchen dreams into delicious realities! Are your pumpkin pies cracking? Is your apple bread sinking? Don't let seasonal baking woes dampen your autumn spirit. Dive in and discover our essential Fall baking troubleshooting tips – we'll help you diagnose and conquer common baking pitfalls, turning potential disasters into delectable triumphs. Prepare to elevate your fall baking game!
- Troubleshooting Common Baking Problems
- Understanding Baking Challenges
- Troubleshooting Cake Issues
- Dealing with Flavor Imbalances in Baking
- Common Baking Problems & Solutions: Dough and Batter Issues
- Mastering Baking Techniques: Avoiding Common Pitfalls
- Baking Troubleshooting Tips: Ingredient Substitutions
- Preventing Baking Failures: Last-Minute Checks
- Conclusion: Enjoying Successful Baking
-
Frequently Asked Questions
- What are some common problems encountered when baking with pumpkin puree in the fall?
- Why might my spices seem muted or disappear in my fall baked goods?
- My apple pie filling is too watery, what can I do?
- Why does my gingerbread cookie dough seem dry and crumbly during the fall?
- What can I do if my fall-themed cakes are sinking in the middle?
- Final Reflection: Harvesting the Sweetness of Success in Fall Baking
- Unlock Your Fall Baking Potential!
Troubleshooting Common Baking Problems
Understanding Baking Challenges
Why Baking Can Be Tricky
Baking is often described as a precise science, unlike cooking which can be more forgiving. Ingredients interact in specific ways, and even small deviations in measurements, temperature, or technique can lead to unexpected results. For instance, the leavening agent (like baking soda or yeast) relies on exact conditions to create lift, and if the oven temperature is off by just 25°F (about 14°C), a cake might sink or bake unevenly. This level of dependency on precise chemistry makes mastering baking a journey of careful attention to detail and understanding the 'why' behind each step.
Furthermore, environmental factors play a significant role. Humidity levels can affect how flour absorbs liquid, making doughs stickier on damp days. Altitude also impacts baking; at higher elevations, liquids evaporate faster, and leavening agents work more rapidly, often requiring adjustments to recipes, such as reducing leavener or increasing liquid. Understanding these variables and how they interact with your specific recipe and environment is crucial for consistent success, especially when trying new Fall baking troubleshooting tips.
Common Mistakes in Baking Recipes
One of the most frequent errors is inaccurate ingredient measurement. Using measuring cups designed for liquids for dry ingredients (or vice versa) can lead to significant discrepancies. For example, scooping flour directly from the bag with a measuring cup and leveling it off can pack it down, resulting in up to 25% more flour than intended when measured by weight. This excess flour can make cakes dry or cookies tough.
Another common mistake is not understanding the state of ingredients. Using cold butter when a recipe calls for softened butter, or vice versa, drastically changes the texture. Softened butter, creamed with sugar, incorporates air crucial for lift in cakes and cookies, while cold, cubed butter is cut into flour to create flaky layers in pastries. Overmixing or undermixing batters and doughs are also pitfalls; overmixing can develop too much gluten, leading to tough baked goods, while undermixing can leave pockets of dry ingredients or uneven distribution of leavening.
Troubleshooting Cake Issues
Problem: Cake Sinking in the Middle
This is a classic baking frustration, often indicating an issue during the final stages of baking or cooling. One primary culprit is an oven temperature that is too low or fluctuates significantly. If the oven isn't hot enough, the cake's structure doesn't set properly before the leavening gases expand too much, causing the center to collapse as it cools. Ensuring your oven is accurately calibrated, perhaps by using an external oven thermometer, is a key step in preventing this, aiming for the temperature specified in the recipe, typically around 325°F to 350°F (160°C to 175°C) for many cakes.
Another common cause is premature removal from the oven. The cake might look done on the outside, but the center hasn't finished setting. Testing for doneness with a toothpick inserted into the center is vital; it should come out clean or with just a few moist crumbs. Removing it too early means the internal structure isn't strong enough to support itself once out of the heat, leading to a sunken middle. Also, check if you used the correct amount of leavening; too much baking powder can cause the cake to rise too quickly and then collapse.
Solution: Ensure Accurate Oven Temperature
An oven thermometer is a baker's best friend. Ovens can be off by as much as 50°F (about 28°C) from the temperature they display. A thermometer placed inside confirms the actual temperature, allowing you to adjust accordingly. If your oven runs cool, preheat it longer or set it slightly higher. If it runs hot, set it slightly lower. Consistent, accurate heat ensures the cake bakes evenly from edge to center, allowing the structure to set correctly before the leavening agents exhaust themselves.
Using the correct rack position is also part of temperature management. For most cakes, the middle rack is ideal as it provides the most even heat distribution. Using the bottom rack can result in a burnt bottom and undercooked top, while the top rack might brown the top too quickly. Proper temperature and placement are foundational Fall baking troubleshooting tips for successful cakes.
Solution: Avoid Opening the Oven Door During Baking
Opening the oven door, especially in the first two-thirds of the baking time, causes a sudden drop in temperature. This rapid cooling can halt the leavening process and prevent the cake's internal structure from setting, almost guaranteeing a sunken center. Try to resist the urge to check on your cake constantly. Most recipes provide a time range; wait until at least the minimum time has passed before opening the door, and then only briefly to check for doneness.
If you must check, do so quickly. Relying on visual cues through the oven door glass is preferable. Look for the edges pulling away from the pan or the top looking set. Using a timer religiously helps you avoid unnecessary peeking. Patience is a virtue in baking, and keeping the oven door closed until the cake is nearly done is a simple yet effective troubleshooting tip.
Problem: Cake Too Dry
A dry cake is disappointing, often resulting from too much flour or overbaking. Flour absorbs liquid, and an excess amount will soak up moisture needed for tenderness. Weighing your flour (e.g., 120-130 grams per cup, depending on the type) instead of using volume measurements is the most accurate way to ensure you're not adding too much. If a recipe only provides volume measurements, gently spoon the flour into the measuring cup and level it off without packing.
Overbaking is another prime cause. The longer a cake bakes, the more moisture it loses. Even a few minutes too long can turn a moist cake into a crumbly, dry one. Start checking for doneness at the minimum bake time specified in the recipe. A toothpick test should yield moist crumbs, not a clean, dry stick, which indicates the cake is likely already overcooked.
Solution: Add More Liquid to the Batter
If you suspect a recipe is prone to dryness or if you've made it before and it was dry, consider slightly increasing the liquid component next time. This could be milk, buttermilk, yogurt, sour cream, or even applesauce or pumpkin puree in Fall baking recipes. Start with a small increase, perhaps 1-2 tablespoons per cup of flour in the recipe. For instance, if a standard pumpkin cake uses 1 cup of milk, try adding 1 cup plus 2 tablespoons.
Adding fats like oil or melted butter can also improve moisture, as fats tenderize the cake structure and retain moisture better than flour. Using oil often results in a more consistently moist cake than butter, especially for recipes like muffins or quick breads. Experimenting with these ratios on subsequent attempts is part of refining your Fall baking troubleshooting tips.
Solution: Reduce Baking Time
As mentioned, overbaking is detrimental to moisture. Pay close attention to the visual cues and the toothpick test. The cake is done when the edges are pulling away from the pan slightly, the top springs back when gently pressed, and a toothpick inserted into the center comes out with moist crumbs. Avoid waiting for the toothpick to be completely clean, as this often means the cake is already slightly overdone.
If your oven runs hot, reducing the temperature by 10-15°F (about 5-8°C) and baking for the time recommended can help, or keep the temperature the same but check for doneness 5-10 minutes before the minimum time listed. Every oven is different, and getting to know yours is crucial for successful baking. Note down the adjusted times and temperatures for your specific oven for future reference.

Cookies that spread into flat discs are often a result of warm butter, too much sugar, or insufficient chilling. Butter that is too soft or melted causes cookies to spread rapidly in the oven before the flour and eggs can set the structure. Using butter that is softened but still cool to the touch is usually best for creaming methods.
Excess sugar can also lead to over-spreading. Sugar melts as the cookie bakes, and if there's too much relative to the flour and fat, it causes the cookie to flatten out excessively. Ensure you're measuring sugar accurately, ideally by weight. Additionally, not chilling the dough allows the butter to be too soft before hitting the hot oven, accelerating the spread.
Solution: Chill the Dough Before Baking
Chilling cookie dough is a crucial step for many recipes, especially those using a higher ratio of butter. Chilling solidifies the fat, which means the cookies will spread less in the oven as the butter takes longer to melt. Refrigerate the dough for at least 30 minutes, but often 1-2 hours or even overnight yields better results. Chilling also allows the flavors to meld and the flour to fully hydrate, improving texture and taste.
For doughs that spread excessively, consider chilling the dough after scooping or shaping the cookies onto the baking sheet for 10-15 minutes before baking. This ensures the butter is firm right before hitting the heat. This simple step is one of the most effective Fall baking troubleshooting tips for achieving thicker, chewier cookies.
Solution: Use the Correct Type of Fat
The type of fat significantly impacts cookie spread. Butter, with its relatively low melting point and water content (around 18%), causes more spread than shortening, which is 100% fat and has a higher melting point. Cookies made with shortening tend to be thicker and softer, while those made with butter are often crispier around the edges and more flavorful.
Using a blend of butter and shortening can offer a balance of flavor and texture, reducing spread compared to using butter alone. For instance, if a recipe calls for 1 cup of butter, try using ½ cup butter and ½ cup shortening. Ensure the fat is at the correct temperature (softened but cool, or cold and cubed, depending on the recipe method). Using cold, solid fats is key for recipes like shortbread or cut-out cookies where minimal spread is desired.
Hard or tough cookies are typically the result of overbaking or overworking the dough. Baking cookies for too long at too high a temperature dries them out and makes them brittle. The residual heat on the baking sheet continues to cook them even after they are removed from the oven, so they should look slightly underbaked in the center when you take them out.
Overworking the dough, especially after adding flour, develops gluten. While gluten is necessary for structure, too much makes cookies tough and less tender. Mix until the ingredients are just combined, and avoid excessive kneading or stirring once the flour is incorporated.
Solution: Avoid Overbaking Cookies
This is perhaps the most critical step to prevent hard cookies. Cookies bake quickly, often in just 8-12 minutes depending on size and thickness. Watch for visual cues: the edges should be lightly golden, but the centers should still look slightly soft or pale. Different types of cookies have different doneness indicators; for example, sugar cookies might just look set, while chocolate chip cookies will have slightly darker edges.
Remove cookies from the oven and let them cool on the hot baking sheet for 2-5 minutes before transferring them to a wire rack. This allows them to finish cooking gently from the residual heat without becoming excessively hard. Learn the signs of doneness for your specific cookie recipe and err on the side of slightly underbaked for a chewier result.
Solution: Use Brown Sugar
The type of sugar used impacts cookie texture. Granulated sugar promotes spread and crispness, while brown sugar (which contains molasses) adds moisture and chewiness. Using a higher proportion of brown sugar to granulated sugar can result in softer, more tender cookies. For example, a classic chocolate chip cookie recipe often uses a mix, like ½ cup granulated sugar and ½ cup brown sugar. Increasing the brown sugar to ¾ cup and decreasing the granulated to ¼ cup will yield a chewier cookie.
Ensure your brown sugar is fresh and moist; dry brown sugar can lead to drier cookies. Store it in an airtight container, perhaps with a marshmallow or a piece of bread, to keep it soft. Adjusting the sugar ratio is a simple yet effective Fall baking troubleshooting tip for improving cookie texture.
Dealing with Flavor Imbalances in Baking
Problem: Too Much Sweetness
Sometimes, a baked good can be overwhelmingly sweet, masking other flavors. This can happen with recipes that use a lot of sugar, especially when other ingredients aren't present to provide balance. While sugar is essential for moisture, tenderness, and browning, too much can be cloying. This is particularly noticeable in some fruit-based bakes where the natural sweetness of the fruit is compounded by added sugar.
Using ingredients like sweetened condensed milk or certain frostings can also contribute to excessive sweetness. Understanding the role of each sweet component in a recipe helps in identifying where the imbalance might originate.
Solution: Reduce Sugar Quantities Gradually
If you find a recipe too sweet, you can often reduce the sugar by 10-20% without significantly impacting the structure or texture, particularly in quick breads, muffins, or some cakes. For example, if a recipe calls for 1 cup (200g) of sugar, try reducing it to ¾ cup (150g) or even ⅔ cup (135g) next time. Avoid drastic reductions (more than 30%) as sugar plays a vital role in moisture, browning, and leavening activation.
Test the recipe with a small reduction first and adjust further on subsequent attempts if needed. Note down your adjustments. This gradual approach allows you to tailor the sweetness level to your preference while minimizing the risk of negative structural changes. This is a practical Fall baking troubleshooting tip for healthier bakes.
Solution: Balance Sweetness with Acidity
Adding acidic ingredients is a fantastic way to cut through and balance excessive sweetness, much like a squeeze of lemon brightens a rich sauce. Ingredients like lemon juice, lime zest, buttermilk, yogurt, sour cream, or even a touch of vinegar (like apple cider vinegar in vegan baking) can provide the necessary contrast. For example, a very sweet apple pie filling benefits greatly from a squeeze of lemon juice and a sprinkle of lemon zest.
Incorporating tart fruits, like cranberries or Granny Smith apples in Fall baking, alongside sweeter varieties also helps create a more balanced flavor profile. Even a pinch of salt enhances other flavors and can temper sweetness. Consider adding a teaspoon of lemon juice or a tablespoon of buttermilk if a batter tastes overly sweet before baking.
Problem: Not Enough Flavor
Conversely, some baked goods can taste bland or flat. This often happens when relying solely on basic ingredients without enhancing them with aromatics, spices, or extracts. Simple sugar cookies or plain cakes can lack depth if they don't include vanilla extract, almond extract, or citrus zest.
Using stale spices or extracts that have lost their potency is another common cause. Spices, especially ground ones, lose their flavor over time. Extracts can evaporate or degrade if not stored properly.
Solution: Use Extracts and Zests
Extracts and zests are concentrated sources of flavor. Vanilla extract is almost universally beneficial in baked goods, enhancing sweetness and adding complexity. A standard recipe for 12 muffins or a single cake layer might use 1-2 teaspoons of vanilla extract. Almond extract, peppermint extract, or maple extract can add specific flavor profiles. Zests from citrus fruits (lemon, orange, lime) contain potent oils that add brightness and aroma without the acidity of the juice.
In Fall baking, spices like cinnamon, nutmeg, cloves, ginger, and allspice are key. Ensure your spices are fresh; a good test is to smell them – they should be fragrant. Consider using whole spices and grinding them yourself for maximum potency. Adding a little more spice or extract than the recipe calls for can sometimes boost flavor significantly, perhaps an extra ½ teaspoon of cinnamon or ¼ teaspoon of nutmeg in a pumpkin bread recipe.
Solution: Toast Nuts or Spices Before Adding
Toasting nuts (like pecans, walnuts, or almonds often used in Fall baking) before adding them to batters or toppings enhances their flavor and aroma. The heat brings out their natural oils, resulting in a richer, nuttier taste. Spread nuts in a single layer on a baking sheet and toast in a preheated oven at 300-325°F (150-160°C) for 8-15 minutes, stirring occasionally, until fragrant and lightly colored. Let them cool completely before chopping and adding to your recipe.
Similarly, gently toasting whole spices in a dry skillet before grinding them can intensify their flavor. This is especially effective for seeds like cumin, coriander, or cardamom, though less common for the typical ground spices used in Fall baking like cinnamon sticks or cloves. However, a brief toast can wake up even ground spices if you're feeling adventurous.
Common Baking Problems & Solutions: Dough and Batter Issues
Problem: Dough Too Sticky
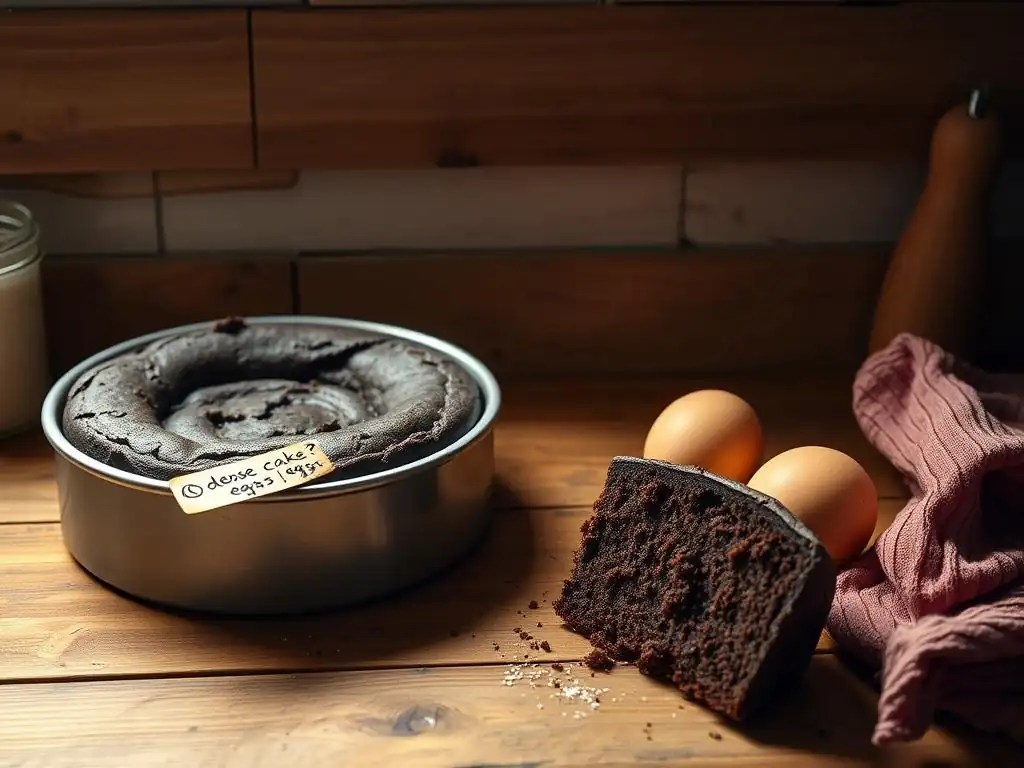
A dough that is excessively sticky is difficult to handle, shape, or roll out. This usually means there is too much liquid or not enough flour. Humidity can also play a role, as flour absorbs moisture from the air. Overmixing can sometimes make dough seem stickier as gluten develops.
Recipes often provide a range for flour quantity (e.g., "3 to 3 ½ cups flour"). Start with the lower amount and add more only as needed.
Solution: Add Flour Gradually
If your dough is too sticky, add flour one tablespoon at a time, incorporating it fully before adding more. Work the flour in gently, preferably by hand or with a stand mixer on low speed, until the dough is manageable and no longer excessively sticky. Be cautious not to add too much, as this will result in a dry, tough baked good. The goal is a dough that is soft but not sticking to your hands or the bowl.
For yeast doughs, a slightly sticky dough is often desirable for a tender crumb. The key is learning the feel of the dough the recipe intends. For cookie or pastry doughs meant to be rolled, chilling the dough can often help manage stickiness without adding extra flour.
Problem: Batter Too Thick
A batter that is too thick can result in dense, heavy baked goods that don't rise properly. This is typically caused by too much dry ingredient (flour, cocoa powder, leavening) or not enough liquid (milk, eggs, oil). Using ingredients at the wrong temperature (e.g., cold eggs or melted butter when softened is required) can also affect batter consistency.
Sometimes, the recipe itself might have an incorrect ratio, or you might have accidentally mis-measured an ingredient.
Solution: Add Liquid Gradually
If your batter appears too thick compared to the recipe's description or your past experience, add liquid one tablespoon at a time, stirring gently until the desired consistency is reached. Use the liquid specified in the recipe (milk, water, buttermilk, etc.). For instance, if making pumpkin muffins and the batter seems too thick to scoop easily, add a tablespoon of milk or buttermilk.
Be careful not to overmix while adding liquid, as this can develop gluten in cakes and muffins, leading to toughness. Stop adding liquid as soon as the batter reaches the correct, pourable or scoopable consistency. This careful adjustment is another useful point in your Fall baking troubleshooting tips arsenal.
Mastering Baking Techniques: Avoiding Common Pitfalls
Baking Troubleshooting Tips: Measuring Ingredients Accurately
Accurate measurement is the bedrock of successful baking and a fundamental part of Fall baking troubleshooting tips. For dry ingredients like flour, sugar, and cocoa powder, using a kitchen scale provides the most consistent results. For example, a cup of all-purpose flour typically weighs around 120-130 grams. Weighing eliminates the variability caused by scooping and leveling methods.
If using volume measurements, especially for flour, spoon the flour lightly into the measuring cup and level off the excess with a straight edge without packing it down. For liquids, use a liquid measuring cup (with a spout) and place it on a flat surface to read the measurement at eye level. Fats like butter should be measured accurately based on the recipe's instructions (by weight, by volume in a measuring cup, or using the markings on the wrapper).
Baking Troubleshooting Tips: Understanding Ingredient Functions
Knowing what each ingredient does helps you predict outcomes and troubleshoot problems. Flour provides structure through gluten development. Sugar adds sweetness, tenderness, moisture, aids in browning, and helps activate leavening. Fats (butter, oil, shortening) add richness, moisture, tenderness, and contribute to texture (flaky layers in pastries, chewiness in cookies). Eggs bind ingredients, add moisture, richness, and contribute to leavening. Leavening agents (baking powder, baking soda, yeast) create gases that make baked goods rise. Liquids (milk, water, buttermilk) hydrate dry ingredients and activate leaveners.
Understanding these roles helps diagnose issues. For example, if a cake is dense (lack of rise), it might be a leavening problem, or if it's dry, it could be too much flour or not enough fat/liquid. This knowledge empowers you to apply effective Fall baking troubleshooting tips.
Baking Troubleshooting Tips: Ingredient Substitutions

Sometimes you need to make substitutions, whether due to dietary needs, allergies, or simply missing an ingredient. Successful substitutions require understanding how the replacement ingredient functions compared to the original. A straight 1:1 substitution doesn't always work.
For example, substituting applesauce for oil in muffins can reduce fat and calories, but using too much can make them dense and rubbery because applesauce adds moisture but lacks the tenderizing properties of fat. Often, a partial substitution works best (e.g., replacing half the oil with applesauce).
Substituting Ingredients in Gluten-Free Baking
Gluten provides structure and elasticity in traditional baking. When removing wheat flour, you need a blend of gluten-free flours (like rice flour, tapioca starch, potato starch, almond flour) and often binders (like xanthan gum or psyllium husk) to mimic gluten's function. Using a pre-mixed 1:1 gluten-free blend designed for baking is often the easiest starting point. These blends typically already contain a binder.
Recipes specifically developed for gluten-free baking are usually more reliable than trying to convert a traditional recipe directly. Adjustments to liquid, leavening, and baking time may still be necessary. For instance, gluten-free baked goods can sometimes be crumbly, requiring slightly more liquid or a stronger binder.
Substituting Ingredients in Vegan Baking
Vegan baking removes eggs and dairy. Eggs provide binding, leavening, moisture, and richness. Replacements include applesauce, mashed banana, flax egg (1 tbsp flaxmeal + 3 tbsp water), chia egg, commercial egg replacers, or silken tofu, depending on the recipe's need. Each substitute functions differently; applesauce adds moisture but little binding, while a flax egg is a better binder.
Dairy milk can often be substituted 1:1 with plant-based milks (soy, almond, oat, etc.). Dairy butter can be replaced with vegan butter sticks designed for baking or sometimes oil, though the texture will differ. Sour cream or yogurt can be replaced with vegan versions or sometimes applesauce or mashed banana for moisture. Understanding the role of the original ingredient is key to choosing the right vegan substitute.
Preventing Baking Failures: Last-Minute Checks
Before you even start mixing, a few quick checks can prevent common problems. These simple steps are vital Fall baking troubleshooting tips.
- Read the recipe thoroughly from start to finish before beginning. Ensure you understand each step and have all the necessary equipment ready.
- Check oven temperature calibration.
- Gather all ingredients and measure them before you start mixing. This is called mise en place and prevents frantic searching or mis-measuring mid-process.
Checking Ingredient Freshness
Using fresh ingredients is paramount. Flour can go rancid over time, especially whole wheat flour. Leavening agents like baking powder and baking soda lose their potency. Baking powder can be tested by adding a teaspoon to a few tablespoons of hot water; it should fizz vigorously. Baking soda can be tested by adding a teaspoon to a few tablespoons of vinegar; it should also fizz. If they don't fizz, they need replacing.
Eggs should be within their expiration date. Dairy and fats should be fresh and stored properly. Spices, as mentioned, lose flavor; check their aroma. Using fresh ingredients ensures they perform their intended function in the recipe.
Ensuring Proper Mixing Techniques
Mixing techniques are specified for a reason. Creaming butter and sugar incorporates air for leavening and tenderness. Overmixing after adding flour develops gluten, leading to toughness in cakes and muffins. Undermixing can leave pockets of unmixed ingredients or result in uneven texture.
Follow the recipe's instructions regarding mixing speed and duration (e.g., "mix on low speed until just combined," "beat on high speed for 5 minutes"). For quick breads and muffins, the "muffin method" involves combining wet and dry ingredients separately, then mixing them together just until the dry ingredients are moistened, even if lumps remain. This minimizes gluten development. For cakes using the creaming method, beat butter and sugar until light and fluffy, then add eggs one at a time, and finally alternate adding dry and wet ingredients, mixing only until just combined.
Conclusion: Enjoying Successful Baking
Baking challenges are part of the learning process, but with effective Fall baking troubleshooting tips, you can turn potential failures into delicious successes. Understanding why problems occur – whether it's a sunken cake, flat cookies, or bland flavor – empowers you to make the necessary adjustments.
From ensuring accurate measurements and oven temperatures to recognizing the signs of doneness and understanding ingredient functions, each step contributes to a better bake. Don't be discouraged by mistakes; view them as opportunities to learn and refine your skills. Every baker, no matter how experienced, has had a bake that didn't go according to plan.
Recap of Key Baking Troubleshooting Tips
Let's quickly recap some essential Fall baking troubleshooting tips:
- Always preheat your oven fully and consider using an oven thermometer for accuracy.
- Measure ingredients precisely, ideally using a kitchen scale for dry goods.
- Understand the role of each ingredient in your recipe.
- Avoid opening the oven door unnecessarily, especially during the first two-thirds of baking time.
- Learn the visual and physical cues for doneness for different types of baked goods (toothpick test, browning, firmness).
- Chill cookie dough to control spread.
- Don't overmix batters, particularly after adding flour.
- Check the freshness of your leavening agents and spices.
- Don't be afraid to make small, gradual adjustments to recipes based on your results and preferences.
Applying these principles consistently will significantly improve your baking outcomes.
Resources for Further Baking Assistance
Mastering baking takes practice and continuous learning. If you encounter issues not covered here, or want to deepen your understanding, there are many resources available. Cookbooks dedicated to baking techniques often provide detailed explanations and visual guides for common processes like creaming, kneading, and folding.
Online baking communities and forums offer platforms to ask specific questions and learn from the experiences of other bakers. Many reputable baking websites provide extensive guides on ingredients, equipment, and troubleshooting specific recipes or types of baked goods. Exploring these resources can provide additional Fall baking troubleshooting tips and confidence as you continue your baking journey.
Frequently Asked Questions
What are some common problems encountered when baking with pumpkin puree in the fall?
Pumpkin puree can sometimes result in overly dense or mushy baked goods. This is often due to excess moisture in the puree or not adjusting other liquid ingredients accordingly.
Why might my spices seem muted or disappear in my fall baked goods?
Spices can lose their potency over time. Ensure your spices are fresh and properly stored. You may also need to increase the amount used in the recipe.
My apple pie filling is too watery, what can I do?
This is often caused by excess moisture released from the apples during baking. Try using a thickening agent like cornstarch or tapioca starch, or pre-cooking the filling to reduce moisture.
Fall weather can mean lower humidity, which can dry out your dough. Try adding a tablespoon of liquid (water or molasses) at a time until the dough comes together, or reduce the flour slightly.
What can I do if my fall-themed cakes are sinking in the middle?
This could be due to underbaking, too much leavening, or opening the oven door too early. Ensure your oven is properly calibrated, use the correct amount of baking powder/soda, and avoid opening the oven until the cake is nearly done.
Final Reflection: Harvesting the Sweetness of Success in Fall Baking
The art of fall baking, with its comforting aromas and intricate recipes, shouldn't be a source of frustration. Mastering the techniques and understanding the common pitfalls is key to unlocking the joy of creating delicious seasonal treats. This article has explored some of the most frequent challenges encountered during fall baking, providing practical solutions to ensure your creations are as delightful as they are visually appealing.
The enduring appeal of fall baking lies not just in the delicious results, but in the process itself – a comforting ritual that connects us to tradition and the changing seasons. Baking is at once child's play and adult joy. And love, of course.
This quote perfectly encapsulates the emotional connection we forge with baking, especially during fall, a time when we crave warmth and connection. The challenges we face in the kitchen, and the triumphs we achieve in overcoming them, only deepen this bond.
Now, as you embark on your own fall baking adventures, remember the tips and tricks we've discussed. Don't be discouraged by a slightly sunken cake or a less-than-perfect pie crust. Embrace the learning process, experiment with flavors, and most importantly, enjoy the journey. Each perfectly risen loaf, each exquisitely spiced cookie, is a testament to your dedication and a delicious reward for your efforts. Let the warmth of the season and the sweetness of your creations fill your home with joy this fall.
Unlock Your Fall Baking Potential!
Thanks for joining us on this delicious journey through common fall baking pitfalls! We hope you now feel more confident tackling those tricky recipes. Ready to put your newfound knowledge to the test?
- Bake your dream fall dessert! Grab that recipe you've been eyeing and give it a go – you've got this!
- Share your baking triumphs (and even your flour-covered mishaps!) on social media using #BakeWithEase – let's inspire each other!
- Explore our other baking guides on BakeWithEase.com for more tips and tricks.
What's your favorite fall treat to bake, and what's one tip you're most excited to try?