
How to Use Food Coloring Effectively for Celebration Cupcakes

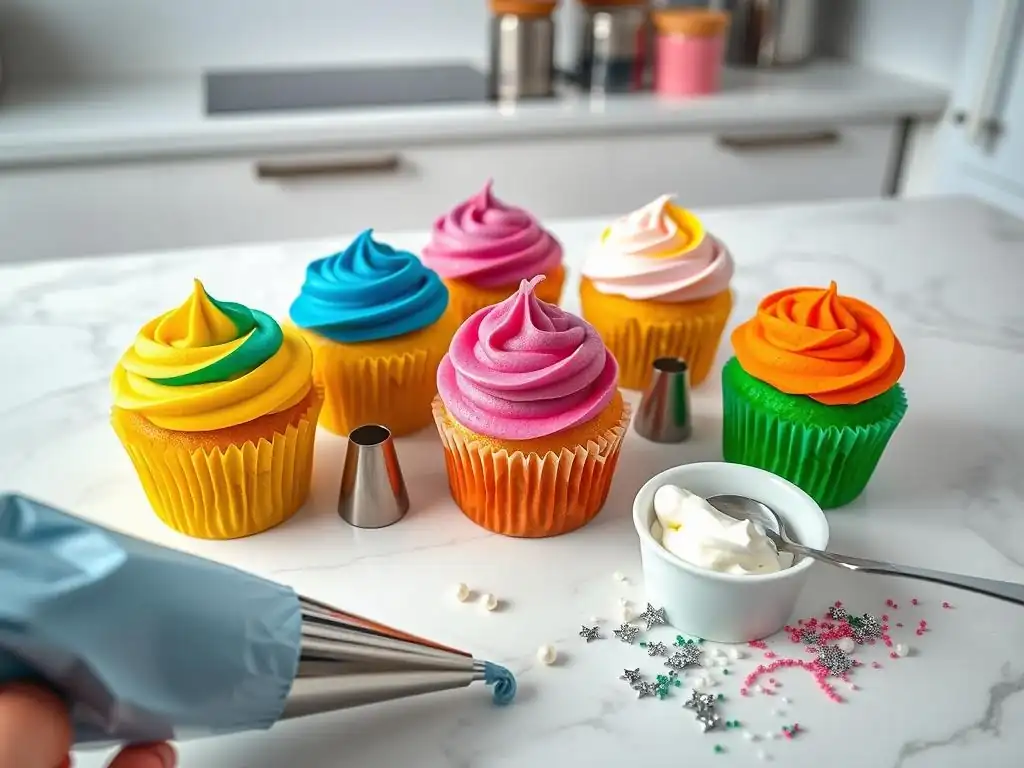
Welcome to BakeWithEase, your trusted companion in the world of baking! Ever wondered how to color cupcakes with vibrant, show-stopping hues that perfectly match your celebration? Unlock the secrets to achieving flawless frosting and batter colors that will impress your guests and elevate your baking game. Dive in and discover our expert tips for using food coloring effectively, turning ordinary cupcakes into extraordinary treats!
-
How to Color Cupcakes: A Complete Guide to Using Food Coloring Effectively for Celebration Cupcakes
- Understanding Food Coloring for Cupcakes: Types and Uses
- Preparing Cupcake Batter for Vibrant Colors
- Techniques for Coloring Frosting and Icing on Celebration Cupcakes
- Creative Ideas for Using Food Coloring in Celebration Cupcakes
- Troubleshooting Common Issues When Coloring Cupcakes
- Storing Colored Cupcakes to Preserve Vibrancy and Freshness
- Expert Tips and Tricks to Master How to Color Cupcakes Like a Pro
-
Frequently Asked Questions
- How much food coloring should I use for cupcakes to achieve vibrant colors?
- What's the best type of food coloring to use for cupcakes?
- Can I use natural food coloring for my cupcakes?
- How can I prevent my cupcake batter from becoming watery when adding food coloring?
- What's the best way to mix food coloring into cupcake batter for even distribution?
- Final Reflection: The Joyful Art of Perfectly Colored Cupcakes
- Unleash Your Inner Cupcake Artist!
How to Color Cupcakes: A Complete Guide to Using Food Coloring Effectively for Celebration Cupcakes
Understanding Food Coloring for Cupcakes: Types and Uses
Different Types of Food Coloring: Liquid, Gel, Powder, and Natural Dyes
When learning how to color cupcakes, understanding the different types of food coloring available is the first step. Liquid food coloring, commonly found in grocery stores, is water-based and relatively inexpensive. It's good for lighter shades but requires larger amounts for vibrant colors, which can sometimes thin out batter or frosting.
Gel paste colors, often found in specialty baking stores, are concentrated and glycerin or corn syrup based. A tiny amount goes a long way, making them ideal for achieving intense hues without adding excess moisture. For instance, just 1/4 teaspoon of a vibrant gel color can deeply color 2 cups of buttercream.
Powdered food coloring is highly concentrated and pigment-rich, often used for dusting or mixing with a liquid (like alcohol or extract) to create paint. It's excellent for delicate items like macarons or white chocolate where moisture is detrimental. Natural food dyes are derived from sources like fruits, vegetables, and plants (e.g., beet powder for red, turmeric for yellow, spirulina for blue). While appealing for their natural origin, they can sometimes impart a subtle flavor and may not always yield the same vibrant, stable colors as artificial dyes, often requiring larger quantities.
Choosing the Right Food Coloring for Cupcake Batter vs. Frosting
The type of food coloring you choose significantly impacts the outcome, especially when deciding how to color cupcakes and their toppings. For cupcake batter, liquid dyes work for pastels but can affect the texture if too much is added – think about adding 2-3 tablespoons of liquid dye to a standard cake batter recipe; this could easily change its consistency. Gel colors are generally preferred for batter because their concentration allows you to achieve deep colors with minimal liquid, preserving the batter's structure. A few drops of gel color are usually sufficient for a batch of 12 cupcakes.
When coloring frosting or icing, especially buttercream, gel colors are overwhelmingly the top choice. Their thick consistency means they don't thin out the frosting, crucial for maintaining pipeable texture. A single drop of concentrated gel color can dramatically change the shade of 1 cup of frosting.
Powdered colors, when mixed with a small amount of clear extract, can also be used to paint designs directly onto hardened frosting or fondant, offering fine detail possibilities not easily achieved with gels or liquids. Natural dyes can be used in both, but test a small amount first to check for flavor changes and color stability.
Safety and Quality Considerations When Selecting Food Colorants
Safety and quality are paramount when selecting food colorants for your celebration cupcakes. Always choose food-grade dyes specifically manufactured for consumption. Look for certifications or indications on the packaging confirming they are safe for use in food. Reputable brands adhere to strict quality control standards. For instance, many professional-grade gel colors undergo rigorous testing to ensure consistency and safety across batches.
Expiration dates are also important; while dyes may not spoil in the traditional sense, their potency can diminish over time, leading to weaker colors. Storing them properly, usually in a cool, dry place away from direct light, helps maintain their quality. When learning how to color cupcakes for special occasions, especially for events involving children, some people prefer to use natural dyes as an alternative, although they should be aware of potential flavor impacts and less vibrant results compared to artificial options. Always read ingredient labels, especially if dealing with allergies or dietary restrictions.
Preparing Cupcake Batter for Vibrant Colors
How to Mix Food Coloring into Cupcake Batter for Even Color Distribution
Achieving uniform color throughout your cupcake batter is essential for a professional look. The best time to add food coloring is after all the wet and dry ingredients have been combined but before you add any leavening agents like baking powder or baking soda, or just before the final gentle mix if leavening was added earlier.
This allows you to mix the color thoroughly without overmixing the batter, which can lead to tough cupcakes. Start with a small amount of color, especially with concentrated gels (e.g., a drop or two for a small batch of 6 cupcakes), and mix gently with a spatula or on the lowest speed of your mixer until the color is evenly distributed.
For vibrant hues when learning how to color cupcakes, you may need to add more color incrementally. Add a few more drops, mix, and assess the shade. Remember that colors often deepen slightly as the cupcakes bake. For instance, a batter that looks medium pink might bake into a deep rose. Avoid dumping a large amount of color in at once, as it's harder to gauge the final shade and can be difficult to mix in evenly without overworking the batter. This careful, step-by-step approach ensures consistent color from the center to the edges of each cupcake.
Tips to Achieve Bright and Consistent Cupcake Colors Without Affecting Taste
To get truly bright and consistent colors without compromising the taste of your cupcakes, focus on using high-quality, concentrated gel food colorings. These require minimal amounts, often less than a teaspoon for a full batch of 24 cupcakes, ensuring no discernible flavor is added. Using white cake batter as a base is also crucial; the natural yellow tint of vanilla or butter-based batters can subtly alter your desired color, making pure whites difficult and shifting blues towards green or pinks towards orange. A pure white canvas allows the true pigment of the dye to shine through.
Another tip is to let the colored batter sit for a few minutes before portioning into liners. This allows the color molecules to fully disperse. If using natural dyes, be mindful that some, like those made from spinach or activated charcoal, can impart a distinct flavor. Using larger quantities of natural dyes to achieve intensity is more likely to affect taste than using concentrated artificial gels. Always taste a tiny bit of the colored batter (before adding eggs, if that's your recipe structure) to ensure the color hasn't introduced an off-flavor.
Adjusting Recipes When Using Food Coloring to Maintain Texture and Flavor
Generally, using concentrated gel food coloring requires no recipe adjustments because the amount added is negligible – typically less than 1% of the total batter weight. For example, adding 1/2 teaspoon of gel color to a standard recipe yielding 12 cupcakes (approx. 500g of batter) is only about 2.5g of added liquid, which won't impact texture.
However, if you opt for liquid food coloring and need to add a significant amount (say, more than a tablespoon for a large batch), you might need to slightly reduce other liquid components in the recipe, such as milk or water, to maintain the correct batter consistency. This balance is key to mastering how to color cupcakes without negative side effects.
Using natural dyes derived from liquids (like beet juice or spinach juice) will definitely introduce more moisture, necessitating recipe adjustments. For instance, if a recipe calls for 1 cup of milk and you want to use 1/4 cup of beet juice for color, reduce the milk by 1/4 cup.
Powdered dyes added directly to batter can potentially dry it out if used in large quantities, although this is less common; they are usually mixed with a liquid first. Always monitor your batter consistency after adding color and make small adjustments to liquid or dry ingredients as needed, aiming for the original desired texture.
Techniques for Coloring Frosting and Icing on Celebration Cupcakes
Step-by-Step Method to Color Buttercream and Cream Cheese Frosting
Coloring frosting, especially rich buttercreams or tangy cream cheese frostings, is straightforward when you know how to color cupcakes effectively. Start with your prepared frosting base. For vibrant colors, begin with a white frosting base. If using butter-based frosting, ensure the butter is pale yellow or use a touch of violet food coloring to neutralize the yellow undertones and achieve a whiter base first. Transfer the frosting to a clean bowl.
Add a small amount of gel food coloring – for 2-3 cups of frosting, start with just a drop or two of concentrated gel color. Mix thoroughly using a spatula or the paddle attachment of your stand mixer on low speed. Scrape down the sides of the bowl frequently to ensure all the frosting is evenly colored.
Continue adding color drop by drop, mixing after each addition, until you reach the desired shade. Remember that colors often deepen slightly over time, especially if the frosting is refrigerated. For example, a light blue might become a medium blue after an hour.
Using Food Coloring to Create Ombre and Multicolor Frosting Effects
Ombre and multicolor effects add a stunning visual element to celebration cupcakes. To create an ombre effect, divide your white frosting into several portions (e.g., 3-4 portions for a gradual shade change). Leave one portion white. Color the remaining portions with increasing amounts of the same food coloring, creating progressively darker shades. For instance, color one portion light blue (1 drop), one medium blue (3 drops), and one dark blue (6 drops) for 2 cups of frosting each.
To pipe ombre frosting onto cupcakes, you can layer the different shades inside a piping bag. Spoon the darkest color into the bottom of the bag, closest to the tip. Then layer the medium shade on top, followed by the lightest shade or white at the top.
When you pipe, the colors will blend together as they are squeezed out, creating a gradient effect. For multicolor swirls, you can dollop different colored frostings side-by-side onto a sheet of plastic wrap, roll it into a log, snip off one end, and insert this log into a piping bag fitted with a star tip. As you pipe, the different colors will swirl together beautifully.
Avoiding Common Frosting Coloring Mistakes for Smooth, Vibrant Results
Several common mistakes can hinder your efforts on how to color cupcakes and their frosting effectively. One major pitfall is adding too much liquid food coloring, which can make the frosting runny and difficult to pipe or spread smoothly. Always opt for concentrated gel colors for frostings. Another mistake is not mixing the color thoroughly, resulting in streaks or uneven patches of color. Ensure you mix until the color is uniform throughout the batch.
Not accounting for color development over time is another issue; a color that looks perfect immediately after mixing might become too dark after sitting. Start with a slightly lighter shade than your target color, especially for deep hues like red or black, and allow it to sit for 30 minutes to an hour to fully develop before adding more color. Finally, using a yellow-tinted frosting base for colors like white, pale blue, or pink will result in off-shades (e.g., greenish-blue, peachy-pink). Always aim for the whitest possible frosting base for true-to-hue coloring.
Creative Ideas for Using Food Coloring in Celebration Cupcakes
How to Color Cupcake Fillings and Layers for Surprise Effects
Adding colored fillings or layers inside your cupcakes creates a delightful surprise when they are bitten into, adding an extra layer of fun for celebration cupcakes. For colored fillings, you can color pastry cream, whipped cream, or even a simple ganache using gel food coloring. For example, a vibrant pink strawberry filling inside a vanilla cupcake for a gender reveal party, or a bright green lime curd filling for a tropical-themed event.
Use concentrated gel colors sparingly, as fillings tend to be softer than frosting and can be thinned easily. Add color after the filling is fully cooked and cooled.
To create colored cake layers within a single cupcake, you can divide your plain cupcake batter into smaller bowls and color each bowl a different shade before layering them into the cupcake liners. For instance, for a rainbow effect, divide the batter into six bowls and color each one a different rainbow color (red, orange, yellow, green, blue, purple). Spoon a small amount of each color into the liner sequentially.
This technique works best with thicker batters that won't bleed into each other during baking. This adds an unexpected pop of color inside, mastering another aspect of how to color cupcakes creatively.
Decorating Tips: Using Food Coloring to Paint or Airbrush Cupcake Designs
Beyond coloring batter and frosting, food coloring can be used as a medium for direct decoration. To paint designs onto set frosting or fondant, mix powdered food coloring with a small amount of clear extract like vodka or lemon extract (alcohol evaporates quickly, leaving the pigment behind). This creates an edible paint that can be applied with fine brushes. You can hand-paint intricate patterns, messages, or cartoon characters directly onto the smooth surface of your frosted cupcakes.
Airbrushing is another advanced technique for how to color cupcakes with gradients, stencils, or overall coverage. Edible airbrush colors are specialized liquid dyes designed for use with an airbrush machine. They are very thin and highly pigmented. You can airbrush an entire cupcake top a solid color, create soft gradients, or use stencils to spray specific shapes and patterns. For example, airbrushing a sunset gradient (yellow, orange, red) onto the frosting for a tropical theme, or using a star stencil to spray gold edible paint onto dark blue frosting for a galaxy theme.
Themed Color Combinations Perfect for Birthdays, Holidays, and Special Occasions
Choosing the right color combinations is key to making your celebration cupcakes truly special. For birthdays, classic bright colors like red, blue, yellow, and green are popular, or specific character color palettes. A child's favorite color is always a hit. For holidays, specific color palettes are instantly recognizable:
- Christmas: Red, green, white, gold.
- Halloween: Orange, black, purple, green.
- Valentine's Day: Red, pink, white.
- Easter: Pastels – pink, yellow, blue, green, lavender.
Special occasions like gender reveals call for pink and blue. Weddings often feature elegant palettes like ivory, gold, and soft pastels, or colors matching the wedding theme. Graduations use school colors. When planning how to color cupcakes for a specific event, consider the overall theme, decorations, and the preferences of the person being celebrated. Using color effectively ties your baked goods into the event's aesthetic.
Troubleshooting Common Issues When Coloring Cupcakes
How to Fix Faded or Dull Colors in Cupcakes and Frosting
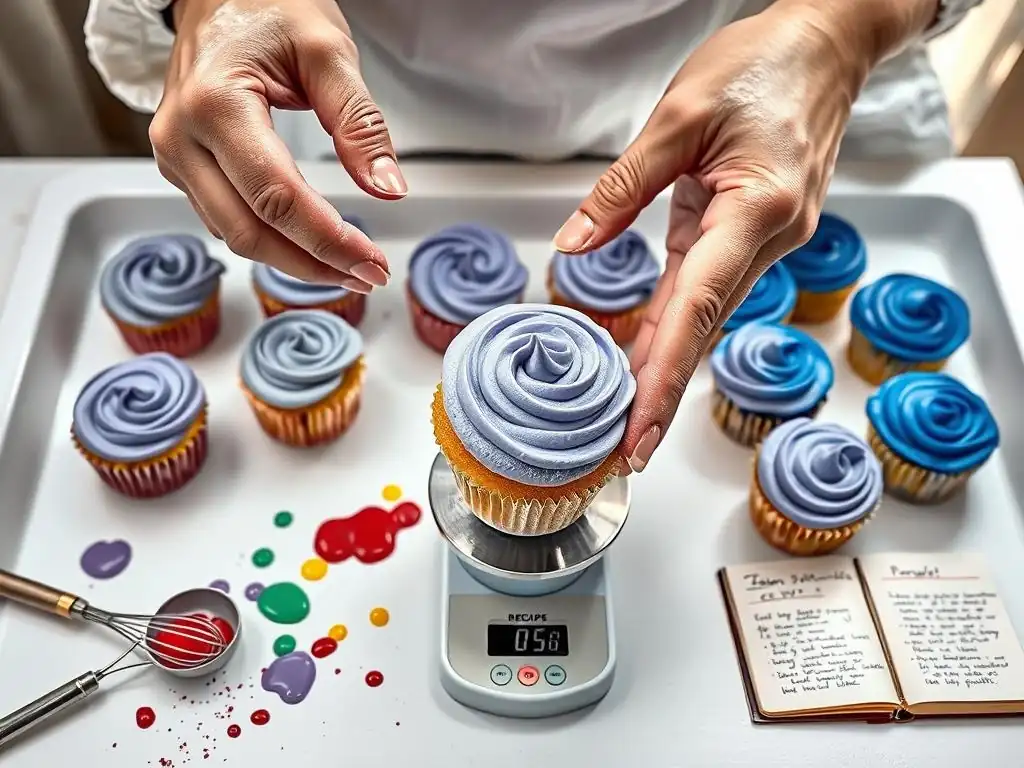
Encountering faded or dull colors after baking or frosting can be disappointing when you're trying to master how to color cupcakes. For baked cupcakes, the color may fade slightly during the heating process. If the baked color is too light, you can often compensate by using a more intensely colored frosting. For example, if your red velvet cupcakes baked up a bit brownish, top them with a vibrant red cream cheese frosting. In the future, use a higher quality, heat-stable gel food coloring and start with a slightly deeper shade in the batter than your target baked color.
For frosting that looks dull, the most common culprit is not adding enough color initially or using a less concentrated dye. Simply add more concentrated gel food coloring, mixing thoroughly until the desired vibrancy is achieved. Remember that colors deepen over time, so give it a few minutes before adding excessive amounts. If using a butter-based frosting, ensuring your butter is pale or neutralizing its yellow tone with a tiny touch of violet dye before adding your main color can prevent dullness, especially with shades of white, blue, or pink.
Preventing Food Coloring from Altering Cupcake Texture or Taste
The best way to prevent food coloring from negatively impacting your cupcake texture or taste is to use minimal amounts of high-quality, concentrated gel food coloring. Gel colors are designed to deliver intense pigment with very little liquid, typically adding less than 1% moisture to your batter or frosting. For a batch of 12 cupcakes, you might only need 1/4 to 1/2 teaspoon of total gel color across batter and frosting.
Avoid using large quantities of water-based liquid food coloring, especially in sensitive recipes like macarons or delicate cakes, as the extra liquid can disrupt the balance of ingredients. If you must use liquid color and need a deep shade, try reducing another liquid component in the recipe slightly to compensate. When working with natural dyes, be mindful that some, like those derived from beets or spinach, can impart noticeable flavors if used in large quantities. Always taste a small sample if using natural dyes to ensure the flavor isn't compromised.
Solutions for Overly Intense or Bleeding Colors in Cupcake Decorations
If your frosting or batter ends up too intensely colored, the easiest solution is often to make more plain batter or frosting and mix the overly colored batch into the new plain batch until you reach the desired lighter shade. For example, if you accidentally made 2 cups of neon pink frosting when you wanted pastel pink, make another 2-3 cups of plain white frosting and gradually mix in the pink frosting until the color is right.
Bleeding colors, where colors spread into each other (e.g., red frosting bleeding into white frosting), are usually caused by excess moisture, humidity, or direct contact between highly contrasting colors, especially over time. To minimize bleeding when learning how to color cupcakes:
- Use concentrated gel colors, which contain less moisture.
- Ensure frosting is properly set before adding decorations in a contrasting color.
- Avoid storing cupcakes in overly humid environments.
- If stacking cupcakes, use separators to prevent direct contact between different colored frostings.
- Consider using white chocolate or candy melts as barriers between highly contrasting colors.
Storing Colored Cupcakes to Preserve Vibrancy and Freshness
Best Practices for Refrigerating and Freezing Colored Cupcakes
Proper storage is crucial not only for freshness but also for maintaining the vibrancy of your colored celebration cupcakes. When refrigerating, store cupcakes in an airtight container to prevent drying out and absorbing odors. Cupcakes with colored frosting can be refrigerated for 3-4 days. Be aware that some colors, particularly red and dark blues/purples, can deepen slightly during refrigeration.
For longer storage, freezing is an excellent option. Freeze cupcakes without frosting first. Once frozen solid (about 1-2 hours), wrap each cupcake individually in plastic wrap, then place them in a freezer-safe airtight container or freezer bag. Baked, unfrosted colored cupcakes can last in the freezer for up to 2-3 months. Frost cupcakes after thawing. If you must freeze frosted cupcakes, ensure the frosting is firm before wrapping loosely in plastic wrap and then placing in a container. Colored frosting can sometimes develop condensation upon thawing, which might affect appearance slightly.
How to Protect Food Coloring from Fading During Storage and Transport
Protecting food coloring from fading during storage and transport requires minimizing exposure to light, air, and temperature fluctuations. Direct sunlight is a major culprit for color fading, especially with red and pink dyes. Always store colored cupcakes and leftover colored frosting in opaque or dark containers, or cover clear containers completely.
Temperature changes can also affect color stability. Avoid moving colored cupcakes repeatedly between warm and cold environments. When transporting cupcakes, especially on a warm day, use insulated carriers and keep them out of direct sunlight. For very sensitive colors or long transport times, consider using specific food colorings known for their light and heat stability, although this information isn't always readily available on packaging. Proper airtight storage also limits exposure to air, which can contribute to oxidation and color degradation over time.
Expert Tips and Tricks to Master How to Color Cupcakes Like a Pro
Balancing Color Intensity and Recipe Integrity
Mastering how to color cupcakes professionally is a balance between achieving stunning visuals and maintaining the delicious texture and flavor of your baked goods. The key is to prioritize concentrated gel or powdered food colorings. These allow you to achieve deep, vibrant colors using minimal amounts – typically less than 1% of the total weight of your batter or frosting. For example, you might only need 1 gram of gel color to achieve a rich red in 100 grams of frosting.
Always add color incrementally, mixing well after each addition, rather than adding a large amount at once. This prevents over-coloring and reduces the total amount of dye needed. Taste your batter or frosting as you go, especially when using natural dyes, to ensure the flavor isn't being compromised. If you need a very intense color like black or deep red, using specific "super red" or "super black" concentrated gels formulated for intensity can help you reach the desired shade with less product compared to standard dyes.
Combining Food Coloring with Edible Glitter, Sprinkles, and Other Enhancements
Food coloring lays the foundation for visually stunning cupcakes, but combining it with other edible enhancements elevates them further for celebrations. Once your colored frosting is applied, add complementary edible glitter or shimmer dust for sparkle. For instance, silver glitter on deep blue frosting for a winter theme, or gold shimmer on red frosting for a festive look. Apply glitter while the frosting is still slightly soft so it adheres.
Sprinkles are another fantastic partner to colored cupcakes. Choose sprinkle mixes that match or contrast with your colored frosting and batter. Jimmies, nonpareils, sanding sugar, and shaped sprinkles all add texture and visual interest. For example, rainbow sprinkles on brightly colored frosting for a fun birthday party, or black and orange sprinkles on green frosting for Halloween. Edible pearls, dragees, and sugar flowers can be strategically placed on colored frosting to complete the look, turning simple colored cupcakes into edible works of art perfect for any celebration.
Recommended Brands and Tools for Consistent and Professional Coloring Results
Achieving consistent and professional results when learning how to color cupcakes relies heavily on using quality products and appropriate tools. For food coloring, highly recommended brands known for their vibrant, concentrated gel colors include Americolor, Wilton (specifically their "Color Right" or gel paste lines), and Chefmaster. These brands offer a wide spectrum of colors and require minimal amounts to achieve intensity. For powdered colors, brands like The Sugar Art or CK Products are popular among decorators.
Essential tools include small spatulas or toothpicks for adding gel color drop by drop, especially when working with small quantities of frosting or batter. A stand mixer or hand mixer helps ensure even distribution when coloring larger batches of frosting. For advanced techniques like airbrushing or painting, investing in an edible airbrush kit and a set of fine-tipped food-grade brushes is necessary. Using squeeze bottles to pre-mix and store diluted powdered colors for painting can also be helpful for repeated use.
Frequently Asked Questions
How much food coloring should I use for cupcakes to achieve vibrant colors?
It depends on the type of food coloring. Start with a few drops of gel food coloring, as it's more highly concentrated, and gradually add more until you reach your desired shade. Remember, a little goes a long way!
What's the best type of food coloring to use for cupcakes?
Gel food coloring is generally recommended. It's more potent than liquid food coloring, meaning you need less of it, and it's less likely to affect the consistency of your cupcake batter. Avoid water-based liquid colors.
Can I use natural food coloring for my cupcakes?
Yes, you can! Natural food colorings are derived from fruits, vegetables, and other natural sources. However, they might not produce as vibrant colors as artificial food colorings, and the flavor might be slightly affected.
How can I prevent my cupcake batter from becoming watery when adding food coloring?
Use gel or paste food coloring, as these are more concentrated and less likely to add excess liquid. If using liquid, add it sparingly and adjust the dry ingredients if needed.
What's the best way to mix food coloring into cupcake batter for even distribution?
Add the food coloring to the wet ingredients first before combining with the dry ingredients. This helps to ensure the color is evenly distributed throughout the batter without overmixing.
Final Reflection: The Joyful Art of Perfectly Colored Cupcakes
The vibrant hues of perfectly colored cupcakes aren't just about aesthetics; they're a powerful expression of joy, celebration, and creativity. Mastering the art of food coloring, as explored in this guide, allows you to transform simple cupcakes into miniature masterpieces, elevating any occasion from a casual gathering to a grand event. The techniques discussed here, from achieving consistent color to avoiding common pitfalls, empower you to take control of your baking and create truly personalized treats.
The impact of color on our perception of food is undeniable. A beautifully colored cupcake instantly evokes feelings of delight and anticipation, a testament to the power of visual appeal. Color is a power which directly influences the soul.
– Wassily Kandinsky. This quote resonates deeply with the transformative power of food coloring; it's not just about adding pigment, it's about adding emotion and enhancing the overall experience of enjoying a delicious cupcake. The techniques outlined in this article are a gateway to unlocking this creative potential, allowing you to express your unique style and personality through your baking.
Now, it's your turn to experiment! Don't be afraid to try different color combinations, explore various techniques, and most importantly, have fun with it. The journey of mastering cupcake coloring is as rewarding as the final product. So, gather your ingredients, embrace your inner artist, and let your imagination run wild. The perfectly colored cupcake awaits – and so does the joy of creating it.
Unleash Your Inner Cupcake Artist!
Thanks for taking the time to explore the art of vibrant cupcakes! We hope you've gained some valuable tips and tricks to elevate your baking game. Now it's time to put your newfound knowledge into action.
- Master the perfect cupcake color: Experiment with different coloring techniques and shades to create your dream cupcake masterpiece. Try that ombre effect you've always wanted!
- Share your colorful creations: Show us your vibrant cupcake triumphs on social media using #BakeWithEaseColor. We love seeing your creations!
- Explore advanced techniques: Dive deeper into the world of cupcake decorating by researching advanced frosting techniques and unique color combinations.
Ready to transform your cupcakes from delicious to dazzling? What's your favorite color combination for celebratory cupcakes?