
The Easiest Way to Master Basic Pies

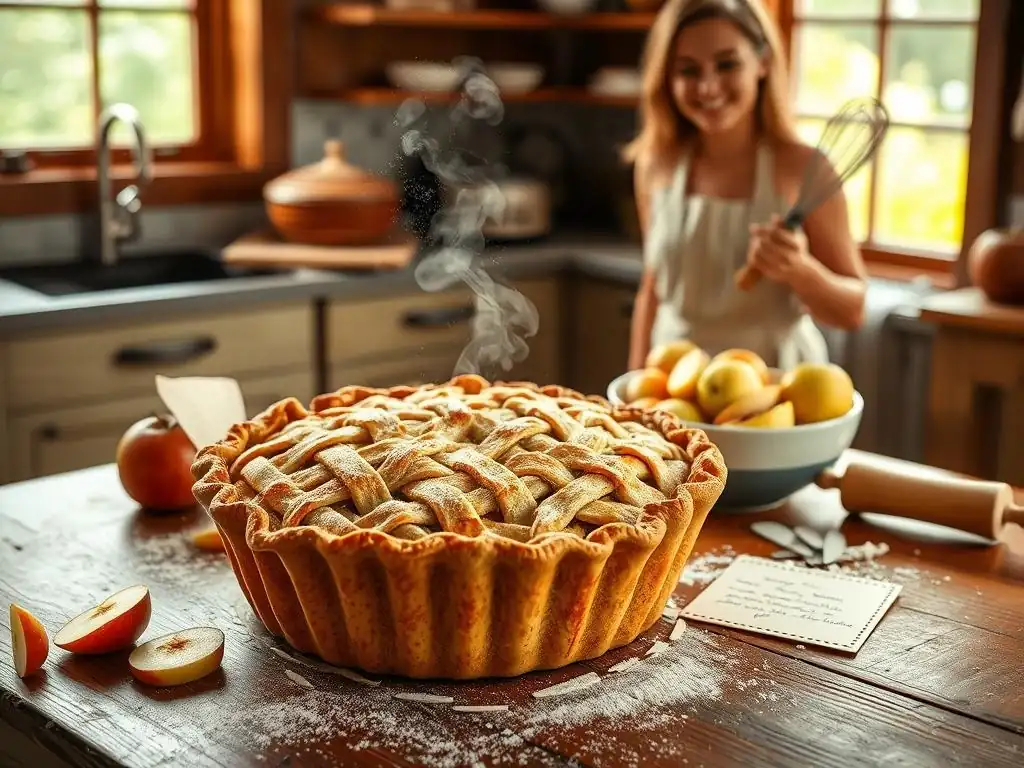
Welcome to BakeWithEase, your guide to unlocking the secrets of delicious homemade baking! Ever dreamed of effortlessly creating a perfect pie? Our latest article, "The Easiest Way to Master Basic Pies," dives into easy basic pie recipes that will transform you into a confident pie baker in no time. Ready to discover the foolproof techniques and simple secrets to baking pies that will impress? Let's get started!
- The Easiest Way to Master Basic Pies: BakeWithEase Guide
- Introduction to Easy Basic Pie Recipes for Beginners
- Understanding the Fundamentals of Pie Dough
- Step-by-Step Guide to Making Easy Pie Dough
- Rolling Out the Dough: A Beginner's Guide
- Pre-Baking or Blind Baking: When and Why
- Easy Basic Pie Filling Recipes to Get You Started
- Troubleshooting Common Pie-Making Problems
- Tips and Tricks for Baking Perfect Pies Every Time
- Storing and Serving Your Homemade Pies
- Conclusion: Embrace the Joy of Easy Pie Baking
-
Frequently Asked Questions
- What makes a pie recipe truly "easy" for a beginner?
- What are the key ingredients in a basic pie crust?
- What's the most common mistake people make when baking pies, and how can I avoid it?
- What kind of pie fillings are considered "basic" and beginner-friendly?
- How can I tell when my pie is perfectly baked?
- Final Reflection: The Enduring Allure of the Humble Pie
- Unleash Your Inner Pie Baker!
The Easiest Way to Master Basic Pies: BakeWithEase Guide
Introduction to Easy Basic Pie Recipes for Beginners
Why Master Basic Pie Making?
Learning to make easy basic pie recipes from scratch is a fundamental skill that unlocks a world of delicious possibilities. Beyond the sheer satisfaction of pulling a golden, bubbling pie from your oven, mastering the basics allows you to customize fillings, control ingredients, and save money compared to store-bought options. Imagine the pride of sharing a warm apple pie or a vibrant berry tart made entirely by your own hands – it's an experience that store-bought simply can't replicate.
Furthermore, understanding the foundational techniques for an easy basic pie recipe, like making a simple crust and preparing a classic filling, builds confidence in the kitchen. These skills are transferable to many other baking projects, from quiches and tarts to pastries and turnovers. It demystifies the process, turning something that might seem intimidating into an achievable and enjoyable hobby. At BakeWithEase, we believe everyone can bake, and starting with easy basic pie recipes is a perfect entry point.
BakeWithEase: Your Pie-Making Companion
BakeWithEase is dedicated to making baking accessible and enjoyable for everyone, especially beginners. Our approach to easy basic pie recipes focuses on clear, step-by-step instructions, readily available ingredients, and techniques designed for success on your first attempt. We break down complex processes into manageable steps, ensuring you understand the 'why' behind each action, not just the 'how'.
We understand that starting can feel overwhelming, which is why our resources are tailored to build your confidence incrementally. From choosing the right flour to understanding the perfect temperature for chilling your dough, we cover all the essential details. Think of us as your friendly guide in the kitchen, providing the support and knowledge you need to confidently tackle easy basic pie recipes and create delicious results that will impress yourself and your loved ones.
Understanding the Fundamentals of Pie Dough
Essential Ingredients for an Easy Pie Crust
Creating an easy basic pie crust relies on a few simple ingredients working together in a specific way to achieve that coveted flaky texture. The core components are flour, fat, water, and salt. Each plays a crucial role in the structure and flavor of the crust, and understanding their function is key to mastering easy basic pie recipes.
Getting the balance right is vital. Too much flour can make the crust tough, while too little fat results in a crumbly texture. The temperature of the water is also surprisingly important, as we'll discuss. Using cold ingredients helps prevent the fat from melting prematurely, which is essential for creating steam pockets during baking that lift the layers of dough, resulting in flakiness.
Flour Selection for the Perfect Pie Crust
For most easy basic pie recipes, all-purpose flour is your best friend. It has a moderate protein content (typically between 10-12%) which provides enough structure without making the crust tough, provided you handle it gently. While pastry flour (lower protein, ~8-9%) can yield a more tender crust, all-purpose is widely available and forgiving for beginners.
The key when working with flour for an easy basic pie crust is accurate measurement – weigh it if possible (1 cup is typically around 120-125 grams). Also, avoid overworking the dough once the liquid is added. Excessive mixing develops gluten, leading to a tough, bread-like texture rather than a tender, flaky one, which is the hallmark of great easy basic pie recipes.
The Importance of Fat in Pie Dough (Butter, Shortening, Lard)
Fat is the magic ingredient that gives pie crust its flakiness and tenderness. As the fat melts in the oven, it creates steam, pushing apart the layers of dough and forming those desirable flakes. Different fats contribute different qualities. Butter provides excellent flavor and flakiness but melts quickly. Shortening (like Crisco) is 100% fat and has a higher melting point, making it easier to work with and resulting in very flaky crusts, though with less flavor than butter. Lard offers incredible flakiness and a unique savory quality.
For easy basic pie recipes, a combination of cold butter and shortening is often recommended. This blend leverages the flavor of butter with the structural stability and flakiness of shortening. Using cold, diced fat and cutting it into the flour until it resembles coarse crumbs with some pea-sized pieces is the technique that sets the stage for a truly flaky crust.
Water Temperature: A Crucial Element
The temperature of the water used in pie dough is critically important for achieving flakiness. You must use ice-cold water. The cold temperature keeps the fat solid in tiny pieces distributed throughout the flour. When the pie bakes, these solid pieces of fat melt and create steam, which puffs up the layers of dough.
Using warm or even room-temperature water will melt the fat before baking, resulting in a hard, dense crust instead of a light and flaky one. Add the ice water just a tablespoon or two at a time, mixing until the dough just barely comes together. This minimal hydration also prevents excessive gluten development, contributing to a tender crust perfect for easy basic pie recipes.
Essential Equipment for Baking Pies with Ease
Having the right tools can make a significant difference in the ease and success of your pie-making journey, especially when tackling easy basic pie recipes for the first time. You don't need a kitchen full of gadgets, but a few key items are certainly helpful. These tools are designed to assist you at various stages, from mixing the dough to baking the final product.
While some equipment can be improvised, having the standard tools ensures consistency and makes the process less frustrating. For example, while you could roll dough with a wine bottle, a proper rolling pin provides better control and even thickness. Investing in a few basic items will elevate your results and make baking easy basic pie recipes a more enjoyable experience.
Pie Plates: Choosing the Right Size and Material
A standard pie plate is typically 9 inches in diameter and about 1.5 to 2 inches deep. This size is common for most easy basic pie recipes and fillings. Pie plates come in various materials, each with pros and cons. Glass pie plates heat evenly and allow you to see the bottom crust browning, helping prevent a soggy bottom. Ceramic plates also distribute heat well and come in attractive designs for serving.
Metal pie plates, particularly aluminum or steel, conduct heat quickly and are excellent for promoting a crisp bottom crust. Dark metal pans absorb more heat and can lead to faster browning, so monitor carefully. For beginners making easy basic pie recipes, a clear glass pie plate is often recommended as it lets you monitor the crust's progress visually.
Rolling Pin: Achieving the Ideal Dough Thickness
A rolling pin is essential for shaping your pie dough. They come in different styles, including American (with handles and a central barrel), French (tapered stick), and baker's pins (straight, heavy cylinder). For easy basic pie recipes, any style you find comfortable will work, but a sturdy one that allows for even pressure is best.
The goal is to roll the dough to an even thickness, usually about 1/8 inch thick, ensuring it bakes uniformly. Using a lightly floured surface and rolling from the center outwards, rotating the dough frequently, helps prevent sticking and ensures an even circle large enough to fit your pie plate with some overhang for crimping.
Pastry Blender or Food Processor: Combining Ingredients Efficiently
When cutting cold fat into the flour, a pastry blender or a food processor is invaluable. A pastry blender is a simple tool with wires or blades used to 'cut' the solid fat into smaller pieces within the flour mixture by pressing down and twisting. This manual method gives you control over the size of the fat pieces, which is crucial for flakiness.
A food processor offers a faster method. Pulse the flour and cold, diced fat together a few times until the mixture resembles coarse crumbs. Be careful not to over-process, or the fat will become too finely incorporated. Both tools are effective for making easy basic pie dough; choose the one you are most comfortable using.
Step-by-Step Guide to Making Easy Pie Dough
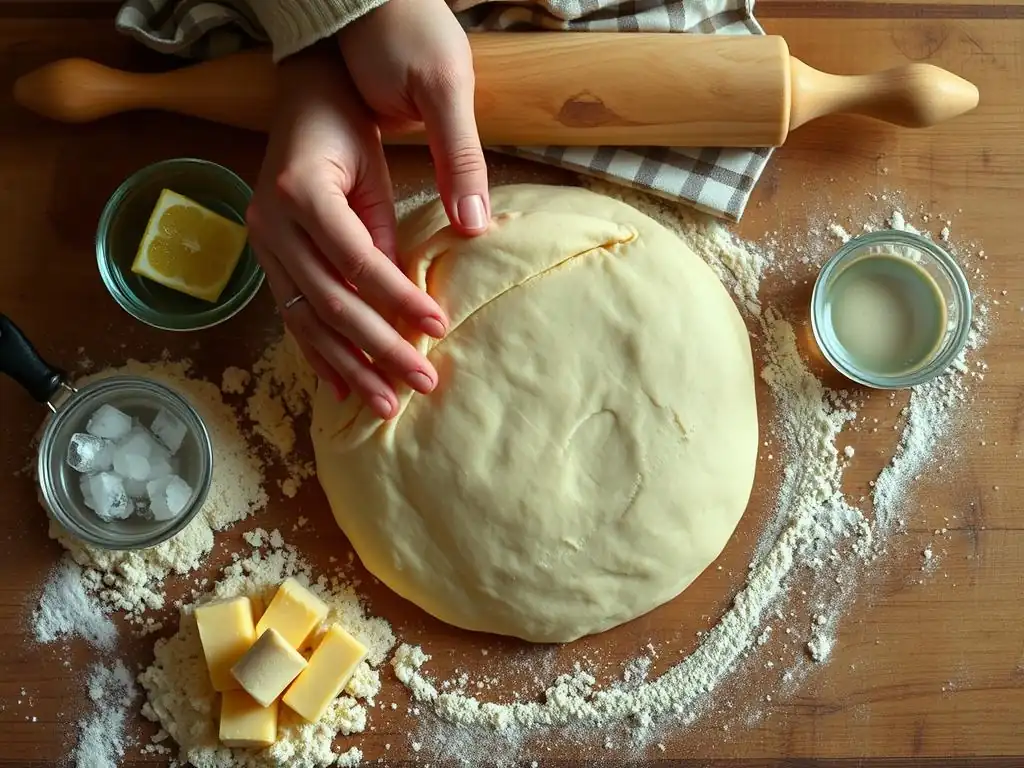
Making the dough for easy basic pie recipes might seem daunting, but broken down into simple steps, it's quite manageable. The process involves combining dry ingredients, cutting in the fat, adding just enough water, forming the dough, and chilling it. Each step is designed to contribute to a tender, flaky crust.
Consistency is key when following these steps. Pay attention to the texture of the dough at each stage and resist the urge to rush the process, especially the chilling part. This guide provides a reliable method for creating the foundation of any great easy basic pie recipe.
Measuring Ingredients Accurately for Consistent Results
Accurate measurement is the first critical step in any baking recipe, especially when making easy basic pie dough. Too much flour can make the dough dry and tough, while too little fat will result in a less flaky crust. For best results, especially with flour, use the "spoon and level" method (gently spoon flour into your measuring cup and level off the excess with a straight edge) or, ideally, use a kitchen scale.
For a standard double-crust pie (top and bottom), you might start with approximately 2 1/2 cups (about 300-315 grams) of all-purpose flour. The amount of fat will typically be around 1 cup (about 2 sticks or 225 grams) of cold butter or a combination of butter and shortening. The amount of ice water needed is small, usually just 6-8 tablespoons (90-120 ml), added gradually. Precision here sets you up for success with easy basic pie recipes.
Combining Dry Ingredients: Flour and Salt
In a large bowl, whisk together your measured flour and salt. The salt not only adds flavor to the crust but also helps to tenderize the dough slightly. A typical amount for the flour mentioned above is about 1 teaspoon of salt.
Ensure the salt is evenly distributed throughout the flour before adding the fat. This simple step ensures that every bite of your finished pie crust has balanced seasoning and that the salt doesn't interfere with the fat incorporation in certain spots.
Cutting in the Fat: Achieving a Flaky Texture
This is arguably the most important step for flakiness in easy basic pie recipes. Add your cold, diced fat (butter, shortening, or both) to the flour and salt mixture. Use a pastry blender, your fingertips, or a food processor to cut the fat into the flour.
Continue until the mixture resembles coarse crumbs with some larger pieces of fat, ranging from the size of peas to small beans. These larger pieces of fat are what create the steam pockets during baking, resulting in those desirable flakes. Avoid overworking it into a fine, sandy texture.
Adding Water: Hydrating the Dough Properly
Now, it's time to add the ice-cold water, one tablespoon at a time. Sprinkle a tablespoon over the flour/fat mixture and gently toss with a fork or your hands. Repeat, adding just enough water until the dough just starts to come together when you squeeze a handful.
You likely won't need all the water specified in a recipe. The exact amount depends on the humidity and your flour. Stop adding water as soon as the dough holds together; too much water will develop too much gluten and make the crust tough, defeating the purpose of making easy basic pie recipes.
Forming the Dough: Shaping a Disc
Once the dough is hydrated enough to hold together, turn it out onto a lightly floured surface. Gather the dough gently and press it into a cohesive ball. Avoid kneading it like bread dough.
Divide the dough in half (if making a double crust) and gently pat each half into a flattened disc, about 1 inch thick. Wrapping the discs tightly in plastic wrap makes them easier to handle after chilling. This shape also makes rolling out the dough later much simpler.
Chilling the Dough: Relaxing the Gluten
Chilling the dough is a non-negotiable step for successful easy basic pie recipes. Wrap the dough discs tightly in plastic wrap and refrigerate them for at least 1 hour, but preferably 2 hours or up to 2-3 days.
This chilling period serves two main purposes: it allows the gluten developed during mixing to relax, resulting in a more tender crust, and it re-hardens the fat, making the dough easier to roll out and ensuring maximum flakiness during baking. Skipping this step will make the dough sticky and difficult to work with, and your crust won't be as flaky.
Rolling Out the Dough: A Beginner's Guide
Rolling out pie dough can feel intimidating, but with a few tips, it becomes much easier. The goal is to roll it into a circle large enough to fit your pie plate with some overhang, while maintaining an even thickness. Patience and a gentle hand are key.
This stage requires a balance between preventing sticking and not using excessive flour, which can dry out the dough. Practice makes perfect, and soon you'll be rolling out dough for your easy basic pie recipes with confidence.
Preparing Your Work Surface: Flour Power
Before you start rolling, prepare a clean, dry work surface. Lightly flour the surface and your rolling pin. "Lightly" is the operative word here – too much flour will be incorporated into the dough, making it tough and dry.
You can also roll dough between two sheets of parchment paper or plastic wrap, which minimizes the need for extra flour and makes cleanup easier. Whichever method you choose, ensure the surface is ready before taking your chilled dough out of the refrigerator.
Rolling Technique: Achieving Even Thickness
Take one disc of chilled dough and place it on your floured surface. Start rolling from the center outwards, rotating the dough a quarter turn after every few rolls. This helps maintain a circular shape and prevents the dough from sticking in one spot.
Roll the dough to an even thickness of about 1/8 inch (roughly the thickness of two quarters stacked together). Aim for a circle about 12-13 inches in diameter for a standard 9-inch pie plate, which will give you enough overhang for crimping. If the dough starts to crack at the edges, you can gently pinch it back together. If it becomes too soft, pop it back in the fridge for 10-15 minutes.
Transferring the Dough to the Pie Plate: Avoiding Tears
Transferring the rolled dough without tearing can be tricky. One common method is to gently roll the dough circle loosely around your rolling pin, then unroll it over the pie plate. Alternatively, you can carefully fold the dough in half or quarters before lifting and unfolding it into the plate.
Gently ease the dough into the bottom and sides of the pie plate, making sure it sits snugly without stretching it. Stretching the dough can cause it to shrink significantly during baking. Trim the excess dough, leaving about a 1-inch overhang around the edge.
Crimping the Edges: Creating a Decorative Finish
Crimping the edges serves both a functional and decorative purpose. It seals the top and bottom crusts together (for a double-crust pie) or simply finishes the edge of a single crust, and it creates a beautiful border. The simplest crimp involves using your thumb and forefinger to pinch the edge of the dough against the index finger of your other hand, working your way around the plate.
You can also use a fork to press down around the edge for a simpler pattern. For easy basic pie recipes, a simple, secure crimp is perfect. Ensure the edges are well-sealed to prevent filling from bubbling out during baking.
Pre-Baking or Blind Baking: When and Why
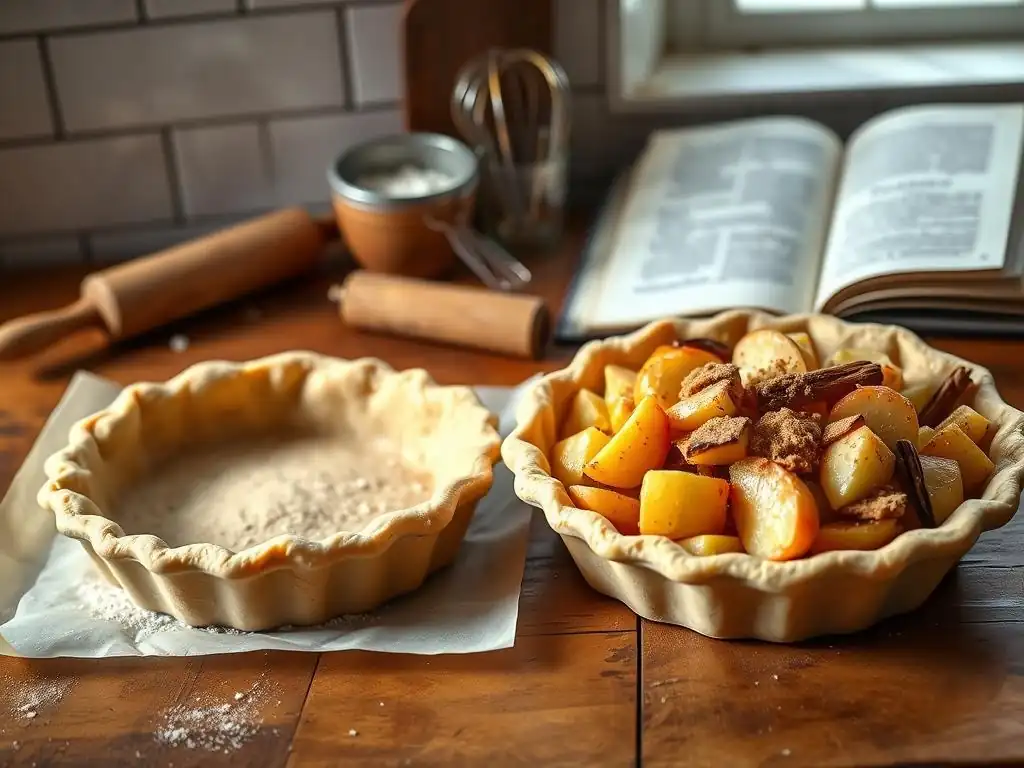
Pre-baking, also known as blind baking, involves partially or fully baking the pie crust before adding the filling. This step is essential for pies with wet fillings that aren't baked for a long time (like quiches or cream pies) to prevent a soggy bottom crust. It ensures the crust is cooked through and firm enough to hold the filling.
For easy basic pie recipes with fillings that require longer baking times, like many fruit pies, you might skip blind baking or only partially blind bake the crust. However, for custard or no-bake fillings, a fully blind-baked crust is usually necessary.
Preparing the Pie Shell for Blind Baking
To prepare a pie shell for blind baking, first, fit your rolled dough into the pie plate and crimp the edges. Then, line the inside of the raw crust with parchment paper or aluminum foil, pressing it gently against the bottom and sides.
Next, fill the lined crust with pie weights, dried beans, or uncooked rice. These weights prevent the crust from shrinking or puffing up during baking. Ensure the weights are distributed evenly across the bottom and up the sides of the crust.
Using Pie Weights or Beans: Preventing Shrinkage
Pie weights, dried beans, or rice serve a crucial function during blind baking: they provide ballast to keep the dough in place as it bakes. Without them, the crust edges might slump down the sides of the plate, and the bottom could puff up unevenly.
For a standard 9-inch pie plate, you'll likely need about 1-2 pounds of pie weights or dried beans to adequately fill the shell. Spread them in a single layer, ensuring they reach up the sides to support the crimped edge.
Baking Time and Temperature for Pre-Baked Crusts
Blind baking typically involves baking the weighted crust in a hot oven, often around 400°F (200°C). Bake for about 15-20 minutes with the weights in place, until the edges are set and lightly golden.
Carefully remove the weights and parchment/foil. If the recipe calls for a fully baked crust, return the crust to the oven for another 10-15 minutes, or until the bottom is golden brown and appears dry. For a partially baked crust (often used for fruit pies), bake for just 5-10 minutes more after removing weights, until the bottom looks dry but not yet heavily browned.
Easy Basic Pie Filling Recipes to Get You Started
Once you've mastered the easy basic pie crust, the fun really begins with fillings! Starting with simple, classic fillings is a great way to build confidence. These recipes are straightforward, use common ingredients, and pair beautifully with a flaky homemade crust.
We'll explore a few popular options that are perfect for beginners tackling easy basic pie recipes. These fillings require minimal fuss and deliver maximum flavor, proving that delicious homemade pie is truly within reach.
Classic Apple Pie Filling: A Timeless Favorite
Apple pie is a quintessential American dessert and a perfect candidate for an easy basic pie recipe filling. It's forgiving, and the aroma of cinnamon and baked apples is simply irresistible. You'll need about 6-8 cups of sliced apples for a 9-inch pie.
Choosing the right apples is key. A mix of varieties often provides the best flavor and texture. Consider using firm, slightly tart apples like Granny Smith, Honeycrisp, Fuji, or Gala. Avoid mushy apples like Red Delicious.
Slicing Apples for Even Baking
To ensure the apples in your easy basic pie recipe filling cook evenly, slice them to a consistent thickness, usually about 1/4 inch. You can peel, core, and slice them by hand or use an apple peeler/corer/slicer tool for speed and uniformity.
Toss the sliced apples immediately with lemon juice to prevent browning while you prepare the other ingredients. This also adds a touch of brightness to the finished pie.
Spices and Sweeteners: Enhancing the Apple Flavor
The classic apple pie spice blend includes cinnamon, nutmeg, and sometimes a pinch of cloves or allspice. For 6-8 cups of apples, start with about 1-2 teaspoons of cinnamon and 1/4 teaspoon of nutmeg, adjusting to your preference.
Sweeten the filling with sugar, typically a mix of granulated sugar and brown sugar for depth of flavor. The amount needed will vary depending on the sweetness of your apples, but a starting point is usually 1/2 to 3/4 cup total sugar, plus a couple of tablespoons of flour or cornstarch to help thicken the juices. Toss the apples with the sugar, spices, and thickener until well coated before adding to the pie shell.
Simple Berry Pie Filling: Using Fresh or Frozen Berries
Berry pies are wonderfully vibrant and relatively simple, making them ideal easy basic pie recipes. You can use a single type of berry or a mix, such as blueberries, raspberries, strawberries, or blackberries. You'll need about 5-6 cups of berries for a 9-inch pie.
Using frozen berries is perfectly acceptable, especially when fresh berries are out of season or expensive. If using frozen, you might need to add a little extra thickener as they release more liquid when they thaw and bake. Do not thaw them completely before mixing with other ingredients; use them straight from the freezer.
Choosing the Right Berries for Your Pie
For an easy basic pie recipe with berries, consider the sweetness and tartness of the fruits. Blueberries are naturally sweet and become jammy when baked. Raspberries and blackberries are tarter and pair well with sugar. Strawberries add freshness but can become quite soft. A mix offers complexity.
Ensure you wash fresh berries gently and pat them dry. If using frozen, measure them directly from the freezer into your mixing bowl.
Thickening Berry Filling: Cornstarch vs. Tapioca
Berry fillings release a lot of juice as they bake, so a thickener is essential to prevent a runny pie. Cornstarch and tapioca starch are common choices. Cornstarch provides a clear, glossy finish but can sometimes give a slightly chalky texture if too much is used. Tapioca starch (often sold as Minute Tapioca or tapioca flour/starch) creates a slightly less clear but very stable gel and works well with fruits that release a lot of liquid.
For 5-6 cups of berries, you'll typically need 3-4 tablespoons of cornstarch or tapioca starch. Mix the thickener with the sugar and any spices (like cinnamon or lemon zest) before tossing with the berries. This ensures the thickener is evenly distributed and prevents clumps.
Creamy Chocolate Pie Filling: A Decadent Treat
For those who prefer something other than fruit, a creamy chocolate pie filling is a delicious and relatively easy basic pie recipe option, though it often requires blind baking the crust fully. This type of filling is essentially a rich chocolate custard or pudding poured into a pre-baked shell and chilled until set.
Unlike fruit fillings that bake with the crust, creamy fillings are added after the crust is baked and cooled. This makes it an easy basic pie recipe filling that focuses on stovetop technique rather than oven chemistry with the fruit.
Making a Smooth Chocolate Custard
A basic chocolate custard filling typically involves heating milk or cream with sugar and cocoa powder or melted chocolate. Egg yolks are whisked separately with a little sugar and cornstarch (for thickening), then tempered with the hot milk mixture before returning everything to the pot to cook until thickened.
The key to a smooth custard is constant whisking over medium heat and ensuring the mixture reaches the correct temperature to thicken (around 160-170°F or 71-77°C) without boiling, which can curdle the eggs. Using good quality chocolate or cocoa powder will significantly impact the final flavor of your easy basic pie recipe.
Chilling the Chocolate Pie for Optimal Texture
Once the chocolate custard is cooked and smooth, pour it into your cooled, blind-baked pie crust. Cover the surface of the filling directly with plastic wrap to prevent a skin from forming as it cools.
Refrigerate the pie for several hours, usually at least 3-4 hours, or until the filling is completely set and firm. This chilling time is crucial for the filling to achieve its intended creamy, sliceable texture. This type of easy basic pie recipe is perfect for making ahead of time.
Troubleshooting Common Pie-Making Problems
Even with easy basic pie recipes, you might encounter a few hiccups along the way. Don't get discouraged! Most common pie problems have simple solutions or preventative measures. Learning how to identify and fix these issues is part of the baking journey.
Here are some frequent challenges beginners face and how to address them, helping you refine your technique for making the best easy basic pie recipes.
Dough Too Dry: Adding More Water
If your pie dough mixture looks too crumbly and won't come together when you squeeze a handful after adding the initial water, it's likely too dry. This often happens if you didn't add enough water or if your flour was particularly dry.
- Solution: Sprinkle in another tablespoon of ice water. Gently toss or mix with a fork. Test the dough again by squeezing a small amount. If it still doesn't hold together, add one more tablespoon. Be patient and add water sparingly; it's easier to add more than to fix dough that's too wet.
Dough Too Wet: Adding More Flour
Conversely, if your dough feels sticky, is difficult to handle, or clings excessively to your bowl or hands, you've probably added too much water. This can lead to a tough crust.
- Solution: If the dough is just slightly sticky, lightly flour your work surface and hands when turning it out. If it's quite wet, sprinkle a tablespoon of flour over the dough mixture in the bowl and gently incorporate it. Be cautious not to add too much flour, as this will also make the crust tough. It's better to have slightly sticky dough than overly dry dough.
Shrinking Crust: Proper Chilling and Blind Baking
A common frustration is when the pie crust shrinks significantly away from the edges of the plate during baking. This is usually caused by stretching the dough when fitting it into the plate or insufficient chilling time before baking.
- Solution: Always ensure your dough is well-chilled (at least 1-2 hours) before rolling and transferring. When fitting the dough into the plate, gently ease it in rather than stretching it. For blind baking, make sure you use enough pie weights (they should fill the shell completely) and bake with the weights in for the initial period to set the structure.
Soggy Bottom Crust: Pre-Baking and Using a Hot Oven
A soggy bottom crust is a classic pie woe, especially with wet fruit fillings. It happens when the filling's moisture seeps into the bottom crust before it has a chance to set and crisp up.
- Solution: For very wet fillings or pies with short baking times, always blind bake the bottom crust fully. For fruit pies, consider partially blind baking the bottom crust. Ensure your oven is properly preheated to the specified temperature (often 400-425°F initially for fruit pies) as a hot oven helps set the crust quickly. Baking the pie on a preheated baking sheet or pizza stone can also help conduct heat to the bottom crust faster.
Tips and Tricks for Baking Perfect Pies Every Time
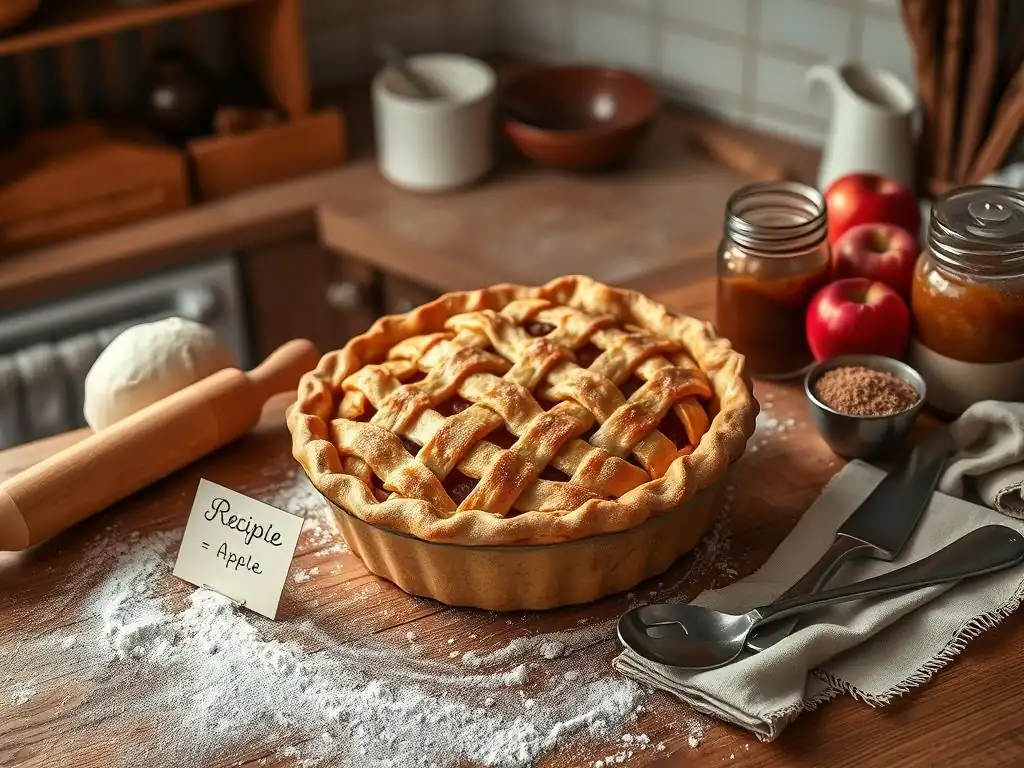
Beyond the basic steps, a few extra tips can significantly improve the outcome of your easy basic pie recipes and help you achieve consistently excellent results. These are small details that can make a big difference in the texture and appearance of your crust.
Incorporating these simple practices into your routine will make your pie baking even more successful and enjoyable. They are tried-and-true methods used by bakers to ensure that flaky, golden crust every time.
Using Cold Ingredients for a Flaky Crust
We've mentioned it before, but it bears repeating: cold ingredients are paramount for a flaky crust. Ensure your butter or shortening is very cold and diced. Your water should be ice water.
Working quickly to keep the fat cold during mixing and rolling is also helpful. If your kitchen is warm, or you're a slow worker, chilling the dough periodically during the rolling process can prevent the fat from melting prematurely.
Don't Overwork the Dough: Preventing a Tough Crust
Handle the dough gently at all stages. Overmixing after adding water develops gluten, which leads to a tough, chewy crust instead of a tender, flaky one. Mix only until the dough just comes together.
When rolling and transferring, use a light touch. If the dough resists rolling, let it rest for 5-10 minutes to allow the gluten to relax before continuing. For easy basic pie recipes, minimizing dough handling is key to tenderness.
Egg Wash for a Golden Brown Crust
For a beautiful, golden-brown, slightly shiny top crust or edge, apply an egg wash. Whisk together one egg with a tablespoon of water or milk. Brush this mixture lightly over the top crust or the crimped edges of a single crust just before baking.
An egg wash also helps sugar or coarse salt sprinkled on top adhere. This simple step adds a professional finish to your easy basic pie recipes.
Venting the Top Crust: Preventing Bubbling
If your pie has a top crust, you must cut vents in it. These vents allow steam to escape from the filling as the pie bakes. If steam cannot escape, it will build up pressure, potentially causing the top crust to crack or even explode in places, and the filling to bubble out messily.
Use a sharp knife to cut several slits (at least 4-6) in the top crust before placing it over the filling. You can make simple slits, decorative cutouts, or use cookie cutters for shapes.
Storing and Serving Your Homemade Pies
You've successfully baked your easy basic pie recipe – congratulations! Now, proper cooling, storage, and serving will ensure you enjoy your delicious creation at its best. Different types of pies have different storage requirements to maintain quality and safety.
Knowing how to handle your finished pie ensures that all your hard work results in a perfect slice when you're ready to enjoy it.
Cooling Pies Properly Before Slicing
Allowing a pie to cool properly is crucial, especially for fruit pies. Hot fruit fillings are very runny. Cooling allows the filling to thicken and set as it cools, making the pie much easier to slice cleanly.
Most fruit pies should cool on a wire rack for at least 2-3 hours, or until they are just warm or at room temperature. Cream or custard pies need to cool slightly at room temperature before being refrigerated to set fully. Slicing a hot pie will result in a messy, runny slice.
Storing Pies at Room Temperature or in the Refrigerator
Storage depends on the type of filling in your easy basic pie recipe. Fruit pies made with sugar as the primary sweetener can generally be stored at room temperature for up to 2 days, loosely covered with foil or plastic wrap.
Pies containing dairy, eggs, or cream (like custard, cream, or meringue pies) must be stored in the refrigerator. Cover them loosely and refrigerate for up to 3-4 days. Always err on the side of caution if unsure; refrigeration slows bacterial growth.
Reheating Pies for Optimal Flavor
While many pies are delicious served at room temperature or chilled, some (especially fruit pies) benefit from being gently reheated. This warms the filling and re-crisps the bottom crust slightly.
To reheat a slice, place it on a plate and microwave for 30-60 seconds. For a whole pie, cover loosely with foil to prevent the crust from burning and warm in a preheated oven at 300-325°F (150-160°C) for 15-25 minutes, or until warmed through.
Conclusion: Embrace the Joy of Easy Pie Baking
You've now walked through the essential steps for mastering easy basic pie recipes, from making the dough to troubleshooting and serving. The process might seem detailed at first glance, but each step is simple and builds upon the last. Remember that baking is a skill that improves with practice.
Don't aim for perfection on your very first attempt. Focus on understanding the fundamental techniques, pay attention to your ingredients, and most importantly, have fun! The aroma filling your kitchen and the taste of a homemade pie are incredibly rewarding.
You've Got This!
Making easy basic pie recipes is entirely achievable for beginners. By following this guide, paying attention to detail, and being patient with yourself, you are well-equipped to create delicious pies. Every baker started somewhere, and every pie you make will teach you something new.
Embrace the learning process, celebrate your successes, and don't be afraid to try again if a pie doesn't turn out exactly as planned. The journey of mastering easy basic pie recipes is a delicious one!
BakeWithEase: More Baking Adventures Await!
This guide to easy basic pie recipes is just the beginning of your baking adventure with BakeWithEase. We offer a wealth of simple recipes, helpful tips, and beginner-friendly techniques for all sorts of baked goods, from cookies and cakes to breads and pastries.
Keep exploring our site for more easy basic pie recipes and other delightful baking projects. We are here to support you every step of the way as you build your skills and discover the joy of baking from scratch. Happy baking!
Frequently Asked Questions
What makes a pie recipe truly "easy" for a beginner?
An "easy" pie recipe, according to BakeWithEase, focuses on simple ingredients, straightforward instructions, and minimal specialized equipment.
What are the key ingredients in a basic pie crust?
A basic pie crust primarily requires flour, fat (butter or shortening), cold water, and salt. The ratio of these ingredients is crucial for the right texture.
What's the most common mistake people make when baking pies, and how can I avoid it?
Overworking the dough is a common mistake. Avoid it by gently mixing the ingredients and chilling the dough before rolling.
What kind of pie fillings are considered "basic" and beginner-friendly?
Fruit fillings like apple, cherry, or blueberry are generally considered basic. They often require minimal pre-cooking and are readily available.
How can I tell when my pie is perfectly baked?
The crust should be golden brown and the filling should be bubbling (if it's a fruit pie). A toothpick inserted into the center of the filling should come out clean, or with just a bit of moisture depending on the filling.
Final Reflection: The Enduring Allure of the Humble Pie
The art of pie-making, once considered a grandmotherly secret, is experiencing a vibrant resurgence, fueled by a renewed appreciation for simple pleasures and homemade goodness. More than just a dessert, the humble pie represents connection, comfort, and the satisfaction of creating something delicious from scratch. This accessible skill, once confined to kitchens of the past, is now readily available to anyone with a little patience and the right guidance.
The enduring appeal of the pie lies not only in its deliciousness, but in its capacity to bring people together. From family gatherings where pies are shared and stories are told, to the simple act of gifting a homemade pie to a friend, this tradition transcends generations. It's a tangible expression of care and creativity. A pie is a love letter to the stomach.
– Unknown. This sentiment perfectly captures the emotional resonance of a perfectly baked pie, a sentiment I hope this article has helped you understand and even experience yourself.
Now, I invite you to roll up your sleeves, gather your ingredients, and embark on your own pie-making journey. Don't be intimidated by the seemingly complex process; embrace the simplicity and the joy of creating something beautiful and delicious with your own hands. The satisfaction of sharing your first (or next!) perfectly baked pie is a reward in itself, a testament to your own capabilities and a delicious way to connect with those you cherish. Let the aroma of warm spices and sweet pastry fill your kitchen and your heart.
Unleash Your Inner Pie Baker!
Thanks for taking the time to explore the world of effortless pie-making! We hope you now feel confident and inspired to create delicious pies with ease. Ready to get baking?
- Bake your first masterpiece today! Grab your favorite recipe (or try one of ours!) and get started. Don't be afraid to experiment—that's where the fun is!
- Share your baking journey with us and other pie enthusiasts on social media using #BakeWithEase. We love seeing your creations!
- Challenge a friend to a pie-off! It's a fun way to share your new skills and enjoy some delicious treats.
What delicious pie flavor will you conquer first?