
Bake Australian Damper: A Rustic Campfire Bread Recipe

Welcome to BakeWithEase!
Ever dreamt of baking a warm, crusty loaf under a starlit sky? Imagine the aroma of freshly baked bread filling the air around your campfire. We're thrilled to share our secrets to creating delicious baked goods with ease. Get ready to discover our easy campfire damper recipe and unlock the magic of rustic baking. Ready to embark on a flavorful adventure? Let's get started!
- Classic Australian Damper Recipe: A Campfire Baking Guide for BakeWithEase.com
- Introduction to Damper: The Iconic Australian Campfire Bread
- Campfire Damper Recipe: Ingredients and Preparation
- Step-by-Step Guide: Baking Damper in Campfire Embers
- Tips for Perfect Campfire Damper
- Troubleshooting Common Damper Baking Issues
- Storing and Reheating Damper
- Conclusion: Experience the Joy of Campfire Damper
-
Frequently Asked Questions
- What exactly is Australian Damper, and why is it considered a "rustic" bread?
- Can I bake damper in a regular oven if I don't have a campfire?
- What are the "easy-to-find ingredients" needed for this campfire damper recipe?
- What are some tips for ensuring my damper cooks evenly in the campfire?
- What kind of variations can I make to this easy campfire damper recipe to personalize it?
- Final Reflection: The Enduring Magic of Campfire Damper
- Unleash Your Inner Baker: Craft the Perfect Campfire Damper!
Classic Australian Damper Recipe: A Campfire Baking Guide for BakeWithEase.com
Introduction to Damper: The Iconic Australian Campfire Bread
What is Damper? A History of Outback Baking
Damper is a traditional Australian bread, historically baked by stockmen, drovers, and travelers in the vast, remote outback. It's a simple, unleavened bread typically made with flour, water (or milk), and a pinch of salt. The magic happens in its preparation and cooking: traditionally, the dough is mixed quickly, formed into a round loaf, and cooked directly in the hot ashes or embers of a campfire. This method made it ideal for life on the trail, requiring minimal ingredients and equipment, and providing a hearty, filling staple.
The origins of damper trace back to the early days of European settlement in Australia, though it's believed to have been influenced by indigenous Australian methods of preparing food in ash. It quickly became a staple for those living and working in the bush, valued for its simplicity and portability. While modern versions often incorporate baking powder for a lighter texture, the essence remains a rustic loaf cooked over an open fire, a true symbol of Australian resilience and resourcefulness in challenging conditions.
Why Bake Damper? Simplicity, Flavor, and Connection to Nature
Baking damper is an incredibly rewarding experience, perfect for anyone seeking an easy campfire damper recipe. Its fundamental simplicity means you don't need complex techniques or specialized tools; a few basic ingredients and a warm campfire are all that's required. This accessibility makes it a fantastic activity for camping trips, backyard bonfires, or even just a simple outdoor cooking adventure, bringing the taste of the Australian bush to your own space.
Beyond its ease, campfire damper offers a unique flavor and texture that's hard to replicate in a conventional oven. The smoky essence from the embers infuses the crust, while the interior remains soft and warm. It’s more than just food; it's an experience that connects you to a piece of Australian history and the simple pleasure of cooking outdoors. Sharing a warm piece of freshly baked damper, perhaps slathered with butter or golden syrup, straight from the fire, is a moment of pure, rustic joy.
Campfire Damper Recipe: Ingredients and Preparation
Ingredients for Authentic Damper
An authentic, easy campfire damper recipe relies on just a few pantry staples. The most crucial ingredient is self-raising flour, which contains a leavening agent (baking powder) and salt already mixed in, simplifying the process even further. A standard recipe often calls for around 2-3 cups of self-raising flour. If you only have plain flour, you'll need to add about 2 teaspoons of baking powder and ½ teaspoon of salt per cup of flour.
The liquid component is traditionally water, but milk or even beer can be used for a richer flavor and slightly softer crumb. You'll typically need about 1 cup of liquid for every 2-3 cups of flour, though this can vary slightly depending on the flour and humidity. Some recipes also include a small amount of butter or dripping (animal fat) rubbed into the flour for extra richness and tenderness, usually around 1-2 tablespoons. These simple ingredients come together to create a surprisingly satisfying bread.
Equipment for Campfire Baking
Baking damper over a campfire requires minimal equipment, which is part of its appeal as an easy campfire damper recipe. The most important "equipment" is a well-established campfire with a good bed of hot embers, not roaring flames. You'll need a safe place to handle the dough and the cooked loaf, such as a clean surface or a piece of foil.
Other useful items include a mixing bowl (or even just a clean plastic bag for mixing), a sturdy spoon or your hands for combining the ingredients, and potentially a piece of heavy-duty aluminum foil or a cast-iron camp oven. While traditional damper is cooked directly in ash, many modern campers prefer wrapping the loaf in foil to keep it clean. A pair of heat-resistant gloves or tongs is essential for handling the hot damper and adjusting the embers safely.
Step-by-Step Guide: Baking Damper in Campfire Embers
Preparing the Campfire for Baking
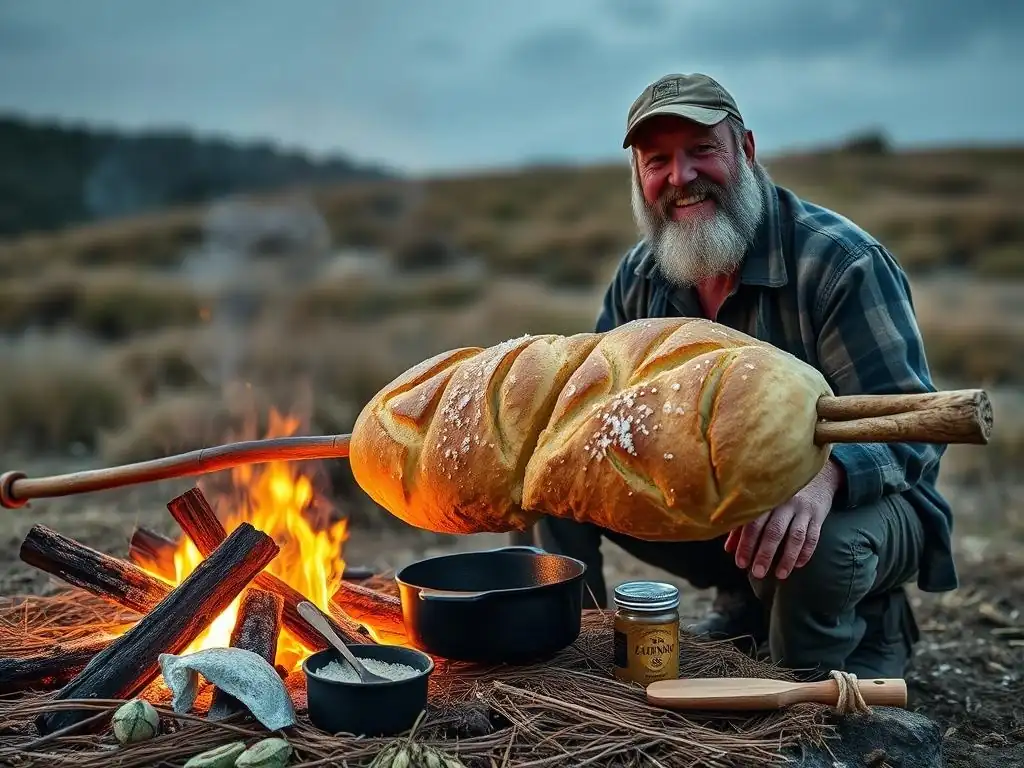
Successful campfire damper starts with the right fire. You need a fire that has been burning for at least 30-60 minutes, allowing the wood to burn down into a substantial bed of hot coals and embers. Avoid using fresh logs or areas with active flames, as these will burn the damper rather than cook it evenly. The ideal spot is beside the main fire, where you can rake out a clear, flat area of glowing embers.
Clear away any unburnt wood or debris from the chosen baking spot. You want a consistent layer of hot ash and embers, roughly the size of your intended damper loaf plus a little extra space. The heat should be significant but not scorching; you should be able to hold your hand about 10-15 cm (4-6 inches) above the embers for a few seconds before needing to pull it away. This prepared bed of embers is where your easy campfire damper recipe will come to life.
Mixing the Damper Dough: A Quick and Easy Method
Mixing damper dough is wonderfully straightforward. In your mixing bowl (or bag), combine the self-raising flour (and salt/baking powder if using plain flour) with any optional butter or fat. Use your fingertips to rub the fat into the flour until the mixture resembles coarse breadcrumbs. This step helps create a tender crumb.
Next, make a well in the center of the dry ingredients and pour in most of the liquid. Start mixing with a spoon or your hand, gradually adding more liquid until the dough just comes together. Avoid overmixing; you want a slightly shaggy, cohesive dough, not a smooth, elastic one like bread. The key to an easy campfire damper recipe is minimal handling.
Shaping the Damper Loaf: Creating a Rustic Form
Once the dough has just come together, turn it out onto a lightly floured surface (or handle it within the bag or bowl). Gently bring the dough together and shape it into a rustic, round loaf, about 15-20 cm (6-8 inches) in diameter and 4-5 cm (1.5-2 inches) thick. Don't knead it extensively; just form it into a disk or slightly rounded shape.
If you are using foil, place the shaped loaf onto a large piece of heavy-duty aluminum foil. Wrap it securely, creating a sealed parcel. This protects the damper from direct ash contact while still allowing the heat from the embers to cook it. If you're going traditional, the loaf goes directly onto the prepared ash bed.
Cooking the Damper in the Embers: Achieving Golden-Brown Perfection
Carefully place the shaped and potentially wrapped damper loaf directly onto the prepared bed of hot embers. Gently rake some embers and ash around and slightly over the top of the loaf. The heat needs to surround the damper for even cooking.
The cooking time for an easy campfire damper recipe can vary significantly depending on the heat of your embers and the size of your loaf, but it typically takes between 20 to 40 minutes. You'll need to rotate the damper periodically, perhaps every 10-15 minutes, using tongs or gloves, to ensure it cooks evenly on all sides and doesn't burn in one spot. Look for the crust to start firming up and potentially showing a few cracks.
Checking for Doneness: Ensuring a Perfectly Cooked Loaf
Knowing when your campfire damper is done is crucial. The outside should look firm and have a lovely golden-brown color, or appear cooked and solid if wrapped in foil. A key test is to tap the bottom of the loaf – if it sounds hollow, it's a good indication that the inside is cooked through.
For definitive proof, you can carefully insert a skewer or thin stick into the center of the loaf. If it comes out clean with no wet dough attached, your damper is ready. If it's still gooey, rake more embers around it and continue cooking for another 5-10 minutes before checking again.
Tips for Perfect Campfire Damper

Choosing the Right Flour for Optimal Texture
While self-raising flour is the easiest option for a classic, easy campfire damper recipe, the type of flour can slightly influence the texture. Standard self-raising wheat flour provides a reliable result, yielding a soft, slightly crumbly interior and a firm crust. Using a stoneground or wholemeal self-raising flour can add a nuttier flavor and denser texture, which some people prefer for a more rustic feel.
If using plain flour and adding your own leavening, ensure your baking powder is fresh; expired baking powder is a common cause of dense, heavy damper. Approximately 2 teaspoons of baking powder per cup of flour is a good starting point for achieving a decent rise when baking over embers. Experimenting with different flours can help you find your perfect damper texture.
Variations: Adding Bush Herbs for Unique Flavor
Adding flavorings to your damper can elevate this simple bread. Traditionally, bush herbs were sometimes incorporated. You could try adding dried native Australian herbs like Lemon Myrtle or Wattleseed (ensure they are food-grade and sustainably sourced) to the dry ingredients for an authentic twist. About 1-2 teaspoons of dried herbs per loaf is usually sufficient to impart a subtle flavor.
Other delicious additions include grated cheese, chopped wild garlic (if foraging safely and responsibly), or even a handful of sultanas for a sweet version. Mix these additions into the dry ingredients before adding the liquid. These variations turn a basic damper into a more complex and interesting campfire treat, showcasing the versatility of this easy campfire damper recipe.
Managing Campfire Heat: Preventing Burning
Controlling the heat is perhaps the trickiest part of baking damper in embers. Too hot, and the outside burns before the inside cooks; too cool, and it takes forever and might be dense. A common mistake is placing the damper directly into the hottest, whitest ash. You want red, glowing embers with a light dusting of grey ash.
If your embers feel too hot, spread them out slightly or add a thin layer of cooler ash over the base before placing the damper. If they seem to be cooling down too quickly, gently rake some fresh, hot embers from the main fire area towards your baking spot. Regularly rotating the damper also helps distribute the heat and prevents one side from getting excessively hot.
Serving Suggestions: Complementing Your Freshly Baked Damper
Freshly baked campfire damper is best served warm, straight from the embers. Its simple flavor makes it incredibly versatile. The most classic accompaniment is butter, which melts beautifully into the warm, rustic crumb. Golden syrup is another traditional pairing, adding a sweet, sticky contrast.
Consider serving damper with savory options too. It's excellent alongside stews, soups, or barbecued meats, soaking up the delicious juices. For a simple snack, try it with jam, honey, or even Vegemite for an extra Australian touch. Sharing the warm loaf, broken into pieces by hand, is part of the communal pleasure of this easy campfire damper recipe.
Troubleshooting Common Damper Baking Issues
Dry Dough: Adding Moisture for the Right Consistency
If your damper dough feels dry and crumbly after mixing, it means you haven't added enough liquid. This can result in a dense, heavy loaf that doesn't cook through properly. The hydration level in damper is quite forgiving, but it shouldn't feel like biscuit dough.
To fix dry dough, simply add a tablespoon or two more of water or milk at a time, mixing gently until the dough just comes together into a cohesive mass. Be careful not to add too much at once, as it's easier to add liquid than to take it away. The goal is a dough that holds its shape but isn't stiff or hard.
Sticky Dough: Reducing Moisture for Manageability
Conversely, if your damper dough is excessively sticky and difficult to handle, you've likely added too much liquid. Overly wet dough can spread out in the embers and cook unevenly, potentially resulting in a gummy interior.
To rectify sticky dough, incorporate a small amount of extra self-raising flour, a tablespoon at a time. Gently fold it into the dough until it's manageable and no longer excessively sticky. Avoid adding too much flour, as this can make the baked damper dry. The dough should be slightly tacky but not stick stubbornly to your hands.
Underbaked Damper: Adjusting Embers for Thorough Cooking
An underbaked damper is disappointing – often pale on the outside and still wet or doughy in the center. This usually occurs because the embers weren't hot enough, or the damper wasn't cooked for long enough, or the heat wasn't distributed properly around the loaf.
If you suspect your damper is underbaked after the initial cooking time, carefully re-bury it in hotter embers (rake some fresh ones towards your baking spot if needed) and continue cooking, checking every 5-10 minutes. Ensure embers are surrounding the top and bottom. Increasing the cooking time by 10-15 minutes is often sufficient.
Burnt Damper: Reducing Heat for Even Baking
A burnt crust with a raw or undercooked interior is a sign the embers were too hot, or the damper wasn't rotated frequently enough. The outside cooks too quickly, forming a hard, black crust before the heat can penetrate the center.
If you notice the crust is darkening too rapidly, immediately remove the damper from the hottest embers. Rake out a cooler spot with more ash and fewer glowing coals, or add a thin layer of soil or sand over the embers before returning the damper. You might need to finish cooking it wrapped more securely in foil to shield the already-darkened crust from direct heat.
Storing and Reheating Damper
Keeping Damper Fresh: Optimal Storage Methods
Fresh damper, especially one made following an easy campfire damper recipe, is best enjoyed warm, shortly after baking. However, if you have leftovers, proper storage will keep it edible for a day or two. Once completely cooled, wrap the damper tightly in plastic wrap or aluminum foil, or place it in an airtight container.
Store the wrapped damper at room temperature for up to 1-2 days. Because it's a simple, unleavened bread, it can dry out relatively quickly compared to yeasted breads. Avoid refrigerating damper, as this tends to make bread go stale faster. For longer storage, you could wrap it well and freeze it for up to a month, though the texture might change slightly upon thawing.
Reheating Damper: Reviving its Warm, Rustic Charm
Reheating damper can bring back some of its appealing warmth and softness. The best way to reheat is gently. If you're still by the campfire, you can wrap slices or the whole loaf in foil and place it near (not directly on) the dying embers for 5-10 minutes until warmed through.
Alternatively, at home, you can reheat slices in a toaster or under a grill (broiler). To reheat the whole loaf, wrap it in foil and warm it in a moderate oven (around 160°C / 320°F) for about 10-15 minutes. This helps to steam the inside and soften the crumb, making your easy campfire damper recipe leftovers enjoyable once more.
Conclusion: Experience the Joy of Campfire Damper
Connect with Australian Culinary Heritage Through Damper Baking
Baking an easy campfire damper recipe is more than just making bread; it's an invitation to connect with a significant part of Australian history and outdoor culture. From the early days of the outback to modern camping trips, damper has been a symbol of resourcefulness, community, and the simple pleasure of sharing food cooked over an open fire. Mastering this straightforward technique allows you to participate in this tradition, wherever you are.
The process itself is a rewarding experience – the smell of the woodsmoke, the warmth of the embers, the anticipation as the dough transforms into a rustic loaf. It's a hands-on activity that slows you down and connects you to the elements. Whether you're a seasoned baker or a complete novice, baking campfire damper is an achievable goal that delivers delicious results and a taste of the Australian bush.
We hope this guide inspires you to try making your own easy campfire damper recipe. It’s a fantastic way to practice your outdoor cooking skills and enjoy a truly unique bread. Don't worry if your first attempt isn't perfect; part of the charm of damper is its rustic nature. Every fire and every batch of dough is slightly different, leading to unique results each time.
We'd love to see how your campfire damper turns out! Share photos of your creations, tell us about your baking adventures in the embers, or ask any questions you might have. Connecting with fellow baking enthusiasts is what BakeWithEase.com is all about. Happy baking by the campfire!
Frequently Asked Questions
What exactly is Australian Damper, and why is it considered a "rustic" bread?
Damper is a simple, unleavened bread traditionally baked in the campfire ashes by Australian stockmen. It's "rustic" because it requires minimal ingredients and equipment, reflecting a basic, outdoorsy cooking style.
Can I bake damper in a regular oven if I don't have a campfire?
Yes, you can! Simply preheat your oven to around 350°F (175°C) and bake the damper on a baking sheet for approximately 30-40 minutes, or until golden brown and cooked through.
What are the "easy-to-find ingredients" needed for this campfire damper recipe?
The basic recipe typically requires only self-raising flour, water (or milk), and a pinch of salt. Some variations might include butter or sugar for added flavour, but the core ingredients remain simple and accessible.
What are some tips for ensuring my damper cooks evenly in the campfire?
Make sure your campfire embers are glowing red and not flaming to avoid burning the damper. Wrap the dough in foil before placing it in the ashes to prevent it from getting too dirty. Turn it regularly for even cooking.
What kind of variations can I make to this easy campfire damper recipe to personalize it?
You can add dried fruit, herbs, cheese, or even chocolate chips to the damper dough. Experiment with different flavour combinations to create your own unique version of this classic campfire bread.
Final Reflection: The Enduring Magic of Campfire Damper
The simple act of baking damper over an open fire connects us to a rich history of Australian bush cooking, a tradition that remains surprisingly relevant today. In a world increasingly dominated by technology and convenience, the primal satisfaction of creating something delicious with minimal tools and ingredients offers a powerful antidote to the pressures of modern life. The ease and adaptability of this recipe make it accessible to everyone, regardless of their baking experience.
The enduring appeal of damper lies not just in its taste, but in the shared experience it fosters. It's a recipe that transcends generations, bringing families and friends together around the warmth of a campfire. The aroma of baking bread mingling with the scent of woodsmoke creates an atmosphere of comfort and connection, a feeling that resonates deeply with our innate human need for community and belonging. The best things in life are simple,
a sentiment perfectly embodied by this humble yet satisfying bread.
Consider the next time you're seeking a moment of peace and connection, the simplicity of baking a damper. Let the rhythmic crackle of the fire and the earthy aroma transport you to a slower pace of life, a reminder that true satisfaction often lies in the most basic of pleasures. Embrace the rustic charm, the shared experience, and the delicious taste – bake your own piece of Australian history.
Unleash Your Inner Baker: Craft the Perfect Campfire Damper!
Thanks for joining us on this delicious journey into the heart of Australian campfire cooking! You've just learned how to bake a truly authentic damper – a skill that will impress friends and family for years to come. Ready to take your baking to the next level?
- Master the art of damper: Try baking a damper this weekend! Experiment with different additions like herbs or cheese. Share your results with us!
- Share your damper success: Post a picture of your freshly baked damper on social media using #BakeWithEaseDamper – let's inspire others!
- Explore our other campfire recipes: Discover more rustic and easy campfire recipes on BakeWithEase.com (this one is hypothetical; don't create a real link).
So, what unique twist will you add to your next damper adventure? Let's hear your ideas in the comments below!