
Baking Baguettes at Home: Temperature, Time, and Technique

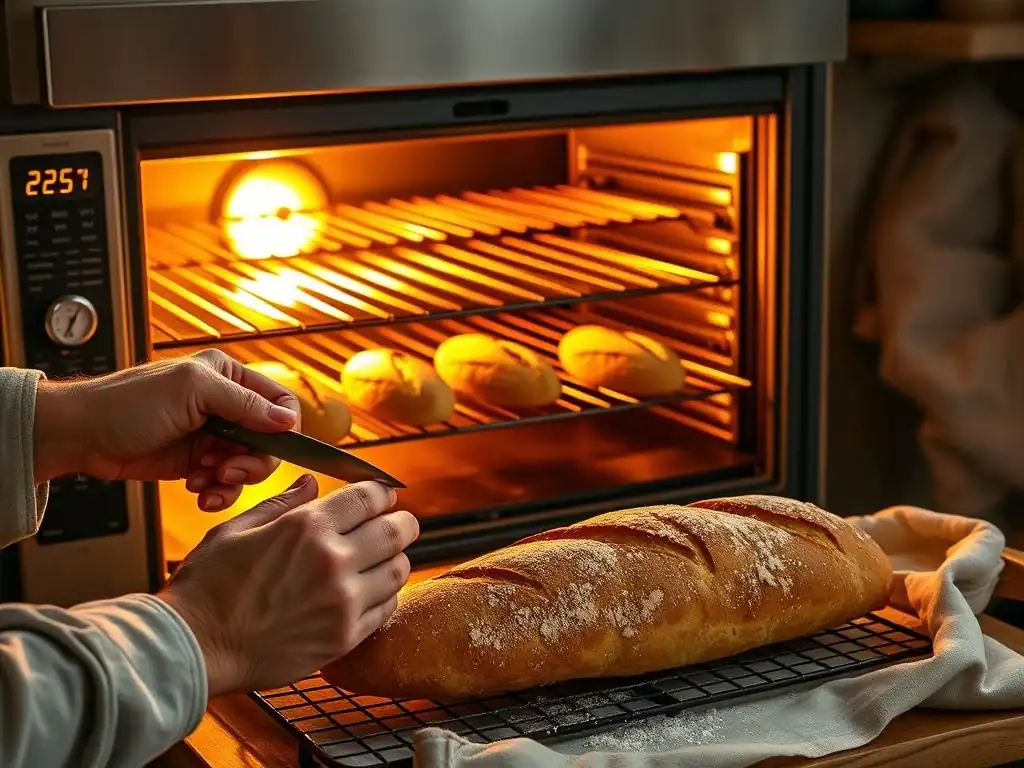
Welcome to BakeWithEase, your trusted companion on your baking journey! Ever dreamt of pulling a perfectly crusty baguette from your own oven? This article dives deep into the secrets of achieving that golden-brown perfection, focusing on the crucial elements of homemade baguettes temperature baking time. Uncover the techniques and timing that transform simple ingredients into culinary masterpieces, and discover why mastering these factors is the key to baguette baking success. Read on to unlock the secrets!
- Baking Baguettes at Home: Temperature, Time, and Technique - BakeWithEase
- Introduction: Mastering Homemade Baguettes
- Essential Ingredients for Perfect Baguettes
- The Baguette Dough: A Step-by-Step Guide
- Shaping Baguettes: The Art of the Tapered End
- Baking Baguettes: Temperature and Time Secrets
- Scoring Baguettes: Creating Beautiful and Functional Slits
- Cooling and Storing Your Homemade Baguettes
- Troubleshooting Common Baguette Baking Problems
- Advanced Baguette Baking Techniques
- Conclusion: Enjoying the Fruits of Your Labor - Perfect Homemade Baguettes
-
Frequently Asked Questions
- What is the ideal oven temperature for baking homemade baguettes?
- How long should I bake baguettes for that perfect golden crust?
- Why is steam important when baking baguettes at home?
- What's the best technique for creating steam in a home oven while baking baguettes?
- Can I use all-purpose flour for baking baguettes, or do I need bread flour?
- Final Reflection: The Humble Baguette, A Testament to Patience and Precision
- Unleash Your Inner Boulanger: Bake the Perfect Baguette!
Baking Baguettes at Home: Temperature, Time, and Technique - BakeWithEase
Introduction: Mastering Homemade Baguettes
Why Bake Baguettes at Home? The Allure of Fresh Bread
There's something truly magical about the aroma of freshly baked bread wafting through your kitchen. Baking baguettes at home allows you to capture that magic, offering a sensory experience that store-bought loaves simply can't replicate. You gain complete control over the ingredients, ensuring a pure, delicious result free from additives.
Beyond the ingredients, the satisfaction of transforming simple flour and water into a beautifully crisp, airy baguette is immensely rewarding. It's a craft that, while requiring attention to detail, is accessible to home bakers and yields a product with a unique texture and flavor profile – a thin, crackly crust giving way to a soft, open crumb.
Making your own baguettes is also an opportunity to connect with traditional baking methods. It's a process that teaches patience and observation, from the slow fermentation of the dough to the dramatic expansion in the hot oven. The result is not just bread, but a testament to simple ingredients and careful technique. Imagine slicing into a warm baguette you pulled from your own oven just minutes ago, its crust singing as you cut – that experience alone makes the effort worthwhile.
Understanding the Key Elements: Temperature, Time, and Technique
Achieving baguette perfection hinges on mastering three fundamental pillars: temperature, time, and technique. Each plays a critical role in developing the dough's structure, flavor, and the signature characteristics of a great baguette, particularly the crust and crumb. Temperature influences yeast activity during fermentation, the dough's handling properties, and crucially, the final bake. The high temperatures required for baking baguettes are key to achieving that desirable thin, crisp crust and maximizing oven spring.
Time, from mixing to fermentation to proofing and baking, allows enzymes to break down starches into sugars (enhancing flavor) and gluten to develop, providing structure. Rushing the process often leads to underdeveloped flavor and poor texture. Finally, technique encompasses everything from gentle mixing and effective folding to precise shaping and scoring.
Proper technique ensures the dough has the necessary strength and tension to hold its shape and expand correctly in the oven. Understanding how temperature, time, and technique interrelate is essential for consistently successful homemade baguettes. Mastering the homemade baguettes temperature baking time, alongside skilled handling, transforms potential into reality in your home oven.
Essential Ingredients for Perfect Baguettes
High-Protein Bread Flour: The Foundation of Flavor
The quality of your flour is paramount when baking baguettes. High-protein bread flour, typically containing 12-13% protein, provides the necessary gluten-forming proteins that give baguettes their characteristic chew and open crumb structure. Gluten develops into a strong, elastic network during mixing and fermentation, trapping the gases produced by the yeast and allowing the dough to rise and hold its shape. Using a lower protein flour, like all-purpose flour (around 10-11.5% protein), will result in a weaker dough, making it harder to handle, shape, and achieve that desirable airy interior.
Opting for unbleached bread flour is often preferred by bakers as the bleaching process can slightly weaken the gluten. Look for reputable brands known for quality bread flour. Some artisanal bakers even use specialized French bread flours (Type 55), which have a protein content similar to American bread flour but are milled from different wheat varieties, potentially offering subtle flavor differences. However, standard high-protein bread flour readily available in most supermarkets is perfectly suitable for excellent results.
Water Temperature: Achieving the Ideal Dough Consistency
Water is more than just a hydrating agent in baguette dough; its temperature significantly impacts the dough's final temperature and, consequently, the yeast's activity level. The ideal dough temperature after mixing is often targeted between 75-78°F (24-26°C). This range promotes steady yeast fermentation without being too fast or too slow.
You can calculate the approximate water temperature needed by using a simple formula, taking into account the flour temperature and room temperature. As a general rule of thumb for typical room temperatures (around 70°F or 21°C), water between 75-85°F (24-29°C) is often appropriate, but slight adjustments may be needed based on your environment.
Beyond temperature, the amount of water, known as hydration, is crucial. Baguette dough is typically high hydration, often ranging from 70% to 80% (meaning 70-80 grams of water per 100 grams of flour). This high hydration contributes to the open, airy crumb. While it makes the dough stickier and harder to handle initially, proper technique like folding helps develop the necessary structure. Starting with a hydration level you're comfortable with, perhaps 70-72%, and gradually increasing it as you gain experience is a good approach.
Instant Dry Yeast: Choosing the Right Type for Baguette Baking
Instant dry yeast is a popular choice for home baguette baking due to its convenience and reliability. Unlike active dry yeast, instant yeast can be mixed directly into the dry ingredients without prior proofing (dissolving in water). It's highly active and produces a consistent rise, making the timing of the process more predictable.
A typical amount of instant dry yeast used in a baguette recipe might be around 0.5% to 1% of the flour weight, depending on the desired fermentation time and ambient temperature. For instance, using 5 grams of instant yeast for 1000 grams of flour is common for a fermentation schedule that includes several hours at room temperature.
While instant yeast is convenient, some recipes might call for active dry yeast or even fresh yeast. Active dry yeast needs to be rehydrated in warm water (around 105-115°F or 40-46°C) before adding to the dough, and you generally use about 20% more by weight than instant yeast. Fresh yeast offers a slightly different flavor profile and faster fermentation, but it has a shorter shelf life and requires more careful handling. For beginners focusing on mastering the homemade baguettes temperature baking time and technique, instant dry yeast provides a straightforward path to success.
Salt: Enhancing Flavor and Controlling Fermentation
Salt plays a vital role in bread baking, serving two primary functions: enhancing flavor and regulating yeast activity. Without salt, bread often tastes bland and flat. Salt brings out the natural sweetness of the fermented dough and balances the flavors. From a technical standpoint, salt slows down yeast fermentation, providing a more controlled and gradual rise. This slower fermentation allows more complex flavors to develop in the dough. Salt also strengthens the gluten structure, contributing to a better crumb and crust.
The amount of salt used is typically between 1.8% and 2.2% of the flour weight. Using too little salt will result in a fast, uncontrolled rise and a bland loaf, while too much salt can inhibit fermentation significantly and make the dough tough. For 500 grams of flour, you would typically use about 9 to 11 grams of fine sea salt or kosher salt. It's important to add salt after the initial mixing of flour and water (the autolyse phase, if using) but before the main fermentation begins, ensuring it's evenly distributed throughout the dough.
The Baguette Dough: A Step-by-Step Guide
Mixing the Dough: Achieving the Right Hydration Level
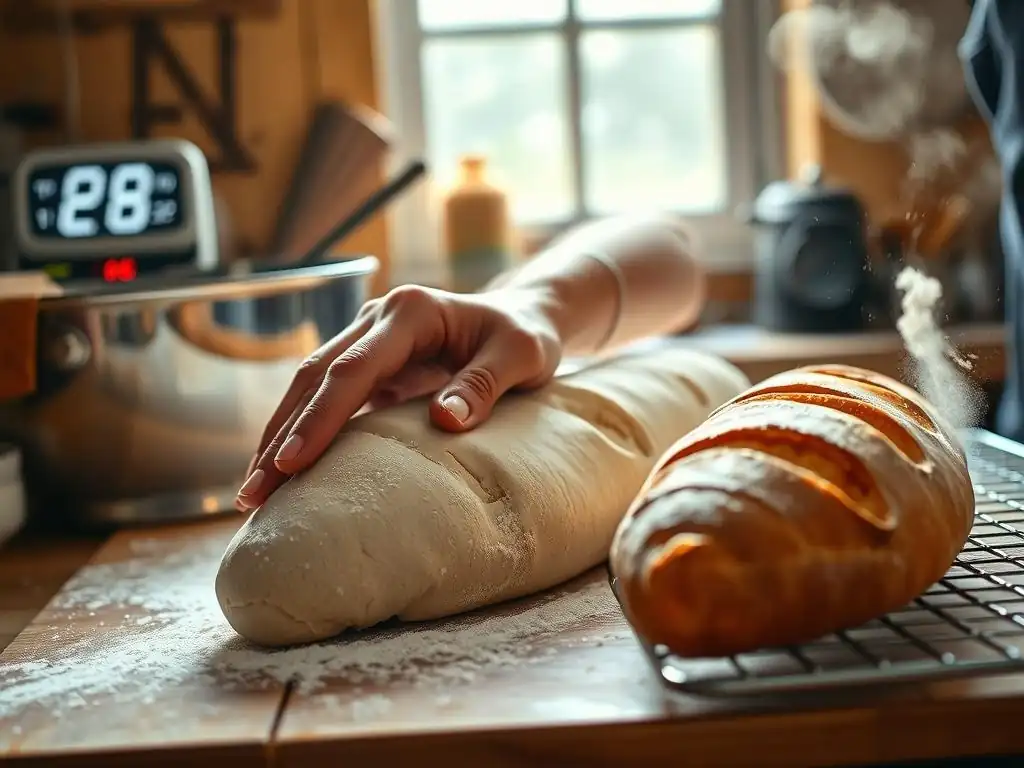
The process of mixing baguette dough is about bringing the ingredients together and beginning gluten development. Baguette dough is often high hydration, meaning it has a relatively large amount of water compared to flour, typically ranging from 70% to over 80%. This high hydration contributes to the open, airy crumb structure characteristic of baguettes. You can mix by hand or with a stand mixer fitted with a dough hook. For high-hydration doughs, a stand mixer can make the initial mixing easier as the dough will be quite sticky.
A common approach is the "autolyse" method, where you mix only the flour and water together and let it rest for 20-60 minutes before adding the yeast and salt. This rest allows the flour to fully hydrate and gluten development to begin naturally with minimal effort. After the autolyse (or after combining all ingredients if skipping autolyse), mix until the dough comes together. It won't be smooth and elastic immediately, especially at high hydration. The real gluten development happens during the subsequent folding steps. The dough should feel shaggy but cohesive.
First Fermentation (Bulk Fermentation): Developing Flavor and Structure
Bulk fermentation, also known as the first rise, is a crucial period where flavor develops and the dough gains strength and volume from yeast activity. This stage typically lasts from 2 to 4 hours at room temperature (around 70-75°F or 21-24°C), though it can be extended significantly in the refrigerator for even deeper flavor development (sometimes 12-24 hours or more). During this time, enzymes in the flour break down starches into sugars, which the yeast consumes, producing carbon dioxide gas and alcohol – both contributing to the bread's rise and complex flavor.
Visually, the dough should increase significantly in volume, often doubling or nearly doubling depending on the temperature and duration. It should also become noticeably more smooth and airy. The timing is flexible; it's better to watch the dough's activity and feel rather than strictly adhering to a clock. A dough that has fermented properly will feel alive and slightly bubbly when gently handled.
Folding the Dough: Strengthening Gluten
Folding the dough during bulk fermentation is a key technique for building gluten structure and strength in high-hydration doughs without intensive kneading. This process involves gently stretching and folding the dough over itself every 30-60 minutes during the bulk fermentation period. Typically, you would perform 3 to 5 sets of folds. For example, you might do a set of folds 30 minutes after mixing, then again at 60 minutes, 90 minutes, and possibly 120 minutes into a 3-hour bulk ferment.
To perform a fold, wet your hands slightly to prevent sticking. Gently lift one side of the dough from the container, stretch it upwards, and fold it over the rest of the dough. Rotate the container and repeat with the other sides (usually 4-6 folds per set). This action aligns the gluten strands, incorporates air, and equalizes the dough's temperature. As you perform the folds, you'll notice the dough becoming progressively smoother, stronger, and more elastic.
Dividing and Pre-Shaping: Preparing for the Final Shape
Once the bulk fermentation is complete, the dough is ready to be divided into individual portions for each baguette. The typical weight for a standard baguette is between 250 and 350 grams. Lightly flour your work surface and gently turn the dough out. Using a bench scraper, divide the dough into the desired number of pieces. Try to handle the dough as gently as possible to avoid degassing it too much.
After dividing, gently pre-shape each piece. This initial shaping helps to build some tension and makes the final shaping easier. For baguettes, a common pre-shape is a loose cylinder or a rectangle. Gently cup your hand around the dough and lightly drag it across the surface to create a taut skin on top, or gently fold the edges into the center and lightly roll into a log. Let the pre-shaped pieces rest for 15-20 minutes, covered, to allow the gluten to relax. This bench rest is crucial for the dough to be pliable enough for final shaping without tearing.
Shaping Baguettes: The Art of the Tapered End
Techniques for Shaping: From Simple to Advanced
Shaping is where the dough truly begins to resemble a baguette, and mastering this technique is key to achieving the iconic long, thin shape with tapered ends. The goal is to create surface tension while handling the dough gently to preserve the internal gas built during fermentation. A common method starts with the rested, pre-shaped dough (often a cylinder or rectangle). Lightly flour your surface if needed, but too much flour will prevent the dough from sticking to itself and creating tension.
Lay the dough piece flat. Fold the top edge down about two-thirds of the way and press lightly. Then, fold the dough in half lengthwise, enclosing the first fold. Use the heel of your hand to seal the seam firmly along the entire length.
Finally, using the palms of your hands and starting from the center, gently roll the dough back and forth, gradually moving your hands outwards, to lengthen the loaf and taper the ends. Apply increasing but gentle pressure to build tension on the surface. Practice is key here; the goal is a smooth, taut surface and an even thickness along the loaf, tapering at the ends.
Achieving a Smooth and Tight Skin
A smooth, tight skin on your shaped baguette is essential for several reasons. It helps the loaf hold its shape during proofing and baking, contributes to a beautiful, even crust, and allows the score marks to open properly, creating the desired "ears." Achieving this requires careful handling and the correct shaping technique. As you perform the final roll-out, focus on applying gentle pressure to the surface while elongating the loaf. The dough should grip the work surface slightly as you roll, helping to create tension on the top side.
Avoid tearing the dough's surface during shaping. If the dough resists stretching, let it rest for a few minutes before continuing. Ensure the seam is well-sealed on the underside of the loaf. When transferring the shaped baguettes, handle them carefully to maintain the tension you've created. Using a couche (a piece of linen canvas) or a floured baking peel helps support the delicate shape during proofing and transfer to the oven, preventing the skin from sticking and tearing.
Proofing the Baguettes: The Final Rise
After shaping, the baguettes undergo their final rise, or proofing. This allows them to expand and become airy before baking. Proper proofing is critical; under-proofed baguettes won't expand enough in the oven and may burst unpredictably, while over-proofed baguettes can collapse or bake flat with a dense crumb. The ideal proofing environment is often slightly humid. Baguettes are traditionally proofed on a couche, which is heavily floured linen. The folds of the couche support the loaves and prevent them from sticking to each other as they expand.
Proofing time varies depending on the dough temperature, ambient temperature, and the amount of yeast used. At room temperature (around 70-75°F or 21-24°C), proofing might take 45 to 75 minutes. A well-proofed baguette will look visibly puffy and slightly increased in size. You can test readiness with the "poke test": gently press a floured finger into the side of the loaf; if the indentation springs back slowly and doesn't completely disappear, it's ready to bake. If it springs back immediately, it needs more time. If it stays indented completely, it might be over-proofed.
Baking Baguettes: Temperature and Time Secrets
Preheating Your Oven: Reaching the Optimal Baking Temperature
A screaming hot oven is non-negotiable for baking perfect baguettes. The high temperature provides the initial burst of heat, known as oven spring, that causes the dough to expand rapidly before the crust sets. It also helps create that desirable thin, crisp crust. You need to preheat your oven thoroughly, including any baking stones or steels you plan to use. Aim for a preheating time of at least 45-60 minutes, and potentially longer, to ensure your stone or steel is fully saturated with heat.
The optimal baking surface is a preheated baking stone or steel, placed on the middle or lower-middle rack. These surfaces conduct heat efficiently to the base of the loaf, promoting a good bottom crust and maximizing oven spring. While your oven's thermostat might indicate it's reached the set temperature in 15-20 minutes, the stone or steel requires much longer to heat up sufficiently. Patience during this preheating phase is rewarded with better results.
Creating Steam: Achieving a Crisp Crust
Steam is arguably the most critical element for achieving the classic thin, crackly crust of a baguette. In the initial phase of baking, steam keeps the surface of the dough moist and pliable. This delays the formation of a hard crust, allowing the loaf to expand fully during oven spring. Without sufficient steam, the crust forms too quickly, restricting expansion and resulting in a dense loaf with a thick, dull crust. Professional deck ovens have steam injection, but home bakers can mimic this environment.
There are several effective methods for creating steam in a home oven. One common technique is placing a heat-safe pan on the bottom rack while preheating. Just before loading the bread, carefully pour a cup of boiling water into this hot pan to generate a burst of steam.
Another method involves placing lava rocks or a cast iron pan filled with nuts/bolts in the bottom pan, which absorb and radiate heat, producing steam when water is added. Baking in a Dutch oven or using a cloche also effectively traps the dough's own moisture, creating a steamy environment around the loaf.
Baking Temperature Guide: 450-475°F (232-246°C)
The ideal homemade baguettes temperature baking time starts with a very high oven temperature. Baguettes are typically baked at temperatures ranging from 450°F to 475°F (232°C to 246°C). This intense heat is necessary to drive maximum oven spring and quickly set the crust. For the first 15-20 minutes of baking, maintain this high temperature, along with steam. The steam protects the crust, allowing the internal dough structure to expand rapidly in the heat.
After this initial phase, many bakers reduce the oven temperature slightly, perhaps to 425-450°F (220-232°C), and vent the steam (by opening the oven door briefly or removing the steam pan). This allows the crust to dry out and brown, developing its final color and crispness. Monitoring your oven's actual temperature with an oven thermometer can be helpful, as internal thermostats can vary. Getting the homemade baguettes temperature baking time right is a key factor in achieving that perfect bake.
Baking Time: Visual Cues for a Perfectly Baked Baguette
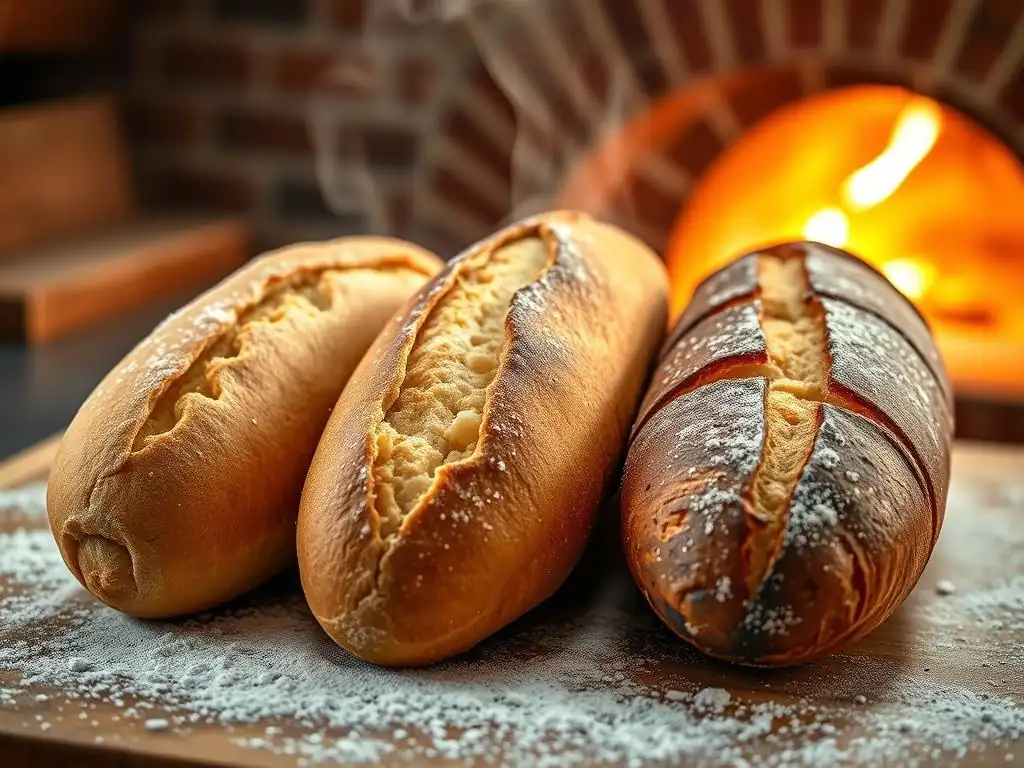
Beyond temperature, understanding the homemade baguettes temperature baking time involves knowing how long to bake the loaves. A typical baking time for standard-sized baguettes (around 250-300g) at high temperatures (450-475°F) is usually between 20 and 30 minutes. The exact time will depend on your oven, the size of your baguettes, and your desired crust color. The most reliable indicators of doneness are visual and physical cues, not just the clock.
Look for a deep golden-brown crust across the entire loaf, including the ends and the bottom. The score marks should have opened up beautifully. A perfectly baked baguette will feel light for its size. You can also tap the bottom crust; it should sound hollow. If the crust is pale or the loaf feels heavy, it needs more time. Don't be afraid to bake them until they are quite dark golden brown; this indicates good flavor development in the crust. Adjusting the homemade baguettes temperature baking time based on these cues is crucial for consistent results.
Achieving a Golden-Brown Crust: The Maillard Reaction
The beautiful golden-brown color and rich flavor of a baguette crust are primarily the result of the Maillard reaction and caramelization. The Maillard reaction is a complex chemical process that occurs when amino acids and reducing sugars are present with heat. This reaction begins at temperatures around 300°F (150°C) and accelerates rapidly at the high temperatures used for baguettes. It creates hundreds of different flavor compounds and the characteristic brown pigments. Caramelization, the browning of sugars, also contributes to the crust's color and flavor at these high temperatures.
For the Maillard reaction and caramelization to occur optimally, the crust needs to be relatively dry and exposed to high heat after the initial steaming period. This is why venting the oven and potentially lowering the temperature slightly after the first 15-20 minutes is beneficial. The sugars in the dough surface, resulting from enzymatic breakdown during fermentation, react with proteins to form that delicious, complex crust. Proper homemade baguettes temperature baking time ensures these reactions have enough time at the right temperature to fully develop.
Scoring Baguettes: Creating Beautiful and Functional Slits
The Importance of Scoring: Controlling Expansion
Scoring, or making cuts on the surface of the dough just before baking, is much more than just decoration; it's a critical functional step. As the baguettes hit the hot oven and experience oven spring, the dough expands rapidly. Without planned cuts, the expanding gases would find the weakest point in the crust and burst open unpredictably, resulting in an uncontrolled, often unattractive, rupture. Scoring provides predetermined weak points, guiding the expansion of the loaf in a controlled manner.
The score marks allow the dough to expand upwards and outwards along the cuts. This controlled expansion contributes to the loaf's final shape and volume. It also helps achieve a more open crumb structure by facilitating even expansion throughout the loaf. Think of scoring as creating vents that direct the powerful force of oven spring precisely where you want it to go.
Scoring Techniques: Straight, Overlapping, and Decorative
The traditional scoring pattern for a baguette consists of a series of overlapping diagonal cuts along the top of the loaf. These cuts are typically made parallel to the length of the baguette and overlap slightly. The number and length of the cuts depend on the length of the baguette, but usually, there are 3 to 5 cuts.
Each cut should be made with a sharp blade (like a razor blade or lame) held at a shallow angle (about 30 degrees) to the surface of the dough. This shallow angle is crucial for creating the "ear" – the flap of crust that lifts up along the cut.
Other scoring patterns exist, but the overlapping diagonal cuts are standard for baguettes because they promote even expansion along the length of the loaf. Practice is needed to make confident, swift cuts. Hesitant cuts can tear the dough rather than slice cleanly. Ensure your blade is very sharp. Some bakers slightly wet the blade to help it glide through the dough more easily. The depth of the cut should be about 1/4 to 1/2 inch (0.5 - 1 cm), depending on the dough's tension and proof level.
Achieving the Perfect "Ears": A Sign of a Well-Baked Baguette
The "ear" is the beautiful flap of crust that peels back along the edge of a well-executed score mark. It's a hallmark of a properly baked baguette and indicates several things went right: the dough had good tension from shaping, it was proofed correctly (not over or under), you used sufficient steam in the oven, and your scoring was done at the correct angle and depth. The ear forms because the shallow angle of the score allows the top surface of the dough to lift and crisp up separately from the expanding interior.
Achieving prominent ears requires the right combination of factors. A dough with strong gluten structure and good surface tension is essential. Sufficient steam in the oven is critical during the first phase of baking, as it keeps the surface pliable and allows the ear to lift before setting. Finally, the angle of the score (around 30 degrees to the surface) and the swiftness of the cut directly influence ear formation. It's a skill that improves with practice, and seeing those ears develop in the oven is incredibly satisfying.
Cooling and Storing Your Homemade Baguettes
Cooling Rack Essentials
Just like any baked bread, baguettes must cool completely on a wire rack before slicing or storing. This step is non-negotiable for developing the final texture and flavor. When bread comes out of the oven, the interior is still cooking from residual heat, and moisture is migrating from the center outwards. Placing the baguette on a cooling rack allows air circulation around the entire loaf, preventing the bottom crust from becoming soggy and allowing the internal moisture to evaporate properly.
Cooling typically takes at least 30-60 minutes, depending on the size of the baguette. Slicing into a hot baguette might be tempting, but it can result in a gummy, doughy interior because the starches haven't fully set. Allowing it to cool lets the crumb structure stabilize and the flavors mature. A simple wire cooling rack is all you need; ensure it's elevated enough to allow air to flow underneath the loaf.
Best Practices for Storing Baguettes: Maintaining Freshness
Baguettes are best enjoyed the day they are baked, ideally within a few hours of cooling, when their crust is at its crispiest. However, you can store them for a short period while attempting to preserve some of their freshness. The enemy of a crisp baguette crust is moisture. Storing a baguette in a plastic bag will trap moisture and quickly turn the crust soft and chewy.
For short-term storage (a few hours up to a day), the best method is often to store the baguette in a paper bag or simply leave it exposed on the counter cut-side down. This allows some air circulation while offering minimal protection. If you need to store it for longer, freezing is the best option.
Allow the baguette to cool completely, then wrap it tightly in plastic wrap and then in aluminum foil or place it in a freezer bag. Frozen baguettes can last for a couple of months. To reheat, remove from the freezer, unwrap, and bake in a preheated oven at 350-400°F (175-200°C) for 10-15 minutes until warmed through and the crust is crisp again.
Enjoying Your Freshly Baked Baguettes: Serving Suggestions
The beauty of a freshly baked baguette lies in its simplicity. It's perfect served warm, simply sliced and perhaps with a little butter. The crisp crust and airy interior are delightful on their own. Use it to soak up sauces from a meal, slice it for bruschetta or crostini, or build delicious sandwiches. The tapered ends are perfect for tearing and sharing.
Consider serving it alongside soups, stews, or salads. Its neutral yet flavorful profile makes it a versatile accompaniment to countless dishes. A classic way to enjoy it is with cheese and charcuterie. Don't forget to listen for the characteristic "singing" or crackling sound the crust makes as it cools – a sign of its perfect crispness, achieved through careful homemade baguettes temperature baking time and steam.
Troubleshooting Common Baguette Baking Problems
Dense Baguettes: Causes and Solutions
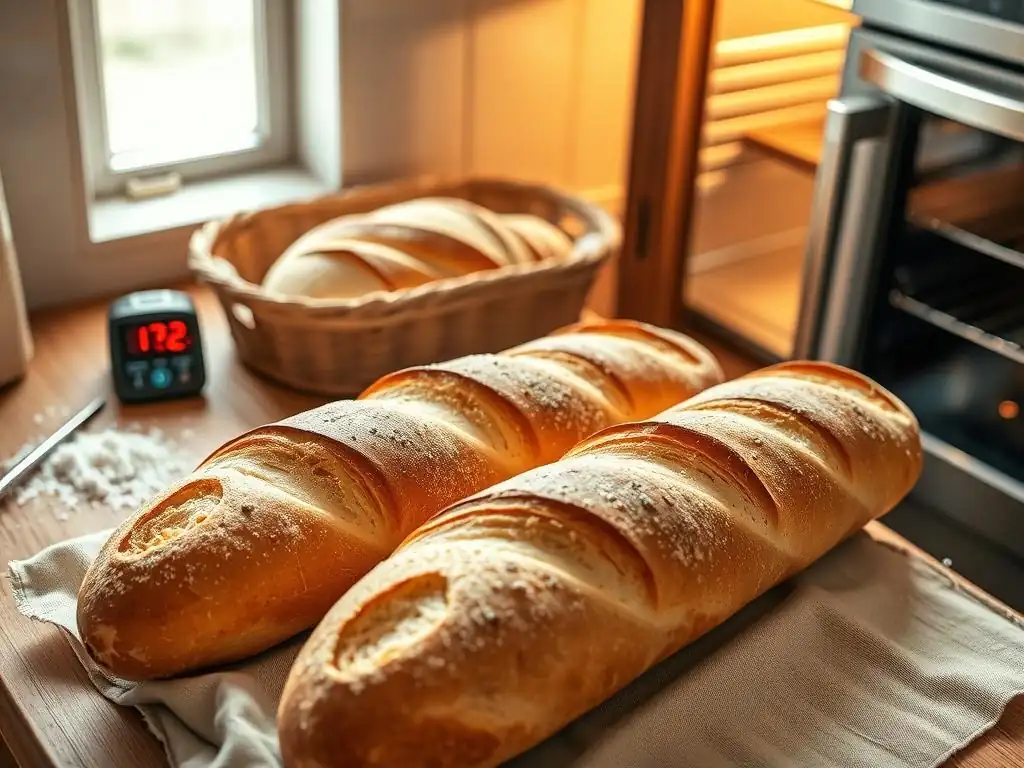
A dense baguette, lacking that open, airy crumb, is a common frustration. Several factors can contribute to this. One primary cause is under-proofing; the dough didn't have enough time to develop sufficient gas before baking. Ensure your bulk fermentation and final proofing times are adequate, watching the dough's volume and using the poke test. Another reason can be insufficient gluten development. Make sure you're using high-protein bread flour and performing enough folds during bulk fermentation to build strength.
Handling the dough too roughly during shaping and transfer can also degas it excessively, leading to a tighter crumb. Be gentle when dividing, pre-shaping, shaping, and moving the loaves. Finally, too low hydration (not enough water) can result in a denser texture, as high hydration naturally promotes a more open crumb. Review your recipe's hydration level and consider increasing it slightly in future attempts if your dough feels stiff.
Flat Baguettes: Addressing Proofing and Shaping Issues
Flat baguettes that spread sideways instead of rising upwards often stem from issues with proofing or shaping. Over-proofing is a frequent culprit; if the dough proofs for too long, the gluten structure can weaken, and it won't have the strength to hold its shape in the hot oven. The poke test is crucial here – if the indentation doesn't spring back at all, the dough is likely over-proofed. Bake it immediately, though it may still spread.
Poor shaping technique is another major factor. If you don't create enough surface tension during shaping, the loaf won't have the structure needed to rise upwards. Practice your shaping to ensure you're creating a taut skin and sealing the seam properly. Weak gluten development (due to low protein flour or insufficient folding) can also lead to a dough that lacks the strength to hold its shape. Ensure you're using bread flour and folding the dough adequately during bulk fermentation.
Pale Crust: Increasing Oven Temperature or Steam
A pale crust lacks the desirable color, flavor, and crispness of a well-baked baguette. This usually indicates insufficient heat or steam during the bake. If your crust is pale and thick, you likely didn't use enough steam in the initial phase of baking. Increase the amount of steam you generate (e.g., more boiling water, larger steam pan) or ensure your steam method is effective for the full first 15-20 minutes.
If the crust is pale but also seems underdeveloped or soft, your oven temperature might be too low or your baking time too short. Verify your oven temperature with an oven thermometer and ensure you're preheating long enough to saturate your baking surface. Increase the oven temperature closer to 475°F (246°C) and/or bake for a longer duration until the crust achieves a deep golden-brown color. Getting the homemade baguettes temperature baking time correct is key to a beautiful crust.
Uneven Baking: Rotating Your Baguettes
Uneven baking, where some parts of the baguette are darker than others or loaves on one side of the oven bake faster, is often due to hot spots in your oven. Most home ovens have variations in temperature. If you notice this happening, the simplest solution is to rotate your baguettes halfway through the baking time.
After the initial steaming period (around 15-20 minutes), when you open the oven to vent steam, carefully rotate your baking sheet or stone 180 degrees. This ensures that all parts of the baguettes are exposed to the same average temperature for roughly equal amounts of time, promoting more even browning and baking. This simple adjustment can make a significant difference in achieving uniformly golden-brown loaves.
Advanced Baguette Baking Techniques
Using a Poolish or Biga: Enhancing Flavor Complexity
Moving beyond a simple straight dough (one-day process), incorporating a pre-ferment like a poolish or biga can significantly enhance the flavor and texture of your homemade baguettes. A poolish is a liquid pre-ferment made with equal parts flour and water by weight, plus a very small amount of yeast, fermented for several hours (typically 8-16 hours) at room temperature or longer in the fridge. A biga is a stiffer pre-ferment, usually made with a lower hydration (around 50-60% water to flour), also fermented for several hours.
These pre-ferments allow enzymatic activity and yeast fermentation to begin slowly, developing more complex flavors (acids and alcohols) than a dough mixed all at once. They also contribute to a more open crumb structure and a crispier crust. While they add an extra step and require planning ahead, the depth of flavor they impart is often considered well worth the effort for serious baguette enthusiasts.
Experimenting with Different Flours: Exploring Flavor Profiles
While high-protein bread flour is the standard for baguettes, incorporating small percentages of other flours can add subtle nuances to the flavor profile. For example, adding 5-10% whole wheat flour or rye flour (relative to the total flour weight) can introduce earthy or slightly tangy notes. These flours absorb water differently and contain bran and germ, which can affect gluten development and crumb structure, so they are typically used in limited quantities in a baguette dough to avoid making it too dense or heavy.
Experimenting with different types of bread flour from various millers can also yield different results, as the wheat varieties and milling processes vary. Some bakers enjoy blending different flours to find their preferred balance of flavor and texture. As you gain confidence with the basic technique and homemade baguettes temperature baking time, trying out small additions of alternative flours can be a fun way to personalize your baking.
Baking with a Dutch Oven: Mimicking a Professional Oven
For home bakers, using a Dutch oven or a lidded baking vessel is one of the most effective ways to mimic the steamy environment of a professional deck oven. The lid traps the moisture released by the dough as it heats up, creating the necessary steam for excellent oven spring and a thin, crisp crust during the initial baking phase. This method is particularly helpful if you struggle to create sufficient steam using other techniques in your oven.
To bake baguettes in a Dutch oven, you typically preheat the Dutch oven with the lid on at your high baking temperature (450-475°F or 232-246°C). Carefully transfer the shaped and scored baguette into the hot Dutch oven (using parchment paper can help), place the lid back on, and bake for the first 15-20 minutes. Then, remove the lid to allow the crust to dry out and brown for the remaining baking time (another 10-15 minutes or so). This technique often yields impressive oven spring and a fantastic crust.
Conclusion: Enjoying the Fruits of Your Labor - Perfect Homemade Baguettes
Mastering the Art of Baguette Baking: A Rewarding Experience
Baking baguettes at home is a journey that involves understanding the interplay of ingredients, time, temperature, and technique. It's a craft that requires patience and practice, but the rewards are immense. From the tactile pleasure of working with the dough to the intoxicating aroma filling your kitchen and the satisfying crackle of the crust, every step offers its own joy. Successfully pulling a beautifully shaped, golden-brown baguette from your oven is a truly rewarding experience that builds confidence and skill.
Each attempt provides valuable learning opportunities. Perhaps the crust was pale – next time, increase the steam or adjust the homemade baguettes temperature baking time. If the crumb was dense, consider longer fermentation or more folds. Embrace the process, learn from each bake, and celebrate your successes, big or small.
The best part about mastering homemade baguettes? Sharing them! A fresh baguette is meant to be enjoyed with others. Whether you're serving it with dinner, bringing it to a gathering, or simply gifting one to a friend, sharing your baking spreads warmth and happiness. The effort you put into understanding the nuances of homemade baguettes temperature baking time and technique culminates in a delicious gift that speaks volumes.
So, bake often, practice your technique, fine-tune your homemade baguettes temperature baking time, and share the delicious results. Happy baking!
Frequently Asked Questions
What is the ideal oven temperature for baking homemade baguettes?
The best oven temperature for baking baguettes is typically between 450°F (232°C) and 475°F (246°C). This high heat helps create a crispy crust and a light, airy interior.
How long should I bake baguettes for that perfect golden crust?
Baguettes usually bake for 20 to 30 minutes, but it depends on your oven. Look for a deep golden-brown color and a hollow sound when tapped on the bottom.
Why is steam important when baking baguettes at home?
Steam is crucial for creating a crispy crust on baguettes. It helps to delay the formation of the crust initially, allowing the bread to expand fully.
What's the best technique for creating steam in a home oven while baking baguettes?
You can create steam by placing a preheated cast-iron skillet on the bottom rack and pouring a cup of hot water into it right after putting the baguettes in the oven. Be careful of the hot steam!
Can I use all-purpose flour for baking baguettes, or do I need bread flour?
While you can use all-purpose flour, bread flour is recommended for baguettes. It has a higher protein content, which helps develop the gluten structure needed for a chewy interior.
Final Reflection: The Humble Baguette, A Testament to Patience and Precision
The pursuit of the perfect homemade baguette is more than just a culinary endeavor; it's a journey into the heart of precision and patience. The seemingly simple act of baking a baguette reveals a complex interplay of temperature, time, and technique, each element crucial to achieving that satisfying crust and airy crumb. This article has explored these elements in detail, providing a roadmap for bakers of all levels to navigate the process and achieve success.
The influence of the humble baguette extends far beyond the kitchen table. It's a symbol of simple pleasures, a testament to the artistry of baking, and a connection to a rich culinary heritage. Bread is the staff of life,
a common saying reminds us of its fundamental importance. But beyond sustenance, the baguette represents a deeper connection to tradition, a tangible link to generations of bakers who have perfected this craft. The process itself, from the careful kneading to the watchful eye during baking, fosters a sense of mindfulness and accomplishment that transcends the final product.
Now, consider your own journey in the kitchen. Have you ever felt the satisfaction of creating something delicious from simple ingredients? I encourage you to embrace the challenge of baking your own baguettes. Don't be discouraged by initial setbacks; the process of learning, experimenting, and refining your technique is part of the joy. The aroma of freshly baked bread filling your home, the satisfying crunch of the crust, and the soft, airy interior – these are rewards worth striving for. So, gather your ingredients, preheat your oven, and embark on your own baguette adventure. The perfect loaf awaits.
Unleash Your Inner Boulanger: Bake the Perfect Baguette!
Thanks for joining us on this baking adventure! You've just unlocked the secrets to crafting delicious, crusty baguettes right in your own kitchen. Now it's time to put your newfound knowledge to the test!
- Knead your way to success: Try baking a baguette today using the techniques we outlined. Note down your results and see how you can refine your process for even better results next time.
- Share your masterpiece: Post a picture of your beautiful baguette on social media and tag us @BakeWithEase (fictional handle). Let's inspire others to rise to the occasion!
- Explore further: Check out our other bread recipes on BakeWithEase – we have everything from sourdough to focaccia waiting for you!
Ready to transform your kitchen into a Parisian boulangerie? What unique ingredient or technique are you most excited to experiment with?