
Making Baguettes with AllPurpose Flour: Can You Do It?

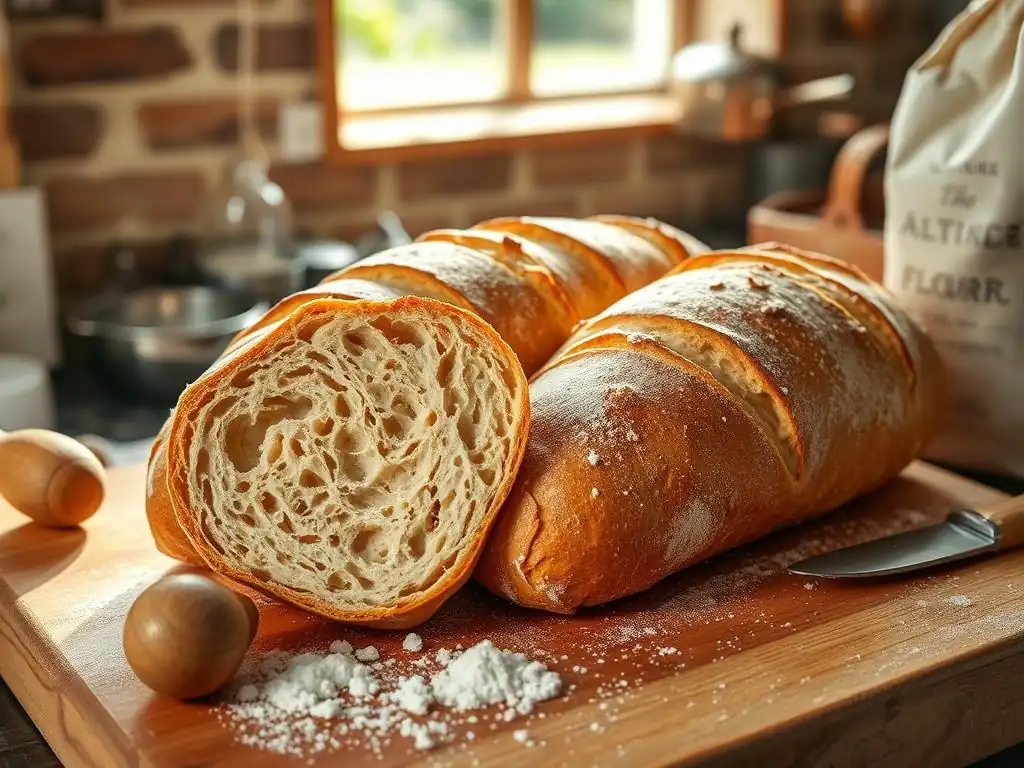
Welcome to BakeWithEase, your trusted guide in the delightful world of baking! Ever wondered if you could achieve that perfect, crusty baguette using just all-purpose flour? Spoiler alert: You absolutely can! Dive in to discover our easy all-purpose baguette recipe and unlock the secrets to creating bakery-worthy bread right in your own kitchen. Get ready to transform simple ingredients into something truly extraordinary – the baking adventure begins now!
- HomeBake Mastery: Achieving Baguettes Without Bread Flour
- Understanding All-Purpose Flour for Baguettes
- Can You Really Make Baguettes with All-Purpose Flour? Realistic Expectations
-
Simple All-Purpose Baguette Recipe: Detailed Instructions
- Ingredients for Your All-Purpose Flour Baguette: Quantities and Notes
- Step 1: Autolyse - Hydrating the Flour for Improved Dough
- Step 2: Kneading - Developing Strength in All-Purpose Flour Dough
- Step 3: Bulk Fermentation - Time and Temperature for Flavor Development
- Step 4: Dividing and Pre-Shaping - Preparing the Dough for Final Shaping
- Step 5: Shaping - Achieving the Tapered Baguette Form
- Step 6: Proofing - Monitoring the Rise Before Baking
- Step 7: Scoring - Creating Expansion Points for Oven Spring
- Step 8: Baking - Temperature and Time for Optimal Crust and Crumb
- Step 9: Cooling - Allowing the Baguettes to Set
- Tips and Tricks for Excellent All-Purpose Baguettes
- Troubleshooting Common All-Purpose Baguette Issues
- Flavor Variations for Your All-Purpose Baguettes
- Serving and Storing Your Homemade All-Purpose Flour Baguettes
- Conclusion: Mastering Baguettes with All-Purpose Flour - Accessible Baking
-
Frequently Asked Questions
- Can I really make a baguette using all-purpose flour?
- What adjustments do I need to make when using all-purpose flour instead of bread flour for baguettes?
- How does using all-purpose flour affect the crust of the baguette?
- What are some tips for getting a good rise with all-purpose flour baguettes?
- Is there anything else I should keep in mind when baking baguettes with all-purpose flour?
- Final Reflection: The Humble Baguette, Reimagined
- Unleash Your Inner Boulanger: Bake the Perfect Baguette!
HomeBake Mastery: Achieving Baguettes Without Bread Flour
Making beautiful, crusty baguettes often feels like a challenge reserved for professional bakers or those with specialized ingredients like high-gluten bread flour. However, for the home baker looking for an easy allpurpose baguette recipe, the good news is that you absolutely can achieve delicious results using standard all-purpose flour.
While bread flour's higher protein content is ideal for developing strong gluten networks crucial for baguette structure and chew, all-purpose flour is readily available and, with the right techniques, can yield impressive loaves right in your own kitchen. This guide will walk you through the nuances of using all-purpose flour and provide a simple, effective recipe to get you started on your baguette journey.
Mastering baguettes with all-purpose flour is all about understanding the flour's limitations and employing specific techniques to compensate. It requires a bit more attention to detail during mixing, kneading, and fermentation, but the process is entirely manageable for bakers of any skill level. By adjusting hydration, using methods like autolyse, and focusing on gentle handling, you can coax enough strength and elasticity from all-purpose flour to produce baguettes with a respectable crumb and a satisfyingly crisp crust. Our easy allpurpose baguette recipe is designed to simplify these steps, making the traditionally intimidating baguette accessible to everyone.
Understanding All-Purpose Flour for Baguettes
What is All-Purpose Flour? Composition and Characteristics
All-purpose flour, as the name suggests, is milled from a blend of hard and soft wheat varieties, designed to be versatile for a wide range of baking applications, from cakes and cookies to breads and pastries. Its protein content typically falls in the range of 10% to 12%. This moderate protein level means it can form a gluten network, but it's generally weaker and less elastic than the network formed by higher-protein flours like bread flour. The milling process removes the bran and germ, resulting in a fine, white flour.
The balanced nature of all-purpose flour makes it a pantry staple, but its characteristics present specific considerations when attempting a classic baguette. While it contains enough protein to develop some gluten, the slightly lower percentage compared to bread flour means the dough might feel less extensible and require different handling to build adequate structure. Understanding this composition is the first step in adapting an easy allpurpose baguette recipe to work effectively with the ingredients you have on hand.
All-Purpose Flour vs. Bread Flour: Gluten Content and Impact on Baguettes
The key difference between all-purpose flour and bread flour lies primarily in their protein content, which directly impacts gluten development. Bread flour is typically milled from hard wheat and has a protein content ranging from 12% to 14% or even higher. This higher protein level allows for the formation of a strong, elastic gluten network capable of trapping the carbon dioxide produced by yeast, resulting in a loaf with excellent structure, chew, and significant oven spring – all hallmarks of a traditional baguette.
In contrast, all-purpose flour's 10-12% protein content means it forms a less robust gluten network. When making baguettes, this can lead to a dough that is less able to hold its shape, potentially resulting in flatter loaves, a less open crumb structure, and reduced oven spring compared to those made with bread flour.
However, this does not mean achieving a good baguette is impossible with all-purpose flour. Techniques aimed at maximizing the development of the available gluten, such as longer kneading times, specific folding methods during fermentation, and careful hydration management, become crucial when using an easy allpurpose baguette recipe designed for this flour type.
Can You Really Make Baguettes with All-Purpose Flour? Realistic Expectations
The Challenge: Weaker Gluten Network with All-Purpose Flour
The primary challenge when using all-purpose flour for baguettes is managing its weaker gluten network. Gluten is the protein structure that gives bread dough its elasticity and strength, allowing it to trap gases and rise.
With all-purpose flour's lower protein content (typically 10-12% versus 12-14%+ in bread flour), the gluten network that forms is less robust and less able to support the elongated shape and open crumb characteristic of a classic baguette. This can lead to dough that is stickier, harder to handle, and may result in loaves that spread out more during proofing and baking rather than holding their tall, narrow form.
Furthermore, a weaker gluten structure can affect the final texture of the baguette. While bread flour yields a chewy, airy crumb with large irregular holes, all-purpose flour might produce a crumb that is slightly denser or more uniform. Achieving that signature open, irregular crumb requires careful development of the gluten structure through specific techniques. Understanding this limitation is key to setting realistic expectations and appreciating the specific methods employed in an easy allpurpose baguette recipe designed for all-purpose flour.
The Solution: Techniques for Improving Structure Using All-Purpose Flour
Fortunately, bakers have developed several techniques to compensate for the lower gluten content in all-purpose flour and improve the structure of baguette dough. One effective method is the autolyse, where the flour and water are mixed and left to rest for 20-60 minutes before adding yeast and salt. This resting period allows the flour to fully hydrate and enzymes to begin breaking down proteins, making the dough more extensible and easier to work with, which helps in gluten development during subsequent kneading.
Another crucial technique involves using specific kneading and folding methods. Longer, more vigorous kneading (either by hand or mixer) helps align the gluten strands. During bulk fermentation, incorporating 'stretch and folds' at regular intervals (e.g., every 30-45 minutes for the first 1.5-2 hours) is highly effective. This process gently strengthens the dough by tightening the gluten network without tearing it. By consistently applying these methods, an easy allpurpose baguette recipe can significantly improve the structure and handling of dough made with all-purpose flour, leading to better shape retention and a more desirable crumb.
Simple All-Purpose Baguette Recipe: Detailed Instructions

Ingredients for Your All-Purpose Flour Baguette: Quantities and Notes
To make a classic easy allpurpose baguette recipe, you'll need just a few basic ingredients. The exact quantities can vary slightly depending on your flour and environment, but a good starting point for two medium baguettes is:
- All-Purpose Flour: Approximately 300 grams (about 2 ½ cups). Use a standard unbleached all-purpose flour if possible.
- Water: Approximately 210-225 grams (about ¾ to 1 cup). The hydration level (water as a percentage of flour weight) is crucial. Aim for 70-75% hydration initially. Adjust based on how the dough feels – it should be wet but manageable.
- Instant Dry Yeast: About 1/4 teaspoon (around 0.8 grams). Instant yeast can be mixed directly with the dry ingredients. If using active dry yeast, you'll need slightly more (about 1/2 teaspoon) and should proof it in a small amount of the warm water first.
- Fine Sea Salt: About 6 grams (approximately 1 teaspoon). Salt not only adds flavor but also helps control yeast activity and strengthens the gluten structure.
These proportions provide a foundation for an easy allpurpose baguette recipe that balances manageability with achieving a desirable texture. Remember that humidity and your specific flour can influence how much water is absorbed, so be prepared to make minor adjustments.
Step 1: Autolyse - Hydrating the Flour for Improved Dough
The autolyse step is simple yet incredibly beneficial when working with all-purpose flour in an easy allpurpose baguette recipe. In a large mixing bowl, combine the all-purpose flour and the water. Mix them together with a spoon or your hands until no dry flour remains and you have a shaggy, rough dough. Do not add the salt or yeast at this stage.
Once the ingredients are just combined, cover the bowl and let the mixture rest at room temperature for 20 to 60 minutes. During this rest, the water fully hydrates the flour particles, and enzymes naturally present in the flour begin to break down complex starches and proteins. This process makes the dough more extensible and significantly easier to knead, promoting better gluten development with less effort later on. This seemingly small step makes a noticeable difference in the final dough's texture and handling.
Step 2: Kneading - Developing Strength in All-Purpose Flour Dough
After the autolyse period, add the yeast and salt to the dough in the bowl. Now it's time to knead. The goal here is to develop the gluten network. You can knead by hand or use a stand mixer fitted with a dough hook. By hand, this might take 10-15 minutes of folding, stretching, and pushing the dough until it becomes smoother and more elastic. In a stand mixer on medium speed, it typically takes 6-10 minutes.
You'll know the dough is sufficiently kneaded when it passes the "windowpane test." Pinch a small piece of dough and gently stretch it between your fingers. If you can stretch it thin enough to see light through it without it tearing, the gluten is well-developed.
If it tears easily, continue kneading for a few more minutes and test again. With all-purpose flour, achieving a perfect windowpane might be slightly harder than with bread flour, but you should aim for a dough that feels smooth and elastic. This kneading step is vital for building the structure needed for an easy allpurpose baguette recipe that holds its shape and develops a good crumb.
Step 3: Bulk Fermentation - Time and Temperature for Flavor Development
Bulk fermentation, also known as the first rise, is where the magic of flavor development happens. Lightly oil a clean bowl or container large enough for the dough to double in size. Transfer the kneaded dough to the bowl, turning it to coat all sides with a thin layer of oil. Cover the bowl tightly with plastic wrap or a lid to prevent a skin from forming.
Let the dough ferment at room temperature. The ideal temperature is around 70-75°F (21-24°C). At this temperature, bulk fermentation for an easy allpurpose baguette recipe typically takes 2 to 3 hours. During this time, the yeast produces carbon dioxide, causing the dough to rise, and beneficial bacteria develop complex flavors. Incorporate 'stretch and folds' every 30-45 minutes during the first 1.5-2 hours.
To do a stretch and fold, grab a side of the dough, stretch it up, and fold it over the center. Rotate the bowl and repeat with the remaining sides (usually 3-4 folds per session). This strengthens the gluten and degases the dough gently. The dough should increase significantly in volume and feel airy.
Step 4: Dividing and Pre-Shaping - Preparing the Dough for Final Shaping
Once bulk fermentation is complete and the dough has roughly doubled in size, gently turn the dough out onto a lightly floured surface. Be careful not to deflate it too much. Use a bench scraper to divide the dough into the desired number of portions for your baguettes. For the quantities listed earlier, this will likely be two equal pieces, each weighing around 250-275 grams.
Now, pre-shape each piece into a loose log or rectangle. This step helps to build tension in the dough and makes the final shaping easier. Gently pat each piece into a rough rectangle. Then, fold the top edge down about two-thirds of the way and press gently.
Fold the bottom edge up over the top fold and seal the seam with the heel of your hand. You should now have a rough log shape. Place these pre-shaped pieces seam-side down on the counter, cover them loosely with a clean kitchen towel or plastic wrap, and let them rest for 15-20 minutes. This resting period allows the gluten to relax, making the dough pliable enough for the final shaping.
Step 5: Shaping - Achieving the Tapered Baguette Form
Shaping is a critical step for achieving the iconic baguette form in your easy allpurpose baguette recipe. After the rest period, uncover one piece of pre-shaped dough. Gently flatten it into a rectangle again. Fold the top third of the dough down and press gently to seal. Fold the dough in half lengthwise, bringing the top edge down to meet the bottom edge. Use the heel of your hand to firmly seal the seam along the entire length of the log.
Now, gently roll the log back and forth with your hands, starting from the center and working outwards, applying gentle pressure to lengthen the baguette and taper the ends slightly. Aim for a length appropriate for your baking surface (e.g., 12-16 inches for a standard home oven). The surface of the baguette should be taut. Place the shaped baguettes seam-side up in a floured couche (a piece of linen cloth) or on parchment paper separated by folds, which helps them maintain their shape during proofing.
Step 6: Proofing - Monitoring the Rise Before Baking
Proofing, the final rise before baking, is essential for achieving a light and airy interior in your easy allpurpose baguette recipe. Place the shaped baguettes, nestled in their couche or separated by parchment folds, in a warm, draft-free spot. Cover them loosely with plastic wrap or a clean kitchen towel to prevent drying.
Proofing time can vary significantly depending on the temperature of your kitchen. It typically takes between 45 to 90 minutes at room temperature (around 70-75°F or 21-24°C). The baguettes are ready to bake when they have increased in size by about 50-75% and feel light and airy. To test if they are ready, gently poke the side of a baguette with a floured finger.
If the indentation slowly springs back partway, they are ready. If it springs back immediately, they need more time. If the indentation stays completely, they are likely over-proofed. Proper proofing is key to achieving good oven spring.
Step 7: Scoring - Creating Expansion Points for Oven Spring
Scoring is the art of making intentional cuts on the surface of the baguette just before baking. This step is crucial for an easy allpurpose baguette recipe as it guides the dough's expansion in the hot oven, allowing for maximum oven spring and creating those beautiful, characteristic slashes. Use a very sharp blade, like a baker's lame or a razor blade, held at a shallow angle (about 30-45 degrees) to the surface of the dough.
Make several overlapping slashes along the length of each baguette. For a standard-length baguette, three to five slashes are typical. Each slash should be about 4-6 inches long and overlap the previous one by about a third of its length. Make quick, confident cuts about 1/2 inch deep. The goal is to cut through the surface tension of the dough without tearing it. Practice makes perfect with scoring; don't be discouraged if your first attempts aren't perfect. Correct scoring ensures the baguette expands upwards and outwards in a controlled manner during baking.
Step 8: Baking - Temperature and Time for Optimal Crust and Crumb
Baking baguettes requires high heat and steam to achieve that signature crisp crust and excellent oven spring. Preheat your oven with a baking stone or steel inside to a very high temperature, typically 475-500°F (245-260°C), for at least 30-60 minutes. You'll also need a method for creating steam, such as placing a cast iron pan or tray on the bottom rack during preheating.
Carefully transfer the scored baguettes to the hot baking surface. Immediately pour about a cup of hot water into the preheated steam pan on the bottom rack and quickly close the oven door. The steam keeps the crust soft initially, allowing the baguette to expand fully before the crust sets.
Bake for 20-25 minutes, or until the crust is deep golden brown and the internal temperature reaches around 200-210°F (93-99°C). For the last 5-10 minutes, you can open the oven door slightly to allow steam to escape, promoting a crispier crust. A successful easy allpurpose baguette recipe relies heavily on this hot, steamy environment.
Step 9: Cooling - Allowing the Baguettes to Set
Once baked to a beautiful golden brown with a firm crust, carefully remove the baguettes from the oven. Transfer them immediately to a wire cooling rack. This step is often overlooked but is essential for the texture of your easy allpurpose baguette recipe.
Allow the baguettes to cool completely, or at least for 30-60 minutes, before slicing into them. As the baguettes cool, residual heat continues to cook the interior slightly, and moisture redistributes throughout the loaf. Slicing into a hot baguette can result in a gummy interior. Letting them cool allows the crumb structure to set properly, ensuring a pleasant texture. You'll likely hear the characteristic crackling sounds (known as "singing") as the crust cools and contracts – a sure sign of a successful bake!
Tips and Tricks for Excellent All-Purpose Baguettes
Hydration Levels: Adjusting Water Content for All-Purpose Flour
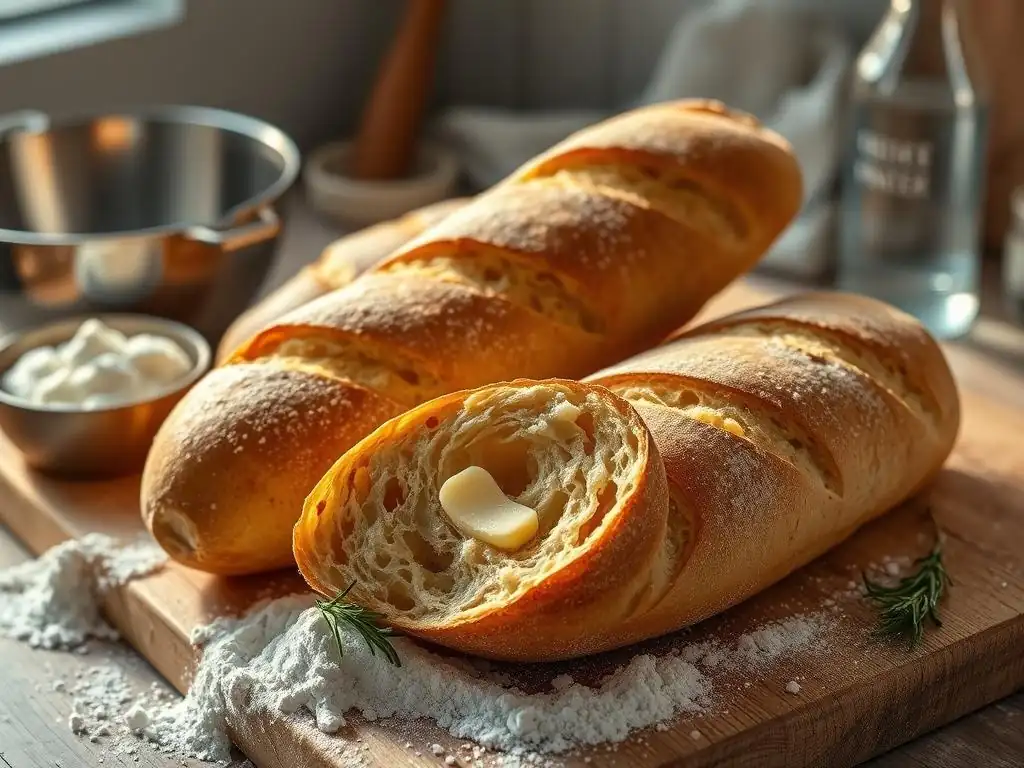
Hydration level, the ratio of water to flour by weight, plays a significant role in bread dough, and it's particularly important when working with all-purpose flour in an easy allpurpose baguette recipe. All-purpose flour tends to absorb slightly less water than bread flour due to its lower protein content. While a typical baguette recipe using bread flour might call for 75-80%+ hydration, starting with 70-75% hydration is often more manageable with all-purpose flour.
However, the exact amount of water needed can vary based on the specific brand of flour you use and the humidity in your kitchen. It's best to add the water gradually, especially if you're new to the recipe. Observe how the dough feels as you mix it. It should be wet and sticky but still cohesive enough to eventually develop tension.
If the dough feels too stiff, add a tablespoon or two more water. If it feels excessively soupy and impossible to handle, you might need to add a little extra flour (a tablespoon at a time). Don't be afraid to adjust based on dough feel rather than sticking rigidly to the recipe's water quantity.
Kneading Techniques: Effective Methods for Gluten Development
Developing sufficient gluten is paramount when using all-purpose flour for an easy allpurpose baguette recipe. Since all-purpose flour has less protein, it requires more encouragement to form a strong network. If kneading by hand, techniques like the French fold (or slap and fold) are highly effective. This involves picking up the dough, slapping it onto the counter, stretching it out, and folding it back onto itself. Repeat this vigorously for 10-15 minutes until the dough becomes smooth and elastic.
If using a stand mixer, ensure you knead for the full recommended time (typically 6-10 minutes on medium speed). Don't stop as soon as the dough comes together; continue until it clears the sides of the bowl and passes the windowpane test (or nearly so). Additionally, incorporating stretch and folds during bulk fermentation is indispensable. Performing 3-4 rounds of stretch and folds at 30-45 minute intervals during the first part of the rise significantly strengthens the dough and improves its structure without overworking it, compensating for the weaker gluten potential of all-purpose flour.
Fermentation Control: Managing Yeast Activity for Flavor
Managing fermentation time and temperature is key to developing complex flavors and achieving the right dough structure in your easy allpurpose baguette recipe. Yeast activity is highly dependent on temperature; warmer temperatures speed up fermentation, while cooler temperatures slow it down, allowing for longer flavor development. Aiming for a room temperature around 70-75°F (21-24°C) for bulk fermentation typically yields a good balance of rise and flavor development within 2-3 hours.
You can also experiment with retarding (cold proofing) the dough in the refrigerator after bulk fermentation or even after shaping. Placing the dough in the fridge (around 38-40°F or 3-4°C) for 8-24 hours significantly slows down yeast activity but allows enzymes and bacteria to continue their work, producing more complex, nuanced flavors. Cold dough is also easier to score and handle. If cold proofing shaped baguettes, bake them directly from the refrigerator into a hot, steamy oven. This extended fermentation is a fantastic way to elevate the flavor of your easy allpurpose baguette recipe.
Scoring Patterns: Enhancing Baguette Appearance and Oven Spring
Scoring is not just for looks; it's a functional step that directs the oven spring and contributes to the final shape and crumb structure of your easy allpurpose baguette recipe. The most common and effective scoring pattern for baguettes is a series of overlapping diagonal slashes. These cuts should be made quickly and confidently with a sharp blade at a shallow angle (about 30-45 degrees) to the dough surface.
Aim for slashes that are about 4-6 inches long and overlap each other by about one-third to one-half. The depth should be around 1/2 inch. Practice on scrap dough if you're nervous. Proper scoring allows the dough to expand upwards along the cuts rather than bursting randomly. Experiment with the angle and overlap to see how it affects the final look. Consistent, well-placed scores are a hallmark of a well-made baguette and significantly enhance its visual appeal after baking.
Oven Environment: Creating Steam for a Crisp Crust
Creating a steamy environment in your oven during the initial stages of baking is crucial for developing a thin, crisp crust on your easy allpurpose baguette recipe. Without steam, the surface of the dough dries out too quickly, forming a hard crust that restricts oven spring and results in a thicker, less desirable texture. The steam keeps the surface pliable, allowing the baguette to expand fully before the crust sets.
A simple and effective method for home bakers is to place a cast iron pan, broiler tray, or old baking sheet on the bottom rack of your oven while it preheats to a high temperature (475-500°F or 245-260°C). Just before loading the baguettes, carefully pour about 1 cup of hot water into this preheated pan and quickly close the oven door to trap the steam.
Alternatively, you can use a Dutch oven or baking cloche, though these limit the length of the baguette you can bake at once. Maintain the steam for the first 10-15 minutes of baking, then remove the steam pan (or lid) and finish baking in a dry oven to crisp the crust.
Troubleshooting Common All-Purpose Baguette Issues
Dense Crumb: Causes and Prevention Strategies
A dense or tight crumb is a common issue when making baguettes, especially with all-purpose flour in an easy allpurpose baguette recipe. Several factors can contribute to this. Insufficient gluten development during kneading is a primary cause; if the dough doesn't have enough strength and elasticity, it can't trap gases effectively. Ensure you are kneading or performing stretch and folds until the dough feels smooth and passes at least a partial windowpane test.
Another frequent culprit is under-proofing. If the dough hasn't risen enough during bulk fermentation or proofing, it won't have the necessary volume and airiness before hitting the oven. Make sure the dough has significantly increased in size (50-75% during proofing) and feels light and airy when ready to bake. Over-handling the dough during shaping can also knock out too much air, leading to a dense result. Be gentle when dividing and shaping to preserve the air pockets created during fermentation.
Lack of Oven Spring: Identifying and Addressing the Root Cause
Lack of oven spring – when your baguette doesn't expand much in the oven – can be disappointing after following an easy allpurpose baguette recipe. This is often linked to issues similar to those causing a dense crumb. Under-proofed dough doesn't have enough gas built up to expand vigorously in the heat. Ensure your proofing time is adequate and the dough passes the poke test.
Conversely, over-proofed dough can also lead to poor oven spring. If the dough has risen too much and the gluten structure is stretched too thin, it can collapse in the oven. The poke test is crucial here – if the indentation stays completely, the dough is likely over-proofed. Baking in an oven that isn't hot enough or lacks sufficient steam is another major cause.
A hot oven sets the crust quickly, and steam keeps it pliable, allowing for maximum expansion. Ensure your oven is fully preheated to a high temperature and that you are creating steam for the first part of the bake. Finally, improper scoring can also restrict oven spring; ensure your cuts are deep enough to allow for expansion.
Pale Crust: Achieving a Golden-Brown Color
A pale crust on your easy allpurpose baguette recipe indicates that the surface hasn't caramelized properly. This can happen for several reasons. The most common cause is insufficient baking time or temperature. Ensure your oven is accurately calibrated and preheated to the recommended high temperature (typically 475-500°F or 245-260°C). Baking for the full recommended time, or even a few extra minutes, is often necessary to achieve a deep golden color and a crisp crust.
Another factor is insufficient steam. While steam is crucial initially, too much steam throughout the bake or not enough dry heat at the end can prevent the crust from browning and crisping. Make sure you remove the steam source after the first 10-15 minutes of baking. Also, ensure the baguettes are not over-proofed, as over-proofed dough can sometimes lack the sugars needed for good browning. Finally, some flours brown better than others; using unbleached all-purpose flour can sometimes contribute to better crust color compared to bleached varieties.
Irregular Shape: Refining Shaping Techniques
Achieving a consistently beautiful, elongated, and tapered shape in your easy allpurpose baguette recipe takes practice. Irregular shapes, like loaves that are too flat, lopsided, or unevenly thick, are often due to inconsistent shaping technique or insufficient gluten development. Ensure you are building good surface tension during the final shaping step. The goal is to create a taut skin on the exterior of the baguette, which helps it hold its form during proofing and baking.
Review the shaping steps: flatten the dough gently, fold it correctly to build layers, and seal the seam firmly. When rolling to lengthen, apply even pressure along the entire length, starting from the middle and working towards the ends. Practice helps develop the feel for how much pressure is needed.
Insufficient gluten development from kneading or stretch and folds can also make the dough too weak to hold its shape, leading to spreading. Ensure your dough has developed adequate strength before shaping. Using a well-floured couche or properly folded parchment paper during proofing is also essential for supporting the shaped baguettes and preventing them from spreading sideways.
Flavor Variations for Your All-Purpose Baguettes
Incorporating Herbs and Spices for Aromatic Baguettes
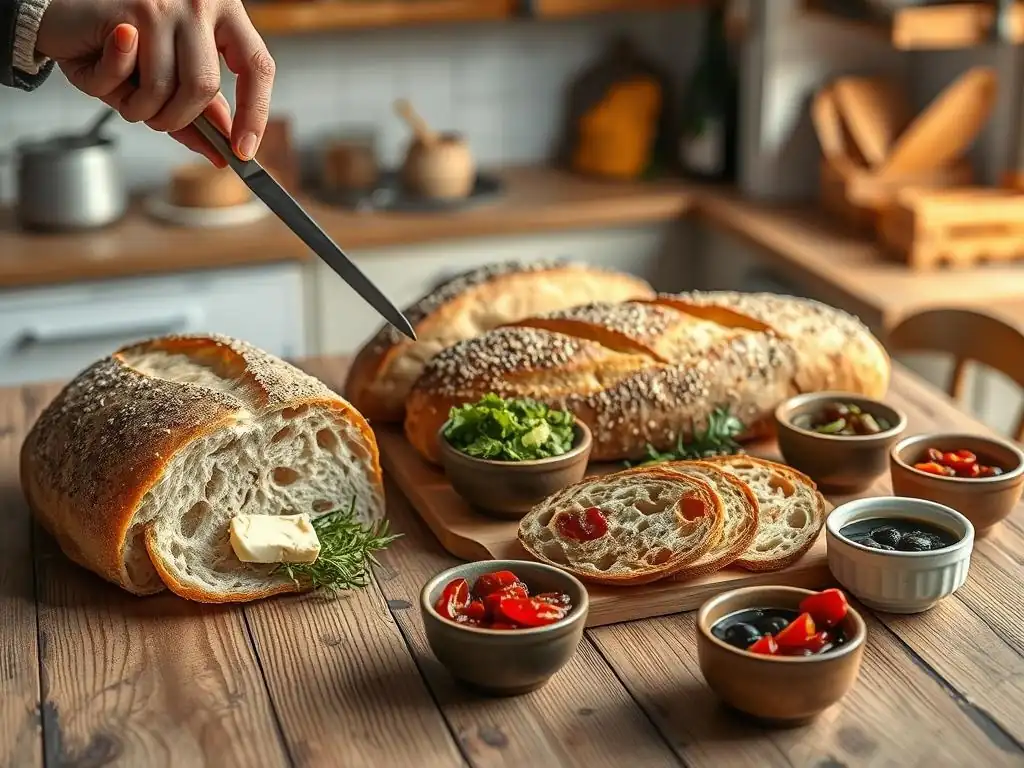
Elevating your easy allpurpose baguette recipe beyond the classic involves incorporating various flavorings directly into the dough. Adding dried herbs and spices is a simple way to infuse your baguettes with wonderful aromas and tastes. Herbs like dried rosemary, thyme, or oregano can be mixed into the dry flour or added during the initial kneading stage. For example, adding 1-2 teaspoons of dried rosemary to a batch of dough creates a fragrant, savory loaf perfect for dipping in olive oil.
Ground spices like black pepper, smoked paprika, or even a pinch of garlic powder can also add depth. Consider combining herbs and spices, such as a blend of Herbes de Provence. For fresh herbs, chop them finely and add them towards the end of kneading to prevent them from being completely broken down. The amounts can be adjusted to your preference, but starting with 1-2% of the flour weight (e.g., 3-6 grams for 300g flour) is a good starting point to ensure the flavors aren't overpowering. These additions turn a simple easy allpurpose baguette recipe into a gourmet experience.
Adding Cheese or Olives for Savory Options
For a more substantial savory variation, incorporate cheese or olives into your easy allpurpose baguette recipe. Cubed or shredded cheese, such as Gruyère, sharp cheddar, or Parmesan, can be folded into the dough during the last few minutes of kneading or during the first set of stretch and folds. Aim for roughly 10-15% of the flour weight (e.g., 30-45 grams for 300g flour). Be aware that cheese can affect dough handling, making it slightly stickier.
Pitted and roughly chopped olives, like Kalamata or green olives, also make a fantastic addition. Drain them well and pat them dry before adding to the dough (around 15-20% of the flour weight, or 45-60 grams for 300g flour). Olives add moisture and salt, so you might slightly reduce the amount of salt in the recipe. Both cheese and olives benefit from being distributed evenly throughout the dough during incorporation. These savory additions are perfect for serving alongside meals or enjoying on their own.
Creating Sweet Baguettes with Chocolate or Dried Fruit
While baguettes are traditionally savory, there's no reason you can't adapt your easy allpurpose baguette recipe to create sweet versions, perfect for breakfast or dessert. Incorporating chunks of chocolate or dried fruit adds bursts of sweetness and texture. Chocolate chunks or chips (around 15-20% of the flour weight, or 45-60 grams for 300g flour) can be folded in during the last stage of kneading or during stretch and folds. Using good quality dark or milk chocolate will yield the best flavor.
Dried fruits like cranberries, cherries, or raisins (also around 15-20% of the flour weight) should ideally be plumped first by soaking them in warm water or juice for 15-20 minutes, then drained thoroughly before adding to the dough. This prevents them from drawing moisture out of the dough during baking. You might also consider adding a touch of sugar (1-2 tablespoons) to the dough itself when making sweet variations, though it's not strictly necessary with the added fruit or chocolate. These sweet twists on the easy allpurpose baguette recipe offer a delightful change of pace.
Serving and Storing Your Homemade All-Purpose Flour Baguettes
Serving Suggestions: Complementary Dishes and Pairings
Your freshly baked easy allpurpose baguette is incredibly versatile and can elevate a wide range of meals. Served warm with just butter, it's a simple pleasure. It's the perfect accompaniment to soups, stews, and salads, ideal for soaking up flavorful broths and dressings. Slice it thinly for crostini, topping with tomatoes and basil, or cheese and roasted vegetables.
A baguette is also essential for making classic sandwiches like banh mi or simple ham and cheese. Use it to build hearty open-faced sandwiches or slice it for dipping in olive oil and balsamic vinegar. The simple, clean flavor profile of an easy allpurpose baguette makes it a fantastic canvas for countless pairings, from a cheese board to a simple side of pasta. Don't forget it's also perfect for making garlic bread!
Storage Methods: Maintaining Freshness and Texture
Baguettes are best enjoyed the day they are baked, ideally within a few hours of cooling, when the crust is at its crispiest. However, if you have leftovers from your easy allpurpose baguette recipe, proper storage can help maintain freshness, though the crust will inevitably soften over time.
For storing overnight, the best method is often simply placing the baguette in a paper bag at room temperature. This allows the crust to breathe somewhat, reducing sogginess compared to a plastic bag. For longer storage (up to 2-3 days), a linen bread bag or a loosely wrapped plastic bag can work, but the crust will soften significantly. To revive a baguette from storage, sprinkle it lightly with water and reheat it in a 350°F (175°C) oven for 5-10 minutes until the crust is crisp again.
For longer term storage, baguettes freeze exceptionally well. Wrap cooled baguettes tightly in plastic wrap, then in foil or a freezer bag, and freeze for up to a few months. To serve, thaw at room temperature and reheat as described above.
Conclusion: Mastering Baguettes with All-Purpose Flour - Accessible Baking
As we've explored, creating delicious baguettes is absolutely within reach for the home baker, even when using readily available all-purpose flour. While bread flour certainly offers advantages in gluten development, understanding the characteristics of all-purpose flour and applying specific techniques allows you to compensate effectively. From the initial autolyse and targeted kneading to careful fermentation control and creating that crucial steamy oven environment, each step in our easy allpurpose baguette recipe is designed to maximize the potential of standard flour.
Don't be discouraged by initial results; baking artisan bread is a skill that improves with practice. The journey of mastering an easy allpurpose baguette recipe is rewarding, yielding loaves with a satisfying crust and a pleasant crumb that are perfect for sharing (or not!). Embrace the process, pay attention to the feel of the dough, and enjoy the aroma of fresh bread filling your kitchen. Baking beautiful baguettes doesn't require specialized ingredients or professional equipment – just a little patience, the right techniques, and a willingness to experiment. Happy baking!
Frequently Asked Questions
Can I really make a baguette using all-purpose flour?
Yes, absolutely! While bread flour is often recommended, all-purpose flour can be used to create a delicious and satisfying baguette. The texture might be slightly different, but the flavor will be excellent.
What adjustments do I need to make when using all-purpose flour instead of bread flour for baguettes?
You might need to adjust the hydration (water content) slightly. All-purpose flour often absorbs less water than bread flour, so start with a little less water in your dough and add more gradually if needed.
How does using all-purpose flour affect the crust of the baguette?
The crust might not be quite as crispy or chewy as with bread flour. However, proper baking techniques, such as using steam in the oven, can help achieve a nice, crusty exterior even with all-purpose flour.
What are some tips for getting a good rise with all-purpose flour baguettes?
Ensure your yeast is active and use a longer fermentation time. A longer rise allows the gluten in all-purpose flour to develop more fully, resulting in a better rise and texture.
Is there anything else I should keep in mind when baking baguettes with all-purpose flour?
Don't over-knead the dough. Over-kneading can lead to a tougher baguette. Focus on developing the gluten through gentle handling and allowing the dough to rest adequately during the fermentation process.
Final Reflection: The Humble Baguette, Reimagined
The pursuit of the perfect baguette, even with all-purpose flour, reveals more than just baking technique; it reflects our desire for accessible excellence. This seemingly simple quest challenges the notion that only specialized ingredients can yield exceptional results. We've seen that with careful attention to detail and a few clever substitutions, a delicious, satisfying baguette is within everyone's reach.
The journey of making bread, especially a classic like the baguette, is deeply intertwined with our cultural heritage. It's a process that connects us to generations past, a testament to the enduring power of simple ingredients transformed by human skill and care. Bread is the staff of life,
a phrase often repeated, truly encapsulates the significance of this staple food and the satisfaction derived from creating it oneself. This recipe democratizes that experience, making it accessible to home bakers who may not have access to specialized flours or equipment.
Now, consider your own kitchen. What seemingly insurmountable culinary challenges have you faced? Perhaps you've shied away from a particular recipe, believing it too complex or requiring specialized ingredients. I encourage you to embrace the spirit of this article – to experiment, to adapt, and to discover the joy of creating something delicious and satisfying, even with what you already have. Don't be afraid to try your hand at this easy all-purpose baguette recipe; the rewarding aroma of freshly baked bread is a testament to the power of perseverance and a little bit of culinary courage.
Unleash Your Inner Boulanger: Bake the Perfect Baguette!
Thanks for joining us on this baguette baking adventure! You've now learned that yes, you absolutely can make amazing baguettes with all-purpose flour. Ready to take your skills to the next level?
- Bake your own baguette today! Use what you’ve learned to create your first perfect loaf. Don't be afraid to experiment!
- Share your baking journey! Post a picture of your baguette on social media using #BakeWithEaseBaguette and inspire others.
- Explore our other recipes: Discover more bread-baking secrets on BakeWithEase.com – from sourdough to artisan rolls, we've got you covered!
So, what unique twist will you add to your next baguette masterpiece? Let us know in the comments below!