
Baguette Baking Schedule: Planning for Perfect Timing

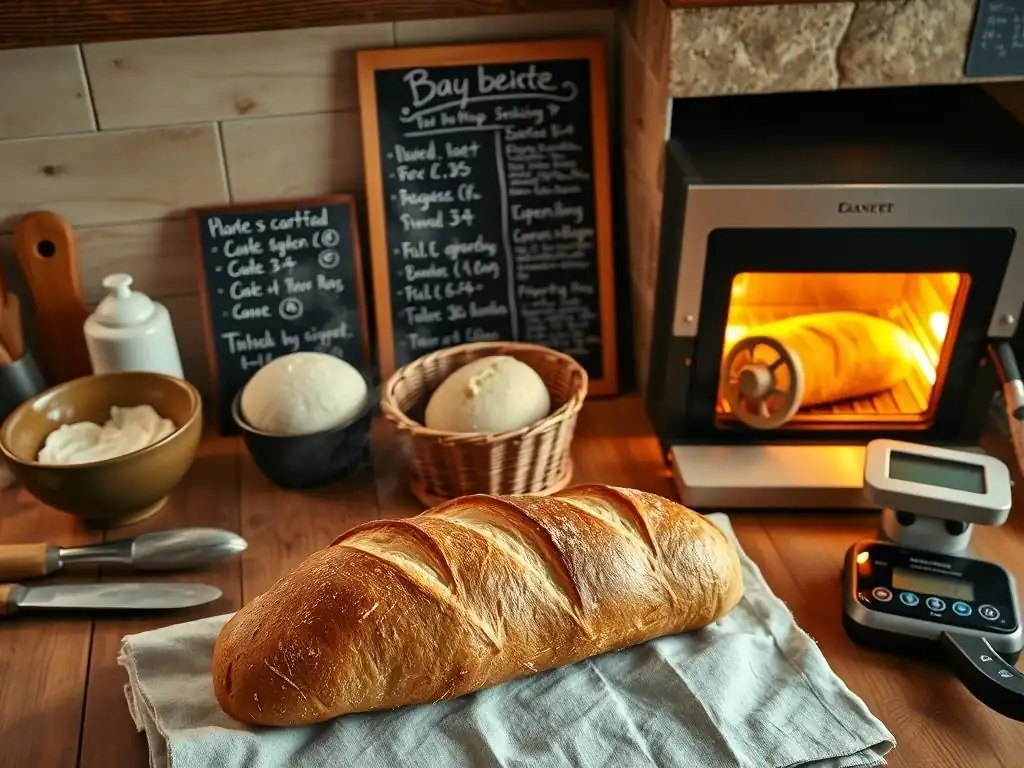
Welcome to BakeWithEase, your haven for all things baking! Ever dreamt of pulling a perfectly crisp, golden-brown baguette from your oven, but feel intimidated by the timing? Fear not! Unlocking the secrets to baguette baking timing schedule success is simpler than you think. Dive in to discover our carefully crafted schedule, and let's embark on a journey to effortlessly bake delicious baguettes, every single time. Ready to craft your perfect loaf?
- Introduction: Mastering the Baguette Baking Timing Schedule
- Understanding the Baguette Baking Process: A Timeline Overview
- Creating Your Baguette Baking Timing Schedule: Step-by-Step
- Sample Baguette Baking Timing Schedules: Examples for Different Schedules
- Factors Affecting Your Baguette Baking Schedule
- Troubleshooting Your Baguette Baking Schedule
- Tips for a Successful Baguette Baking Timing Schedule
- Advanced Baguette Baking Schedules: Exploring Variations
- Conclusion: Achieving Perfect Baguettes with a Precise Baking Schedule
-
Frequently Asked Questions
- What is the most important factor in a Baguette Baking Timing Schedule?
- How long does the entire Baguette Baking Timing Schedule typically take?
- Can I shorten the Baguette Baking Timing Schedule?
- What happens if I over-proof my baguette dough?
- How does temperature affect the Baguette Baking Timing Schedule?
- Final Reflection: The Art and Science of Baguette Timing
- Unlock Your Inner Boulanger: Bake the Perfect Baguette!
Introduction: Mastering the Baguette Baking Timing Schedule
Embarking on the journey to bake the perfect baguette is exciting, and understanding the baguette baking timing schedule is perhaps the most critical step. While the ingredients are simple – flour, water, salt, and yeast – the magic truly happens through the careful management of time and temperature. A well-thought-out baguette schedule doesn't just help you fit baking into your life; it dictates the flavor, texture, and overall success of your loaf. Without a clear plan, you risk under-proofed, dense baguettes or over-proofed, slack dough that's difficult to handle.
Mastering the baguette baking timing schedule allows you to control the fermentation process, which is the engine driving flavor development and gas production for a light, airy crumb. Whether you're aiming for a crisp, crackling crust or a complex, slightly tangy interior, precision in your schedule is key. This guide will walk you through the essential stages, helping you build a reliable baguette schedule that yields consistently delicious results, making your baking experience both rewarding and predictable.
Understanding the Baguette Baking Process: A Timeline Overview
The Importance of a Well-Planned Baguette Schedule
A meticulously planned baguette schedule is paramount for achieving that coveted crust and open, airy crumb. The timing directly impacts the dough's development, from gluten structure to fermentation byproducts that contribute to flavor. For instance, a longer, slower fermentation, often involving refrigeration for 12-24 hours, allows enzymes to break down starches into sugars, resulting in a more complex flavor profile and better crust browning during baking. Conversely, rushing the process can lead to a bland loaf with a tight crumb structure.
Consider the impact on handling: dough that has proofed according to a proper baguette baking timing schedule is typically easier to shape and score. Over-proofed dough becomes overly extensible and difficult to handle without deflating, while under-proofed dough is stiff and resists shaping, often resulting in a dense loaf with poor oven spring. A well-structured baguette schedule ensures each stage of dough development occurs optimally, setting the stage for a successful bake and a truly remarkable baguette.
Key Stages in Baguette Production: From Mixing to Baking
The journey of a baguette involves several distinct stages, each with its own critical timeframe. It begins with mixing the dough, which can take anywhere from 5 to 15 minutes depending on the method (hand mixing vs. machine). This is followed by bulk fermentation, where the dough undergoes its initial rise and develops flavor; this stage can range from 1 hour at warm temperatures (around 75-80°F or 24-27°C) to 18 hours or more in a cooler environment (around 40°F or 4°C).
After bulk fermentation comes dividing and pre-shaping, typically followed by a short rest period (around 15-30 minutes). The dough is then shaped into its final baguette form. The final proofing stage allows the shaped loaves to rise again before baking; this can take 1-3 hours at room temperature or several hours in the refrigerator. Finally, the baguettes are scored and baked at high temperatures, often between 450°F and 480°F (230°C and 250°C), for about 20-30 minutes until golden brown and crisp. Each of these stages must be factored into your overall baguette baking timing schedule.
Creating Your Baguette Baking Timing Schedule: Step-by-Step
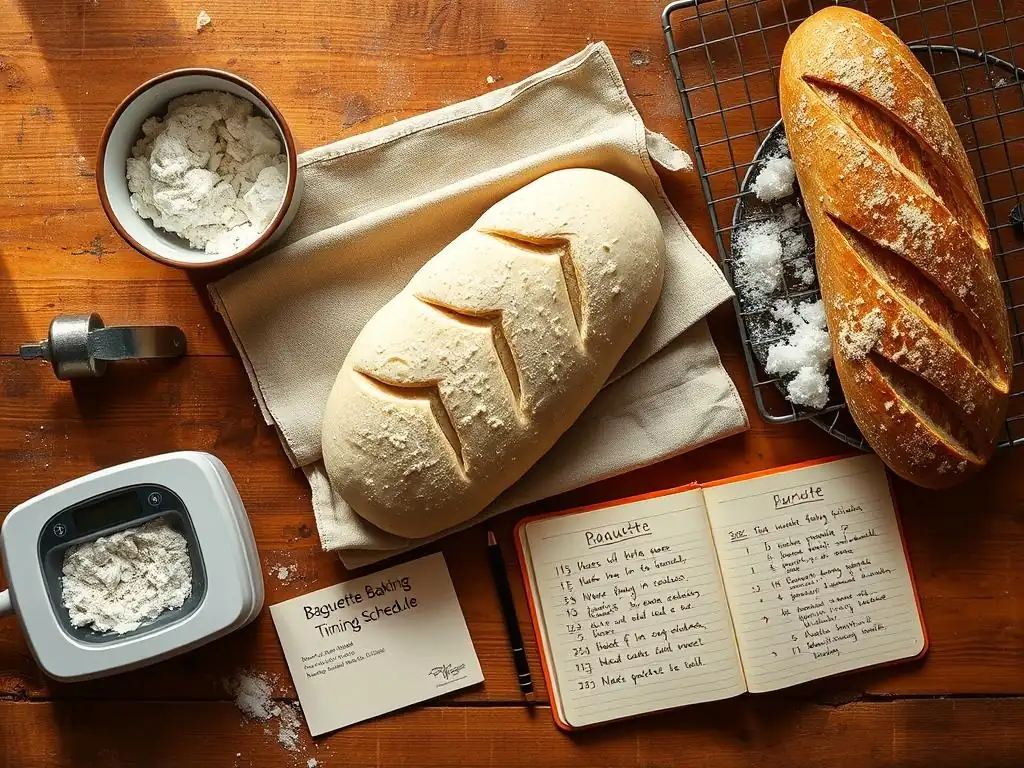
Step 1: Determining Your Desired Bake Time
The first step in building your baguette baking timing schedule is deciding when you want to pull those beautiful, crusty loaves out of the oven. Do you want fresh baguettes for breakfast on Saturday morning? Or perhaps warm bread for dinner guests on Friday night? Your target bake time is the anchor around which the entire schedule is built. For example, if you want to bake at 9:00 AM on Saturday, you'll work backward from that time to determine when each preceding stage must be completed.
Consider the typical baking time for a baguette, which is approximately 20-30 minutes at high heat. If you plan to bake at 9:00 AM, the baguettes need to go into the oven around 8:30 AM or 8:40 AM. This means your final proofing must be completed just before that time. Knowing your desired finish time allows you to reverse-engineer the entire baguette schedule, ensuring you allocate sufficient time for the longer processes like fermentation and proofing.
Step 2: Calculating Proofing and Fermentation Durations
Once your bake time is set, the next crucial step in developing your baguette baking timing schedule is calculating the durations for bulk fermentation and final proofing. These are the most variable stages and heavily influenced by temperature and yeast quantity. As a general rule, warmer temperatures and more yeast lead to faster fermentation, while cooler temperatures and less yeast result in slower, longer fermentation, which typically develops more complex flavors.
A common approach for flavor development is a long, cold bulk fermentation (e.g., 12-18 hours at 40°F / 4°C) followed by a shorter final proof at room temperature (e.g., 1-2 hours). Alternatively, a same-day schedule might involve a warmer bulk fermentation (e.g., 2-4 hours at 75°F / 24°C) with several folds, followed by a final proof of 1-2 hours. It's essential to estimate these times based on your recipe and ambient conditions, building in flexibility for slight variations.
Bulk Fermentation Timing: Achieving Optimal Flavor Development
Bulk fermentation is the engine of flavor development in your baguette schedule. During this period, yeast consumes sugars, producing carbon dioxide (which makes the dough rise) and alcohol and organic acids (which contribute to the bread's characteristic flavor). The duration and temperature of bulk fermentation significantly impact the final taste and texture. For example, a dough fermented at 75°F (24°C) for 3 hours might have a simple, yeasty flavor, whereas the same dough fermented at 40°F (4°C) for 18 hours will develop deeper, tangier notes due to the slower activity of yeast and bacteria.
Monitoring the dough's development, rather than just the clock, is key during bulk fermentation. The dough should increase significantly in volume (often doubling or nearly doubling, depending on the recipe and desired outcome) and become aerated and slightly puffy. Performing stretch and folds during this stage, typically every 30-60 minutes for the first couple of hours, helps build gluten strength and equalize dough temperature, further influencing the overall bulk fermentation timing within your baguette schedule.
Final Proofing Schedule: Avoiding Over-Proofing
The final proof, or proofing, is the last rise of the shaped baguettes before they are baked. This stage is crucial for achieving good oven spring and a light crumb. The duration of the final proof is often shorter than bulk fermentation but equally critical to get right in your baguette schedule. At room temperature (around 70-75°F or 21-24°C), this might take 1 to 2.5 hours. If proofing in the refrigerator, it can take much longer, potentially 8-12 hours or even more, which is convenient for scheduling.
Over-proofing is a common pitfall; the dough rises too much, the gluten structure weakens, and the loaf may collapse in the oven, resulting in a flat, dense baguette. Under-proofing, conversely, means the dough hasn't developed enough gas, leading to poor oven spring and a tight crumb. A good indicator is the poke test: gently press the dough; if the indentation springs back slowly but not completely, it's likely ready.
If it springs back immediately, it needs more time. If it stays indented, it might be over-proofed. Adjusting the final proofing schedule based on these observations is vital for a successful bake.
Step 3: Incorporating Mixing and Shaping Time
While fermentation and proofing take the longest, don't forget to allocate time for the hands-on stages in your baguette baking timing schedule: mixing and shaping. Mixing typically takes 10-20 minutes, including weighing ingredients, mixing the dough, and potentially a short autolyse (resting period after mixing flour and water, before adding salt and yeast, often 20-60 minutes). Allow a buffer here, especially if you are hand-mixing or working with a high-hydration dough that might take longer to come together.
Shaping involves dividing the dough, a short rest (bench rest, usually 15-30 minutes), and then the final shaping into baguettes. Factor in about 30-45 minutes for these steps, especially when starting out. The bench rest is important as it allows the gluten to relax after dividing, making the dough easier to shape. Practicing your shaping technique will help you become more efficient, but initially, build ample time into your baguette schedule for this stage to avoid rushing.
Step 4: Accounting for Preheating and Baking
The final steps before enjoying your baguettes are preheating your oven and the actual baking time, both essential components of your baguette baking timing schedule. Your oven needs sufficient time to reach its target temperature, typically 450-480°F (230-250°C), and crucially, to heat any baking surfaces like a baking stone or steel, and any equipment used to create steam (like a Dutch oven or a pan with lava rocks). This can take anywhere from 30 minutes to a full hour or even longer, depending on your oven and equipment. Do not underestimate this preheating time.
Baking itself usually takes 20-30 minutes for baguettes, depending on their size, the desired crust color, and your oven's performance. Many bakers use steam during the initial phase of baking (the first 10-15 minutes) to keep the crust pliable, allowing the loaf to expand fully (oven spring), before venting the steam to allow the crust to crisp and brown. Account for this two-phase baking process in your schedule. Adding the preheating and baking times to the end of your calculated proofing time will bring you right back to your desired bake time.
Sample Baguette Baking Timing Schedules: Examples for Different Schedules
Creating a baguette baking timing schedule that fits your life is key to making this rewarding hobby sustainable. Here are a few sample schedules illustrating different approaches, from a leisurely overnight method to a faster same-day process. Remember that these are examples, and actual times may vary based on your specific recipe, room temperature, and yeast activity.
Planning ahead allows you to enjoy the process without stress. By visualizing the timeline, you can ensure you are available for the hands-on steps (mixing, shaping, baking) and allow the dough to do its work during the longer, less active periods (fermentation, proofing). Choosing the right baguette schedule depends entirely on your personal availability and desired outcome – longer schedules often yield more complex flavors.
Example 1: The Overnight Baguette Schedule (Long Fermentation)
This type of baguette baking timing schedule is popular because it allows for significant flavor development through a long, cold fermentation, and splits the active work over two days. It's ideal if you want fresh baguettes for breakfast or lunch the next day, requiring only mixing and a short bulk fermentation on day one, with shaping and baking on day two. The cold temperature of the refrigerator drastically slows down yeast activity, allowing enzymes more time to break down starches and proteins, leading to a more digestible and flavorful loaf.
A typical overnight schedule involves mixing the dough in the late afternoon or evening, performing a few folds over the next 1-2 hours, and then placing the dough in the refrigerator for 12-18 hours (or even up to 24 hours). The next morning, the dough is taken out, divided, rested, shaped, and proofed at room temperature for 1-2 hours before baking. This approach minimizes the active time needed on baking day, making it convenient for busy mornings, while maximizing flavor.
Detailed Timing Breakdown for Overnight Baguettes
Here is a sample baguette baking timing schedule for an overnight bake, aiming for fresh baguettes by Saturday morning:
- Friday 6:00 PM: Mix dough. Perform initial mixing until ingredients are just combined (autolyse optional for 30-60 mins).
- Friday 6:30 PM: Add salt and yeast (if using autolyse), mix until dough is developed (5-10 minutes).
- Friday 7:00 PM: First stretch and fold.
- Friday 7:45 PM: Second stretch and fold.
- Friday 8:30 PM: Third stretch and fold.
- Friday 9:00 PM: Place dough in a lightly oiled container, cover, and refrigerate (approx. 12-18 hours at 40°F / 4°C). Bulk fermentation occurs overnight.
- Saturday 7:00 AM: Remove dough from refrigerator. Divide and pre-shape. Rest for 20-30 minutes.
- Saturday 7:30 AM: Final shaping into baguettes. Place on a couche or proofing surface.
- Saturday 7:45 AM: Final proofing at room temperature (approx. 1.5 - 2 hours at 72°F / 22°C). Preheat oven and baking surface to 475°F (245°C) during the last 45-60 minutes of proofing.
- Saturday 9:15 AM: Gently transfer baguettes to baking surface, score, and bake with steam for 15 minutes.
- Saturday 9:30 AM: Remove steam setup. Continue baking for 10-15 minutes until golden brown.
- Saturday 9:45 AM - 10:00 AM: Remove from oven, cool on a rack for 10-20 minutes. Enjoy!
Example 2: The Same-Day Baguette Schedule (Faster Process)
If you're pressed for time or prefer a less tangy flavor profile, a same-day baguette baking timing schedule is a great option. This method relies on warmer temperatures to accelerate fermentation and proofing, allowing you to mix, shape, and bake within a matter of hours. While flavor complexity might be slightly less developed compared to a cold fermentation, you can still achieve a delicious baguette with a great crust and crumb by carefully managing the shorter timeframes.
A typical same-day schedule might involve mixing the dough in the morning, performing several folds over a 2-3 hour bulk fermentation period at room temperature (around 75-80°F or 24-27°C), followed by dividing, shaping, and a final proof of 1-1.5 hours before baking. This requires more active monitoring of the dough's progress due to the faster pace of fermentation. It's perfect for a spontaneous baking day or when you need fresh baguettes relatively quickly.
Detailed Timing Breakdown for Same-Day Baguettes
Here is a sample baguette baking timing schedule for a same-day bake, aiming for fresh baguettes by late afternoon:
- Saturday 11:00 AM: Mix dough. Autolyse (optional) for 30 minutes.
- Saturday 11:30 AM: Add salt and yeast (if using autolyse), mix until dough is developed (10-15 minutes).
- Saturday 11:45 AM: First stretch and fold.
- Saturday 12:30 PM: Second stretch and fold.
- Saturday 1:15 PM: Third stretch and fold.
- Saturday 2:00 PM: Bulk fermentation complete (approx. 2.5 hours total at 78°F / 26°C). Dough should be significantly increased in volume.
- Saturday 2:00 PM: Divide and pre-shape. Rest for 20 minutes.
- Saturday 2:20 PM: Final shaping into baguettes. Place on a couche or proofing surface.
- Saturday 2:30 PM: Final proofing at room temperature (approx. 1 - 1.5 hours at 78°F / 26°C). Preheat oven and baking surface to 475°F (245°C) during the last 45 minutes of proofing.
- Saturday 3:30 PM - 4:00 PM: Gently transfer baguettes, score, and bake with steam for 15 minutes.
- Saturday 3:45 PM - 4:15 PM: Remove steam setup. Continue baking for 10-15 minutes until golden brown.
- Saturday 4:00 PM - 4:30 PM: Remove from oven, cool on a rack for 10-20 minutes. Enjoy!
Example 3: The Weekend Baguette Schedule (Flexible Timing)
The weekend baguette baking timing schedule offers a blend of the previous two, providing flexibility while still allowing for good flavor development. This often involves starting the dough on Friday evening with a short bulk fermentation at room temperature, followed by a cold retardation in the refrigerator overnight or longer. This allows for a more relaxed pace on Saturday or Sunday, as the cold dough is more forgiving during shaping and proofing.
This approach is excellent for home bakers as it allows you to fit the active stages around your weekend activities. You can mix the dough after work on Friday, pop it in the fridge, and then decide on Saturday morning whether you want to bake that day or even wait until Sunday. The long cold rest builds flavor and makes the dough easier to handle when cold, which is a significant advantage for shaping baguettes.
Detailed Timing Breakdown for Weekend Baguettes
Here is a sample baguette baking timing schedule for a flexible weekend bake:
- Friday 8:00 PM: Mix dough. Autolyse (optional) for 30 minutes.
- Friday 8:30 PM: Add salt and yeast (if using autolyse), mix until dough is developed (10-15 minutes).
- Friday 8:45 PM: First stretch and fold.
- Friday 9:30 PM: Second stretch and fold.
- Friday 10:00 PM: Place dough in a lightly oiled container, cover, and refrigerate (approx. 14-48 hours at 40°F / 4°C). This is the flexible window.
- Saturday/Sunday (Choose your bake day):
- Morning (e.g., 9:00 AM): Remove dough from refrigerator. Divide and pre-shape. Rest for 20-30 minutes.
- Morning (e.g., 9:30 AM): Final shaping into baguettes. Place on a couche or proofing surface.
- Morning (e.g., 9:45 AM): Final proofing at room temperature (approx. 1.5 - 2.5 hours at 72°F / 22°C). Preheat oven and baking surface to 475°F (245°C) during the last 60 minutes of proofing.
- Late Morning (e.g., 11:30 AM - 12:15 PM): Gently transfer baguettes, score, and bake with steam for 15 minutes.
- Late Morning (e.g., 11:45 AM - 12:30 PM): Remove steam setup. Continue baking for 10-15 minutes until golden brown.
- Noon (e.g., 12:00 PM - 12:45 PM): Remove from oven, cool on a rack for 10-20 minutes. Enjoy!
Factors Affecting Your Baguette Baking Schedule

Understanding the variables that influence dough activity is crucial for successfully executing any baguette baking timing schedule. Even with a detailed plan, external factors and ingredient properties can cause your dough to behave differently from one bake to the next. Being aware of these influences allows you to make necessary adjustments on the fly and increase your chances of a perfect bake.
These factors interact with each other, creating a dynamic environment for your dough. For instance, high hydration dough might ferment slightly faster than a drier dough at the same temperature. Similarly, the type of flour used can affect both hydration needs and fermentation speed. Paying attention to these elements will help you become more intuitive with your baguette schedule.
Room Temperature and Humidity Considerations
Temperature is arguably the most significant factor affecting fermentation speed in your baguette baking timing schedule. Yeast is more active in warmer conditions. A dough that takes 2 hours to bulk ferment at 78°F (26°C) might take 3-4 hours at 70°F (21°C) and 12-18 hours at 40°F (4°C). Small variations in room temperature can significantly alter your timeline. If your kitchen is warmer than usual, your dough will progress faster; if it's cooler, it will be slower.
Humidity also plays a role, though less directly than temperature. High humidity can make the dough feel stickier and less prone to drying out during long proofs, which is generally beneficial. Low humidity can cause the dough surface to dry and form a skin, hindering expansion. Keeping the dough covered during fermentation and proofing is essential to manage surface moisture, regardless of ambient humidity, and helps maintain the intended pace of your baguette schedule.
Yeast Activity and Its Impact on Timing
The quantity and type of yeast used have a direct impact on how quickly your dough ferments and rises, critically influencing your baguette baking timing schedule. Using more yeast will generally result in a faster fermentation. For example, a recipe calling for 0.5% instant dry yeast based on flour weight might require 3-4 hours of bulk fermentation at room temperature, while using 1% might cut that time down to 2-3 hours. Active dry yeast typically needs to be rehydrated and might be slightly slower than instant dry yeast.
The viability of your yeast is also key. Old or improperly stored yeast may be less active, leading to sluggish fermentation and potentially doubling your expected proofing times. Using fresh, reliable yeast is crucial for predictable results. If you suspect your yeast is slow, a slightly warmer environment might help, but adjusting the amount of yeast in future bakes is a more reliable long-term solution for hitting your target baguette schedule.
Dough Hydration and Its Influence on Fermentation
Dough hydration, the ratio of water to flour, affects the consistency of the dough and can indirectly influence the fermentation speed within your baguette baking timing schedule. Higher hydration doughs (e.g., 75% hydration and above) are typically slacker and more extensible. The extra water makes it easier for yeast to access the starches and sugars in the flour, potentially leading to slightly faster fermentation compared to lower hydration doughs (e.g., 60-65% hydration) at the same temperature.
However, handling and shaping high hydration dough takes more practice and time. While fermentation might be marginally faster, the time required for effective mixing and especially the careful handling during shaping can add to the overall timeline. When adjusting hydration in a recipe, be prepared for potential knock-on effects on both fermentation speed and the time needed for the manual steps in your baguette schedule.
Flour Type and Its Effect on Baking Time
The type of flour used in your baguette recipe impacts not only the dough's structure but also its fermentation characteristics, influencing your baguette baking timing schedule. Different flours absorb water differently and contain varying levels of protein and enzymes. Strong bread flour with high protein content (e.g., 12-14%) develops gluten readily and can handle longer fermentation periods, often used in traditional baguette recipes. All-purpose flour with lower protein (e.g., 10-12%) might ferment slightly faster and develop gluten less robustly, potentially requiring shorter fermentation times.
Flours also contain enzymes that break down starches into sugars, providing food for the yeast and contributing to crust browning. Highly enzymatic flours can lead to faster fermentation and more browning. While the baking time itself (the 20-30 minutes in the oven) is relatively consistent regardless of flour type, the flour's properties significantly affect the fermentation and proofing times leading up to the bake, making flour choice a key consideration in your baguette schedule.
Troubleshooting Your Baguette Baking Schedule
Even with a perfect baguette baking timing schedule planned, sometimes things don't go exactly as expected. Dough can be unpredictable! Knowing how to identify common issues and having strategies to address them can save your bake and help you learn for next time. Don't get discouraged by setbacks; troubleshooting is a normal part of the baking process and helps you refine your understanding of dough behavior.
Being observant is key. Pay attention to how the dough feels, looks, and smells at each stage. Is it puffy enough? Is it too sticky? Does it smell yeasty or overly alcoholic? These sensory cues provide valuable information about whether your baguette schedule is progressing as planned or if adjustments are needed.
Problem: Dough Rising Too Quickly
If your dough is zooming through its fermentation or proofing stages faster than your baguette baking timing schedule anticipates, the most likely culprits are a warm environment or overly active yeast (perhaps you used slightly too much, or it's particularly vigorous). For example, if your bulk fermentation is supposed to take 3 hours but it's already doubled in 1.5 hours, it's rising too fast.
To slow things down, the simplest solution is to move the dough to a cooler location. This could be a cooler spot in your kitchen, a basement, or even the refrigerator for a short period (15-30 minutes) to bring the temperature down. If it's the final proof and the baguettes are rising too fast, you can place them gently in the refrigerator while your oven finishes preheating. For future bakes, consider using slightly less yeast or a cooler fermentation temperature in your baguette schedule.
Problem: Dough Rising Too Slowly
Conversely, if your dough is sluggish and not rising according to your baguette baking timing schedule, the issue is usually a cool environment or inactive yeast. For example, if your recipe calls for a 2-hour final proof at room temperature, but after 3 hours the baguettes show minimal signs of expansion, fermentation is too slow.
To speed things up, find a warmer spot for your dough. This could be near a warm appliance (not on a hot surface), in a slightly warmed oven (turned off, with just the light on), or in a proofer box if you have one set to around 75-80°F (24-27°C). Ensure your yeast is fresh for future bakes, and consider using slightly warmer water when mixing the dough initially. Adjusting the fermentation temperature in your future baguette schedule is the most reliable way to control speed.
Problem: Over-Proofed Dough Solutions
Over-proofed dough feels very airy, fragile, and may even start to collapse. It often smells strongly of alcohol. If your baguettes have over-proofed during the final rise according to your baguette baking timing schedule, they have exhausted much of their rising power. Baking them as is will likely result in flat loaves with little oven spring and a dense crumb.
If caught early (just slightly over-proofed), you might still get a decent loaf, but significant over-proofing is hard to fully recover from. One potential fix is to very gently reshape the dough and give it a very short final proof (perhaps only 30-45 minutes) before baking immediately. This allows some gas to be redistributed and builds a little tension, but handle with extreme care to avoid deflating it completely. Prevention is better: monitor your dough closely during the final proof and bake when it's ready, not just when the clock says so in your baguette schedule.
Under-proofed dough feels dense and tight, resists shaping, and doesn't show significant volume increase. When baked, it results in poor oven spring, a tight, often gummy crumb, and a thick crust. If your baguettes are under-proofed according to your baguette baking timing schedule when it's time to bake, they need more time.
The solution is simple: give them more time to proof! If they are in the final proofing stage, let them continue to rise in a warm spot until they pass the poke test (indentation springs back slowly). This might mean delaying your planned bake time by 30 minutes to an hour or even longer. If you realize the bulk fermentation was too short, you can extend that stage as well, performing additional folds if needed. Patience is key when correcting an under-proofed baguette schedule.
Tips for a Successful Baguette Baking Timing Schedule
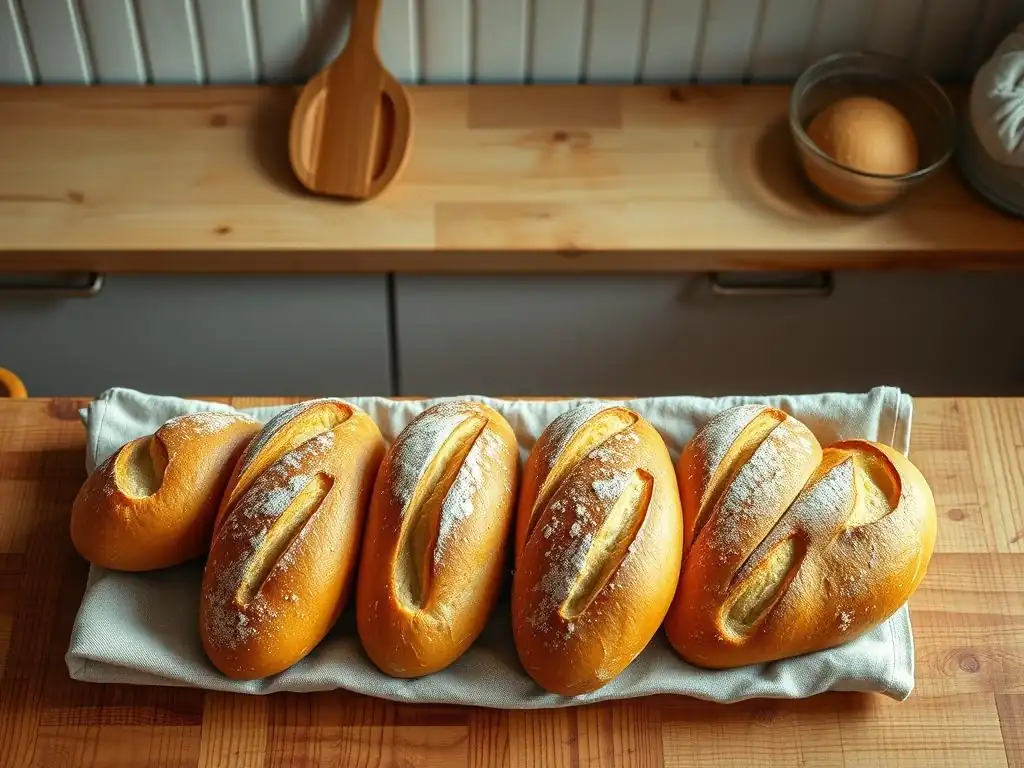
Developing a reliable baguette baking timing schedule is an iterative process. Each bake is an opportunity to learn how your specific environment and ingredients interact. Implementing a few key practices can significantly improve your consistency and help you achieve perfect baguettes more often.
These tips focus on observation, record-keeping, and managing your baking environment. They empower you to move from passively following a recipe to actively managing the process based on your dough's needs, ultimately leading to greater success with your baguette schedule.
Using a Baking Journal to Track Your Results
A baking journal is an invaluable tool for refining your baguette baking timing schedule. For each bake, record details like the date, recipe used, ingredient weights, water temperature, ambient room temperature and humidity, and the actual time each stage took (mixing, bulk fermentation start/end, final proof start/end, bake time). Also note observations about the dough's behavior (how it felt, how much it rose) and the final outcome (crust color, crumb structure, flavor).
Reviewing your journal entries helps you identify patterns. Did the dough ferment faster when the kitchen was warmer? Did using a different flour change the proofing time? This data allows you to make informed adjustments to your future baguette schedule, predicting how long stages will take under different conditions and troubleshooting issues more effectively.
Adjusting Your Schedule Based on Experience
As you gain experience, you'll develop an intuition for how your dough should look and feel at each stage, allowing you to adjust your baguette baking timing schedule in real-time. Don't be a slave to the clock if the dough isn't ready. If your recipe says bulk fermentation is 3 hours, but after 2.5 hours the dough looks and feels ready (significantly increased in volume, bubbly), move on to the next step. Conversely, if 3 hours have passed and the dough is still dense and hasn't risen much, give it more time.
Learning to read the dough is more important than strictly adhering to times listed in a recipe or sample baguette schedule, as these are often averages. Use the times as a guideline, but let the dough's development be your ultimate indicator of when to proceed to the next stage. This flexibility is a hallmark of experienced bakers.
Maintaining Consistent Temperature and Humidity
While you can't control the weather, you can take steps to maintain a more consistent environment for your dough, making your baguette baking timing schedule more predictable. Avoid placing dough directly in drafts or near heat sources like ovens or sunny windows, which can cause uneven fermentation. Using a proofing box (even a DIY one with an oven and light) or placing the dough in a consistent location can help.
If your kitchen is consistently cool, you might need to use slightly warmer water when mixing or rely on longer fermentation times, perhaps incorporating a cold retard into your baguette schedule. If it's consistently warm, cooler water or less yeast might be necessary. Covering your dough properly (plastic wrap, damp towel, or a lid) helps maintain humidity around the dough surface, preventing drying and ensuring a more consistent proof.
The importance of Patience in Baguette Baking
Perhaps the most crucial tip for success with any baguette baking timing schedule is patience. Good bread takes time. Rushing the process, especially fermentation and proofing, will inevitably compromise the flavor and texture of your baguettes. Allow the dough the time it needs to develop properly at each stage.
Even when troubleshooting, patience is key. If the dough is rising slowly, give it the extra time it requires rather than trying to force it with excessive heat. If you've planned an overnight schedule, resist the urge to check on the dough constantly in the fridge; trust the process. Embracing patience will lead to better bread and a more enjoyable baking experience, making your dedication to the baguette schedule truly pay off.
Advanced Baguette Baking Schedules: Exploring Variations
Once you've mastered the basic baguette baking timing schedule, you might want to explore more advanced techniques that enhance flavor and texture. Incorporating pre-ferments or utilizing controlled cold fermentation methods can elevate your baguettes to the next level, though they often add complexity to the timing.
These advanced schedules are not necessarily "better" than simpler ones, but they offer different avenues for flavor development and scheduling convenience. Experimenting with these variations allows you to discover what kind of baguette you enjoy baking and eating the most, and how different timing strategies impact the final loaf.
Incorporating a Poolish or Biga for Enhanced Flavor
Adding a pre-ferment like a poolish (a wet, liquid starter made of equal parts flour and water, plus a tiny amount of yeast) or a biga (a stiffer starter with less water) is a common way to boost flavor and improve the structure of baguettes. These starters are typically mixed 12-16 hours before the main dough mix, allowing a long, slow fermentation to develop complex flavors and active yeast.
Integrating a pre-ferment into your baguette baking timing schedule means adding an initial step the day before you plan to mix the main dough. For example, if you plan to mix your main dough on Saturday morning, you would mix the poolish or biga on Friday evening. This pre-ferment then ferments at room temperature or in the refrigerator before being added to the final dough mix. This extra step adds time to the overall process but contributes significantly to the baguette's aroma and taste.
Using a Retarder for Controlled Fermentation
A retarder is essentially a temperature-controlled refrigerator specifically designed for dough. Using a retarder (or even just your home refrigerator with careful temperature monitoring) allows for precise control over the cold fermentation stage in your baguette baking timing schedule. This enables very long fermentation periods (24-72 hours is possible) at low temperatures, leading to maximum flavor development and convenient scheduling.
With a retarder, you can mix the dough, perform a short bulk fermentation at room temperature, shape the baguettes, and then place them in the retarder for a long, slow final proof. This means you can prepare baguettes days in advance and bake them straight from the fridge whenever you're ready. This level of control over the baguette schedule is ideal for commercial bakeries but can also be achieved at home with careful use of your refrigerator and observation of the dough.
Conclusion: Achieving Perfect Baguettes with a Precise Baking Schedule
Mastering the baguette baking timing schedule is the cornerstone of consistently baking perfect baguettes. It's a careful dance between time, temperature, and ingredient activity, where each stage builds upon the last to create that iconic loaf with its crisp crust and airy interior. While it might seem daunting at first, understanding the purpose of each step and how factors like temperature and yeast activity influence the timeline empowers you to take control of your bake.
By planning your schedule backward from your desired bake time, calculating appropriate fermentation and proofing durations, and accounting for hands-on time like mixing and shaping, you build a solid framework. Using sample schedules as a starting point and then refining them based on your own experience and observations – perhaps with the help of a baking journal – allows you to create a personalized baguette schedule that works for you and consistently yields delicious results.
Refining Your Baguette Baking Timing for Consistent Results
Consistency in baguette baking comes from understanding and controlling your baguette baking timing schedule. Pay attention to how your dough responds in your specific kitchen environment. Is your room temperature consistently cooler or warmer than the recipe assumes? Does your yeast seem particularly active? By making small, informed adjustments to fermentation times or temperatures based on these observations, you can bring your dough back in line with the intended pace.
Remember that baking is both an art and a science. While the science provides the principles behind fermentation and dough development, the art is in learning to read your dough and adapt your baguette schedule accordingly. With practice, patience, and careful planning, you will refine your approach, troubleshoot challenges effectively, and ultimately achieve consistent, perfect baguettes that you'll be proud to share.
Frequently Asked Questions
What is the most important factor in a Baguette Baking Timing Schedule?
The most important factor is understanding the fermentation process. This directly impacts the final texture and flavor of your baguette.
How long does the entire Baguette Baking Timing Schedule typically take?
The total time can vary, but generally, expect around 24 to 36 hours from start to finish. This includes the bulk fermentation, shaping, and proofing stages.
Can I shorten the Baguette Baking Timing Schedule?
While possible, shortening it significantly can compromise the flavor development. You can use more yeast, but the taste may be less complex.
What happens if I over-proof my baguette dough?
Over-proofing can lead to a flat, dense baguette. The dough will be too weak to hold its shape during baking.
How does temperature affect the Baguette Baking Timing Schedule?
Warmer temperatures will accelerate the fermentation process, requiring shorter proofing times. Colder temperatures slow it down, necessitating longer times.
Final Reflection: The Art and Science of Baguette Timing
Mastering the baguette baking schedule isn't just about achieving a perfectly crisp crust; it's about understanding the delicate dance between time, temperature, and the transformative power of yeast. The precise timing outlined in this article is crucial not only for achieving optimal results but also for understanding the fundamental principles behind successful bread making. This knowledge empowers bakers of all levels to confidently tackle this seemingly complex process.
The influence of a perfectly timed baguette extends far beyond the kitchen. It represents a connection to tradition, a celebration of simple ingredients elevated through careful technique, and a testament to the patience required for true mastery. Bread is the staff of life,
a common saying reminds us, but it's the timing of that staff's creation that truly elevates it to an art form. The rhythmic process, from initial mixing to the final oven spring, is a meditative experience, a reminder of the slow, deliberate pace often lost in our fast-paced world.
Now, consider your own baking journey. What aspects of the baguette baking schedule resonate most with you? Perhaps it's the precision of the cold fermentation, the anticipation of the oven spring, or the sheer satisfaction of slicing into a perfectly crafted loaf. Whatever it may be, I encourage you to embrace the process, experiment with different timings, and discover the joy of creating something beautiful and delicious with your own two hands. The perfect baguette awaits – all it needs is your time and dedication.
Unlock Your Inner Boulanger: Bake the Perfect Baguette!
Thanks for joining us on this journey to baguette perfection! We hope you’ve gained valuable insights into planning the perfect baking schedule. Now it's time to put your knowledge into practice.
Here's how to take the next step:
- Start baking! Choose your favorite recipe (or try a new one! ), and use the timing guide to create your perfect baguette baking schedule. This is your chance to master the art of the perfect crust.
- Share your success! Post a picture of your freshly baked baguette on social media and tag us – we’d love to see your culinary creations!
- Explore more bread recipes on our website; we have tons of fantastic recipes waiting for you to discover.
Ready to transform your kitchen into a Parisian bakery? What unique twist will you add to your next baguette creation?