
Baguette Troubleshooting: Dense Crumb? Here's Why.

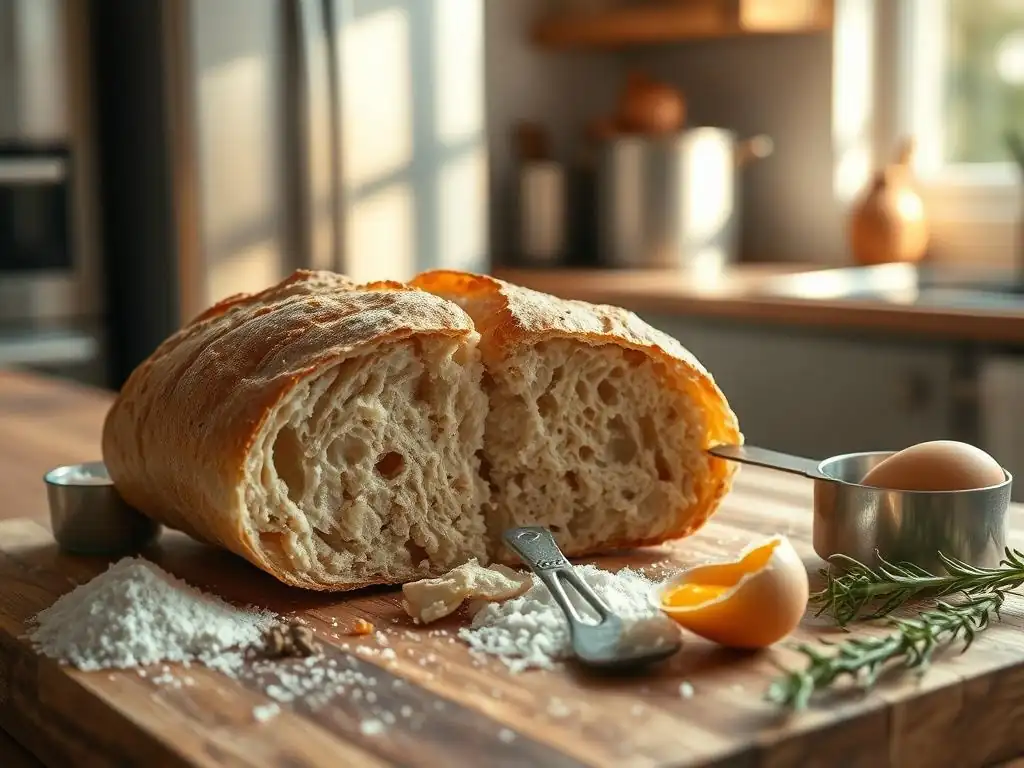
Welcome to BakeWithEase, your guide to conquering the world of baking! Ever wondered what causes a dense baguette crumb? Dive into our latest exploration and discover the secrets to achieving that perfect, airy texture. Unravel the mysteries behind common baking mishaps and elevate your bread-making skills with our expert tips and tricks. Let's bake!
- Introduction: Achieving the Perfect Baguette Crumb
- Understanding Baguette Crumb Structure
- Common Reasons for a Dense Baguette Crumb
- Diagnosing Your Dense Crumb
- Tips for Improving Baguette Crumb
- Conclusion: Achieving the Ideal Open Crumb Baguette
- Frequently Asked Questions
- Final Reflection: The Pursuit of the Perfect Crumb
- Unleash Your Inner Boulanger: Perfect Baguettes Await!
Introduction: Achieving the Perfect Baguette Crumb
Baking a baguette is a truly rewarding experience, culminating in that iconic long loaf with a crisp crust and, ideally, a beautifully open, airy crumb. However, many home bakers encounter the frustrating issue of a dense baguette crumb. Instead of large, irregular holes separated by thin walls of dough, you might find a tight, uniform structure reminiscent of sandwich bread.
This dense crumb not only impacts the texture, making the baguette heavy and less pleasant to chew, but it also affects the flavor, preventing the full development of those complex, subtle notes that make a great baguette sing. Understanding the common reasons for a dense baguette crumb is the first step towards achieving that coveted open structure.
This guide delves into the key factors that influence the internal structure of your baguette, from the initial mixing of ingredients to the final moments in the oven. We'll explore the potential pitfalls at each stage and provide practical insights to help you diagnose why your baguette crumb might be falling short. By systematically addressing common issues related to ingredients, technique, and process timing, you can significantly improve your results and consistently bake baguettes with the light, airy crumb you're aiming for. Let's troubleshoot those dense baguette crumb reasons together!
Understanding Baguette Crumb Structure
Characteristics of a Good Baguette Crumb
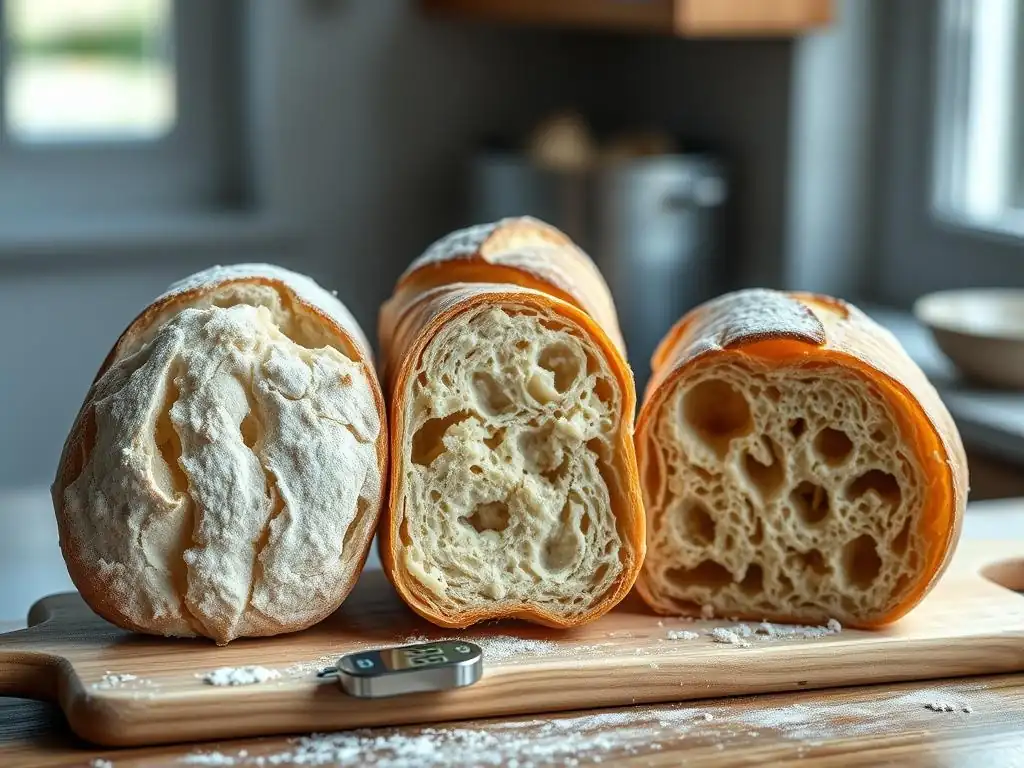
A hallmark of a well-baked baguette is its crumb structure. Ideally, the interior should display an open, irregular pattern of varying-sized air pockets, sometimes referred to as an 'open crumb' or 'alveolated' structure. These air pockets should be surrounded by thin, translucent walls of dough, indicating proper gluten development and fermentation. A truly excellent baguette crumb feels light and airy in the mouth, providing a pleasant contrast to the crisp crust. It's not uniform like a sponge but rather a dynamic landscape of bubbles.
This desired structure is not just about aesthetics; it's a direct result of successful biological and physical processes during fermentation and baking. Large, irregular holes suggest vigorous yeast activity producing carbon dioxide gas, combined with a strong, extensible gluten network capable of trapping that gas and expanding significantly. The thin walls indicate that the dough was properly hydrated and handled gently, allowing the gas pockets to expand without collapsing. Achieving this texture is often the primary goal for bakers tackling the classic baguette.
Crumb Structure's Impact on Texture and Flavor
The internal crumb structure profoundly affects the overall eating experience of a baguette. A dense baguette crumb results in a heavy, sometimes gummy texture that lacks the characteristic chewiness and lightness of a traditional baguette. This can make the bread feel less satisfying and harder to digest. Conversely, an open crumb provides a delightful contrast to the crisp exterior, offering a tender yet resilient chew. The varying sizes of the air pockets contribute to a more complex mouthfeel.
Beyond texture, the crumb structure also influences flavor. The large surface area created by an open crumb allows volatile flavor compounds, produced during fermentation, to be released more readily when you bite into the bread. A dense crumb can trap these flavors, resulting in a flatter taste profile. Furthermore, the proper development of an open crumb is closely linked to optimal fermentation, which itself is crucial for developing depth of flavor and complexity in the bread. Thus, a dense baguette crumb often signals underlying issues that also compromise taste.
Common Reasons for a Dense Baguette Crumb
1. Yeast Activity
Insufficient Yeast: Testing and Activation
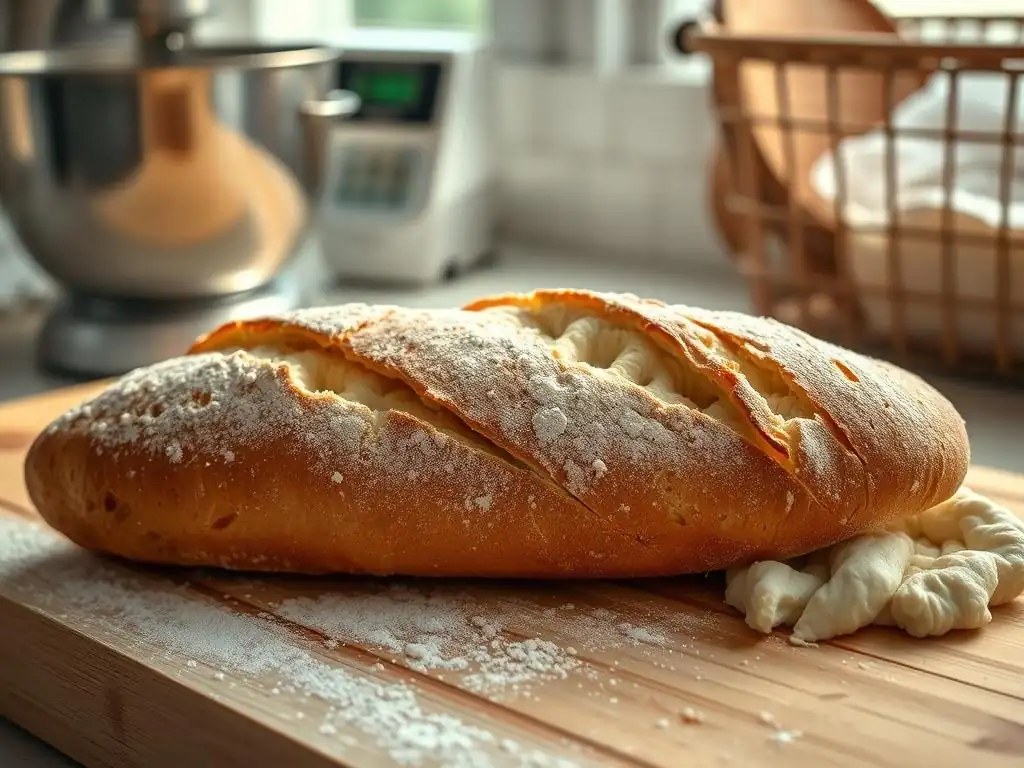
One primary reason for a dense baguette crumb can be insufficient yeast activity. Yeast is the engine of fermentation, producing the carbon dioxide gas that inflates the dough and creates the airy structure. If there isn't enough yeast, or if the yeast isn't active, the dough won't rise adequately during bulk fermentation or proofing, leading to a tight, compact crumb. For instance, using half the recommended amount of yeast in a recipe designed for a specific fermentation time will almost certainly result in a denser loaf, as there simply aren't enough microorganisms to produce the necessary gas volume.
To test if your active dry yeast is still alive and active, you can perform a simple test. In a small bowl, combine about 1 teaspoon of yeast with 1 teaspoon of sugar and 1/4 cup of lukewarm water (around 105-115°F or 40-46°C). Stir gently and let it sit for 5-10 minutes.
If the mixture becomes foamy and bubbly, the yeast is active and ready to use. If it remains flat or shows only minimal activity, your yeast may be dead or inactive and should be replaced. For instant yeast, while it doesn't strictly require proofing, a lack of rise in the dough after the initial mixing and rest period can indicate an issue with the yeast itself or the water temperature used.
Expired Yeast: Replacement
Using expired yeast is a common culprit behind a dense baguette crumb. Yeast is a living organism, and like any living thing, it has a shelf life. Over time, the yeast cells die off, significantly reducing their leavening power. Even if some cells are still alive, the population may be too small to effectively ferment the dough and produce enough gas for an open crumb. Checking the expiration date on your yeast package is crucial. While yeast stored properly in an airtight container in the refrigerator or freezer might last slightly beyond its printed date, its activity will decline.
If your yeast is past its expiration date, or if the activation test mentioned above fails, it's best to replace it with a fresh package. A small investment in new yeast can save you the frustration of a failed bake and a dense baguette crumb. Proper storage is also key; once opened, yeast should be stored in an airtight container in a cool, dry place, preferably the refrigerator or freezer, to extend its viability and ensure consistent leavening performance for future bakes.
2. Dough Hydration
Insufficient Water: Gluten Development Issues
Dough hydration, which is the ratio of water to flour by weight, plays a critical role in crumb structure. Baguette dough is typically made with relatively high hydration, often ranging from 70% to 80% or even higher. Insufficient water, or low hydration, limits the flour's ability to absorb moisture and for the gluten proteins (glutenin and gliadin) to form a strong, elastic network. Without enough water, the dough will be stiff and difficult to work with, and the gluten development will be stunted.
A poorly developed gluten network is unable to effectively trap the carbon dioxide gas produced by the yeast. As a result, the gas escapes, and the dough cannot expand properly, leading to a dense, tight crumb with small, uniform holes. Imagine trying to blow up a balloon made of stiff, brittle material versus one made of flexible rubber – the latter expands much more easily and holds air better. Similarly, a well-hydrated dough allows for a more extensible gluten network that can stretch around the gas bubbles, facilitating the development of an open crumb.
Correcting Low Hydration: Adding Water Carefully
If you suspect your dough hydration is too low based on the recipe or the dough's feel (it's stiff, crumbly, or very difficult to stretch), you can sometimes correct this by adding more water. This should be done gradually and carefully during the initial mixing or early stages of kneading. Water can be added in small increments, perhaps a tablespoon at a time, allowing it to be absorbed by the dough before adding more. You can use the 'pincer' method or folding to incorporate the water.
Alternatively, for very stiff doughs, you might try the 'autolyse' technique if you haven't already. This involves mixing just the flour and water from the recipe and letting it rest for 20-60 minutes before adding the yeast and salt. This rest period allows the flour to fully hydrate and enzymes to start breaking down proteins, which helps with gluten development even with less effort. If you encounter consistently low hydration issues, double-check your scale calibration or measure ingredients by weight, not volume, for accuracy, as volume measurements for flour can be highly variable.
3. Kneading Technique
Under-Kneading: Identification and Correction
Under-kneading is a frequent contributor to a dense baguette crumb. Kneading develops the gluten network, which provides the structure and elasticity necessary for the dough to trap gas and rise. If the dough is not kneaded enough, the gluten strands remain weak and disconnected. Consequently, the dough lacks the strength to hold the gas produced during fermentation, leading to poor volume and a tight, uneven crumb structure. The dough might feel rough, tearing easily when stretched rather than forming a thin membrane.
You can identify under-kneaded dough using the windowpane test. Take a small piece of dough and gently stretch it between your fingers. If you can stretch it thinly enough to see light through it without it tearing, the gluten is well-developed. If it tears quickly and doesn't stretch, it needs more kneading.
To correct under-kneading, continue kneading by hand or mixer. For instance, if using a stand mixer, you might need to knead for 8-12 minutes on medium speed instead of the 5-7 minutes specified in some recipes, depending on the flour and mixer. By hand, this could mean an extra 10-15 minutes of work. The dough should become smooth, elastic, and pass the windowpane test.
Over-Kneading: Recognition and Prevention
While less common than under-kneading, over-kneading can also lead to issues, though it typically results in a tough texture rather than a dense crumb initially. However, excessively developed gluten can become tight and difficult to relax, potentially hindering gas expansion during proofing and baking, indirectly contributing to a less open structure or a tough, slightly dense result. Over-kneaded dough often feels very stiff, sticky, and can sometimes become slack and lose structure if pushed too far, as the gluten strands begin to break down.
Recognizing over-kneading involves paying attention to the dough's texture and behavior. If the dough feels unusually tight, resists stretching, or starts to become sticky and smeary after prolonged kneading, you might be over-kneading. Prevention is key: learn the signs of properly kneaded dough (smooth, elastic, passes windowpane test) and stop kneading once those signs are met. Relying on time alone can be misleading; the dough's feel is a better indicator. If you suspect you've slightly over-kneaded, giving the dough a longer rest period during bulk fermentation or proofing might help the gluten relax somewhat.
4. Bulk Fermentation
Insufficient Bulk Fermentation: Under-Proofing
Insufficient bulk fermentation (the first rise) is a major reason for a dense baguette crumb, often referred to as under-proofing. During this critical stage, yeast produces the majority of the gas that inflates the dough, and enzymes begin breaking down starches into sugars, contributing to flavor and crust color. If this stage is cut short, the dough hasn't had enough time to develop sufficient gas volume or for the gluten network to relax and become extensible enough to hold that gas.
Dough that has not bulk fermented long enough will look dense and potentially feel heavy. It might not have increased significantly in volume (a typical target is a 50-100% increase, depending on the recipe and temperature). When shaped and baked, under-proofed dough often experiences rapid, uncontrolled oven spring (often called a "blowout") as the yeast suddenly becomes very active in the heat, but the underdeveloped gluten cannot manage the rapid expansion, resulting in a tight, uneven, or dense crumb.
Over-Proofing: Signs and Consequences
While less common as a direct cause of dense crumb (it often leads to a collapsed structure), extreme over-proofing during bulk fermentation can indirectly contribute to a less desirable crumb. If the dough ferments for too long, the yeast consumes most of the available sugars, and the gluten structure can begin to degrade. The dough might rise significantly and then start to deflate slightly. It might smell strongly alcoholic or acidic.
When dough is severely over-proofed during bulk fermentation, it loses structural integrity. While it might have large air pockets initially, it often struggles to hold its shape during shaping and can collapse in the oven. This collapse results in a flatter loaf, and while some large holes might remain, the overall structure can be compromised, sometimes leading to a dense, gummy layer near the bottom of the loaf and an overall less airy texture compared to a properly proofed loaf.
5. Shaping Technique
Excessive Degassing: Gentle Handling
Shaping is a crucial step where you form the dough into its final baguette shape. However, improper handling during shaping, specifically excessive degassing, can lead to a dense baguette crumb. While you need to gently release some of the large gas bubbles formed during bulk fermentation, you want to preserve a significant amount of the trapped gas and the network of smaller bubbles that contribute to an open crumb. Vigorously punching down the dough or handling it roughly will expel too much gas, leaving little to expand during proofing and baking.
Think of the dough after bulk fermentation as a delicate structure of interconnected bubbles. When shaping, the goal is to consolidate the dough and create tension on the surface without destroying this internal network. Techniques like folding and rolling should be firm enough to create shape and tension but gentle enough to leave life in the dough. Avoiding excessive flour on your work surface also helps prevent you from needing to manhandle the dough to get it to stick together. A gentle touch preserves the internal structure essential for an airy crumb.
Improper Sealing: Preventing Air Loss
Another shaping issue contributing to a dense baguette crumb is improper sealing of the seam. Baguettes are typically formed by folding the dough onto itself multiple times and then sealing the final seam along the bottom. If this seam is not properly pinched or sealed, it can open up during proofing or in the oven. When the seam opens, gas escapes from the loaf instead of being trapped within the gluten network to inflate the bread.
An open seam allows the precious carbon dioxide to leak out, preventing the dough from expanding fully. This results in reduced oven spring and a denser interior structure. To ensure a good seal, use the pad of your thumb or fingers to firmly pinch the dough together along the entire length of the seam. The seam should be placed face down on the couche or proofing surface so the weight of the loaf helps keep it closed during proofing. A well-sealed loaf retains its gas, leading to better volume and a more open crumb.
6. Baking Temperature and Time
Low Oven Temperature: Optimal Rise
Baking temperature is critical for achieving optimal oven spring, which significantly impacts the final crumb structure. Baguettes are typically baked at high temperatures, often between 450°F and 475°F (230°C and 245°C), sometimes even higher initially. This high heat provides a burst of energy that causes the yeast to rapidly produce gas and the trapped gases to expand quickly. This rapid expansion, known as oven spring, is what gives the baguette its final volume and contributes to an open crumb.
If the oven temperature is too low, the dough heats up too slowly. The yeast activity and gas expansion are less vigorous, and the gluten structure sets before maximum expansion is achieved. This leads to reduced oven spring and a denser interior. Furthermore, a lower temperature might not properly set the crust quickly enough, allowing some gas to escape before the structure is firm. Ensure your oven is accurately preheated to the specified temperature, ideally using an oven thermometer, as many home ovens can be off by 25-50°F (15-30°C).
Insufficient Baking Time: Ensuring Thorough Baking
Baking for too short a time can also contribute to a dense or gummy texture, although perhaps not a fundamentally dense crumb structure caused by leavening issues. If a baguette is removed from the oven before it is fully baked through, the interior may still contain too much moisture and the starches may not be fully set. This results in a doughy, sometimes gummy texture, even if the crumb structure itself isn't necessarily tight.
A properly baked baguette should have an internal temperature of around 205-210°F (96-99°C). While you don't always need to use a thermometer, a well-baked baguette will sound hollow when tapped on the bottom and will have a deep golden-brown crust. If your baguettes look pale or feel heavy for their size, they might need a few more minutes in the oven. Extending the baking time slightly at a slightly reduced temperature (e.g., dropping to 425°F/220°C after the initial burst) can help ensure the interior is fully cooked without burning the crust.
Diagnosing Your Dense Crumb
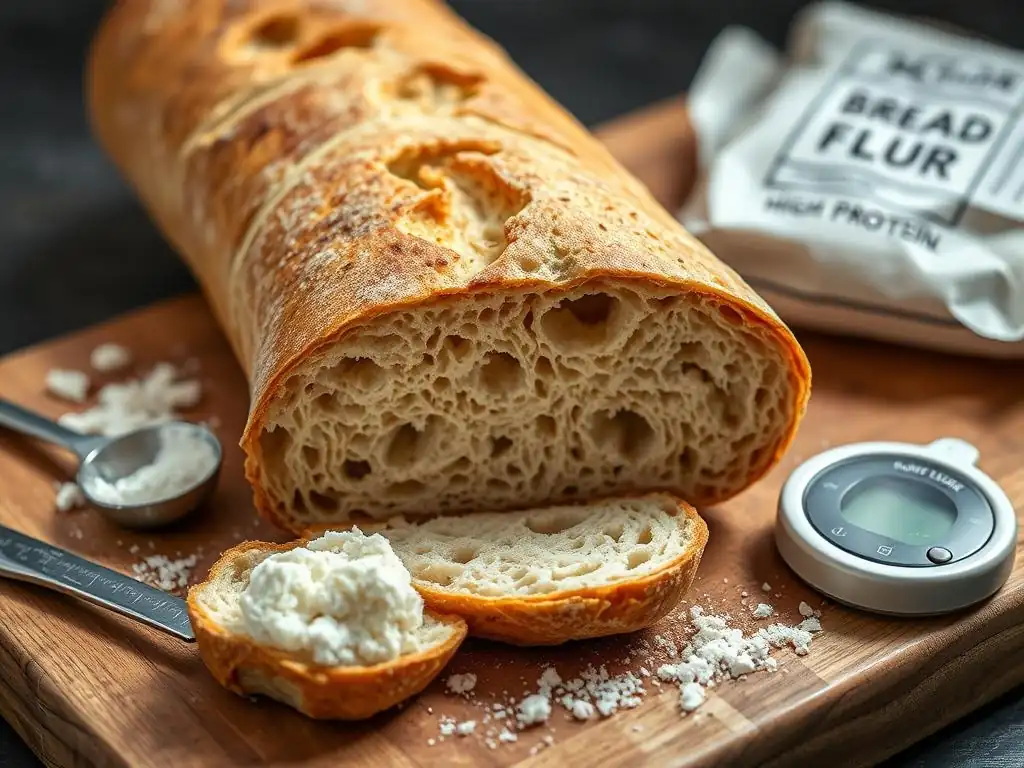
To pinpoint the specific dense baguette crumb reasons you're facing, a systematic review of your process is essential. Don't just guess; actively evaluate each step of your baking journey.
Recipe and Ingredient Review
- Check your recipe carefully: Are you using the correct type of flour (bread flour is common for baguettes)? Is the hydration percentage appropriate (typically 70%+)? Are the yeast and salt quantities correct relative to the flour weight?
- Verify ingredient freshness: Is your yeast active? Is your flour fresh and not rancid? Old ingredients can significantly impact results.
- Measure accurately: Are you weighing your ingredients using a digital scale? Volume measurements, especially for flour, can be highly inaccurate and lead to incorrect hydration.
Dough Handling Evaluation
- Assess your mixing and kneading: Does the dough look and feel smooth and elastic after kneading? Does it pass the windowpane test? Under-kneaded dough is a frequent cause of dense crumb.
- Evaluate bulk fermentation: Did the dough increase sufficiently in volume during the first rise (e.g., double)? How long did it take, and what was the ambient temperature? Was it too short (under-proofed) or potentially too long (over-proofed)?
- Examine your shaping technique: Were you gentle with the dough, or did you punch out too much air? Was the seam properly sealed? Check for blowouts along the seam after baking.
- Consider final proofing: Did the shaped baguettes rise adequately before baking? Were they under-proofed (not enough rise) or over-proofed (puffy, fragile, potentially deflating)?
Baking Process Assessment
- Check oven temperature: Did you preheat your oven thoroughly? Is your oven temperature accurate (use an oven thermometer)? Baking in a too-cool oven inhibits oven spring.
- Evaluate steam: Did you use steam during the initial phase of baking? Steam keeps the crust soft, allowing the loaf to expand fully before the crust sets. Lack of steam can restrict oven spring.
- Assess baking time: Did you bake the baguettes long enough? Are they deeply golden brown and sound hollow when tapped? Under-baked baguettes can be gummy and seem dense.
- Review cooling: While not a primary cause of dense crumb structure, cutting into a hot baguette can make the interior seem gummy. Allow it to cool properly.
Tips for Improving Baguette Crumb
Improving your baguette crumb and avoiding a dense result involves refining your technique at each stage. Focus on consistency and observation.
Optimizing Yeast
- Always check your yeast's expiration date.
- If using active dry yeast, proof it in warm water with a pinch of sugar before adding to the dry ingredients to ensure it's active.
- Consider adjusting yeast quantity slightly based on ambient temperature – a little less in warm conditions, a little more in cool conditions, while still aiming for the recipe's target fermentation time.
- Store yeast properly in an airtight container in the refrigerator or freezer.
Mastering Hydration
- Measure flour and water by weight using a digital scale for accuracy.
- Don't be afraid of sticky dough; high hydration is key to an open crumb. Use wet hands or a bench scraper if needed.
- Consider the flour type – different flours absorb water differently. You might need to slightly adjust hydration based on your specific flour.
- If the dough feels too stiff, carefully add a tablespoon of water at a time during early kneading until the desired consistency is reached.
Perfecting Kneading
- Knead until the dough is smooth, elastic, and passes the windowpane test. This ensures a strong gluten network capable of trapping gas.
- Develop a feel for the dough; don't rely solely on timer recommendations, as mixing times vary by equipment and technique.
- Use techniques like stretch and folds during bulk fermentation to further strengthen the gluten network without aggressive kneading. Typically, 3-4 sets of folds over the first 1.5-2 hours of bulk fermentation can be very beneficial.
Controlling Fermentation
- Pay attention to the dough's volume increase and feel, not just the clock. Aim for the increase specified in your recipe (often 50-100% during bulk).
- Ferment at a consistent temperature if possible. Warmer temperatures speed up fermentation, cooler temperatures slow it down.
- Learn the signs of properly proofed dough before baking (it should feel airy but still have some resistance when gently poked). Under or over-proofing can lead to dense crumb reasons.
- Consider using a small amount of preferment (like a poolish or levain) which can contribute to a more open crumb and better flavor.
Refining Shaping
- Handle the dough gently during shaping to preserve trapped gas bubbles. Minimize punching or flattening.
- Focus on creating surface tension without tearing the dough.
- Ensure the final seam is securely sealed along the entire length of the baguette.
- Use a couche (linen cloth) or a well-floured surface to support the baguettes during final proofing, helping them maintain their shape and rise upwards rather than outwards.
Fine-Tuning Baking
- Always preheat your oven thoroughly, ideally for 30-60 minutes, with your baking surface (baking stone or steel) inside.
- Use an oven thermometer to verify your oven's actual temperature.
- Employ a steam method during the first 10-15 minutes of baking (e.g., pouring hot water into a preheated tray on the bottom rack, or using a Dutch oven/cloche). Steam is crucial for maximum oven spring.
- Bake until the baguettes are a deep golden brown and sound hollow when tapped on the bottom, indicating they are fully baked through.
- Allow baguettes to cool on a wire rack for at least 20-30 minutes before slicing to allow the interior structure to set.
Conclusion: Achieving the Ideal Open Crumb Baguette
Baking baguettes with a beautiful, open crumb is a skill that develops with practice and attention to detail. A dense baguette crumb is a common hurdle, but by understanding the underlying reasons – issues with yeast activity, dough hydration, kneading, fermentation timing, shaping technique, or baking conditions – you can systematically troubleshoot your process. Each step, from accurately weighing ingredients to providing adequate steam in the oven, plays a vital role in creating that light, airy interior.
Don't be discouraged by initial results that aren't perfect. Baking is a continuous learning process. By carefully reviewing your steps, making small adjustments based on the principles discussed here, and practicing regularly, you will gradually improve your results. Pay close attention to how your dough feels and behaves at each stage. Soon, you'll be consistently pulling beautiful baguettes with crisp crusts and wonderfully open crumbs from your oven, enjoying the satisfaction of mastering this classic bread. Keep baking, keep learning, and those dense crumb reasons will become a thing of the past!
Frequently Asked Questions
Why is my baguette crumb so dense?
A dense baguette crumb is often caused by insufficient gluten development during the mixing and kneading process, or under-proofing the dough before baking. A lack of proper hydration can also contribute.
What role does hydration play in baguette crumb density?
Hydration is crucial. If your dough is too dry, the crumb will be dense. Ensure you're using the correct water-to-flour ratio specified in your recipe.
Could over-kneading cause a dense baguette crumb?
While under-kneading is more common, over-kneading can also lead to a dense crumb. It weakens the gluten structure, preventing proper aeration.
How does proofing affect the crumb structure of a baguette?
Proper proofing allows the dough to rise and develop air pockets, resulting in a light and airy crumb. Under-proofing leaves the dough dense and compact.
What type of flour is best for achieving an open baguette crumb?
Bread flour, with its higher protein content, is recommended. It promotes stronger gluten development, which is essential for a light and airy baguette crumb.
Final Reflection: The Pursuit of the Perfect Crumb
The quest for a light, airy baguette crumb is a journey shared by bakers worldwide, and understanding the science behind a dense loaf is crucial to achieving that coveted texture. A seemingly simple bread, the baguette reveals complex interactions between flour, water, fermentation, and technique, highlighting the delicate balance required for baking success. This understanding isn't just about perfect loaves; it's about mastering a process and appreciating the artistry involved.
The frustration of a dense crumb is a familiar feeling to many home bakers, a stark contrast to the ethereal lightness of a perfectly executed baguette. It's a lesson in patience, precision, and the importance of understanding the fundamentals. This journey of troubleshooting, of identifying the culprit behind a heavy loaf, is a microcosm of the larger creative process: The only way to do great work is to love what you do.
- Steve Jobs. This applies equally to baking as it does to any creative endeavor; passion and persistence are key ingredients in achieving excellence.
Now, consider your own baking journey. What have you learned from your successes and failures? Don't be discouraged by a dense crumb; instead, see it as an opportunity to learn, to refine your technique, and to deepen your understanding of the baking process. Embrace the challenge, experiment with different flours, hydration levels, and fermentation times. The path to the perfect baguette is paved with experimentation, and each dense loaf brings you closer to mastering the art of bread making. The reward? Not just a delicious loaf, but a deeper appreciation for the craft itself.
Unleash Your Inner Boulanger: Perfect Baguettes Await!
Thanks for joining us on this baguette baking journey! We hope you’ve gained valuable insights into troubleshooting those pesky dense crumb issues. Now it’s time to put your newfound knowledge to the test!
- Bake a Better Baguette Today: Grab your ingredients and try the recipe again, focusing on the techniques we discussed. Remember, practice makes perfect!
- Share Your Success (or Struggles!): Post a picture of your baguette on social media using #BakeWithEaseBaguette – we'd love to see your results!
- Explore Advanced Techniques: Dive deeper into sourdough starters or explore different flour types to elevate your baguette game even further.
Ready to create the perfect crusty, airy baguette? What's your biggest baking challenge – and how will you tackle it next time?