
Troubleshooting Irregular Sourdough Holes: What Went Wrong?

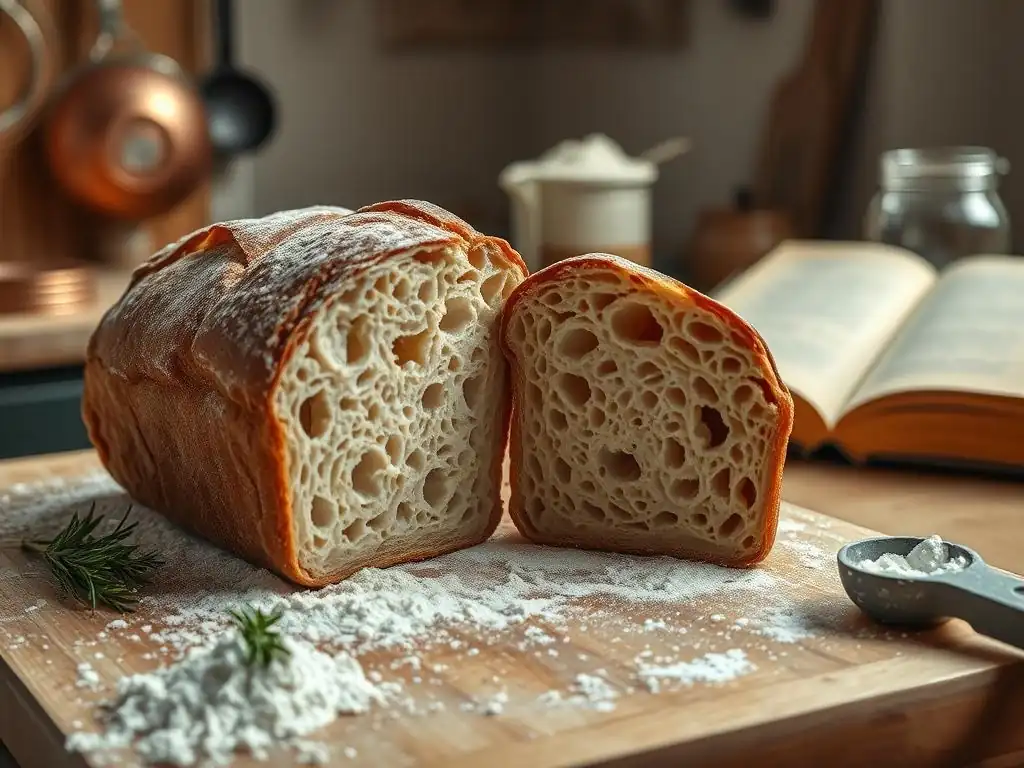
Welcome to BakeWithEase, where even the most intricate bakes become achievable! Ever wondered why your sourdough dreams are dashed by dense, uneven textures? Dive into our troubleshooting guide and unlock the secrets behind those elusive sourdough holes. Discover the common pitfalls and expert solutions to finally bake that picture-perfect loaf you've been striving for. Keep reading to diagnose why those sourdough holes won't appear and transform your baking today!
- Troubleshooting Irregular Sourdough Holes: Achieving the Perfect Crumb
- Understanding Sourdough Crumb Structure: Openness and Consistency
-
Common Factors Affecting Sourdough Crumb
- 1. Sourdough Starter Health: Activity and Performance
- 2. Dough Hydration: Balancing Moisture for Optimal Results
- 3. Gluten Development: Kneading and Folding Techniques
- 4. Proofing: Time, Temperature, and Visual Cues
- 5. Shaping: Tension and Structure Development
- 6. Baking: Oven Temperature, Steam, and Techniques
- Refining Your Sourdough Baking Process
- Advanced Sourdough Techniques
- Preventing Crumb Problems
- Troubleshooting Checklist: Addressing Hole Issues
- Conclusion: Patience and Practice in Achieving Sourdough Success.
-
Frequently Asked Questions
- Why aren't any holes appearing in my sourdough bread?
- My sourdough has giant, irregular holes. What causes this?
- How can I improve the shaping of my sourdough to get more even holes?
- What role does hydration play in the size and distribution of sourdough holes?
- How do I adjust the bulk fermentation process to get more consistent sourdough holes?
- Final Reflection: The Elusive Sourdough Hole – A Baker's Journey
- Unlock Your Sourdough's Potential: Get Those Perfect Holes!
Troubleshooting Irregular Sourdough Holes: Achieving the Perfect Crumb
Understanding Sourdough Crumb Structure: Openness and Consistency
The internal texture of a sourdough loaf, known as the crumb, is a key indicator of a successful bake. It's composed of a network of gluten that traps carbon dioxide produced by the fermentation process. The size, shape, and distribution of the holes within this network determine the crumb's appearance and mouthfeel, ranging from a tight, even structure to a dramatically open one. Achieving a desirable crumb is often a goal for sourdough bakers, and understanding its fundamental structure is the first step in troubleshooting when your sourdough holes won't appear as expected.
A well-developed crumb provides both structural integrity and a pleasant texture. The balance between the strength of the gluten network and the volume of gas produced dictates the final result. Factors like fermentation time, dough handling, and baking conditions all play a significant role in shaping this internal landscape. When you encounter issues like dense spots or large, irregular voids, it signals that one or more of these factors likely needs adjustment.
Desirable Sourdough Crumb: Characteristics of Success
A desirable sourdough crumb typically features a relatively open structure with holes that are varied in size but distributed fairly evenly throughout the loaf. These holes, or alveoli, should be surrounded by thin, glossy walls of well-developed gluten. This kind of crumb indicates proper fermentation, sufficient gluten development, and effective gas retention during proofing and baking.
For many bakers, the benchmark is an "open crumb," meaning larger, more irregular holes are desired. However, even in an open crumb, there shouldn't be huge tunnels or dense, heavy areas. A truly successful open crumb provides a light, airy texture while still having enough structure to hold butter or toppings without collapsing. Achieving this specific texture is a common goal, and understanding why sourdough holes won't appear in this desirable pattern requires attention to detail.
Causes of Large, Irregular Sourdough Holes
Large, irregular holes, often called "tunnels" or "caverns," can be a symptom of several underlying issues, distinct from a desired open crumb. These voids are frequently surrounded by dense, underdeveloped areas of dough. One common cause is uneven gluten development or inadequate shaping, leading to pockets of gas that aren't uniformly distributed throughout the dough. Imagine trying to inflate a balloon with weak spots – the air will rush into the strongest areas, leaving the weak spots collapsed.
Another significant factor is improper handling during shaping, which can trap large air bubbles or fail to create even tension across the dough surface. For example, incorporating too much flour on the counter during shaping can create dry layers that don't meld properly, resulting in voids. Similarly, insufficient degassing during the bulk fermentation or shaping stages can leave large pockets of carbon dioxide that expand excessively during baking, forming tunnels rather than a network of smaller, well-distributed holes.
Crumb Expectations: Open vs. Closed
Understanding the difference between an "open" and a "closed" crumb is crucial for setting realistic expectations and diagnosing problems. A closed crumb is characterized by a uniform, relatively dense structure with small, evenly distributed holes. This is often the desired result for sandwich bread or loaves intended for toasting. It suggests a well-fermented dough with solid gluten development, but perhaps less aggressive proofing or a lower hydration level.
An open crumb, on the other hand, features larger, more varied holes and is typically associated with artisanal loaves like country loaves or ciabatta. This is achieved through higher hydration levels, careful handling to preserve gas, and specific proofing and baking techniques designed to maximize oven spring and alveoli formation. If your goal is an open crumb but sourdough holes won't appear larger than pinpricks, you likely need to adjust hydration, fermentation time, or handling to encourage that structure. Conversely, if you aim for a closed crumb and get tunnels, it's a different set of issues.
Common Factors Affecting Sourdough Crumb
1. Sourdough Starter Health: Activity and Performance
The vitality of your sourdough starter is paramount to achieving a good crumb structure. A healthy, active starter is teeming with yeast and bacteria capable of producing enough carbon dioxide to leaven the dough effectively. If your starter is sluggish or weak, it simply won't generate sufficient gas to create an open or even a moderately airy crumb. This is often the first place to look if sourdough holes won't appear at all, resulting in a dense loaf.
An underperforming starter might be caused by irregular feeding schedules, incorrect feeding ratios, or unsuitable temperatures. For example, a starter fed 1:1:1 (starter:water:flour by weight) and kept at 75°F (24°C) should typically double in volume within 4-6 hours. If your starter takes significantly longer than this, or shows minimal activity after feeding, its leavening power is compromised. Using such a starter will inevitably lead to a poor rise and a tight crumb.
Evaluating Starter Strength: Visual Cues and Performance Tests
Assessing your starter's strength involves both observation and simple tests. Visually, a healthy starter should double or triple in volume after feeding, show many bubbles on the surface and throughout the jar, and have a pleasant, tangy aroma. It should also feel light and airy at its peak activity.
A reliable performance test is the "float test." Take a small spoonful of starter at its peak (when it has doubled/tripled and is full of bubbles) and gently drop it into a glass of water. If the starter floats, it indicates sufficient gas production and strength to leaven your dough. If it sinks, it likely needs more time, warmer temperatures, or more consistent feeding to build strength before being used in a bake, especially if sourdough holes won't appear in your finished bread.
Reviving a Weak Starter: Feeding, Temperature, and Time
Reviving a weak starter requires consistent care. The most effective method is regular, frequent feeding with a ratio that provides plenty of "food" for the microbes, such as 1:2:2 or even 1:3:3 (starter:water:flour). For example, discard all but 20g of starter, feed it with 40g water and 40g flour, mix well, and place it in a warm spot, ideally between 75-80°F (24-27°C).
Repeat this feeding process every 12 hours, or even every 8 hours if needed, discarding down to a small amount each time to ensure the microbes have ample fresh food and aren't competing too much. Using a mix of flours, like part whole wheat or rye, can also sometimes boost activity due to higher nutrient content. Within a few days of this consistent, warmer feeding schedule, you should observe a significant increase in activity, volume change, and bubble production, making it ready to tackle the job of creating open sourdough holes.
2. Dough Hydration: Balancing Moisture for Optimal Results
Dough hydration, the ratio of water to flour by weight, is one of the most significant factors influencing crumb structure. Higher hydration doughs (typically 75% hydration and above) are generally easier to achieve an open crumb with, as the extra water allows for greater expansion of the gluten network and trapped gas. However, working with very high hydration doughs can be challenging due to their stickiness and slackness.
Lower hydration doughs (65-70%) tend to produce a more regular, closed crumb. While it's harder to get large, open holes at lower hydrations, it's certainly possible to achieve a beautiful, even, and airy structure. If you're aiming for an open crumb but sourdough holes won't appear, consider gradually increasing your hydration by a few percentage points in your next few bakes.
Hydration's Impact on Sourdough Crumb
The amount of water in your dough directly affects how easily the gluten proteins can bond and develop into a strong, extensible network. More water allows the proteins to move and connect more freely, leading to a more flexible and stretchy dough capable of trapping larger pockets of gas. This flexibility is key to forming the thin walls characteristic of an open crumb.
Conversely, a dough that is too dry (low hydration) will be stiff and less extensible. While it might develop strength, it will resist stretching around the gas bubbles, resulting in a tighter, more uniform crumb structure. Understanding this relationship is vital; if your sourdough holes won't appear large and open, evaluating and potentially adjusting your hydration level is a critical step.
Hydration Adjustment: Practical Tips and Considerations
Adjusting hydration should be done gradually. If your standard recipe uses 70% hydration and yields a tight crumb, try increasing it to 72% or 73% for the next bake. Observe the dough's handling characteristics and the resulting crumb. Continue to increase incrementally until you reach a hydration level that gives you the desired crumb and is still manageable to work with.
Remember that different flours absorb water differently. Whole wheat flour absorbs significantly more water than white bread flour. Ambient humidity can also play a role. What works as 75% hydration with one flour in a dry climate might feel like 80% in a humid one. Always feel the dough and be prepared to slightly adjust the water based on its consistency, rather than strictly adhering to a number if it feels too dry or too wet for your experience level.
3. Gluten Development: Kneading and Folding Techniques
Gluten is the fundamental structure provider in bread dough. It's the network of proteins (glutenin and gliadin) that forms when flour and water are mixed and worked. This network is responsible for trapping the carbon dioxide gas produced by the starter, allowing the dough to rise and form the characteristic crumb structure. Without sufficient gluten development, your dough will be weak, unable to hold gas, and sourdough holes won't appear properly, leading to a dense, flat loaf.
Developing gluten involves hydrating the flour and then applying mechanical force through kneading or folding. This process aligns the protein strands and strengthens the network. A well-developed dough will feel elastic, smooth, and be able to stretch into a thin membrane without tearing (the "windowpane test").
Gluten's Crucial Role in Gas Retention
Think of the gluten network as millions of tiny, elastic balloons within the dough. As the starter ferments, it produces CO2 gas, which fills these balloons. A strong, well-developed gluten network is like durable balloon material – it can stretch significantly to accommodate the expanding gas without breaking. This allows the dough to increase in volume during bulk fermentation and proofing, and crucially, to achieve a good "oven spring" in the hot oven, where the trapped gases expand rapidly before the structure sets.
If the gluten is underdeveloped, the network is weak and fragile. The gas bubbles will escape easily or pop the weak walls, resulting in less rise and a tight, uneven crumb where sourdough holes won't appear as distinct voids. Conversely, overdeveloped gluten can become tight and inelastic, also hindering expansion.
Effective Kneading for Sourdough Structure
While sourdough often relies more on folding than intensive kneading, some initial kneading can be beneficial, especially for lower hydration doughs. The goal is to mechanically work the dough until it starts to feel smooth and elastic. Techniques like the stand mixer method or traditional hand kneading help align gluten strands quickly.
A common method for sourdough is a brief initial mix followed by rest periods (autolyse), then incorporating the starter and salt, and finally performing a few minutes of gentle kneading or mixing until the dough just starts to come together and show some initial strength. Avoid over-kneading, which can tear the developing gluten network, especially in high-hydration doughs.
Stretch and Folds: Building Strength and Evenness
Stretch and folds are the cornerstone of gluten development in many sourdough recipes, particularly for higher hydration doughs. This technique involves wetting your hands, gently stretching a portion of the dough up and folding it back over itself. This is repeated around the bowl, usually 3-4 times per set, with rest periods (typically 30-60 minutes) in between sets.
Performing several sets of stretch and folds over the first few hours of bulk fermentation builds strength and elasticity progressively while also helping to distribute the gas evenly throughout the dough. This gentle method is less likely to damage the delicate gluten network in wet doughs compared to aggressive kneading and helps create the structure needed for an open, even crumb where sourdough holes won't appear randomly or unevenly.
4. Proofing: Time, Temperature, and Visual Cues
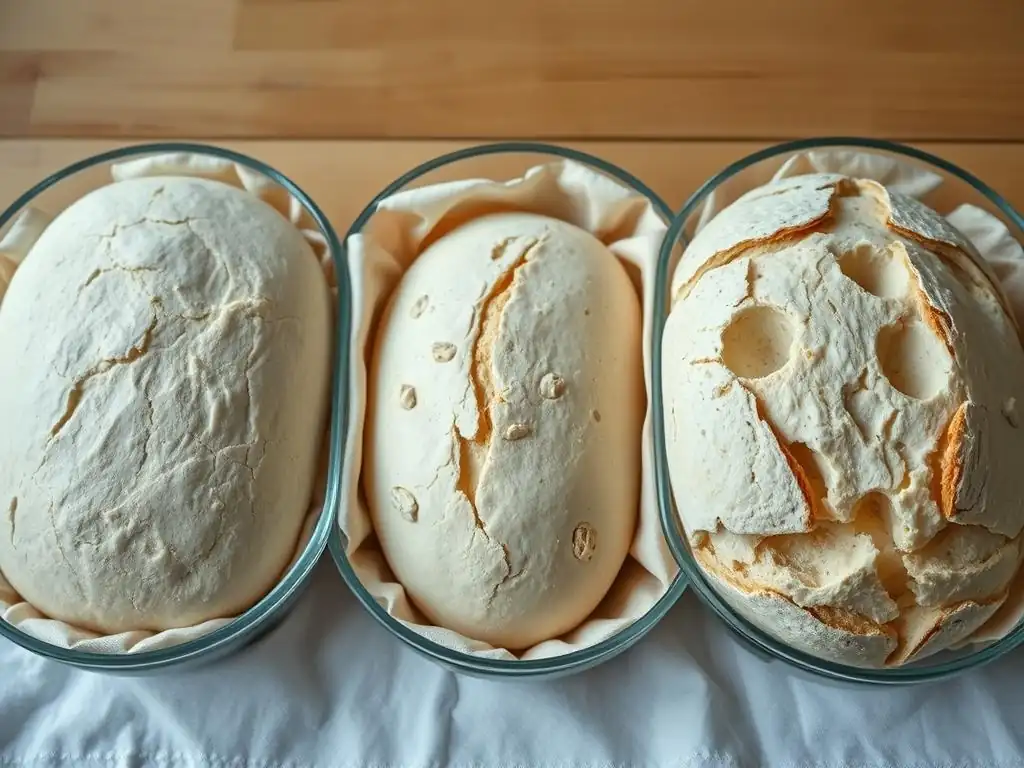
Proofing is the final rise of the shaped dough before baking. This is where the dough expands significantly as the starter continues to produce gas. Proper proofing is critical for crumb structure. Over-proofing or under-proofing can both lead to issues, including poor oven spring and an undesirable crumb where sourdough holes won't appear correctly.
The ideal proofing time and temperature are highly variable depending on your starter's activity, dough hydration, ambient temperature, and the specific recipe. Paying close attention to visual cues rather than just relying on a clock is essential for consistent results.
Recognizing Over-Proofed Sourdough
Over-proofed dough has fermented for too long or at too warm a temperature, causing the gluten structure to weaken and potentially collapse. Visual signs include a dough that looks very puffy and fragile, possibly spreading rather than holding its shape. If you gently poke it with a wet finger, the indentation will likely remain completely, or spring back very slowly, if at all.
Baking over-proofed dough often results in a loaf that spreads wide in the oven rather than springing upwards. The crumb tends to be dense and uniform, or sometimes has large, irregular holes coupled with dense areas, as the weakened structure couldn't hold the gas evenly. The flavor can also be overly sour or alcoholic. This is a common reason sourdough holes won't appear with good definition.
Identifying Under-Proofed Dough
Under-proofed dough hasn't fermented long enough for sufficient gas production and gluten relaxation. It will look less expanded than expected and feel dense and firm. When poked, the indentation will spring back quickly and completely.
Baking under-proofed dough typically results in a loaf with significant, often uncontrolled, oven spring, sometimes causing blowouts in weak spots. The crumb is usually dense, especially towards the bottom, with irregular, sometimes large, but often unevenly distributed holes, and a thick, chewy crust. While there might be some holes, they won't appear as a consistent, open structure if the dough wasn't proofed enough.
Optimizing Proofing: Time and Temperature Guidelines
Optimizing proofing involves finding the sweet spot where the dough has sufficient gas and strength but hasn't begun to degrade. Warm temperatures (around 75-80°F / 24-27°C) speed up proofing, while colder temperatures (like cold fermentation in the refrigerator, 35-40°F / 2-4°C) slow it down considerably, allowing for longer fermentation and flavor development.
A common technique is to bulk ferment at room temperature until the dough increases by about 50-75% in volume and shows significant bubbling, which might take 4-6 hours depending on temperature. After shaping, the final proof (often in a banneton) can be done at room temperature for 1-3 hours or cold in the refrigerator for 8-16 hours or even longer. Using the poke test and observing the dough's volume increase are the most reliable indicators of readiness.
5. Shaping: Tension and Structure Development
Proper shaping is more than just forming a nice-looking loaf; it's a critical step in building tension and creating a skin on the dough surface that will support the oven spring and contribute to a well-structured crumb. A poorly shaped loaf can result in uneven gas distribution, leading to dense spots or large, irregular voids where sourdough holes won't appear evenly.
The goal of shaping is to gently coax the dough into its final form while creating a taut outer layer. This tension helps the loaf hold its shape during proofing and baking, directing the expansion upwards rather than outwards. Different shapes (batard, boule) require slightly different techniques, but the principle of creating surface tension remains the same.
Shaping's Influence on Crumb Structure
The tension created during shaping acts like a skin that contains the expanding gases during baking. If the dough is shaped too loosely, this skin is weak, and the loaf will spread out, resulting in a flatter loaf with a denser crumb. If the shaping technique incorporates too much flour or isn't done smoothly, it can create seams or dry spots within the dough that prevent layers from fusing, leading to tunnels or large voids.
Effective shaping also helps redistribute gas bubbles that might have become too large during bulk fermentation, promoting a more even crumb structure. It's the final opportunity to ensure the dough is ready to perform in the oven. If sourdough holes won't appear consistently, refining your shaping technique is a key area to investigate.
Shaping Techniques for Consistent Results
Common shaping techniques involve gently degassing the dough slightly (but not completely) after bulk fermentation, pre-shaping into a rough ball or log, allowing a brief rest (bench rest) for the gluten to relax (15-30 minutes), and then final shaping. For a boule, this involves folding the edges into the center and then using the surface of your work area to create tension by rotating the dough while pulling it towards you.
For a batard, you might fold the dough into thirds, then fold it lengthwise and seal the seam, rolling it slightly to create tension. The key is to handle the dough gently to preserve internal gas while creating significant surface tension. Using a little water on your hands instead of excess flour can help prevent dry seams. Practice is essential here; observing videos and feeling how the dough responds will help you master the technique needed for even sourdough holes.
6. Baking: Oven Temperature, Steam, and Techniques
The baking phase is where all the prior work comes to fruition. The intense heat of the oven causes a final burst of activity from the starter and rapid expansion of gases, leading to "oven spring." The presence of steam in the oven is also crucial for developing a thin, extensible crust initially, allowing the loaf to expand fully before the crust sets. Incorrect baking conditions can severely impact the final crumb structure, even if everything else was perfect, often resulting in a dense loaf where sourdough holes won't appear as desired.
High initial oven temperature is essential for maximizing oven spring. Baking in a preheated Dutch oven or using baking stones/steels helps transfer heat efficiently to the dough.
Oven Spring's Importance in Crumb Formation
Oven spring is the rapid expansion of the dough during the first 10-15 minutes of baking. This is driven by the final burst of yeast activity and the vaporization of water within the dough, which causes the trapped gases to expand dramatically. A strong oven spring is directly correlated with a light, open crumb. If your loaf doesn't spring well, the resulting crumb will likely be dense and potentially gummy, and your sourdough holes won't appear large and airy.
Poor oven spring can be a symptom of under-proofed or over-proofed dough, insufficient gluten development, or inadequate oven temperature and steam. It's the final test of the dough's strength and gas-holding capacity.
Maintaining Consistent Oven Temperature
A consistent, high oven temperature is vital for a good bake and optimal crumb. Many sourdough recipes call for temperatures between 450-500°F (230-260°C). Preheat your oven for at least 30-60 minutes, especially if using a Dutch oven or baking stone/steel, to ensure the heat has fully saturated the baking vessel or surface.
An oven thermometer is a valuable tool, as many home ovens are inaccurate. If your oven temperature fluctuates or doesn't reach the target heat, it can negatively impact oven spring and crust development, contributing to a less open crumb where sourdough holes won't appear consistently.
Creating Steam for Crust and Crumb Development
Steam in the oven during the initial baking phase keeps the surface of the dough moist and flexible. This prevents the crust from setting too early, allowing the dough to expand maximally during oven spring. Once the crust sets, typically after 15-20 minutes, the steam is removed, allowing the crust to brown and crisp.
Baking in a preheated Dutch oven with the lid on for the first part of the bake is the most effective way for home bakers to create a steamy environment around the loaf. Other methods include placing a tray of hot water or ice cubes on the bottom rack of the oven, or spraying the oven walls with water, though these are generally less effective than a Dutch oven. Insufficient steam will lead to a hard, early-set crust that restricts oven spring and can result in a dense crumb where sourdough holes won't appear as desired.
Refining Your Sourdough Baking Process
Achieving consistent results and troubleshooting issues like when sourdough holes won't appear requires a systematic approach. Refining your process involves careful observation, detailed record-keeping, and a willingness to experiment and adapt based on your findings. It's a journey of continuous learning.
Detailed Baking Records: Tracking Variables and Outcomes
Keeping detailed notes for each bake is one of the most powerful tools for improving your sourdough. Record everything: ambient temperature and humidity, starter feeding ratio and peak time, flour types and weights, hydration percentage, autolyse time, bulk fermentation start/end times and temperature, number and timing of folds, pre-shape and final shape, final proof time and temperature, oven temperature, baking vessel used, and bake time/schedule.
Alongside these variables, note the outcome: oven spring (good/moderate/poor), crust appearance, and most importantly, crumb structure (open/closed, even/uneven, dense spots, tunnels). When your sourdough holes won't appear correctly, comparing your notes from a "problem" bake to a "successful" bake can quickly highlight potential culprits. For example, you might notice that dense crumbs correlate with shorter bulk fermentation times or cooler proofing temperatures.
Flour Selection: Impact of Different Flours on Crumb
The type of flour you use significantly impacts gluten development and water absorption, and therefore the final crumb. Bread flour, with its higher protein content (typically 12-14%), develops a stronger gluten network capable of trapping more gas, making it easier to achieve an open crumb. All-purpose flour (10-12% protein) can also work, but may require more careful handling and potentially slightly lower hydration.
Whole wheat and rye flours, while adding flavor and nutrition, contain bran and germ particles that can interfere with gluten development, resulting in a denser crumb. Using a blend of flours, such as 80% bread flour and 20% whole wheat, is a common approach to balance structure and flavor. If your sourdough holes won't appear despite good technique, experimenting with different flours or flour blends could make a difference.
Recipe Adjustment: Analyzing and Adapting
Don't be afraid to adjust recipes based on your observations and goals. If a recipe consistently gives you a tight crumb and you desire more openness, consider increasing the hydration slightly (e.g., from 70% to 75%), or extending the bulk fermentation time if your dough seems underdeveloped. If you get tunnels, perhaps you need to degas slightly more during shaping or refine your folding technique.
Analyze your results against the factors discussed (starter health, hydration, gluten, proofing, shaping, baking). If sourdough holes won't appear as you want, isolate one variable to change per bake (e.g., increase hydration by 3%, or extend bulk ferment by 1 hour) and see the impact. This iterative process of analysis and adaptation is key to mastering sourdough.
Advanced Sourdough Techniques
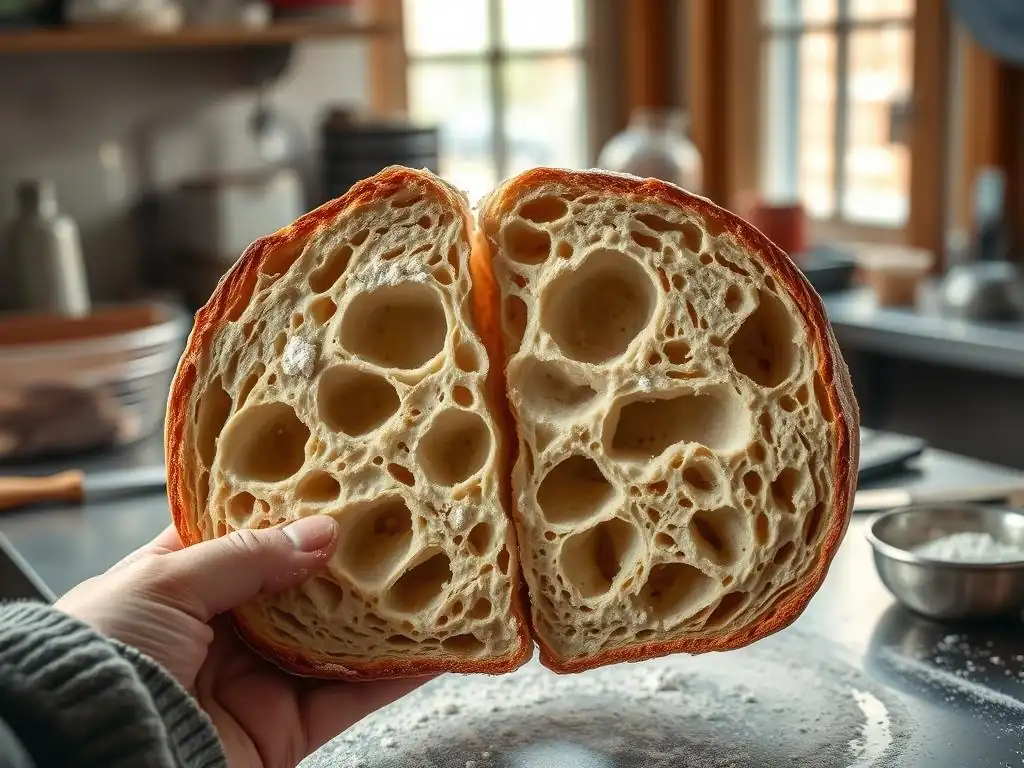
Beyond the fundamentals, several advanced techniques can further enhance crumb structure and flavor, often helping to achieve a more open and consistent result, especially if you find basic methods aren't quite getting you there and sourdough holes won't appear to your satisfaction.
Autolyse: Hydration and Gluten Enhancement
Autolyse is a technique where you mix just the flour and water from your recipe and let it rest for 20 minutes to several hours before adding the starter and salt. This resting period allows the flour to fully hydrate and enzymes naturally present in the flour to begin breaking down proteins, which helps gluten development without mechanical work.
Performing an autolyse can lead to a more extensible dough that is easier to handle and shape, and can hold gas more effectively. For example, a 30-60 minute autolyse can significantly improve the dough's structure and make it easier to incorporate the starter and salt smoothly. This can contribute to a more uniform crumb where sourdough holes won't appear randomly but are instead well-distributed.
Cold Fermentation: Flavor and Structure Development
Cold fermentation involves placing the dough in the refrigerator (typically 35-40°F / 2-4°C) for a long period, often 12-48 hours, for either the bulk fermentation or the final proof. The cold temperature significantly slows down yeast activity but allows the bacteria to continue their work, developing complex flavors and organic acids.
The slow fermentation also allows enzymes to further condition the dough, leading to a more extensible gluten network. Cold dough is also firmer and easier to score and handle, which can improve oven spring and contribute to a more open, glossy crumb. If you're struggling with crumb structure and sourdough holes won't appear airy, incorporating a cold proof is a highly recommended technique to explore.
Banneton Baskets: Dough Support During Proofing
Banneton baskets (proofing baskets), typically made of cane or wood pulp, are used to support the shaped dough during its final proof. Lining the basket with flour or a floured cloth prevents the dough from sticking. The basket helps the dough maintain its shape and prevents it from spreading outwards during the crucial final rise.
This support is particularly important for higher hydration doughs, which can easily lose their structure if proofed on a flat surface. The tension and shape maintained by the banneton help build the internal structure needed for a good oven spring and a well-formed crumb. Using a banneton is a simple but effective step towards achieving consistent results and ensuring your sourdough holes have the best chance to appear properly.
Preventing Crumb Problems
An ounce of prevention is worth a pound of cure in sourdough baking. By establishing good habits and paying attention to the fundamentals, you can significantly reduce the likelihood of encountering issues like a dense crumb or when sourdough holes won't appear as you expect.
Consistent Starter Maintenance: Daily Routine and Care
A healthy, active starter is the foundation of good sourdough. Establishing a consistent feeding routine, ideally daily when kept at room temperature, ensures your starter is always ready for baking. Use a consistent feeding ratio (like 1:1:1 or 1:2:2), the same type of flour you'll use for baking, and maintain a suitable temperature (around 70-80°F / 21-27°C) for optimal activity.
Regularly discard a portion of your starter before feeding to maintain a manageable volume and ensure the microbes always have plenty of fresh food. A strong starter will double or triple predictably, smell pleasant and tangy, and float reliably in water at its peak. This consistent vitality is your best defense against a dense loaf where sourdough holes won't appear due to insufficient leavening power.
Mastering Dough Handling: Practice and Refinement
Skillful dough handling comes with practice. Learn to feel the dough and understand its consistency at different hydration levels and stages of fermentation. Practice your stretch and fold technique to build strength without tearing the gluten. Refine your shaping methods to create even tension and a smooth surface.
Avoid using excessive flour on your work surface during shaping, as this can create dry seams. Be gentle but firm. The more comfortable you become with handling the dough, the better you'll be at judging its readiness at each stage and preventing structural issues that lead to poor crumb or where sourdough holes won't appear uniformly.
Essential Baking Equipment: Tools for Success
Having the right tools can make a significant difference. A digital scale for accurate measurements is non-negotiable in sourdough baking, where small variations in ratios matter. A reliable oven thermometer ensures you're baking at the correct temperature. A Dutch oven or baking stone/steel provides the necessary heat and steam environment for optimal oven spring and crust development.
Other useful tools include a bench scraper for handling sticky dough, a banneton basket for proofing, and a lame or sharp razor for scoring. While not strictly essential for a basic loaf, these tools make the process smoother and contribute to more consistent, professional results, increasing your chances of achieving that desired open crumb and ensuring your sourdough holes appear beautifully.
Troubleshooting Checklist: Addressing Hole Issues
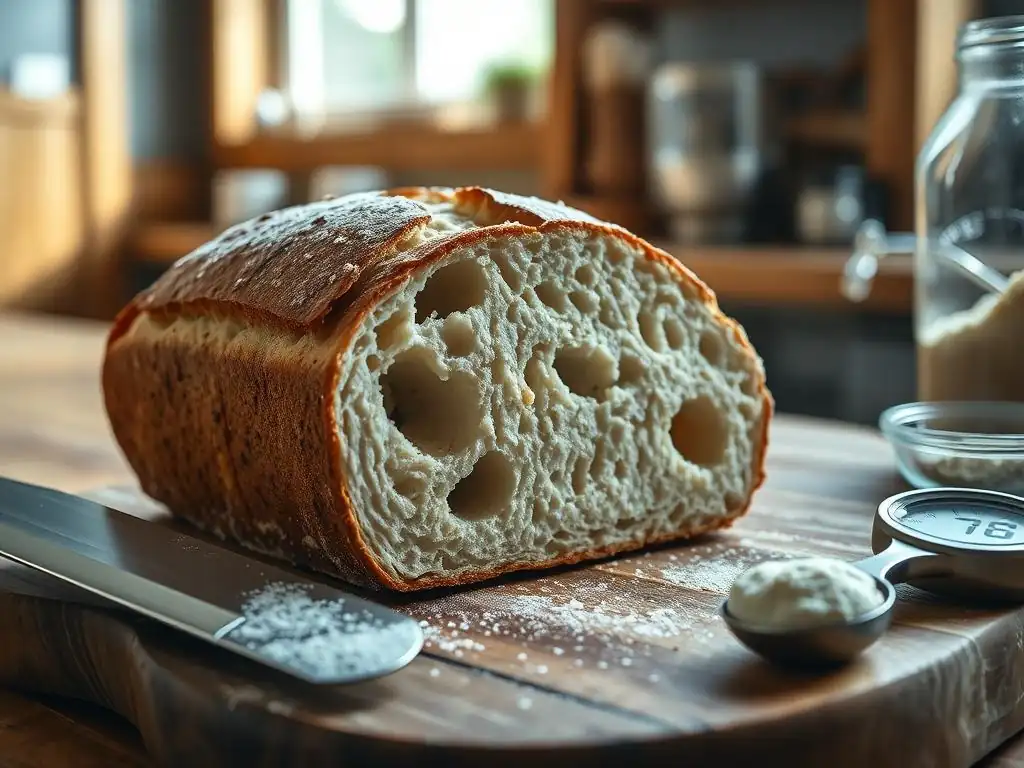
When your sourdough holes won't appear as you hoped, work through this checklist to identify potential culprits.
- [ ] Step 1: Starter Evaluation
- Is your starter consistently doubling/tripling within 4-8 hours after feeding at room temperature?
- Does a small amount float in water at its peak?
- If not, focus on reviving your starter with consistent feeding and warmth before baking again.
- [ ] Step 2: Hydration Assessment
- Is your hydration level appropriate for the flour you're using and the crumb structure you desire (e.g., 75%+ for open crumb)?
- Does the dough feel excessively stiff or slack?
- Consider adjusting hydration gradually by 2-3% in future bakes.
- [ ] Step 3: Gluten Development Review
- Did the dough pass the windowpane test after bulk fermentation or shaping?
- Did you perform enough stretch and folds or kneading to build strength?
- If not, ensure you're developing sufficient gluten through proper technique.
- [ ] Step 4: Proofing Time and Temperature Check
- Did you rely solely on time, or did you use visual cues (volume increase, poke test)?
- Was the proofing temperature too hot (leading to over-proofing) or too cold/short (leading to under-proofing)?
- Adjust proofing time/temperature based on dough's activity and visual cues.
- [ ] Step 5: Shaping Technique Refinement
- Did you create sufficient tension on the dough surface during shaping?
- Did you use excessive flour that might have created dry seams?
- Practice shaping techniques to build a strong, even structure.
- [ ] Step 6: Baking Condition Monitoring
- Was your oven fully preheated to the correct temperature (check with an oven thermometer)?
- Did you provide adequate steam during the initial baking phase?
- Ensure high, consistent heat and plenty of steam for optimal oven spring.
Conclusion: Patience and Practice in Achieving Sourdough Success.
Troubleshooting sourdough crumb issues, especially when sourdough holes won't appear as you envision, is a common part of the baking journey. It requires patience, attention to detail, and a willingness to learn from each bake. By understanding the fundamental factors that influence crumb structure – from the health of your starter to the final moments in the oven – you gain the knowledge to diagnose problems and make targeted adjustments.
Keep baking, keep experimenting, and keep taking notes. Each loaf, whether perfect or not, offers valuable insights into the process. Don't be discouraged by a dense crumb or irregular holes; view them as opportunities to refine your technique. With consistent practice and a systematic approach to troubleshooting, you will undoubtedly improve your sourdough baking skills and achieve the beautiful, airy crumb you desire.
Frequently Asked Questions
Why aren't any holes appearing in my sourdough bread?
A lack of holes, or a very dense crumb, in sourdough usually indicates under-fermentation. This means the dough didn't have enough time to develop sufficient gas during the bulk fermentation stage. Adjusting the temperature or time can help.
My sourdough has giant, irregular holes. What causes this?
Large, irregular holes, often called "gummy" spots, are typically caused by uneven fermentation or poor shaping. Over-fermentation in some areas and under-fermentation in others can lead to this uneven structure.
How can I improve the shaping of my sourdough to get more even holes?
Proper shaping is crucial. Focus on creating surface tension during shaping. Use a gentle but firm hand to avoid degassing the dough completely, but ensure a tight, even structure for even hole distribution.
What role does hydration play in the size and distribution of sourdough holes?
Higher hydration doughs tend to produce larger, more open crumb structures with bigger holes. However, higher hydration also requires more experience and careful handling to prevent a flat, dense loaf. Lower hydration can result in a tighter crumb.
How do I adjust the bulk fermentation process to get more consistent sourdough holes?
Monitor your dough's volume increase and bubble activity during bulk fermentation. Adjust the time based on the temperature of your kitchen. Aim for a 25-50% increase in volume and visible bubbles throughout the dough.
Final Reflection: The Elusive Sourdough Hole – A Baker's Journey
The quest for the perfect sourdough loaf, riddled with glorious holes, is a journey shared by countless bakers. It's a testament to the delicate balance required in this ancient craft, a balance easily disrupted by seemingly minor variations in technique or ingredient. This article explored the common pitfalls that lead to dense, hole-less loaves, highlighting the crucial role of fermentation, hydration, and shaping. Understanding these factors is not just about aesthetics; it's about unlocking the full potential of your sourdough starter and achieving a truly exceptional bread.
The pursuit of that perfect open crumb is more than just a baking challenge; it's a reflection of our own desire for mastery and understanding. It's a journey of experimentation, patience, and a willingness to learn from failures. The process itself, with its unpredictable nature, mirrors life's own ebb and flow. As the renowned baker, Chad Robertson, once said: Baking is a conversation between you and the dough. Listen carefully, and it will tell you what it needs.
This conversation, filled with both triumphs and setbacks, is what makes sourdough baking so rewarding.
So, the next time your sourdough refuses to cooperate, remember this: it's not a failure, but an opportunity. Take a deep breath, revisit the fundamentals, and engage in that conversation with your dough. Don't be discouraged by a dense loaf; instead, use it as a learning experience. Analyze your process, adjust your technique, and embrace the journey. The perfectly holed sourdough loaf awaits, a testament to your perseverance and understanding. The reward? Not just a beautiful bread, but a deeper connection to the art of baking itself.
Unlock Your Sourdough's Potential: Get Those Perfect Holes!
Thanks for taking the time to dive into the world of sourdough baking! We hope you gained valuable insights into troubleshooting those pesky irregular holes. Ready to take your sourdough game to the next level?
- Master the art of sourdough hydration: Experiment with different hydration levels to discover the perfect balance for your starter and flour. This is the key to unlocking those beautiful, even holes!
- Share your sourdough journey: Post a picture of your latest loaf on social media and tag us @BakeWithEase – we'd love to see your baking success!
- Join our baking community: Head over to our forum to connect with fellow sourdough enthusiasts and share your tips and tricks. Ask questions and learn from others facing similar challenges!
Ready to bake your most perfect loaf yet? What hydration level will you try first?