
Salted Caramel Cinnamon Rolls: An Addictive Combination


Welcome to BakeWithEase, your haven for delicious baking adventures! Ever dreamed of creating a treat that's both comforting and utterly irresistible? Prepare to be captivated by our latest obsession: the Salted Caramel Cinnamon Roll. This recipe takes the classic cinnamon roll to a whole new level of decadent delight. Ready to unlock the secrets to this addictive combination? Let's get baking!
- Introduction to Salted Caramel Cinnamon Roll Recipe
- Mastering the Cinnamon Roll Dough
- Crafting the Irresistible Salted Caramel Filling
- Baking Your Cinnamon Rolls to Perfection
- The Decadent Salted Caramel Glaze
- Cinnamon Roll Recipe Variations
- Storing and Reheating Your Cinnamon Rolls
- Troubleshooting Common Cinnamon Roll Baking Issues
- Conclusion: Enjoying Your Homemade Cinnamon Rolls
-
Frequently Asked Questions
- What makes these Salted Caramel Cinnamon Rolls so special?
- Are these Salted Caramel Cinnamon Rolls difficult to make?
- What kind of ingredients do I need for this Salted Caramel Cinnamon Roll recipe?
- Can I make the dough for these rolls ahead of time?
- Can I freeze these Salted Caramel Cinnamon Rolls?
- Final Reflection: The Enduring Allure of Salted Caramel Cinnamon Rolls
- Unleash Your Inner Baker: Craft These Amazing Rolls!
Introduction to Salted Caramel Cinnamon Roll Recipe
Why Salted Caramel and Cinnamon Rolls are a Match Made in Heaven
The marriage of sweet, gooey cinnamon rolls and rich, slightly bitter salted caramel is nothing short of culinary genius. Cinnamon rolls, at their heart, offer a comforting blend of warm spice, soft dough, and buttery sweetness. Introducing salted caramel elevates this classic by adding layers of complexity: the deep, caramelized sugar notes, the hint of salt that cuts through the sweetness and enhances all the other flavors, and the luxurious, often slightly chewy or runny texture. This combination creates a truly decadent experience that transcends the standard cinnamon roll.
Consider the sensory experience. The aroma of baking cinnamon and sugar is already intoxicating, but add the scent of bubbling caramel, and it becomes irresistible. The texture contrast is also key; the soft, fluffy dough and gooey cinnamon-sugar filling are beautifully complemented by the smooth, sometimes slightly chewy texture of the caramel, often finished with a sprinkle of flaky sea salt for a delightful crunch. This salted caramel cinnamon roll recipe takes comfort food to a sophisticated new level, appealing to both traditionalists and those seeking a more adventurous sweet treat.
BakeWithEase's Take on the Classic Cinnamon Roll
At BakeWithEase, we believe baking should be a joyful and accessible experience, and our approach to the salted caramel cinnamon roll recipe embodies this philosophy. We focus on clear, step-by-step instructions designed to guide bakers of all levels to success. Our recipe starts with a reliable, enriched dough that yields incredibly soft and fluffy rolls, providing the perfect canvas for the star flavor: the salted caramel.
We've fine-tuned the balance between the sweet cinnamon filling and the rich, salty caramel, ensuring neither overpowers the other. Our method for making the salted caramel is designed to be straightforward, even for beginners, demystifying a process that can sometimes seem intimidating. This BakeWithEase salted caramel cinnamon roll recipe is crafted to deliver consistently delicious results, making those bakery-style treats achievable right in your own kitchen.
Mastering the Cinnamon Roll Dough
Ingredients for the Perfect Cinnamon Roll Dough
Creating a tender, fluffy cinnamon roll begins with the right foundation: the dough. An enriched dough, meaning it contains fat (butter), sugar, and often eggs, is crucial for achieving that desirable soft texture. Key ingredients typically include all-purpose flour, which provides structure; granulated sugar, to sweeten the dough and aid in browning; active dry or instant yeast, the leavening agent; warm milk, which activates the yeast; melted butter, for richness and tenderness; and eggs, which contribute to richness, color, and structure.
The precise ratio of these ingredients is vital. For example, using milk warmed to around 105-115°F (40-46°C) is ideal for activating most dry yeasts without killing them. The amount of flour versus liquid needs to be balanced to create a dough that is soft and slightly sticky but still manageable.
A typical recipe might call for approximately 3 to 4 cups of flour per 1 to 1.5 cups of liquid (milk and eggs combined), plus a few tablespoons of butter and sugar. Using high-quality ingredients will always enhance the final product, contributing to better flavor and texture in your salted caramel cinnamon roll recipe.
Step-by-Step Guide to Making the Dough from Scratch
Making cinnamon roll dough from scratch involves several key stages, starting with activating the yeast. This usually involves dissolving the yeast and a pinch of sugar in warm milk and letting it sit for 5-10 minutes until foamy, indicating the yeast is active. Next, the remaining wet ingredients (melted butter, eggs) and dry ingredients (sugar, salt) are combined with the yeast mixture in a large bowl.
Flour is then added gradually. The dough is mixed until it just comes together, then kneaded. Kneading, either by hand or with a stand mixer fitted with a dough hook, develops the gluten structure, which is essential for a light and airy texture. Kneading typically takes about 5-10 minutes until the dough is smooth and elastic. Over-kneading can result in tough rolls, so it's important to stop once the dough passes the "windowpane test" – where a small piece can be stretched thinly enough to see light through it without tearing.
Mixing the Dough: Achieving the Right Consistency
The initial mixing phase is about bringing all the ingredients together to form a cohesive dough. When using a stand mixer, start on a low speed to combine the wet and dry ingredients, gradually increasing the speed as the dough comes together. The goal is a dough that pulls away from the sides of the bowl but still sticks slightly to the bottom. If mixing by hand, use a sturdy spoon or spatula initially, then turn the dough out onto a lightly floured surface for kneading.
The consistency should be soft and slightly tacky. If the dough is too dry, it will be stiff and hard to knead; add a tablespoon of milk at a time. If it's too wet and sticky, add a tablespoon of flour at a time. The correct consistency is crucial for the dough to rise properly and yield tender rolls in your salted caramel cinnamon roll recipe. It should feel alive and elastic after kneading, not dense or heavy.
First Proofing: Allowing the Dough to Rise Properly
After kneading, the dough needs to undergo its first rise, or proofing. This allows the yeast to produce carbon dioxide gas, which makes the dough expand and become light and airy. Place the dough in a lightly oiled bowl, turning it to coat, then cover it tightly with plastic wrap or a clean kitchen towel. The ideal environment for proofing is warm and draft-free, typically around 75-80°F (24-27°C).
Proofing time varies depending on the yeast type, room temperature, and recipe specifics, but it generally takes 1 to 2 hours. The dough should approximately double in size. A good test is to gently press two fingers into the dough; if the indentations remain, it's ready. If they spring back immediately, the dough needs more time. Proper proofing is non-negotiable for fluffy salted caramel cinnamon rolls.
Crafting the Irresistible Salted Caramel Filling

Ingredients for the Salted Caramel Filling
The filling is where the magic truly happens in a salted caramel cinnamon roll recipe. Beyond the classic cinnamon-sugar mix, we incorporate a luscious salted caramel component. Standard cinnamon roll filling ingredients include softened butter (not melted, as softened butter helps hold the filling in place), granulated or brown sugar (brown sugar adds moisture and depth), and ground cinnamon (use fresh, good-quality cinnamon for the best flavor).
For the salted caramel part of the filling, you'll need granulated sugar, water (to help the sugar melt evenly), heavy cream (to create a smooth, rich sauce), butter, and a pinch of sea salt (flaky sea salt is excellent for texture and flavor). The quantities will depend on the desired intensity and volume of caramel. A typical ratio might be 1 cup sugar, 1/4 cup water, 1/2 cup heavy cream, 2 tablespoons butter, and 1/2 teaspoon flaky sea salt.
Making Homemade Salted Caramel: A Simple Guide
Making caramel can seem intimidating, but it's quite simple if you follow a few key steps. Start by combining the sugar and water in a heavy-bottomed saucepan over medium heat. Stir initially just to dissolve the sugar, then stop stirring. Allow the mixture to boil undisturbed. As the water evaporates, the sugar will melt and begin to change color.
Watch closely as the sugar turns from clear to pale yellow, then amber, and finally a deep, rich brown. This process can take anywhere from 5 to 15 minutes, depending on the heat and pan size. Once the desired color is reached (a deep amber is usually best for flavor without being burnt), carefully remove the pan from the heat. Slowly and very carefully pour in the warm heavy cream (warming the cream slightly prevents the caramel from seizing up completely).
The mixture will bubble vigorously. Stir gently until smooth, then stir in the butter and salt until fully incorporated. Let the caramel cool slightly before using it in your salted caramel cinnamon roll recipe.
Tips for Preventing Burnt Caramel
Burning sugar happens quickly and results in a bitter, unusable caramel. To prevent this, use a heavy-bottomed, light-colored pan so you can easily monitor the color change. Avoid stirring the sugar once it starts to boil and color; stirring can cause crystallization. Swirling the pan gently is acceptable if needed. Cook over medium heat; high heat makes it harder to control the color change.
Timing is crucial; once the sugar starts to change color, it progresses rapidly. Have your cream and butter measured and ready to add as soon as the caramel reaches the desired shade. If you're nervous, you can remove the pan from the heat just before it reaches the perfect color, as it will continue to cook in the residual heat. If crystals form on the sides of the pan, you can brush them down with a wet pastry brush.
Achieving the Perfect Salted Caramel Consistency
The desired consistency for the salted caramel in a cinnamon roll filling can vary. For a gooey, slightly chewy texture, the caramel needs to be thick enough to stay mostly within the rolls while baking but still soft. The ratio of sugar to cream is key here. More cream will result in a thinner sauce, while less cream will yield a thicker, more solid caramel once cooled. Adding butter also contributes to richness and a smoother texture.
Allowing the caramel to cool slightly before spreading is important. Hot caramel will be too thin and will run everywhere. Cooling it for 10-15 minutes thickens it to a more spreadable consistency. For the filling, you might want it slightly thicker than a pourable sauce. For the glaze, a thinner, pourable consistency is usually preferred, achieved with a higher cream ratio or by adding more liquid like milk or powdered sugar glaze base. Experimentation with the cream/sugar ratio can help you find the perfect texture for your salted caramel cinnamon roll recipe.
Assembling the Cinnamon Rolls: Filling and Rolling
Assembling the rolls is the satisfying step where the dough meets the filling. Once the dough has completed its first proof, gently punch it down to release the air. Turn the dough out onto a lightly floured surface. Roll the dough into a large rectangle. The typical size is about 12x18 inches (30x45 cm), and the thickness should be around 1/4 inch (about 0.6 cm). Aim for even thickness across the rectangle for uniform rolls.
Next, spread the softened butter evenly over the surface of the dough, leaving a small border (about 1/2 inch) on one of the long edges. This border will help seal the roll. Then, sprinkle the cinnamon-sugar mixture over the butter. Finally, drizzle or dollop the cooled salted caramel over the cinnamon-sugar layer. Don't worry about perfect coverage; the caramel will melt and spread during baking.
Spreading the Salted Caramel Filling Evenly
Applying the salted caramel filling requires a bit of care to ensure every bite of your salted caramel cinnamon roll has that rich flavor. Since the caramel might be thick, it's often easier to dollop spoonfuls over the cinnamon-sugar layer rather than trying to spread it thinly. Use the back of a spoon or an offset spatula to gently spread the caramel, but don't worry about covering every single spot perfectly.
Ensure the caramel is relatively evenly distributed across the entire rectangle, avoiding the border you left for sealing. The goal is to have pockets of gooey caramel throughout the swirls. Using caramel that is slightly cooled will prevent it from running off the dough immediately.
Rolling the Dough: Creating Tight Cinnamon Roll Swirls
Rolling the dough is key to achieving those beautiful, tight swirls. Starting from the long edge opposite the border you left plain, begin rolling the dough tightly into a log. Use your fingers to keep the roll firm and even as you go. Try to roll it as tightly as possible without tearing the dough. Tight rolls result in more layers and a better swirl pattern after baking.
Once you've rolled the dough into a complete log, pinch the seam (the border you left plain) firmly against the roll to seal it. This prevents the filling from leaking out during proofing and baking. Gently lift and position the log seam-side down.
Cutting the Rolls: Ensuring Uniform Size
To ensure your salted caramel cinnamon rolls bake evenly, they need to be of uniform size. There are several methods for cutting the log. A sharp chef's knife works well; slice straight down with minimal sawing motion to avoid squishing the rolls. Wipe the knife clean periodically if the filling is sticky.
A popular method is using dental floss or thread. Slide a piece of floss under the log, bring the ends up and cross them over the top, then pull to slice through the dough. This creates very clean cuts and prevents the rolls from being compressed. Aim for slices about 1 to 1.5 inches thick (2.5 to 3.8 cm). This usually yields 10-12 rolls from a standard-sized log. Arrange the cut rolls in a greased baking dish, leaving a small space between them as they will expand during the second proof and baking.
Baking Your Cinnamon Rolls to Perfection
Second Proofing: Preparing the Rolls for the Oven
Once the rolls are cut and placed in the baking dish, they need a second proofing. This is a shorter rise than the first, typically lasting 30 to 60 minutes. Cover the baking dish loosely with plastic wrap or a clean towel and let the rolls sit in a warm, draft-free place. During this time, the rolls will puff up and fill the spaces between them, becoming visibly larger and softer.
The second proof is crucial for achieving a light and fluffy texture. Don't rush this step. The rolls should look visibly puffy and soft before going into the oven. Over-proofing can lead to rolls that collapse while baking, while under-proofing results in dense, heavy rolls.
Oven Temperature and Baking Time: The Key to Golden Brown Rolls
Preheating your oven to the correct temperature is essential for even baking. For most cinnamon roll recipes, including this salted caramel cinnamon roll recipe, a temperature of around 350°F (175°C) is common. This moderate temperature allows the dough to cook through and the filling to melt without the outsides burning.
Baking time typically ranges from 20 to 30 minutes, depending on the size of your rolls and your oven. The rolls are done when they are golden brown on top and cooked through in the center. You can gently separate one roll to check if the dough is cooked in the middle. An internal temperature of around 190-200°F (88-93°C) indicates the dough is fully baked.
Baking Tips for Evenly Cooked Cinnamon Rolls
For the most evenly cooked salted caramel cinnamon rolls, consider using a metal or ceramic baking dish rather than glass, as glass can sometimes cause the bottoms to cook faster than the tops. If your oven has hot spots, rotate the baking dish halfway through the baking time.
If the tops of the rolls are browning too quickly before the centers are done, you can loosely tent the dish with aluminum foil. Avoid opening the oven door too frequently during baking, as this can cause temperature fluctuations that affect the rise and cooking. Baking on the middle rack usually provides the most even heat distribution.
The Decadent Salted Caramel Glaze
Ingredients for the Salted Caramel Glaze
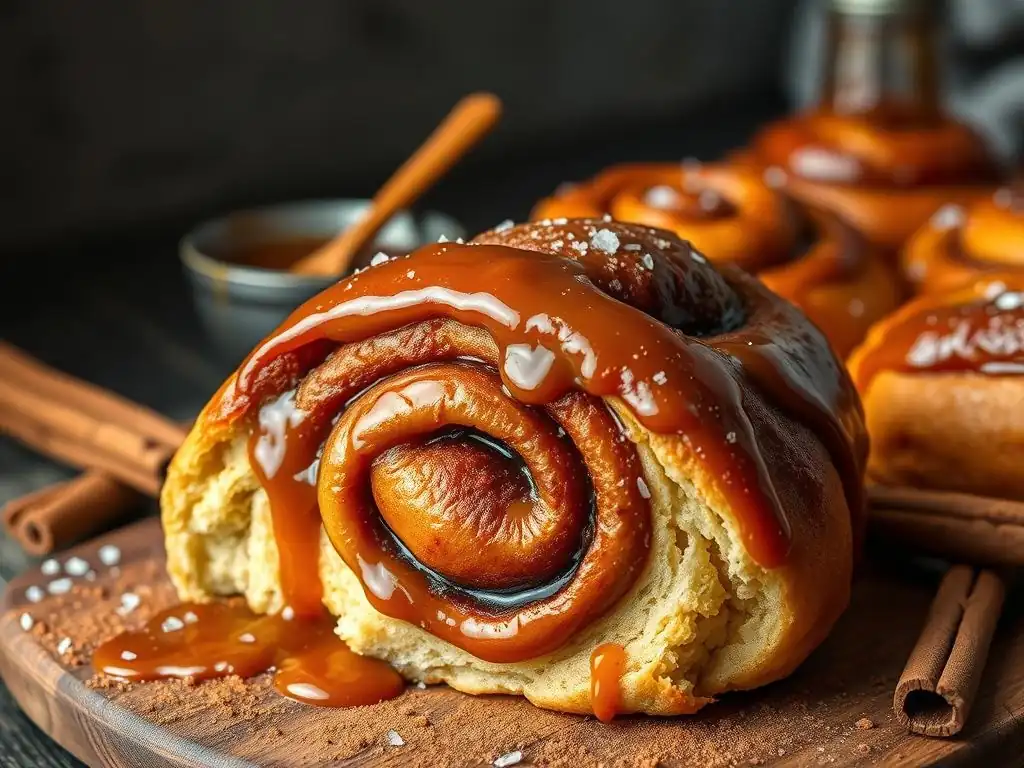
No salted caramel cinnamon roll recipe is complete without a luscious glaze. While a simple cream cheese frosting is classic, a salted caramel glaze doubles down on the star flavor. Ingredients typically include powdered sugar (confectioners' sugar) for sweetness and body, heavy cream or milk to achieve the desired consistency, melted butter for richness, vanilla extract for flavor, and more of that delicious homemade salted caramel sauce.
You can use the same batch of caramel made for the filling, or make a separate, slightly thinner batch specifically for the glaze. The ratio of powdered sugar to liquid (cream/milk/caramel) will determine the glaze's thickness. A good starting point might be 1.5 to 2 cups of powdered sugar, 1/4 cup of heavy cream, 2 tablespoons of melted butter, 1 teaspoon of vanilla, and 1/4 to 1/2 cup of salted caramel sauce.
Making the Salted Caramel Glaze: A Smooth and Creamy Finish
Making the glaze is usually the simplest step. In a medium bowl, whisk together the powdered sugar, melted butter, and vanilla extract. Gradually whisk in the heavy cream or milk, starting with a smaller amount (e.g., 2-3 tablespoons) and adding more until you reach your desired consistency – a pourable yet opaque glaze is usually ideal.
Once the base glaze is smooth, whisk in the cooled salted caramel sauce. Mix thoroughly until the caramel is fully incorporated and the glaze is uniform in color and texture. If the glaze is too thick, add a tiny splash more milk or cream. If it's too thin, whisk in a bit more powdered sugar. Ensure there are no lumps of powdered sugar.
Glazing the Rolls: Achieving the Perfect Drizzle
The timing of glazing is important. For a glaze that melts slightly into the rolls, glaze them while they are still warm, but not piping hot – perhaps 10-15 minutes after they come out of the oven. If you prefer a glaze that sets up more firmly, wait until the rolls are closer to room temperature.
You can apply the glaze by drizzling it generously over all the rolls in the pan, or you can lift individual rolls and dip or spoon the glaze over each one. For a beautiful finish on your salted caramel cinnamon roll, ensure good coverage, allowing the glaze to drip down the sides and into the swirls. A final sprinkle of flaky sea salt over the glaze is a wonderful touch, enhancing the salted caramel flavor and adding visual appeal.
Cinnamon Roll Recipe Variations
Adding Nuts: Pecan & Walnut for Extra Crunch
Introducing nuts adds a delightful textural contrast to the soft, gooey salted caramel cinnamon roll. Pecans and walnuts are classic choices that pair wonderfully with both cinnamon and caramel flavors. You can chop them finely and sprinkle them over the butter and cinnamon-sugar layer before adding the caramel, or mix them directly into the cinnamon-sugar filling.
For best results, lightly toast the chopped nuts before adding them to the filling. Toasting enhances their flavor and crunch. About 1/2 to 1 cup of chopped toasted nuts is usually sufficient for a batch of 10-12 rolls. The nutty crunch complements the smooth caramel and soft dough beautifully.
Chocolate & Sea Salt Cinnamon Rolls: A Decadent Twist
For a truly indulgent variation, consider adding chocolate to your salted caramel cinnamon roll recipe. Sprinkle miniature chocolate chips or finely chopped dark chocolate over the cinnamon-sugar and caramel layers before rolling. The chocolate will melt during baking, creating pockets of rich, fudgy goodness that mingle with the caramel.
Combining chocolate with salted caramel and cinnamon creates a deeply flavored, luxurious roll. A sprinkle of extra flaky sea salt on top of the glaze is essential with this variation to highlight the "salted" aspect alongside the chocolate.
Vegan Cinnamon Rolls: A Plant-Based Delight
Adapting the salted caramel cinnamon roll recipe for a vegan diet is entirely possible. Replace dairy milk with plant-based milk (such as almond, soy, or oat milk), ensuring it's warmed to the correct temperature for yeast activation. Substitute butter with a high-quality vegan butter stick or margarine. Eggs can often be omitted in enriched doughs or replaced with an egg substitute like flax egg (1 tbsp flax meal + 3 tbsp water, let sit 5 mins) or a commercial vegan egg replacer.
For the salted caramel, use a dairy-free heavy cream alternative (like full-fat canned coconut milk or a store-bought vegan cream) and vegan butter. The process for making the caramel remains similar. The glaze can be made with powdered sugar, plant-based milk, vegan butter, and the vegan salted caramel. These substitutions allow everyone to enjoy a delicious salted caramel cinnamon roll.
Storing and Reheating Your Cinnamon Rolls

Best Practices for Keeping Your Rolls Fresh
Proper storage is key to maintaining the softness and flavor of your homemade salted caramel cinnamon rolls. Once they have cooled completely (or after the glaze has set, if you prefer), store them in an airtight container at room temperature. Layering them with parchment paper can prevent them from sticking together.
Stored at room temperature, they are typically best enjoyed within 1-2 days. For longer storage, you can refrigerate them in an airtight container for up to 5 days. While refrigeration can sometimes slightly alter the texture, it extends their shelf life significantly.
Reheating Instructions: Maintaining Softness and Flavor
Reheating brings refrigerated or day-old salted caramel cinnamon rolls back to their warm, gooey glory. The best method is often in the oven or microwave. To reheat in the oven, place rolls in a baking dish, cover loosely with foil, and warm at 300°F (150°C) for 10-15 minutes, or until heated through. This method helps maintain a softer texture.
For quicker reheating, use the microwave. Place a single roll on a microwave-safe plate and heat on high for 20-40 seconds, depending on your microwave's power. Be careful not to overheat, as this can make the rolls tough. Microwaving is fast but can sometimes result in a slightly chewier texture compared to oven reheating.
Troubleshooting Common Cinnamon Roll Baking Issues
Dough Not Rising: Solutions for a Fluffy Texture
If your cinnamon roll dough isn't rising, the most common culprit is inactive yeast. Ensure your yeast is fresh (check the expiration date) and that the liquid used to activate it is the correct temperature – too cold won't activate it, too hot will kill it. Warm milk should feel comfortably warm to the touch, not hot.
Another factor could be the environment. Yeast needs warmth to thrive. Make sure your proofing location is warm and draft-free. If your kitchen is cool, you can create a warm environment by placing the covered dough in a slightly warm (turned off) oven with the light on, or in a warm spot near a sunny window. Ensure the dough is adequately kneaded; proper gluten development provides structure for the rise.
Filling Leaking: Preventing Caramel Overflow
Filling leaking out during baking is a common issue, especially with gooey fillings like caramel. Several factors contribute. First, ensure the dough is rolled tightly into a log and the seam is securely pinched closed. A loose roll or unsealed seam provides an escape route for the filling.
Second, avoid overfilling the rolls. While generous filling is tempting, too much can push its way out. Finally, ensure the salted caramel used in the filling is cooled slightly and is not too thin. A caramel that is too liquid when assembled is more likely to run. Baking the rolls in a dish with slightly higher sides can also help contain any minor leaks.
Rolls Too Dry: Tips for Moist and Delicious Results
Dry cinnamon rolls are disappointing. This can result from several factors. Over-measuring flour is a frequent cause; too much flour makes the dough stiff and dry. Using a scale for flour measurement (grams are most accurate) is highly recommended. The dough should be soft and slightly sticky before the first rise.
Over-baking is another major culprit. Bake the rolls only until they are golden brown and cooked through, not longer. Using an oven thermometer can verify your oven's actual temperature. Ensure your ingredients, especially the butter and eggs in the dough, are fresh and correctly measured, as they contribute moisture and richness. Proper proofing also helps; under-proofed dough can result in a denser, drier roll.
Conclusion: Enjoying Your Homemade Cinnamon Rolls
There's immense satisfaction in pulling a pan of warm, gooey salted caramel cinnamon rolls from your oven, especially when following a reliable salted caramel cinnamon roll recipe. The aroma alone is rewarding, a testament to your baking efforts. Sharing these treats is part of the joy.
We encourage you to share photos of your finished BakeWithEase salted caramel cinnamon roll creations! Tag us on social media or share them in our community forums. Seeing how your rolls turn out and hearing about your baking journey inspires us and fellow bakers. Enjoy every delicious, caramel-swirled bite!
Frequently Asked Questions
What makes these Salted Caramel Cinnamon Rolls so special?
These rolls are special because they combine the comforting classic of cinnamon rolls with the rich, decadent flavors of salted caramel. The sweet and salty balance creates an addictive taste experience.
Are these Salted Caramel Cinnamon Rolls difficult to make?
While they require some time due to the dough rising, the recipe is designed to be beginner-friendly with clear, step-by-step instructions. The salted caramel sauce is also simple to prepare.
What kind of ingredients do I need for this Salted Caramel Cinnamon Roll recipe?
You'll need basic baking ingredients like flour, yeast, sugar, butter, eggs, and cinnamon. For the salted caramel, you'll need sugar, butter, cream, and sea salt for that characteristic flavor.
Can I make the dough for these rolls ahead of time?
Yes, you can prepare the dough the night before and let it rise in the refrigerator overnight. This allows for a longer, slower rise that enhances the flavor and texture.
Can I freeze these Salted Caramel Cinnamon Rolls?
Absolutely! You can freeze them either before or after baking. If freezing before baking, thaw completely before baking as directed. Baked rolls can be reheated for a warm and gooey treat.
Final Reflection: The Enduring Allure of Salted Caramel Cinnamon Rolls
The perfect balance of sweet and salty, warm spice and gooey caramel, remains a culinary triumph that continues to captivate taste buds worldwide. These aren't just pastries; they're an experience, a testament to the power of simple ingredients elevated to extraordinary heights. The seemingly effortless combination of cinnamon, caramel, and salt creates a flavor profile so addictive, it transcends mere dessert and becomes a comforting ritual.
The journey of creating the perfect salted caramel cinnamon roll is a microcosm of the culinary arts themselves – a delicate dance between precision and improvisation, patience and passion. It's a process that connects us to traditions of baking, reminding us of the simple joys found in creating something delicious from scratch. The best things in life are simple,
a sentiment perfectly embodied by this deceptively complex treat. The enduring popularity of this recipe, and variations thereof, speaks volumes about our collective desire for comfort, indulgence, and a little bit of magic in our everyday lives.
Now, I invite you to take this journey yourself. Don't just read the recipe; experience it. Embrace the warmth of the oven, the rich aroma filling your kitchen, and the pure satisfaction of creating something truly special. Share your creations, your triumphs, and even your mishaps – because even in the kitchen, the most memorable moments often come from the unexpected. The salted caramel cinnamon roll isn't just a recipe; it's an invitation to savor the moment, to connect with your creativity, and to share a little bit of sweetness with the world.
Unleash Your Inner Baker: Craft These Amazing Rolls!
Thanks for joining us on this delicious journey into the world of salted caramel cinnamon rolls! We hope you've gained some inspiration and maybe even a little extra sweetness in your day. Ready to take your baking skills to the next level?
- Bake your own batch of Salted Caramel Cinnamon Rolls: The recipe is waiting for you – it's easier than you think! Use the tips and tricks from the article to create truly irresistible rolls.
- Share your baking triumphs (or even your baking disasters!): We'd love to see your creations! Use #BakeWithEaseSaltedCaramel on social media.
- Experiment with different flavor combinations: What other sweet and salty treats can you create using this recipe as inspiration?
Ready to roll up your sleeves and create some magic in your kitchen?