
Advanced Techniques for Beautiful Lettering on Cookies

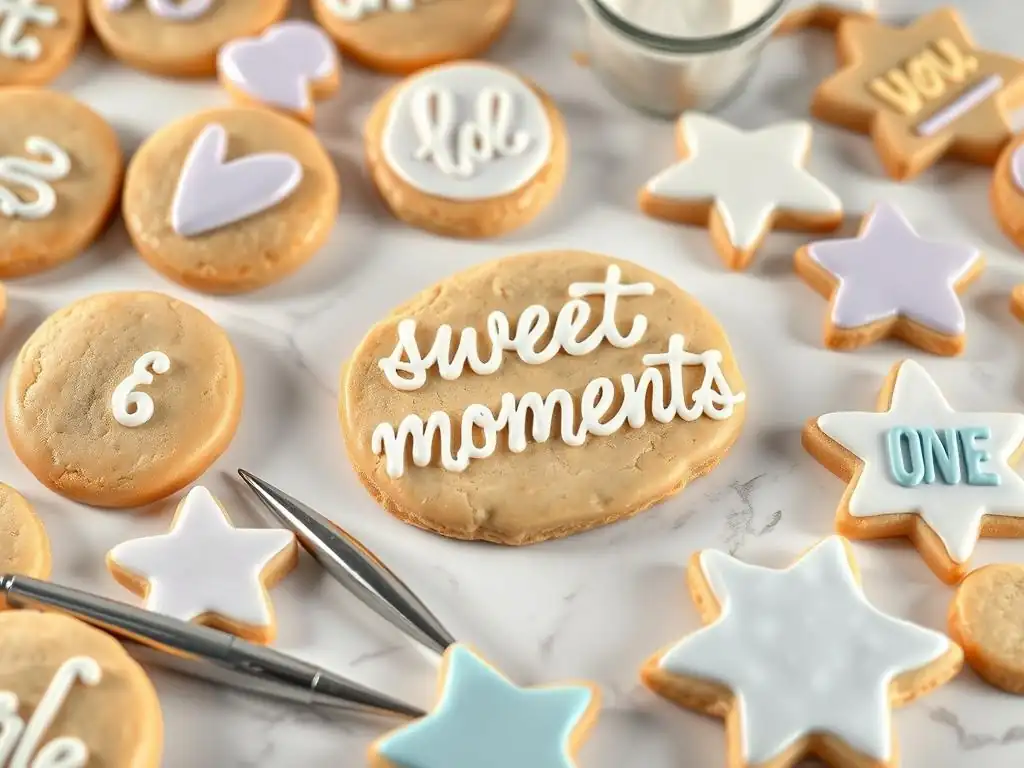
Welcome to BakeWithEase, where baking becomes a joy, not a chore! Ready to transform your ordinary cookies into edible masterpieces? This week, we're diving deep into advanced cookie lettering techniques. Discover the secrets to achieving flawless script and intricate designs that will wow your friends and family. Intrigued? Let's unlock the art of perfect cookie lettering and elevate your baking game, one beautifully decorated cookie at a time!
- Advanced Techniques for Beautiful Lettering on Cookies: A BakeWithEase Tutorial
- Introduction to Cookie Lettering Mastery
- Essential Tools and Materials for Professional Cookie Lettering
- Advanced Cookie Lettering Techniques: A Step-by-Step Tutorial
- Adding Dimension and Texture to Your Cookie Lettering
- Troubleshooting Common Cookie Lettering Problems
- Advanced Cookie Lettering Design Ideas and Inspiration
- Conclusion: Unleash Your Creativity with Advanced Cookie Lettering
- Frequently Asked Questions
- Final Reflection: The Enduring Art of Cookie Lettering
- Unleash Your Inner Cookie Artist!
Welcome back to BakeWithEase! You've mastered the basics of flooding and outlining, and now you're ready to add that personal touch that truly elevates your cookies from delicious treats to edible works of art. Advanced cookie lettering techniques open up a world of possibilities, allowing you to convey messages, create intricate designs, and personalize your baked goods in ways that simple flooding can't. This tutorial will guide you through various methods, from achieving seamless wet-on-wet script to creating bold, raised letters, ensuring your next batch of decorated cookies is truly unforgettable.
Moving beyond basic block letters requires understanding icing consistency, tool control, and artistic vision. Whether you're aiming for elegant script, playful bubble letters, or sharp, defined text, mastering these advanced methods is key. We'll cover everything from choosing the right icing thickness for specific techniques to using specialized tools that give your lettering a professional finish. Get ready to transform your cookies into canvases for beautiful, edible typography with these comprehensive cookie lettering techniques tutorial steps.
Learning advanced cookie lettering techniques isn't just about perfecting a skill; it's about adding significant value and personalization to your baking. Imagine presenting a batch of cookies with intricately piped names for a birthday party, elegant monograms for a wedding shower, or festive messages for the holidays. These personalized touches make your baking stand out and show a level of care and effort that delights recipients. It turns a simple cookie into a cherished gift or a memorable party favor.
Furthermore, mastering cookie lettering techniques allows you to tackle more complex and detailed designs. You can create themed sets where the lettering ties everything together, add fine print details, or even replicate specific fonts. This skill set is invaluable for anyone looking to sell decorated cookies, as personalized and detailed work often commands a higher price point. Beyond the practical benefits, there's immense satisfaction in seeing your words come to life beautifully on a cookie, making your baking journey even more rewarding.
Royal icing is the gold standard for cookie lettering due to its ability to dry hard and smooth, providing a stable surface and crisp lines. A basic recipe typically involves powdered sugar, meringue powder or egg whites, and water. The key to successful lettering lies in achieving the correct icing consistency, which varies depending on the specific technique you plan to use. For outlining and detailed dry piping, a medium-stiff consistency is needed – think toothpaste consistency, where a peak holds its shape but eventually softens slightly. This allows for clean, defined lines that don't spread.
For flooding, a thinner consistency is required, often referred to as "flood consistency." This icing should flow smoothly and self-level within 10-15 seconds after a line is drawn through it with a knife or scribe. For techniques like wet-on-wet lettering, you'll use both outlining consistency (for the base color flood) and lettering consistency (slightly thicker than flood, thin enough to sink in but thick enough to hold a line briefly) or even contrasting flood consistencies.
Experimentation is crucial; start with a thicker icing and gradually add water very sparingly (a drop at a time) until you reach the desired flow. Using too much water is a common mistake that leads to bleed or lack of definition.
Precision Lettering Tools: Piping Bags, Tips, and Scribes
Having the right tools is just as important as having the right icing consistency for executing refined cookie lettering techniques. Standard piping bags (either disposable or reusable) are essential for controlling icing flow. For fine lettering, small round piping tips are indispensable. Sizes 1, 1.5, and 2 are commonly used, with size 1 being perfect for delicate script or tiny details, and size 2 offering a slightly bolder line. Ensure your tips are clean and free of dried icing before starting.
A scribe tool (or a toothpick) is another vital tool for cookie lettering techniques tutorial steps. It's used for manipulating wet icing, popping air bubbles in flooded areas, nudging lines into place, and correcting small mistakes. For stenciling, you'll need an offset spatula or a scraper to apply and smooth the icing evenly over the stencil. While not strictly a tool, a steady hand and a comfortable setup (like resting your piping hand on your non-piping hand or the table) significantly improve precision, especially when working on detailed cookie lettering.
The colors you choose can dramatically impact the appearance of your cookie lettering. For vibrant, consistent colors, gel food colorings are highly recommended over liquid ones. Gel colors are concentrated, requiring only a small amount to achieve rich hues, and they don't add excess liquid to your icing, which could thin it out and affect consistency. When working with royal icing, remember that colors tend to deepen slightly as the icing dries.
Mixing colors requires patience. Start with a small amount of gel color on a toothpick and gradually add it to your white icing, mixing thoroughly each time until you achieve the desired shade. For black or deep red, you may need to let the colored icing sit for an hour or two; the color will develop and deepen over time without adding more coloring agent, which can sometimes affect icing structure or taste. For wet-on-wet techniques, ensure your contrasting colors have a similar consistency to prevent one color from dominating or spreading unevenly into the other.
The wet-on-wet technique involves piping lines or dots of wet icing onto a freshly flooded (still wet) base layer of icing. As both layers dry simultaneously, the piped elements sink into the base, creating a smooth, seamless surface with integrated designs. This method is perfect for creating patterns, marbling effects, and achieving lettering that lies flush with the cookie's surface rather than being raised. It requires quick work before the base layer begins to crust over, typically within 5-10 minutes of flooding, depending on humidity.
To execute wet-on-wet cookie lettering, first flood your cookie with your base color icing at flood consistency. Immediately, while the base is still wet, use a piping bag with a small tip (size 1 or 2) filled with your contrasting color icing, also at flood consistency (or slightly thicker, but still wet enough to sink). Pipe your letters or design directly onto the wet base.
You can use a scribe tool to gently pull or swirl the colors together if desired. Work quickly across the cookie, completing the design before any part of the base dries. This results in beautiful, smooth lettering that is part of the cookie's surface design.
Achieving Perfect Icing Consistency for Wet-on-Wet Lettering
Achieving the right icing consistency is paramount for successful wet-on-wet cookie lettering techniques. The base flood icing should be at a standard flood consistency, meaning when you draw a line through it, the line disappears and the surface becomes smooth again within about 10-15 seconds. If it takes longer, it's too thick and your piped lines won't sink properly. If it's faster, it's too thin and your colors might bleed excessively.
For the icing you use to pipe the letters or design onto the wet base, the consistency should be very close to the base consistency – ideally, slightly thicker (maybe a 15-20 second consistency) but still wet enough to meld seamlessly with the base. If the piping icing is too thick, it will sit on top and look raised rather than sinking in. If it's too thin, it might spread too much and lose its shape.
Testing consistency on a piece of parchment paper before applying it to the cookie is highly recommended. Draw a line or letter; it should hold its shape initially but then gently settle into the paper, mimicking how it will sink into the wet flood icing.
Creating Intricate Designs with Wet-on-Wet Cookie Lettering
The wet-on-wet technique allows for surprisingly intricate cookie lettering and design work. Once you've piped your letters onto the wet flood, you can use a scribe tool to drag through the wet icing to create marbled effects, swirls, or feathering within the letters themselves or the surrounding background. For example, after piping a letter "A", you can drag the scribe tool from the edge of the letter inwards to create a feathered look.
Beyond just letters, you can combine wet-on-wet lettering with other wet-on-wet patterns. Flood a background, pipe wet-on-wet polka dots or stripes, and then pipe your wet-on-wet letters on top of that, as long as the base is still wet. This allows for multi-layered, integrated designs. A classic example using these cookie lettering techniques tutorial steps is pulling a scribe through parallel lines piped wet-on-wet to create hearts or feathered patterns around the lettering. The key is speed and a steady hand to manipulate the wet icing before it sets.
Dry piping, also known as raised piping, is a classic cookie lettering technique used to create letters and designs that sit on top of a dried base layer of icing. This method allows for sharp, defined edges and gives your lettering a beautiful, dimensional look. It's ideal for adding names, dates, or detailed messages onto a cookie that has already been flooded and fully dried (which can take 6-24 hours depending on humidity).
For dry piping, you'll use royal icing at a medium or medium-stiff consistency, similar to outlining consistency. It should be thick enough to hold a distinct line and not spread, but not so stiff that it's difficult to pipe smoothly. Using a small round tip (size 1 or 2) is crucial for control and precision. Apply gentle, consistent pressure to the piping bag, keeping the tip slightly elevated above the cookie surface (this is called "floating" the icing). Guide the stream of icing to form your letters. The icing should fall onto the cookie surface and maintain its shape.
Achieving Sharp Edges with Dry Piping Technique
Achieving sharp, clean edges is a hallmark of professional dry piping cookie lettering techniques. The key factors are icing consistency, tip size, and piping technique. As mentioned, a medium-stiff icing is essential; if it's too soft, your lines will spread and lose definition. A small tip size (1 or 1.5) allows for greater control and finer lines, which naturally appear sharper.
When piping, apply steady pressure and lift the piping bag up rather than pulling it sideways when ending a line or stroke. This technique helps break the stream of icing cleanly without dragging or smearing the end. Practice piping straight lines and curves on parchment paper first to get a feel for the pressure needed and how the icing behaves.
Ensure your piping tip opening is perfectly clean and free of any dried icing bits, which can cause jagged lines or clogging. For very sharp corners, you can use a scribe tool very gently to nudge the icing into place immediately after piping, before it begins to crust.
Avoiding Common Mistakes in Dry Piping Cookie Lettering
Several common pitfalls can occur when using dry piping for cookie lettering. One is inconsistent pressure on the piping bag, leading to uneven line thickness. Practice squeezing the bag steadily. Another is holding the tip too close to the cookie surface, which can result in squashed or messy lines; remember to "float" the icing slightly above the surface. Dragging the tip instead of lifting at the end of a stroke is another mistake that causes tails or smears.
Clogging is also a frequent issue, especially with small tips. This is often caused by tiny lumps in the icing (ensure your powdered sugar is sifted and your meringue powder is fully dissolved) or dried icing bits near the tip opening. Keep a damp cloth handy to wipe your tip periodically.
If a clog occurs, try gently squeezing the bag harder or using a pin to dislodge the blockage. If the icing is crusting too quickly in the bag, it might be too stiff or the air is too dry; knead the bag gently or consider adding a tiny drop of water if absolutely necessary, but be cautious not to thin it too much.
Stenciling is an excellent cookie lettering technique for achieving perfectly uniform letters and designs, especially when you need to replicate the same text or pattern across multiple cookies. It's faster than freehand piping for repetitive elements and can produce sharp, clean results that are difficult to achieve manually, particularly for specific fonts or intricate patterns.
To stencil, you'll need a clean, dry cookie with a smooth, dried base layer of royal icing. Place your stencil carefully over the cookie, ensuring it lies flat and is positioned correctly. Hold the stencil firmly in place with one hand or use small magnets if working on a metal tray.
Apply medium-consistency royal icing (thicker than flood, but spreadable) over the stencil openings using a small offset spatula or scraper. Use a smooth, even motion to spread a thin layer of icing across the stencil, filling all the cut-out areas. Scrape off any excess icing with a clean pass of the spatula at a slight angle.
Choosing the Right Stencil for Your Cookie Design
Selecting the appropriate stencil is key to successful stenciled cookie lettering techniques. Stencils come in various materials, typically food-safe plastic. Look for stencils specifically designed for cookies, which are usually sized appropriately for standard cookie shapes (like circles, squares, or plaques). Consider the font style and size on the stencil – is it legible? Does it fit your cookie size and design theme?
For beginners, stencils with larger, bolder fonts are often easier to use than those with very fine or delicate script, as thin lines can be harder to fill cleanly and are more prone to breaking when removing the stencil. Ensure the stencil material is sturdy enough to lie flat against the cookie surface without buckling, which can lead to messy edges. There are countless stencil designs available, from simple alphabets to complex phrases and patterns, offering vast possibilities for your cookie lettering techniques tutorial journey.
Applying Icing with Stencils for Flawless Cookie Lettering
The application of icing over the stencil is a critical step in achieving flawless stenciled cookie lettering. Use royal icing at a medium consistency – it should be thick enough not to seep under the stencil but spreadable enough to fill the openings smoothly. A consistency similar to peanut butter works well for many stencils. Place a dollop of icing at one end of the stencil.
Using a small offset spatula or a dedicated stencil scraper, gently spread the icing over the stencil openings in a single, smooth motion. Hold the spatula at about a 45-degree angle to the stencil. Apply just enough pressure to fill the openings without forcing icing underneath the stencil edge.
After covering the design, use a clean pass of the spatula at a steeper angle (closer to 90 degrees) to scrape off all excess icing from the stencil surface. This ensures clean lines and prevents smudging when the stencil is removed. Lift the stencil straight up carefully and immediately to reveal the crisp lettering underneath.

Using Edible Markers for Fine Details and Outlines
Edible markers are a fantastic tool for adding fine details, outlines, or even entire messages to dried royal icing. They allow for a level of precision that can be challenging with piping, especially for very thin lines, tiny dots, or specific drawing elements around your cookie lettering. They are particularly useful for adding definition to dry-piped letters or adding small flourishes after the main lettering is complete.
Before using an edible marker, ensure your royal icing surface is completely dry and hard. Drawing on wet or slightly damp icing will damage the tip of the marker and smear the ink. Hold the marker like a pen and draw directly onto the surface.
You can use them to outline piped letters for extra pop, add small decorative elements like dots or stars, or even write small messages or dates. Be mindful that edible markers work best on light-colored icing backgrounds. Practice on a piece of dried icing or parchment paper first to get a feel for the ink flow and pressure needed.
Incorporating Sprinkles and Edible Dust for Added Flair
Adding sprinkles, nonpareils, or edible glitters and dusts can bring incredible texture and sparkle to your cookie lettering techniques. These elements can be applied while the icing is still wet (for sprinkles or nonpareils to stick) or adhered to dried icing using a touch of edible glue or a tiny bit of fresh royal icing.
For example, you can pipe a letter with medium-consistency icing and immediately sprinkle fine glitter or edible dust over it before it dries. The excess can be gently brushed off once dry. Alternatively, after your lettering is dry, you can use a fine brush to apply edible luster dust or petal dust directly onto the raised letters for a metallic or colored sheen.
Small nonpareils can be carefully placed along the outline of a letter using tweezers or a scribe tool for a beaded effect. Be creative with how you incorporate these elements to make your cookie lettering truly shine.
Creating Shadow and Highlight Effects with Icing
Creating shadow and highlight effects using different shades of icing adds significant dimension and visual interest to your cookie lettering. This technique involves piping slightly darker and lighter shades of your lettering color adjacent to the main letter strokes on a dried base.
For a simple shadow effect using cookie lettering techniques, pipe your main letter onto the dried base using your chosen color. Once this letter is dry, mix a slightly darker shade of the same color (or a complementary color like grey or brown for a more dramatic shadow). Using a small tip (size 1 or 1.5), pipe a thin line of the darker icing along one side of your main letter, mimicking where a shadow would naturally fall (e.g., the bottom and right side of each stroke).
For highlights, mix a slightly lighter shade (add a tiny bit of white or lighten your base color) and pipe a thin line along the opposite side (e.g., the top and left). This layered piping creates the illusion of depth, making your letters appear to pop off the cookie surface.
Preventing Icing Bleeding and Color Migration
Icing bleeding, where colors seep into each other, is a frustrating problem in cookie lettering techniques. It's often caused by incorrect icing consistency (too thin), high humidity, or using excessive amounts of liquid or certain types of food coloring (particularly reds, blacks, and dark blues). To prevent bleeding, ensure your icing is the correct consistency for the technique you're using – thicker for outlining and dry piping, and not excessively thin for flooding or wet-on-wet.
Allow each layer of icing to dry completely before adding subsequent layers, especially when layering different colors or using dry piping over a flooded base. This means waiting several hours or even overnight, ideally in a dry environment. Using gel food colors instead of liquid colors helps minimize added moisture. For notorious bleeders like red or black, consider using a base of white or a light color first, letting it dry, and then piping the darker color on top. Sometimes, adding a tiny amount of white gel color to a dark color can help stabilize it.
Fixing Mistakes and Imperfections in Your Lettering
Mistakes happen to everyone, but many imperfections in cookie lettering can be fixed! If you're working with wet icing (like during flooding or wet-on-wet), you can often use a scribe tool to gently nudge or reshape lines, or even scrape off a small section and re-pipe immediately if the surrounding icing hasn't crusted. For small air bubbles that appear after piping, gently pop them with a scribe tool or a pin.
If you make a mistake while dry piping on a dried surface, you have a few options. For small errors like a shaky line or a tiny blob, you can sometimes wait for the icing to crust slightly and gently chip it away with a sharp scribe tool or blade. For larger mistakes, you might need to carefully scrape off the entire letter or section once it's fully dry.
This might leave a slight mark on the base layer, but it's often less noticeable than messy lettering. Alternatively, you can cover the mistake with a decorative element like a sprinkle, a small piped dot, or edible glitter.
Dealing with Clogging Piping Tips and Uneven Icing Flow
Clogged piping tips and uneven icing flow are common frustrations during cookie lettering techniques. Clogging is usually caused by tiny lumps in the icing (undissolved meringue powder, unsifted powdered sugar, or dried icing bits). Uneven flow can result from inconsistent icing consistency, air bubbles in the piping bag, or a partially clogged tip.
To prevent clogs, always sift your powdered sugar and mix your royal icing thoroughly until smooth. Keep your piping tips clean; wipe them with a damp cloth periodically while working and clean them immediately after use. If a tip clogs, try squeezing the bag firmly to force the icing through. If that doesn't work, use a pin or toothpick to carefully clear the opening from the outside or inside.
To ensure even flow, make sure your icing is the correct, consistent thickness throughout the batch. Before starting a letter, squeeze a small amount of icing onto parchment paper to ensure it flows smoothly. If you see air bubbles, gently massage the piping bag to move them towards the tip and squeeze them out onto parchment.

Monogrammed cookies are a classic and elegant application of advanced cookie lettering techniques. They make beautiful gifts for weddings, anniversaries, birthdays, or any occasion where a personal touch is appreciated. Monograms can range from simple single initials to intricate intertwined letters, often combined with decorative elements like wreaths, borders, or floral patterns.
For a simple monogram, you can use a stencil for a crisp single initial or dry pipe a large, elegant initial in the center of a cookie after the base layer is dry. For more complex designs, you might pipe intertwined letters using a fine tip (size 1 or 1.5) or even use a projector to trace a specific monogram design onto the dried icing before piping.
Combining dry piping for the letters with wet-on-wet techniques for a background pattern or stenciling for a surrounding frame can create stunning, layered monogrammed cookies that truly showcase your cookie lettering techniques tutorial skills.
Calligraphy offers a beautiful source of inspiration for sophisticated cookie lettering. Replicating the thick and thin strokes of traditional calligraphy with royal icing requires practice and control. This technique is typically done using dry piping on a dried base layer.
To achieve a calligraphy look, use medium-consistency icing and a small round tip (size 1 or 1.5). The key is varying the pressure on the piping bag as you form the letters. Apply more pressure to create thicker downstrokes and lighten the pressure significantly for thinner upstrokes and connecting lines. Study examples of calligraphy fonts to understand the stroke variations.
Practice piping individual letters and then connecting them smoothly. For a more precise approach, you can lightly sketch the calligraphy in edible pencil on the dried icing first, or use a projector to guide your piping. Mastering this delicate control is a key step in advanced cookie lettering techniques tutorial progress.
Applying advanced cookie lettering techniques to create themed sets allows for a cohesive and impressive presentation. Whether it's a holiday collection, a set for a specific event like a baby shower, or cookies based on a favorite book or movie, consistent lettering ties the entire set together beautifully.
Choose a lettering style that complements your theme. For a vintage theme, you might use elegant script or a slightly distressed dry piping technique. For a fun child's party, consider playful bubble letters or bright stenciled text. Use consistent colors and fonts across all the cookies in the set.
For example, if creating a Christmas set, use the same festive red or green for all the lettering, perhaps varying the style (some dry piped, some wet-on-wet patterns with integrated letters). You can also use lettering to add relevant quotes, names, or dates to different cookies within the set, ensuring they all look like they belong together. This demonstrates a higher level of planning and skill in your cookie lettering techniques.
Practice Makes Perfect: Tips for Continued Improvement
Mastering advanced cookie lettering techniques, like any skill, requires practice. Don't be discouraged by initial imperfections. Set aside time regularly to practice piping lines, curves, and different letter styles on parchment paper. This helps build muscle memory and control. Experiment with different icing consistencies and tip sizes to understand how they affect the outcome. Try replicating fonts you admire from books or online.
It's also helpful to practice specific techniques like wet-on-wet or dry piping on practice cookies or even just scrap pieces of dried icing. Focus on one technique at a time until you feel comfortable before moving on to the next. Watch tutorials (like this cookie lettering techniques tutorial!) and observe how experienced decorators handle the piping bag and manage icing consistency. Be patient with yourself; improvement comes with consistent effort and a willingness to learn from your mistakes.
We love seeing what our community creates! As you practice and master these advanced cookie lettering techniques, we encourage you to share photos of your beautifully lettered cookies. Tag us on social media or share them through our website gallery (details on BakeWithEase.com!). Your creations can inspire others who are just starting their journey with advanced cookie decorating.
Becoming proficient in cookie lettering adds a truly special dimension to your baking. It allows you to express creativity, personalize your treats, and impress everyone who sees (and eats!) your edible art. Keep exploring different fonts, colors, and techniques. There's always something new to learn and try in the wonderful world of cookie decorating. We hope this cookie lettering techniques tutorial has been a valuable resource for you!
Frequently Asked Questions
You'll need royal icing, piping bags (or squeeze bottles), and various sized piping tips. A scribe tool or toothpick is also helpful for fixing minor imperfections.
What is the best consistency of royal icing for lettering?
The ideal consistency for lettering is often called "flood consistency", which should be smooth and flow easily. It needs to be thick enough to hold its shape, but thin enough to spread evenly.
Gently tap the cookie after piping to release any trapped air. Using a scribe tool to pop any visible bubbles before the icing sets is also effective.
What are some advanced techniques for achieving a professional look?
Consider techniques like wet-on-wet design, using edible markers for fine details, or practicing calligraphy separately before piping directly onto the cookie.
If the icing is still wet, use a scribe tool to gently smooth it out. If it's dry, you may need to carefully scrape it off and start over, or incorporate the mistake into the design.
The meticulous art of cookie lettering, once a niche hobby, is experiencing a vibrant resurgence, fueled by the rise of social media and a renewed appreciation for handcrafted details. These intricate designs, far from being mere decorations, transform ordinary cookies into edible masterpieces, capable of conveying messages, celebrating occasions, and even expressing artistic flair. The techniques explored in this tutorial are not just skills; they are pathways to creativity and self-expression.
The impact of personalized, beautifully lettered cookies extends far beyond the plate. They represent a tangible connection, a thoughtful gesture that speaks volumes about the care and effort invested. They're a testament to the power of handmade items in a world increasingly dominated by mass production. The details are not the details. They make the design.
– Charles Eames. This quote perfectly encapsulates the essence of cookie lettering; the seemingly small details—the precise pressure of the piping bag, the careful blending of colors—are what elevate a simple cookie into something truly special.
Now, it's your turn. Don't be intimidated by the initial steps; embrace the process of learning and experimenting. Pick up your piping bag, choose your colors, and let your creativity flow. Each perfectly piped letter, each carefully crafted design, is a step towards mastering this beautiful art form and sharing your unique talent with the world. The journey of learning cookie lettering is as rewarding as the delicious results themselves. So, grab your supplies and let's create some edible magic!
Thanks for taking the time to explore the art of beautiful cookie lettering! We hope you've gained some valuable techniques to elevate your baking. Ready to put your new skills into practice?
- Master the art of royal icing consistency: Experiment with different ratios of meringue powder and water to achieve your perfect piping consistency. This is key to creating those flawless lines and intricate details.
- Share your creations: Tag us on social media with #BakeWithEaseLettering and show off your stunning cookie art! We’d love to see your masterpieces.
- Challenge yourself with a new lettering style: Try out a different font or technique – maybe even a watercolor effect?
What intricate design will you create for your next batch of cookies?