
The Easiest NoBake Pie Recipes for Beginners

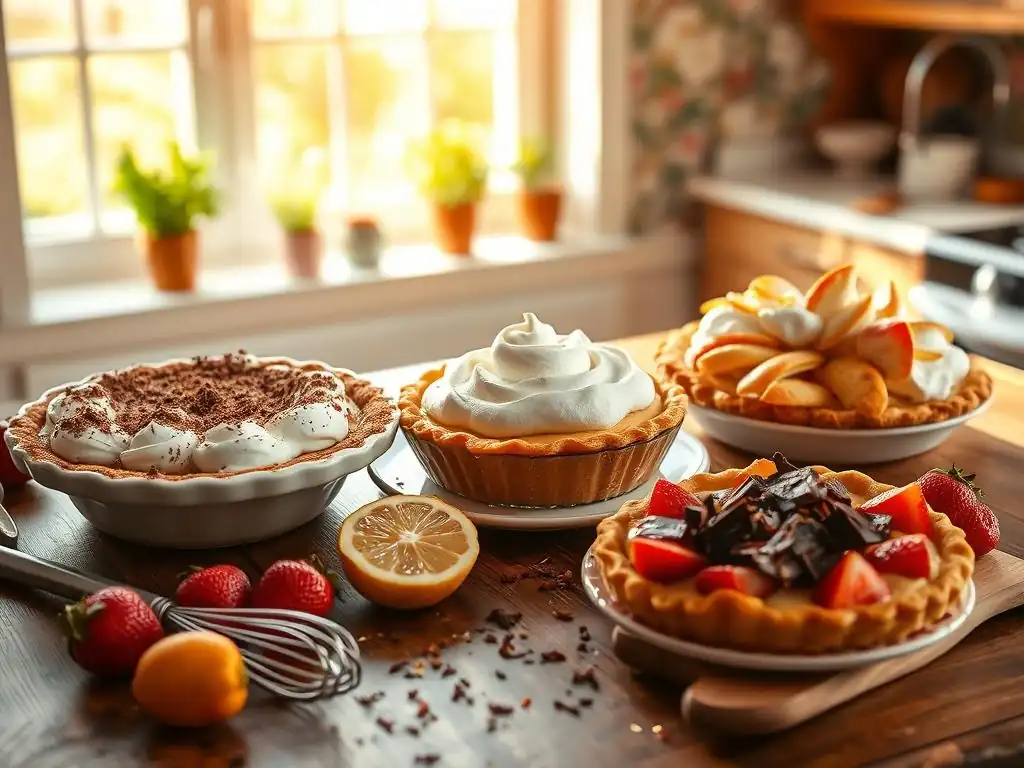
Welcome to BakeWithEase, your kitchen companion on the journey to baking bliss!
Tired of complicated recipes and endless oven watching? Discover the joy of effortless desserts with our collection of No-Bake Pie Recipes. Intrigued by the idea of a delicious pie without turning on the oven? Let's explore the secrets to creating stunning and simple pies, perfect for beginners and busy bakers alike. Get ready to whip up some magic – your no-bake adventure starts now!
- The Easiest No-Bake Pie Recipes for Beginners | BakeWithEase
- Introduction to No-Bake Pie Baking for Newbies
- Recipe 1: Classic Chocolate No-Bake Pie – A Beginner's Dream
- Recipe 2: Refreshing Strawberry No-Bake Pie – A Fruity Delight
- Recipe 3: Creamy Peanut Butter No-Bake Pie – A Nutty Indulgence
- Tips and Tricks for No-Bake Pie Success
- Troubleshooting Common No-Bake Pie Problems
- No-Bake Pie Recipe Variations: Beyond the Basics
- Conclusion: Mastering No-Bake Pies with BakeWithEase
- Frequently Asked Questions
- Final Reflection: Unlocking the Joy of Effortless Baking
- Unleash Your Inner Baker: No-Bake Pie Perfection Awaits!
The Easiest No-Bake Pie Recipes for Beginners | BakeWithEase
Introduction to No-Bake Pie Baking for Newbies
Why Choose No-Bake Pies? Perfect for Beginner Bakers
Embarking on your baking journey can feel a little daunting, especially when ovens, temperatures, and rising times are involved. This is precisely where the magic of easy no-bake pie recipes comes in, offering a fantastic entry point into creating delightful desserts without the need for a hot oven. They simplify the process significantly, focusing on mixing, chilling, and assembling, which are much less intimidating steps for someone just starting out. Think of the ease: no preheating, no worrying about under or over-baking, and minimal specialized equipment needed beyond a bowl and a whisk.
One major advantage is the time saved. While a traditional baked pie might require 30-60 minutes or more in the oven, plus cooling time, most no-bake pies are ready for chilling within 15-20 minutes of active preparation. The bulk of the time is passive chilling in the refrigerator or freezer, allowing you to focus on other things.
This makes no-bake pie recipes ideal for busy weeknights or last-minute dessert needs. Furthermore, they are incredibly forgiving; small errors in mixing consistency are often corrected during the chilling phase, unlike baked goods where a misplaced ingredient or wrong temperature can lead to complete failure.
BakeWithEase's Guide to Simple No-Bake Pie Recipes
At BakeWithEase, our mission is to demystify baking and make it accessible and enjoyable for everyone, especially beginners. Our selection of simple no-bake pie recipes is curated with this in mind. We focus on recipes that use readily available ingredients, require minimal steps, and guarantee delicious results with basic kitchen tools. We believe that your first few attempts at making desserts should be positive and encouraging, building your confidence to tackle more complex recipes later.
Our approach breaks down each recipe into easy-to-follow sections, from gathering ingredients to the final chilling step. We provide clear, concise instructions designed to eliminate guesswork and prevent common pitfalls. For instance, we'll specify exactly how long to chill the pie for the best texture, or suggest simple ways to check if your filling is setting correctly. These no-bake pie recipes are specifically chosen for their high success rate for novices, ensuring you can create impressive and tasty desserts right from your first try, without needing any prior baking experience.
Recipe 1: Classic Chocolate No-Bake Pie – A Beginner's Dream
Ingredients for Your Easy Chocolate No-Bake Pie
Creating a classic chocolate no-bake pie starts with gathering a few simple ingredients. You'll need items for the crust and the filling. For a standard 9-inch pie plate, you'll typically need about 1 ½ cups of graham cracker crumbs, which is roughly one full package of graham crackers crushed finely. To bind these crumbs, you'll need around ½ cup (one stick) of unsalted butter, melted. A pinch of salt, about ¼ teaspoon, can enhance the flavor of the crust.
For the luscious chocolate filling, the core ingredients usually include sweetened condensed milk, which provides both sweetness and structure without cooking. You'll need one 14-ounce can. Unsweetened cocoa powder, about ½ cup, delivers the rich chocolate flavor. For stability and smoothness, cream cheese, softened to room temperature (usually 8 ounces), is often incorporated. Finally, vanilla extract (about 1 teaspoon) and a little salt (another pinch, maybe ⅛ teaspoon) round out the flavors. Some recipes might also call for a bit of whipped cream or whipped topping folded in for a lighter texture.
Step-by-Step Instructions: Making the Chocolate Crust
The base of this easy no-bake pie is a simple graham cracker crust, which requires no baking at all.
Here’s how you make it:
- Crush graham crackers into fine crumbs. You can do this by placing them in a zip-top bag and crushing them with a rolling pin, or by pulsing them in a food processor until they resemble fine sand. Measure out 1 ½ cups of these crumbs into a medium bowl.
- Melt ½ cup of unsalted butter. You can do this in a microwave-safe bowl in 30-second increments until fully melted, or in a small saucepan over low heat.
- Pour the melted butter over the graham cracker crumbs in the bowl. Add ¼ teaspoon of salt.
- Stir the mixture with a fork or spoon until all the crumbs are evenly moistened by the butter. It should look like wet sand.
- Pour the crumb mixture into a 9-inch pie plate.
- Using the bottom of a glass or a flat-bottomed measuring cup, press the crumbs firmly and evenly into the bottom and up the sides of the pie plate. Ensure the edges are well-packed.
- Place the prepared crust in the refrigerator or freezer while you prepare the filling. Chilling for at least 10-15 minutes helps it set slightly before adding the filling.
Preparing the Rich Chocolate Filling (No-Bake Method)
The no-bake chocolate filling comes together quickly with just a few steps, relying on the properties of condensed milk and cream cheese to set.
Follow these steps for the filling:
- In a large mixing bowl, beat 8 ounces of softened cream cheese with an electric mixer (or whisk vigorously by hand) until smooth and creamy, with no lumps. This might take 2-3 minutes on medium speed.
- Gradually beat in the 14-ounce can of sweetened condensed milk until fully combined and smooth. Scrape down the sides of the bowl as needed.
- Sift ½ cup of unsweetened cocoa powder over the mixture. Sifting helps prevent lumps. Add 1 teaspoon of vanilla extract and ⅛ teaspoon of salt.
- Beat the mixture again until everything is well incorporated and the filling is smooth and uniformly chocolate brown. Be careful not to overmix once the cocoa is added, as this can sometimes incorporate too much air.
- If using, gently fold in about 1 cup of lightly sweetened whipped cream or thawed whipped topping for a lighter, mousse-like texture.
Assembling and Chilling Your No-Bake Chocolate Pie
Once both the crust and filling are ready, assembling your no-bake chocolate pie is the final simple step before letting time and cold do their magic.
- Retrieve the chilled graham cracker crust from the refrigerator or freezer.
- Carefully pour the prepared chocolate filling into the crust, spreading it evenly with a spatula or the back of a spoon. Ensure the top is relatively smooth.
- Optional: You can add toppings at this stage or wait until serving. Ideas include chocolate shavings, cocoa powder dusting, or a layer of whipped cream.
- Cover the pie gently. Plastic wrap works well, but try not to let it touch the surface of the filling directly to avoid sticking. Placing toothpicks around the edge before covering can help keep the wrap lifted.
- Place the covered pie in the refrigerator to chill. This is the most crucial step for the pie to set properly. A minimum of 4 hours is required, but chilling for 6 hours or even overnight (about 8-12 hours) yields the firmest, most sliceable pie.
- To serve, remove from the refrigerator and let it sit for 5-10 minutes if desired, especially if chilled overnight. Slice with a sharp knife dipped in hot water for clean cuts.
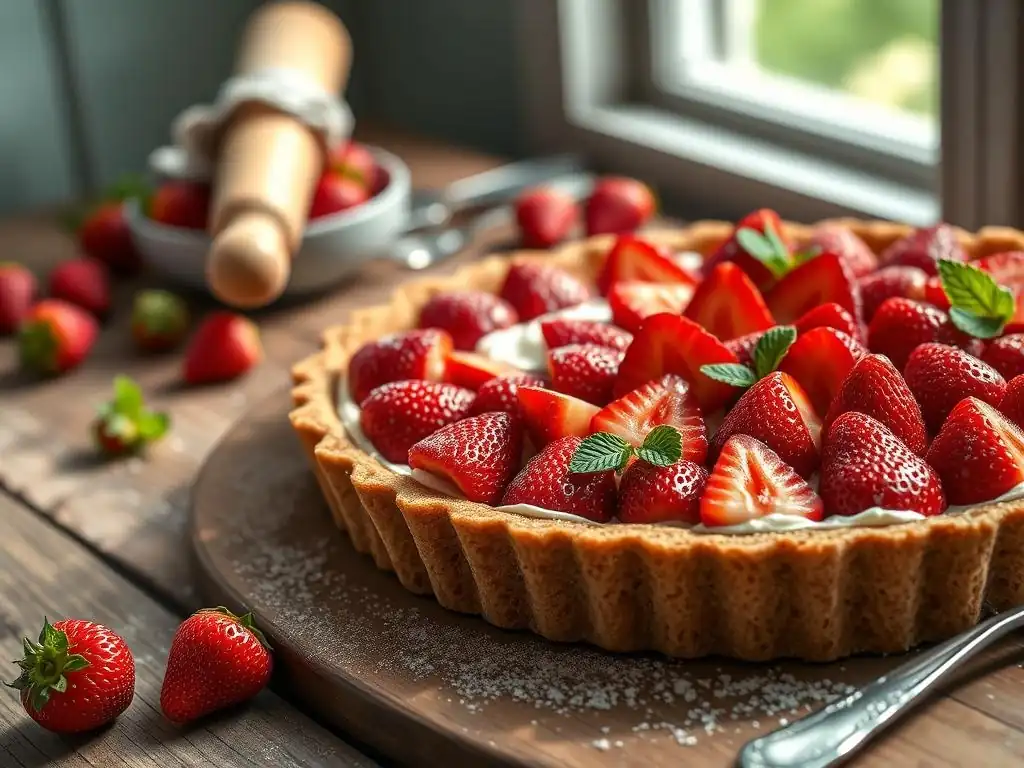
Recipe 2: Refreshing Strawberry No-Bake Pie – A Fruity Delight
Gathering Your Ingredients for the Strawberry Pie
A refreshing strawberry no-bake pie brings bright, fruity flavor without turning on the oven. The ingredients are straightforward and easy to find. You'll need a prepared no-bake crust; a graham cracker crust (1 ½ cups crumbs, ½ cup melted butter, as in the previous recipe) or even a store-bought no-bake shell works perfectly.
For the vibrant filling, fresh strawberries are key – about 4 cups, hulled and sliced. You'll also need granulated sugar, typically ½ to ¾ cup depending on the sweetness of your berries and your preference. A thickening agent is essential for a no-bake fruit pie to set; cornstarch is a common choice, requiring about 3-4 tablespoons mixed with a little cold water to form a slurry.
For extra flavor and a smoother texture, some recipes incorporate a package (3 ounces) of strawberry flavored gelatin powder, dissolved in hot water (about 1 cup). Lemon juice (1-2 tablespoons) can brighten the flavor, and often a small amount of water (½ cup) is needed to cook down some of the strawberries.
Quick Graham Cracker Crust Instructions
For this refreshing no-bake pie, a simple graham cracker crust is ideal, providing a neutral base that lets the strawberry flavor shine.
Here are the quick steps:
- Measure 1 ½ cups of fine graham cracker crumbs. You can buy pre-crushed crumbs or make them yourself from about 10-12 full graham cracker sheets.
- Melt ½ cup (1 stick) of unsalted butter. Combine the melted butter with the graham cracker crumbs in a bowl. You can also add a tablespoon of sugar if you like a slightly sweeter crust.
- Mix until the crumbs are uniformly moistened.
- Press the mixture firmly into the bottom and up the sides of a 9-inch pie plate. A flat-bottomed cup or your knuckles work well for this.
- Chill the crust in the refrigerator for at least 15-20 minutes while you prepare the filling. This helps it firm up slightly before adding the wet filling.
Making the Strawberry Cream Filling
The filling for a strawberry no-bake pie can be made in a few ways, but a common method involves cooking down some of the berries with a thickener to create a stable base, then adding fresh berries.
Follow these steps:
- Hull and slice about 4 cups of fresh strawberries. Set aside about 2 cups of the nicest slices for layering later or mixing into the filling.
- In a medium saucepan, combine the remaining 2 cups of strawberry slices with ½ cup of water and ½ to ¾ cup of granulated sugar. Bring the mixture to a simmer over medium heat, stirring occasionally, until the strawberries are soft and have released their juices, about 5-7 minutes.
- While the strawberries are simmering, whisk together 3-4 tablespoons of cornstarch with 4 tablespoons of cold water in a small bowl until smooth.
- Pour the cornstarch slurry into the simmering strawberry mixture, stirring constantly. Continue to cook, stirring, until the mixture thickens significantly and becomes clear, usually 1-2 minutes after it returns to a simmer. It should coat the back of a spoon. Remove from heat.
- Optional step for extra set: If using, dissolve a 3-ounce package of strawberry gelatin in 1 cup of boiling water in a separate bowl. Stir until completely dissolved, then stir this into the cooked strawberry mixture.
- Let the cooked strawberry mixture cool slightly, about 10 minutes. Then, gently fold in the reserved 2 cups of fresh strawberry slices and 1-2 tablespoons of lemon juice.
Layering and Setting Your No-Bake Strawberry Pie
Assembling the strawberry no-bake pie is quick and simple once the filling is prepared.
Here's how to finish it:
- Retrieve your chilled graham cracker crust from the refrigerator.
- Carefully pour the strawberry filling into the crust, distributing the fresh berries evenly throughout the cooked mixture. Spread the top smooth with a spatula.
- Optional: You can arrange additional fresh strawberry slices on top of the filling in a decorative pattern before chilling.
- Cover the pie loosely with plastic wrap, ensuring it doesn't press directly onto the filling.
- Place the pie in the refrigerator to chill until completely set. This typically takes at least 4-6 hours. For the best results and clean slicing, chilling overnight (8-12 hours) is highly recommended. The filling should be firm to the touch.
- Serve chilled. This bright, easy no-bake pie is perfect topped with a dollop of whipped cream.
Recipe 3: Creamy Peanut Butter No-Bake Pie – A Nutty Indulgence
Essential Ingredients for a Peanut Butter Dream
For lovers of peanut butter, a creamy no-bake peanut butter pie is an absolute dream, and it's surprisingly easy to make. The ingredients list is short and sweet. You'll need a crust; a chocolate cookie crumb crust complements the peanut butter flavor beautifully. This requires about 1 ½ cups of chocolate cookie crumbs (like OREOs with the cream filling removed, or chocolate wafers), mixed with ½ cup (1 stick) of melted butter.
The star of the show is the peanut butter filling. You'll need creamy peanut butter – about 1 ½ cups of a standard, hydrogenated-oil style peanut butter works best for stability. Natural peanut butter can sometimes separate. Cream cheese, softened (8 ounces), provides tanginess and body. Confectioners' sugar (powdered sugar), about 1 ½ cups, sweetens and thickens the filling. For a light and fluffy texture, whipped topping (like Cool Whip), thawed, is essential – usually an 8-ounce tub. Vanilla extract (1 teaspoon) enhances the flavors.
A chocolate cookie crumb crust is the perfect partner for a rich peanut butter filling, and like the graham cracker crust, it's a simple no-bake process.
Here are the steps:
- Make 1 ½ cups of chocolate cookie crumbs. If using OREOs, remove the cream filling from about 18-20 cookies before crushing. Pulse in a food processor or crush in a bag until fine. If using chocolate wafers, simply crush about 20-25 cookies.
- Melt ½ cup of unsalted butter.
- Combine the melted butter with the chocolate cookie crumbs in a bowl. Stir until the crumbs are evenly coated.
- Press the mixture firmly into the bottom and up the sides of a 9-inch pie plate. Use a flat-bottomed glass or measuring cup for even compaction.
- Chill the crust in the refrigerator for at least 15 minutes while you prepare the filling.
Crafting the Peanut Butter Filling
The creamy peanut butter filling comes together with just a few ingredients and minimal effort, resulting in a smooth, decadent texture perfect for no-bake pie recipes.
Follow these steps:
- In a large mixing bowl, beat 8 ounces of softened cream cheese until smooth and fluffy using an electric mixer.
- Add 1 ½ cups of creamy peanut butter and 1 teaspoon of vanilla extract. Beat until well combined and smooth.
- Gradually add 1 ½ cups of confectioners' sugar, beating on low speed until incorporated, then increase speed to medium and beat until the mixture is light and fluffy. Scrape down the sides of the bowl as needed.
- Gently fold in an 8-ounce tub of thawed whipped topping using a spatula. Fold until no white streaks remain and the mixture is uniform. Be careful not to overmix, which can deflate the whipped topping.
Combining and Freezing Your Peanut Butter No-Bake Pie
Unlike many other no-bake pie recipes that set in the refrigerator, peanut butter no-bake pies often benefit from freezing to achieve a firmer, scoopable texture that holds its shape beautifully.
Here's how to finish this indulgent dessert:
- Retrieve your chilled chocolate cookie crumb crust from the refrigerator.
- Spoon the creamy peanut butter filling into the crust, spreading it evenly with a spatula.
- Optional: Drizzle melted chocolate or peanut butter over the top, or sprinkle with chopped peanuts or mini chocolate chips.
- Cover the pie securely. Plastic wrap works, but covering the pie plate tightly with aluminum foil provides better protection against freezer burn.
- Place the pie in the freezer to set. For a firm, sliceable pie, freeze for at least 4-6 hours. For an even firmer, almost ice-cream-like consistency, freeze overnight (8-12 hours).
- To serve, remove the pie from the freezer and let it sit at room temperature for 10-15 minutes to soften slightly before slicing. Slice with a sharp knife dipped in hot water for clean cuts.
Tips and Tricks for No-Bake Pie Success
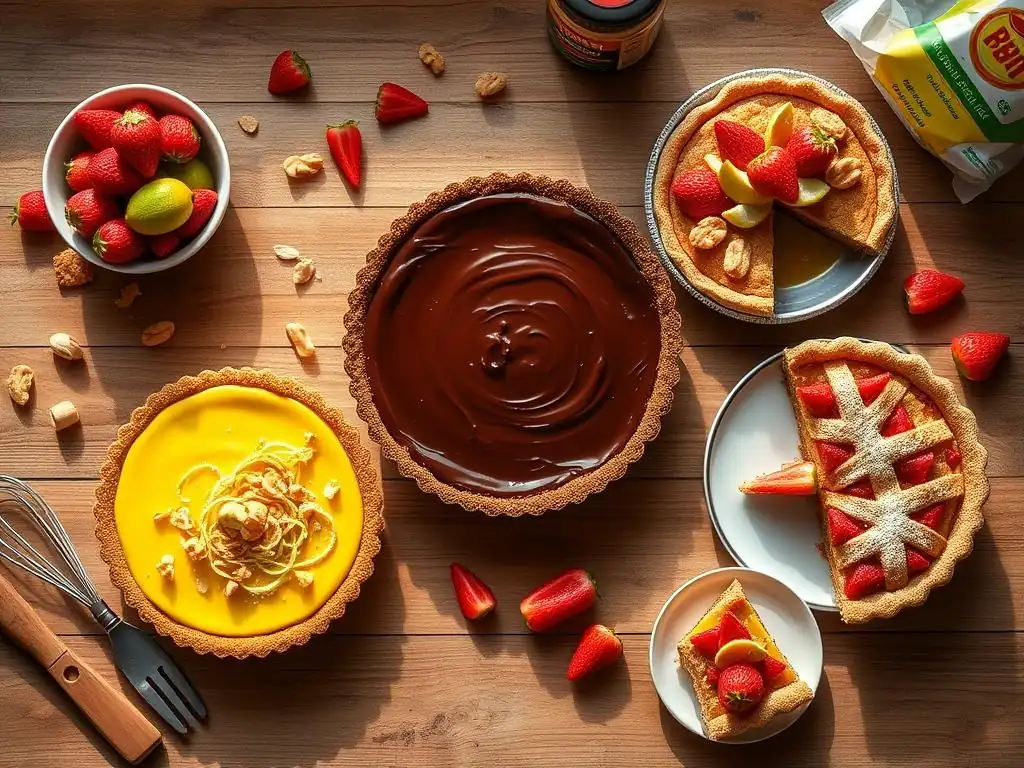
Choosing the Right Crust for Your No-Bake Pie
The crust is the foundation of any pie, and for no-bake pie recipes, the choice of crust can significantly impact the final flavor and texture. The most common and easiest option is a crumb crust made from graham crackers, vanilla wafers, or chocolate cookies (like OREOs). These are simple to make by crushing the cookies/crackers and mixing them with melted butter, then pressing into the pan.
A standard ratio is about 1 ½ cups of crumbs to ½ cup (one stick) of melted butter for a 9-inch pie. This ratio provides enough fat to bind the crumbs firmly when chilled, preventing a crumbly mess when sliced.
Beyond crumb crusts, you can also use pre-made crusts available at most grocery stores, which are often located in the baking aisle or freezer section. These come in various types, including graham cracker, chocolate cookie, and shortbread. Using a store-bought crust is a quick shortcut that makes your no-bake pie recipe even faster. Ensure the crust is designed for no-bake fillings or is a crumb style, as traditional pastry crusts require baking. Whichever crust you choose, pressing it firmly into the pie plate and chilling it before adding the filling is a crucial step for stability.
No-Bake Pie Filling Consistency: Getting it Right
Achieving the perfect filling consistency is key to a successful no-bake pie that slices cleanly and holds its shape. For creamy fillings, like those based on cream cheese, pudding, or sweetened condensed milk, the setting power primarily comes from chilling. Ingredients like cream cheese and condensed milk firm up significantly when cold. Whipped cream or whipped topping adds lightness but can make the filling softer if too much is used or if it's overmixed and deflated. A good creamy no-bake pie recipe will balance these components.
For fruit fillings or those using gelatin, the thickener is critical. Cornstarch or other starches need to be cooked briefly with the fruit juices or liquid until thickened, and then the mixture sets as it cools. Gelatin requires dissolving in hot liquid and then chilling. Using the correct amount of thickener specified in the recipe is vital; too little, and your pie won't set; too much, and it can become rubbery or gummy. Ensure ingredients like cream cheese are properly softened before mixing to avoid lumps, which can affect the filling's smoothness and consistency.
Perfecting the Chill Time for No-Bake Pies
Chilling is arguably the most important step in most no-bake pie recipes. This is when the magic happens – the ingredients firm up, the flavors meld, and the pie becomes sliceable. While a minimum chill time is often given (e.g., 3-4 hours), extending this time significantly improves the pie's structure. For best results, planning to chill your no-bake pie for at least 6-8 hours, or preferably overnight (10-12 hours), is highly recommended. This allows ample time for fats to solidify (in crumb crusts and creamy fillings) and for starches or gelatin to fully set.
Insufficient chilling is a common reason why a no-bake pie filling might seem too soft or the crust crumbles when cut. The temperature of your refrigerator also plays a role; ensure it's set correctly (ideally around 35-40°F or 1-4°C) for efficient chilling.
If you're short on time, some no-bake pie recipes, particularly those with a creamy or mousse-like filling, can be placed in the freezer for 1-2 hours for a quick set, but be mindful of freezing certain ingredients like dairy, which can sometimes affect texture upon thawing. Always cover the pie properly before chilling to prevent it from absorbing odors from the refrigerator.
Easy No-Bake Pie Variations: Customizing Your Dessert
One of the joys of mastering easy no-bake pie recipes is the ability to customize and create endless variations. Once you understand the basic principles of crust making and filling setting, you can start experimenting with flavors and textures. For example, you can swap the type of cookie in your crumb crust – try shortbread for a buttery base, ginger snaps for a spicy kick, or even pretzels for a salty contrast.
The filling possibilities are even wider. Instead of just chocolate, try white chocolate, or swirl the two together. Add mix-ins like chopped nuts, chocolate chips, shredded coconut, or crushed candies to creamy fillings. Fruit fillings can be made with almost any berry or soft fruit, adjusting sugar based on sweetness.
Lemon or lime juice can create tangy fillings, often thickened with condensed milk or gelatin. Consider adding a layer of sliced bananas to a vanilla pudding-based no-bake pie before chilling. Don't be afraid to play with extracts like almond or peppermint, or spices like cinnamon or nutmeg, to add unique dimensions to your easy no-bake pies.
Troubleshooting Common No-Bake Pie Problems
Soggy Crust Solutions for No-Bake Pies
A soggy crust is one of the most disappointing issues when making no-bake pie recipes. This often happens when the filling is too wet or the pie hasn't been chilled for long enough, allowing moisture from the filling to seep into the crumb crust. The ratio of butter to crumbs in the crust is also important; too little butter means the crumbs won't bind properly and will absorb liquid more easily. A typical ratio is 1 ½ cups crumbs to ½ cup (1 stick) melted butter.
To prevent a soggy crust, ensure your crust is well-packed into the pie plate – pressing it down firmly helps create a denser barrier. Chilling the crust before adding the filling for at least 15-20 minutes is a simple but effective step, as it allows the butter to solidify and hold the crumbs together better.
For particularly wet fillings (like some fruit fillings), you can brush the inside of the chilled crumb crust lightly with a thin layer of melted white chocolate or a bit of melted butter and let it set before adding the filling; this creates a moisture barrier. Using a filling that is properly thickened and chilled for the recommended time is also crucial.
No-Bake Pie Filling Not Setting? Here's Why
A no-bake pie filling that refuses to set is frustrating, but the cause is usually one of a few common issues. If your filling relies on cream cheese or condensed milk for setting, the most likely culprit is insufficient chilling time. These ingredients need several hours in the cold to firm up properly. Ensure your refrigerator is cold enough. A temperature above 40°F (4°C) might not be sufficient for proper setting.
If the recipe uses a thickener like cornstarch or gelatin, the problem could be related to its activation. Cornstarch needs to be cooked and reach a certain temperature to thicken; if it wasn't cooked long enough after adding the slurry, it won't set properly. Gelatin needs to be fully dissolved in hot liquid and then chilled; if the liquid wasn't hot enough or the gelatin wasn't stirred thoroughly, it won't activate correctly.
Using the wrong proportions of liquid to thickener is also a common error – using too much liquid or not enough thickener will prevent setting. Ensure ingredients like cream cheese are at the correct temperature (softened) before mixing, as cold, hard cream cheese can prevent smooth incorporation, leading to a filling that doesn't set evenly.
Avoiding a Grainy Texture in Your No-Bake Pies
A smooth, creamy texture is highly desirable in most no-bake pie recipes, and encountering a grainy texture can be disappointing. One frequent cause of graininess in creamy fillings, especially those with cream cheese or powdered sugar, is not properly mixing the cream cheese initially. If the cream cheese isn't softened to room temperature and beaten until completely smooth before other ingredients are added, small lumps can remain and create a grainy mouthfeel.
Another cause, particularly when using powdered sugar, is not mixing it in gradually or not beating the mixture long enough to dissolve the sugar crystals fully. Sifting the powdered sugar before adding it can help prevent lumps and promote smoother incorporation. For fillings that involve cooking, like some pudding or fruit fillings, graininess can occur if a starch thickener (like cornstarch) isn't fully dissolved in a cold liquid before being added to the hot mixture, causing it to clump.
Overheating or boiling a mixture with egg yolks (in cooked pudding bases) can also lead to a grainy or curdled texture, though this is less common in purely no-bake fillings. Ensuring all ingredients are at the correct temperature and fully incorporated is key to a smooth no-bake pie.
No-Bake Pie Recipe Variations: Beyond the Basics
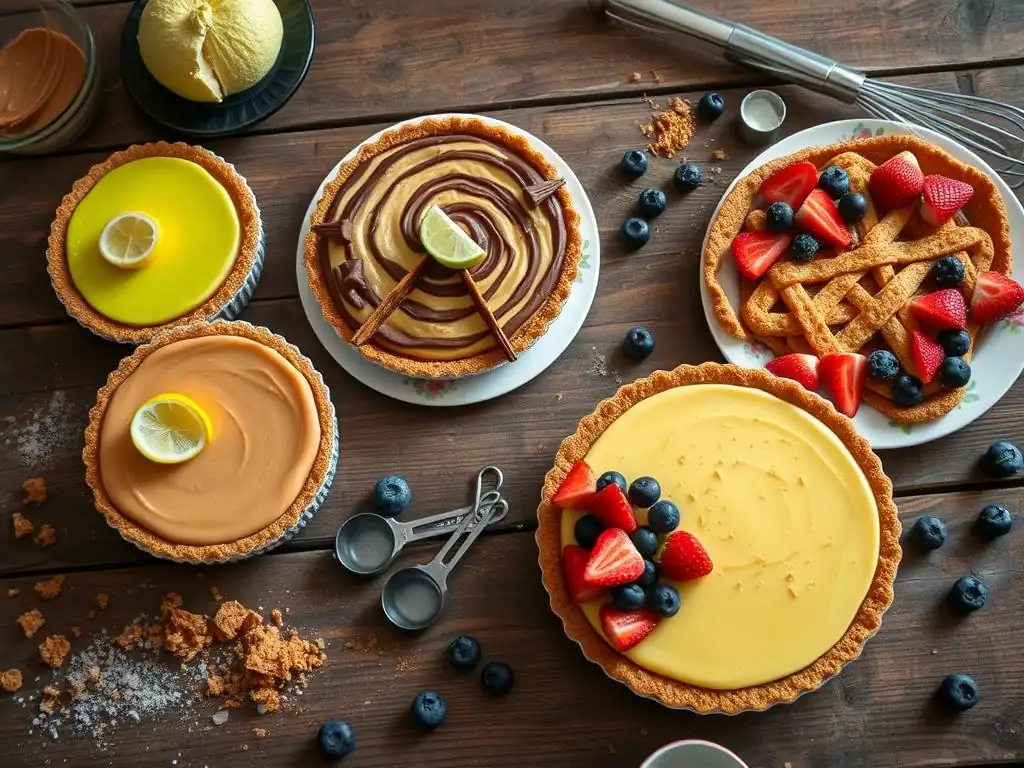
No-Bake Lemon Pie Recipe for Beginners
A no-bake lemon pie offers a bright, tangy alternative to creamy or fruity pies and is surprisingly simple for beginners. The filling often relies on the acidity of lemon juice to interact with sweetened condensed milk, causing it to thicken into a smooth, custard-like consistency when chilled. Typically, this involves whisking together one 14-ounce can of sweetened condensed milk with ½ to ¾ cup of fresh lemon juice and the zest of one lemon for extra flavor. Some recipes might add a bit of whipped topping or cream cheese for a different texture.
This mixture is then simply poured into a pre-made or chilled graham cracker crust and refrigerated until firm, usually 4-6 hours. The chemical reaction between the acidic lemon juice and the proteins in the condensed milk does all the work of setting the filling without any cooking. It's a fantastic example of how simple chemistry can create a delicious dessert, making it one of the easiest no-bake pie recipes to master.
Easy No-Bake Cheesecake Pie Recipe
If you love cheesecake but are intimidated by water baths and potential cracks, an easy no-bake cheesecake pie is the perfect solution. This version captures the creamy essence of cheesecake without the baking fuss. The base is typically a mixture of softened cream cheese (often 2-3 blocks, 16-24 ounces total) beaten with powdered sugar (1-1 ½ cups) and vanilla extract (1-2 teaspoons) until smooth.
To achieve a light, airy texture and help it set firmly, whipped cream or whipped topping (an 8-ounce tub or equivalent homemade) is gently folded into the cream cheese mixture. This filling is then poured into a graham cracker or cookie crumb crust and chilled until firm, usually 6-8 hours or overnight. The result is a rich yet light, tangy, and sweet dessert that's much less prone to the issues associated with baked cheesecakes, making it a very accessible no-bake pie recipe.
No-Bake Banana Cream Pie Recipe: A Simple Treat
A no-bake banana cream pie is a beloved classic, and the no-bake version simplifies it dramatically. Instead of a cooked custard, this recipe often uses instant vanilla pudding mix as the base thickener. You prepare one or two packages (usually 3.4 oz each) of instant vanilla pudding according to package directions, but often using slightly less milk than recommended for a thicker result.
Once the pudding thickens slightly (which happens quickly with instant mix), sliced fresh bananas are layered into a pie crust (a vanilla wafer or graham cracker crust works well), and the pudding is poured over the top. Some variations fold whipped cream or whipped topping into the pudding for a lighter filling. The pie is then chilled until fully set, typically 4-6 hours. The simplicity of using instant pudding makes this one of the quickest and easiest no-bake pie recipes for a creamy, comforting dessert.
Conclusion: Mastering No-Bake Pies with BakeWithEase
Enjoy Delicious, Easy No-Bake Pies Tonight!
You've now explored some of the easiest and most delicious no-bake pie recipes perfect for anyone starting their baking journey. From rich chocolate to refreshing strawberry and creamy peanut butter, these recipes demonstrate just how simple and rewarding creating a homemade dessert can be, all without ever needing to turn on your oven. With basic ingredients, minimal equipment, and straightforward steps focused on mixing and chilling, you have everything you need to succeed.
These no-bake pie recipes are not just easy; they are reliably delicious, offering wonderful textures and flavors that are sure to impress. They are perfect for last-minute gatherings, hot summer days when you don't want to heat up the kitchen, or simply satisfying a dessert craving with minimal fuss. We encourage you to pick one of these easy no-bake pies and give it a try tonight. You might be surprised at how quickly you can create something so delightful.
We love seeing what our community creates! Trying these easy no-bake pie recipes is a fantastic way to build confidence in the kitchen and discover the joy of making desserts. Whether you followed one of our recipes exactly or put your own spin on it with different toppings or variations, your success is our success.
We invite you to share photos of your completed no-bake pies! Let us know which recipe you tried, how it turned out, and any tips you discovered along the way. Connecting with other beginner bakers and sharing experiences is a great part of the BakeWithEase community. Your journey with no-bake pie recipes is just beginning, and we're excited to see the delicious results!
Frequently Asked Questions
What exactly are no-bake pie recipes?
No-bake pie recipes are desserts that don't require the use of an oven for the filling to set. Instead, they typically rely on chilling or refrigeration to achieve the desired consistency, using ingredients like gelatin or cream cheese.
Are no-bake pies easier to make than baked pies?
Generally, yes! No-bake pies often involve simpler steps and fewer ingredients, making them more approachable for beginner bakers and those looking for a quick dessert option.
What are some common ingredients used in no-bake pie recipes?
Common ingredients include graham cracker crusts, cream cheese, sweetened condensed milk, whipped cream, chocolate, fruit, and sometimes gelatin to help the filling set properly.
Can I substitute ingredients in no-bake pie recipes?
While some substitutions are possible, be careful! Altering key ingredients like gelatin or the base ingredient (cream cheese, for example) can significantly affect the pie's texture and stability.
How long do no-bake pies typically need to chill before serving?
Most no-bake pies require at least 4-6 hours of chilling time in the refrigerator to allow the filling to fully set and firm up. Some recipes may even benefit from overnight chilling for optimal results.
Final Reflection: Unlocking the Joy of Effortless Baking
The simplicity of no-bake pie recipes transcends mere convenience; it unlocks a world of delicious possibilities for everyone, regardless of baking experience. This article has explored a range of easy-to-follow recipes, proving that creating delightful desserts doesn't require hours in a hot kitchen or advanced culinary skills. The accessibility of these recipes empowers individuals to enjoy the satisfaction of homemade treats without the intimidation factor often associated with baking.
The enduring appeal of no-bake pies lies in their ability to connect us to simpler times, evoking feelings of nostalgia and shared experiences around the dessert table. These recipes are more than just instructions; they are pathways to creating memories and fostering connections. The best things in life are simple,
a sentiment perfectly captured by the ease and deliciousness of these no-bake creations. The recipes shared here are a testament to the power of simple ingredients transformed into something extraordinary, a testament to the enduring magic of homemade desserts.
Now, it's your turn. Don't let the fear of baking hold you back from experiencing the joy of creating your own delicious no-bake pie. Choose a recipe that sparks your interest, gather your ingredients, and embark on this simple yet rewarding culinary adventure. The sweet taste of success, and the satisfaction of sharing your creation with loved ones, awaits. Let the ease and deliciousness of no-bake pies inspire you to explore your culinary creativity – you might surprise yourself with what you can achieve!
Unleash Your Inner Baker: No-Bake Pie Perfection Awaits!
Thanks for joining us on this delicious journey into the world of no-bake pies! We hope you've discovered some incredibly easy and tasty recipes to try. Ready to take your baking skills to the next level (without turning on the oven)?
- Dive straight into your favorite recipe: Grab your ingredients and let's get baking! Which pie will you tackle first?
- Share your baking triumph: Show off your stunning creation on social media – use #BakeWithEaseNoBake to inspire others!
- Explore our other no-bake delights: Head over to our recipe section for even more sweet treats that require no oven time!
So, what mouthwatering flavor combination will you create next?