
The Ultimate Guide to Chopping Chocolate for Baking

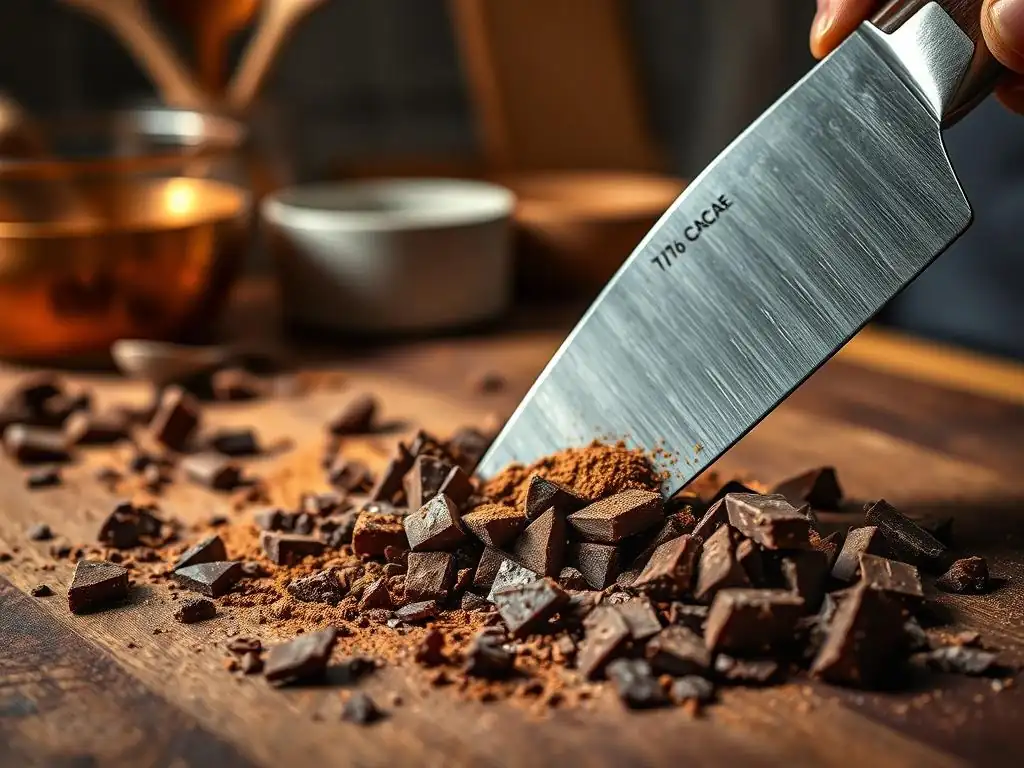
Welcome to BakeWithEase, your haven for all things baking! Ever wondered if you're truly getting the most out of your chocolate when baking? This isn't just about melting; it's about flavor, texture, and that perfect melt-in-your-mouth experience. Dive into our guide, "The Ultimate Guide to Chopping Chocolate for Baking," and discover the secrets to perfecting chocolate chopping for baking, unlocking a whole new level of deliciousness in your creations. Are you ready to elevate your baking game, one perfectly chopped piece at a time? Let's get started!
- The Ultimate Guide to Chopping Chocolate for Baking: Sweet Sensations
- Introduction: Perfecting Chocolate Chopping for Baking Success
- Understanding Different Types of Chocolate for Baking
- Essential Tools for Chopping Chocolate Like a Pro
- Step-by-Step Guide: How to Chop Chocolate for Baking
- Achieving Your Desired Chocolate Size: From Fine to Coarse
- Avoiding Common Chocolate Chopping Mistakes
- Storing Chopped Chocolate for Future Baking Projects
- Beyond the Basics: Advanced Chocolate Chopping Techniques
- Troubleshooting: Common Chocolate Chopping Problems & Solutions
- Incorporating Chopped Chocolate into Sweet Sensations Recipes
- Conclusion: Mastering the Art of Chocolate Chopping
- Frequently Asked Questions
- Final Reflection: The Sweet Science of the Perfect Chop
- Unleash Your Inner Chocolatier: Master the Art of Chocolate Chopping!
The Ultimate Guide to Chopping Chocolate for Baking: Sweet Sensations
Introduction: Perfecting Chocolate Chopping for Baking Success
Why Proper Chocolate Chopping Matters for Sweet Sensations Recipes
The way you chop chocolate fundamentally impacts the outcome of your baked goods. Uneven pieces can lead to a variety of issues; for instance, small shards might melt completely and disappear into the batter, while large chunks could remain solid or even burn on the outside while the inside stays firm.
Imagine biting into a chocolate chip cookie where some bites have no chocolate and others have a massive, unmelted lump – not the consistent "sweet sensation" you're aiming for. Proper chopping ensures that chocolate melts evenly and distributes throughout your dough or batter, preventing these frustrating inconsistencies and guaranteeing a delightful chocolatey experience in every bite.
Furthermore, the surface area created by chopping affects how quickly the chocolate melts during baking. Finely chopped chocolate melts faster and incorporates more fully, ideal for batters where you want a smooth, integrated chocolate flavor, like in a chocolate cake or molten lava cake.
Larger chunks, on the other hand, retain their shape more during baking, providing pockets of melted chocolate that create gooey textures, perfect for classic chocolate chip cookies or chunky brownies. Perfecting chocolate chopping for baking isn't just about breaking up a bar; it's a crucial step in controlling texture, flavor distribution, and the overall quality of your baked goods, directly contributing to those desired sweet sensations.
Elevate Your Baking: Achieving Chocolate Chunks Perfection
Moving beyond simply breaking chocolate into pieces, achieving "chocolate chunks perfection" means intentionally creating pieces of a specific, relatively uniform size tailored to your recipe. This level of precision elevates your baking from good to great. For example, a recipe calling for "chocolate chunks" typically benefits from pieces roughly 1/4 to 1/2 inch in size. Using pieces significantly larger or smaller can alter the intended texture and melting pattern, potentially leading to a less satisfying result. Think about a rich double chocolate brownie – you want distinct pockets of melted chocolate, not a homogenous chocolatey mass.
Consistency in size is key to perfecting chocolate chopping for baking. When all your chocolate pieces are roughly the same size, they will melt or soften at a similar rate during the baking process. This predictability is essential for reliable results, especially in recipes where the chocolate plays a starring role in texture, like a classic chocolate chip cookie. Achieving this uniformity through careful chopping ensures that each bite delivers a consistent amount of chocolate, contributing to a balanced flavor and texture profile across the entire batch and truly delivering on the promise of sweet sensations.
Understanding Different Types of Chocolate for Baking
Baking Chocolate Varieties: A Guide for Sweet Sensations Bakers
The world of baking chocolate is diverse, offering options that behave differently when heated and contribute distinct flavors. Unsweetened chocolate, often labeled as "baking chocolate" and typically sold in 4-ounce bars, contains virtually no sugar (less than 1% by weight) and is 100% cocoa solids. It's intensely bitter and primarily used to provide deep chocolate flavor in recipes where sugar is added separately.
Semisweet chocolate contains between 35% and 60% cocoa solids and is a popular all-purpose choice for cookies, brownies, and cakes. Dark chocolate typically ranges from 60% to 80% cocoa solids, offering a more intense flavor than semisweet but still with some sweetness. Milk chocolate, with around 10-20% cocoa solids and added milk solids, is sweeter and creamier but can be trickier to chop and bake with due to its lower melting point.
White chocolate, technically not a chocolate because it contains no cocoa solids (only cocoa butter, sugar, milk solids, and vanilla), behaves differently during baking, often melting more readily. Each type requires slightly different handling when chopping. Unsweetened and dark chocolate tend to be firmer and less prone to melting from hand heat, making them easier to get clean cuts.
Milk and white chocolate are softer and melt more easily, requiring cooler conditions and quicker work. Understanding these properties is fundamental to perfecting chocolate chopping for baking and selecting the right variety for the specific sweet sensations you wish to create.
Choosing the Right Chocolate for Chopping: From Bars to Callets
When it comes to format, baking chocolate is commonly available as bars, blocks, or callets (small discs or feves). Large blocks (often 1-2 pounds) or bars are generally the most economical choice for chopping large quantities. They offer a solid mass that is ideal for uniform chopping, allowing you to control the size precisely. For example, a 1-pound block of good quality dark chocolate might cost around $10-15, providing plenty of material for multiple baking projects like large batches of cookies or brownies.
Callets, while convenient for melting because of their uniform size, are less ideal for creating distinct "chunks" as they are already small. However, they can be quickly processed in a food processor for fine shavings or very small pieces if needed.
For focused efforts on perfecting chocolate chopping for baking into specific chunk sizes – say, 1/2-inch pieces for a robust chocolate chip cookie – starting with a solid bar or block provides the best control and consistency. The quality of the chocolate also matters; higher-quality chocolate with more cocoa butter often has a better texture for chopping and melts more smoothly.
Essential Tools for Chopping Chocolate Like a Pro
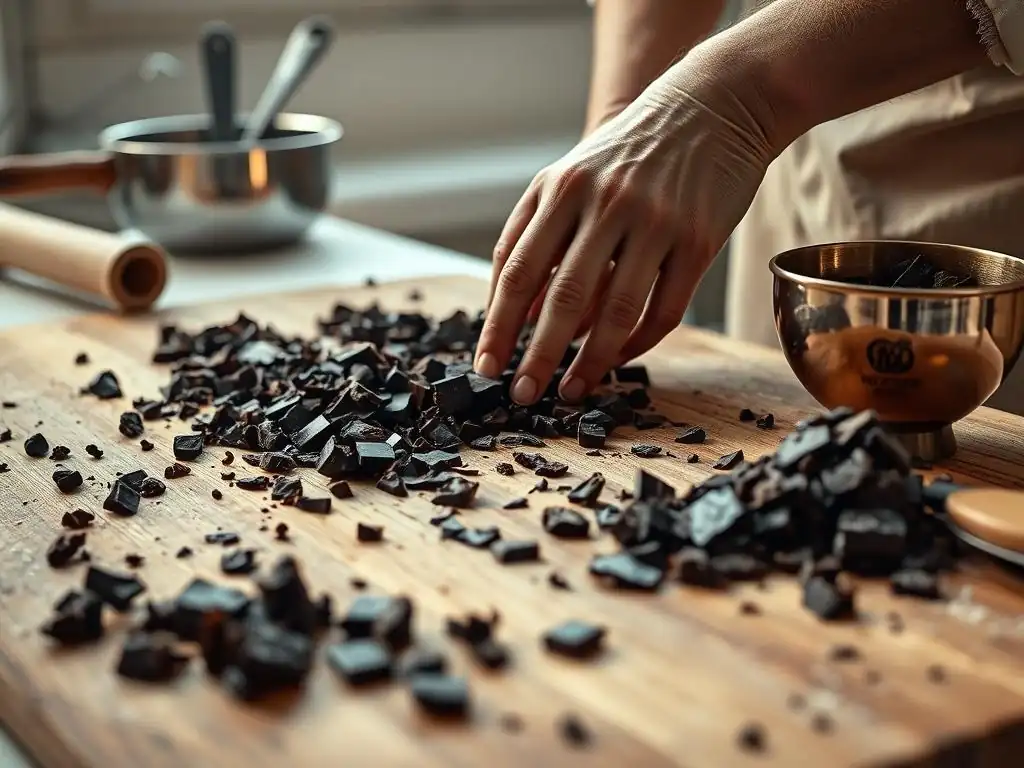
The Best Knives for Chopping Chocolate: Sweet Sensations Recommendations
The right knife makes a significant difference when perfecting chocolate chopping for baking. A sharp, heavy chef's knife is the preferred tool for most bakers. The weight of the knife helps to power through the chocolate without excessive force, which can cause the chocolate to shatter unpredictably.
A blade length of 8 to 10 inches provides enough surface area to chop larger sections of a chocolate bar efficiently and safely. Ensure your knife is freshly sharpened; a dull knife is more likely to slip and crush the chocolate rather than cut it cleanly, leading to uneven pieces and potentially frustrating results.
Alternatively, a large serrated bread knife can also be effective, particularly for firmer types of chocolate like unsweetened or high-percentage dark chocolate. The serrations grip the chocolate and "saw" through it, which can be helpful in preventing slips. However, it might create more fine dust than a sharp chef's knife.
Whichever knife you choose, safety is paramount. Always curl your fingertips inward when holding the chocolate or block to guide the blade, keeping them out of the path of the knife. This technique is fundamental to safely and effectively perfecting chocolate chopping for baking for all your sweet sensations recipes.
Cutting Boards & Bowls: Setting Up Your Chocolate Chopping Station
A stable, non-slip cutting board is absolutely essential for safe and efficient chocolate chopping. Large, heavy cutting boards made of wood or sturdy plastic are ideal. Avoid glass or flimsy plastic boards, which can be unstable and dull your knife quickly. Place a damp paper towel or a non-slip mat underneath your cutting board to prevent it from sliding on your countertop during the chopping process. This stability allows you to apply consistent pressure and control the knife more effectively, contributing to more uniform chocolate pieces.
You'll also need a bowl or container ready to transfer your chopped chocolate into immediately after chopping. Choosing a bowl slightly larger than the volume of chocolate you are chopping makes it easy to scoop the pieces off the board.
Having the bowl ready minimizes the time the chopped chocolate sits on the board, especially if your kitchen is warm, helping to prevent it from melting or clumping together before it's ready to be added to your recipe. Setting up an organized station with a stable board, sharp knife, and ready bowl is the first step in perfecting chocolate chopping for baking with ease and precision.
Step-by-Step Guide: How to Chop Chocolate for Baking
Preparing Your Chocolate for Chopping: Tempering (If Necessary)
For standard baking purposes like adding chunks to cookies or brownies, tempering your chocolate before chopping is usually unnecessary and can actually make it harder to handle. Tempering involves a specific heating and cooling process to stabilize the chocolate's crystal structure, resulting in a glossy, snappy finish. While tempered chocolate is excellent for dipping or molding, its hardness can make chopping more challenging and prone to shattering. For most recipes requiring chopped chocolate, you want the chocolate to be firm but not brittle.
The primary preparation step is simply starting with chocolate that is at a cool room temperature, ideally between 65°F and 70°F (18°C-21°C). If your chocolate has been stored in the refrigerator, let it sit out for 15-30 minutes to warm up slightly. If it's too cold, it will be very hard and shatter when you try to chop it.
If it's too warm, it will be soft and melt from the heat of your hands and knife, creating a messy, clumpy pile instead of distinct pieces. Starting with chocolate at the right temperature is a simple yet crucial step in perfecting chocolate chopping for baking.
Mastering the Rocking Motion: The Key to Even Chocolate Pieces
Once you have your chocolate bar or block on the cutting board, the most effective technique for chopping involves a rocking motion with your knife. Start by cutting the chocolate into smaller, manageable pieces or strips, depending on the size of the original block. For a standard 4-ounce bar, you might cut it in half or thirds lengthwise.
Then, gather a pile of these pieces. Place the tip of your chef's knife on the board, holding the handle firmly. Lift the handle slightly and bring the blade down onto the chocolate, using a smooth, rocking motion from the tip to the heel of the blade.
Keep one hand firmly on the spine of the knife near the tip to stabilize it and guide the cut. As you chop, periodically use the knife blade or a bench scraper to gather the chocolate pieces back into a pile. Continue the rocking motion, working your way through the pile, until the chocolate reaches your desired level of fineness or chunk size. This controlled rocking motion, rather than a straight up-and-down chop, allows for more consistent cutting and is fundamental to perfecting chocolate chopping for baking into uniform pieces.
Chopping Chocolate by Hand: A Detailed Sweet Sensations Tutorial
Chopping chocolate by hand provides the most control over the final size and shape of your chocolate pieces, which is often preferred for creating distinct chunks for recipes like cookies or brownies.
Here is a step-by-step approach:
- Lay your chocolate bar or block on a stable cutting board.
- Using a sharp chef's knife, cut the chocolate into strips about 1/2 to 1 inch wide, depending on how large you want your final chunks.
- Stack a few of these strips on top of each other.
- Cut across the stacked strips at intervals (again, 1/2 to 1 inch) to create initial chunks.
- Gather the resulting pieces into a pile on your board.
- Place the tip of your knife on the board and use a controlled rocking motion, sweeping the blade across the chocolate pile, gradually reducing the size of the pieces.
- Periodically stop and use the knife or a bench scraper to consolidate the pile of chocolate pieces.
- Continue chopping and gathering until all the chocolate is reduced to your desired size – whether it's fine shavings, medium chunks (approx. 1/4 inch), or coarse chunks (approx. 1/2 inch).
- Immediately transfer the chopped chocolate to a bowl.
This manual process allows you to visually inspect the size of the pieces as you go, making adjustments to achieve the perfect consistency for your sweet sensations recipe. It's the classic method for perfecting chocolate chopping for baking that delivers beautiful, distinct chocolate pieces.
Using a Food Processor for Chopping Chocolate: Tips & Tricks
While hand chopping offers precision, a food processor can be a quick and efficient way to chop chocolate, especially when you need large quantities or very fine pieces. However, it requires careful technique to avoid turning the chocolate into a paste.
Here are some tips for using a food processor:
- Start with firm, cool chocolate. Break the chocolate bar or block into smaller pieces (about 1-2 inches) that will fit easily into the food processor bowl.
- Add the chocolate pieces to the food processor bowl fitted with the metal blade. Do not overfill the bowl; process in batches if necessary.
- Use the "pulse" function rather than continuous processing. Pulse in short bursts (1-2 seconds at a time).
- After each pulse, check the size of the chocolate pieces. Scrape down the sides of the bowl if needed to ensure even processing.
- Continue pulsing until the chocolate reaches your desired consistency. This might take anywhere from 5 pulses for coarse chunks to 20-30 pulses for fine shavings, depending on the amount and type of chocolate, and your machine's power.
- Be mindful of heat! Processing for too long or continuously will generate heat from the blade and friction, causing the chocolate to melt and clump. If you see the chocolate starting to look greasy or stick together, stop immediately.
Using a food processor is a faster method for perfecting chocolate chopping for baking when speed is key, but hand chopping offers superior control for specific chunk sizes.
Achieving Your Desired Chocolate Size: From Fine to Coarse
Fine Chocolate Shavings: Ideal for Chocolate Shaving Cake
Fine chocolate shavings, sometimes called grated chocolate, have a very small particle size, often resembling coarse sand or fine sawdust. This form of chocolate melts very quickly and smoothly when incorporated into batters or used as a delicate garnish. For applications like a classic chocolate shaving cake, where finely grated chocolate is folded into the batter, the small size ensures it melts completely during baking, contributing rich chocolate flavor and moisture without leaving distinct chunks. It's also perfect for sprinkling over hot beverages or desserts where you want the chocolate to melt almost instantly upon contact.
To achieve fine shavings, you can use the smallest holes of a box grater, a microplane zester (for very delicate shavings), or a food processor with careful, short pulses as described earlier. When grating by hand, use firm, cool chocolate and grate directly into your bowl or onto a piece of parchment paper. The fine texture is key to its function, allowing it to disperse evenly and melt seamlessly, making it an essential technique for perfecting chocolate chopping for baking when a smooth, integrated chocolate element is desired.
Medium chocolate chunks are arguably the most common size called for in baking, particularly for beloved recipes like chocolate chip cookies, muffins, and scones. This size typically ranges from about 1/4 inch to 1/2 inch (approximately 6mm to 12mm). Chunks in this size range are large enough to hold their shape partially during baking, creating those desirable pockets of gooey, melted chocolate within the baked good, while also being small enough to distribute relatively evenly throughout the dough.
Hand chopping with a sharp chef's knife is often the best method for achieving uniform medium chunks, allowing you to control the size precisely by cutting the chocolate into strips and then crosswise into squares or rectangles of the desired dimension. A 4-ounce bar can yield a generous cup or more of medium chunks.
The specific size can be adjusted slightly based on personal preference or recipe requirements – some prefer slightly smaller chunks for a more frequent chocolate hit, while others like larger pieces for a more dramatic chocolate pool. Perfecting chocolate chopping for baking into medium chunks is a fundamental skill for countless classic sweet sensations recipes.
Coarse Chocolate Chunks: Enhancing Double Chocolate Brownies
Coarse chocolate chunks are larger pieces, typically ranging from 1/2 inch to 1 inch or even slightly larger. These substantial pieces are fantastic in recipes where you want distinct, significant pockets of melted chocolate, such as rich double chocolate brownies, robust chocolate bark, or certain types of cookies and bars. When these large chunks melt, they create intense pools of chocolatey goodness that provide a wonderful contrast in texture to the surrounding baked matrix.
Achieving coarse chunks is often simpler than fine chopping, as it requires less precision. You can simply break a large bar into pieces of the desired size using a knife or even by hand for a more rustic look (though knife chopping is recommended for safety and better control).
For a 1-pound block of chocolate, you might aim to break or chop it into pieces roughly the size of a large peanut or small walnut. These large pieces contribute a luxurious feel and concentrated bursts of flavor, making perfecting chocolate chopping for baking into coarse chunks essential for maximizing the indulgence factor in certain sweet sensations.
Avoiding Common Chocolate Chopping Mistakes
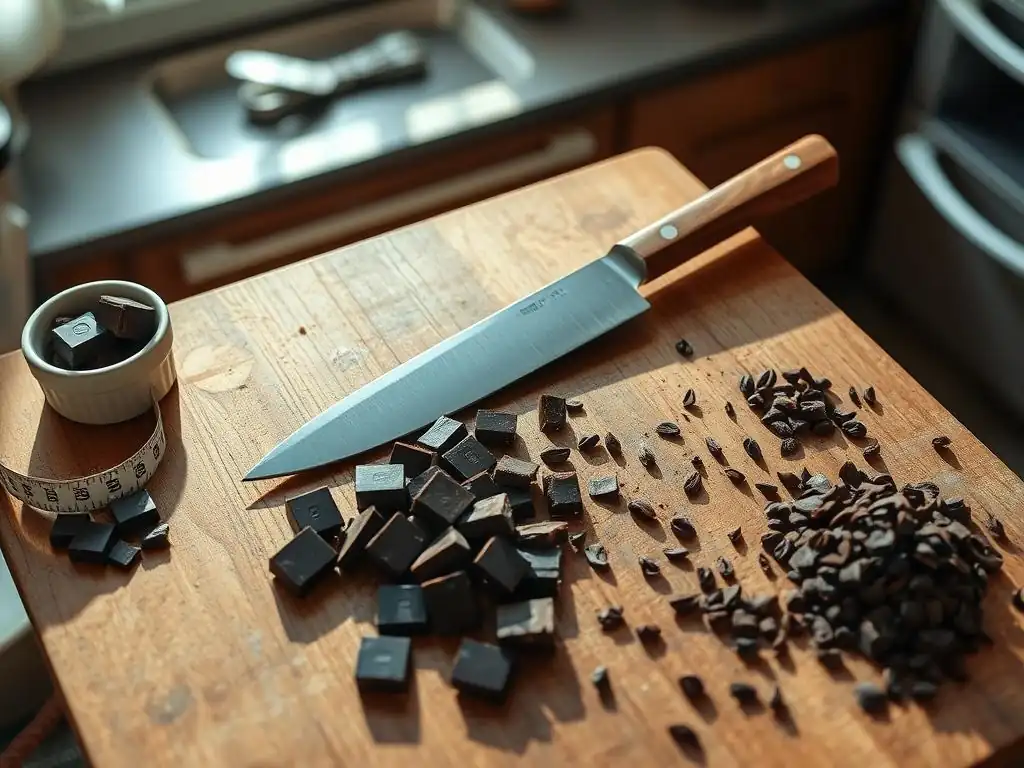
Preventing Chocolate from Melting During Chopping
One of the most common frustrations when chopping chocolate is having it melt before you've finished, especially when working with softer types like milk or white chocolate, or in a warm kitchen. The heat from your hands and the friction from the knife blade can quickly raise the chocolate's temperature.
To prevent this, start with chocolate that is cool, ideally around 65°F-70°F (18°C-21°C), as mentioned earlier. If your kitchen is warm (above 75°F or 24°C), consider chilling the chocolate in the refrigerator for 10-15 minutes beforehand, but be careful not to let it get too cold, which can cause shattering.
Work quickly and efficiently. Have your cutting board and bowl ready so you can transfer the chopped chocolate immediately. Use a sharp knife, as a dull knife requires more force and friction, generating more heat. For large quantities, chop in batches. If you notice the chocolate starting to soften or become greasy, stop and put it back in the refrigerator for a few minutes to firm up before continuing. Keeping the chocolate cool and working swiftly are key steps in perfecting chocolate chopping for baking without a melty mess.
Minimizing Chocolate Dust and Mess
Chopping chocolate, especially into finer pieces, can generate a surprising amount of fine chocolate dust. This dust can be messy and also represents flavor that isn't ending up in your desired chunks. While some dust is inevitable, you can minimize it. Using a very sharp knife creates cleaner cuts and less crumbling compared to a dull knife. The rocking motion technique described earlier also tends to produce less dust than a straight up-and-down chopping action.
Working on a contained surface, like a large cutting board with a slight lip, can help keep the dust from spreading. After chopping, use a bench scraper to efficiently gather all the chopped chocolate and dust into your bowl. You can even sift your chopped chocolate through a coarse sieve if you want to remove the very finest particles for specific applications, though for most baking, including the dust is fine as it will simply melt into the batter. Minimizing mess and maximizing usable chocolate are part of perfecting chocolate chopping for baking efficiently.
Ensuring Uniformity in Your Chocolate Pieces
Achieving relatively uniform pieces is crucial for consistent baking results, ensuring the chocolate melts or holds its shape predictably throughout the batch. Uneven pieces mean some will melt completely while others remain solid, leading to textural inconsistencies. While perfect uniformity is difficult by hand, aim for pieces that are roughly the same size according to your recipe's requirements (e.g., all pieces around 1/4 inch for medium chunks).
To ensure uniformity when hand chopping, focus on cutting the initial strips and then the crosswise cuts at consistent intervals. As you chop the pile using the rocking motion, periodically spread out the chocolate to assess the size distribution and re-chop any larger pieces you find. When using a food processor, rely on short pulses and check the size frequently, stopping as soon as the majority of the chocolate reaches the desired size, even if a few larger pieces remain. Consistency in size is a hallmark of perfecting chocolate chopping for baking for professional-looking and tasting results.
Storing Chopped Chocolate for Future Baking Projects
Best Practices for Storing Chopped Chocolate: Sweet Sensations Advice
Proper storage is crucial for maintaining the quality and usability of chopped chocolate. Exposure to air, moisture, heat, and strong odors can degrade the chocolate, leading to dullness, off-flavors, or bloom (a harmless but unappealing grayish surface). The best way to store chopped chocolate is in an airtight container. Glass jars with tight-fitting lids or plastic containers with secure seals work well. Ensure the container is completely dry before adding the chocolate.
Store the airtight container in a cool, dark, and dry place. A pantry or cupboard away from the stove and direct sunlight is ideal. The optimal storage temperature for chocolate is typically between 60°F and 70°F (15°C-21°C). Avoid storing it in the refrigerator if possible, as the humidity can cause sugar bloom (where sugar crystals come to the surface), and it can absorb odors from other foods. Following these practices helps preserve the chocolate's flavor and texture for future sweet sensations.
Maintaining Freshness and Preventing Bloom
Chopped chocolate, due to its increased surface area compared to a solid bar, is slightly more susceptible to absorbing moisture and odors, and developing bloom. Bloom comes in two forms: fat bloom (a grayish-white film caused by fat crystals separating and rising to the surface, often due to temperature fluctuations) and sugar bloom (a grainy white surface caused by moisture on the surface dissolving sugar, which then recrystallizes). While harmless to eat, bloom affects appearance and texture.
To prevent bloom and maintain freshness, consistency is key. Store the chocolate at a stable, cool temperature and low humidity (ideally below 50% relative humidity). Avoid moving the chocolate between warm and cold environments, as this temperature fluctuation is a primary cause of fat bloom.
Stored correctly in an airtight container in a cool pantry, chopped dark or semisweet chocolate can maintain good quality for several months. Milk and white chocolate have shorter shelf lives due to their dairy content, typically best used within 1-2 months after chopping. By following these storage tips, you ensure that your efforts in perfecting chocolate chopping for baking result in delicious bakes every time.
Beyond the Basics: Advanced Chocolate Chopping Techniques
Creating Chocolate Curls and Shavings for Decoration
Beyond simple chopping for inclusion in batters, you can create beautiful chocolate curls and decorative shavings for garnishes. This requires a slightly different approach and tools. For curls, you typically need a block of chocolate that is tempered and at a specific cool temperature (around 65-70°F or 18-21°C). Using a vegetable peeler, draw the blade along the surface of the chocolate block, allowing thin layers to curl up. The angle and pressure will affect the size and tightness of the curl.
Alternatively, for larger shavings or ribbons, you can use a bench scraper or a wide, flat metal spatula. Lay the chocolate block on its side and scrape the flat edge along the surface to peel off wider pieces. This technique is often easier with slightly warmer chocolate than you'd use for curls. Both methods require practice to get consistent results, but mastering them adds a professional touch to your sweet sensations desserts. It's another dimension to perfecting chocolate chopping for baking that focuses on visual appeal.
Tempering Chopped Chocolate: A Quick Guide
While you don't temper before chopping for inclusion, you might temper after chopping if you plan to use the melted chocolate for dipping, coating, or making decorative elements like chocolate bark or truffles. Tempering ensures the melted chocolate sets with a glossy finish, a firm snap, and resistance to melting at room temperature. It involves heating chocolate to a specific temperature, cooling it while agitating to form stable crystals, and then gently reheating it to a working temperature.
A common method involves melting about two-thirds of your finely chopped tempered chocolate gently (over a double boiler or in the microwave on low power, stirring frequently) until it reaches a target temperature (e.g., around 115°F/46°C for dark chocolate). Then, remove it from the heat and stir in the remaining one-third of the finely chopped chocolate (called seeding). Stir continuously until all the added chocolate is melted and the mixture cools to the correct working temperature (e.g., 88-91°F/31-32°C for dark chocolate).
This process aligns the fat crystals, resulting in tempered chocolate. While a more involved process than simple chopping, tempering chopped chocolate is key for certain applications in perfecting chocolate chopping for baking for decorative and confectionery uses.
Troubleshooting: Common Chocolate Chopping Problems & Solutions
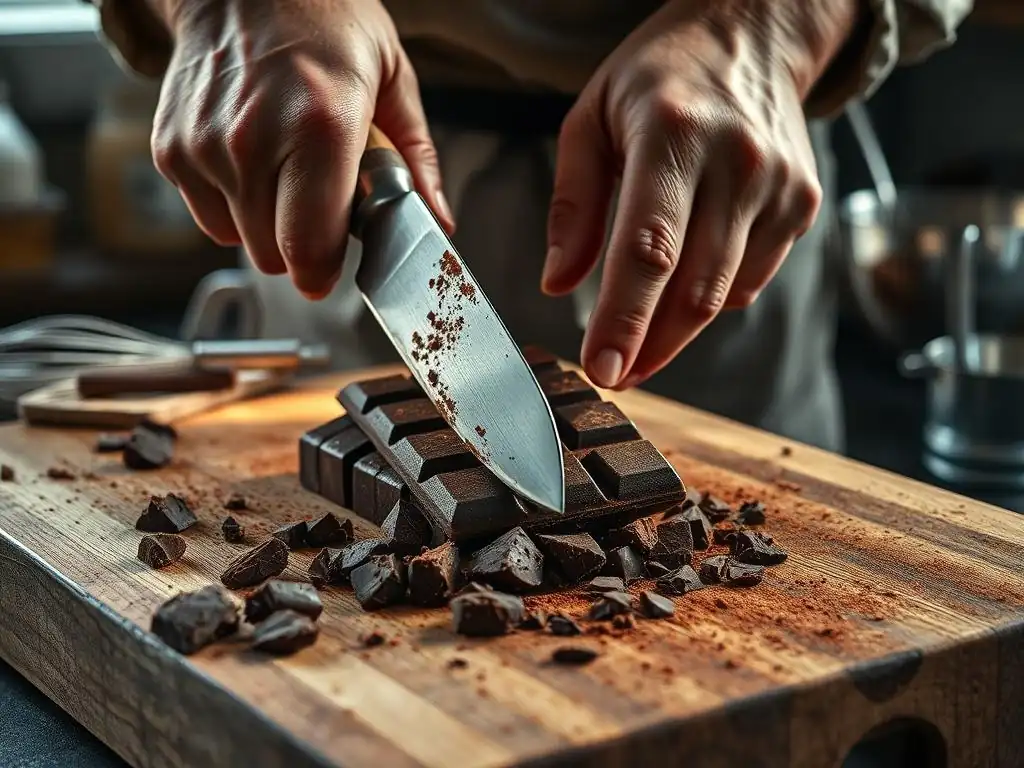
Chocolate Too Hard to Chop? Try This!
If you're attempting to chop chocolate and it's excessively hard, shattering into tiny, uncontrollable shards rather than cutting cleanly, it's likely too cold. This often happens if you've taken it directly from the refrigerator or if your kitchen is very cold.
- Solution: Let the chocolate sit at room temperature for 15-30 minutes to warm up slightly. Aim for a temperature around 65-70°F (18-21°C). You want it to be firm but not brittle. If you're in a hurry, you can gently warm it for just a few seconds (literally 5-10 seconds) in the microwave on its lowest power setting, or hold it in your hands for a minute or two to transfer a little warmth, being careful not to start melting it. Starting with chocolate at the correct temperature makes a significant difference in perfecting chocolate chopping for baking with ease.
Chocolate Melting Too Quickly? Here's What to Do.
Conversely, if your chocolate is softening, becoming greasy, and clumping together as you chop, it's too warm. This can happen if the chocolate was stored in a warm place, if your hands are warm, if your knife blade is warm from friction, or if your kitchen is hot.
- Solution: Stop chopping immediately. Gather the chocolate and spread it out on a cool surface, or place it in a bowl and put it in the refrigerator for 5-10 minutes until it firms up again. Wash and dry your knife if it feels warm. Once the chocolate is firm but not rock hard, resume chopping, working more quickly. Consider chilling your cutting board for a few minutes before starting. If using a food processor, be extra cautious about pulsing only in short bursts to avoid heat buildup. Keeping things cool is essential for perfecting chocolate chopping for baking cleanly.
Incorporating Chopped Chocolate into Sweet Sensations Recipes
Delicious Recipes Featuring Perfectly Chopped Chocolate
Perfecting chocolate chopping for baking opens the door to a world of delicious possibilities. Here are a few classic examples where the quality of your chopped chocolate truly shines:
- Classic Chocolate Chip Cookies: Use medium chunks (1/4 to 1/2 inch) of semisweet or dark chocolate. The varied melting points contribute to pockets of gooeyness and slightly firmer chocolate bits. A standard recipe using 1 cup (about 6 ounces) of chocolate benefits greatly from uniformly chopped pieces.
- Double Chocolate Brownies: Incorporate coarse chunks (1/2 to 1 inch) of dark chocolate into a rich chocolate batter. These larger pieces create intense pools of melted chocolate that contrast beautifully with the dense brownie texture. A typical batch using 8 ounces of chocolate often uses coarse pieces.
- Chocolate Scones: Medium or coarse chunks work well, providing bursts of chocolate flavor in a flaky scone. Using about 4 ounces of chopped chocolate per batch adds delightful pockets throughout.
- Muffins and Quick Breads: Medium chunks are ideal, distributing evenly and melting into soft pockets. Recipes often call for 1/2 to 1 cup (3-6 ounces) of chopped chocolate.
In each of these recipes, the specific size and even distribution of the chopped chocolate, a result of perfecting chocolate chopping for baking, are key to achieving the desired texture and flavor profile, delivering truly sweet sensations.
Tips for Evenly Distributing Chocolate in Your Batter
Once you've expertly chopped your chocolate, ensuring it's evenly distributed throughout your dough or batter is the final step before baking. This prevents all the chocolate from sinking to the bottom or clumping together.
- Toss with Flour: For heavier batters like muffins or quick breads, toss the chopped chocolate with a tablespoon or two of the dry ingredients (usually flour) from the recipe before adding it to the wet ingredients. The light coating of flour helps suspend the chocolate pieces in the batter, preventing them from sinking during baking.
- Fold Gently: When incorporating chopped chocolate into cookie dough or brownie batter, fold it in gently using a spatula, just until it's evenly distributed. Avoid overmixing, which can develop gluten unnecessarily and can also cause the chocolate to break down further or melt from friction.
- Layering: For cakes or layered desserts, you can sometimes sprinkle layers of chopped chocolate between layers of batter.
- Reserve Some for Topping: For many recipes, reserving a small amount of chopped chocolate (say, 1/4 cup) to sprinkle on top of the batter just before baking ensures beautiful molten chocolate puddles visible on the surface.
Proper distribution, after perfecting chocolate chopping for baking, guarantees that every bite of your sweet sensations creation contains a delightful amount of chocolate.
Conclusion: Mastering the Art of Chocolate Chopping
Level Up Your Baking: Enjoy the Results of Perfectly Chopped Chocolate
Mastering the seemingly simple task of chopping chocolate is a skill that can significantly elevate your baking. It's not just about breaking a bar; it's about understanding the different types of chocolate, choosing the right tools, employing proper techniques, and selecting the ideal size for your specific recipe. From the clean, quick melt of fine shavings in a delicate cake to the dramatic, gooey pools created by coarse chunks in a rich brownie, the way you prepare your chocolate directly impacts the texture, flavor, and overall success of your baked goods.
By taking the time to learn and practice the techniques discussed, from using a sharp knife and a stable board to mastering the rocking motion and understanding how temperature affects your chocolate, you move beyond basic baking and step into the realm of truly perfecting chocolate chopping for baking. The payoff is evident in every bite – consistent distribution, predictable melting, and the pure enjoyment of perfectly integrated chocolate in all your sweet sensations.
Sweet Sensations: Your Partner in Chocolate Chopping Success
At BakeWithEase, we believe that understanding your ingredients and how to prepare them is fundamental to baking success. Perfecting chocolate chopping for baking is a prime example of how a foundational technique can make a world of difference in your final product. Whether you're a beginner tackling your first batch of chocolate chip cookies or an experienced baker aiming for the perfect brownie texture, honing your chopping skills will bring you closer to achieving those desired sweet sensations every time.
We encourage you to experiment with different types of chocolate and practice the chopping methods outlined here. Pay attention to how different chunk sizes behave in your favorite recipes. With a little practice and attention to detail, you'll be confidently chopping chocolate like a pro, ready to create delicious, chocolate-filled treats that impress everyone who takes a bite. Let BakeWithEase be your guide on this journey to perfecting chocolate chopping for baking and unlocking a new level of baking enjoyment.
Frequently Asked Questions
How does the size of chopped chocolate affect baking?
The size of your chopped chocolate significantly impacts the melting process and the overall texture of your baked goods. Larger chunks create pockets of molten chocolate, while smaller pieces distribute more evenly.
What's the best type of knife for chopping chocolate?
A serrated knife is often preferred for chopping chocolate, particularly harder varieties. Its saw-like edge helps to grip the chocolate and prevent it from slipping, leading to more even pieces.
Can I use a food processor to chop chocolate?
Yes, you can use a food processor, but be cautious. Pulse the chocolate in short bursts to avoid over-processing and creating chocolate paste rather than chopped pieces. Overheating is a risk.
How do I prevent chocolate from melting while chopping?
Keep the chocolate cool and dry before chopping. Consider chilling it in the refrigerator for a short time. Also, ensure your hands and the knife are clean and dry to minimize heat transfer.
What if I don't have a chocolate bar, can I chop chocolate chips instead?
While you can chop chocolate chips, it's generally not recommended. They are already small and designed to hold their shape during baking. Chopping them further may result in chocolate dust that's less ideal.
Final Reflection: The Sweet Science of the Perfect Chop
The art of chopping chocolate, often overlooked, is the cornerstone of successful baking. A seemingly simple task, the precision of your chocolate chop directly impacts the texture, melt, and overall enjoyment of your final product. From the subtle bloom of a perfectly tempered ganache to the satisfying snap of a brownie, the quality of your chocolate preparation truly makes all the difference.
The impact of this seemingly minor detail extends far beyond the individual baker. It speaks to a larger appreciation for detail and craftsmanship in the culinary arts. We live in a world of instant gratification, but the meticulous process of carefully chopping chocolate reminds us of the value of patience and precision. The details are not the details. They make the design.
– Charles Eames. This quote perfectly encapsulates the importance of seemingly small actions in achieving a truly exceptional result. The act of chopping chocolate, done thoughtfully, becomes a meditative practice, a connection to the ingredients and the craft itself.
Now, consider your own baking. Think about the last time you rushed through the chocolate chopping process. Did the final product reflect that haste? I invite you to take a moment, the next time you bake, to truly engage with the chocolate. Embrace the rhythmic chop, the satisfying sound of the blade, and the visual appeal of uniformly sized pieces. By mastering this seemingly simple skill, you'll not only elevate your baking but also cultivate a deeper appreciation for the artistry and mindfulness inherent in even the most basic culinary tasks. The perfect chop awaits you.
Unleash Your Inner Chocolatier: Master the Art of Chocolate Chopping!
Thanks for diving into our guide on chopping chocolate! You've now unlocked the secret to perfectly melted chocolate every time, resulting in flawless baking creations. Ready to put your newfound skills to the test?
- Craft your dream dessert: Use your precise chocolate chopping technique to create your signature baked masterpiece – that perfectly textured brownie or decadent ganache is now within reach!
- Share your chocolate creations: Tag us on social media with your beautifully chopped and baked treats! We'd love to see what you whip up. #BakeWithEase #ChocolateChopping
- Explore advanced chocolate techniques: Delve into our blog for more articles on tempering, molding, and other exciting chocolate adventures!
So, what delicious chocolate treat will you conquer first?