
NoFail Gingerbread Cookies for Absolute Beginners


Welcome to BakeWithEase, your kitchen companion for unlocking baking brilliance! Ever dreamed of whipping up perfectly spiced, melt-in-your-mouth gingerbread cookies, but felt intimidated? Well, dream no more! Our foolproof guide to an easy gingerbread cookies beginner recipe banishes baking fears and empowers you to create festive treats with confidence. Ready to transform simple ingredients into holiday magic? Let's get baking!
- Classic Gingerbread Cookies: A Holiday Baking Tradition
- Introduction: Embracing the Festive Spirit with Gingerbread
- Gingerbread Cookie Recipe: Ingredients & Equipment Checklist
- Step-by-Step Guide: Baking Your Classic Gingerbread Cookies
- Decorating Your Gingerbread Cookies: Creative and Festive Ideas
- Troubleshooting Your Gingerbread Cookies: Common Baking Challenges & Solutions
- Advanced Gingerbread Cookie Techniques [Optional]
- Conclusion: Share the Joy of Homemade Gingerbread Cookies!
-
Frequently Asked Questions
- What makes this gingerbread cookie recipe "no-fail" for beginners?
- What are the key ingredients I need to make these easy gingerbread cookies?
- What are some tips for preventing the gingerbread cookies from spreading too much while baking?
- Can I decorate these gingerbread cookies, and what are some easy decorating options?
- How should I store these gingerbread cookies to keep them fresh?
- Final Reflection: The Sweet Success of Simple Gingerbread
- Unlock Your Inner Baker: Perfect Gingerbread, Guaranteed!
Introduction: Embracing the Festive Spirit with Gingerbread
Welcome to Holiday Baking: Creating Memories Through Delicious Treats
The aroma of baking during the holidays is truly magical, isn't it? It's about more than just making treats; it's about creating warmth, sharing moments, and building traditions that last a lifetime. For many, the scent of gingerbread is synonymous with festive cheer – that comforting blend of spices instantly transports you to cozy evenings and holiday gatherings. Learning an easy gingerbread cookies beginner recipe is the perfect way to kick off your holiday baking adventures, bringing joy to both the baker and everyone who gets to enjoy the delicious results.
This guide is designed specifically for those new to baking, offering a straightforward path to successful gingerbread cookies. We'll break down each step, from gathering simple ingredients to decorating your festive creations. Whether you're baking solo or making it a fun family activity, mastering this simple gingerbread cookies recipe will give you a fantastic foundation and the confidence to explore more complex baking projects in the future. Get ready to fill your home with the irresistible scent of homemade gingerbread!
Gingerbread cookies are more than just a sweet treat; they are edible art pieces and symbols of the holiday season. Their firm yet tender texture makes them ideal for cutting into charming shapes – think gingerbread men, stars, snowflakes, and festive animals. Once baked, they provide a perfect canvas for creative decoration, from simple icing outlines to elaborate edible artwork. This versatility makes them a beloved addition to any holiday cookie platter or a delightful homemade gift.
Our easy gingerbread cookies beginner recipe focuses on reliability and flavor, ensuring that even first-time bakers can achieve excellent results. Unlike some recipes that can be finicky, this approach minimizes common pitfalls, leading to cookies that hold their shape during baking and boast that classic, warmly spiced gingerbread taste everyone loves. By starting with this simple recipe, you're setting yourself up for baking success and ensuring your holiday gatherings are filled with delicious, homemade cheer that everyone will appreciate.
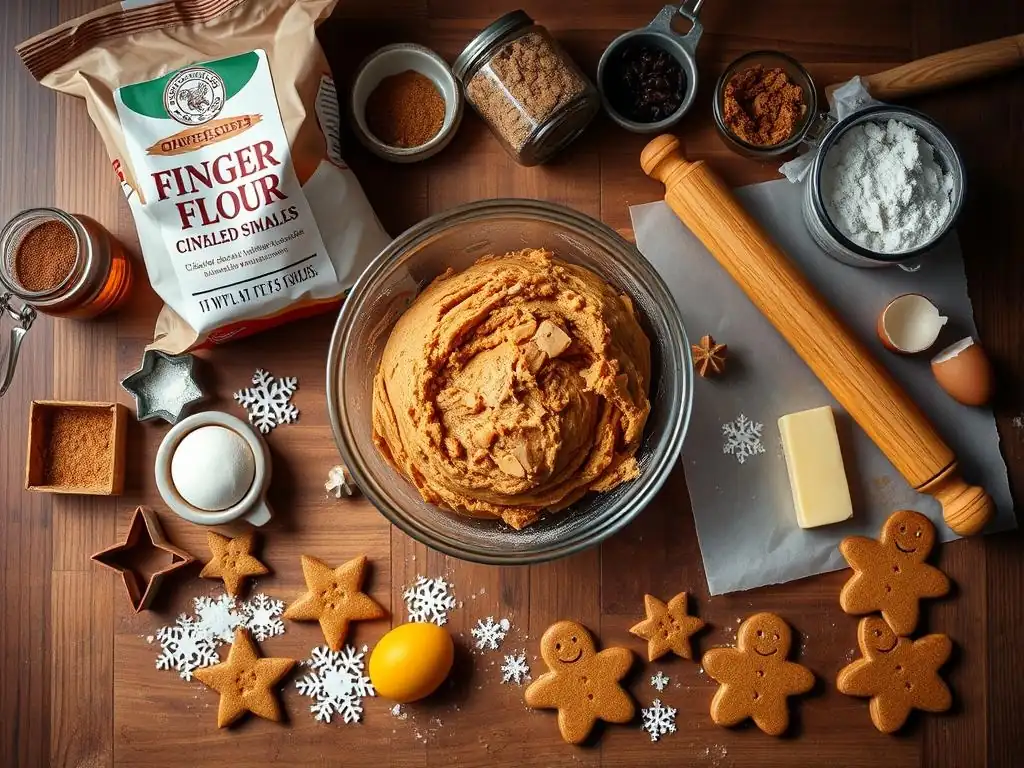
Gathering Your Ingredients for Authentic Gingerbread Flavor
Essential Gingerbread Cookie Ingredients: A Detailed List
To make a batch of truly classic gingerbread cookies using this easy gingerbread cookies beginner recipe, you'll need a few pantry staples and key spices. Start with all-purpose flour, typically around 3 cups for a standard batch, ensuring it's measured correctly. You'll also need granulated sugar (about 1 cup) and brown sugar (around 1/2 cup, packed) for sweetness and moisture. The fat component is usually unsalted butter, softened, roughly 3/4 cup. Don't forget the egg (1 large) and molasses (about 1/2 cup), which is crucial for the distinct flavor and color of gingerbread.
The signature warmth comes from the spices: ground ginger (around 1 tablespoon is standard, but adjust to taste), ground cinnamon (about 1 teaspoon), ground cloves (around 1/2 teaspoon), and a pinch of salt (1/4 teaspoon). A bit of baking soda (1 teaspoon) helps with leavening. Using fresh spices makes a significant difference in flavor intensity. Check the dates on your spice jars; ground spices generally lose potency after about 6-12 months.
Spice Variations and Substitutions for Personalized Gingerbread Cookies [Optional Section]
While the classic spice blend of ginger, cinnamon, and cloves is traditional, feel free to experiment to find your perfect flavor profile. For a spicier kick, you could increase the amount of ground ginger or add a pinch of black pepper or cayenne. If you love nutmeg, a small pinch (1/4 teaspoon) can add another layer of warmth. Cardamom (1/4 teaspoon) offers a slightly more exotic, aromatic note.
If you don't have molasses, golden syrup can be used as a substitute, though the flavor will be slightly different and the color lighter. For dietary needs, some bakers successfully substitute butter with vegan butter alternatives or coconut oil, and eggs with flax eggs or commercial egg replacers, though results can vary in texture and spread. Always research specific substitute ratios if deviating significantly from the original easy gingerbread cookies beginner recipe.
Recommended Tools for Rolling, Cutting, and Baking Gingerbread Cookies
Having the right tools makes the process of baking an easy gingerbread cookies beginner recipe much smoother and more enjoyable. You'll definitely need a large mixing bowl, preferably for an electric mixer, or two medium bowls if mixing by hand. Measuring cups and spoons are essential for accuracy – use dry measures for flour and sugar, and liquid measures for molasses and eggs. A sturdy rolling pin is necessary for flattening the dough evenly.
Cookie cutters are key for shaping; a variety of festive shapes like gingerbread men, stars, and trees work well. Baking sheets (at least two so you can bake in batches) lined with parchment paper are crucial for preventing sticking and ensuring even baking. Finally, an oven preheated to the correct temperature (typically 350°F or 175°C) and a timer are indispensable for achieving perfectly baked cookies.
Combining Dry Ingredients: Achieving the Perfect Spice Blend
The first step in this easy gingerbread cookies beginner recipe is to combine the dry ingredients. In a medium bowl, whisk together the measured all-purpose flour, ground ginger, ground cinnamon, ground cloves, salt, and baking soda. Whisking ensures that the leavening agent and spices are evenly distributed throughout the flour. This prevents pockets of intense spice or uneven rising in the final cookies.
Using fresh spices is particularly important here; stale spices won't provide that signature gingerbread warmth. Giving the dry ingredients a good whisk for about 30 seconds should suffice to thoroughly combine everything. Set this bowl aside while you work on the wet ingredients.
Mixing in the Wet Ingredients: Creating a Rich and Flavorful Dough
In a large mixing bowl, preferably the bowl of a stand mixer fitted with the paddle attachment, cream together the softened butter and both sugars (granulated and brown sugar) until the mixture is light and fluffy. This usually takes about 2-3 minutes on medium speed. Properly creaming incorporates air, which contributes to the cookie's texture. Scrape down the sides of the bowl as needed.
Next, beat in the egg until fully incorporated, followed by the molasses. Mix on low speed until the molasses is evenly distributed, scraping down the bowl again. The mixture might look slightly curdled at this stage, but don't worry; it will come together when the dry ingredients are added. This combination of wet ingredients forms the flavorful base for your easy gingerbread cookies beginner recipe.
Chilling the Dough: Ensuring Easy Handling and Shape Retention
Gradually add the dry ingredients to the wet ingredients, mixing on low speed until just combined. Be careful not to overmix. The dough will be stiff and slightly sticky. Turn the dough out onto a lightly floured surface and divide it into two or three portions. Flatten each portion into a disc, wrap tightly in plastic wrap, and refrigerate for at least 1 hour, or preferably 2-3 hours.
Chilling is a critical step in any roll-and-cut cookie recipe, especially for an easy gingerbread cookies beginner recipe. It allows the fats to firm up, making the dough much easier to handle and roll without sticking excessively. More importantly, it prevents the cookies from spreading too much in the oven, ensuring your carefully cut shapes maintain their definition during baking. You can even chill the dough overnight if needed.
Rolling Out the Dough: Maintaining Consistent Thickness
Once your gingerbread dough is sufficiently chilled and firm, unwrap one disc and place it on a lightly floured surface. You can also roll the dough between two sheets of parchment paper to minimize sticking and the need for excess flour, which can toughen the cookies. Using a rolling pin, roll the dough out evenly to a thickness of about 1/4 inch (approximately 6mm). Consistent thickness is key to ensuring all cookies bake evenly; thin spots will burn while thicker spots may be underbaked.
If the dough becomes too soft or sticky while rolling, gather the scraps, form them into a disc, and pop them back into the refrigerator for 10-15 minutes before continuing. Avoid adding too much extra flour to the rolling surface or the dough itself, as this can make the cookies dry and crumbly.
Cutting Out Your Gingerbread Cookies: Festive Shapes and Holiday Motifs
Now for the fun part! Dip your cookie cutters in flour before pressing them firmly into the rolled-out dough. Wiggle the cutter slightly to ensure a clean cut. Carefully lift the cutouts using a thin spatula and place them about 1-2 inches apart on your baking sheets lined with parchment paper.
If you're using gingerbread men cutters, remember their delicate limbs can be prone to breaking. Be gentle when transferring them. Gather the dough scraps, lightly knead them together, form a disc, and chill again briefly if they're too soft before re-rolling and cutting. This easy gingerbread cookies beginner recipe dough is quite forgiving, allowing for multiple re-rolls.
Baking Your Gingerbread Cookies: Achieving Golden Brown Perfection
Preheat your oven to 350°F (175°C). Bake the cut gingerbread cookies for 8-10 minutes, or until the edges are lightly golden brown and the centers look set. Baking time will vary depending on the size and thickness of your cookies and the accuracy of your oven. Smaller, thinner cookies will bake faster, potentially in 7-8 minutes, while larger, thicker ones might need closer to 10-11 minutes.
Keep a close eye on the cookies during the last few minutes of baking to prevent burning. You can bake multiple sheets at once if your oven allows for even heat distribution, rotating the sheets halfway through the baking time for best results. Properly baked, they should be firm enough to lift without bending excessively but not hard or brittle.
Cooling Properly: Preserving Texture and Preventing Breakage
Once the gingerbread cookies are out of the oven, let them rest on the baking sheet for 1-2 minutes. They are still quite fragile when hot. This short cooling period on the warm sheet allows them to firm up slightly, making them less likely to break when you move them.
After the initial rest, carefully transfer the cookies to a wire cooling rack using a spatula. Allow them to cool completely before decorating or storing. Cooling on a wire rack allows air circulation, preventing condensation that can make the bottoms soggy. Ensure they are fully cool to the touch, which may take 20-30 minutes depending on room temperature.
Storing Your Gingerbread Cookies: Maintaining Freshness and Flavor
Proper storage is key to keeping your homemade gingerbread cookies fresh and flavorful. Once completely cooled, store them in an airtight container at room temperature. Layer the cookies between sheets of parchment paper to prevent them from sticking together, especially if they are decorated.
Stored correctly, plain gingerbread cookies can last for up to two weeks, maintaining their snap and spice. If decorated with royal icing, they can also last for a week or two, though very soft icings or other moist decorations might shorten their shelf life slightly. For longer storage, plain baked cookies can be frozen for up to 3 months in a freezer-safe container.

Royal icing is the classic choice for decorating gingerbread cookies because it dries hard and smooth, creating a beautiful finish and allowing for stacking and intricate details. A basic recipe involves whisking together powdered sugar (about 4 cups), meringue powder (3 tablespoons), and warm water (about 1/2 cup). Meringue powder is key as it contains egg whites and stabilizers that allow the icing to dry firm and food-safe.
Mix these ingredients on low speed until combined, then increase to medium-high and beat for 5-7 minutes until the icing is stiff and glossy, forming peaks. You can adjust the consistency by adding a little more water for outlining or flooding, or more powdered sugar for stiff details like piping. Add food coloring as desired. Keep the icing covered with a damp cloth when not in use, as it dries out quickly.
Decorating is where you can truly personalize your easy gingerbread cookies beginner recipe creations. Start with a piping bag fitted with a small round tip (like Wilton #1, #2, or #3) for outlining the cookies. Once the outline is dry (about 15-20 minutes), you can "flood" the area within the outline with a thinner consistency of icing.
To flood, thin some of the stiff icing with small amounts of water until it reaches a consistency where a spoonful drizzled back into the bowl disappears within about 10-15 seconds. Put this thinner icing into a piping bag or squeeze bottle and fill the outlined areas. Use a scribe tool or toothpick to gently spread the icing to the edges and pop any air bubbles.
Using Sprinkles, Candies, and More for Personalized Gingerbread Cookie Designs
While the flooded icing is still wet, this is the perfect time to add sprinkles, edible glitter, or small candies like nonpareils, jimmies, or sugar pearls. Gently press them into the wet icing. For details like buttons, eyes, or festive accents, you can use small candies like mini M&M's, silver dragees, or even carefully placed dots of stiff icing.
Once the flooded icing has dried (this can take several hours, or even overnight, depending on humidity), you can add additional piped details on top using the stiff icing. Think intricate patterns, swirls, names, or fine lines. Get creative and have fun with it! Each cookie is a mini canvas for your holiday spirit.
Cracking in gingerbread cookies can often be attributed to the dough being too dry. This can happen if you added too much flour during the initial mixing, if you added excessive flour while rolling, or if the dough wasn't mixed enough to fully hydrate the ingredients. Another common cause is over-chilling; dough that is too cold and stiff can crack when rolled.
To fix this, if the dough is slightly dry, you can try kneading in a tiny bit more molasses (start with 1/2 teaspoon) or softened butter. If it's cracking while rolling because it's too cold, let it sit at room temperature for 5-10 minutes to soften slightly before attempting to roll again. Ensure you measure your flour correctly, ideally by weight (1 cup all-purpose flour is typically around 120-130 grams), to avoid adding too much.
Edges burning before the center is cooked usually indicates one of a few issues. The most common is that your oven temperature is too high. Ovens can vary, so using an oven thermometer is highly recommended to ensure your oven is accurately calibrated to 350°F (175°C). Another reason could be that the cookies are too thin, especially around the edges, causing them to cook faster than the thicker parts or other cookies on the sheet.
Ensure you are rolling your dough to a consistent 1/4-inch thickness across the entire sheet. Also, check if your baking sheets are dark-colored, as dark pans absorb more heat and can cause bottoms and edges to brown faster; using parchment paper helps, but you might consider reducing the baking time slightly or lowering the oven temperature by 10-15°F if using dark pans. Arranging cookies of similar size and thickness on the same sheet also promotes even baking.
Why Is My Icing Running?
Icing that is too thin and runs off the cookies or doesn't hold its shape is usually due to adding too much liquid (water or milk) when mixing. Royal icing consistency is crucial for different applications. For outlining, it needs to be stiff enough to create a barrier (like toothpaste). For flooding, it needs to be thinner but still hold a slight shape before melting into itself (like honey).
If your icing is too thin, gradually whisk in more powdered sugar until you reach the desired consistency. Start with a tablespoon at a time. If you're using the icing for piping details and it's running, it definitely needs more powdered sugar to stiffen it up. Always add liquid very gradually when thinning icing, as it's much easier to add more liquid than to correct overly thin icing.

Once you've mastered the basic easy gingerbread cookies beginner recipe and decorating techniques, you can explore more intricate designs. Stencils offer a fantastic way to add detailed patterns to your cookies. Place a stencil over a dry, flooded cookie and gently spread slightly thinned royal icing over the stencil using an offset spatula. Carefully lift the stencil to reveal the design. Edible dusts or airbrushing can also be applied through stencils.
Piping advanced designs requires practice with different tips and consistencies of royal icing. Small star tips (#16, #18) can create borders or textures. Very fine round tips (#00, #0) are used for tiny details like eyes or stitching on gingerbread men. Learning techniques like pressure piping, wet-on-wet designs (piping wet icing onto wet icing to create marbling or feathering effects), or using multiple colors can elevate your cookie decorating skills significantly.
Constructing a Gingerbread House: A Holiday Centerpiece
Building a gingerbread house is the ultimate gingerbread project and a truly impressive holiday centerpiece. While this particular easy gingerbread cookies beginner recipe is great for cookies, a dedicated gingerbread house recipe often uses a dough specifically formulated to be sturdier and less prone to spreading, ensuring the structural integrity of the walls and roof.
You'll need templates for the house pieces (sides, front, back, roof). The dough is rolled thicker (around 1/4 to 1/2 inch), cut using the templates, and baked until very firm. Royal icing, mixed to a very thick, cement-like consistency, acts as the "glue" to assemble the pieces. Decorating a gingerbread house involves copious amounts of icing, candies, cookies, and other edible decorations. It's a time-consuming but incredibly rewarding activity that embodies the holiday spirit.
You've done it! You've successfully baked and potentially decorated a batch of delicious gingerbread cookies using this easy gingerbread cookies beginner recipe. Take a moment to admire your creations – they look fantastic! These cookies are perfect for sharing with friends and family, bringing them to holiday parties, or simply enjoying with a cup of tea or coffee. Sharing homemade treats is a wonderful way to connect with others and spread a little holiday cheer.
Don't be shy about showcasing your work! Arrange them beautifully on a platter, package them in festive bags or boxes as gifts, or even share photos of your successes (and maybe even your learning moments!) with fellow bakers online. Your journey with this simple gingerbread cookies recipe is just the beginning of many delightful baking adventures.
Happy Baking!
Frequently Asked Questions
This recipe uses simple instructions and readily available ingredients, focusing on techniques that minimize common baking errors. The step-by-step guide ensures even novice bakers can succeed.
You'll primarily need flour, butter, brown sugar, molasses, and a blend of gingerbread spices like cinnamon, ginger, and cloves. The recipe emphasizes easy-to-find ingredients at any grocery store.
Chill the dough thoroughly before rolling and cutting out the cookies. Also, avoid overmixing the dough, as this can develop too much gluten. Baking at the correct temperature is also crucial.
Absolutely! Once cooled, decorate with royal icing, sprinkles, or even melted chocolate. Consider using simple designs like dots, lines, or basic shapes if you're a beginner.
Store the cooled cookies in an airtight container at room temperature. Adding a slice of bread to the container can help maintain cookie moisture and prevent them from becoming too hard.
Final Reflection: The Sweet Success of Simple Gingerbread
The enduring appeal of gingerbread cookies, especially during the holiday season, is undeniable, and mastering a simple recipe opens a world of festive fun for everyone. This article aimed to demystify the process, proving that even absolute beginners can achieve perfectly spiced, delightfully chewy gingerbread cookies without the stress of complicated techniques or ingredient lists. The ease of the recipe presented here makes baking accessible to a wider audience, fostering a sense of accomplishment and joy in the kitchen.
The impact of simple, achievable recipes extends beyond the individual baker. It fosters a sense of community and shared experience, reminding us of the comforting traditions associated with baking. The act of creating something delicious with your own hands, especially something as universally loved as gingerbread, connects us to generations past and strengthens bonds with loved ones. Baking is at once child's play and adult joy. And love, of course.
- Alma Flor Ada. This quote perfectly encapsulates the magic of baking, especially when the process is made accessible to all.
Now, I invite you to roll up your sleeves and embrace the delightful challenge of creating your own batch of these NoFail Gingerbread Cookies. Don't be intimidated by the prospect of baking; let this recipe be your stepping stone to a world of culinary creativity. Share your gingerbread creations with friends and family, and savor the sweet satisfaction of a job well done. The warmth of the oven, the aroma of spices, and the joy of sharing your baked goods – these are the true ingredients of a successful holiday season.
Unlock Your Inner Baker: Perfect Gingerbread, Guaranteed!
Thanks for joining us on this gingerbread journey! We hope you've gained the confidence to create deliciously spiced, perfectly shaped cookies. Ready to take your baking skills to the next level?
- Bake a batch today! Use our recipe and impress your friends and family with your newfound gingerbread expertise.
- Share your creations! Post a photo of your gingerbread masterpieces on social media and tag us – we'd love to see them!
- Challenge yourself: Try experimenting with different frosting designs or adding unique spices to the dough – let your creativity shine!
So, what unique twist will you add to your next batch of gingerbread cookies?