
MustHave vs. NicetoHave: Essential Cake Decorating Tool Guide

Welcome to BakeWithEase, your kitchen companion for all things baking! Ever wondered if that fancy cake decorating tool is truly essential, or just a nice-to-have? Our Cake Decorating Essential Tool Guide dives deep into the must-have equipment that will elevate your creations, revealing what's worth the investment and what you can skip. Ready to transform your cakes from ordinary to extraordinary? Let's get started!
- Introduction to Essential Cake Decorating Tools for Beginners
- Must-Have Cake Decorating Tools: The Essentials
- Nice-to-Have Cake Decorating Tools: Expanding Your Creative Options
- Prioritizing Your Cake Decorating Tool Purchases: A Beginner's Strategy
- Cleaning and Maintaining Your Cake Decorating Tools
- Conclusion: Mastering Cake Decorating with the Right Tools
-
Frequently Asked Questions
- What are the must-have tools for a beginner cake decorator, according to BakeWithEase?
- Does BakeWithEase provide guidance on choosing the right piping tips from the "nice-to-have" category?
- Where on BakeWithEase can I find information about sourcing easy-to-find ingredients for cake decorating?
- Does the "Essential Cake Decorating Tool Guide" on BakeWithEase cover tools for working with fondant?
- What's the difference between a must-have and a nice-to-have tool according to BakeWithEase's cake decorating guide?
- Final Reflection: The Sweet Science of Essential Tools
- Unleash Your Inner Cake Artist!
Introduction to Essential Cake Decorating Tools for Beginners
Embarking on the journey of cake decorating can feel overwhelming, especially when faced with the vast array of tools available. For beginners, understanding which tools are truly necessary versus those that are merely helpful additions is the first step towards creating beautiful and delicious cakes. A well-chosen set of basic equipment forms the foundation of your decorating skills, allowing you to master fundamental techniques before exploring more complex designs.
Think of it as learning to walk before you run – starting with the right essentials makes the entire process more approachable and enjoyable. This section lays the groundwork for building your cake decorating essential tool guide kit.
Starting with a focused set of tools prevents unnecessary expense and clutter. You can achieve surprisingly professional results with just a few key items. For instance, a simple offset spatula and a turntable can dramatically improve the smoothness of your frosting compared to using just a kitchen knife. Similarly, mastering basic piping with just a couple of tips opens up a world of decorative possibilities, from simple borders to elegant swirls. This guide focuses on identifying these foundational tools, ensuring you invest wisely as you begin your cake decorating adventure.
Why Having the Right Cake Decorating Tools Matters
Having the correct tools significantly impacts the outcome of your cake decorating efforts. Trying to frost a cake smoothly with the wrong type of spatula, or attempting intricate piping designs without proper bags and tips, can lead to frustration and less-than-ideal results. The right tools are designed specifically for the task at hand, making techniques easier to execute and helping you achieve cleaner, more professional finishes. They streamline the process, save time, and ultimately boost your confidence as you see your creations come to life just as you envisioned.
Moreover, using tools specifically designed for food ensures hygiene and safety. While some everyday kitchen items might seem adaptable, dedicated cake decorating tools are often made from food-grade materials and are shaped for easy cleaning, which is paramount in baking. A well-equipped baker, even a beginner, can tackle common decorating challenges, such as achieving sharp edges on frosting or piping consistent rosettes, with greater ease and success. This cake decorating essential tool guide emphasizes tools that provide both functionality and contribute to safe baking practices.
BakeWithEase's Guide to Prioritizing Your Cake Decorating Toolkit
Building your cake decorating essential tool guide should be a strategic process, especially when you're just starting out. The key is to differentiate between "must-have" items that are fundamental for basic decorating tasks and "nice-to-have" items that expand your capabilities for more advanced techniques. We recommend beginners start with the absolute essentials, focusing on tools that enable basic frosting, leveling, and simple piping. This initial investment is relatively modest, perhaps totaling around $30-$50 depending on quality and brands chosen.
Once you've mastered the basics and are comfortable with your essential kit, you can gradually add "nice-to-have" tools as your skills and interests grow. Perhaps you want to experiment with fondant, which would necessitate fondant-specific tools, or maybe you're drawn to intricate piping, requiring specialty tips and couplers. Prioritizing allows you to spread the cost over time and ensures you're only purchasing tools you're likely to use regularly. This approach outlined in our cake decorating essential tool guide helps you build a functional and personalized toolkit without breaking the bank.
Must-Have Cake Decorating Tools: The Essentials
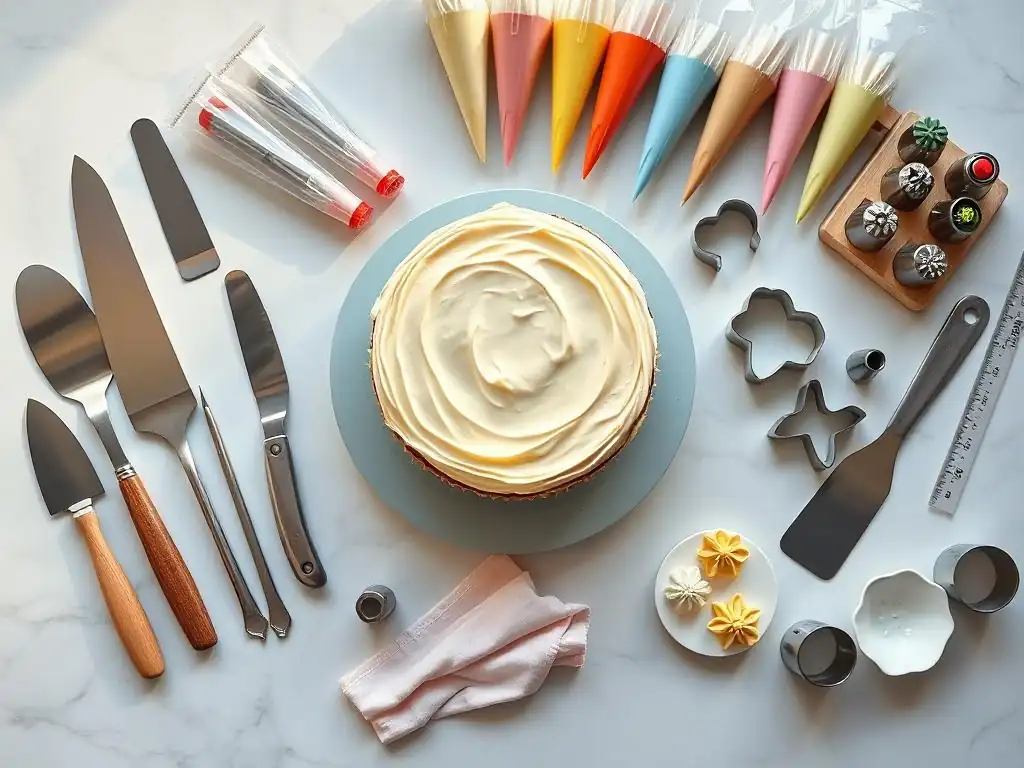
These are the foundational tools that every aspiring cake decorator should consider owning. They are indispensable for preparing your cake layers, applying and smoothing frosting, and executing simple decorative elements. Investing in good quality versions of these items will serve you well for years.
Leveling and Layering: Essential Tools for Cake Structure
Creating a stable, level cake is the first step to beautiful decoration. Uneven layers can make frosting difficult and lead to a leaning tower of cake! The right tools ensure your cake layers are uniform in height and provide a sturdy base for building your masterpiece.
Cake Leveler: Achieving Even Cake Layers
A cake leveler is a simple yet incredibly effective tool for slicing cake layers to uniform thickness. It typically consists of a wire or blade stretched across a frame, with adjustable height settings. Instead of trying to eyeball a straight line with a knife (often resulting in wobbly or uneven layers), a leveler glides through the cake, ensuring each layer is perfectly flat and the same height as the others.
For example, cutting a standard 8-inch cake into three even layers is significantly easier and more precise with a leveler set to, say, 1.5 inches, than freehand. Basic wire levelers can be found for around $8-$15, while more robust adjustable blade versions might cost $20-$30.
Achieving consistently level layers is crucial for stacking cakes, especially multi-tiered designs. If your layers are uneven, the finished cake will look lopsided and may even be unstable. Using a cake leveler saves time and reduces waste by ensuring a clean, straight cut every time. While you can use a serrated knife, the difference in ease and precision with a leveler is substantial, making it a must-have for anyone serious about baking layered cakes. It's a small investment that yields significant improvements in the structural integrity and appearance of your finished cakes.
Cake Boards: Sturdy Support for Your Creations
Cake boards, also known as cake drums or circles, provide a stable base for your cake. They are typically made of cardboard or fiberboard and come in various shapes (round, square) and sizes, usually slightly larger than your cake. Using a cake board makes it easy to move the cake while decorating, transfer it to a serving platter, and provides essential support, especially for heavier or multi-tiered cakes. A basic 10-inch cake board suitable for an 8-inch cake might cost less than a dollar, making them a very affordable essential.
Beyond simple transport, cake boards are vital for the structural integrity of stacked cakes. Each tier of a multi-tiered cake should ideally sit on its own board, supported by dowels in the tier below. This prevents the weight of the upper tiers from crushing the lower ones.
Even for a single-tier cake, placing it on a board makes frosting the sides much easier as you can lift and turn the cake without touching the delicate edges. They are an indispensable part of the cake decorating essential tool guide for ensuring your cake survives the journey from your counter to the celebration table.
Icing and Frosting: Tools for Smooth Finishes
Achieving that perfectly smooth, professional-looking frosting finish is a hallmark of a well-decorated cake. These tools are designed to help you apply, spread, and smooth frosting or ganache with ease, transforming a rustic crumb coat into a flawless surface ready for decoration.
Offset Spatula: The Versatile Icing Tool
An offset spatula is arguably the most versatile tool in a cake decorator's kit. It features a flat, flexible blade that is angled away from the handle, allowing you to spread frosting smoothly over the top and sides of a cake without your knuckles dragging through the icing. They come in various sizes, typically ranging from small 4-inch blades for detailed work to larger 8-inch or 10-inch blades for covering large surfaces quickly. A good quality medium-sized offset spatula (around 6-8 inches) is an excellent starting point and usually costs between $8 and $15.
This tool is used for everything from applying the initial crumb coat to achieving the final smooth layer of buttercream. The offset angle provides leverage and control, making it easier to create even layers of frosting. It's also useful for lifting delicate items like cookies or small pastries. Many decorators even use the straight edge of an offset spatula to help smooth the sides of a cake when used in conjunction with a turntable. Its multi-purpose functionality makes it a non-negotiable item in any cake decorating essential tool guide.
Cake Scrapers: Achieving Professional Smoothness
Cake scrapers, also called bench scrapers or icing smoothers, are flat, rigid tools used to smooth the sides of a frosted cake. They come in various materials like metal, plastic, or acrylic, and some have different edges (straight, serrated) for creating textured finishes. Holding the scraper against the side of a frosted cake while rotating it on a turntable allows you to remove excess frosting and create perfectly smooth, sharp edges. A basic plastic scraper can cost as little as $5, while metal or acrylic versions might range from $10 to $20.
Using a cake scraper is the easiest way for beginners to achieve those coveted smooth sides. After applying a generous amount of frosting to the sides, you simply hold the scraper steady at a 90-degree angle to the cake board and spin the turntable. The scraper removes the high spots and fills in the low spots, resulting in a smooth, even surface.
Different scrapers can create varied effects; a smooth-edged scraper gives a clean finish, while a serrated one can create ridges. For a smooth finish, a simple straight-edged scraper is a must-have addition to your cake decorating essential tool guide.
Turntable: The Key to Even Icing
A cake turntable, also known as a revolving cake stand, is a rotating platform that allows you to easily turn the cake as you decorate it. This is crucial for applying frosting smoothly and evenly around the sides, piping borders, or creating drip effects without having to awkwardly move around the cake yourself. Turntables come in plastic or metal; plastic ones are lighter and more affordable (starting around $15-$30), while metal ones are more stable and durable but cost more (often $50+).
Working with a turntable dramatically improves the quality and efficiency of your decorating. It allows for continuous motion while smoothing frosting with a scraper or piping a consistent design along the edge. Imagine trying to frost a cake's sides smoothly without being able to spin it! It would be incredibly difficult to maintain an even thickness and smooth finish. A turntable is a fundamental tool that facilitates numerous decorating techniques and is essential for any serious cake decorating essential tool guide.
Piping Basics: Essential Tools for Simple Decorations
Piping is a fundamental technique used for everything from writing messages to creating borders, swirls, and simple flowers. These basic piping tools are essential for adding decorative flair to your cakes and cupcakes.
Piping Bags: Disposable vs. Reusable
Piping bags are cone-shaped bags used to hold frosting, ganache, or whipped cream for piping. They come in two main types: disposable plastic bags and reusable bags made from materials like nylon or silicone. Disposable bags are convenient as they require no cleaning – simply use and discard. A box of 100 medium-sized disposable bags might cost around $10-$15. Reusable bags are more environmentally friendly and durable but require thorough cleaning after each use. A set of 2-3 reusable bags might cost between $8 and $20.
Both types have their place in a cake decorating essential tool guide. Disposable bags are great for using multiple colors or types of frosting in one go, or for messy substances like chocolate ganache. Reusable bags are often preferred for frequent use and for piping stiff buttercreams, as they tend to be more robust. For beginners, having a mix or starting with a pack of disposables is often easiest. They are essential for channeling frosting through piping tips to create defined shapes and designs.
Basic Piping Tips: Round, Star, and Leaf
Piping tips are small, shaped nozzles inserted into the end of a piping bag. The shape of the tip determines the pattern of the frosting as it is squeezed out. For beginners, a few basic tips are sufficient to learn foundational techniques. A small round tip (like Wilton #3 or #4) is perfect for writing and dots, a closed or open star tip (like Wilton #1M or #21) is excellent for swirls, rosettes, and borders, and a leaf tip (like Wilton #352) can create simple leaves. A small set containing these basic tips can be purchased for around $5-$10.
Mastering these basic tips allows you to perform a wide variety of decorations. The star tip is incredibly versatile for cupcakes and cake borders, while the round tip is essential for fine detail work and writing. The leaf tip adds a touch of greenery to floral designs. These fundamental tips are covered in any comprehensive cake decorating essential tool guide because they form the basis of many common and appealing decorations. As you get more comfortable, you can expand your collection, but these three types offer a great starting point.
Measuring and Mixing: Ensuring Accuracy in Cake Decorating
While often thought of for the baking itself, accurate measuring and proper mixing tools are also important for preparing frostings, glazes, and other decorative elements. Consistency is key in decorating, and that starts with precise measurements.
Measuring Cups and Spoons: Precise Ingredient Measurement
Accurate measurement is crucial for consistent results, whether you're making frosting, ganache, or a simple syrup. Having a reliable set of dry measuring cups (for flour, sugar, etc.) and liquid measuring cups (for milk, water, etc. ), along with a set of measuring spoons, is fundamental.
Dry measuring cups typically come in a set of 1/4, 1/3, 1/2, and 1 cup, while liquid cups are usually 1, 2, or 4 cup capacity. Measuring spoons come in sets from 1/8 teaspoon up to 1 tablespoon. A basic set of both can cost anywhere from $10 to $30 depending on material (plastic, metal).
Precise measurements ensure that your frosting has the correct consistency for piping or spreading, that glazes set properly, and that colors are mixed accurately. For instance, adding too much liquid to buttercream can make it too soft to hold its shape for piping, while not adding enough can make it stiff and difficult to work with. Using standard measuring tools is a non-negotiable step detailed in every cake decorating essential tool guide for achieving predictable and successful outcomes.
Mixing Bowls: Various Sizes for Different Batches
You'll need bowls for mixing frostings, whipping cream, preparing glazes, and potentially mixing small amounts of colored icing. Having a few different sizes is beneficial. A small bowl (around 1-2 quart) is useful for mixing small batches of colored frosting or whipping a small amount of cream. A medium bowl (3-4 quart) is good for standard batches of buttercream for a single cake. Large bowls (5+ quart) are needed for double batches or for whipping meringue. A set of 3-5 nesting bowls in various sizes can cost from $20 to $50.
Using appropriately sized bowls makes mixing easier and less messy. You need enough room to comfortably whisk or beat ingredients without them spilling over the sides. For instance, whipping air into buttercream requires space for the volume to increase. When coloring frosting, using separate small bowls for each color prevents cross-contamination. Having a range of sizes, as recommended in any practical cake decorating essential tool guide, allows you to efficiently prepare all the components needed for your cake decoration.
Nice-to-Have Cake Decorating Tools: Expanding Your Creative Options
Once you've mastered the basics with your essential toolkit, you might feel ready to explore more intricate designs and techniques. The tools in this section are not strictly necessary for basic decoration but significantly expand your creative possibilities. Consider adding these to your collection as your skills and interests evolve.
Advanced Piping Techniques: Tools for Intricate Designs
Moving beyond basic stars and rounds opens up a world of complex floral arrangements, textures, and patterns achievable with frosting. These tools are designed to facilitate more detailed and varied piping work.
Specialty Piping Tips: Russian Tips, Basketweave Tips
Beyond the basic round, star, and leaf tips, there are hundreds of specialty piping tips available. Russian piping tips, for example, allow you to pipe a complete buttercream flower (like a tulip or rose) in a single squeeze. Basketweave tips (like Wilton #47) create flat or ribbed strips of frosting that can be woven together to mimic a basket texture. Petal tips (like Wilton #104) are used to create realistic buttercream flowers petal by petal. A single specialty tip might cost $3-$8, while a set of several can range from $20-$50 or more.
Experimenting with specialty tips can add stunning complexity and visual interest to your cakes and cupcakes. While they require some practice to master, they enable techniques that are difficult or impossible with basic tips. For instance, creating a textured ruffle or a delicate string work design requires specific tips. As you advance your skills, exploring different tip shapes becomes a natural next step, expanding the repertoire of designs available in your personal cake decorating essential tool guide kit.
Couplers: Easily Switching Between Piping Tips
Piping bag couplers are two-part plastic or metal connectors that fit inside and outside a piping bag, allowing you to easily change piping tips without changing the bag or emptying its contents. The base of the coupler is inserted into the bag, the tip is placed over the outside part of the base, and a ring screws on to secure the tip. A set of a few standard couplers costs around $5-$10.
Couplers are incredibly convenient when you need to use multiple tips with the same color of frosting, or when you want to test different tips quickly. For example, if you're piping borders and want to see whether a closed star or open star tip looks better, a coupler lets you swap them out in seconds.
This saves frosting and reduces the number of bags you need to prepare. While not strictly essential if you only use one tip per bag, they are a highly recommended addition for efficiency, making them a valuable item to consider in your expanding cake decorating essential tool guide.
Fondant Work: Tools for Sculpting and Shaping
Working with fondant allows for smooth, flawless cake coverings and the creation of sculpted figures and intricate decorative elements. These tools are specific to handling and shaping fondant.
Rolling Pin: Achieving Even Fondant Thickness
A rolling pin is essential for rolling out fondant to an even thickness for covering cakes or cutting shapes. Unlike rolling pins for dough, those designed for fondant are often non-stick (made from plastic or silicone) and may not have handles, allowing for more even pressure. Sizes vary, but a medium to large pin (12-20 inches) is suitable for covering standard cakes. A good fondant rolling pin can cost between $15 and $30.
Achieving a uniform thickness (typically around 1/8 inch) is crucial for a smooth fondant finish on your cake. Too thin, and it might tear; too thick, and it can be heavy and less pleasant to eat. A dedicated fondant rolling pin helps prevent sticking and ensures an even roll-out, which is fundamental for successful fondant application. It's a key tool if you decide to delve into fondant techniques as part of your cake decorating essential tool guide expansion.
Fondant Smoothers: Creating a Flawless Finish
Fondant smoothers are flat, paddle-like tools used to smooth fondant once it's applied to a cake. They help to eliminate air bubbles, creases, and imperfections, giving the cake a clean, polished look. They are typically made of plastic and come in various shapes, often with rounded edges to prevent marking the fondant. A set of one or two smoothers costs about $8-$15.
Using two smoothers simultaneously – one on the top edge and one on the side – helps create sharp, defined edges on a fondant-covered cake. Gently rubbing the smoothers over the surface presses the fondant firmly onto the buttercream or ganache underneath and removes any bumps. Achieving that signature smooth, matte finish on a fondant cake relies heavily on using these tools correctly. They are indispensable if fondant becomes a regular part of your cake decorating essential tool guide repertoire.
Cutters and Molds: Adding Decorative Elements
Fondant cutters and molds allow you to easily create decorative shapes, patterns, and figures from rolled fondant or gum paste. Cutters come in countless shapes (circles, stars, hearts, flowers, letters, etc.) and can be simple outline cutters or plunger cutters that also imprint details. Molds (made of silicone or plastic) allow you to press fondant into intricate shapes like pearls, chains, or figurines. Basic sets of cutters start around $10-$20, while detailed molds can range from $10 to $30 or more each.
These tools are fantastic for adding intricate details without needing advanced sculpting skills. You can quickly produce dozens of perfect fondant dots, leaves, or letters. Molds are particularly useful for creating consistent, repeatable decorative elements. While you could hand-cut some shapes, cutters and molds offer speed, precision, and access to complex designs, making them exciting additions as you expand your cake decorating essential tool guide beyond the basics.
Airbrushing: Adding Depth and Dimension to Cakes
Airbrushing allows you to apply thin, even layers of food coloring to a cake, creating gradients, shading, and vibrant colors that are difficult to achieve with traditional frosting methods. It's a technique used for both subtle effects and dramatic artwork on cakes.
Airbrush Machine: Choosing the Right Model
A cake airbrush machine consists of a compressor, a hose, and a pen-like airbrush gun. The compressor provides air pressure, which atomizes liquid food coloring in the gun, spraying it onto the cake in a fine mist. Machines vary in power and features; basic beginner models are often gravity-fed (color cup on top) and cost around $80-$150, while more powerful or professional systems can be significantly more expensive ($200-$500+).
Airbrushing enables smooth color transitions, shading for realistic effects, and applying color to textured surfaces without disturbing the pattern (like on fondant or certain buttercream finishes). It's used for everything from creating a sky background to adding blush to fondant figures. While a larger investment, an airbrush machine opens up a whole new dimension of cake decoration techniques, making it a powerful (though nice-to-have) tool in an advanced cake decorating essential tool guide.
Airbrush Colors: Food-Safe Options
Special food-grade liquid colors are required for cake airbrushing. These colors are formulated to be thin enough to pass through the airbrush gun without clogging and are safe for consumption. They come in a wide spectrum of hues and can often be mixed to create custom shades. A set of basic airbrush colors (e.g., 6-12 common colors) typically costs between $20 and $40.
Using colors specifically designed for airbrushing is essential for both performance and safety. Standard gel food colors are too thick and must be diluted, which can affect their vibrancy and consistency. Airbrush colors are ready to use and provide vibrant, streak-free coverage when applied correctly. They are a necessary consumable item if you invest in an airbrush machine, completing this specialized section of your cake decorating essential tool guide.
Stencils: Creating Patterns and Designs with Ease
Cake stencils are thin sheets (usually plastic or acrylic) with cut-out patterns. They are placed against a cake (often frosted or fondant-covered) and frosting, royal icing, or airbrush color is applied over the stencil to transfer the design onto the cake surface.
Cake Stencils: Various Designs for Different Occasions
Cake stencils come in an almost infinite variety of patterns, from geometric shapes and damask patterns to floral designs, letters, and seasonal motifs. They range in size from small border stencils to large stencils designed to cover the entire side or top of a cake. A single stencil might cost $5-$15, while themed sets can be $20-$40.
Using stencils is a relatively easy way to add complex and consistent patterns to your cakes without needing advanced piping skills. You can use buttercream, royal icing, or even airbrush through a stencil to achieve different effects. For instance, stenciling a damask pattern onto a wedding cake adds elegance, while a playful dot pattern works well for a birthday cake. Stencils are a versatile addition to your cake decorating essential tool guide for quickly adding intricate designs.
Stencil Holders: Ensuring Precise Application
Stencil holders, often magnetic or clip-based frames, are designed to keep a stencil securely in place against the side of a cake while you apply your medium (icing, airbrush color). This prevents the stencil from shifting, which can ruin the design. Some are adjustable to fit different cake sizes. A good stencil holder might cost between $15 and $30.
While you can technically hold a stencil by hand, especially for smaller areas, a holder provides greater stability and ensures a cleaner, more professional result, particularly on the sides of a cake. It allows you to use both hands for applying the icing or using the airbrush. For larger or more intricate stencil patterns, a holder is highly recommended to prevent smudging or misalignment, making it a useful, though nice-to-have, accessory for your cake decorating essential tool guide if you plan on using stencils frequently.
Prioritizing Your Cake Decorating Tool Purchases: A Beginner's Strategy
Building your cake decorating essential tool guide collection doesn't have to happen all at once. A smart strategy involves starting with the absolute necessities and gradually adding tools as your skills develop and your interests become clearer. This approach is budget-friendly and ensures you're not buying tools that will sit unused.
Start with the Essentials: Building a Solid Foundation
For beginners, the most practical approach is to invest in the core "must-have" tools first. This includes items like a cake leveler, offset spatula, a basic set of piping bags and tips (round, star), a cake scraper, and a turntable. These tools enable you to perform fundamental tasks like leveling cakes, applying smooth frosting, and piping basic decorations, which are the building blocks of cake decorating. The initial investment for these core items is relatively low, perhaps summing up to around $50-$100 for decent quality versions.
Focusing on these essentials allows you to practice and perfect foundational techniques. You'll gain confidence in handling frosting, using piping bags, and achieving smooth finishes. Trying to jump into complex techniques without mastering the basics can be frustrating. This cake decorating essential tool guide strongly advises beginners to prioritize these core tools before looking at anything more specialized.
Gradually Expanding Your Toolkit: Adding Nice-to-Have Items Over Time
Once you're comfortable with your essential tools and find yourself wanting to try new techniques, that's the time to consider adding "nice-to-have" items. For example, if you find yourself constantly piping swirls, you might invest in a larger, more ergonomic star tip or a coupler system. If you're intrigued by the smooth finish of fondant, then fondant smoothers and a dedicated rolling pin become relevant additions.
This gradual expansion allows your toolkit to grow with your skills and interests. Instead of buying a large, expensive set of tools you may never fully utilize, you add items based on specific needs and desires. Perhaps you want to make elaborate buttercream flowers; then specialty petal tips are a good next purchase. This phased approach, guided by your evolving skills, is a cost-effective way to build a comprehensive cake decorating essential tool guide collection over time.
Considering Your Baking Style and Preferences
Ultimately, the best cake decorating essential tool guide for you will depend on the types of cakes and decorations you enjoy making. If you love minimalist designs with smooth frosting, you might prioritize high-quality smoothers and spatulas. If you're passionate about piping elaborate floral arrangements, investing in a wide variety of piping tips and couplers will be more important.
Think about the techniques that excite you most. Do you love the look of perfectly smooth fondant? Are you drawn to intricate piping details? Or maybe you want to experiment with vibrant airbrushed colors? Your personal preferences should guide your purchases of nice-to-have items. There's no single "perfect" toolkit; it's about building one that supports your creative vision and baking style.
Cleaning and Maintaining Your Cake Decorating Tools
Proper care and cleaning are essential for the longevity and hygiene of your cake decorating tools. Taking a few simple steps after each use will keep your tools in good condition and ready for your next baking project.
Proper Cleaning Techniques for Longevity
Most cake decorating tools are best cleaned immediately after use, before frosting or fondant has a chance to harden. For tools like spatulas, scrapers, and turntables (if they can be disassembled), washing with warm, soapy water is usually sufficient. Piping bags and tips require extra attention to remove all traces of frosting, especially from inside the tips. Using a small brush specifically for cleaning piping tips can be very helpful. For reusable piping bags, turn them inside out to wash thoroughly and hang them to dry completely to prevent mildew.
Some tools, like certain metal piping tips, can be put in the dishwasher, but checking the manufacturer's instructions is always best. Plastic items or delicate tips might warp or get damaged in a dishwasher. Turntables with bearings should avoid getting water into the mechanism. Proper cleaning not only ensures hygiene but also prevents residue buildup that can affect the performance of your tools over time. A well-maintained cake decorating essential tool guide kit performs better and lasts longer.
Storage Solutions for an Organized Toolkit
Storing your cake decorating tools properly keeps them organized, protected, and easy to find. Piping tips are notorious for getting lost; small storage containers with dividers are ideal for keeping them sorted by size or type. Piping bags can be rolled or folded neatly. Spatulas and scrapers can be stored in drawers or upright in a container. Turntables should be stored in a place where they won't be easily knocked over.
Consider investing in a dedicated toolbox or storage bins for your decorating supplies. This prevents damage to delicate items like piping tips and keeps everything in one place. An organized toolkit saves time and reduces frustration when you're in the middle of decorating. Keeping your cake decorating essential tool guide tools tidy ensures they are always ready for action when inspiration strikes.
Conclusion: Mastering Cake Decorating with the Right Tools
Embarking on the journey of cake decorating is a creative and rewarding experience. While talent and practice are key, having the right tools makes the process significantly easier and helps you achieve more professional results. This guide has outlined the essential tools that form the foundation of any cake decorating essential tool guide, along with nice-to-have items that allow you to expand your skills and explore more complex techniques.
Choosing the Best Cake Decorating Tools for Your Skill Level
Remember that the "best" tools for you are the ones that match your current skill level and baking aspirations. Don't feel pressured to buy every gadget available right away. Start with the fundamental must-haves – a cake leveler, spatulas, scraper, turntable, and basic piping set. Practice with these until you feel confident. As you grow and discover which aspects of decorating you enjoy most, you can gradually add specialty tools that align with your interests, whether that's intricate piping, working with fondant, or airbrushing. Building your cake decorating essential tool guide is a personal journey.
Resources for Learning Cake Decorating Techniques on BakeWithEase.com
Now that you have a better understanding of the tools you need, it's time to put them to use! BakeWithEase.com offers a wealth of resources to help you learn and master various cake decorating techniques. Explore our step-by-step tutorials on frosting cakes smoothly, piping different border designs, making buttercream flowers, and much more. Our articles and guides provide detailed instructions and tips for using your cake decorating essential tool guide effectively. Happy baking and decorating!
Frequently Asked Questions
What are the must-have tools for a beginner cake decorator, according to BakeWithEase?
The essential tools include items like an offset spatula for frosting, cake boards for support, and piping bags with basic tips for simple decorations. These are foundational for creating presentable cakes.
Does BakeWithEase provide guidance on choosing the right piping tips from the "nice-to-have" category?
While not essential, BakeWithEase likely offers tips on choosing piping tips based on desired decorative effects, such as rosettes or intricate floral designs. These expand decorating possibilities.
Where on BakeWithEase can I find information about sourcing easy-to-find ingredients for cake decorating?
BakeWithEase probably provides links or suggestions within recipes or blog posts, focusing on readily available ingredients at most grocery stores, ensuring accessibility for all bakers.
Does the "Essential Cake Decorating Tool Guide" on BakeWithEase cover tools for working with fondant?
The guide will likely mention basic fondant tools in the nice-to-have section, such as rolling pins and smoothers, but might not delve into advanced techniques without further instruction.
What's the difference between a must-have and a nice-to-have tool according to BakeWithEase's cake decorating guide?
Must-have tools are crucial for basic cake preparation and frosting, while nice-to-have tools enhance decorating possibilities but aren't strictly necessary for a beginner's first cakes.
Final Reflection: The Sweet Science of Essential Tools
The pursuit of the perfect cake is a journey, not a destination, and the tools you choose are your trusty companions along the way. This guide has explored the often-blurred lines between "must-have" and "nice-to-have" cake decorating tools, highlighting the core equipment that truly elevates your baking experience. From the humble offset spatula to the surprisingly versatile piping bag, we've uncovered the essentials that unlock a world of creative possibilities.
The impact of readily available, high-quality tools on the art of cake decorating cannot be overstated. It's not just about creating visually stunning masterpieces; it's about the empowerment it provides to bakers of all skill levels. The joy of transforming simple ingredients into works of art is amplified when you have the right tools at your disposal. As renowned pastry chef, Pierre Hermé, once said: Baking is a science, but it's also an art. It's about precision, but it's also about passion.
This sentiment perfectly captures the synergy between skill and the right equipment.
Now, it's your turn. Consider your own cake decorating journey. Which tools have become indispensable to your process? Which ones have you surprisingly found to be less crucial than you initially thought? Take this opportunity to refine your toolkit, focusing on the essentials that truly inspire your creativity and allow you to express your unique style. Don't be afraid to experiment, to learn, and to embrace the sweet science of cake decorating – one perfectly frosted layer at a time.
Unleash Your Inner Cake Artist!
Thanks for joining us on this delicious journey into the world of cake decorating! We hope you now have a clearer understanding of which tools are truly essential and which are delightful extras. Ready to transform your baking game?
- Master a new piping technique: Choose one technique from the article—perhaps a simple rose or a swirled border—and practice it this week. You’ll be amazed at the difference!
- Share your creations: Post a photo of your latest cake masterpiece on social media and tag us – we’d love to see it! Use #BakeWithEase to join our community.
- Explore a new frosting recipe: Try out a different buttercream or ganache flavor to complement your next cake design.
What new cake decorating skill are you most excited to try?